Help Desk Technicians
Create Help Desk Technicians
Creating help desk technicians in SharePoint Manager Plus enables administrators to delegate simple and mundane SharePoint tasks that do not need the expertise of the administrators. The help desk technicians give administrators enough time to focus on mission-critical tasks.
A help desk technician requires a role to operate. By default, SharePoint Manager Plus comes with two built-in roles:
- Super Admin: Has access to all the actions in the product.
- Operator: Has access to view the reports and audits tabs only.
These roles cannot be edited or deleted. To create your own role, click here.
You can create new help desk technicians by following the steps below:
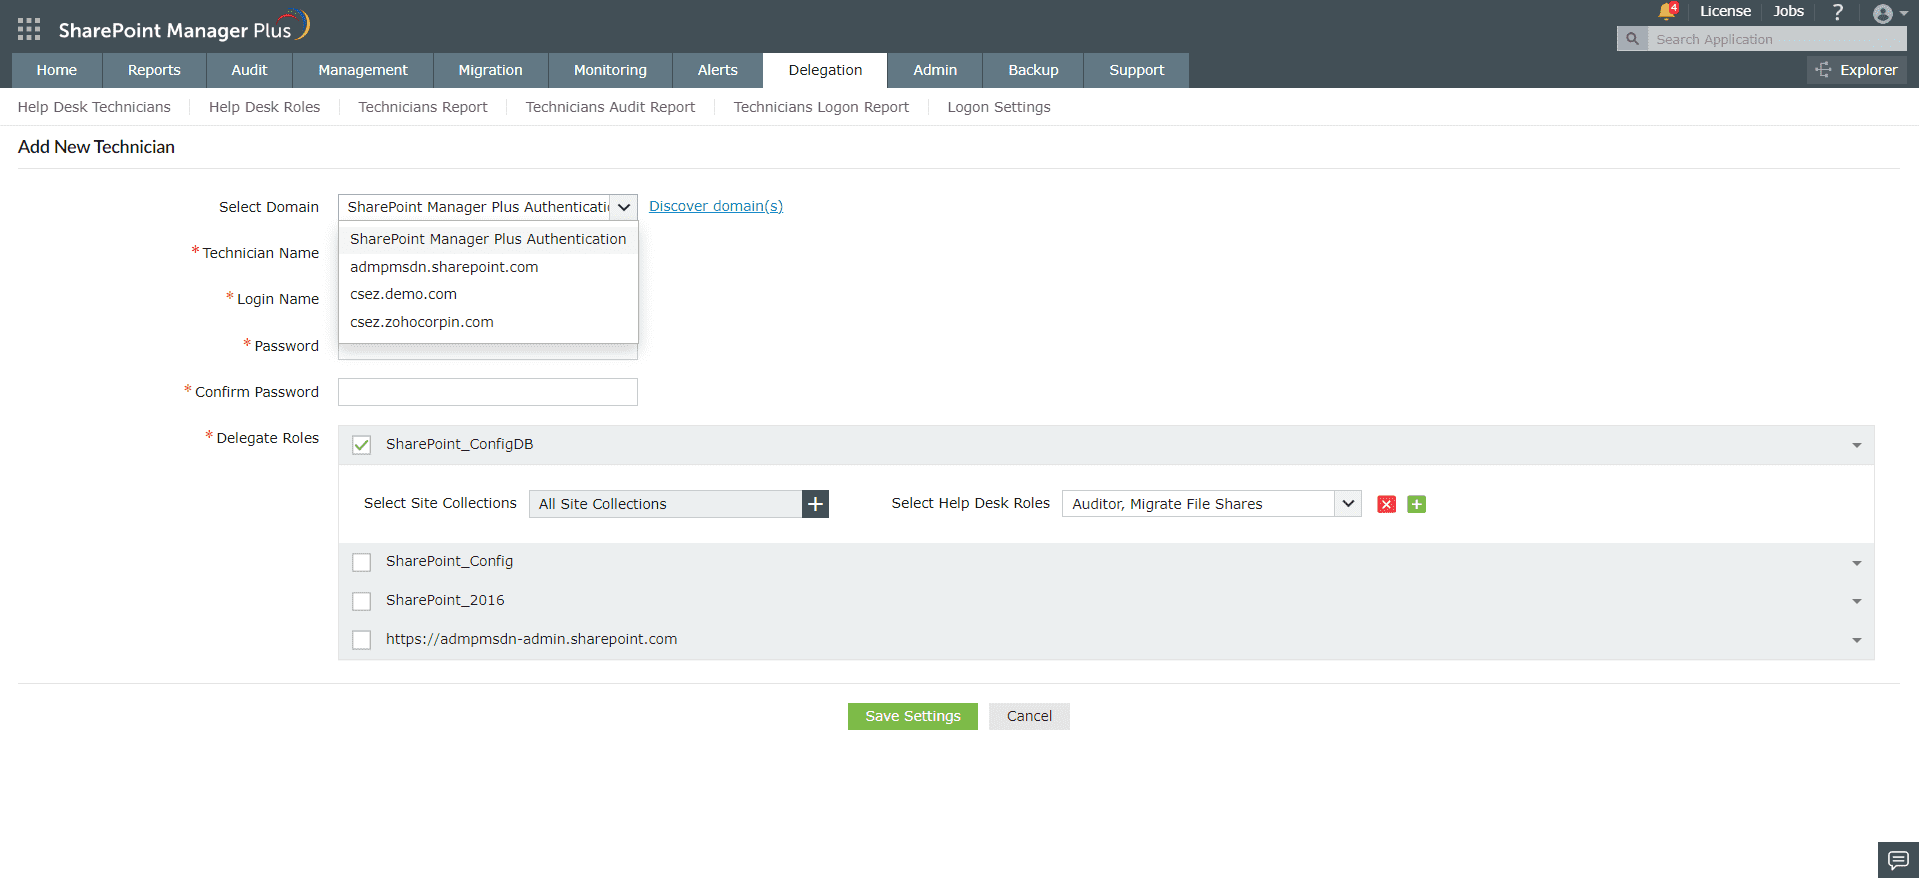
- Navigate to Delegation tab → Help Desk Delegation → Help Desk Technicians.
- Click the Add New Technician button located at the top-right corner.
- Choose from which domain you would like to create the technician using the Select Domain drop-down. SharePoint Manager Plus provides three options for authentication.
- SharePoint Manager Plus Authentication: The technician will be created within SharePoint Manager Plus. After selecting, enter the Technician Name, Login Name, and Password.
- Active Directory (AD): AD users and groups can be added as technicians. In the Select Users field, click the + icon and select the required users or groups. To load the latest list of AD users and groups, click Sync User/Groups in the top-right corner. To learn how to configure an AD domain, click here.
- Azure AD: Azure AD users can be added as technicians. After selecting, click the
 icon on the Select Users field. Click Sync Users at the top right corner to load the list of Azure AD users. To learn how to configure an Azure AD tenant, click here.
 - In the Delegate Roles section, select the farms and tenants where you would like the technician to perform the delegated tasks.
- By default, all site collections are selected. Click if you wish to restrict the scope of the technician to specific site collections.
- Select the site collections or click the
 icon to search for specific site collections.
 - Add the desired help desk roles from the Select Help Desk Roles drop-down.
- Click
 to add a different set of roles for another site collection and repeat the process from Step 6.
 - Click Save Settings.
AD group-based delegation
Assign permissions to an AD group instead of configuring each technician individually.
To delegate access using an AD group:
- Navigate to Delegation > Help Desk Delegation > Help Desk Technicians.
- Click + Add New Technician.
- Select the required AD domain.
- In Select Users, click the Add icon.
- Click Sync Users/Groups.
- Select the Groups tab.
- Choose the required AD groups and click Select.
- Configure the required farms, tenants, site collections, and help desk roles.
- Click Save Settings.
All users in the selected AD group can now access SharePoint Manager Plus according to the delegated permissions.
- Group-based delegation is supported only for AD domains.
- Only synced AD groups are available for selection.
- Changes to AD group membership take effect after the next sync.
Modify Help Desk Technicians
As and when needed, help desk technicians configured in SharePoint Manager Plus can be modified to suit the needs of your organization. You can add or remove roles and modify their administrative boundaries assigned to them.
You can perform the following modification operations on the Help Desk Technicians page.
- Modify the role of a help desk technician
- Enable or disable a technician
- Delete a technician
- Reset password for a technician
- Unlock a technician
Modify the role of a help desk technician
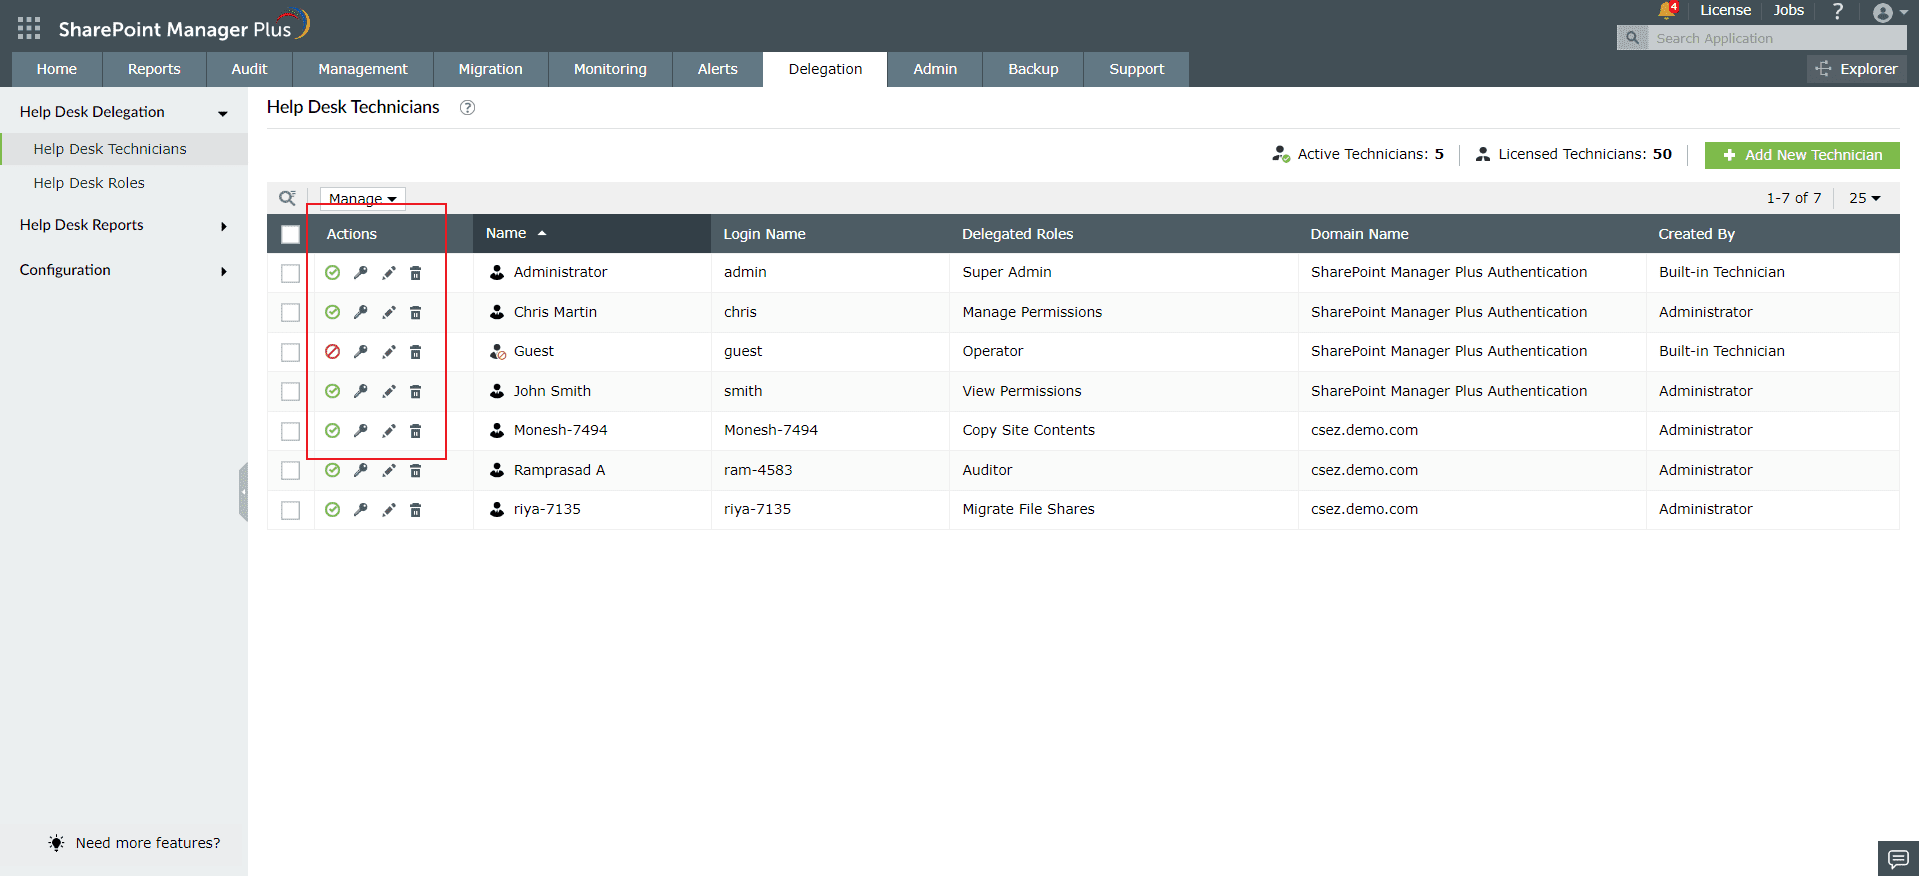
- Navigate to the Delegation tab → Help Desk Delegation → Help Desk Technicians.
- From the list of help desk technicians available, locate the technician that you would like to modify and click the
 icon under the Actions column.
 - In the Edit Help Desk Technician page, you can edit the Technician Name, Logon Name, and the roles assigned to the technician.
- After making the edits, click Save Settings.
Enable or disable a technician
- Locate the technician you would like to enable or disable and click the
 or
or  icons under the Actions column.
 - To perform this operation to multiple technicians, select the technicians and click the Manage drop-down.
- Select Enable or Disable and click OK.
Delete a technician
- Locate the technician you would like to delete and click the
 icon under the Actions column.
 - To perform this operation to multiple technicians, select the technicians and click the Manage drop-down.
- Select Delete and click OK.
Reset password for a technician
- Locate the technician for whom you would like to reset the password and click the
 icon under the Actions column.
 - Enter a new password and re-enter to confirm.
- Click Save.
Unlock a technician
- Select the technician(s) whom you would like to unlock and click the Manage drop-down.
- Select Unlock and click OK.