How to delete a SharePoint list
On this page
Deleting a SharePoint list removes the list and all associated items, columns, views, and settings from the site. Lists are commonly used for tasks, issue tracking, inventories, and business processes, so deletion should be performed carefully to avoid data loss or broken dependencies.
In SharePoint Online, a deleted list is not permanently removed immediately. Instead, it is moved to the site’s Recycle Bin, where it can typically be restored within 93 days (the default retention period). Deletion may be blocked by permissions, retention policies, lookup dependencies, workflows, or system protections. Understanding these conditions helps prevent errors such as Delete option missing, Access denied, or lists reappearing after deletion.
- SharePoint Online
- Windows PowerShell
Method 1: Delete a SharePoint list using the browser UI
SharePoint Online allows site owners to delete lists directly from the browser using either the List settings page or the Site contents page, without requiring scripts or administrative tools.
Prerequisites
- You must be a Site Owner, Designer, or have appropriate delete permissions (Manage Lists).
- The list must not be protected by retention policies or holds.
- Dependencies such as lookup columns, workflows, or apps should not block deletion.
- You must have access to the site’s Recycle Bin.
Steps to delete from List settings (modern experience)
- Go to the SharePoint list home page.
- Click the Settings icon
 .
. - Select List settings.
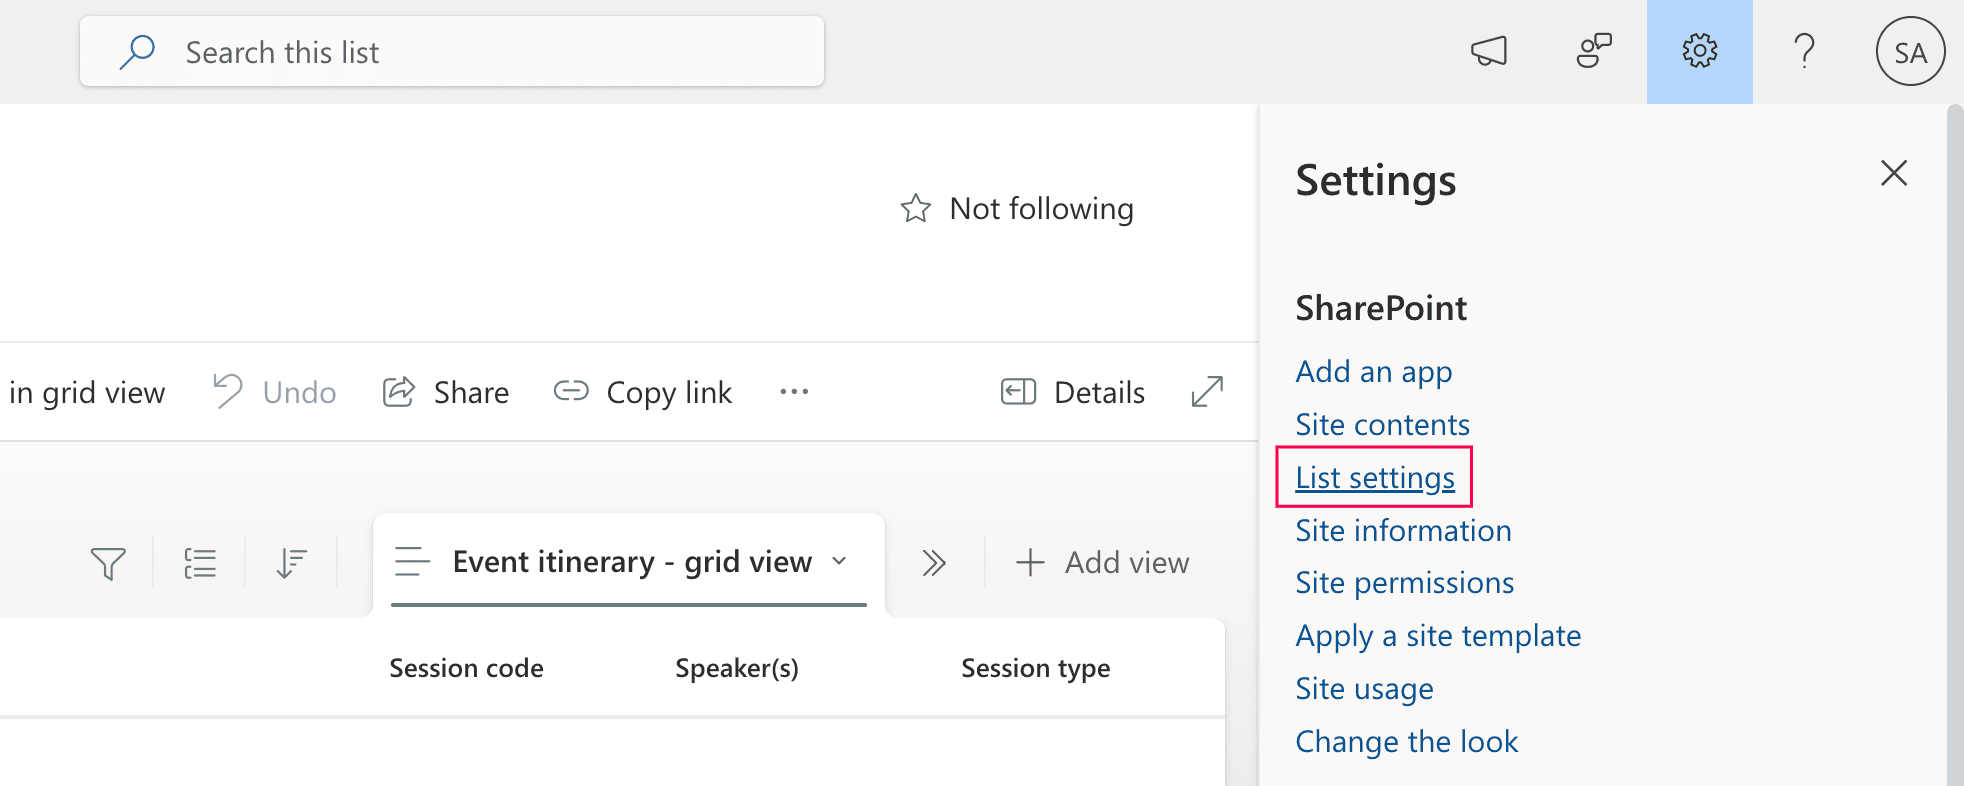
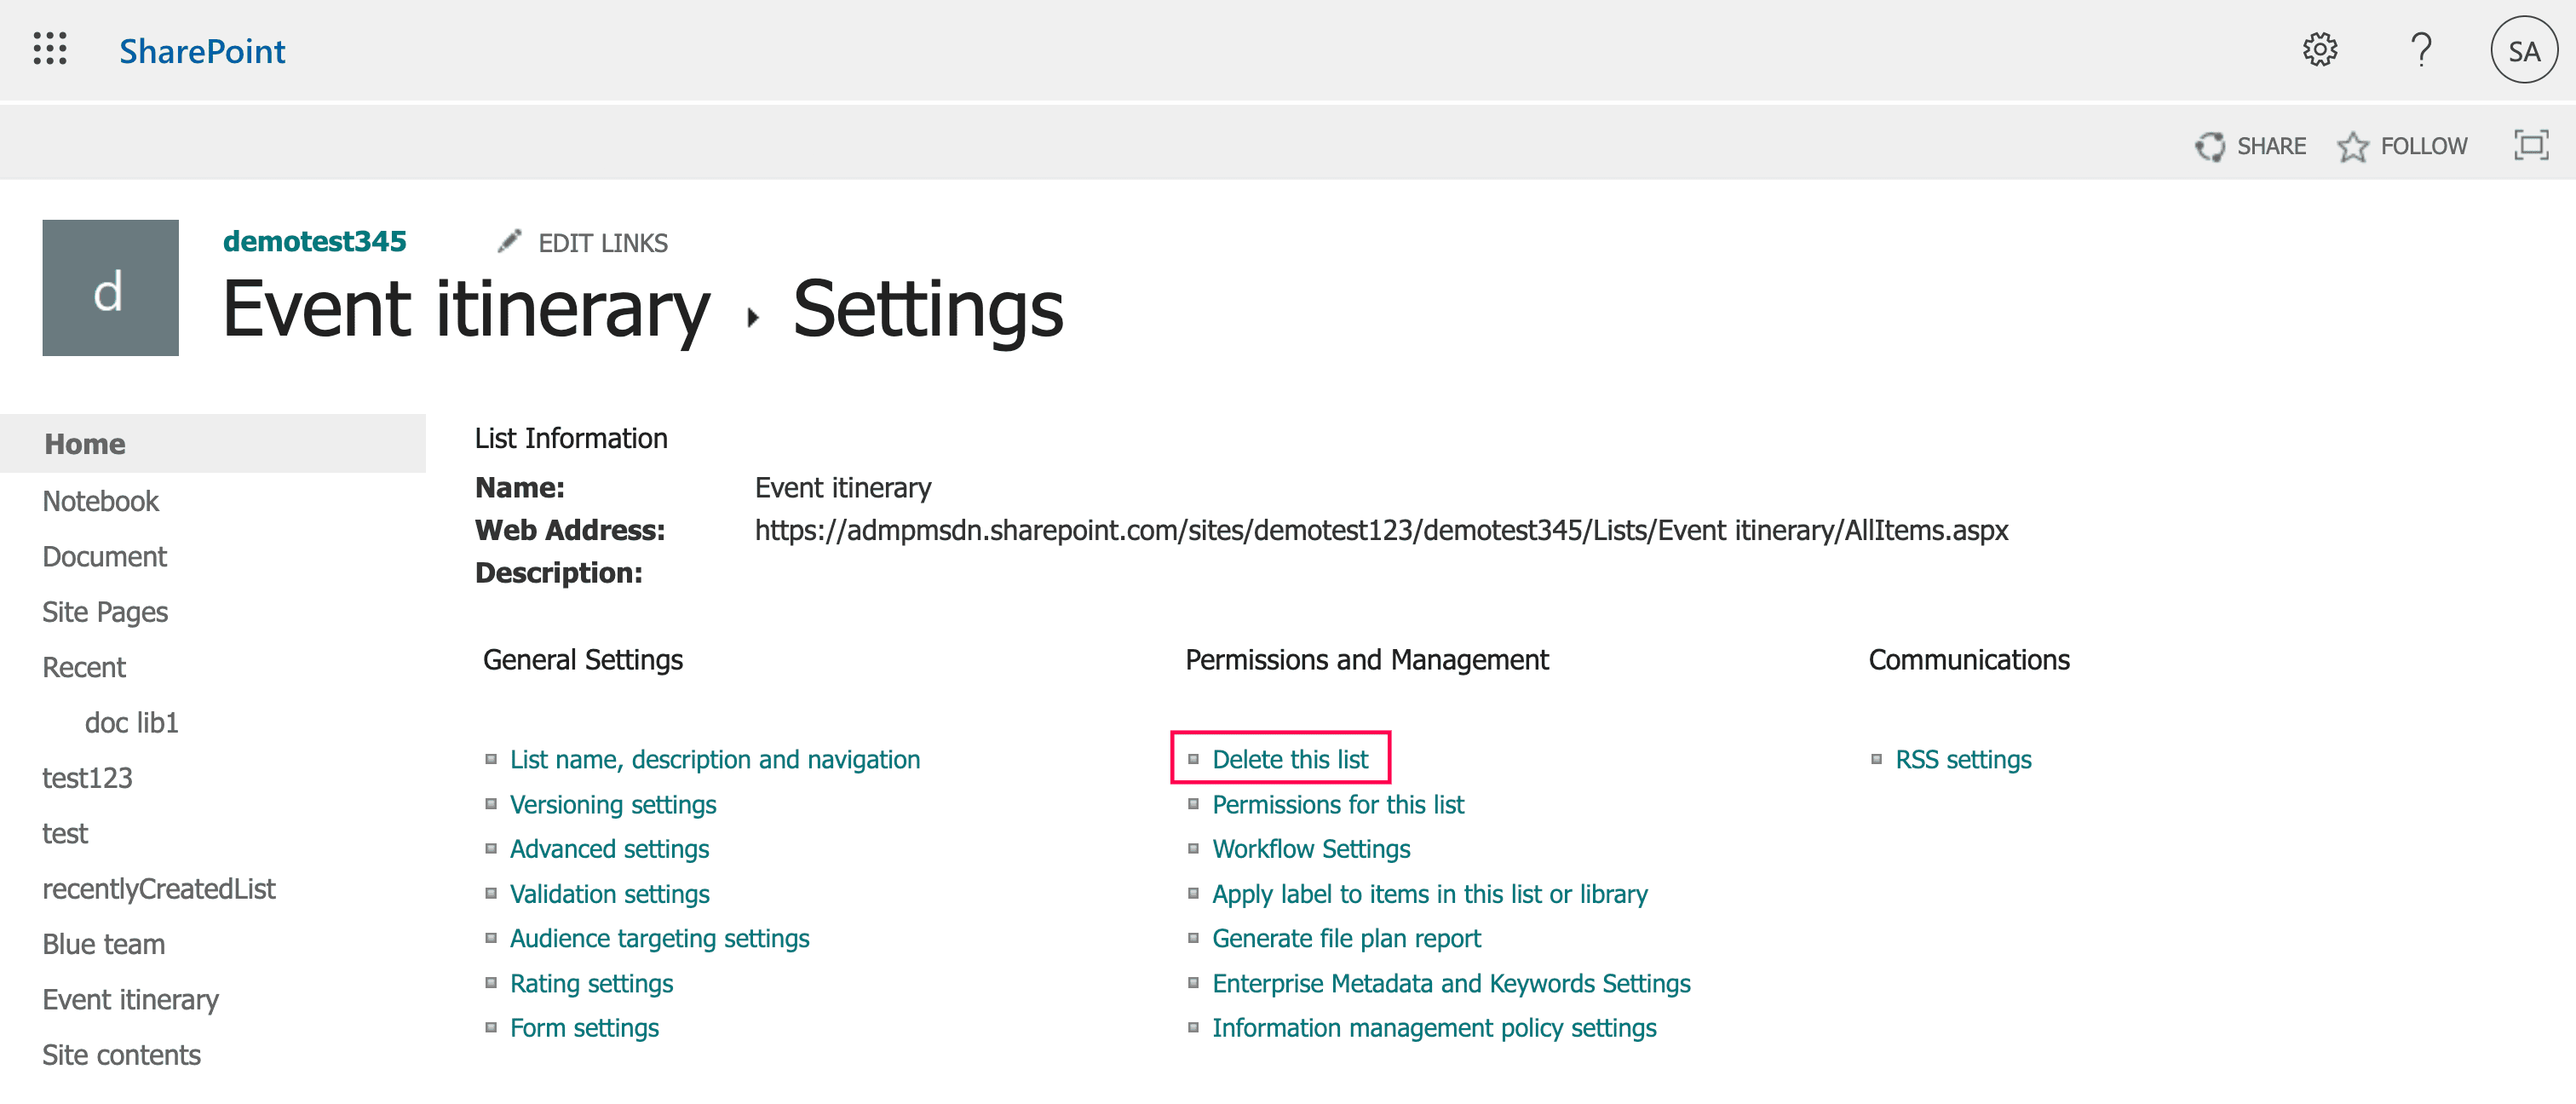
- Under Permissions & Management, click Delete this list.
- Confirm the deletion when prompted.


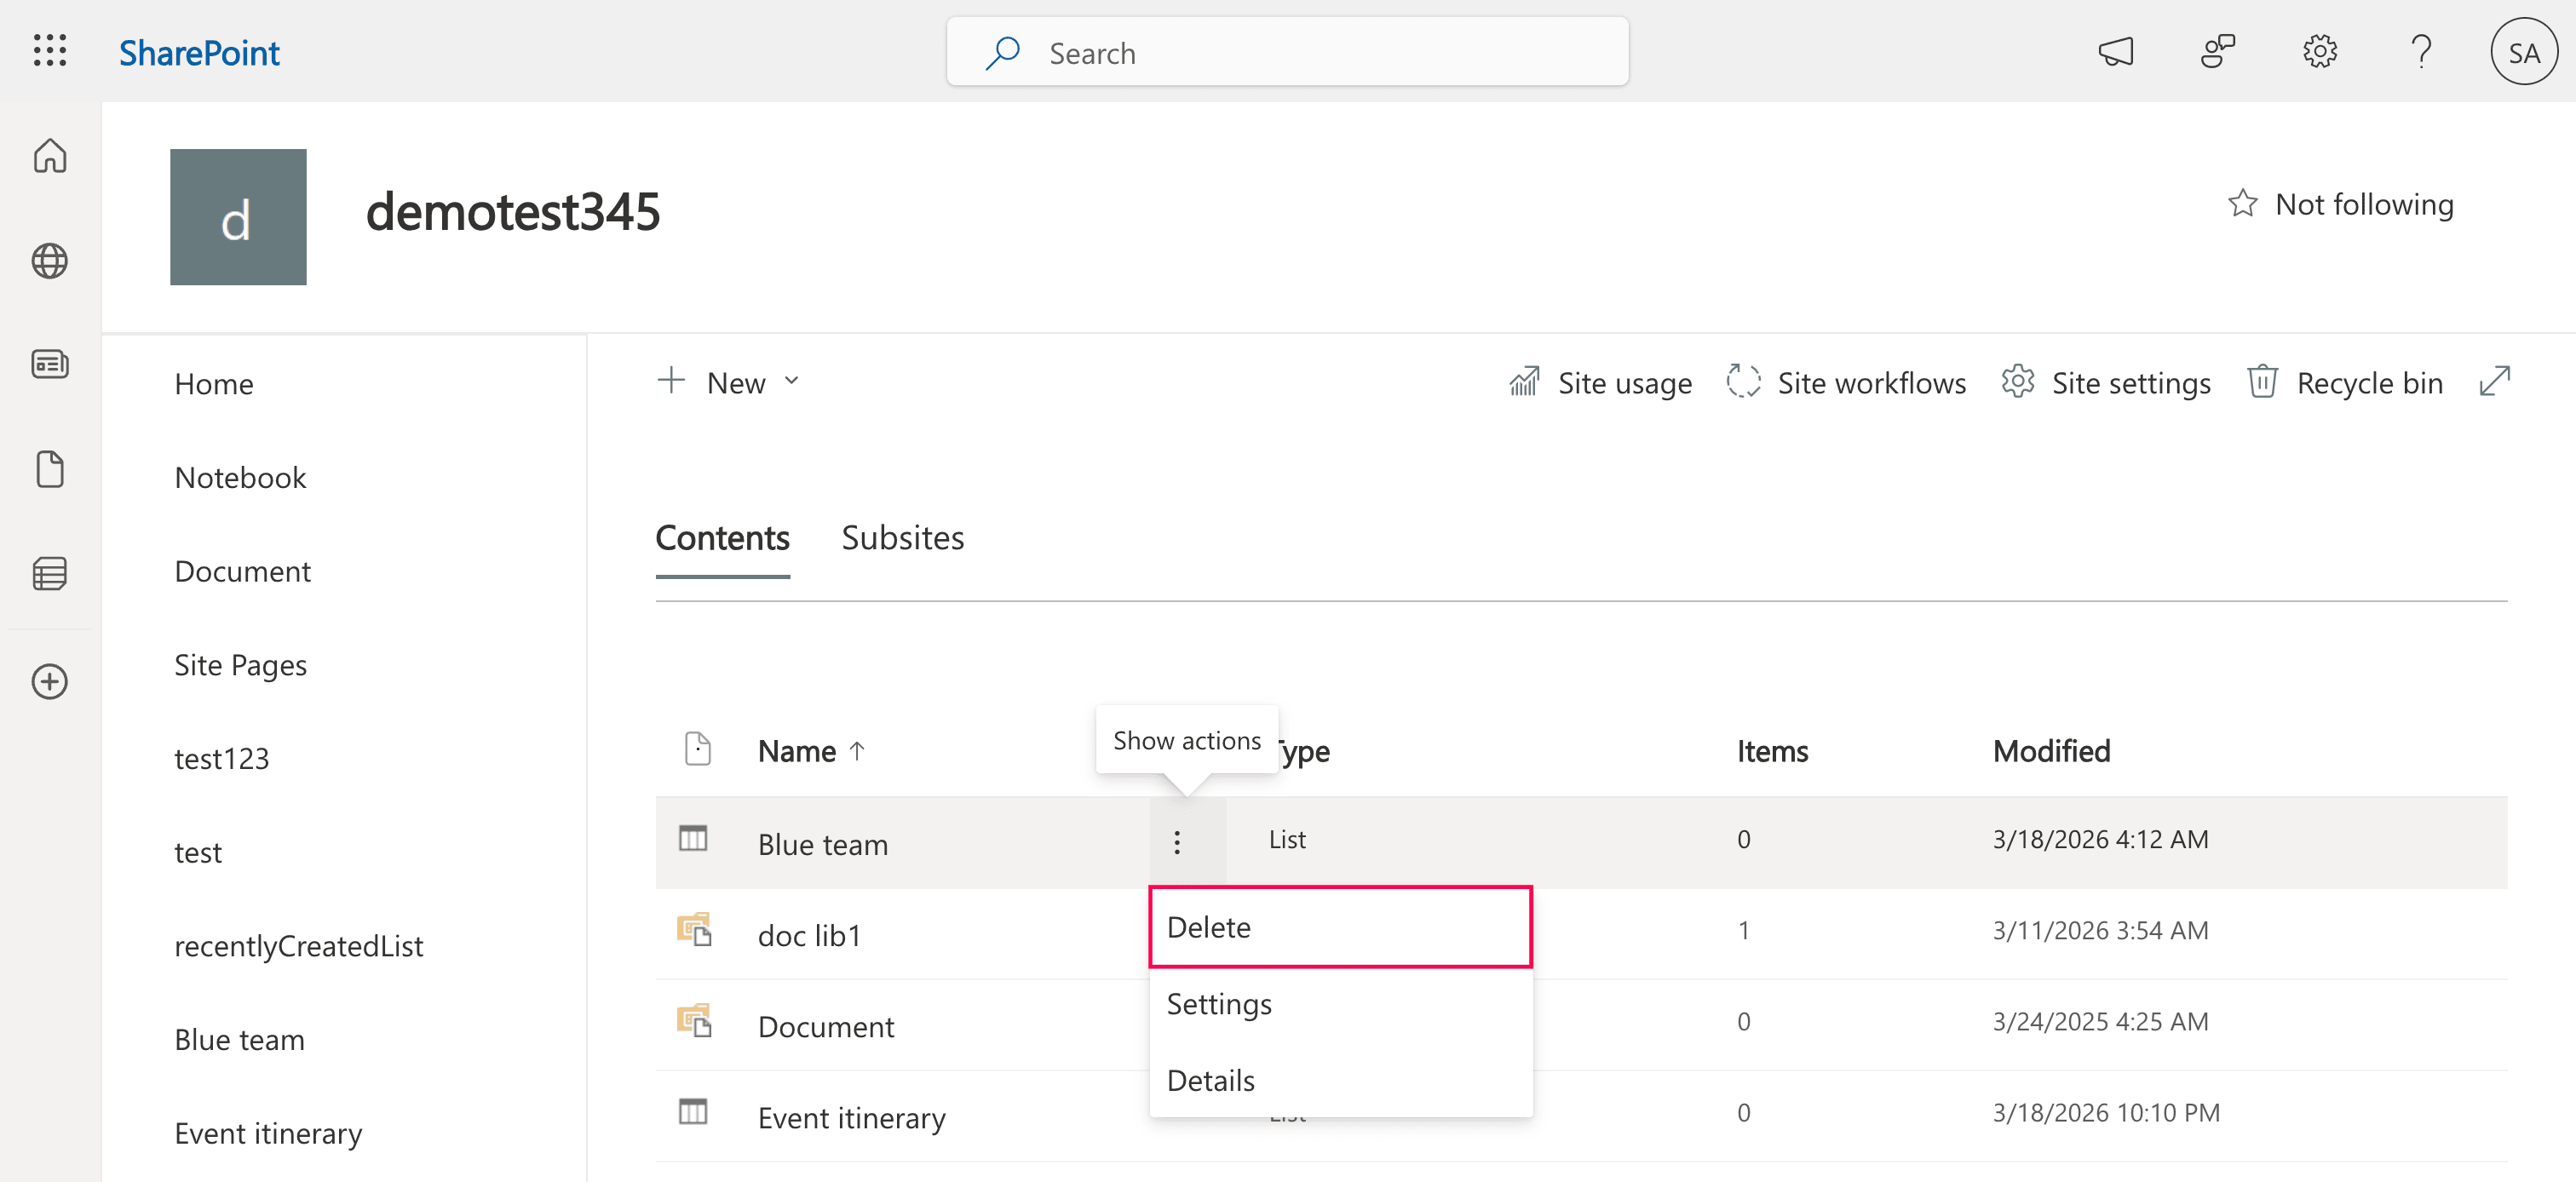
Alternative steps (from Site contents)
- Navigate to the SharePoint site.
- Click Site contents from the left pane.
- Locate the list you want to delete.
- Click the ellipsis (…) next to the list name.
- Select Delete and confirm.

Classic experience steps (if enabled)
- Open the list.
- Go to List Settings from the ribbon.
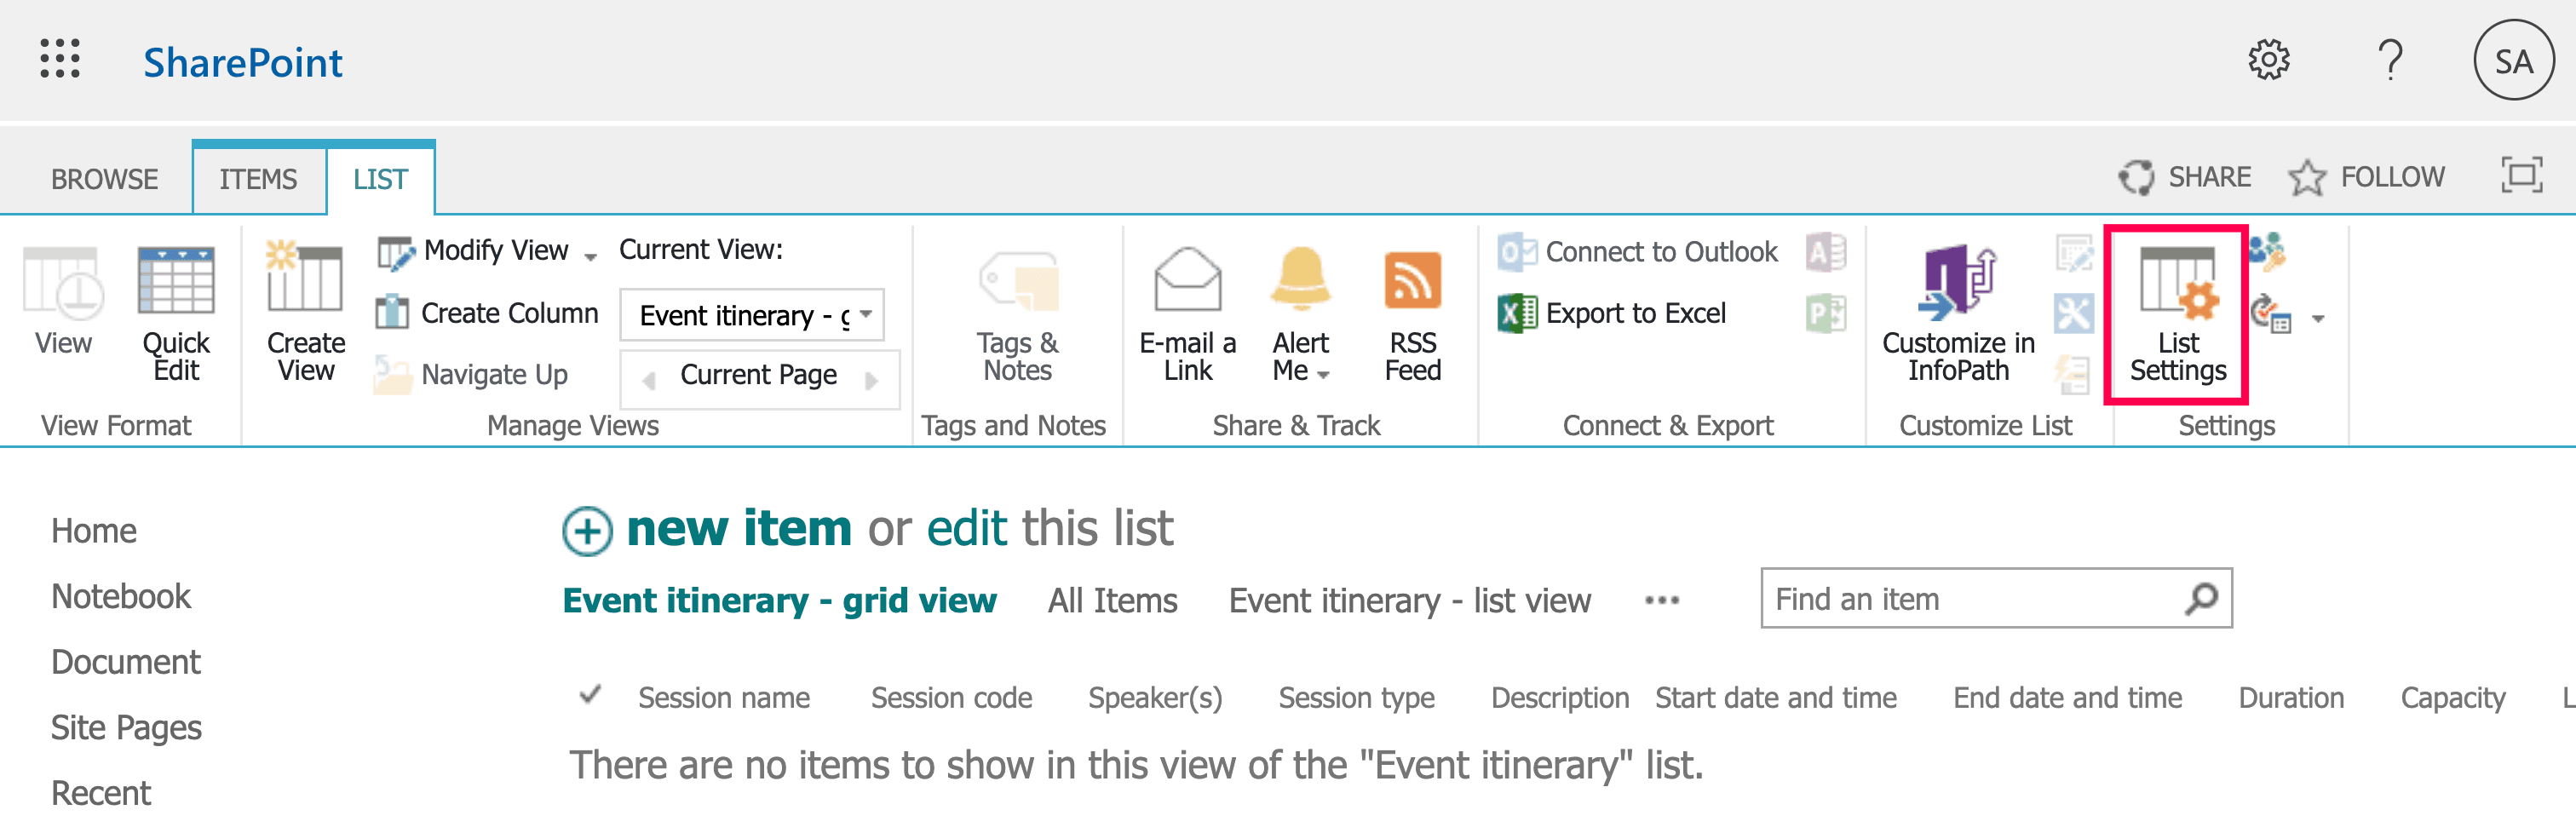
- Choose Delete this list under Permissions & Management.
- Confirm the action.

Deleted lists first move to the site Recycle Bin. If removed from there,they move to the site collection (second-stage) Recycle Bin, where only Site Collection Administrators can restore them.
Deleting a column removes the field definition from the list. All data stored in that column will be permanently lost.
- Go to the SharePoint list home page.
- Click the Settings (gear) icon.
- Select List settings.
- Under Columns, click the name of the column you want to delete.
- Scroll to the bottom of the column settings page.
- Click Delete.
- Confirm the deletion when prompted.
Note: Some default or system columns cannot be removed, and columns associated with content types may require removing the content type first.
Deleting items removes individual records while keeping the list structure intact.
- Go to the SharePoint list.
- Select the item(s) you want to delete using the check box.
- Click Delete from the command bar.
- Confirm the deletion.
Note: To delete all items in the list, use the top check box to select all visible items, then click Delete. For large lists, use filtered views or PowerShell to delete items in batches to avoid threshold limits.
Limitations to consider
- Requires sufficient site permissions.
- Lists must be deleted individually.
- Deletion may be blocked by retention policies or legal holds.
- Lookup column dependencies can prevent deletion.
- Lists used by workflows or Power Automate flows may fail to delete.
- Large lists exceeding the 5,000-item list view threshold may cause performance delays or errors.
Method 2: Delete a SharePoint list using PowerShell
PowerShell is useful when you need to delete lists remotely, in bulk, or as part of automation. Administrators commonly use PnP PowerShell or CSOM scripts for controlled removal.
Prerequisites
- You must have SharePoint Administrator or Site Collection Administrator permissions.
- The PnP PowerShell module must be installed.
- You must be connected to the target SharePoint site.
- Ensure no retention policies or legal holds are preventing deletion.
Install and connect by running this script:
Install-Module PnP.PowerShell -Scope CurrentUser
Connect-PnPOnline -Url https://tenant.sharepoint.com/sites/ProjectSite -Interactive
Delete a list (move to the Recycle Bin)
This command deletes the specified list and moves it to the Recycle Bin, allowing recovery if needed.
Remove-PnPList -Identity "Project Tasks" -Recycle -Force
Permanently delete the list
Use this command to remove the list permanently without sending it to the Recycle Bin. This action cannot be undone.
Remove-PnPList -Identity "Project Tasks" -Force
Enable deletion if it is blocked
Some lists have deletion disabled. This command allows deletion by enabling the AllowDeletion flag.
Set-PnPList -Identity "Project Tasks" -AllowDeletion $True
CSOM PowerShell: Recycle the list
This CSOM method sends the list to the Recycle Bin instead of permanently deleting it.
$List.Recycle()
CSOM PowerShell: Permanently delete the list
Use this CSOM command to permanently remove the list from the site.
$List.DeleteObject()
Bulk delete multiple lists
This script deletes several lists in one operation, which is useful for cleanup projects or decommissioning sites.
$lists = @("Old Tasks","Archive Issues","Temp Data")

foreach ($list in $lists) {
    Remove-PnPList -Identity $list -Recycle -Force
}
Supported parameters
The following parameters can be used when deleting SharePoint lists via PnP PowerShell.
| Parameter | Description |
|---|---|
| -Identity | Specifies the name or GUID of the list |
| -Recycle | Moves list to the Recycle Bin instead of permanent deletion |
| -Force | Suppresses confirmation prompts. |
| -Connection | Specifies a connection object. |
Limitations to consider
- Retention policies or holds override deletion commands.
- Dependencies (like flows, apps, and lookups) can block removal.
- Requires elevated administrative privileges.
- Incorrect use and typos may cause permanent data loss.
- Large environments require careful targeting.
How to ensure safe deletions for SharePoint lists
Before deleting SharePoint lists, organizations should verify access, activity, dependencies, and compliance requirements to prevent accidental data loss or disruption. ManageEngine SharePoint Manager Plus provides centralized visibility and control to help administrators perform safe, informed deletions.
Schedule list reports
Identify who has access to lists, detect excessive or unique permissions, and confirm that only authorized users can modify or delete sensitive data.
Audit list activity
Track item changes, access patterns, and user actions to determine whether a list is still actively used before removing it.
Manage list access at scale
Move or modify list permissions across multiple users and groups to control access before cleanup or archival.
Stay informed via alerts
Enable alerts to get notified when users perform deletion and modification actions on lists. Configure email recipients to have alerts sent to users instantly.
Migrate lists without a hassle
Move lists to another site or environment before deletion to preserve important records. Configure schedules to have lists migrated automatically.
Important tips before deletion
Perform data backup pre-deletion
Export or migrate important data before removing the list to prevent permanent loss of critical information.
Check compliance settings
Retention policies, holds, or record management features can block deletion actions even for administrators.
Remove dependencies first
Disable workflows, Power Automate flows, and lookup relationships tied to the list beforehand.
Handle large lists carefully
Delete items first if you encounter threshold limits or performance issues during removal.
Frequently asked questions
Go to the site Recycle Bin, locate the list, and select Restore. Site Collection Admins can recover items from the second-stage Recycle Bin if needed. View detailed steps here.
Common causes include insufficient permissions, retention policies, protected system lists, or dependencies such as workflows and lookup columns.
Select items and delete them in bulk, use PowerShell scripts, or create filtered views to remove data in stages for large lists.
Yes. Administrators can use PowerShell or automation to remove large numbers of items, especially when dealing with threshold limits.
This usually happens when retention policies, record management features, or provisioning processes automatically restore protected content.