
ManageEngine DataSecurity Plus offers built-in data discovery rules that use regular expressions to locate the credit card numbers of cards issued by American Express, Discover, InstaPay, UnionPay, Visa, MasterCard, and other payment service providers. You can discover credit card data lurking in files across your on-premises data sources and database servers.
Steps to find credit card numbers stored in your data stores:
- Create a data discovery policy.
- Configure your data source.
Create a data discovery policy to find credit card numbers using the steps listed below:
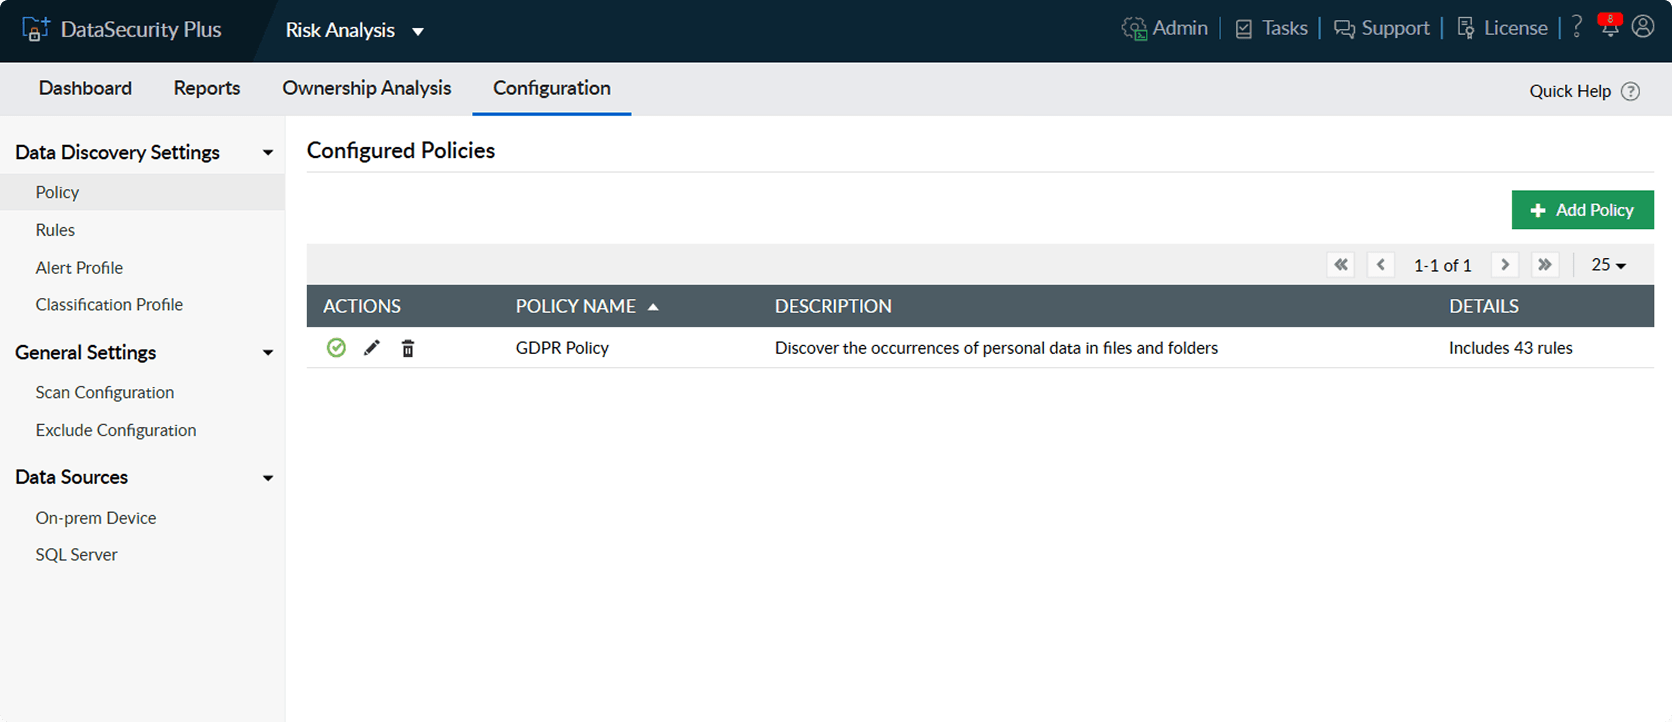
- Select Risk Analysis from the applications drop-down.
- Go to Configuration > Data Discovery Settings > Policy > + Add Policy.
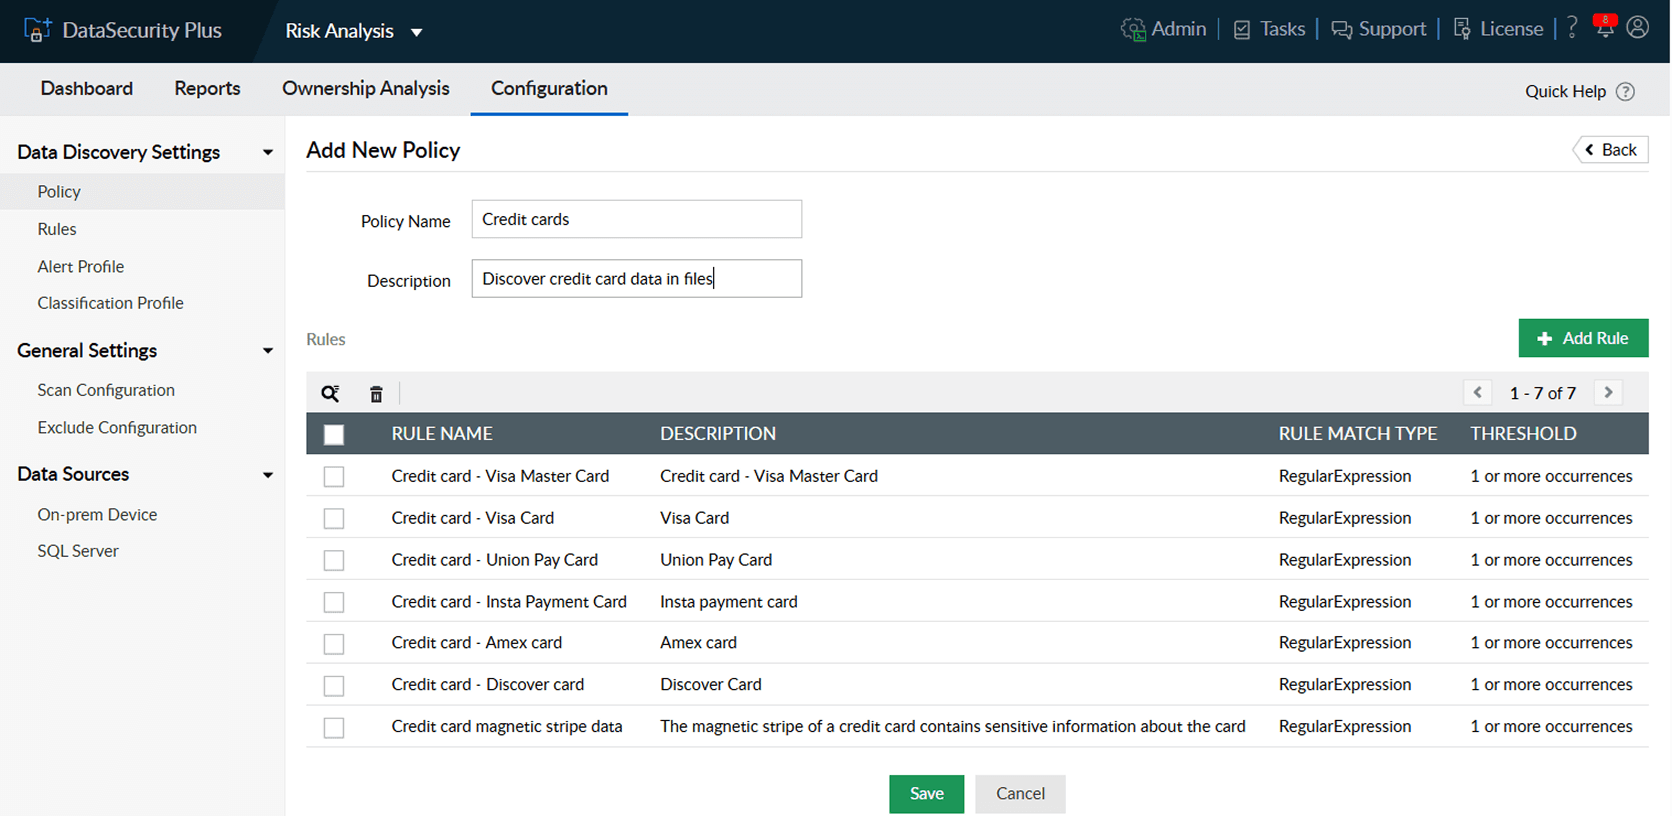
- Enter a Policy Name and Description, and click +Add Rule.
- In the Add Rule to the Policy window that opens, click the Information type filter on top and select Payment card to list all rules related to credit cards.
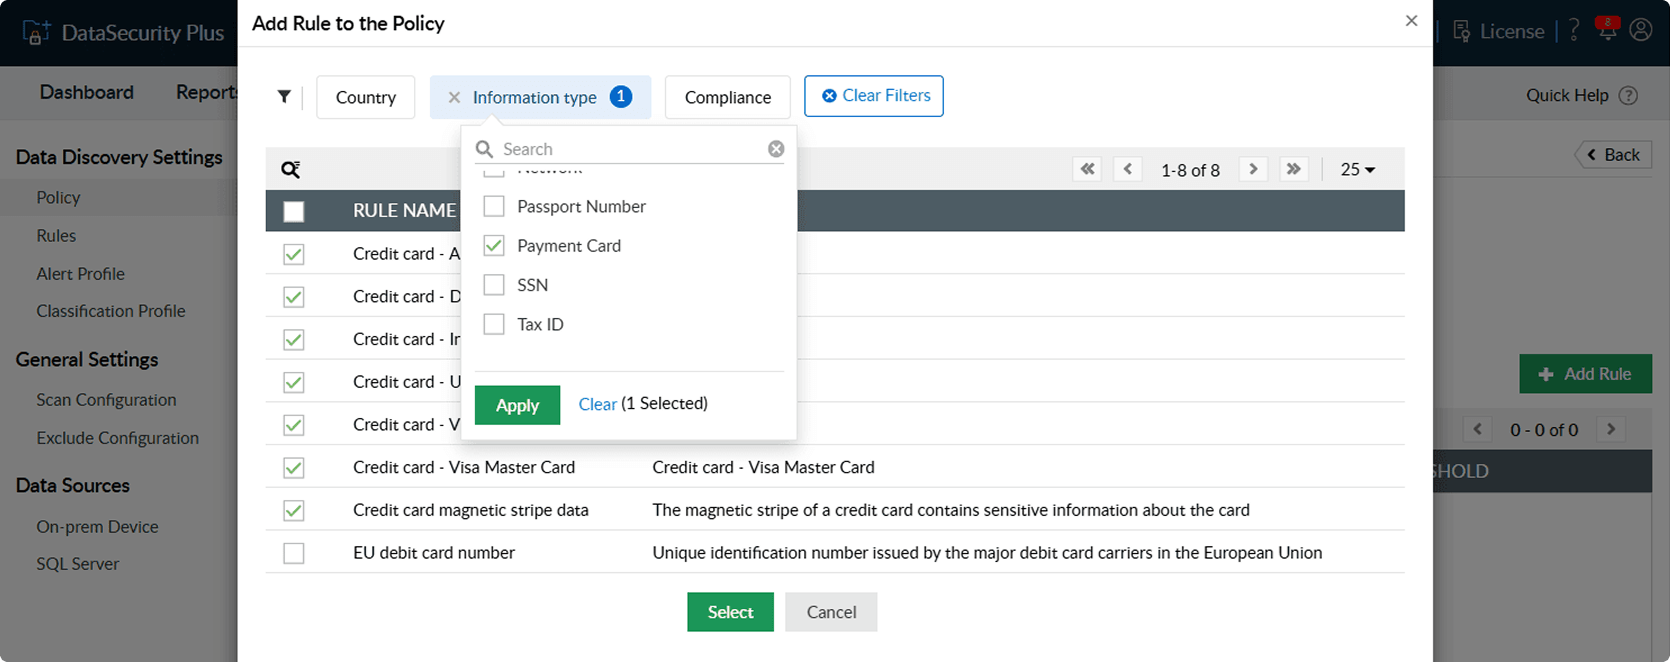
- Add all the listed rules and click Select.
- Click Save.


A data discovery policy to discover credit card numbers will be created. Once your data sources are configured, data scanning will start automatically, and files containing credit card numbers will be discovered. You can take further actions, such as reporting, moving, or removing these files, in line with your data protection strategy.
Configure on-premises data sources using the steps listed below:
- Go to Configuration > Data Sources > On-prem Device > +Add Device.
- Select Domain Devices or Workgroups, depending on the type of device you want to add.
- On the Add Device page, select the domain that the target device is a part of.
- Click the + icon next to the Select Device field, choose your desired list of devices, and click Select.
Note: If a target device is not listed, try clicking the Refresh Table icon in the top-right corner of the table. Furthermore, check our list of supported data sources.
- Under the Select Objects to Monitor section, click:
- Shares to add shares. Select the desired shares, and click Add Shares.
- Subfolders to add subfolders. Enter the target folder path in the Subfolder Share Path text box and click Add.
- Click Save.
Configure database servers using the steps listed below:
- Go to Configuration > Data Sources > SQL Server > + Add SQL server.
- Enter your Server Name, Instance Name, and Port Number.
- Choose an Authentication Type.
-
Provide the Username and Password based on the chosen Authentication Type.
Tips for choosing the authentication type and user credentials:- When choosing Windows Authentication, use a user account with domain admin credentials to ensure the product has sufficient permissions to collect logs.
- When choosing SQL Server Authentication, use a user account configured within the target SQL Server instance that has at least read permissions.
- Click Save.