API
This method allows you to create and authenticate a mail server via your mail provider’s API.
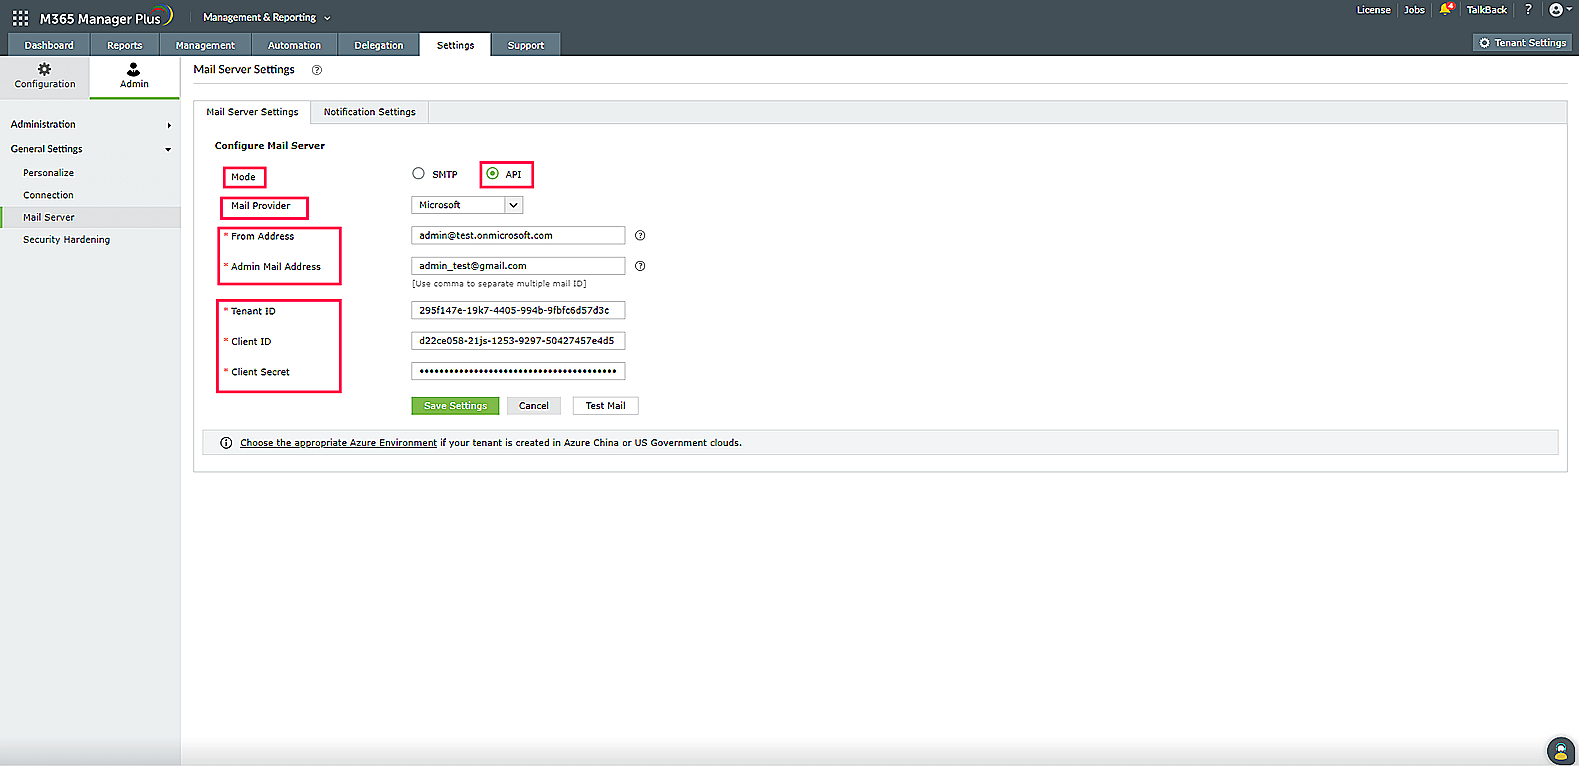
- In the Mode field, select API.
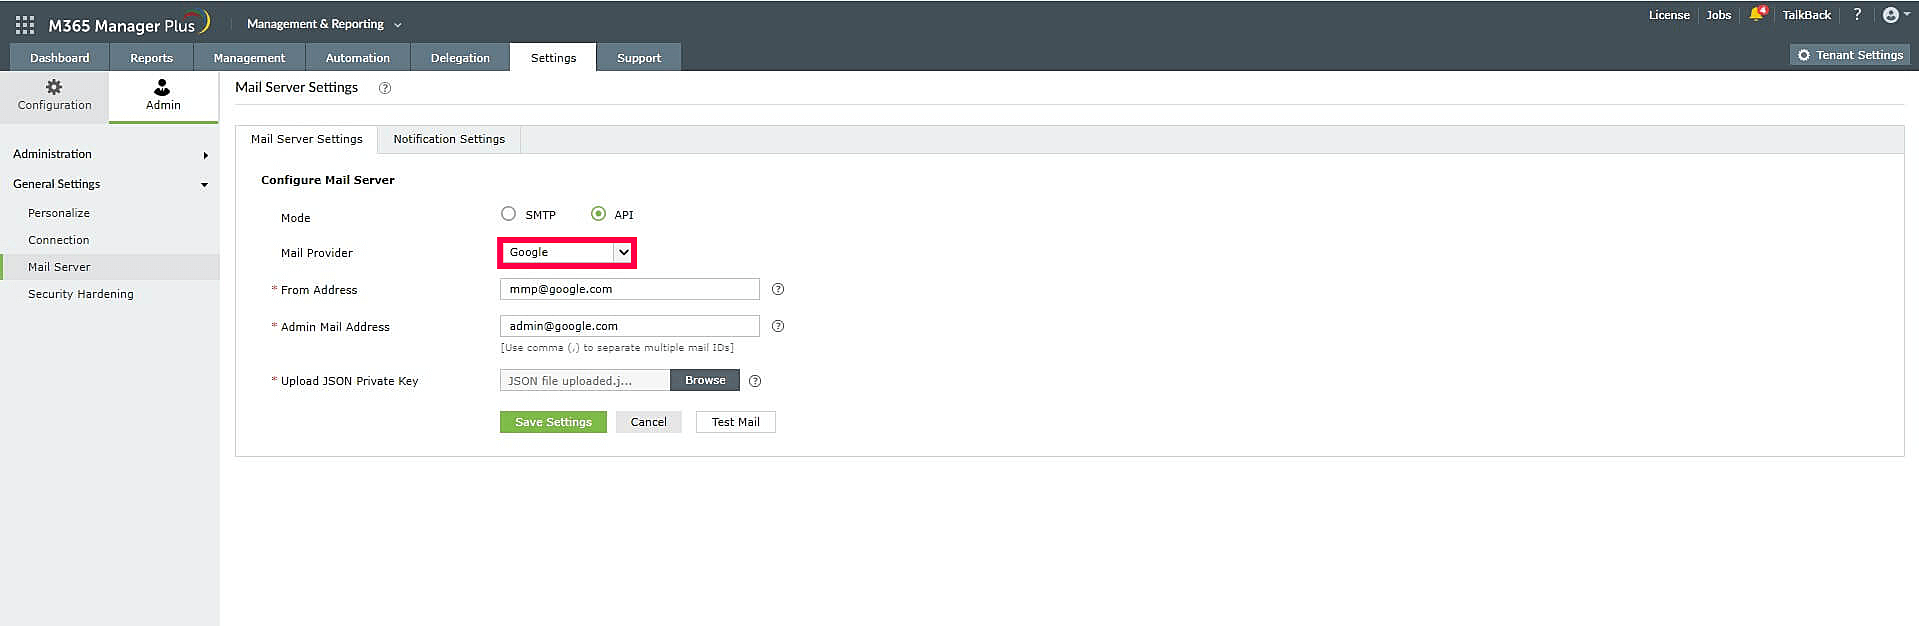
- Select your Mail Provider from the available options: Microsoft or Google.
- In the From Address field, enter the email address that will be used to send out notifications, alerts, etc., from M365 Manager Plus.
- In the Admin Mail Address field, enter the email addresses, separated by commas, to which the email notifications must be sent.
- If your mail provider is Microsoft, provide the Tenant ID, Client ID, and Client Secret in the respective fields. In M365 Manager Plus, the Azure Cloud is considered the default Azure environment. You can modify the Azure environment settings by clicking the Choose the appropriate Azure environment link.
Note: To learn how to find your Azure tenant ID, client ID, and client secret, click here.
- If your mail provider is Google, upload the JSON private key file.
Note: To learn how to get your JSON private key file, click here.
- Click Save settings to save your mail server configuration.
Steps to find your Azure tenant ID, client ID, and client secret for API mail server configuration
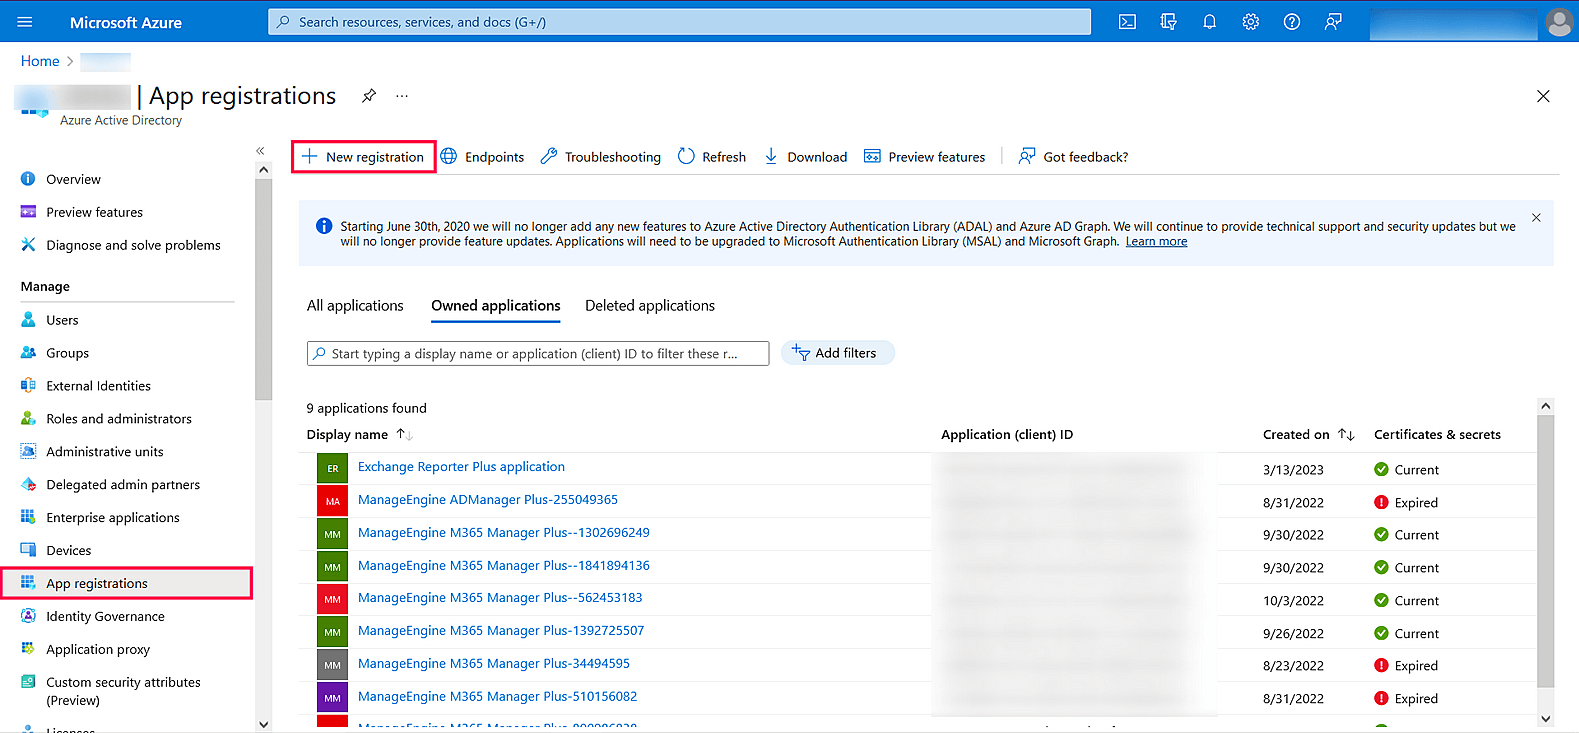
- Log in to portal.azure.com.
- Open Azure Active Directory.
- Under Manage, click App registrations → New registration.
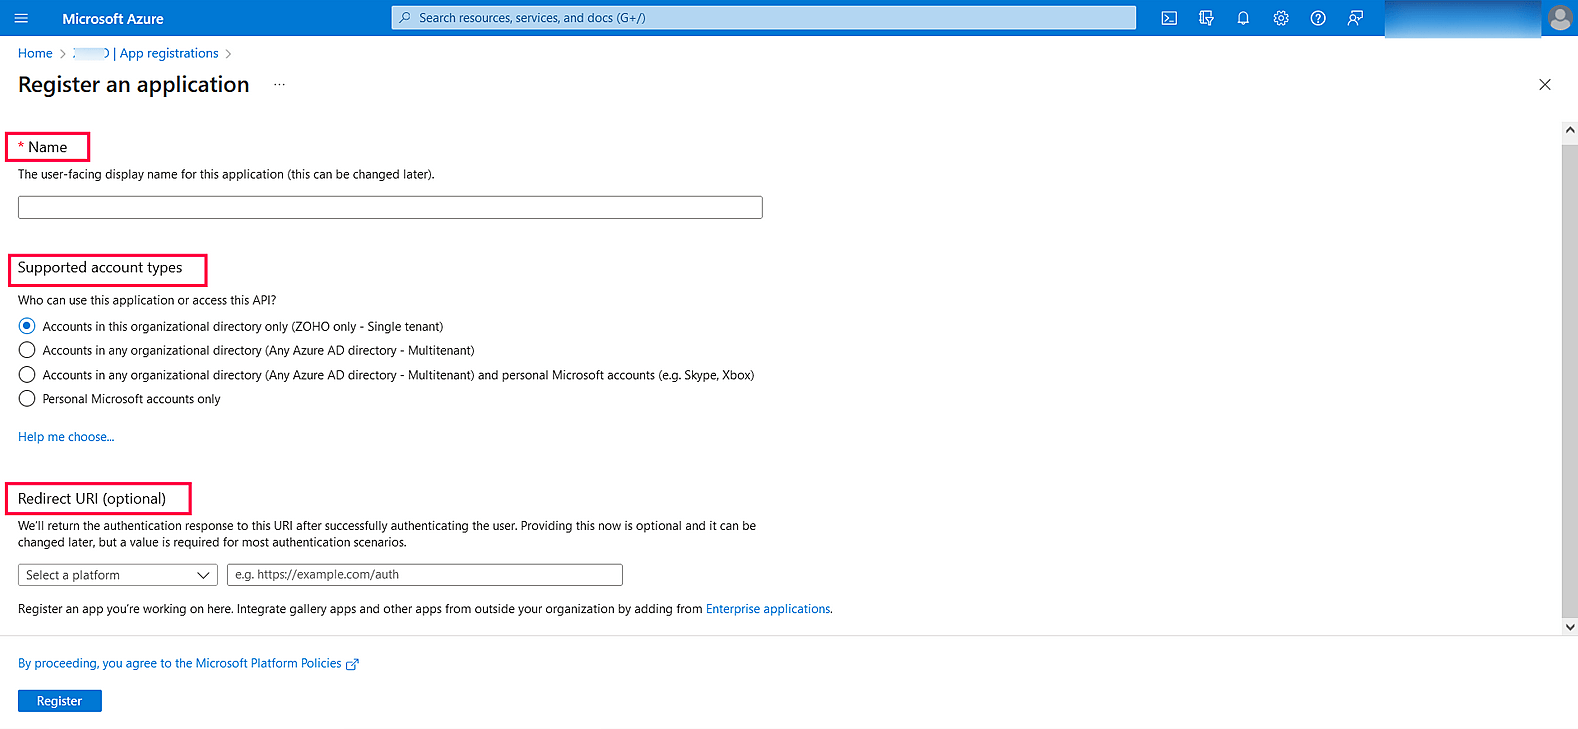
- Enter a Name of your choice and choose the Supported account types. (If you’re unsure about the supported account types, select Accounts in this organizational directory only.)
- Click Register to register the application.
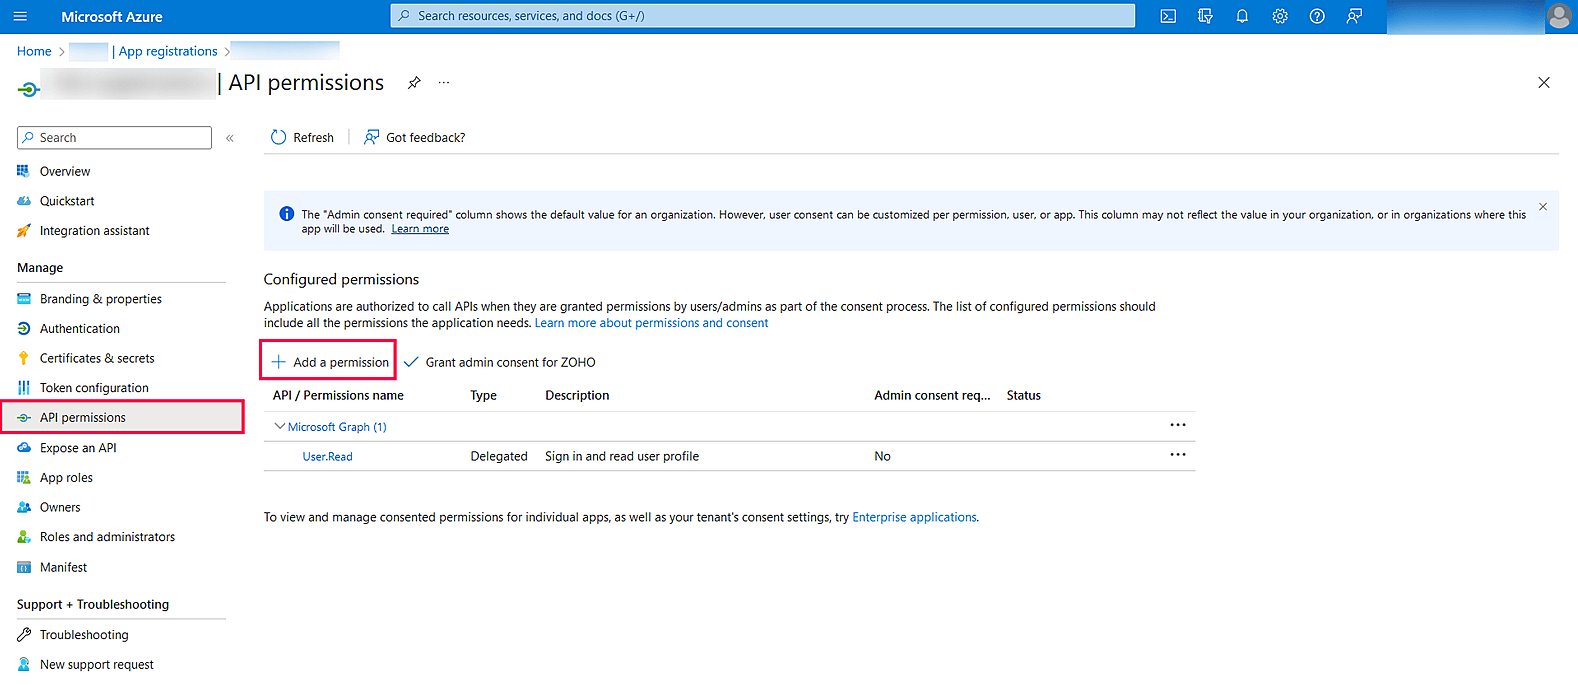
- In the left pane, click API permissions → Add a permission.
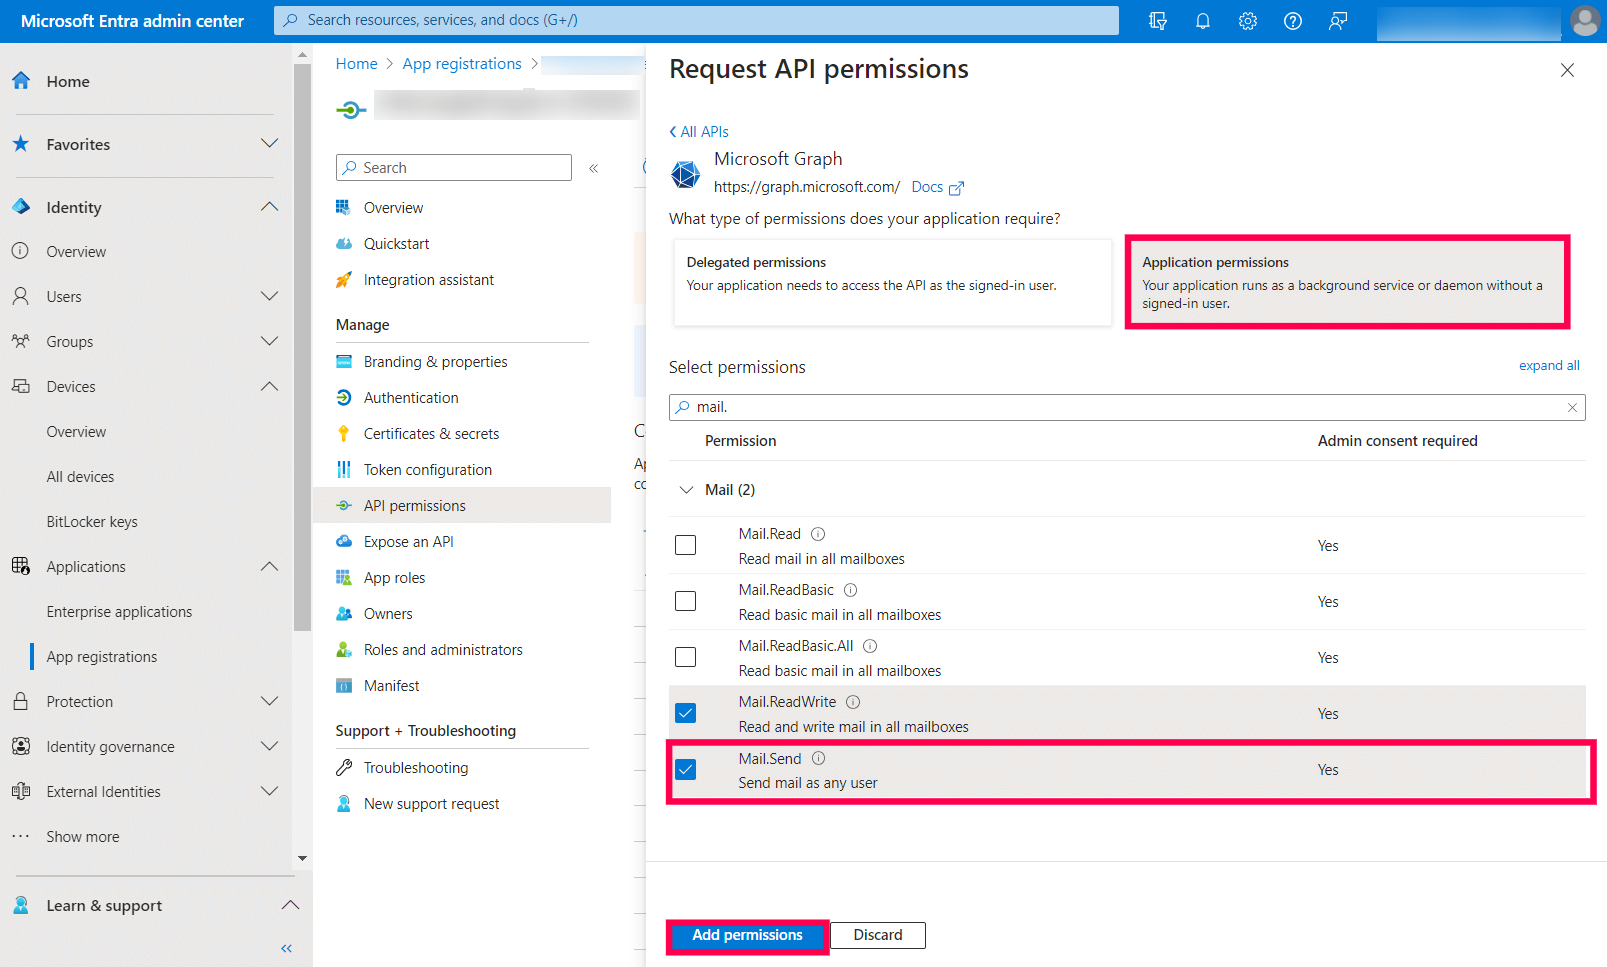
- Click Microsoft Graph → Application permission.
- Search Mail and select the permission Mail.Send. Click Add permissions.
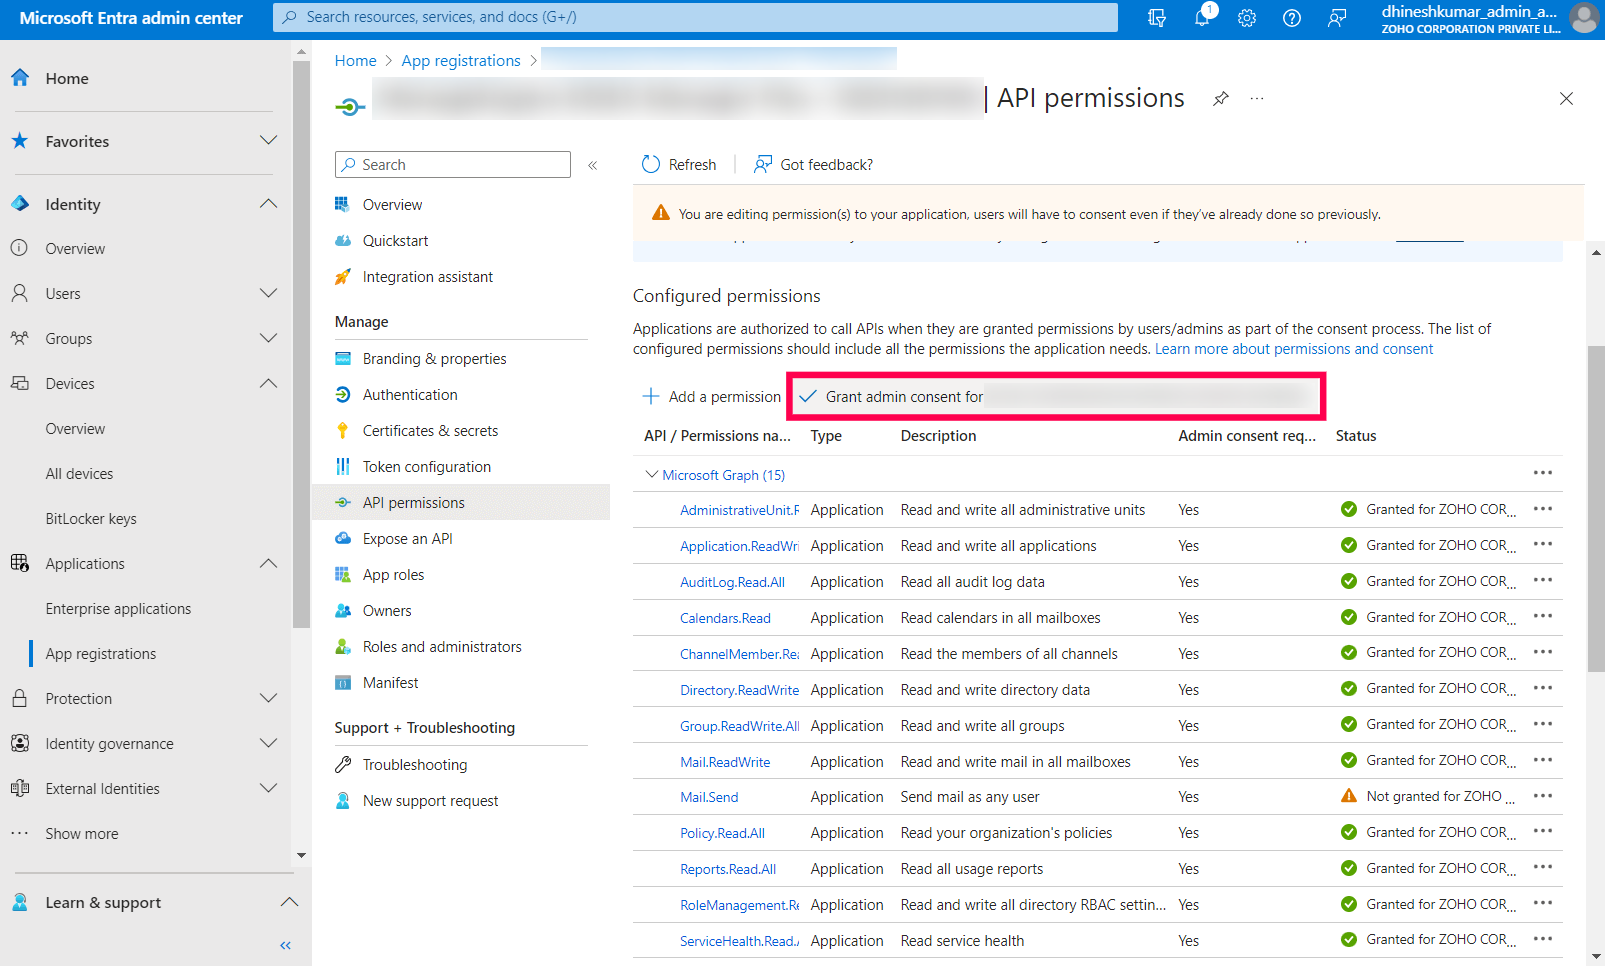
- Click Grant admin consent.
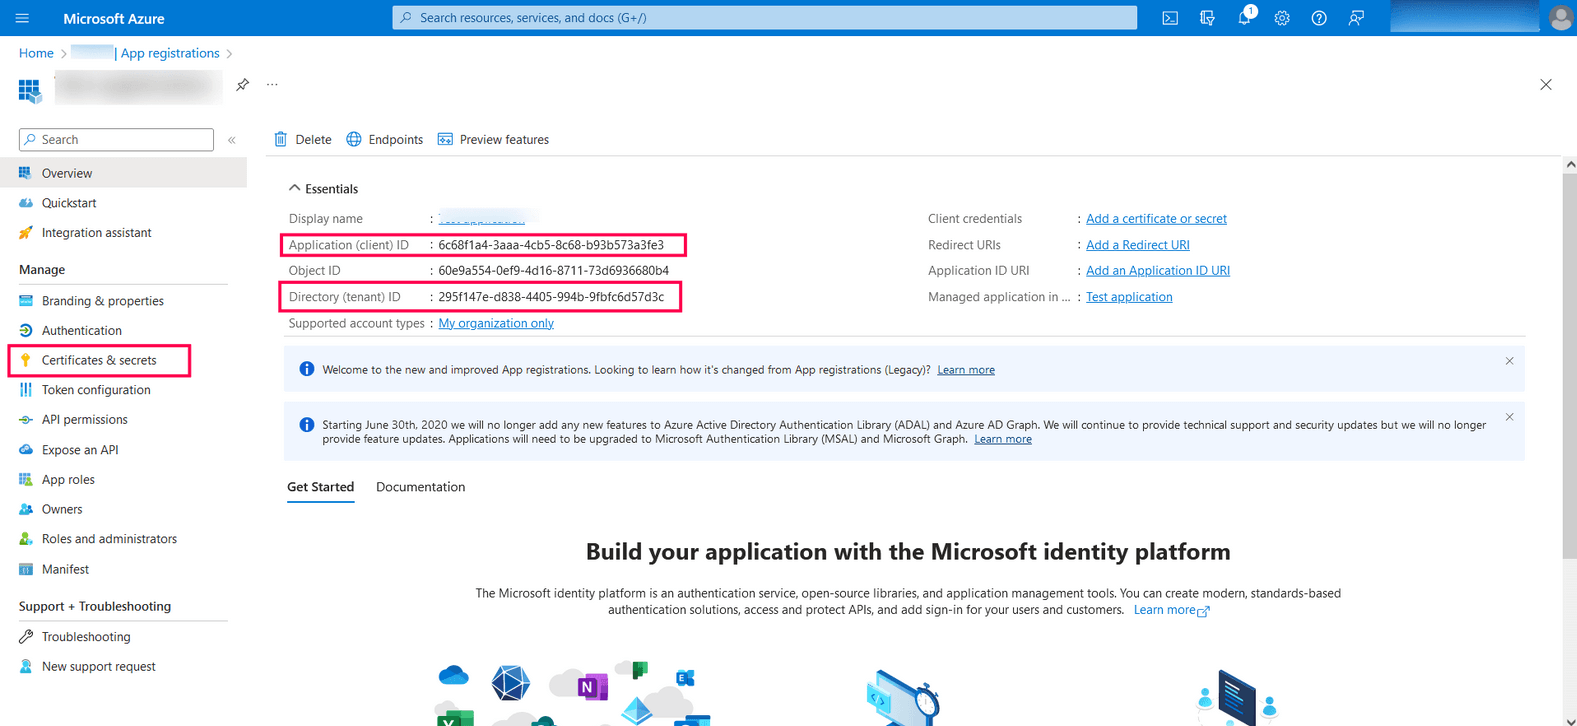
- Copy the Application (client) ID and Directory (tenant) ID displayed.
- In the left pane, click Certificates & secrets → New client secret.
- Provide a Description for the client secret. In the Expires field, choose the validity of the client secret and click Add.
- The client secret will be generated. Copy the string displayed under Value.
- You can now paste the client secret when configuring an Azure application in M365 Manager Plus.
Steps to download the JSON private key for API mail server configuration
- Log in to console.developers.google.com.
- Expand the left sidebar and click IAM & Admin.
- Open the Service Accounts page.
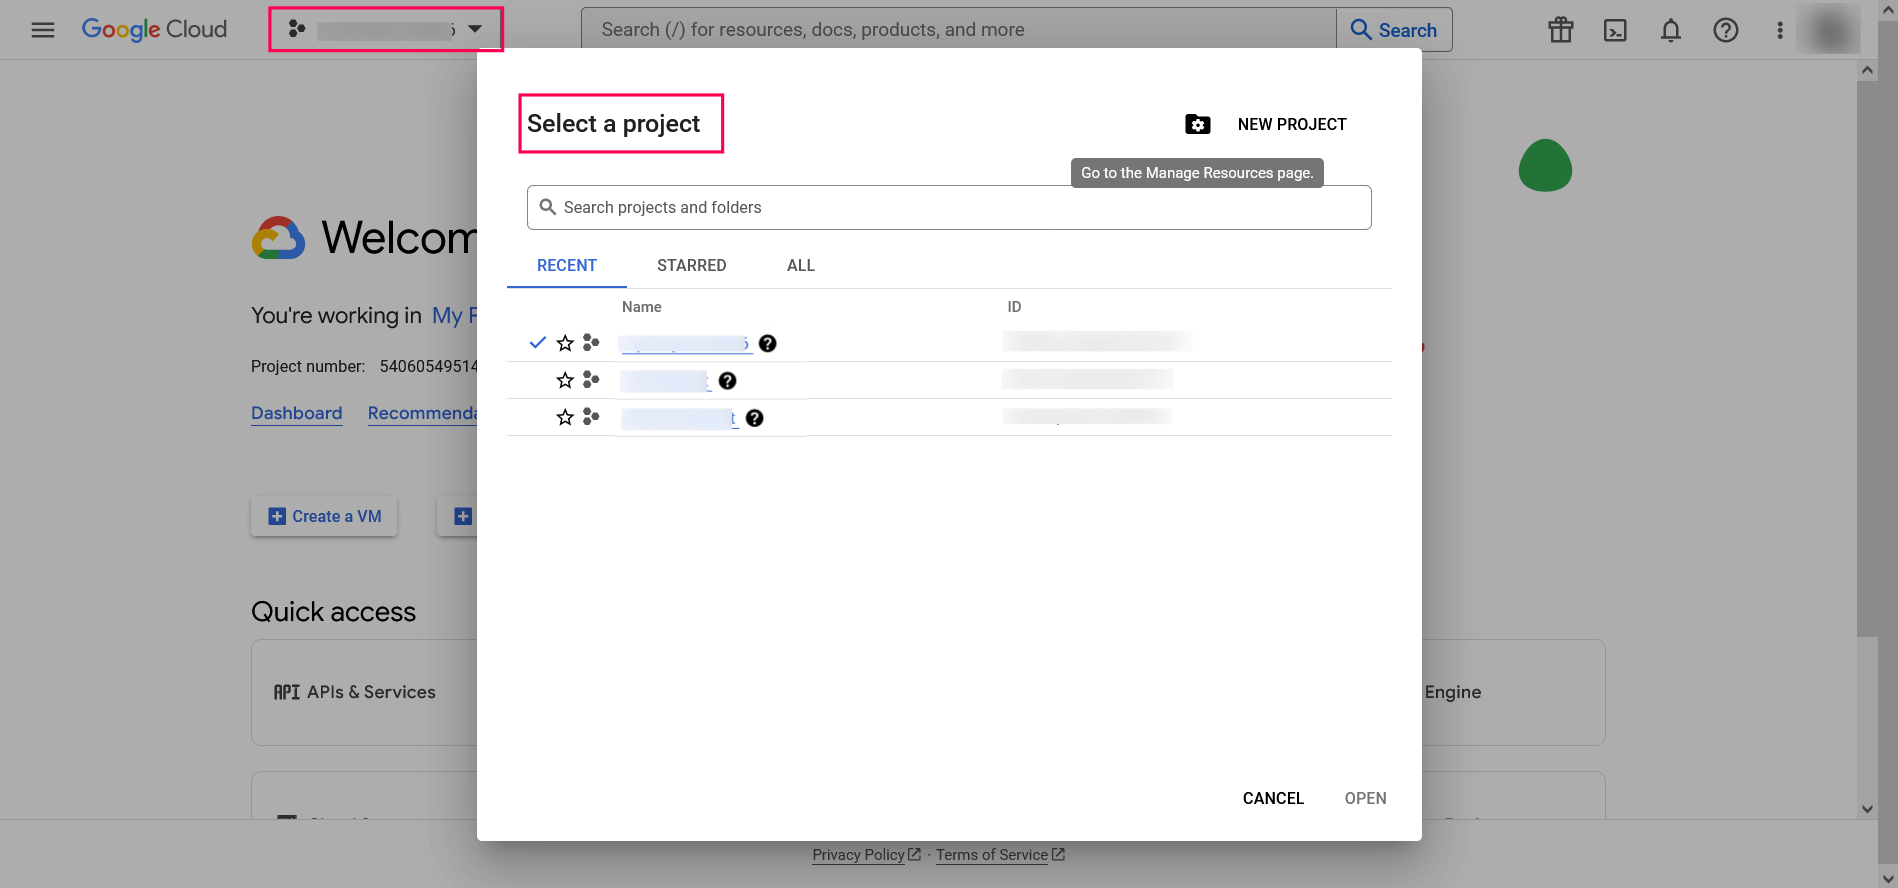
- In the dashboard, select any existing project or click New Project from the project dropdown list.
Note: If you are selecting an existing project, skip to step 13.
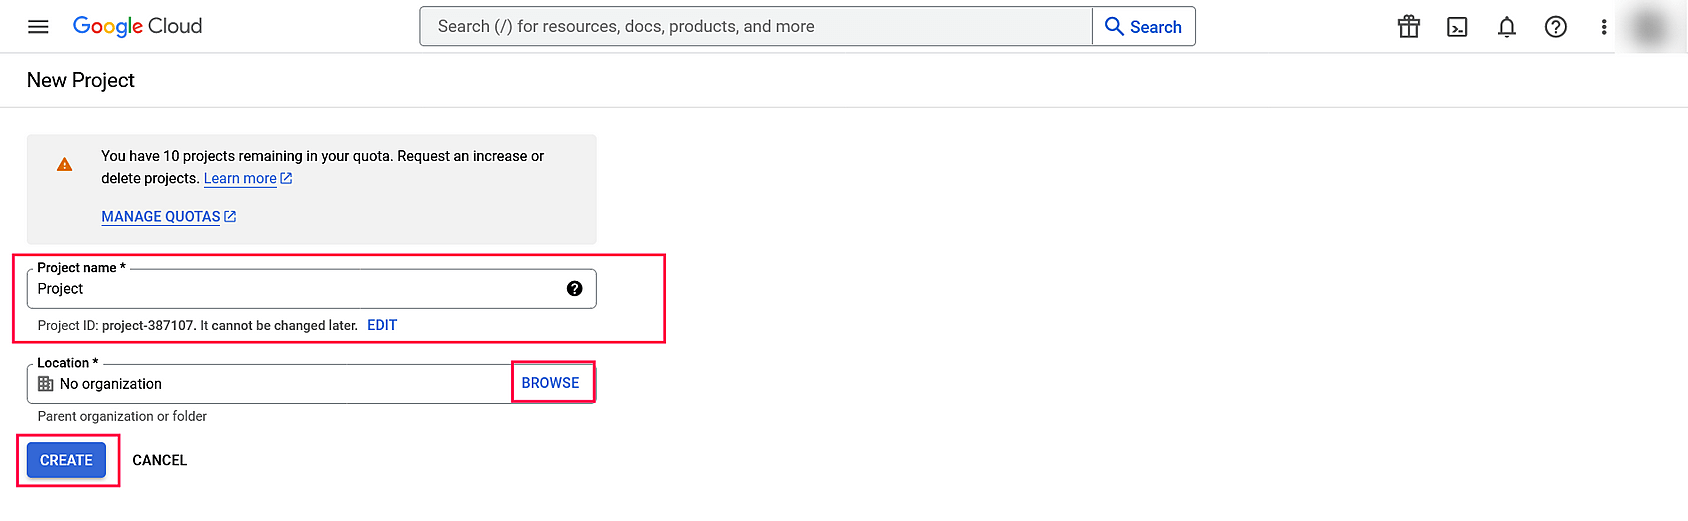
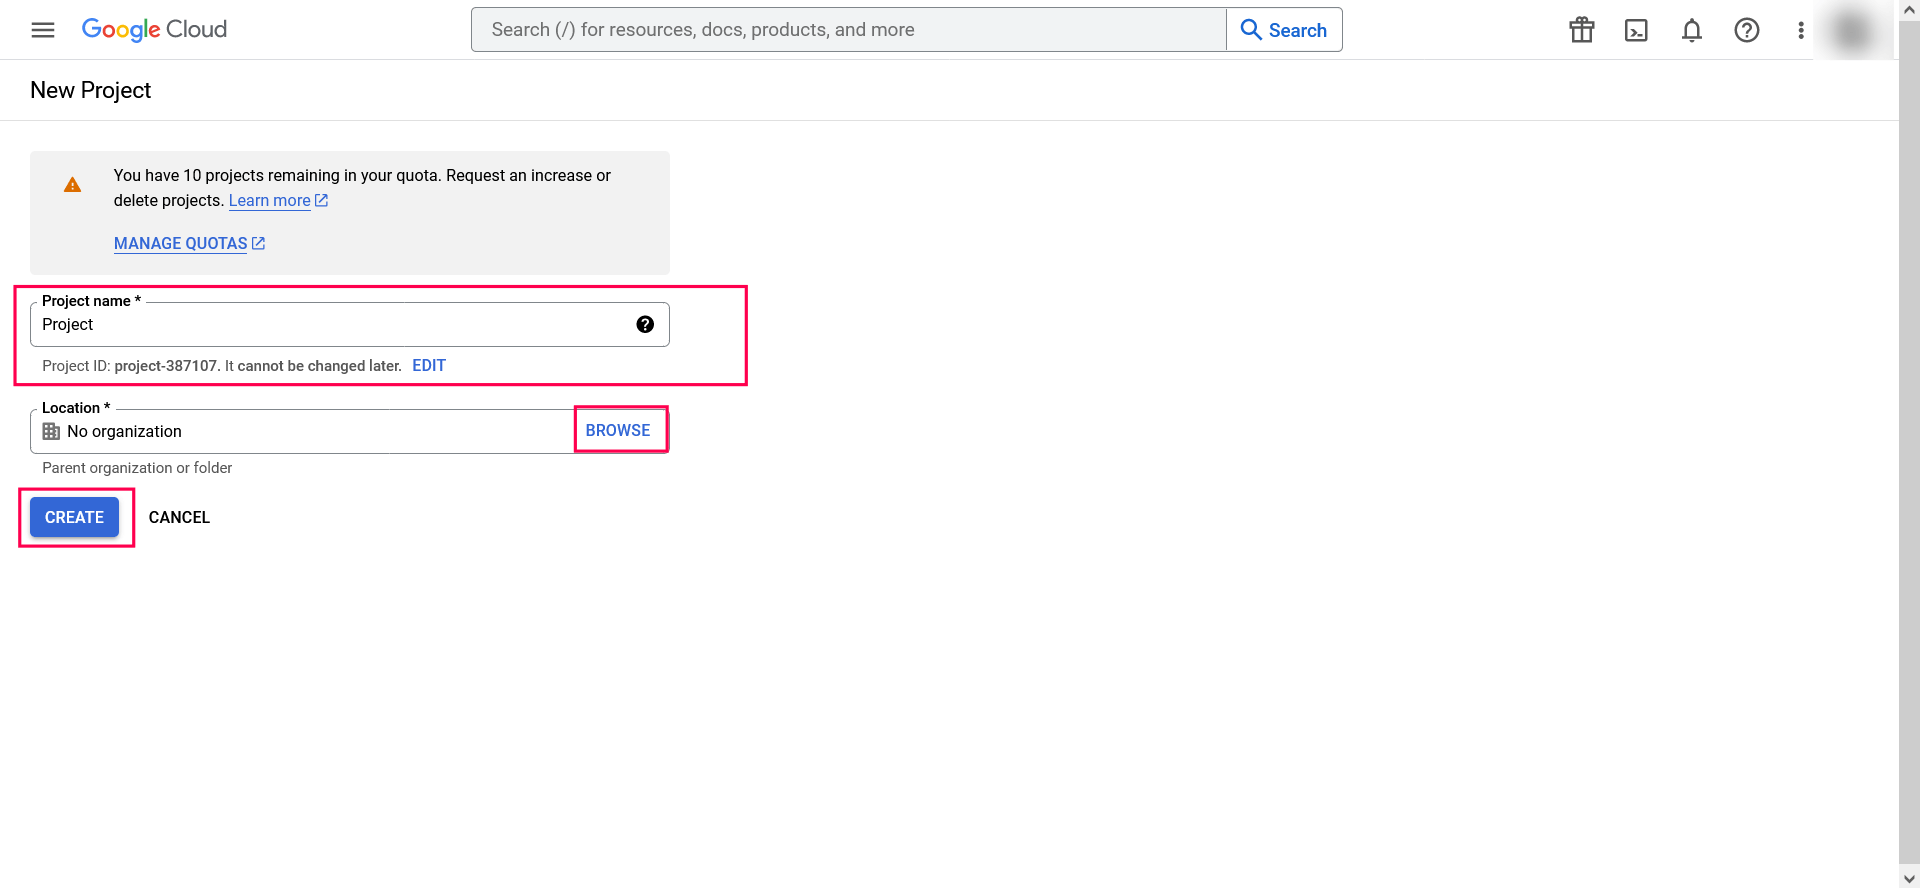
- Click CREATE PROJECT.
- Enter the Project name and Location. Click CREATE.
- Click + CREATE SERVICE ACCOUNT button from the top navigation bar.
- Under Service account details, type a Service account name, Service account ID, and Service account description, then click CREATE AND CONTINUE.
- If required, you can also select the IAM roles to be granted to the service account using the Grant this service account access to project option.
- Click Save.
- If required, you can add the users or groups that are allowed to use and manage the service account.
- Click Done.
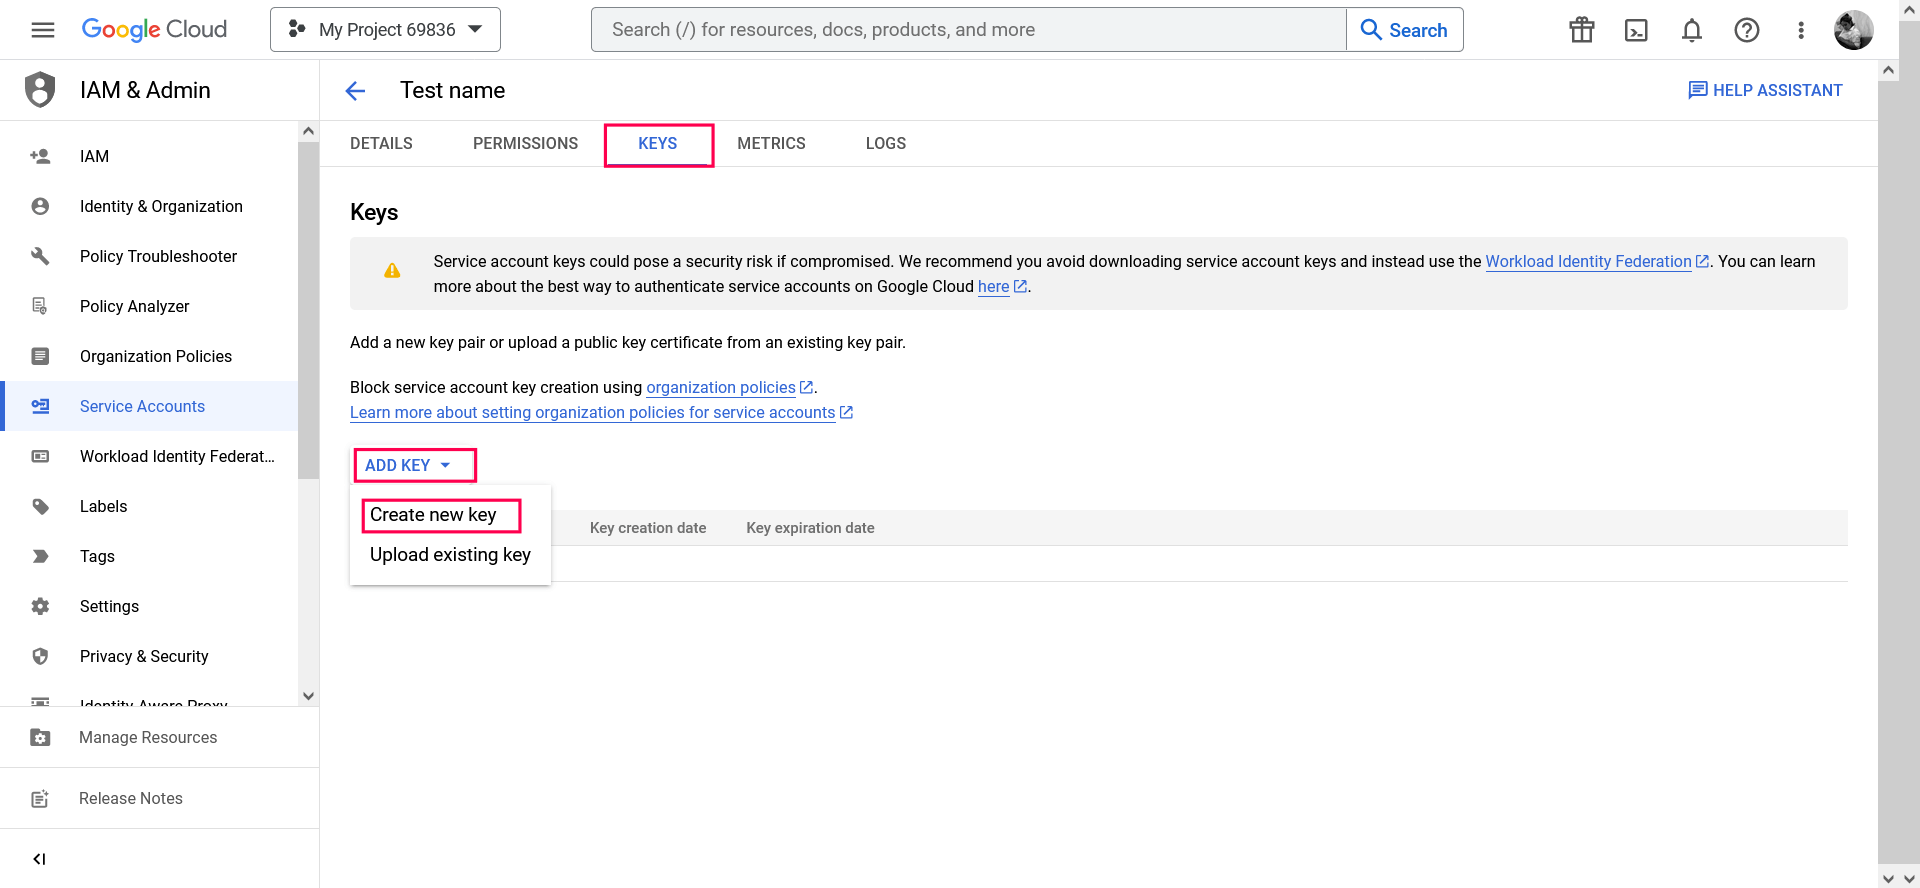
- Click the email address for the service account you created.
- Click the KEYS tab.
- In the ADD KEY dropdown list, select Create new key.
- Select key type as JSON.
- Click Create.
Your new public and private key pair will be generated and downloaded to your machine. Please keep the private key safe as this will be the only copy, and you cannot generate the same private key again.
Once you have downloaded the JSON private key, you’ll have to:
Enable Gmail API service
- Log in to console.cloud.google.com.
- Select the project you created from the dropdown menu.
- Click APIs & Services and choose + ENABLE APIS AND SERVICES.
- Select Gmail API and click Enable.
Delegating domain-wide authority to the service account
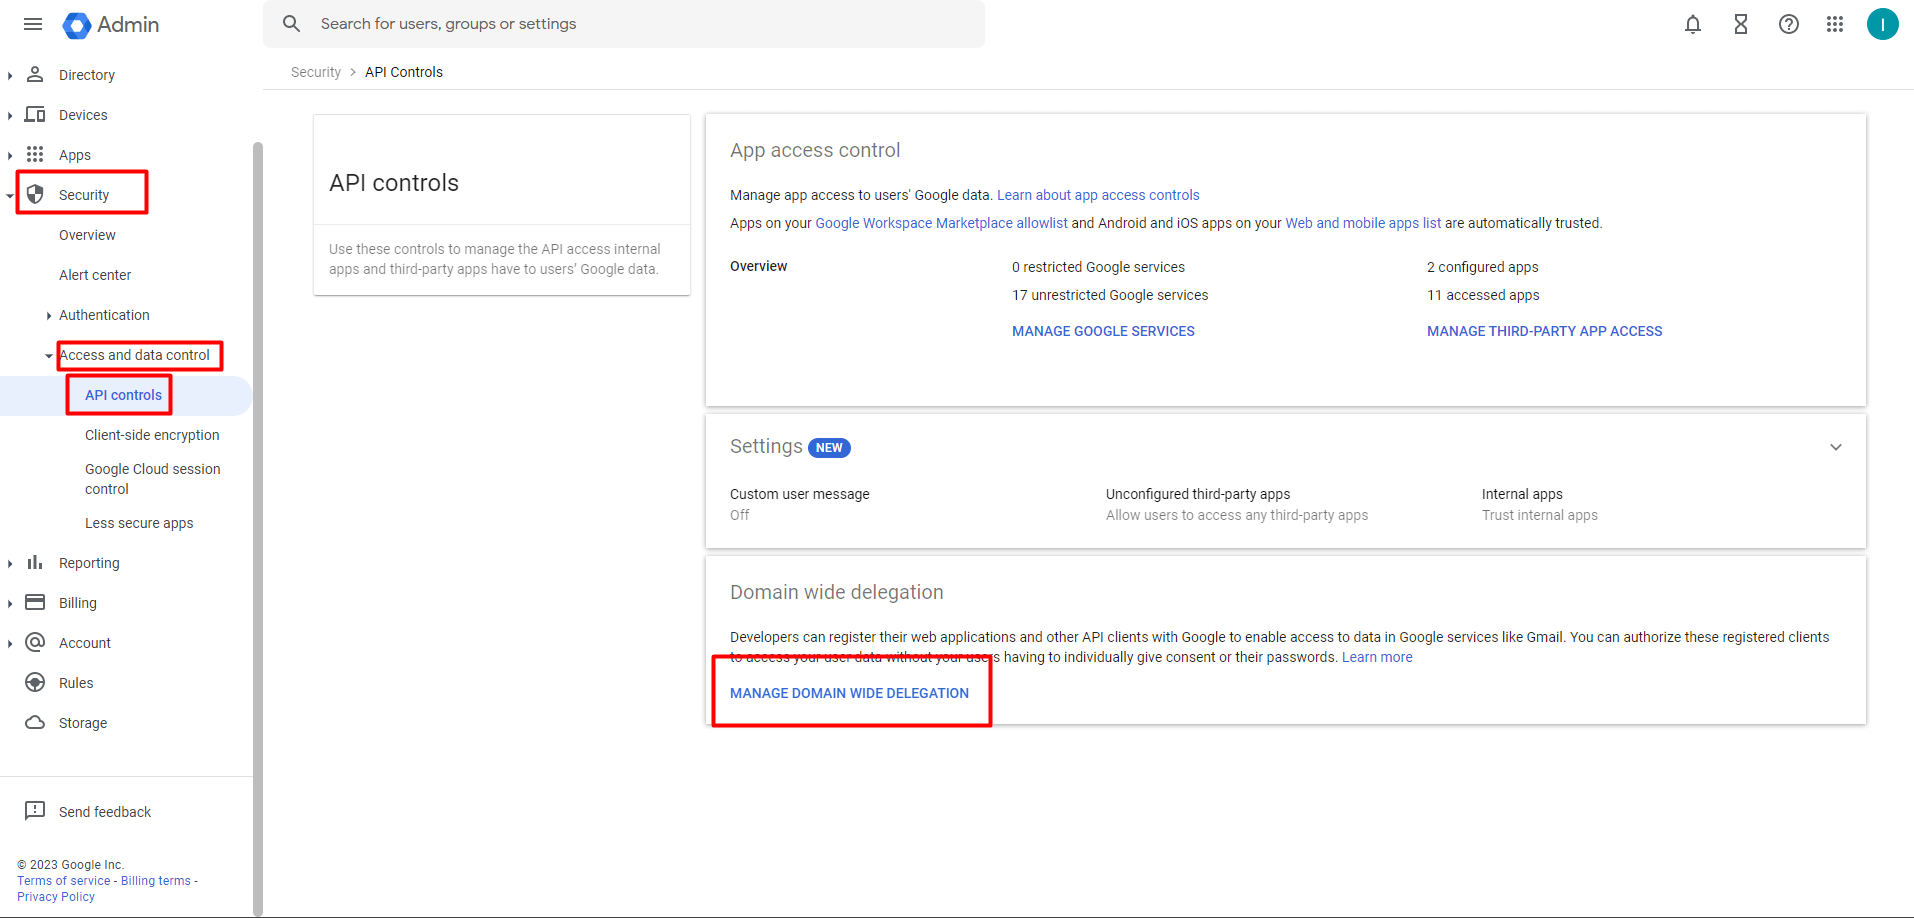
- Log in to the Google Workspace domain's Admin console as a super administrator.
- Navigate to Main menu → Security → Access and data control → API controls.
- In the Domain wide delegation pane, select MANAGE DOMAIN WIDE DELEGATION.
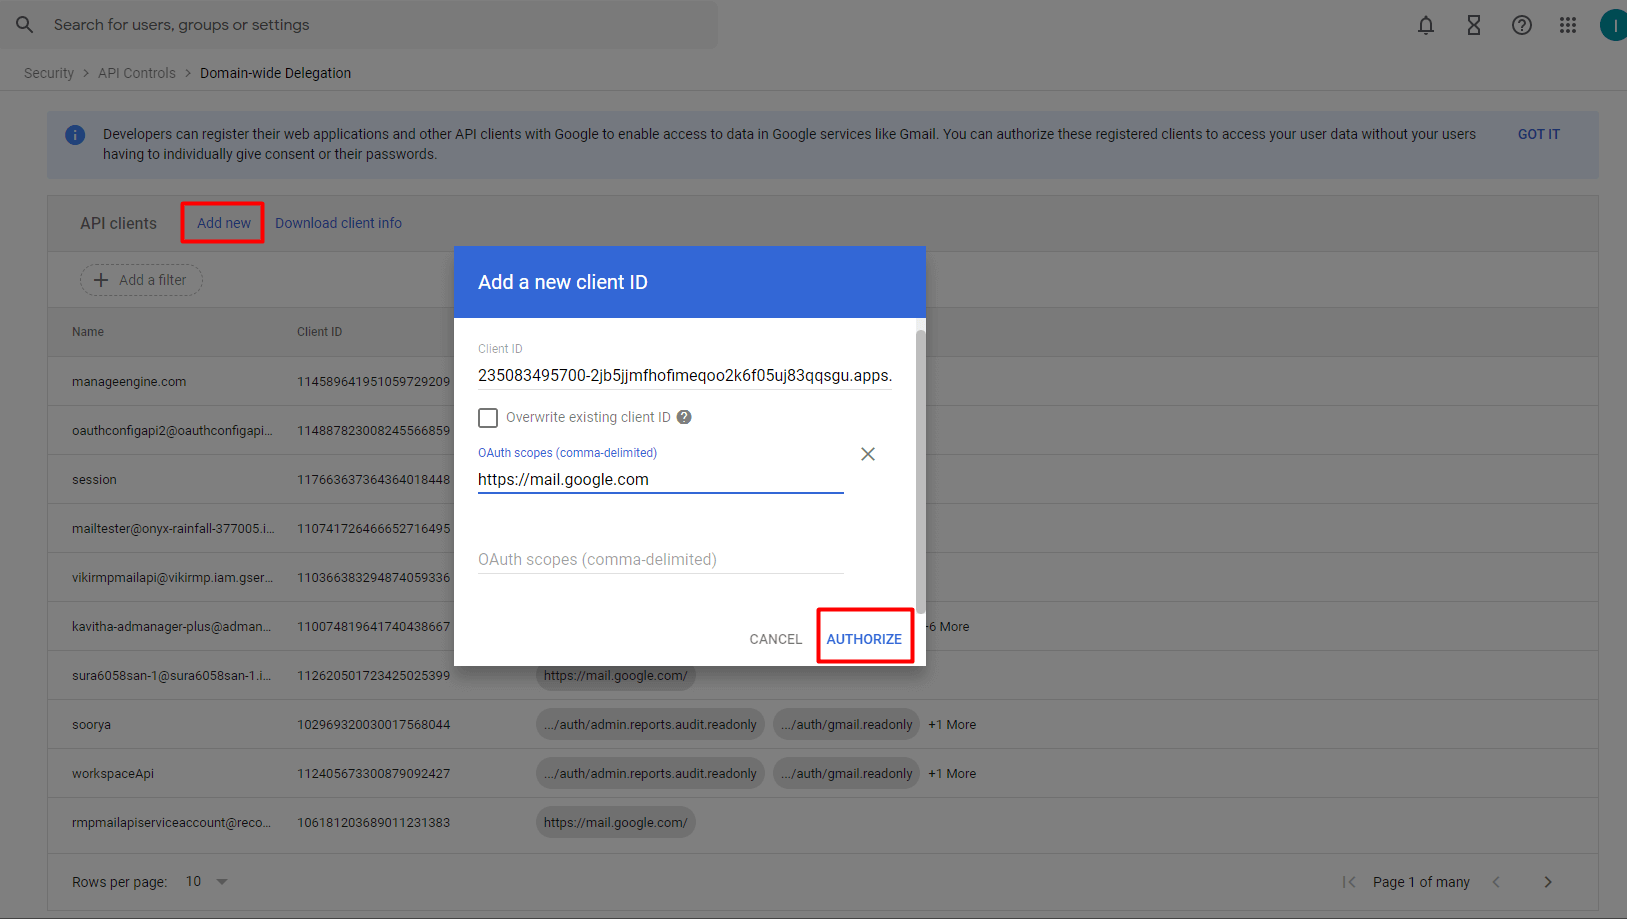
- Click Add new.
- In the Client ID field, enter the service account's client ID. You can find your service account's client ID on the Service accounts page.
- In the OAuth scopes (comma-delimited) field, enter Google Mail API's URI: (https://mail.google.com). You can also list other scopes that your application should be granted access to, by using commas as a delimiter to separate them.
- Click Authorize.
Your application now has the authority to make API calls as users in your domain (to impersonate users). When you prepare to make authorized API calls, specify the user to impersonate as.


 ADManager Plus
 ADAudit Plus
 ADSelfService Plus
 M365 Manager Plus