
How to create a shared mailbox in Office 365
Last updated on:In this page
- Create a shared mailbox using the Microsoft 365 admin center
- Create a shared mailbox in Office 365 using the EAC
- How to create a shared mailbox in Office 365 using Exchange Online PowerShell
- How to create Office 365 shared mailboxes with M365 Manager Plus
- Monitor your Exchange Online shared mailboxes and more
- Important tips
- Frequently asked questions
Creating a shared mailbox in Office 365 (now Microsoft 365) lets multiple users read and send email messages from a centralized address, such as info@ testo rg.com. This allows teams to act as a collective representative, coordinate responses, and ensure consistent communication without requiring individual login credentials for the mailbox. Microsoft 365 shared mailboxes are essential for departmental aliases, customer support, or any scenario where a group needs to monitor and send mail from a common identity.
This article will help you create a shared mailbox in Exchange Online using the Exchange admin center (EAC) and Exchange Online PowerShell. It will also cover how to create multiple Microsoft 365 shared mailboxes with just a few clicks using ManageEngine M365 Manager Plus, a dedicated Microsoft 365 administration tool.
- Microsoft 365
- Exchange Online
- Graph PowerShell
- M365 Manager Plus
Method 1: Create a shared mailbox using the Microsoft 365 admin center
Prerequisite
You must have Global Administrator or Exchange Administrator permissions to create shared mailboxes.
Steps
- Log in to the Microsoft 365 admin center.
- In the left navigation pane, go to Teams & groups > Shared mailboxes.
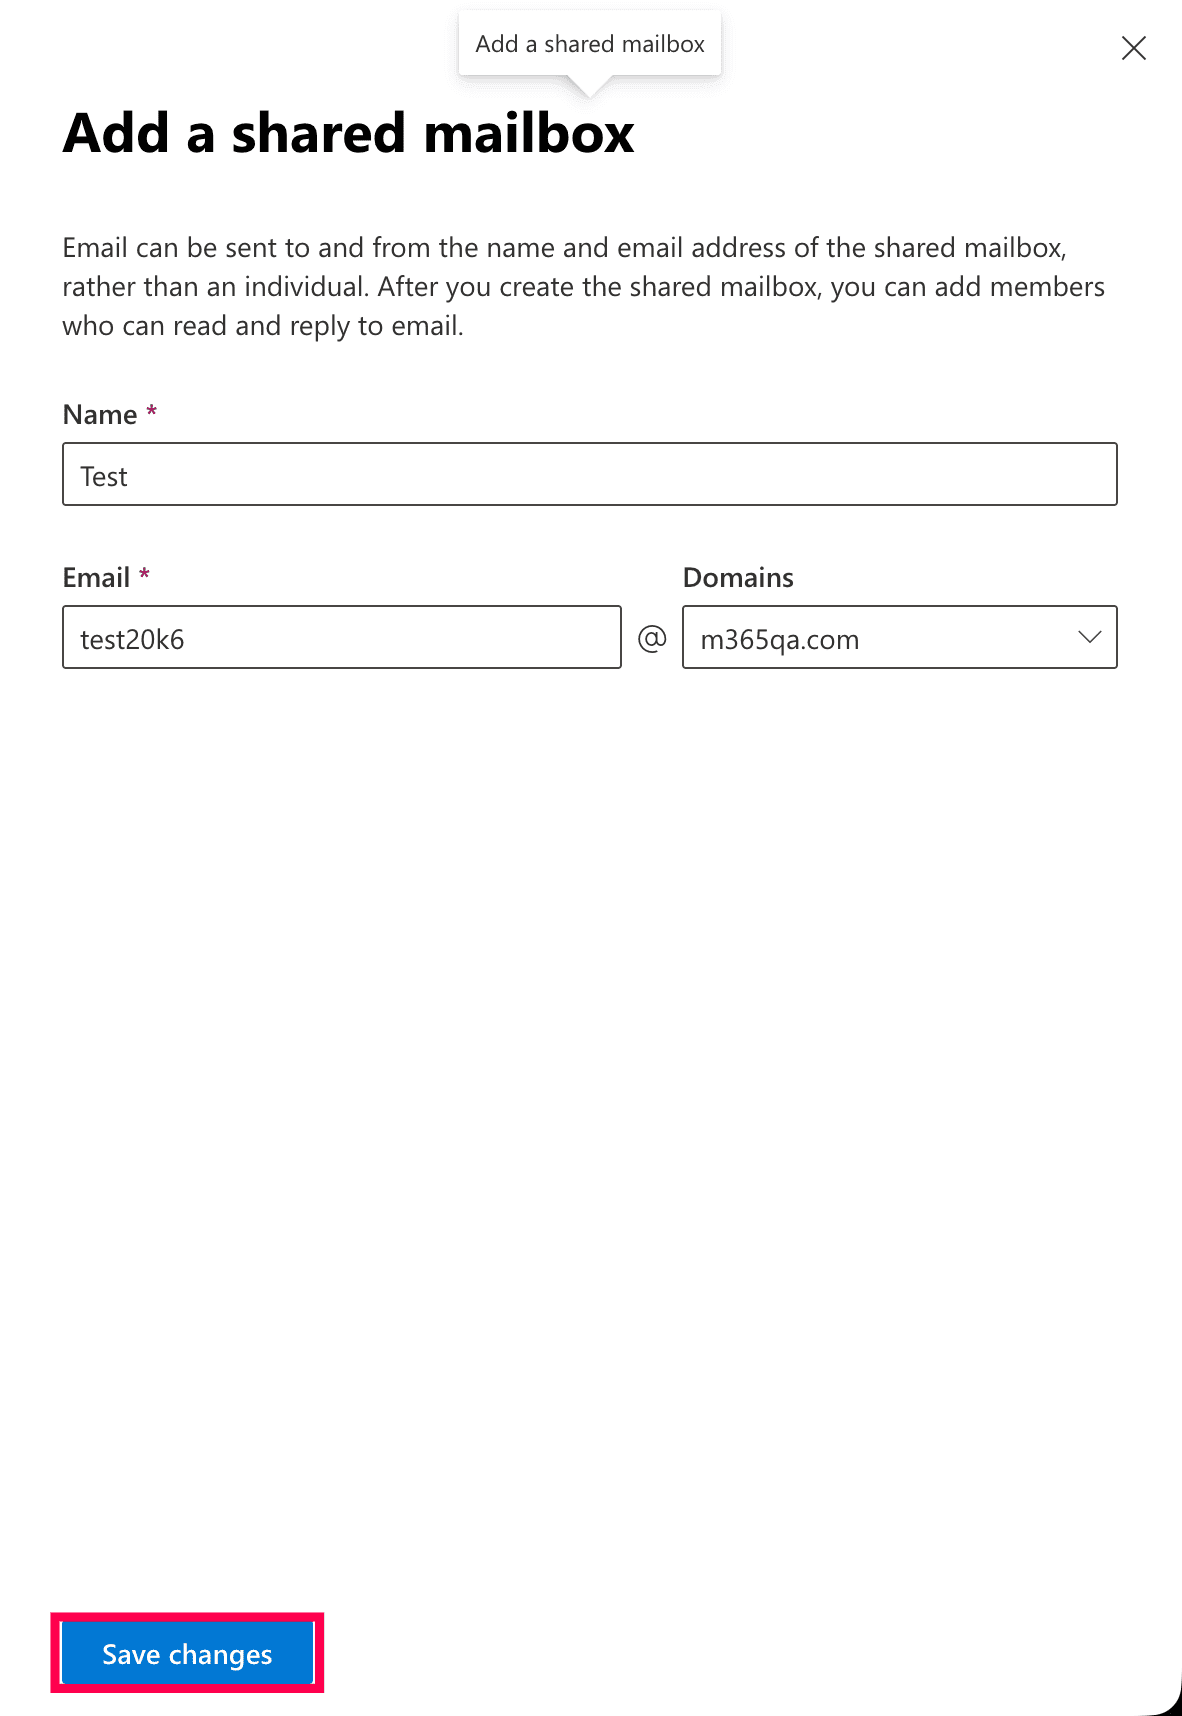
- Click + Add a shared mailbox.
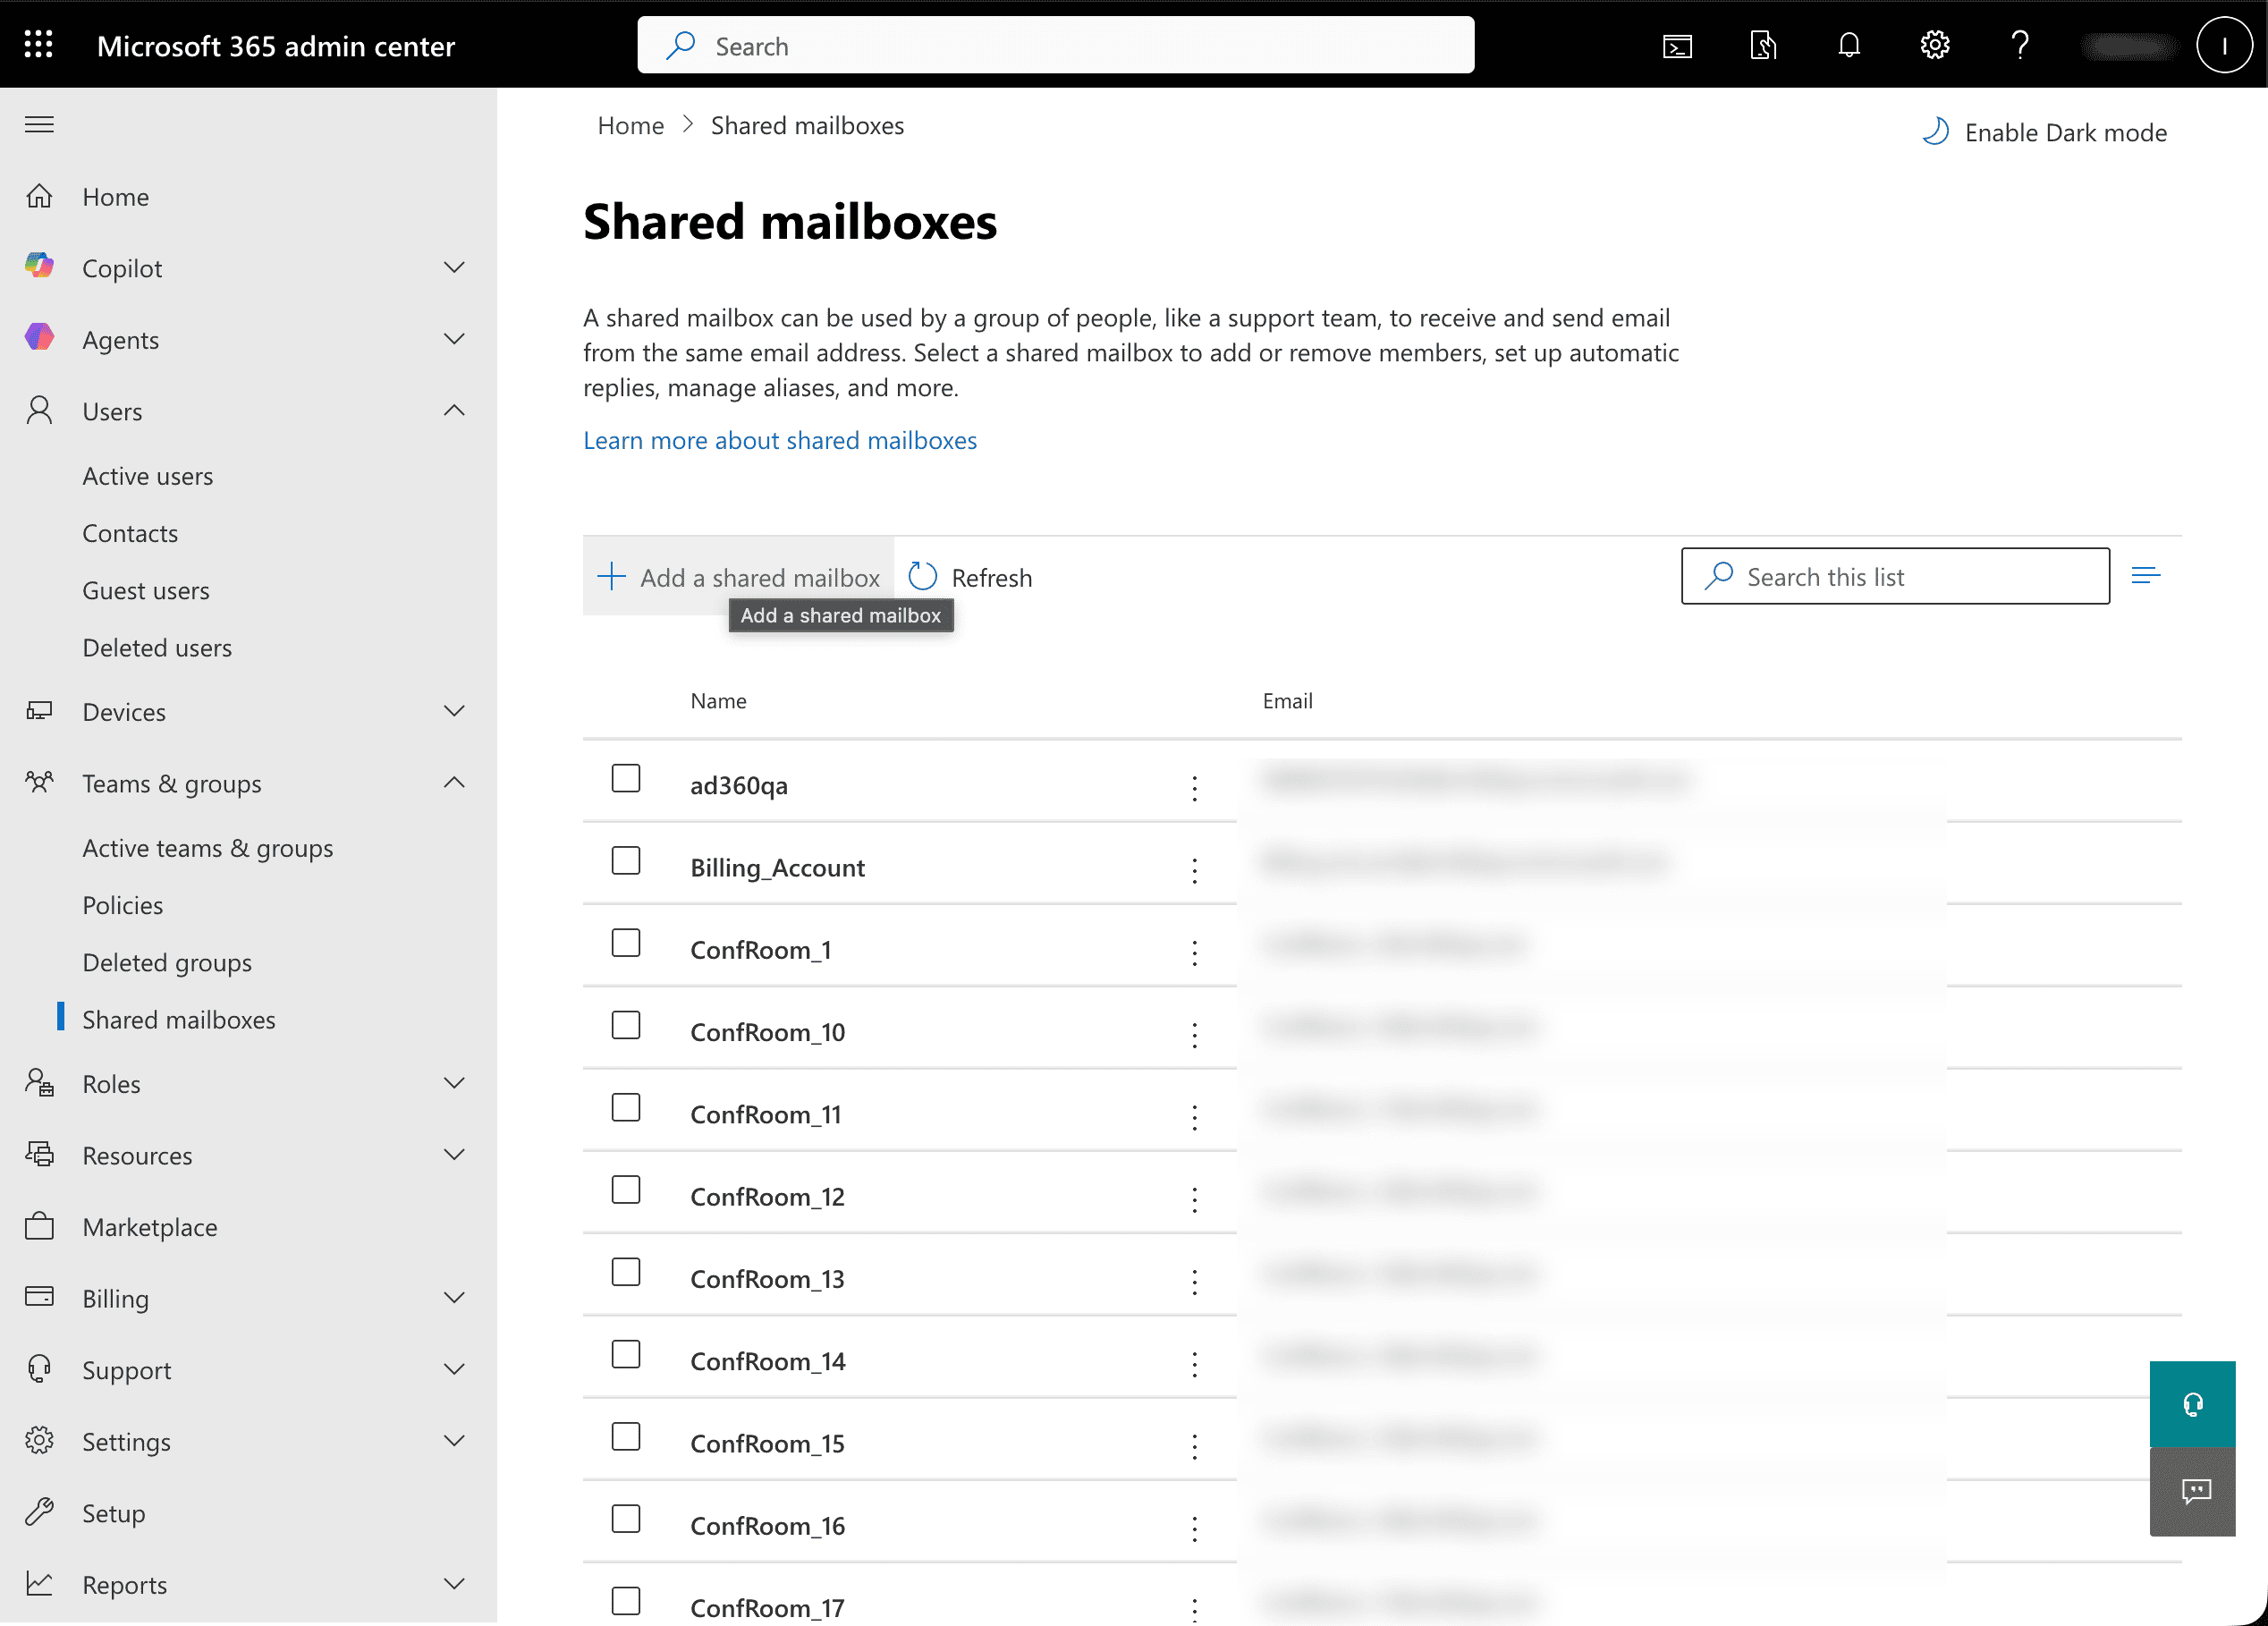
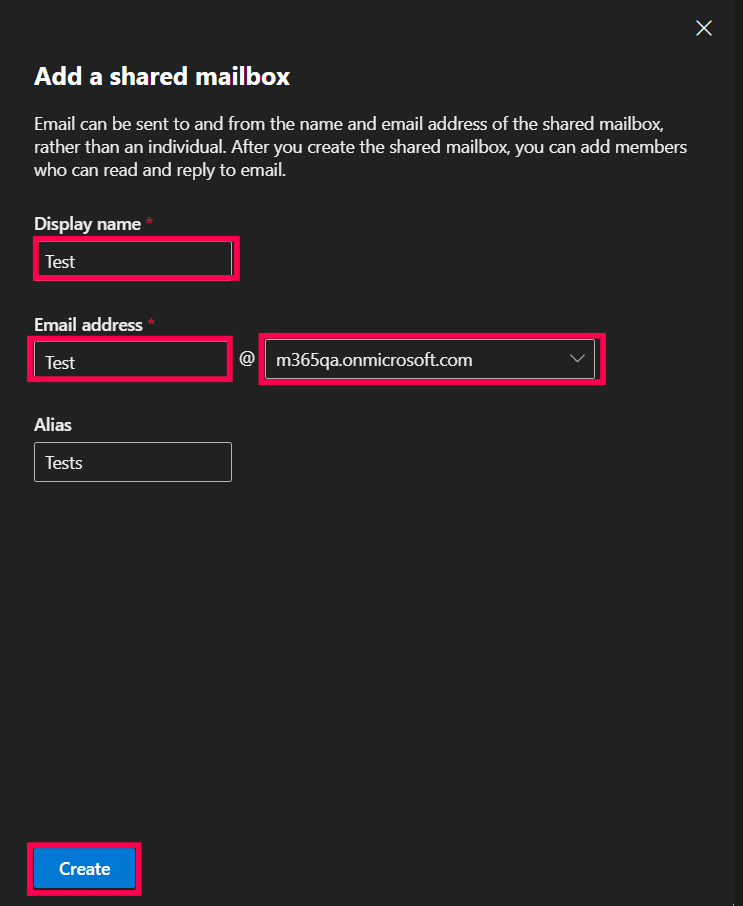
- In the pop-up that appears, enter a name and an email address, then select the appropriate domain from the dropdown menu.
- Click Save changes.
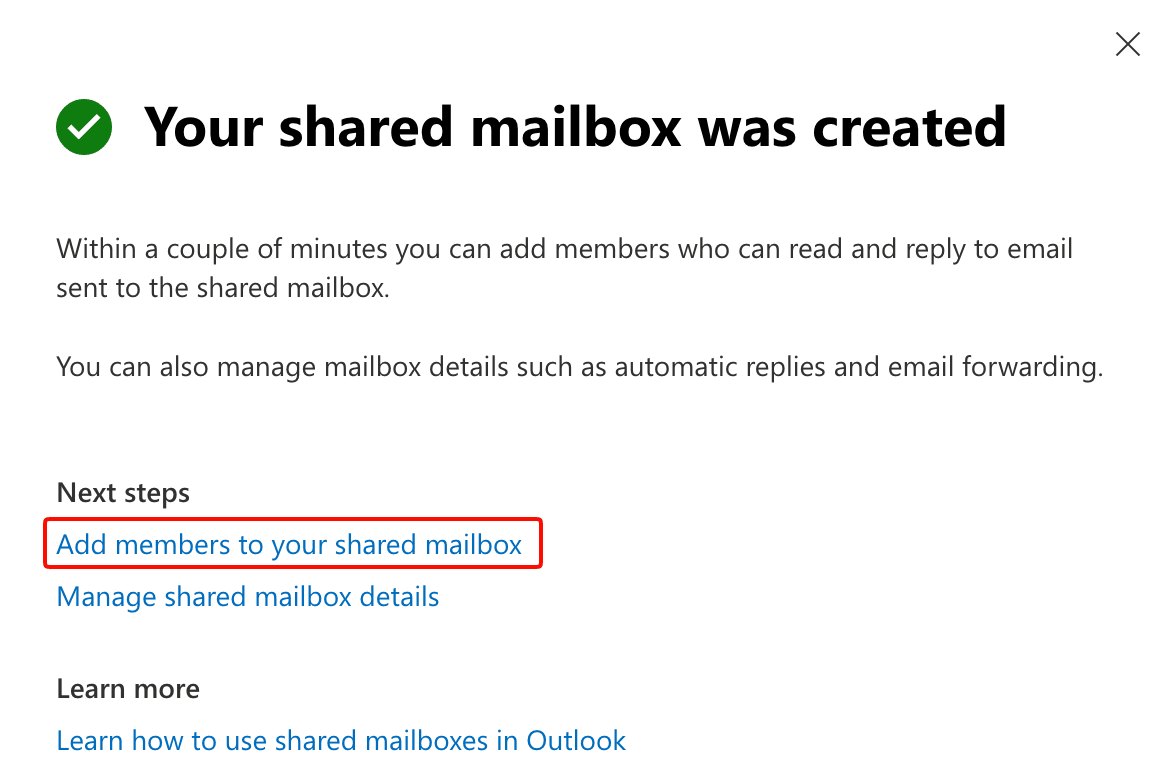
- Once the mailbox is created, select Add members to your shared mailbox to grant users access.


Method 2: Create a shared mailbox in Office 365 using the EAC
Prerequisite
You must have Exchange Administrator permissions on the account signing in to the Exchange admin center (EAC).
Steps
- Log in to the EAC and navigate to Recipients > Mailboxes.
- Click + Add a shared mailbox.
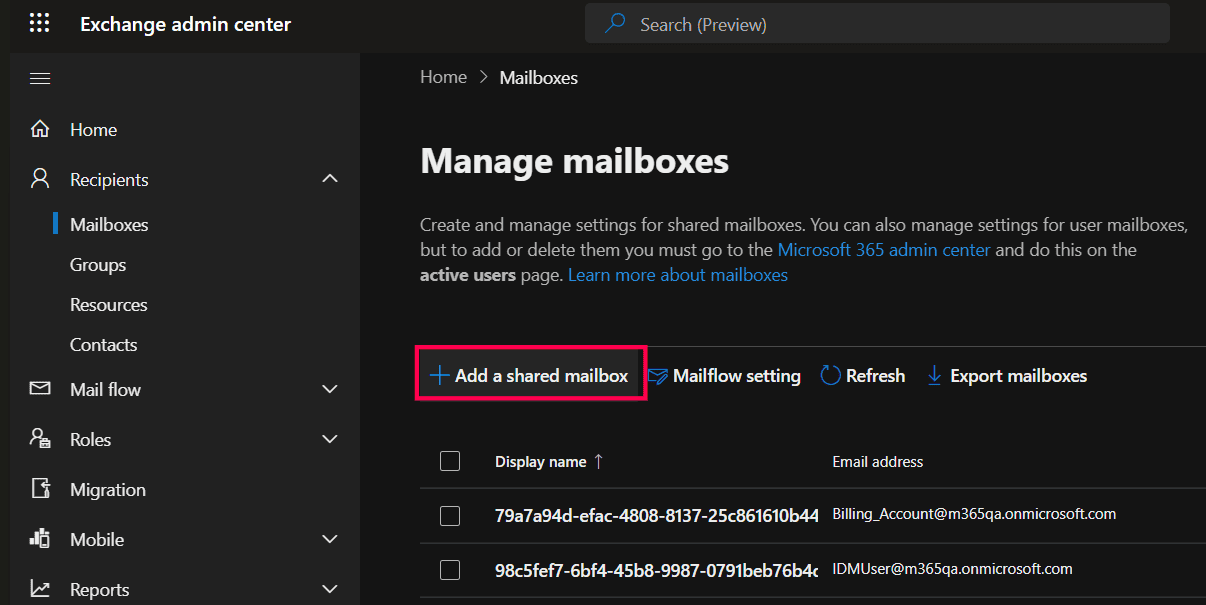
- Enter the Display name and Email address for the new shared mailbox.
- Enter the Alias you wish to use and select the domain from the drop-down menu.
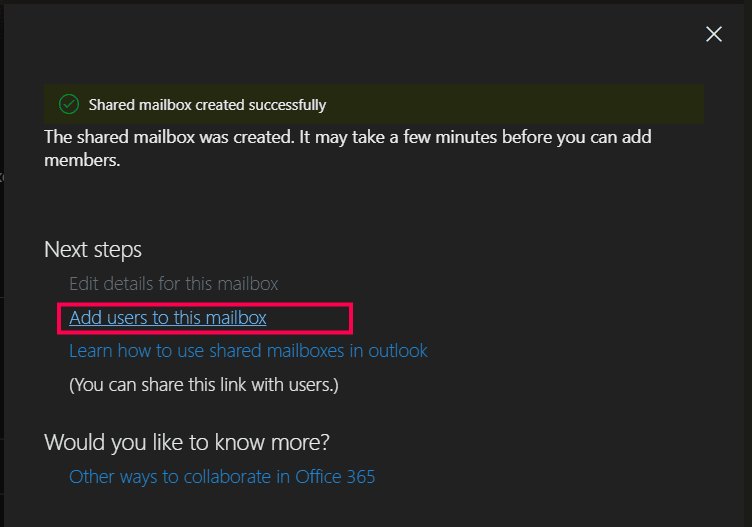
- Click Create to provision the mailbox.
- Once created, click Add users to this mailbox to delegate access to specific team members.


Limitations to consider
You will have to perform the same set of steps for every shared mailbox you create in the EAC. To create multiple shared mailboxes in Exchange Online, you can resort to complex Exchange Online PowerShell scripts or try M365 Manager Plus , a solution that creates shared mailboxes with only a few clicks through its user-friendly interface.
Method 3: How to create a shared mailbox in Office 365 using Exchange Online PowerShell (New-Mailbox)
Prerequisites
Before using Exchange Online PowerShell, verify that:
Steps
- The Exchange Administrator role is applied to the account being used to sign in to Exchange Online PowerShell.
- You are connected to the Exchange Online PowerShell module.
- To check if the Exchange Online PowerShell module is installed, use this script:
Get-Module -ListAvailable ExchangeOnlineManagement
- If it does not return a value, you will have to install the module. To install the Exchange Online PowerShell module, execute this script:
Install-Module ExchangeOnlineManagement -Scope CurrentUser
- To connect to Exchange Online PowerShell, run this script:
Connect-ExchangeOnline
- To check if the Exchange Online PowerShell module is installed, use this script:
Create shared mailboxes with New-Mailbox
The New-Mailbox cmdlet is used to create various types of Exchange Online mailboxes. Use the Type attribute with the Shared parameter to create a shared mailbox.
New-Mailbox -Shared -Name "Sales Team" -PrimarySmtpAddress "sales@testorg.com"
Create multiple Office 365 shared mailboxes using New-Mailbox
An IT administrator needs to create multiple shared mailboxes in Microsoft 365 after a department-wide restructuring so newly formed teams can use shared inboxes such as test, support, or project mailboxes.
Use the following Exchange Online PowerShell script to create multiple Microsoft 365 shared mailboxes in a single run.
$Mailboxes = Import-Csv "C:\Scripts\SharedMailboxes.csv"

foreach ($Mailbox in $Mailboxes) {
    New-Mailbox -Shared `
        -Name $Mailbox.Name `
        -DisplayName $Mailbox.DisplayName `
        -Alias $Mailbox.Alias
}
Method 4: How to create Office 365 shared mailboxes with M365 Manager Plus
- Log in to M365 Manager Plus.
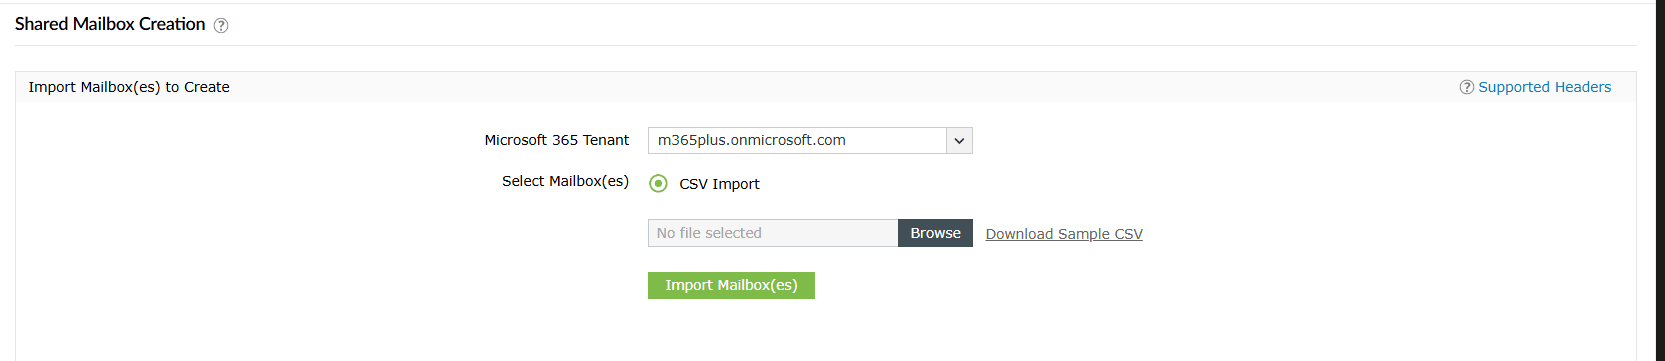
- Select the Management tab , then navigate to Exchange Online > Shared Mailbox Management > Shared Mailbox Creation.
- Use the drop-down menu to select the Microsoft 365 Tenant for which you wish to create Microsoft 365 shared mailboxes.
- Click CSV Import to upload a CSV file that contains the details of the shared mailboxes you wish to create.
- Click Import Mailbox(es). You can now view the data imported from the CSV file.
- Click Apply to create the Microsoft 365 shared mailboxes.

Monitor your Exchange Online shared mailboxes and more
M365 Manager Plus’ shared mailbox management capabilities help you view, monitor, and control shared mailboxes across your Microsoft 365 environment. The solution simplifies permission audits, highlights inactive mailboxes, and provides proactive alerts.
Shared mailbox management
Easily create and manage shared mailboxes in bulk. Add or remove permissions, convert multiple shared mailboxes at once, and decide their retention policies and features—all using the intuitive GUI, eliminating the need for complex PowerShell scripts.
Actionable reports on Microsoft 365 shared mailboxes
Generate detailed reports on shared mailboxes, their permissions, mailbox sizes, and any recent activity to stay on top of your Exchange Online environment.
Real-time alerts on access and permission changes
Set up proactive alerts for any changes to shared mailbox permissions. Get notified instantly when permissions are added or removed, enabling you to take immediate action if changes are unauthorized.
Eliminating PowerShell complexity
Run shared mailbox actions in a single click instead of using PowerShell cmdlets like Set-Mailbox. This reduces dependency on scripting and minimizes the chances of configuration errors.
Important tips
Assign licenses for increased storage and retention: Shared mailboxes require an Exchange Online Plan 2 license to increase their base storage from 50GB to 100GB and to get retention features such as Auto-archiving .
Review mailbox permissions: After creating a shared mailbox, users must be granted permissions before they can access it.
Enable mailbox suditing: Ensure that mailbox auditing is enabled for the shared mailbox by running the following cmdlet:
Get-Mailbox -Identity "<mailboxname>" | Select-Object AuditEnabled
Frequently asked questions
No. A shared mailbox does not require a license as long as it remains under 50GB. If you need 100GB of storage or advanced features like auto-archive, you need to assign the shared mailbox an Exchange Online Plan 2 license.
Once Full Access permission is assigned to the Microsoft 365 user, the shared mailbox usually appears automatically in Outlook. If it does not, users can manually add it by navigating to Account Settings > More Settings > Advanced tab > Add.
Use a shared mailbox when you need to store and centralize email replies. Use a distribution group if you only need to broadcast emails to a list of recipients without storing them in a common folder.
Administrators can use the New-Mailbox cmdlet with the Shared parameter in the Type parameter in Exchange Online PowerShell to loop through a CSV list and create multiple shared mailboxes. They can also use M365 Manager Plus to create multiple shared mailboxes with a single click.
You can convert a user mailbox to a shared mailbox by using the EAC or the Set-Mailbox cmdlet in PowerShell. This is often done when an employee leaves the company but access to their mailbox data is still needed.
In most cases, yes. If a user is granted Full Access permission to a shared mailbox, it is automatically added to their Outlook profile (depending on their Outlook configuration and caching settings).
However, automatic mapping can be disabled when permissions are assigned via PowerShell.