Chrome integration with MDM using G Suite
Pre-requisites:
- To manage Chrome OS devices in MDM, you need to have either Enterprise Standard or Enterprise Plus or Education Plus (for schools/universities) Google workspace license.
- Verify the Workspace Admins licenses in the Google Admin Console under Billing > Subscriptions.
- To Purchase or Upgrade the licence, Follow Google’s official licensing guide. These licenses enable MDM integration for bulk enrollment, policy enforcement, security controls, and auto-syncing, so Chromebooks added in Google Admin instantly reflect in the MDM Console.
Procedure
Step #1: Configure Google Admin Console
- Login to Google Admin Console, with your admin credentials and select Devices.
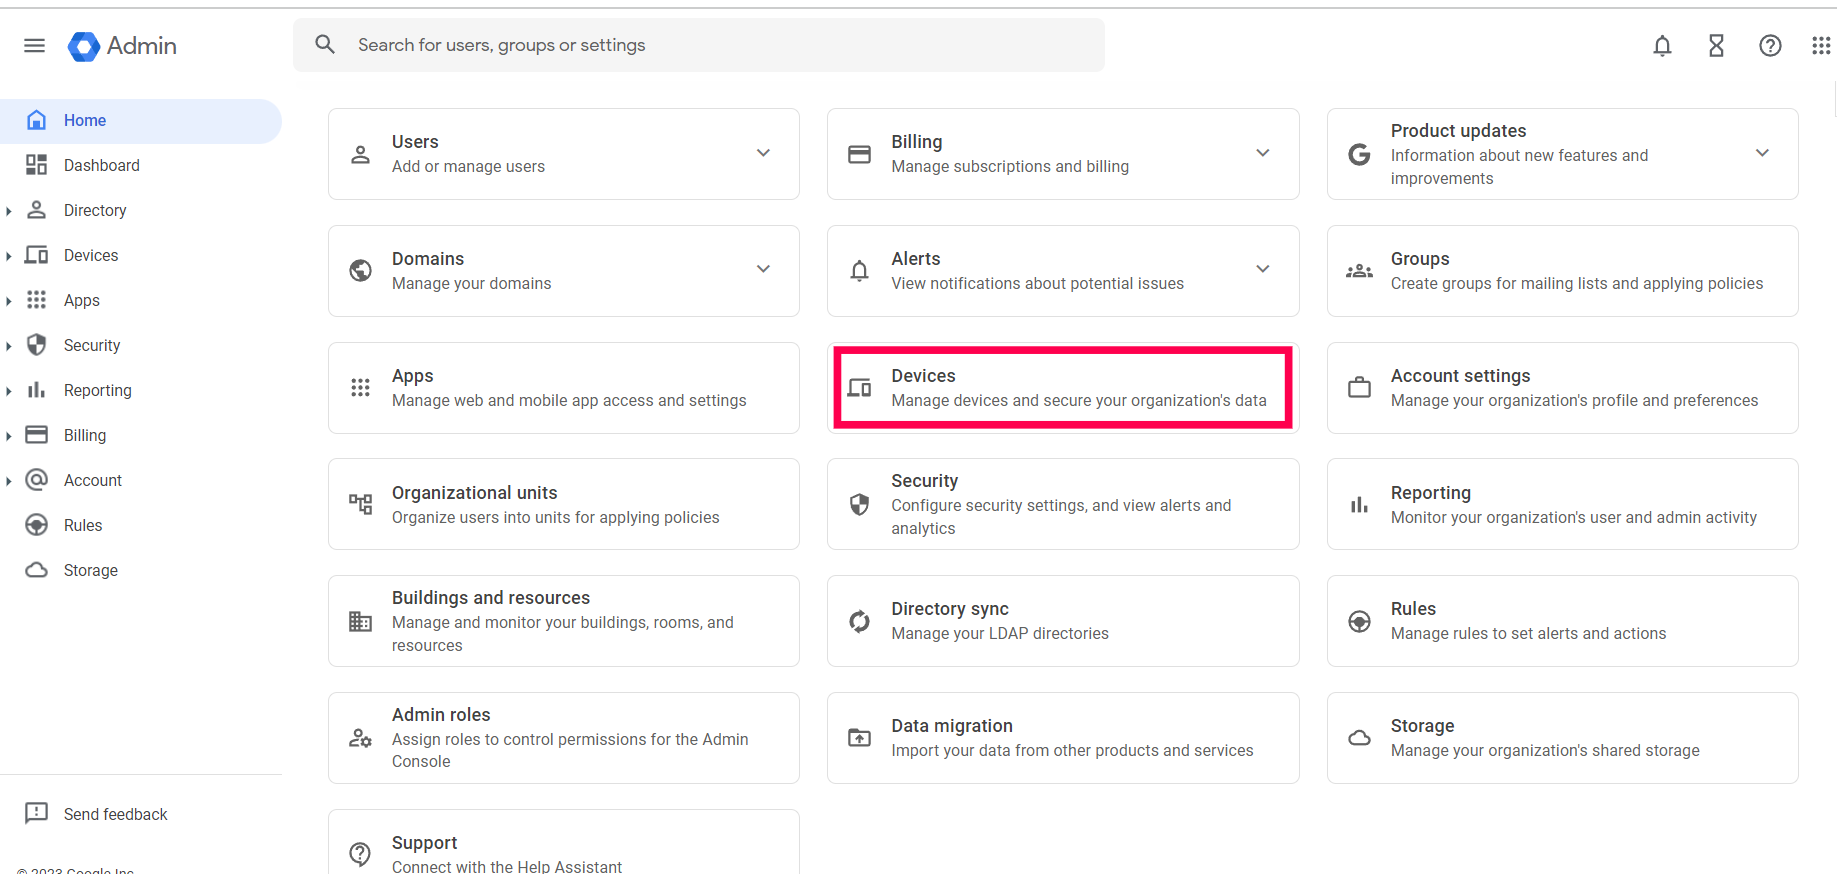
- The chrome device has not been added previously, click on Start Trial under the Chrome Devices option. Once enrolled in the trial, navigate back to the devices page.
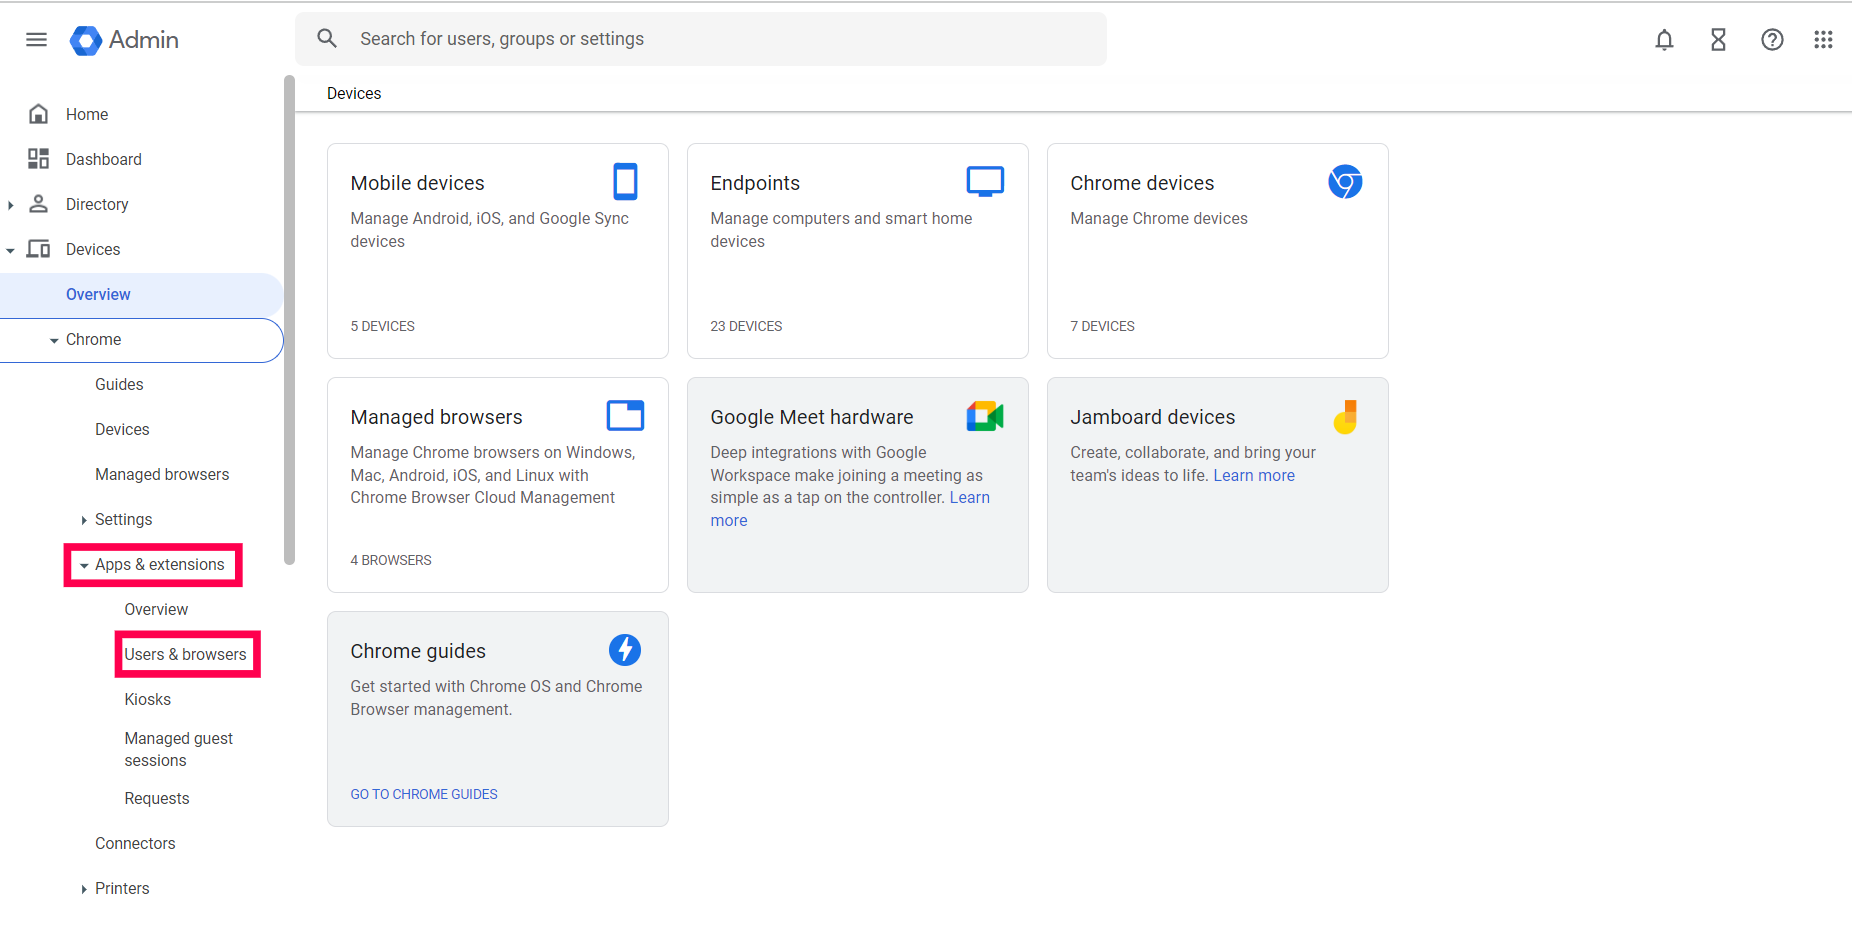
- Select Chrome -> Apps & extensions -> Users & browsers, from the left pane.
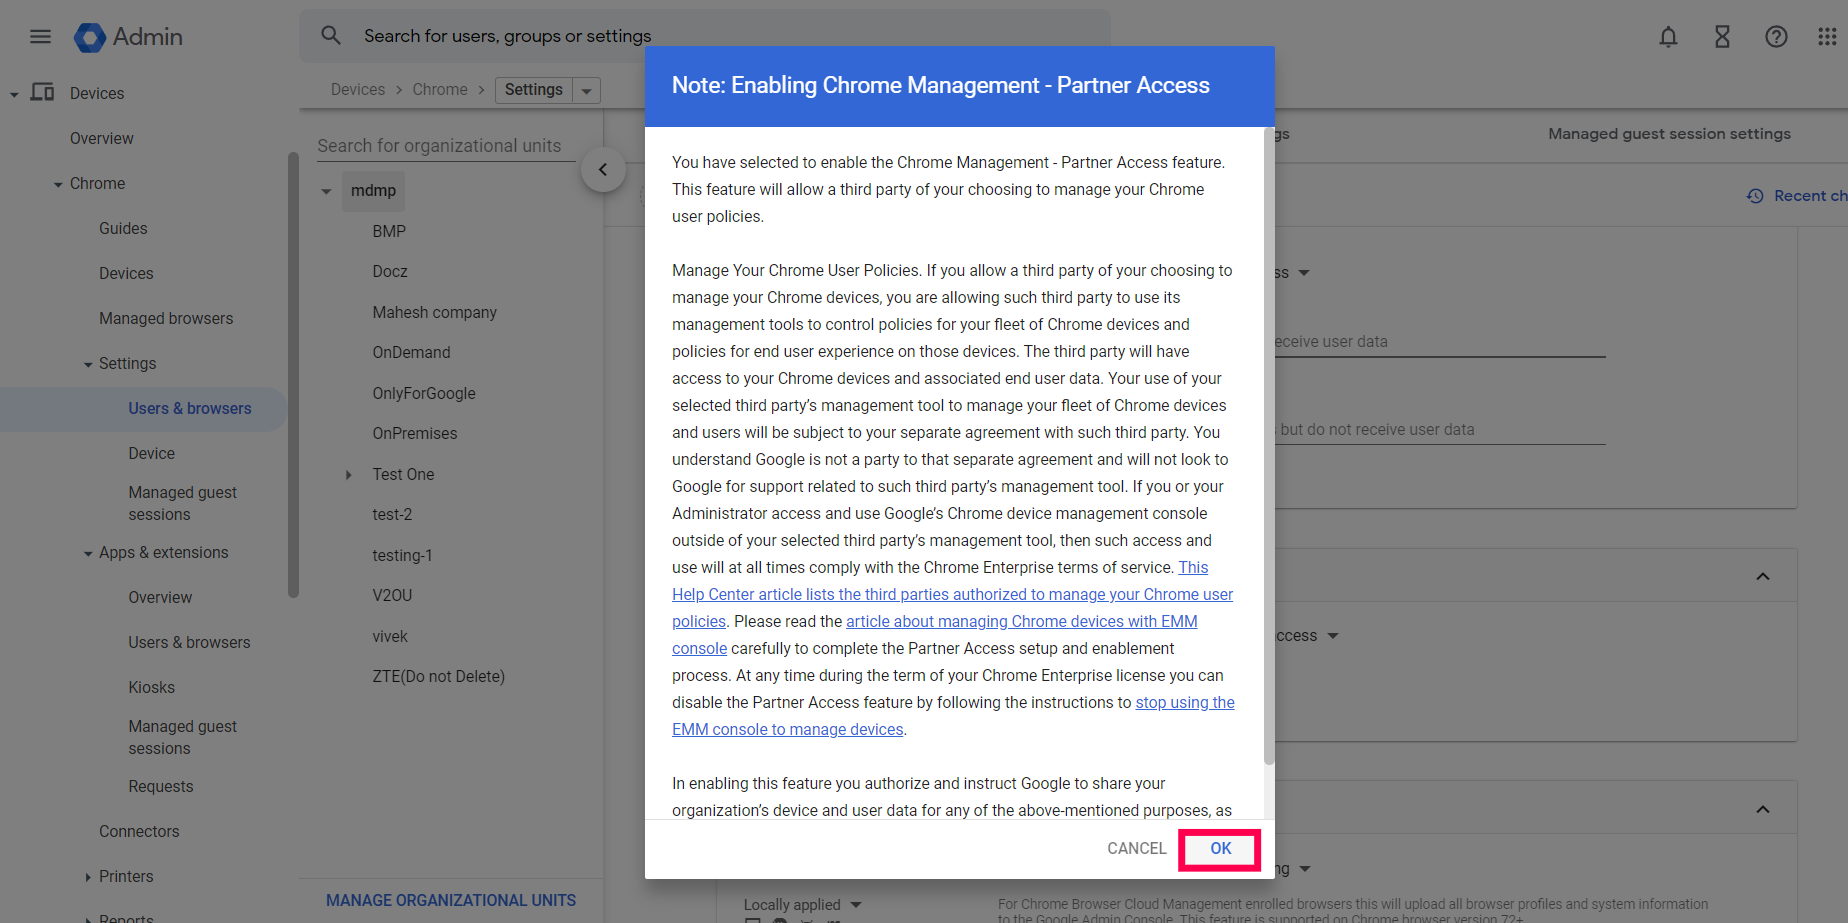
- Now, click on Settings from the dropdown menu. Under User & Browser settings navigate to Chrome Management - Partner Access. Select Enable Chrome Management - Partner Access and agree to the given Terms and Conditions.
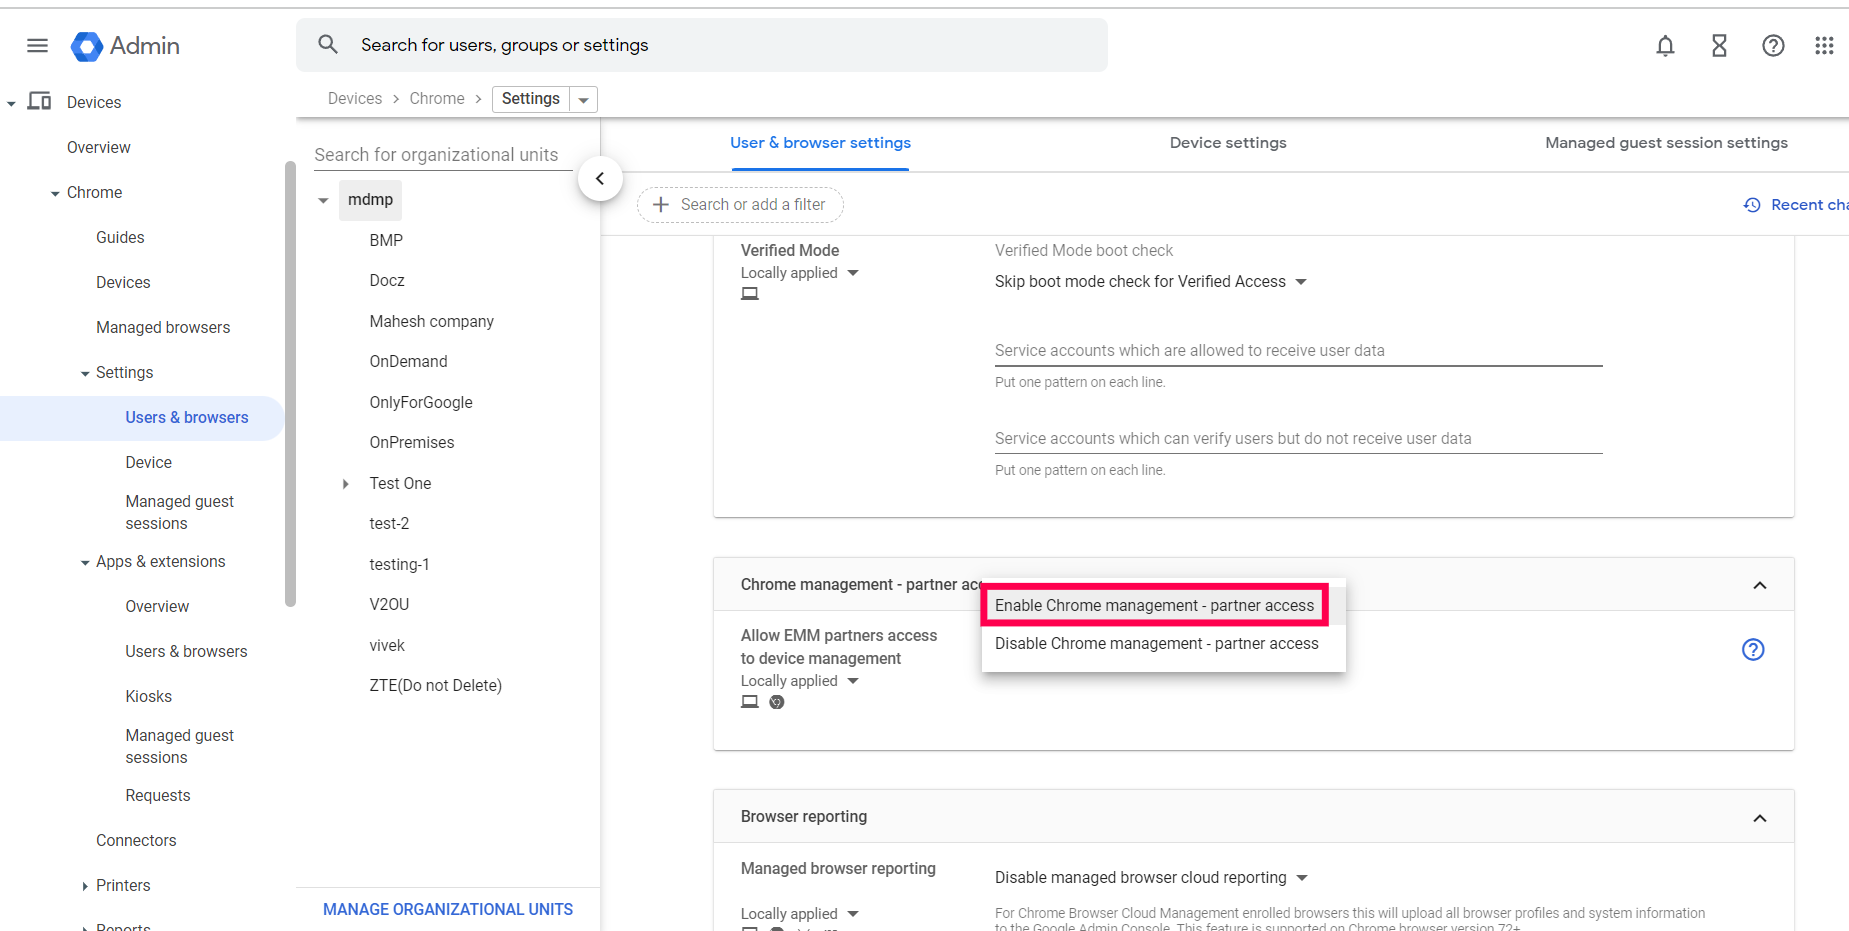
- Click on Save to save the user settings.
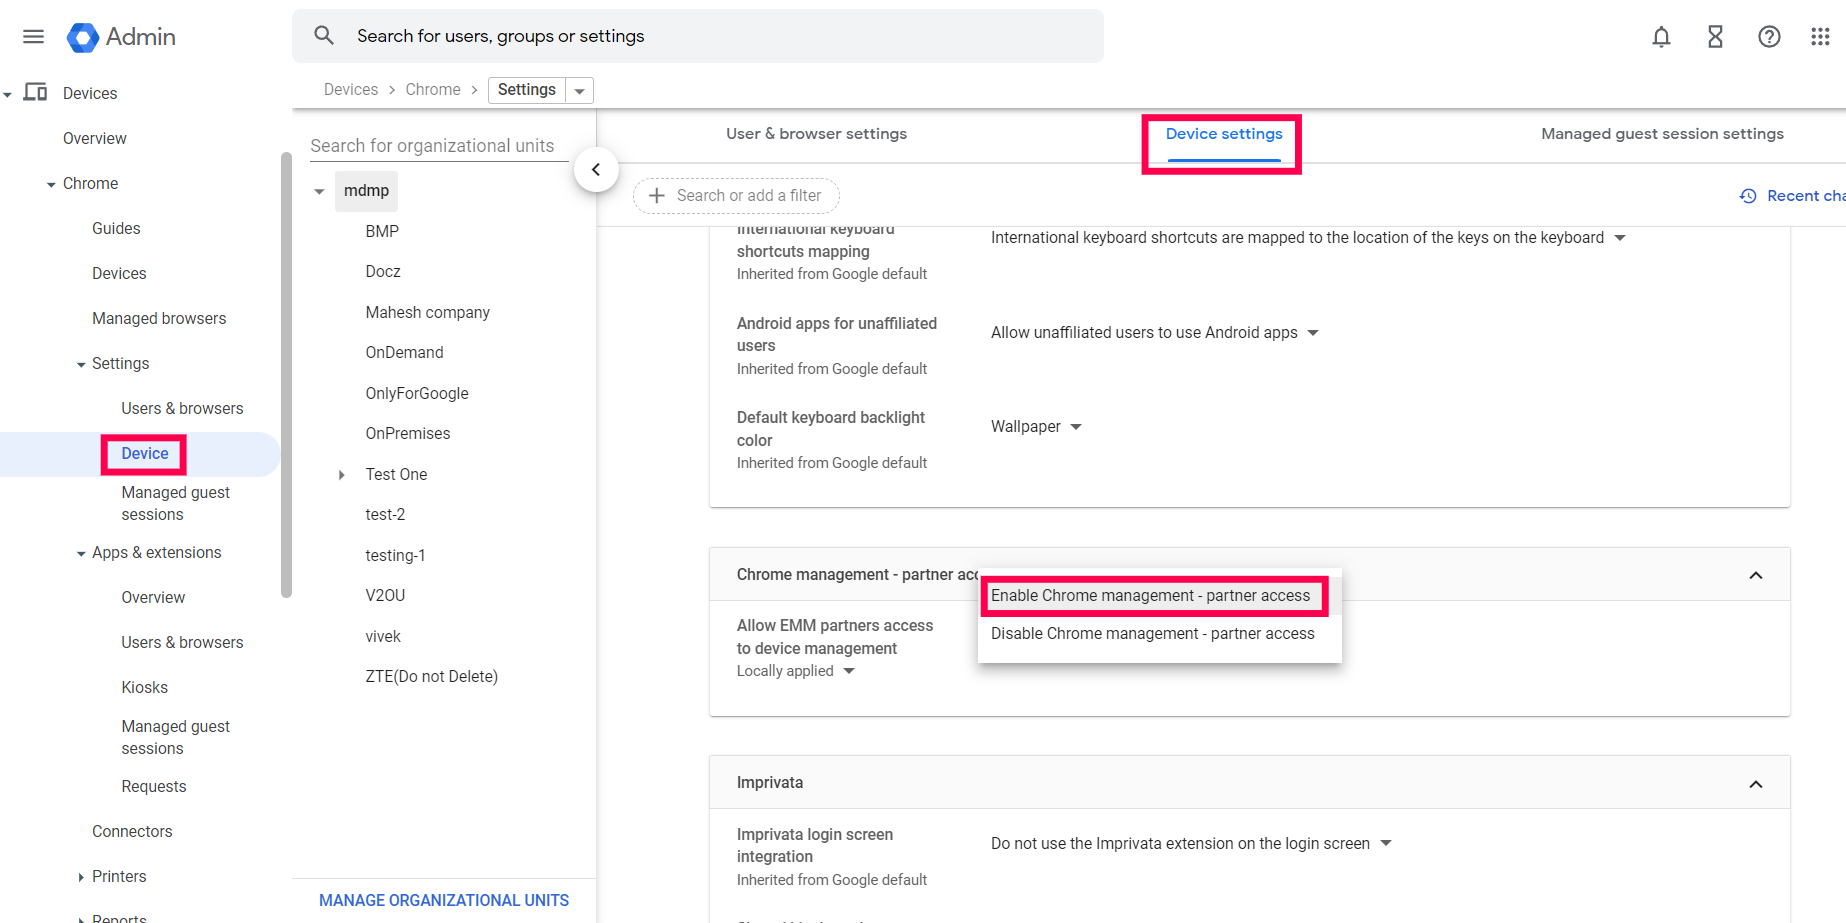
- Now, click on Device Settings and navigate to Chrome Management - Partner Access. Select Enable Chrome Management - Partner Access and agree to the given terms and conditions.
- Click on Save to save the device settings.
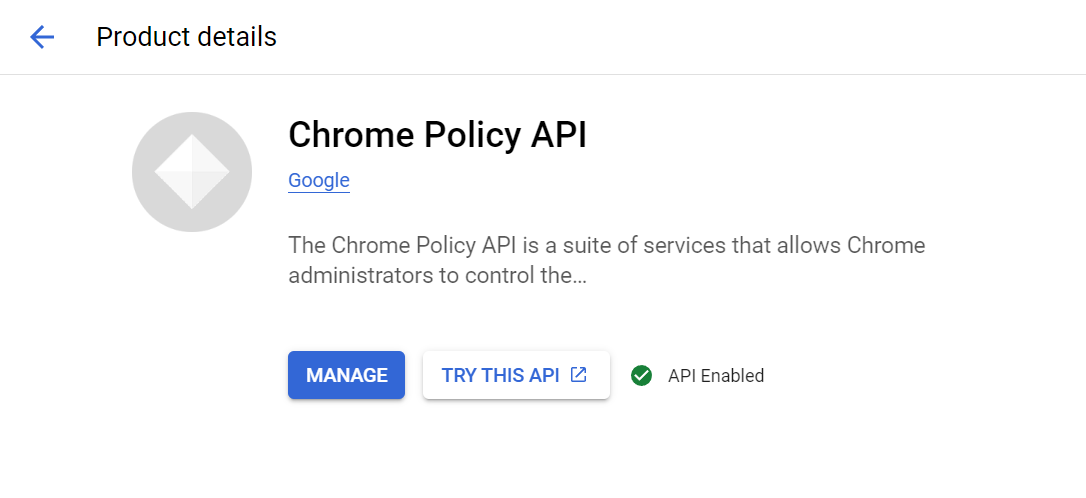
- To enable Chrome Policy API, login to Google Cloud Console using your admin account.
- Go to API & Services > Library .
- In the search bar, type Chrome Policy API to check if it is enabled.
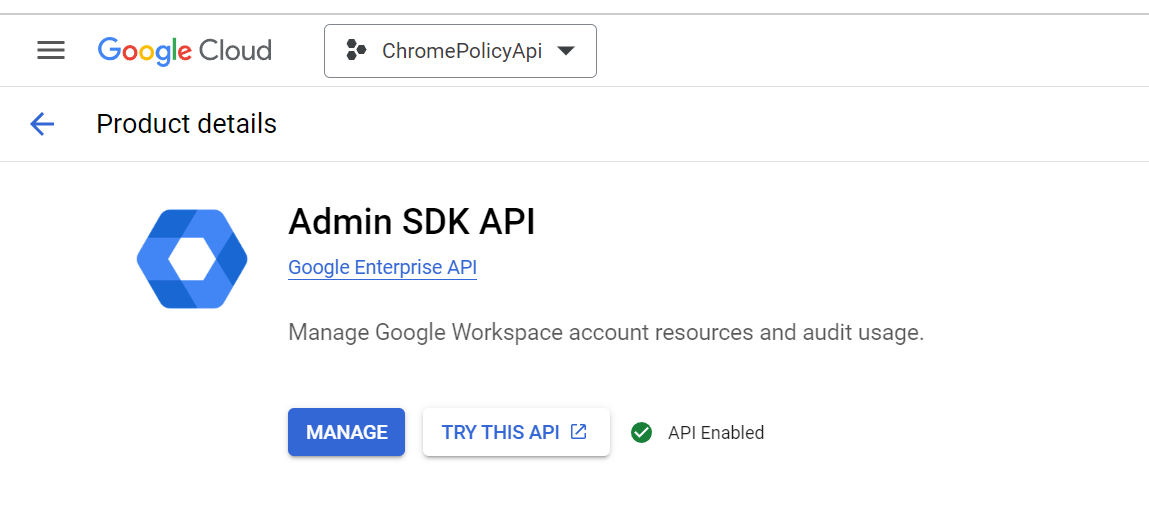
- In the search bar, type Admin SDK API to check if it is enabled.
Step #2: Integrate with MDM
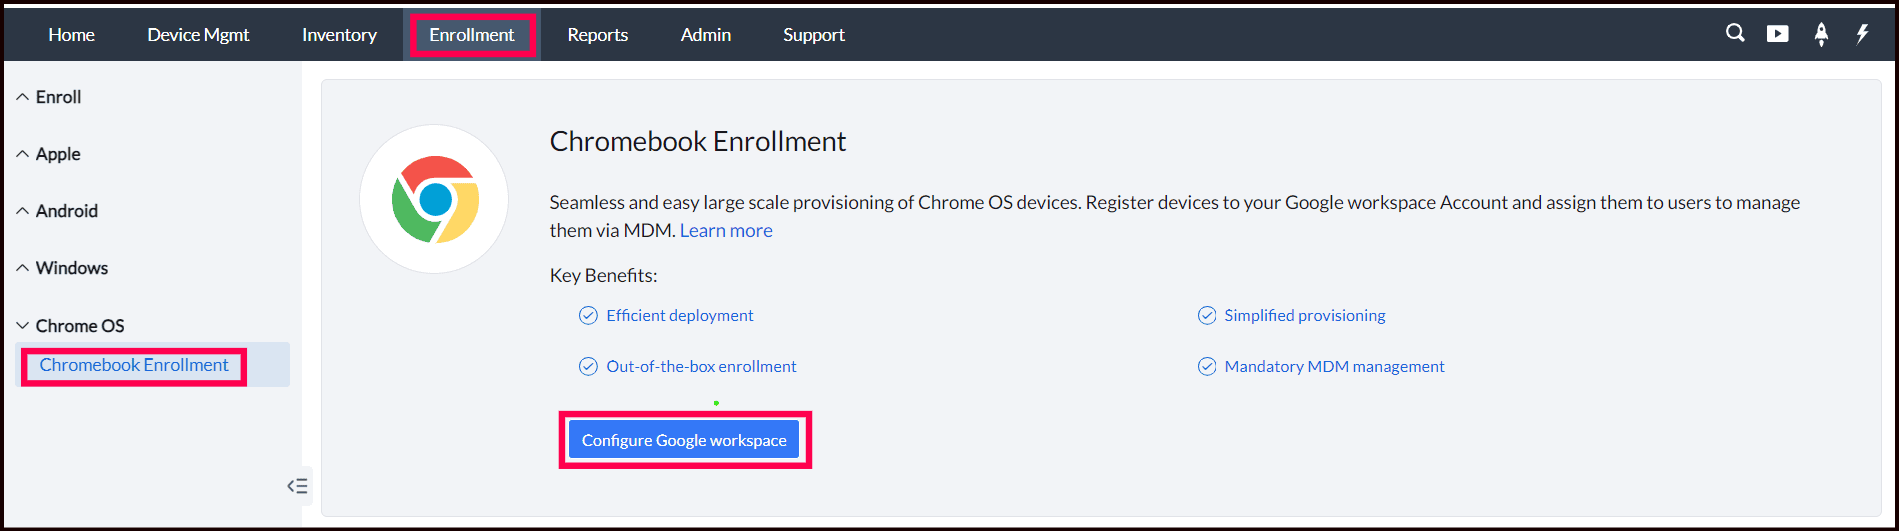
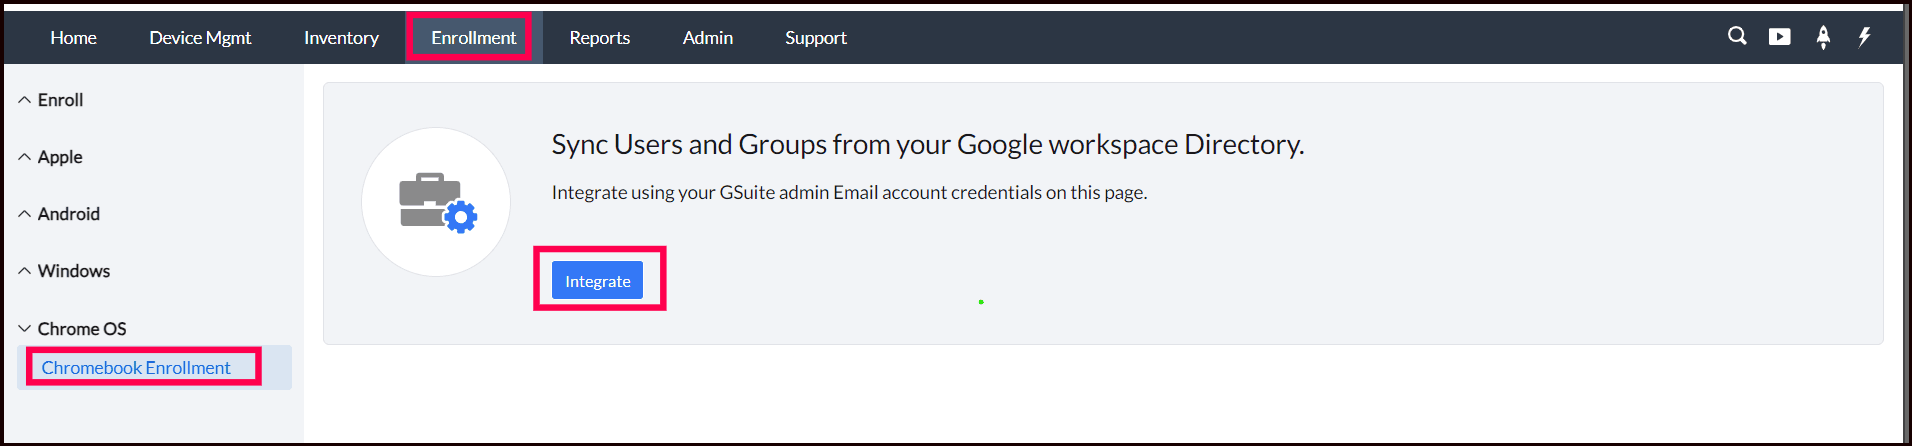
- On the MDM server, click on the Enrollment tab from the top menu and select Chromebook Enrollment, present under Chrome OS .
- If you've already integrated G Suite in Android Enterprise you can go directly to step 3. If not, click on Configure Now and provide the domain registered with G Suite as well as the domain admin account.
- In case of MDM On-Premise, if OAuth is not configured, you will get an error message saying "OAuth App details are not yet configured".
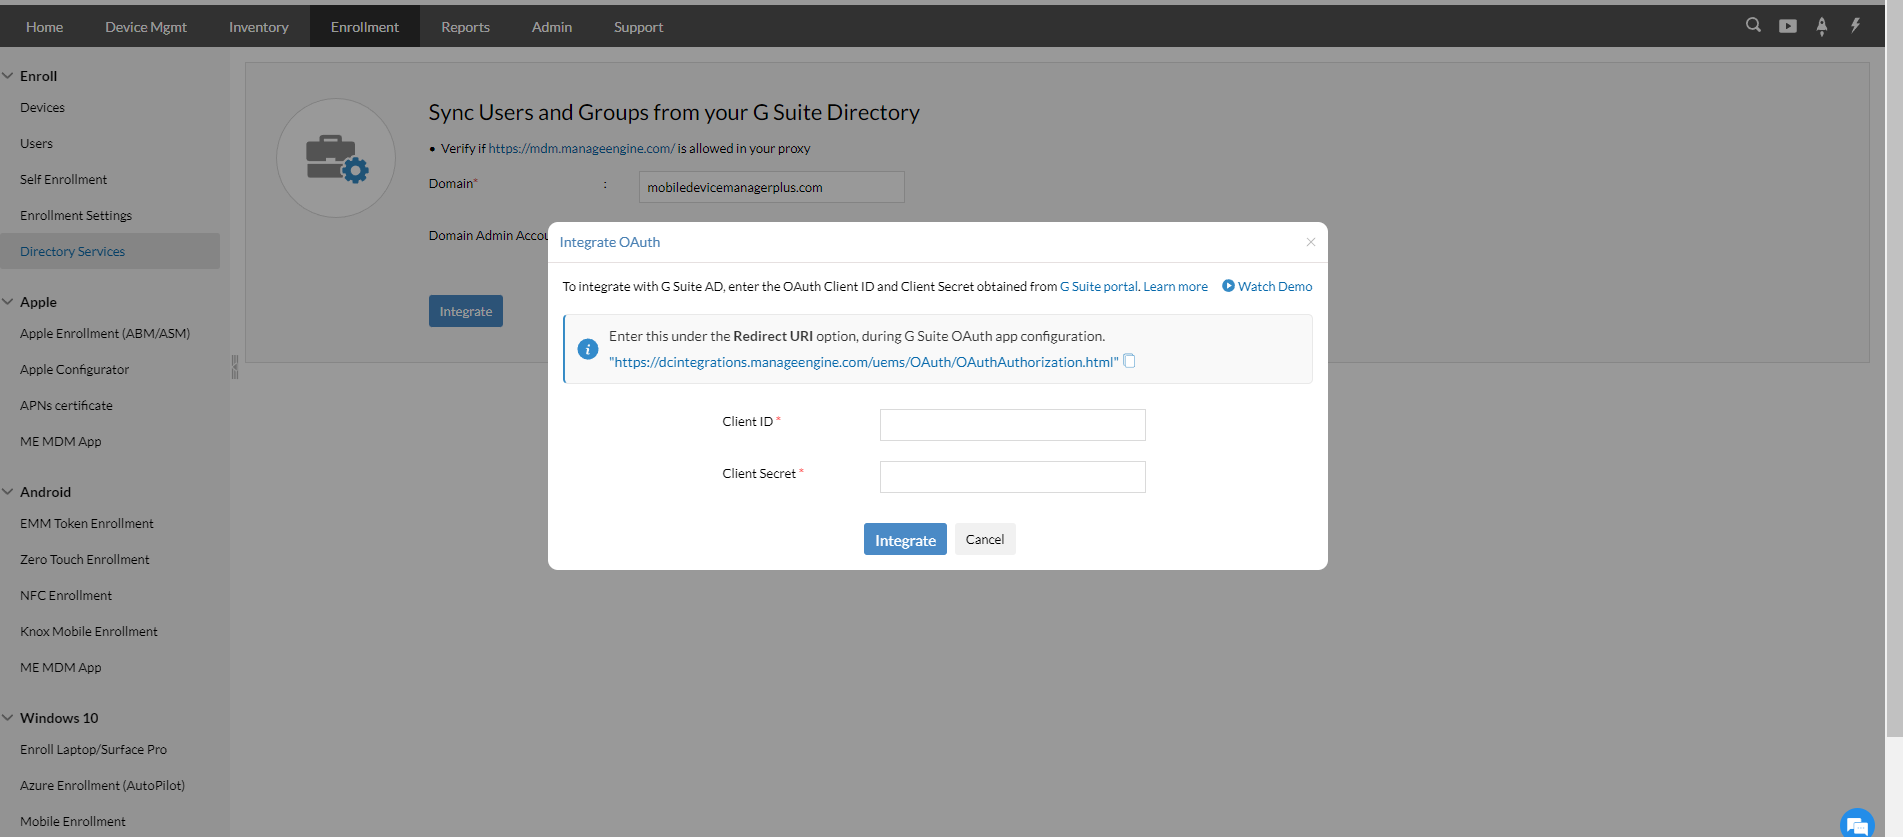
- Click on here to configure OAuth. You will be prompted to enter the Client ID and Client Secret. How to obtain Client ID and Client Secret?
- Once you have entered the Client ID and Client Secret, click on Integrateto complete Chrome integration using G Suite. You can now enroll Chromebooks using MDM.
Note: After integration, all the org units and users will be synced from the Google Admin Console and will be displayed in our MDM server.
How to obtain Client ID and Client Secret
- Log in to the Google Console with your G Suite admin account.
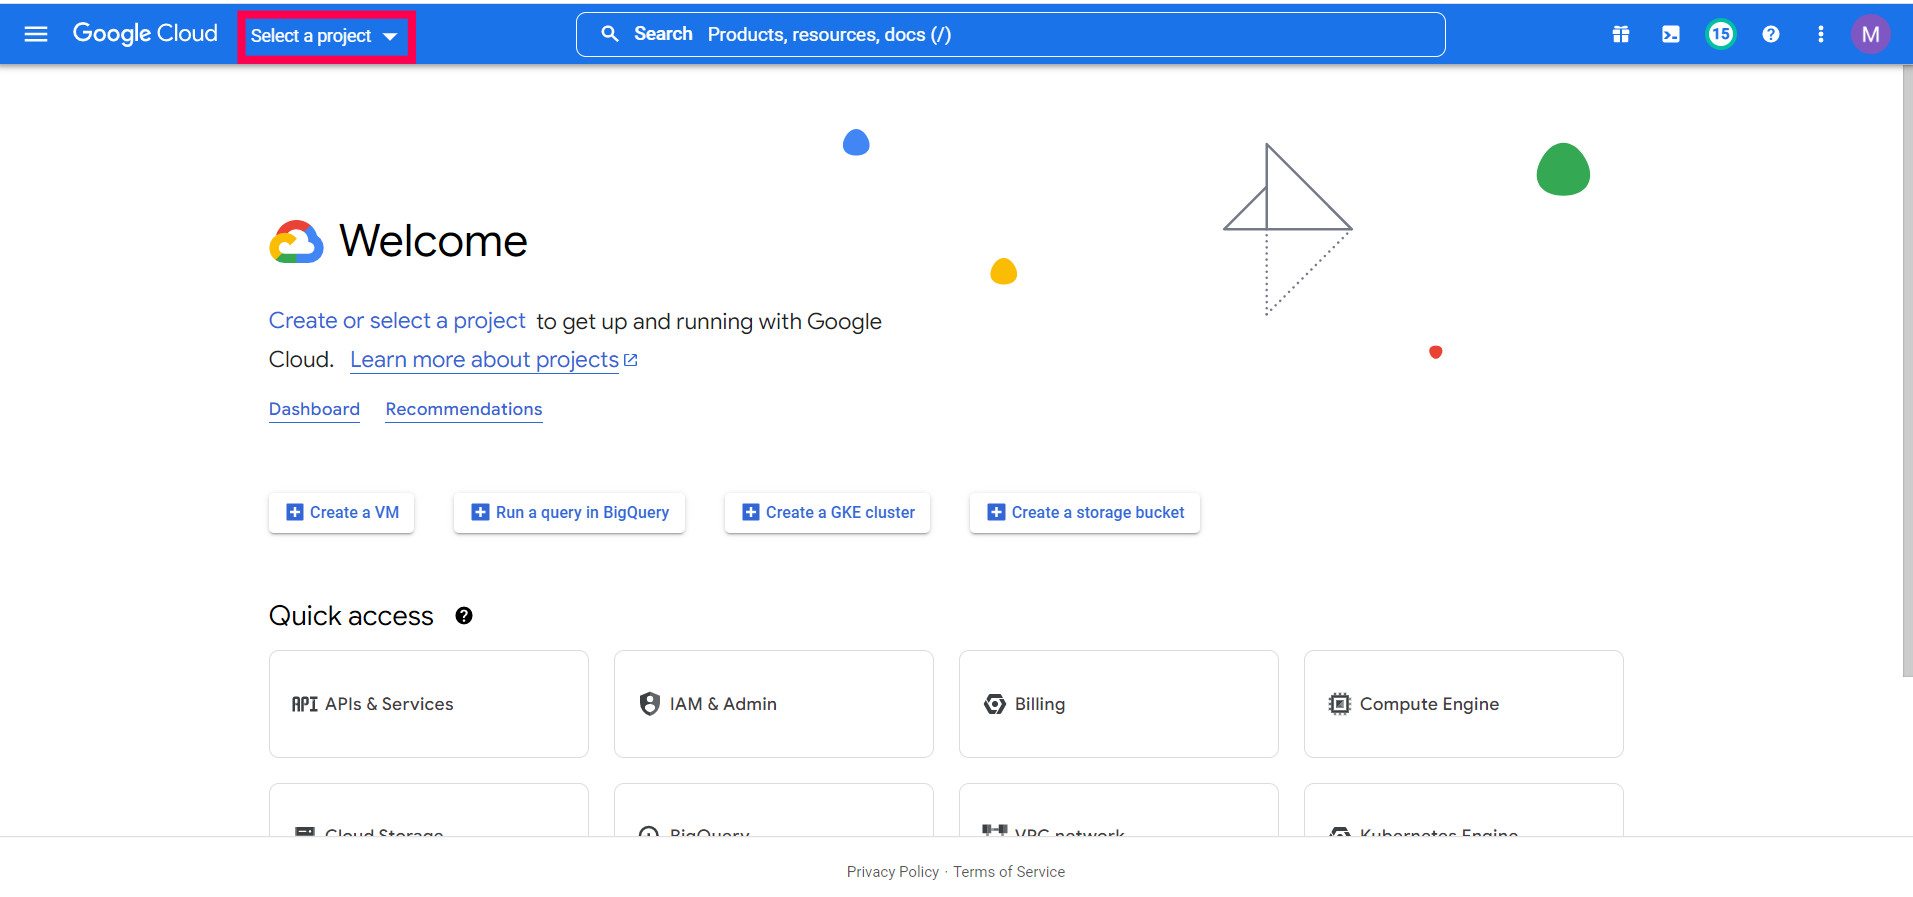
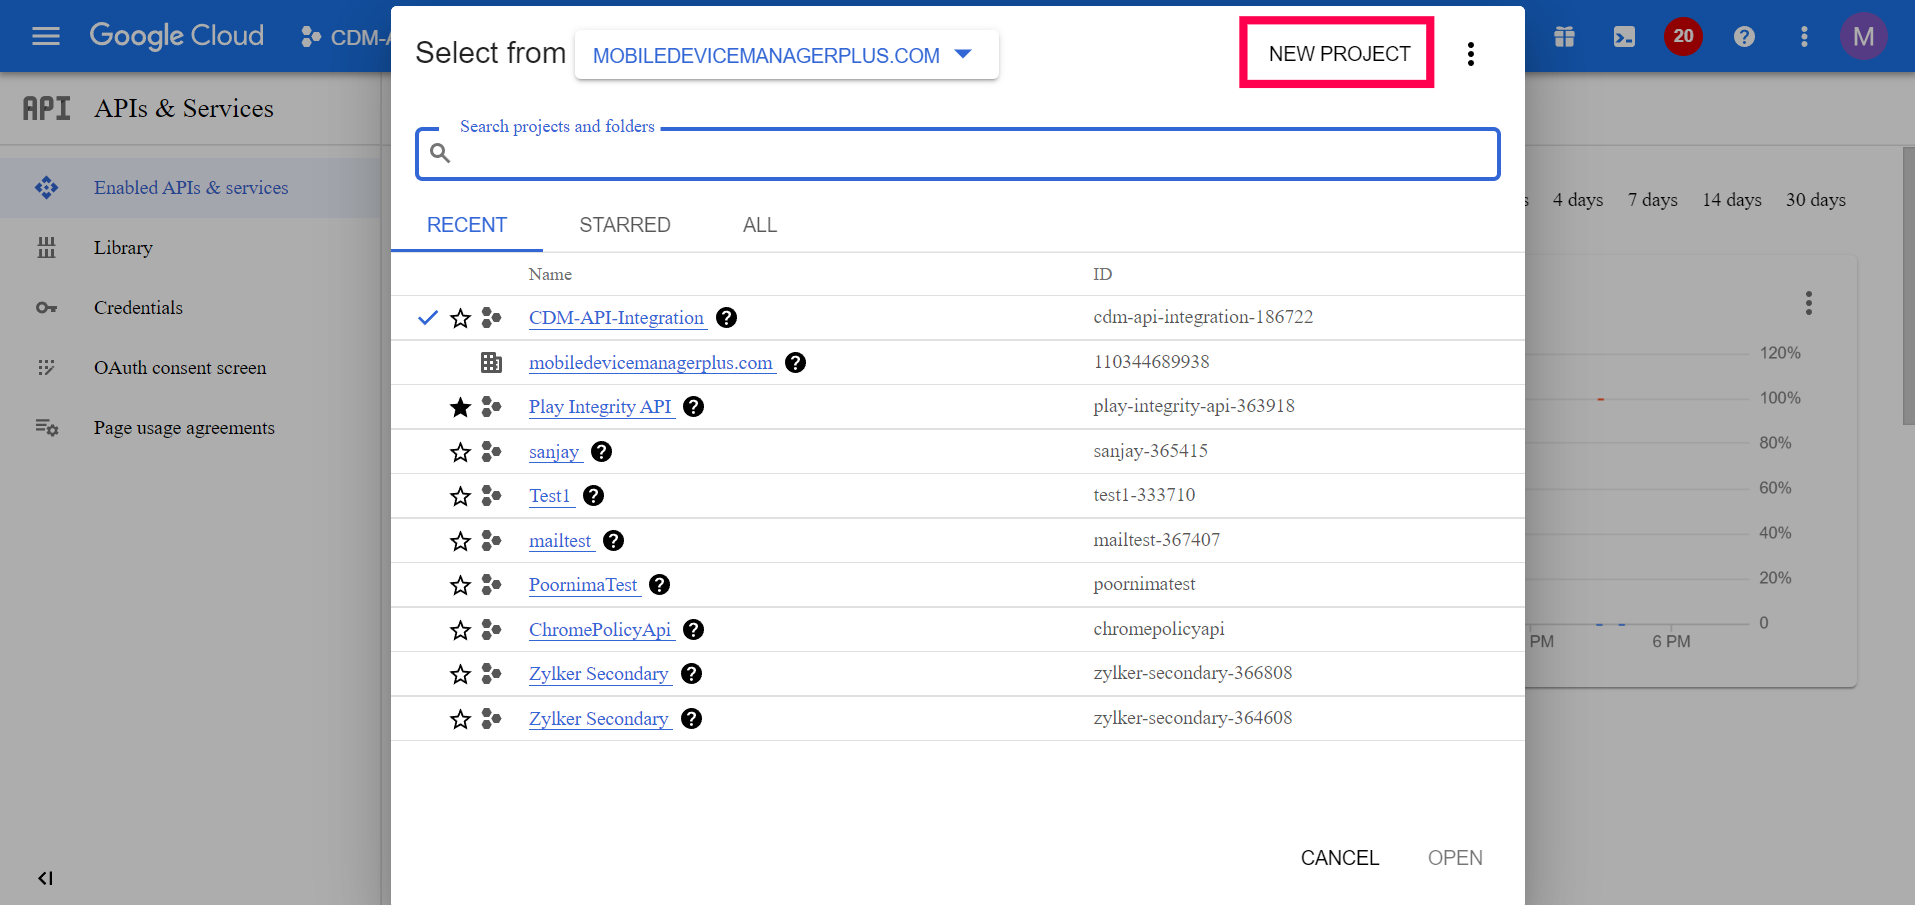
- Click on Select Project -> New Project and enter the required details.
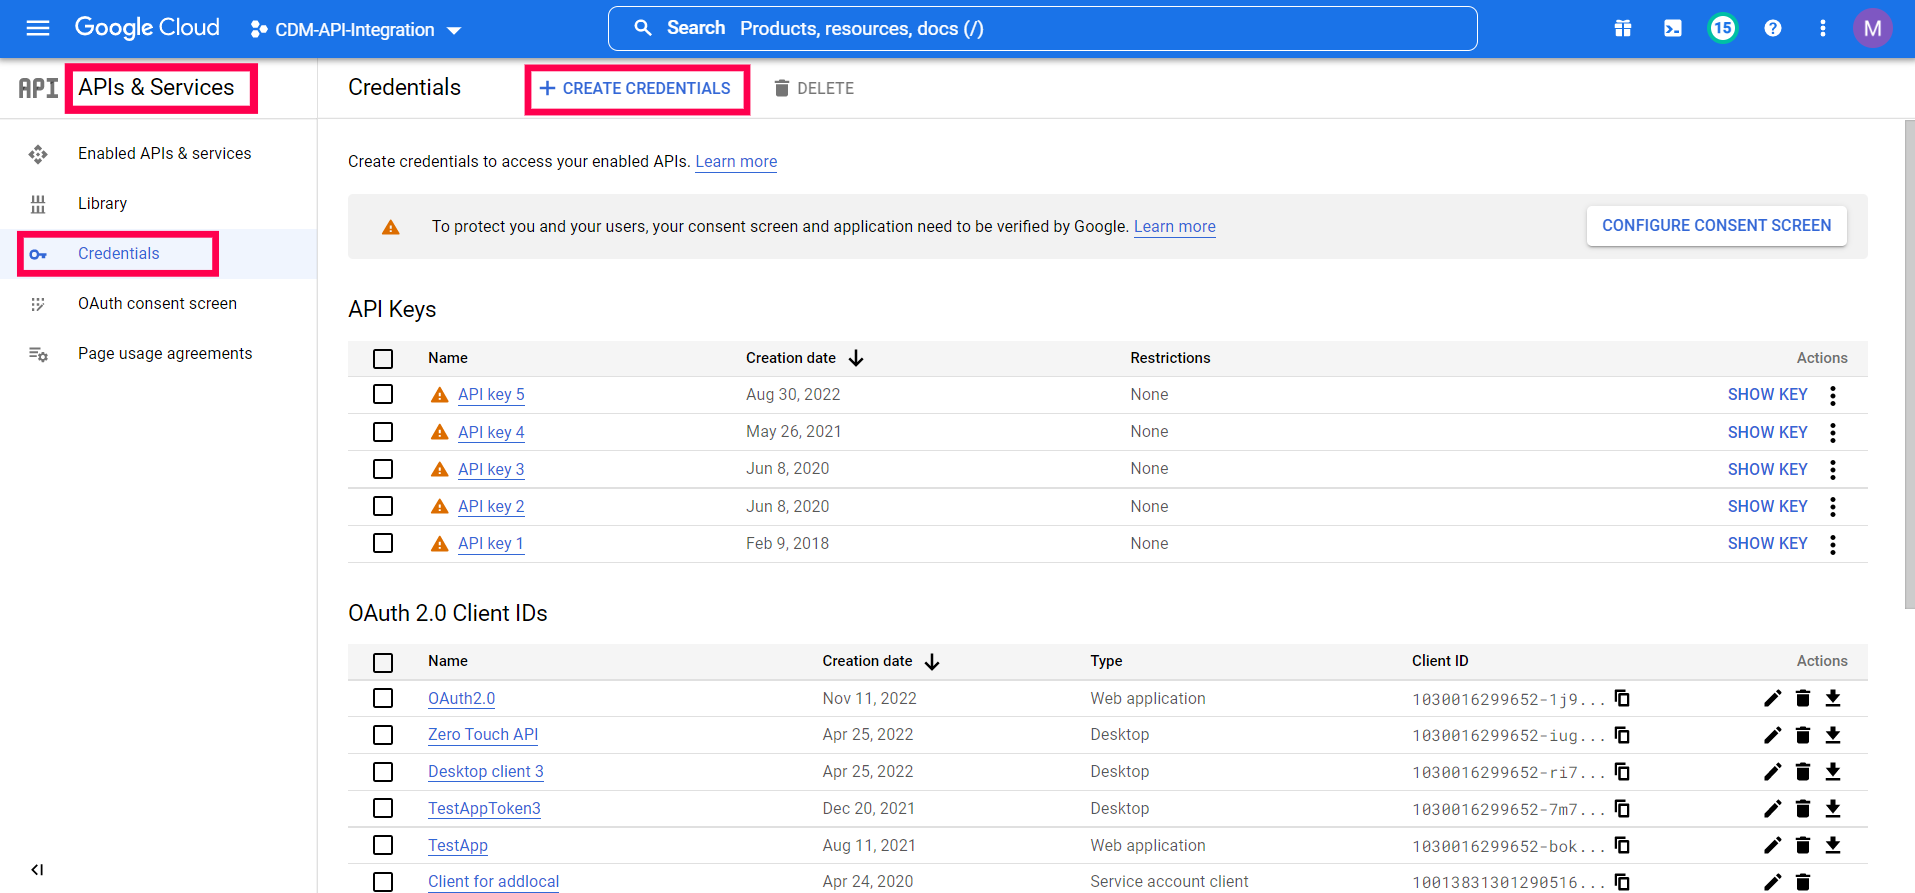
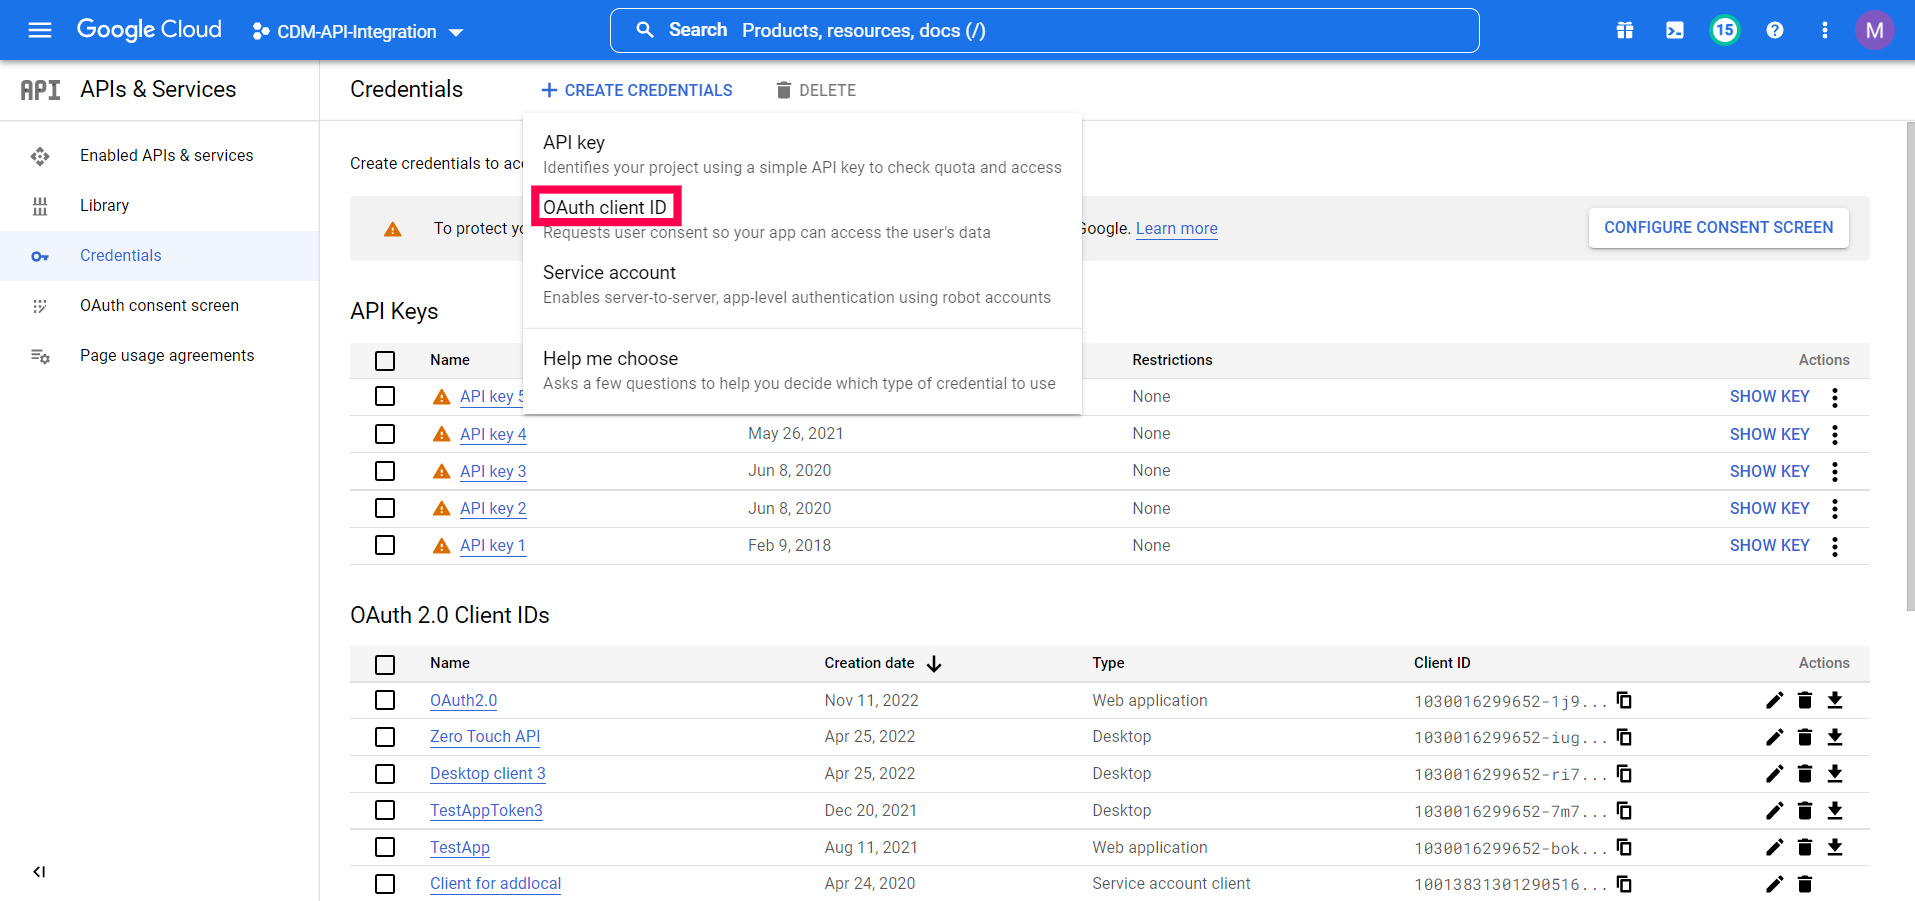
- Navigate to APIs & services -> Credentials -> Create Credentials -> OAuth Client ID.
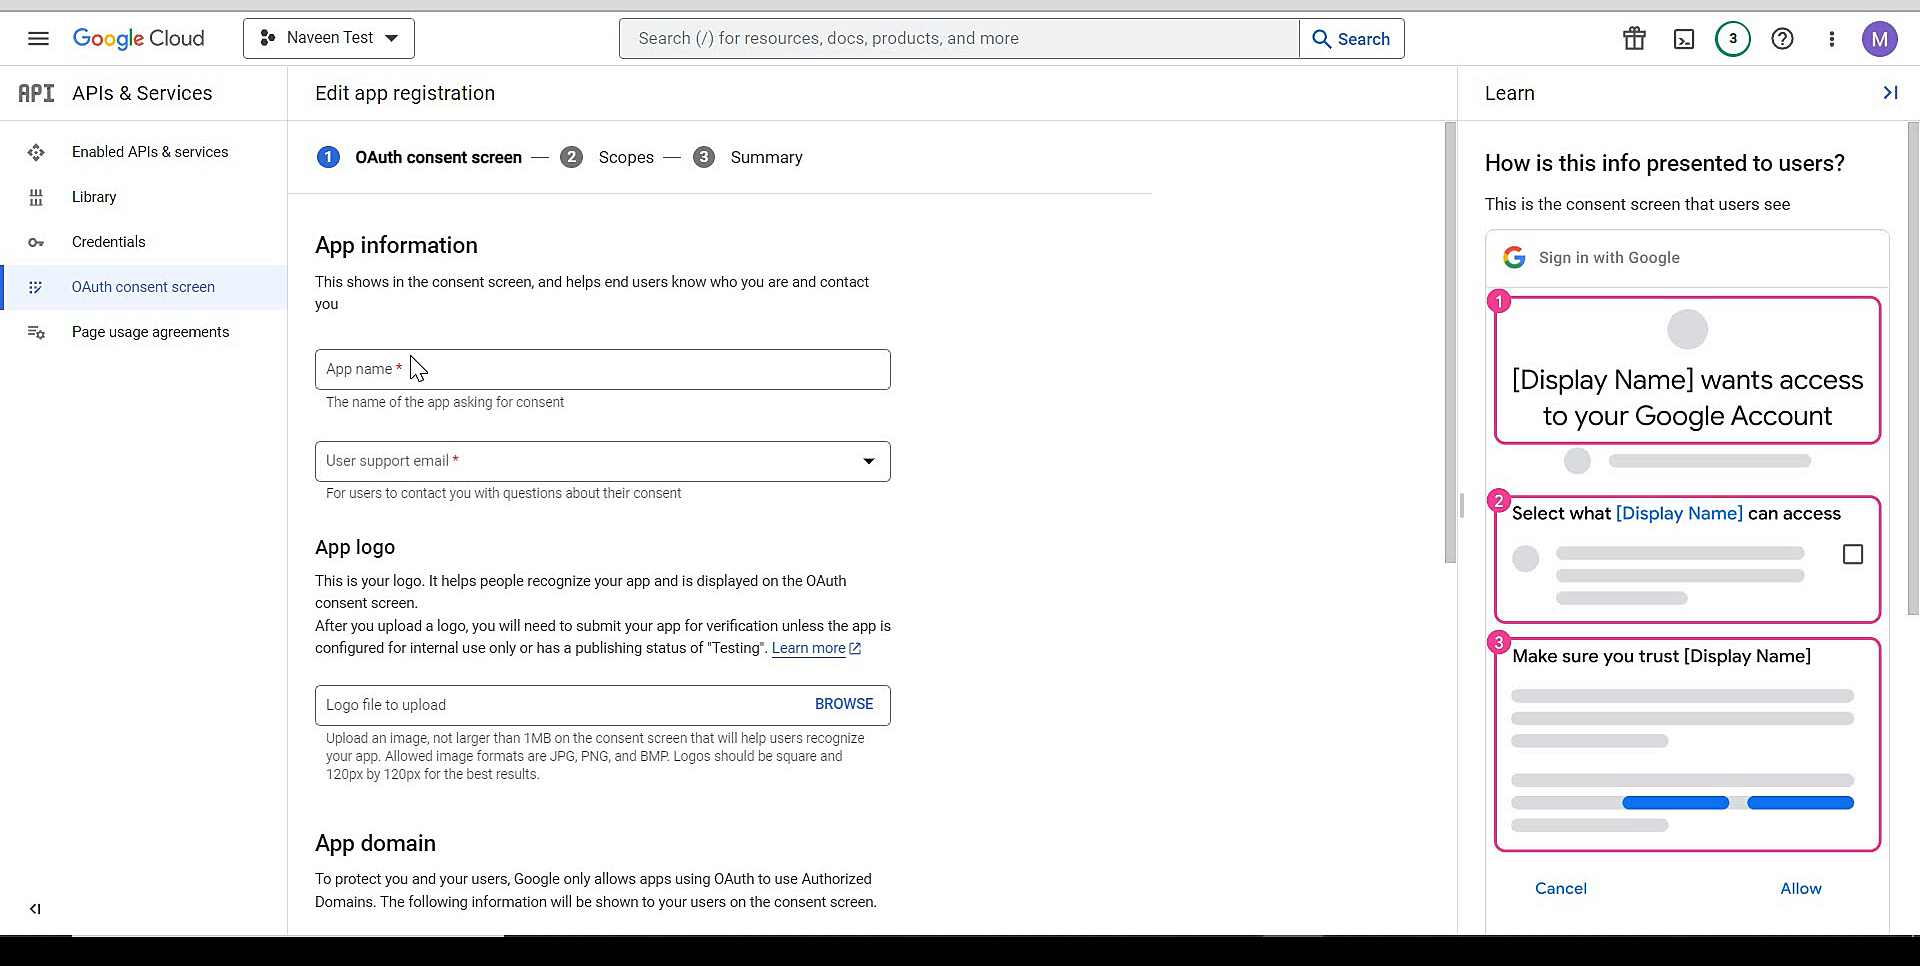
- If you are configuring OAuth Authentication for the first time, you have to set up your OAuth Consent Screen.
- On the left panel, click on OAuth Consent Screen, and choose the User Type as Internal.
- Click on Create. You will now have to enter the app name, support email and developer contact information and click on Save and Continue.
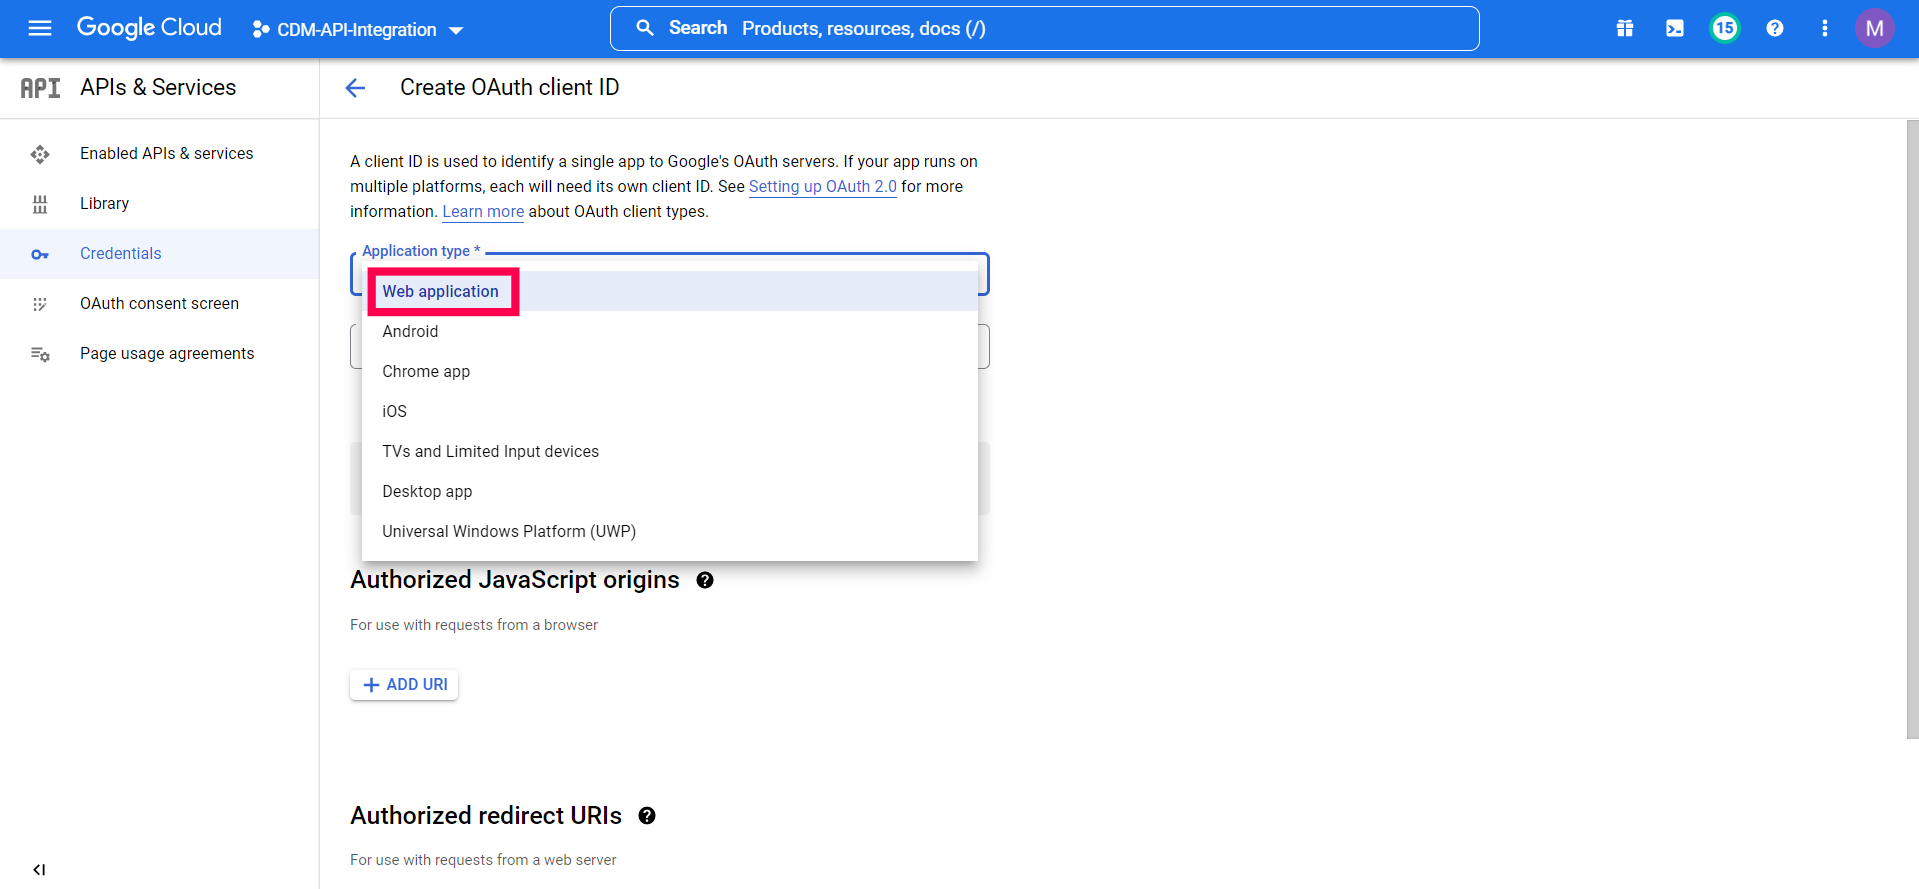
- Now navigate to APIs & services -> Credentials -> Create Credentials -> OAuth Client ID. Select Web Application as the Application type.
- Enter https://www.manageengine.com/ems/OAuthAuthorization.html as Authorized redirect URIs and click on Create.
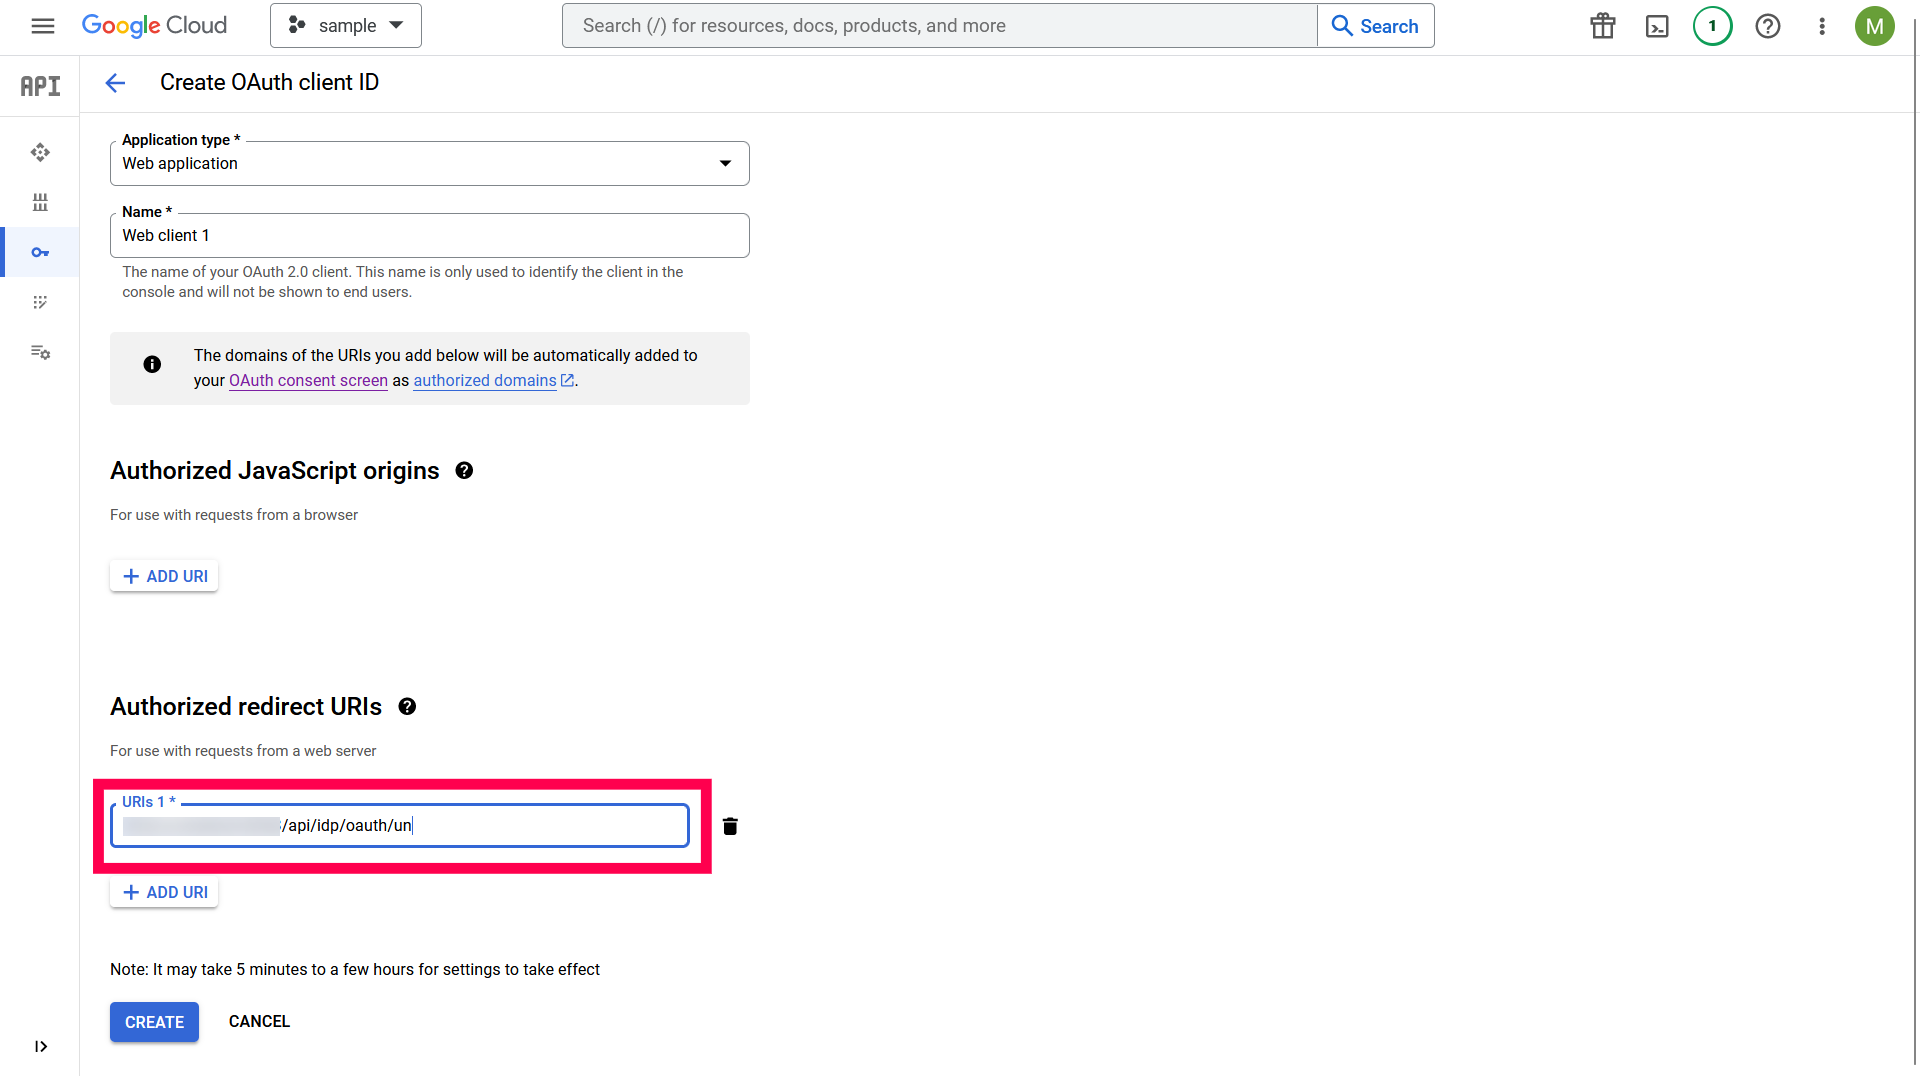
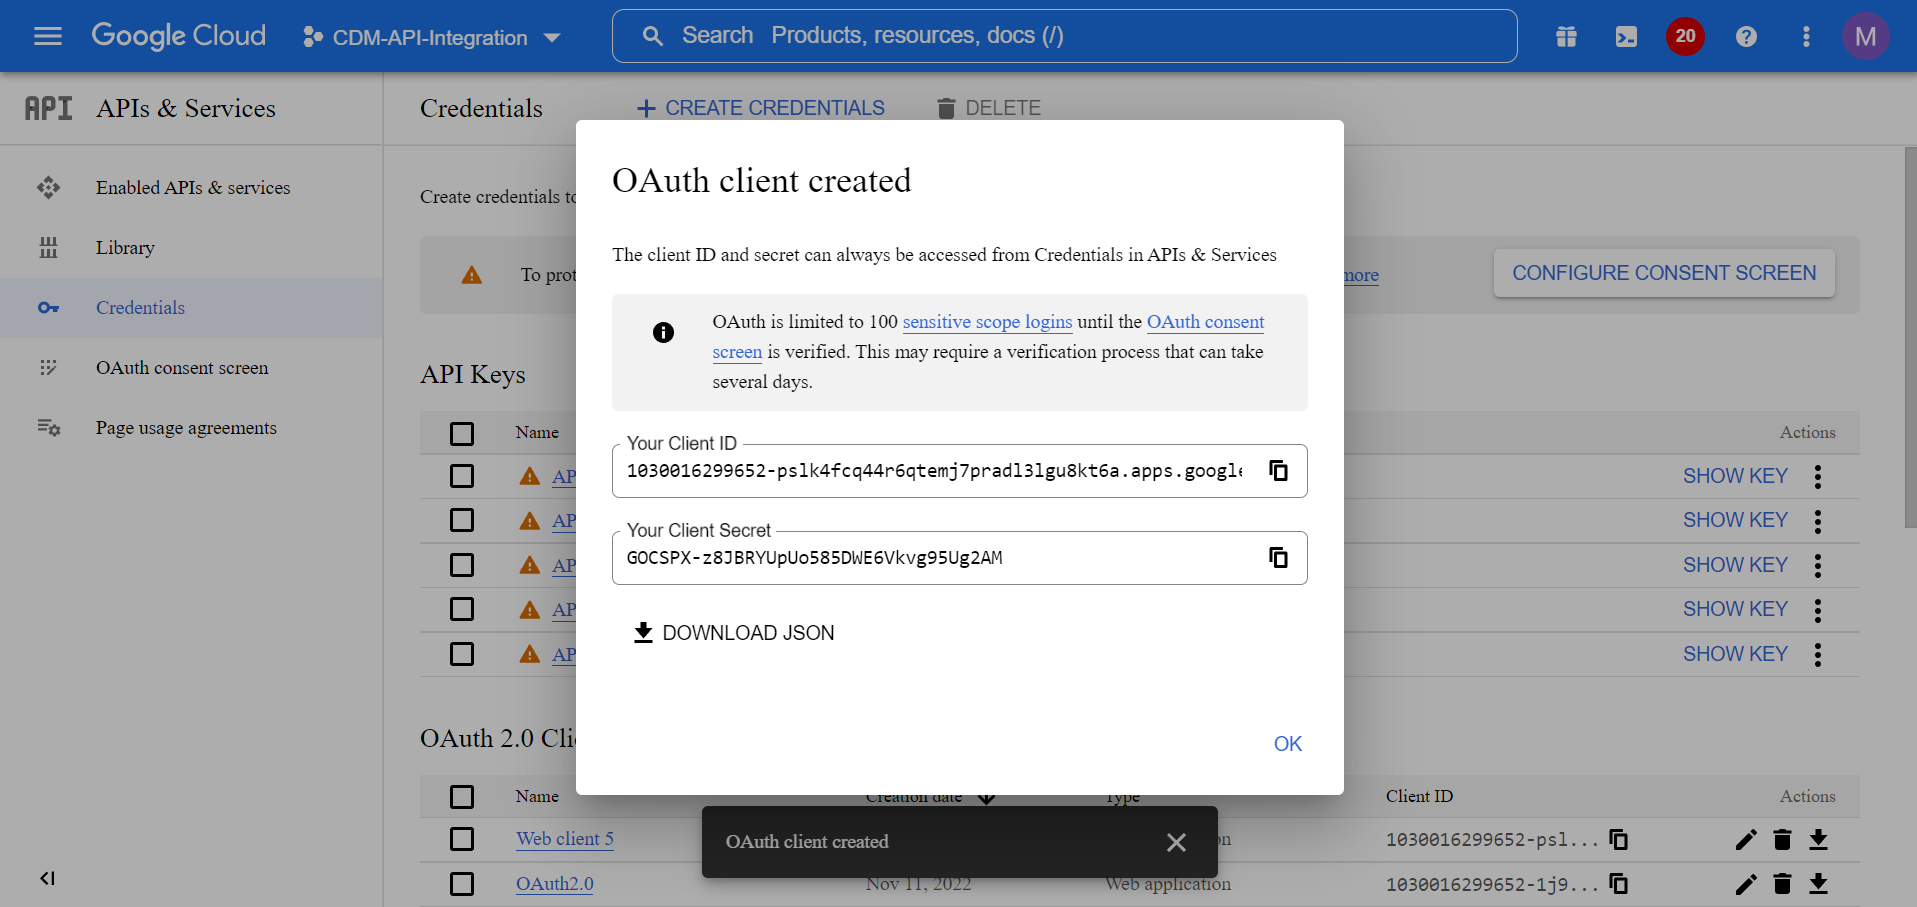
- A new set of Client ID and Client Secret will be generated which is to be copied and pasted back on the MDM server.
- Once you have entered the Client ID and Client Secret, click on Integrate.
Now the OAuth will be successfully configured on the MDM server.
Troubleshooting tips
Unable to see the Device management options
Confirm your license tier supports Chrome OS management (e.g., Upgrade to Enterprise Standard).
unable to apply policies
Check if the Chromebook’s organizational unit (OU) has the correct license assigned.
Unable to Integrate G Suite with MDM
If you are unable to integrate G Suite with MDM, follow the steps mentioned below:
- You have to sign in into the account which is already integrated and remove the access. To do so,
- Go to this page and log in to the account.
- In case of MDM Cloud, Select Manageengine MDM and for On-Premise, select the app name which you have created on the Google Admin Console. Now click on Remove access.
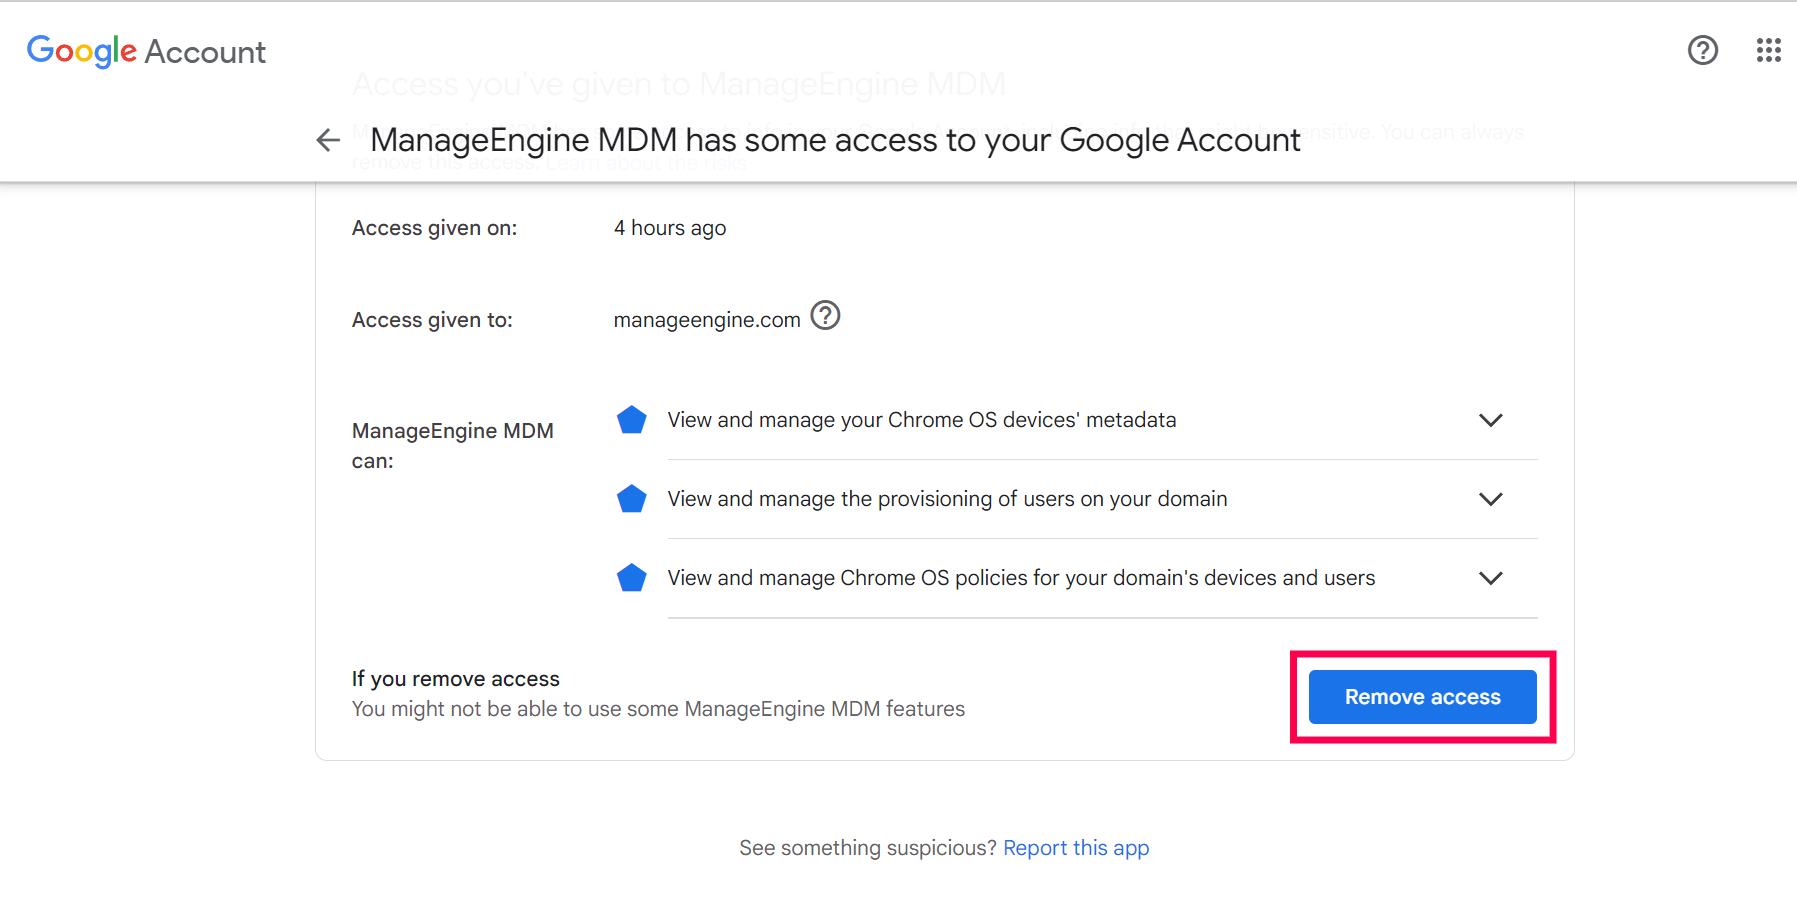
Now the G Suite will get successfully integrated with MDM.
Jump To