OAuth authentication
OAuth is a secure authentication method that uses an authentication token instead of a password to connect your application to your user account. Using OAuth, resource owners can configure permissions separately for each client requesting access to the same resource and can also modify/revoke the access at any point of time.
To configure OpManager with Google, you need to create or register an application. Moreover, for adding and updating actions authentication by the OAuth provider is required.
Configuration of OAuth with Google
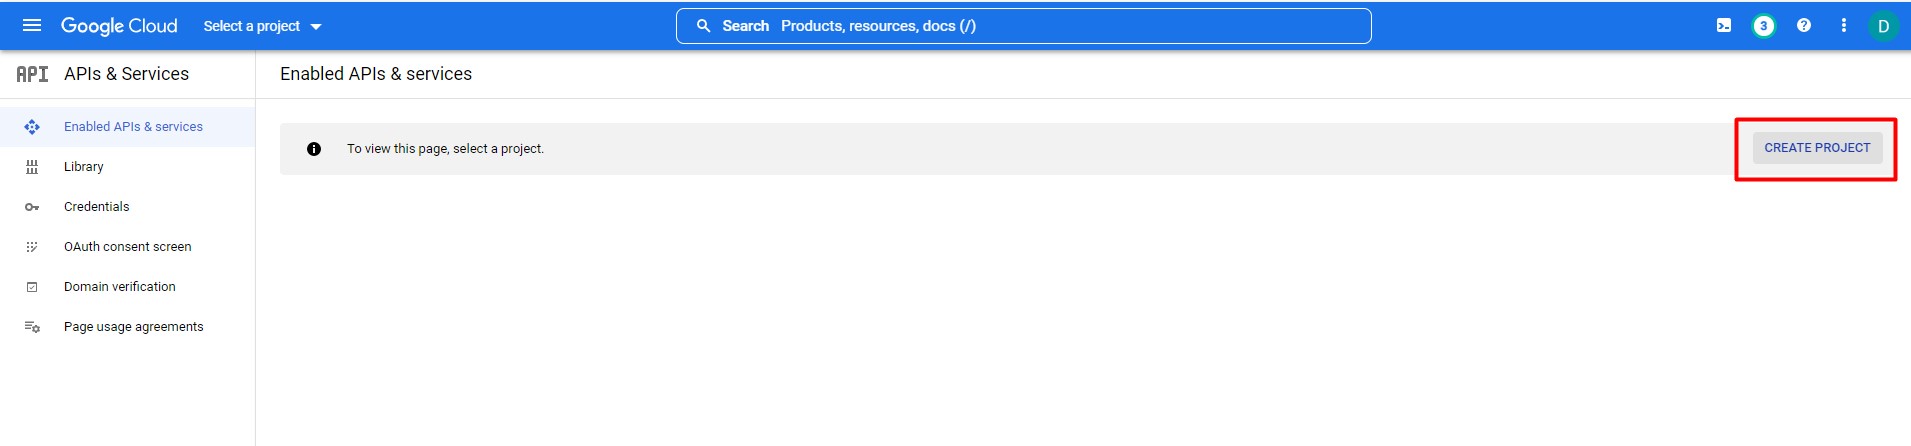
- Go to Google console dashboard.
- Click Create project, to create a new project.
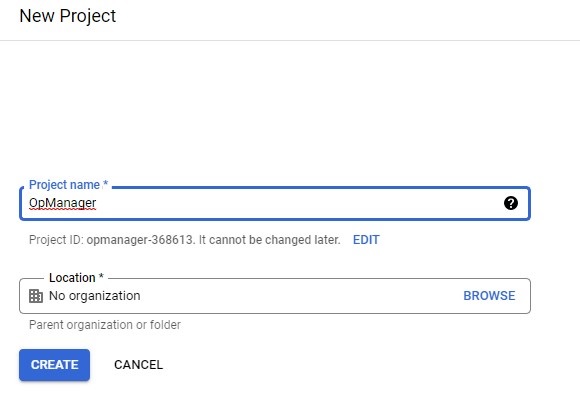
- Provide a name for the application and click Create, it will redirect to the Project home page.
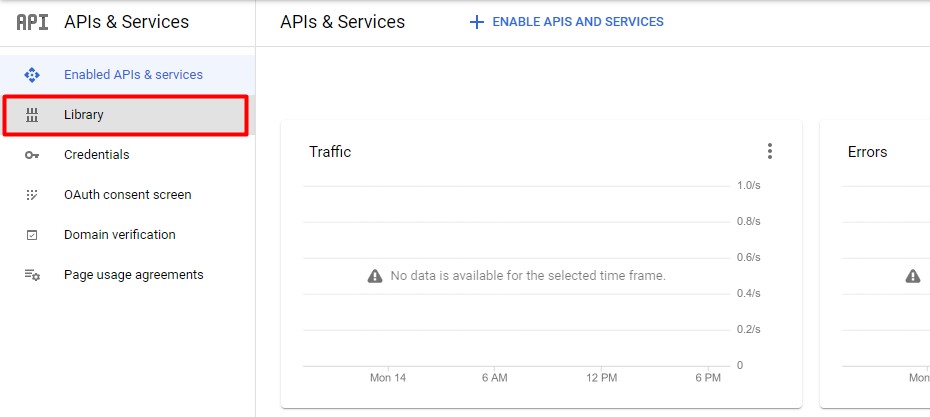
- Then go to Library and search for the required API/Services. Then Enable the API/Services.
- Go to the OAuth consent screen, select the "External" user type and click Create.

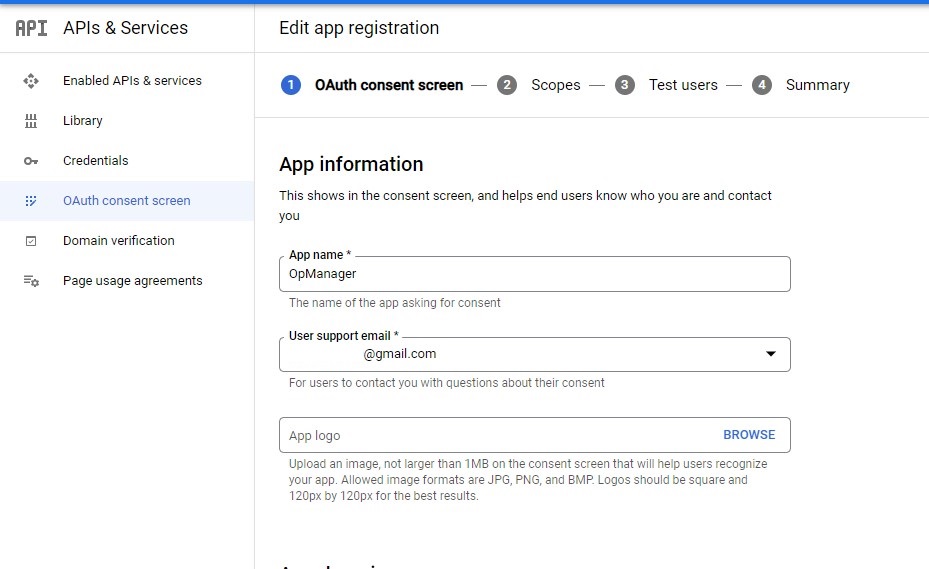
- In App information, provide App name, User support email, Developer contact information (Mandatory fields) and other necessary fields and click Save and continue.
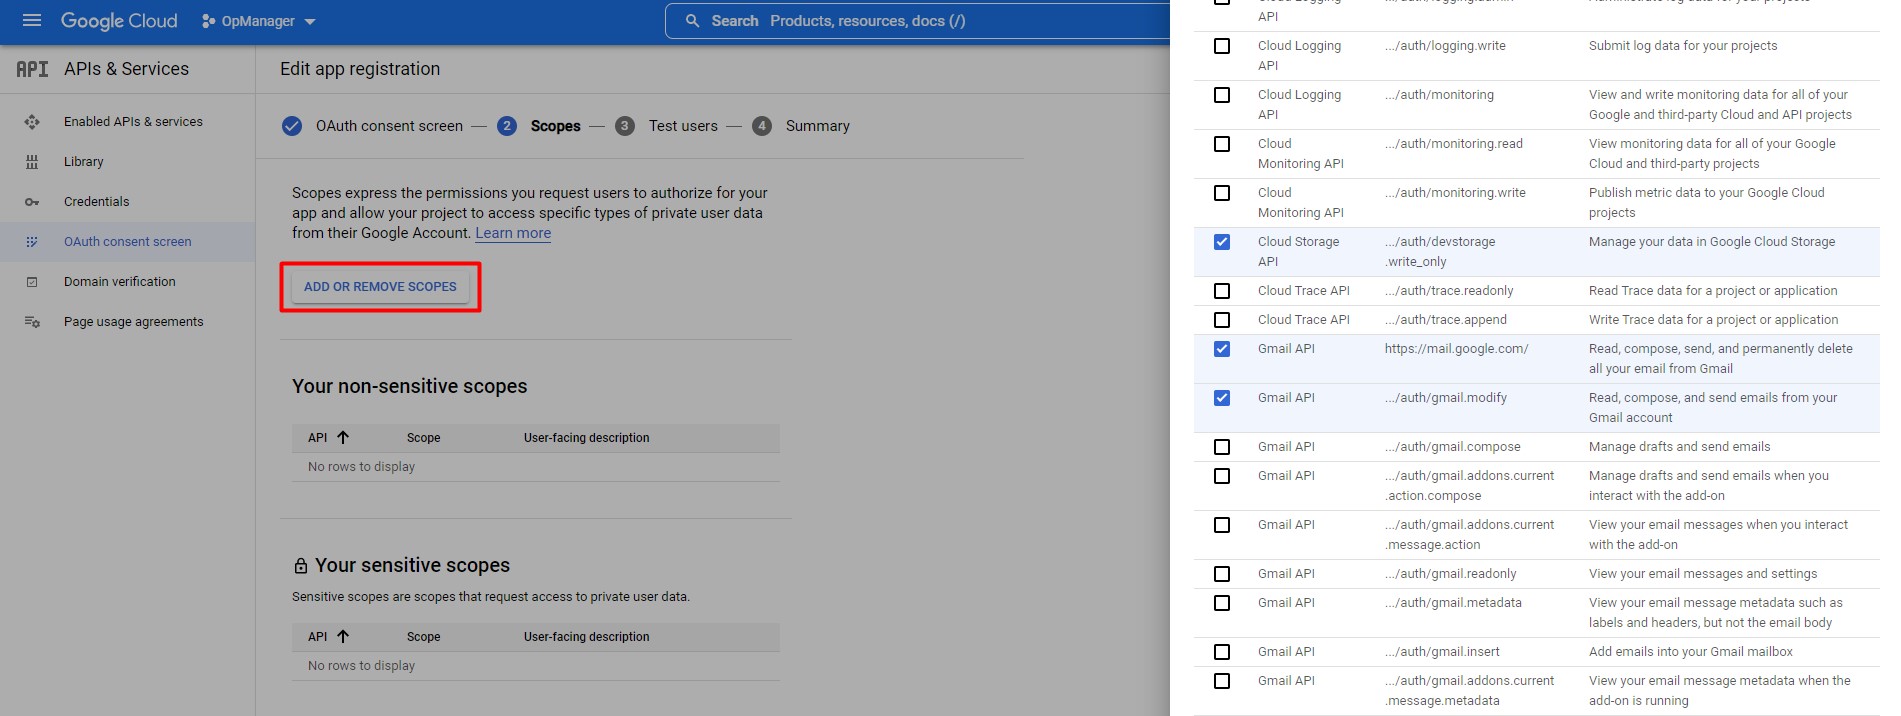
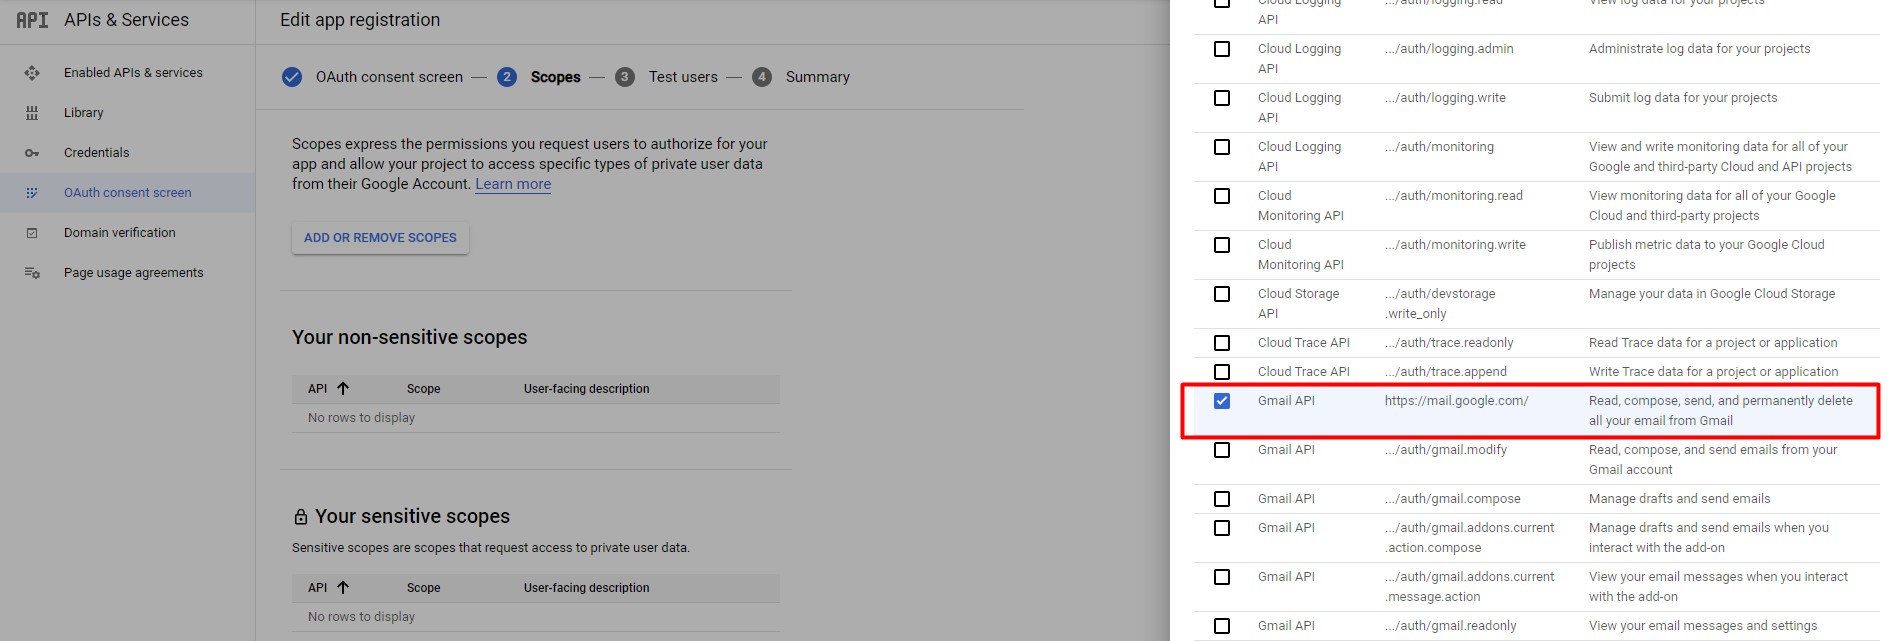
- To configure the Scope, click "Add or Remove Scopes". If any specific scope is not available in the list, go to Library search for the specific API and enable it and then try to add the scope.
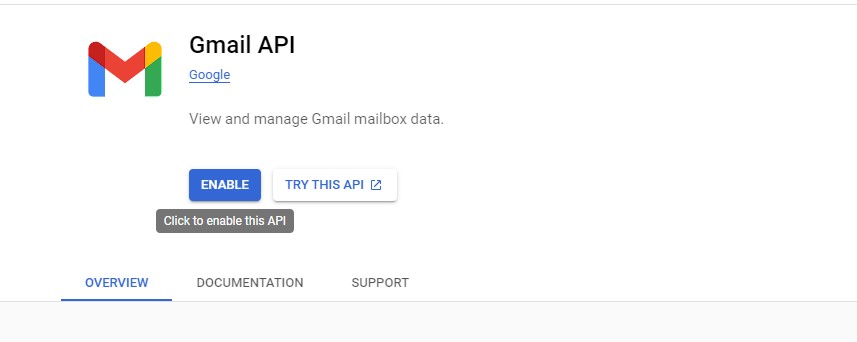
- In the API Library, search for Gmail API & Enable it.
- While adding scope, add and use the scope "https://mail.google.com" under Gmail API.
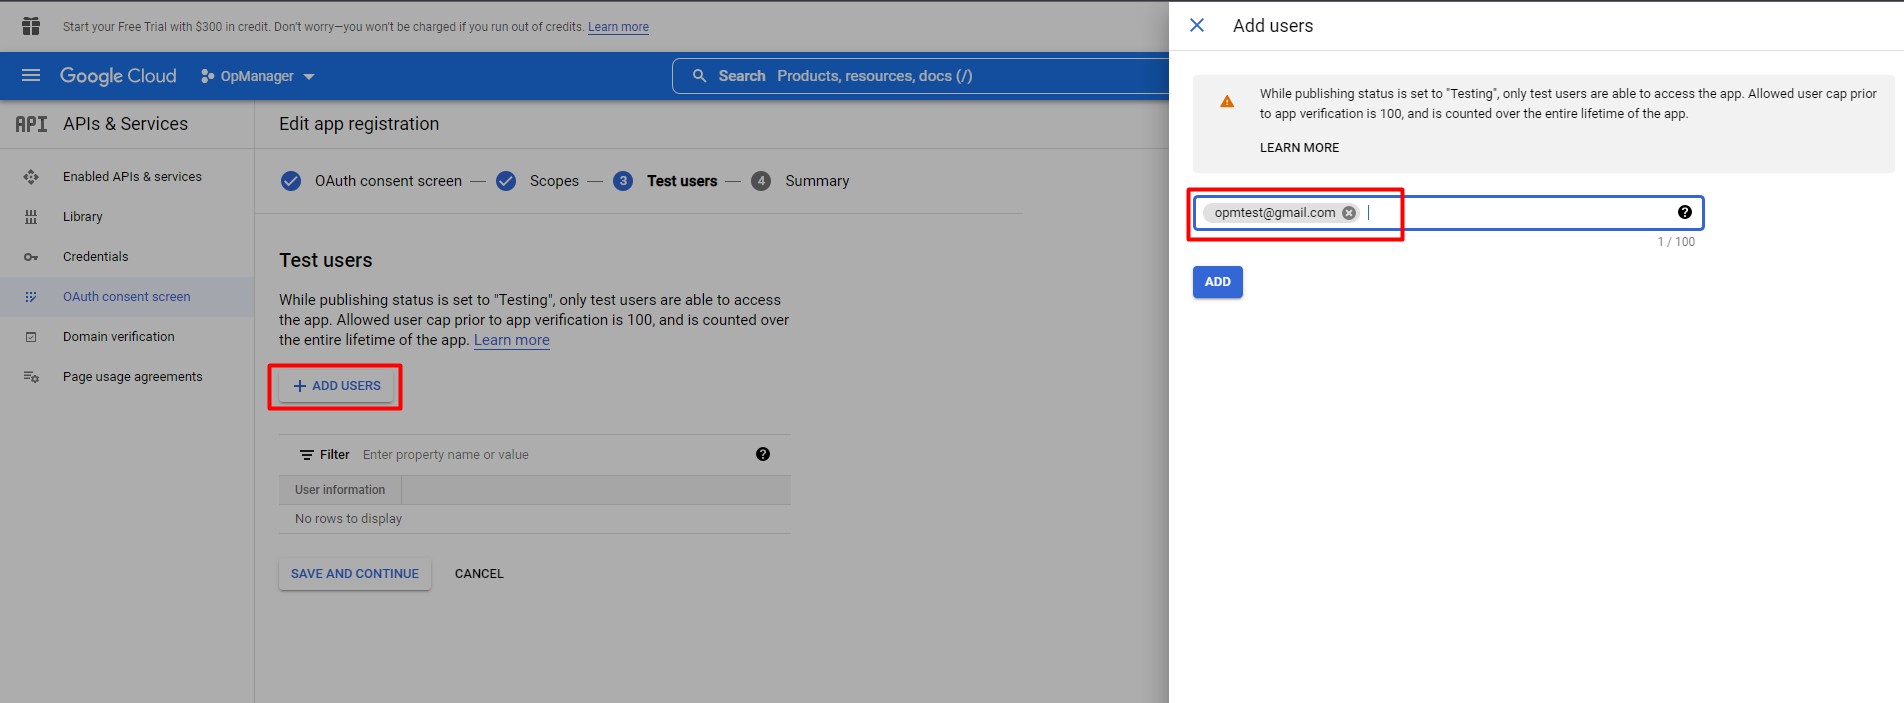
- To add users who can authenticate through this application, click the "Add users" button and add the users.
- Then click Save and Continue, it will show the summary of the created application.
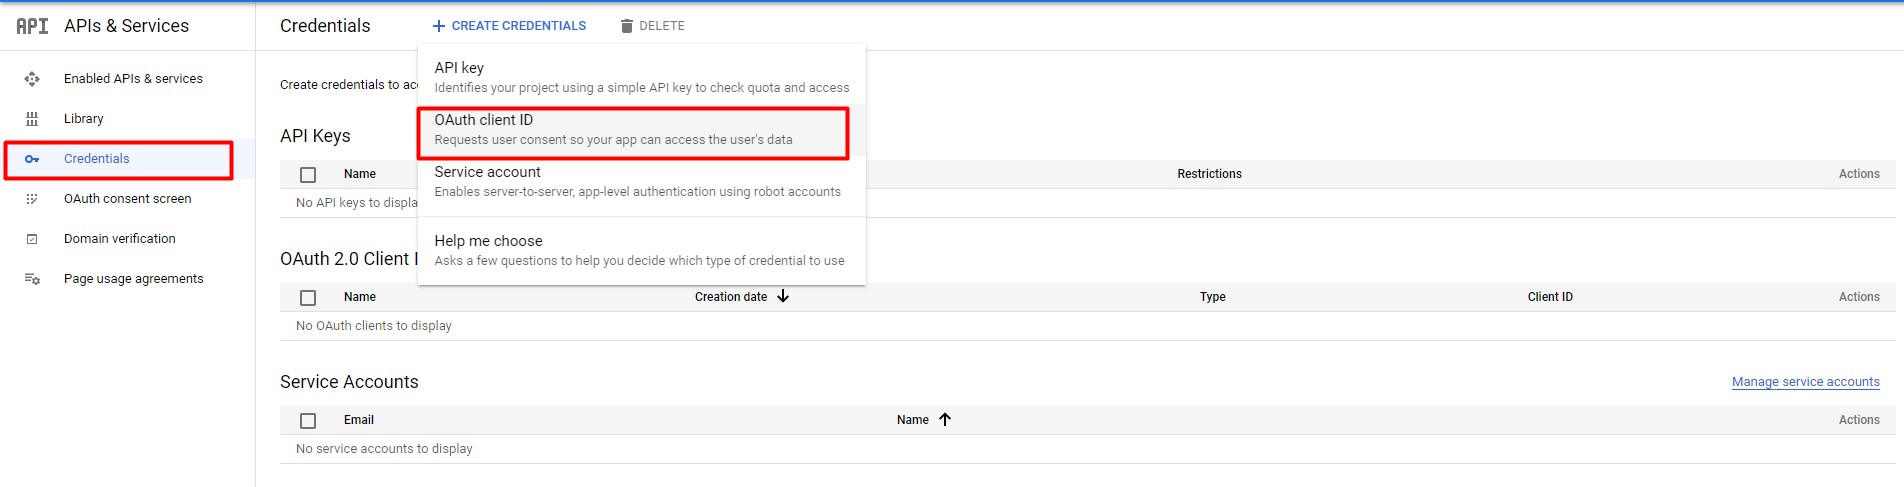
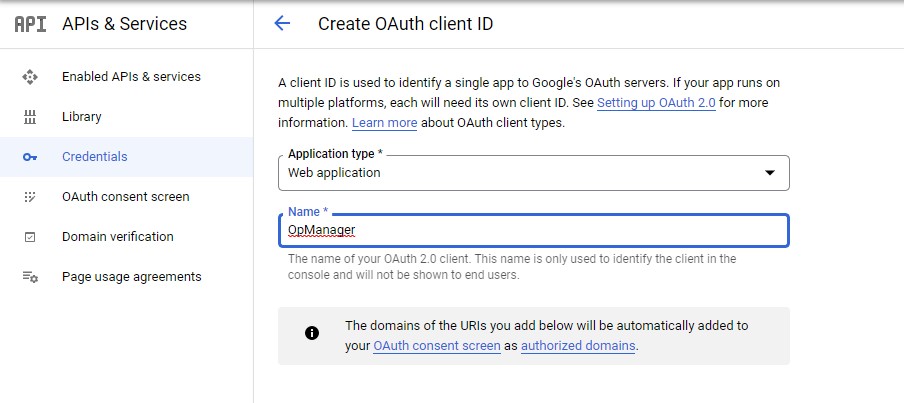
- Select Application type as "Web application" and provide a name for it.
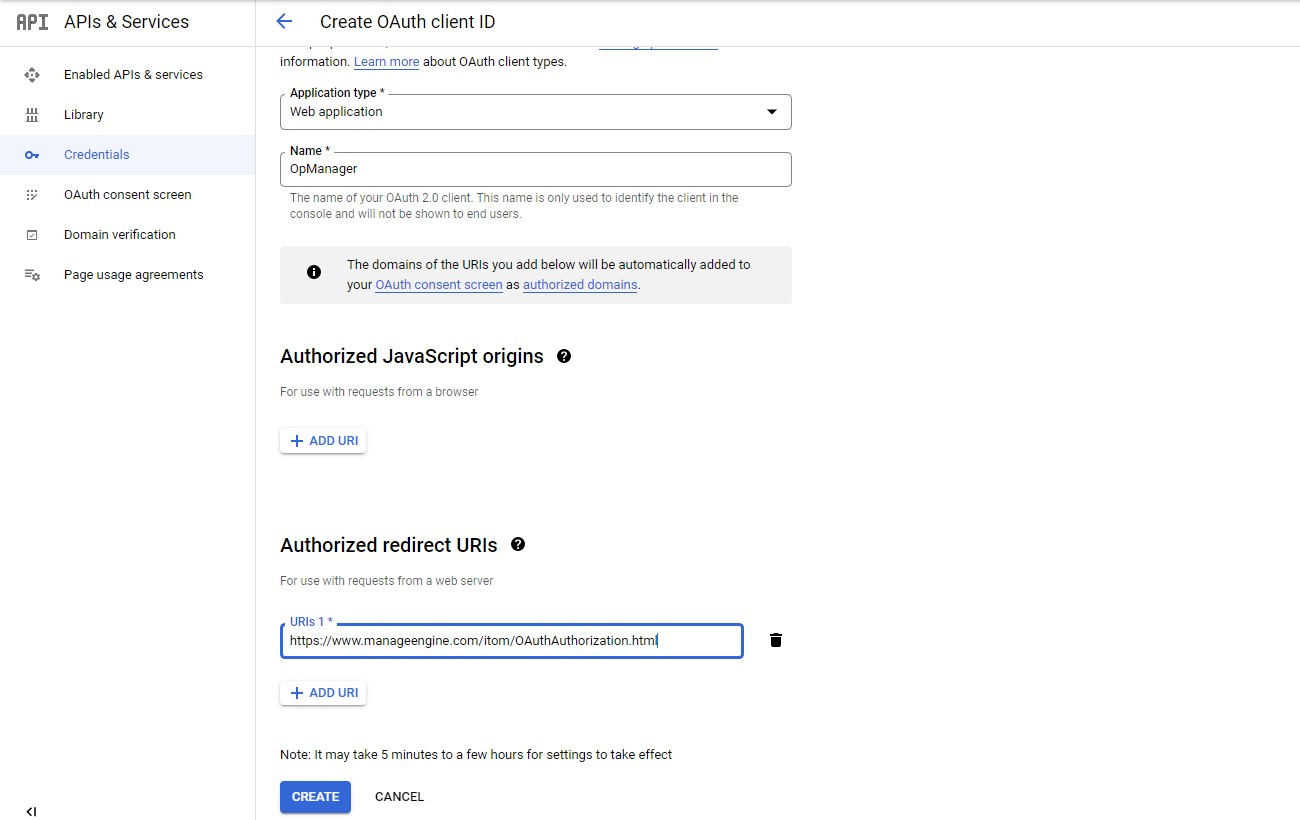
- Then add redirect URL as "https://www.manageengine.com/itom/OAuthAuthorization.html", and click Create. You can copy the Redirect URL from OpManager console -> OAuth provider page as well.
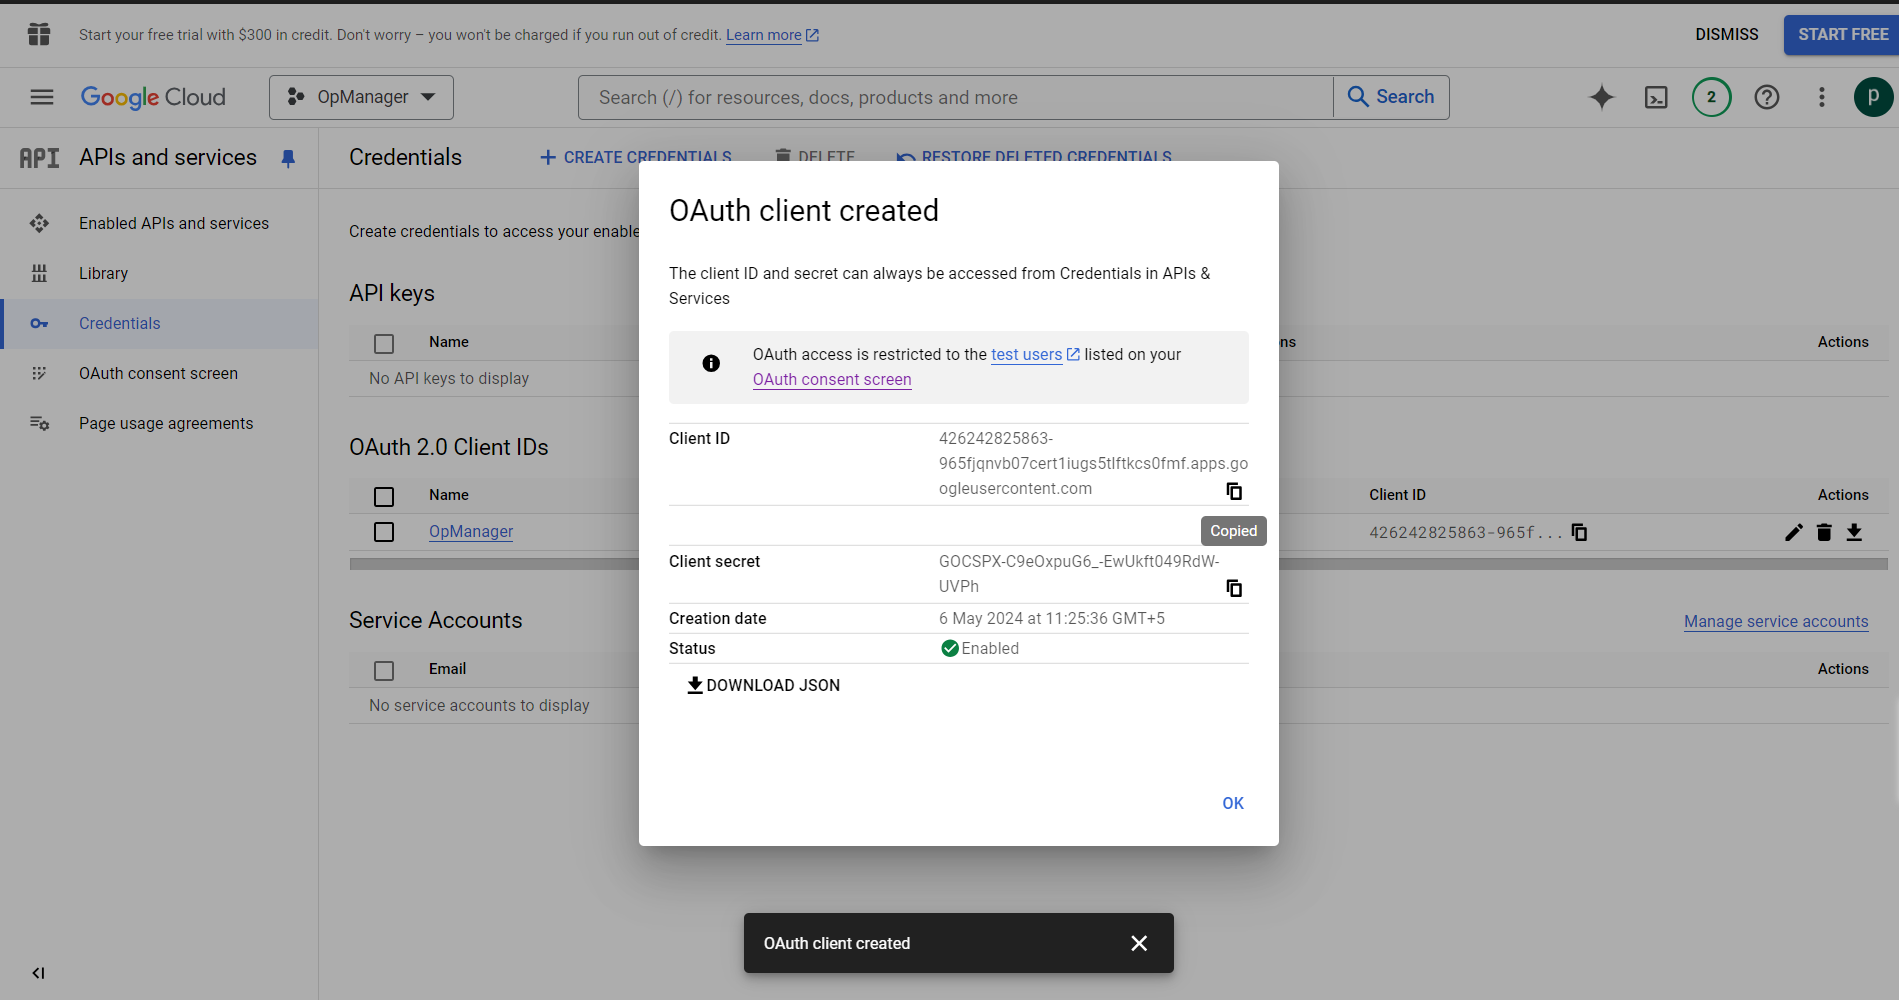
- Once the credentials have been created, Client ID and Client secret will be shown in the dialog box. Copy both the values to configure OAuth Provider Settings in OpManager Console
- Download the JSON, in that we can find Authentication URL and Token URL as auth_url and token_url respectively. Copy these values to configure OAuth Provider Settings in OpManager Console
Recommended Scope for Configuring Mail server with OAuth
OAuth Provider Configuration
After configuring OAuth with Google, open OpManager,
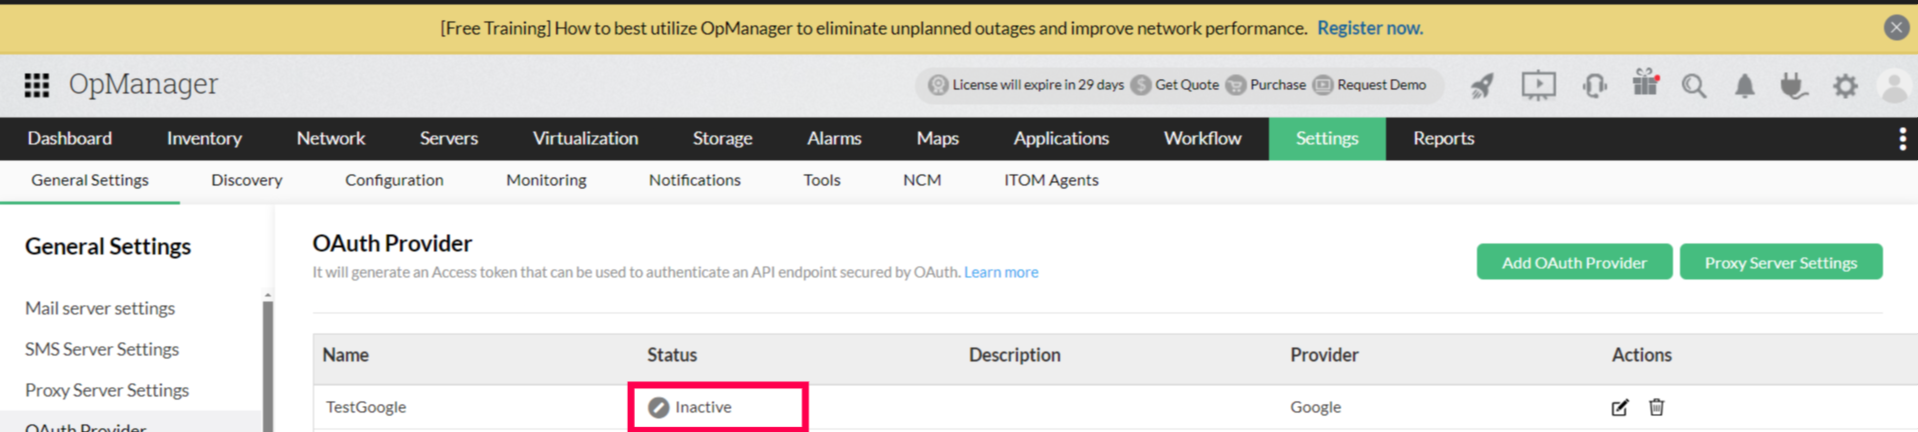
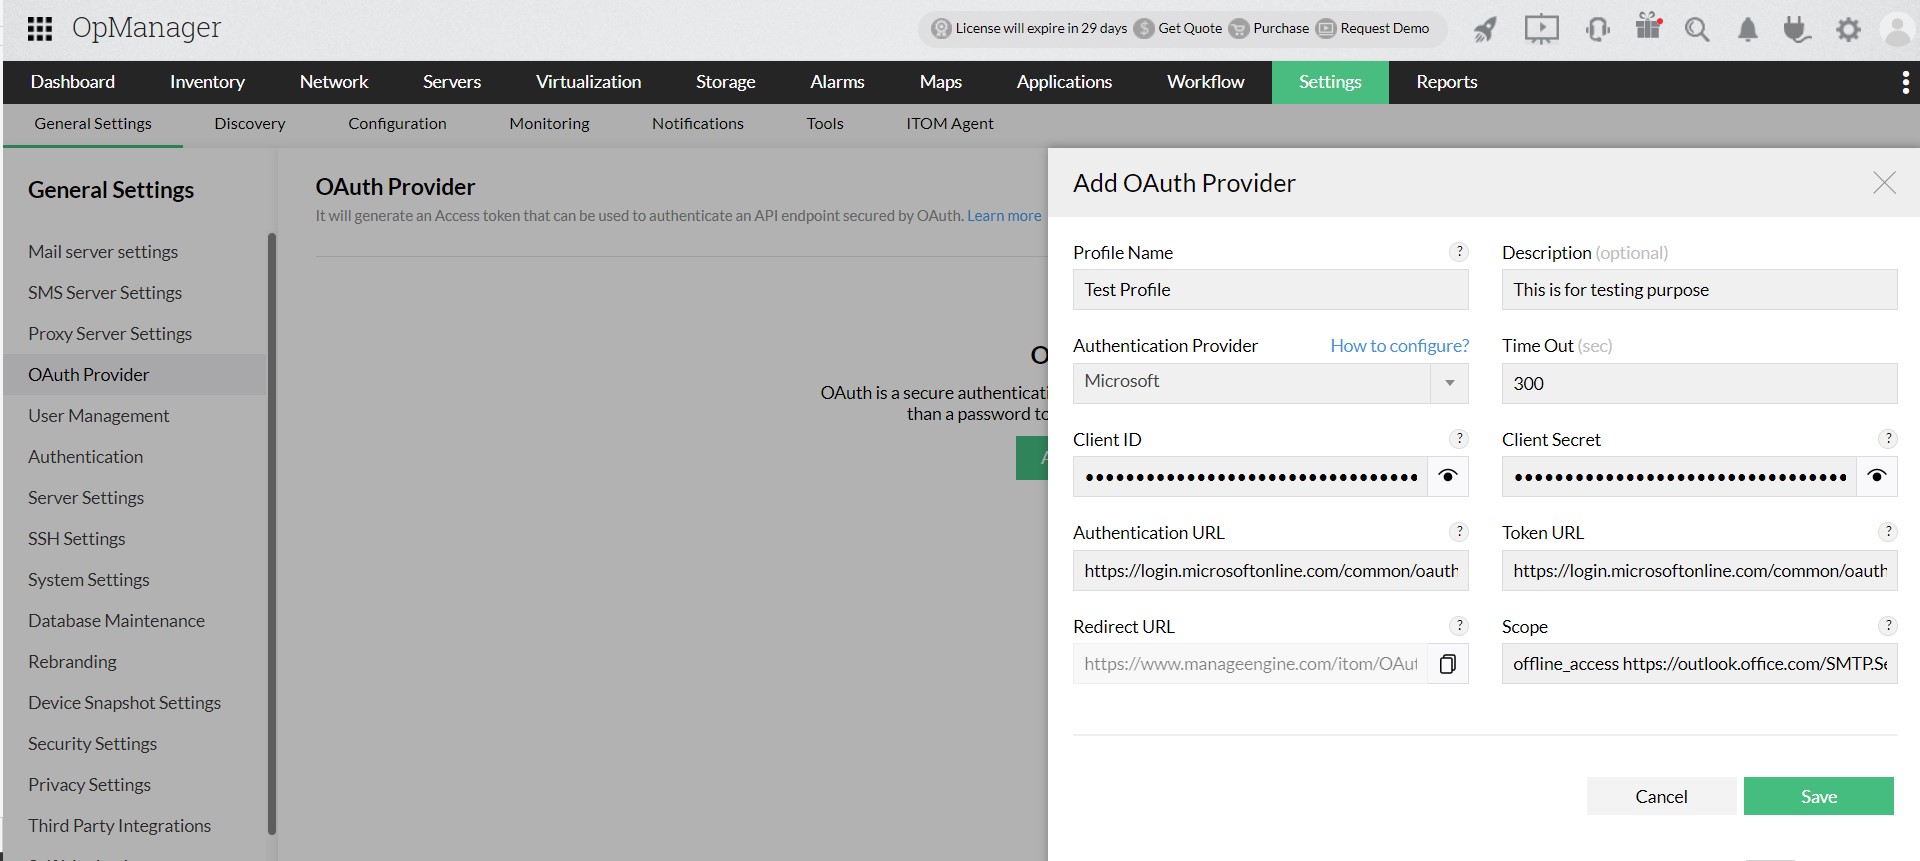
- Go to Settings > General Settings > OAuth Provider - Add OAuth Provider
- Provide the following details,
- Profile Name - A unique profile name for each profile.
- Description - Description about the OAuth profile.
- Authentication Provider - OAuth provider's name - Gogle.
- Timeout - Time required to connect with the provider. Range: 10-300 sec.
- Client ID and Client Secret - Use the values copied from Step 6 of configuring OpManager with Google.
- Authentication URL and Token URL - Use the values copied from Step 6 of configuring OpManager with Google.
- Scope - Use the values copied from this step of configuring OpManager with Google.
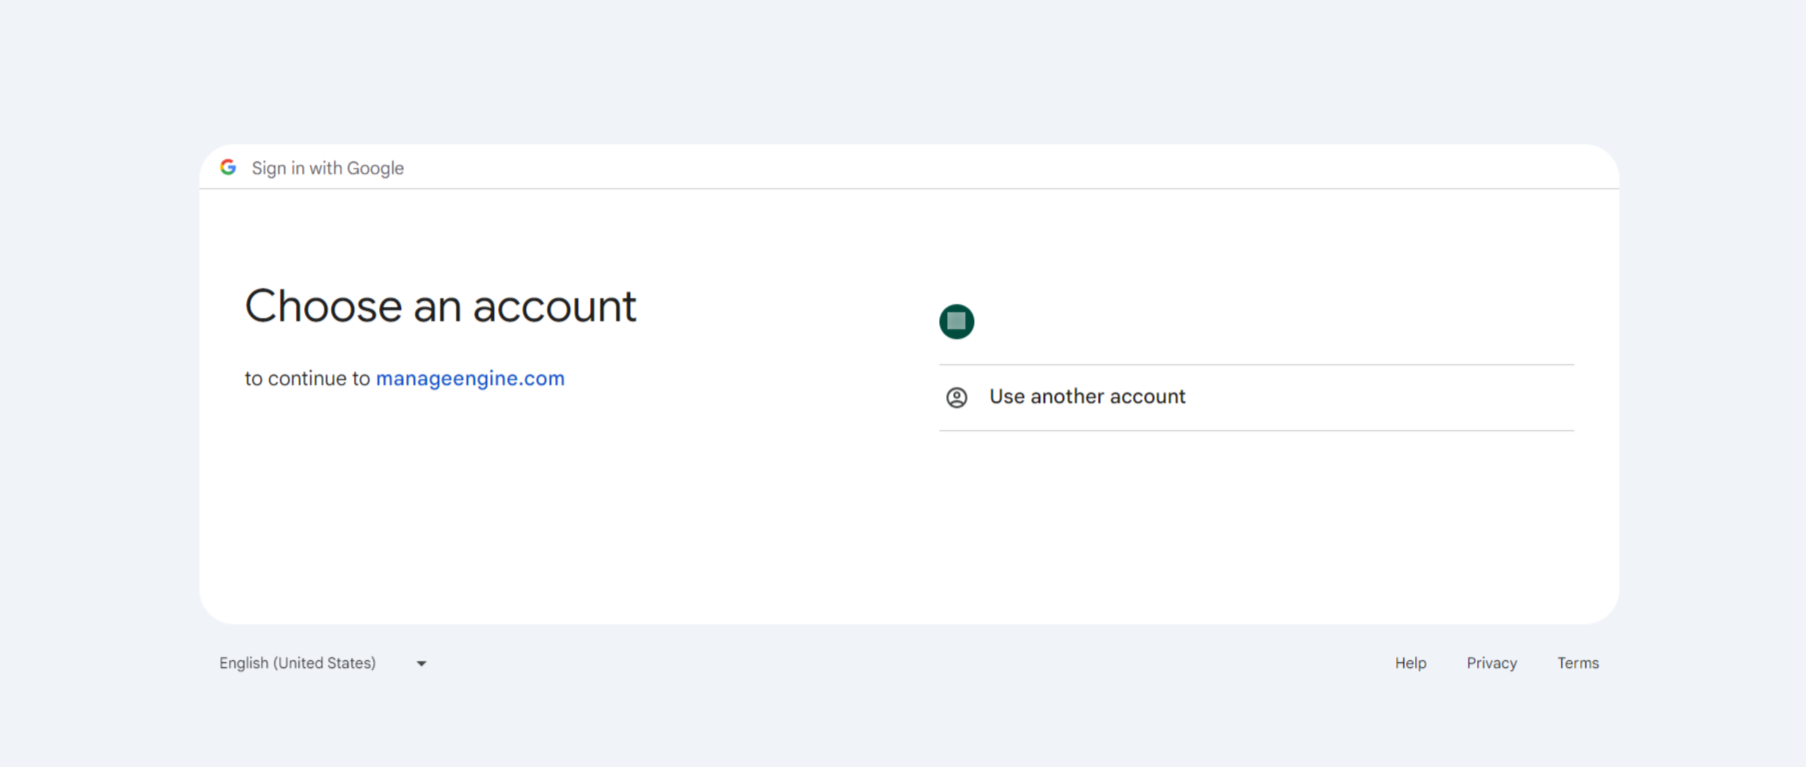
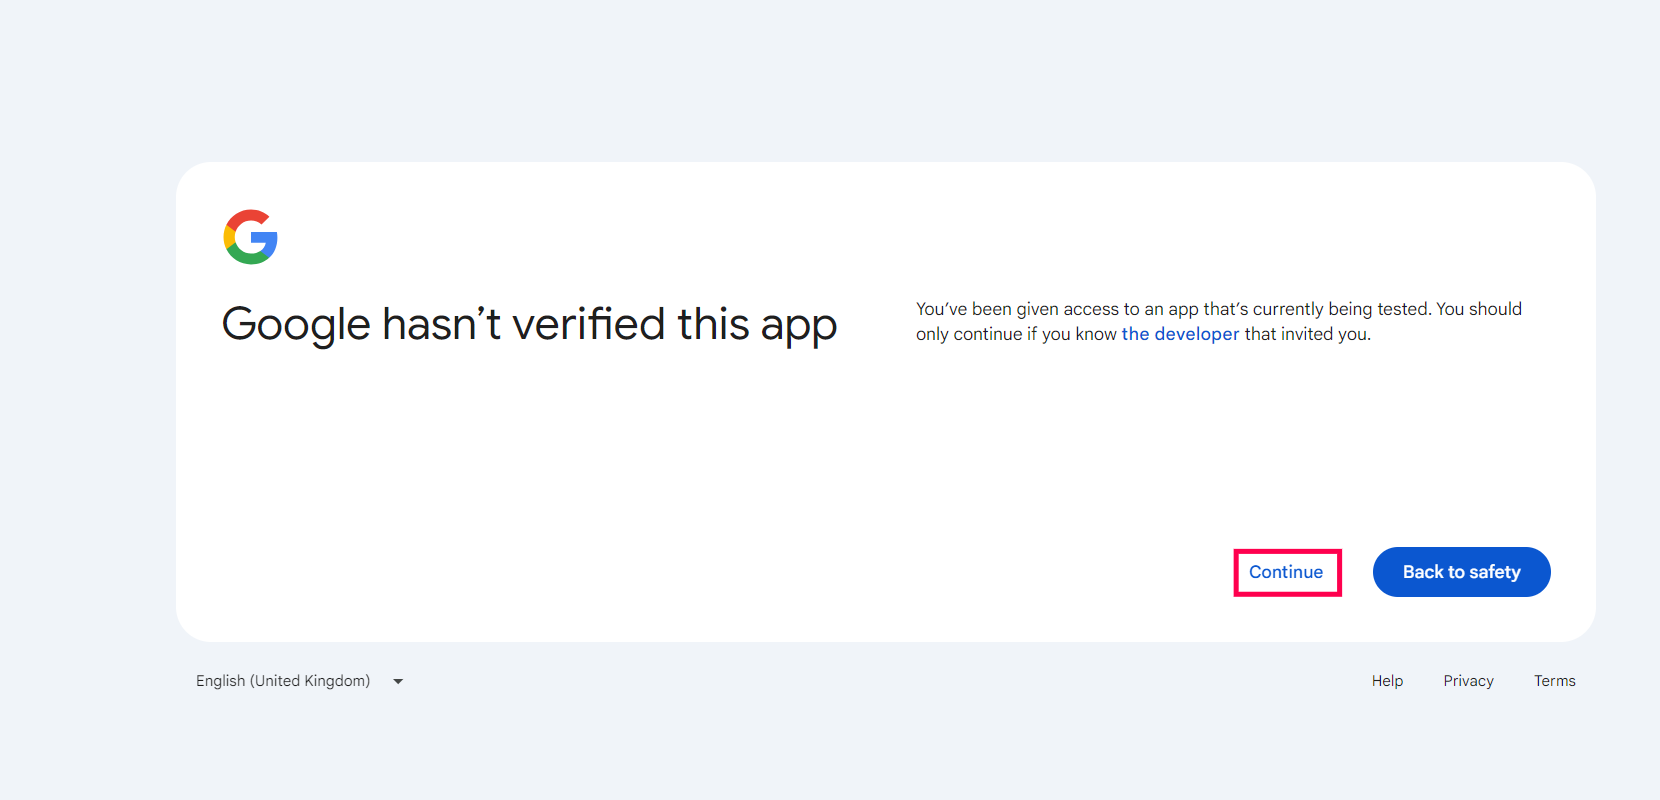
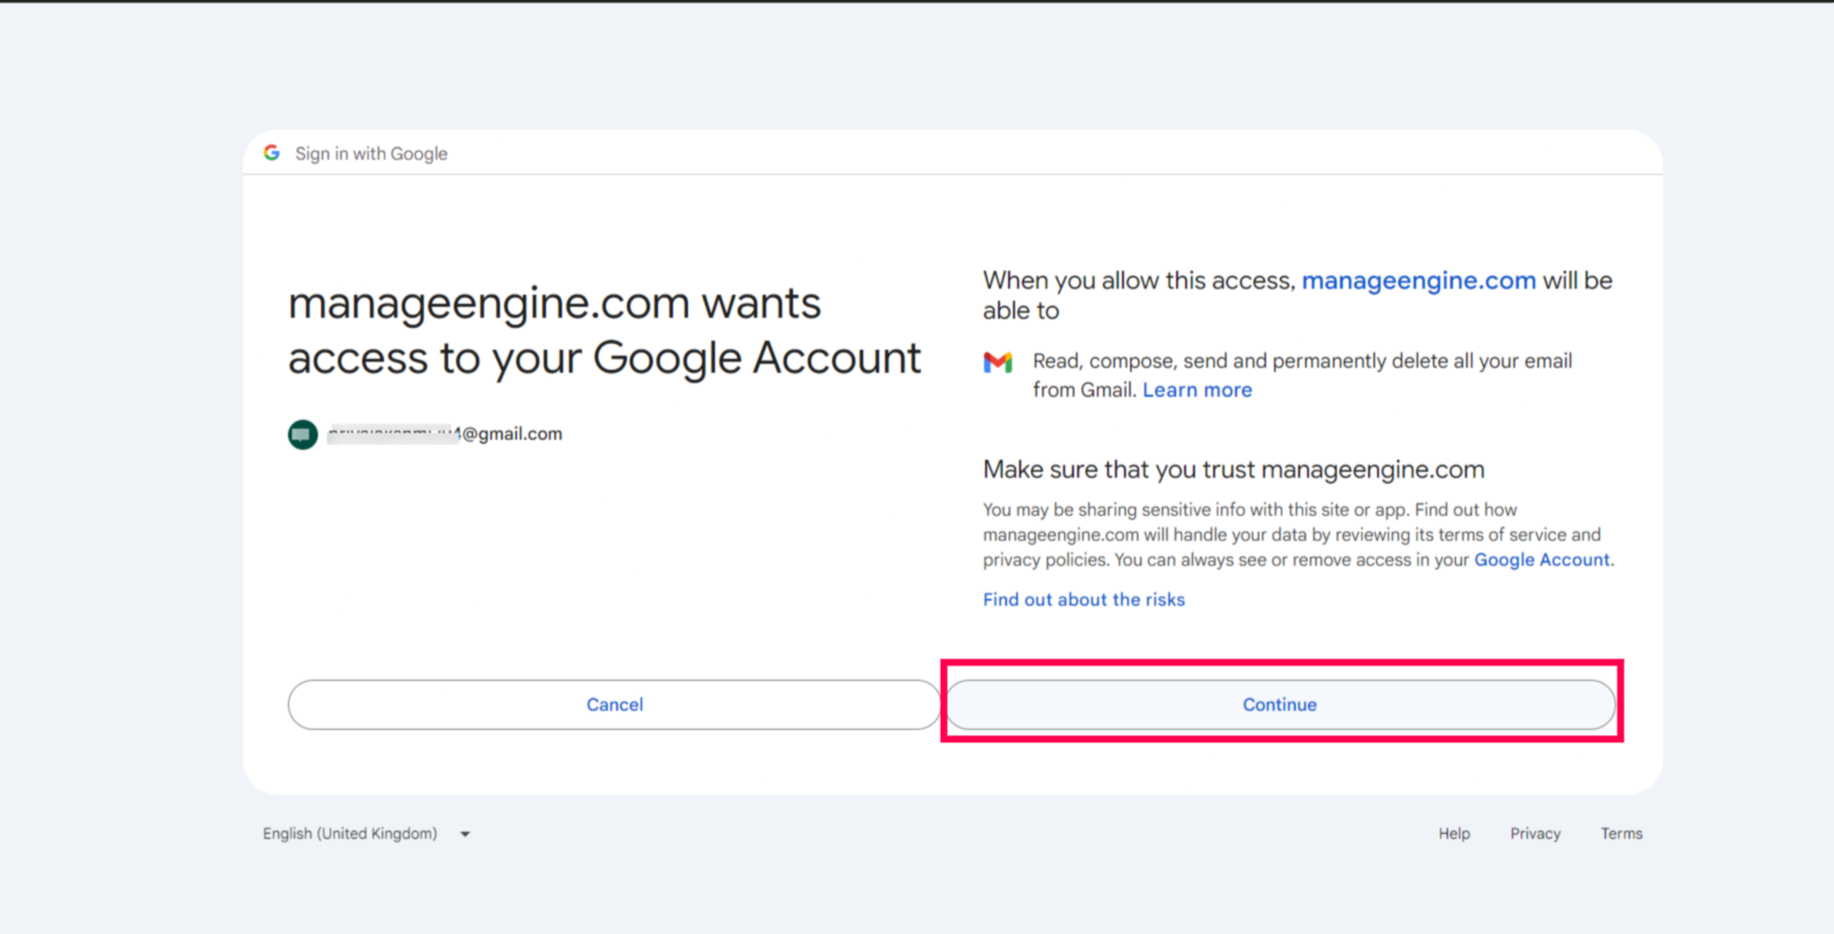
- After providing the above details, save it. You will be redirected to Google Sign in page. Provide Email and Password to Sign in. Then click 'Continue' to provide consent for accessing the application.
Note that the Access Token will be generated for the email provided here. So, if this OAuth Provider is selected for Authentication, make sure to use the same email address as username.
Note:
Now that you have successfully added an OAuth Provider, you can select that in Mail Server Settings for OAuth Authentication.

The status of OAuth Provider settings will be Inactive until it is used in the mail server settings.