Widgets
OpManager's Widgets offer a highly customizable and interactive means to display essential data and metrics on your network dashboard. These widgets allow users to personalize their dashboard, presenting real-time insights into various aspects of network management, such as network performance,device status, and traffic flow, and users can also have a comprehensive overview of their network at a glance. This help documentation will guide you through the process of adding, editing, embedding, deleting, and duplicating a widget to your OpManager dashboard.
- Adding New Widgets
- Adding Widgets from Report Builder
- Editing Widgets
- Embedding Widgets
- Embedding Widgets with expiry
- Deleting Widgets
- Duplicating Widgets
- Repositioning Widgets
Adding New Widgets
To add a new widget to a dashboard follow the steps given below:
- Click on Dashboard. Click on the +Add New button. Select the dashboard you want to add widgets to from from Custom Dashboard. If you want to know the steps to create a new custom dashboard, click here
- Select the Widget(s) that you want to add to the dashboard.
- Click Add button to add the selected widget(s) to the dashboard.


Adding Widgets from Report Builder
You can also add widgets for specific set of devices and monitors using the 'Generate Reports' option:
- Create a Custom Dashboard. (if you dont have an existing Custom Dashboard or If you want a new Custom Dashboard for these widgets)
- Go to Inventory -> Devices -> select the check box next to 'Device Name' for one or more devices.
- Click on the 'Generate Reports' option on the top right.
- Choose the desired 'Report Type' and 'Time Period' for these reports
- Now choose the desired Monitors for these devices and click on 'Generate Report'.
- Now click on the Add as widget or the '+' button in the report builder screen.
- Select desired Dashboard, Widget Name, and Description and click 'OK'.
- You can now access this widget from the selected Custom Dashboard.


Editing Widgets
To modify the existing widgets go through the steps given below:
- Click on the Edit against the widget on which you wish to modify the fields.
- Modify the required fields.
- Click Save to effect the changes.


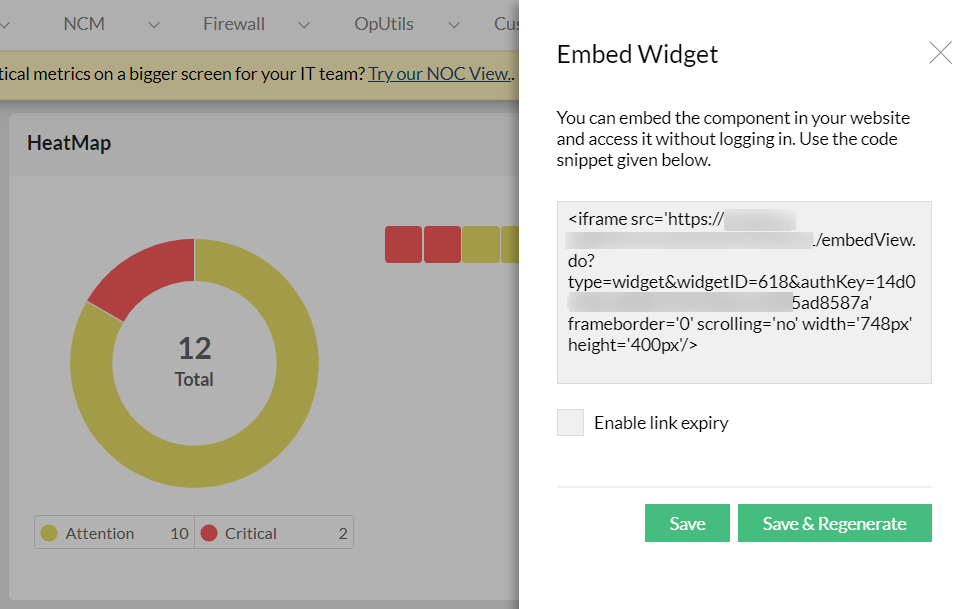
Embedding Widgets
The embed widget feature lets you embed a dashboard widget with its realtime data on any webpage. To embed a widget into your webpage, simply copy and paste the code snippet into the HTML of the website where you want it to be displayed.
The following are the steps to obtain the code snippet to embed a widget:
- Click on the embed widget icon in the top right of the widget.
- Copy the code snippet.
- Paste the code snippet into the HTML of the webpage.
![]()
![]()
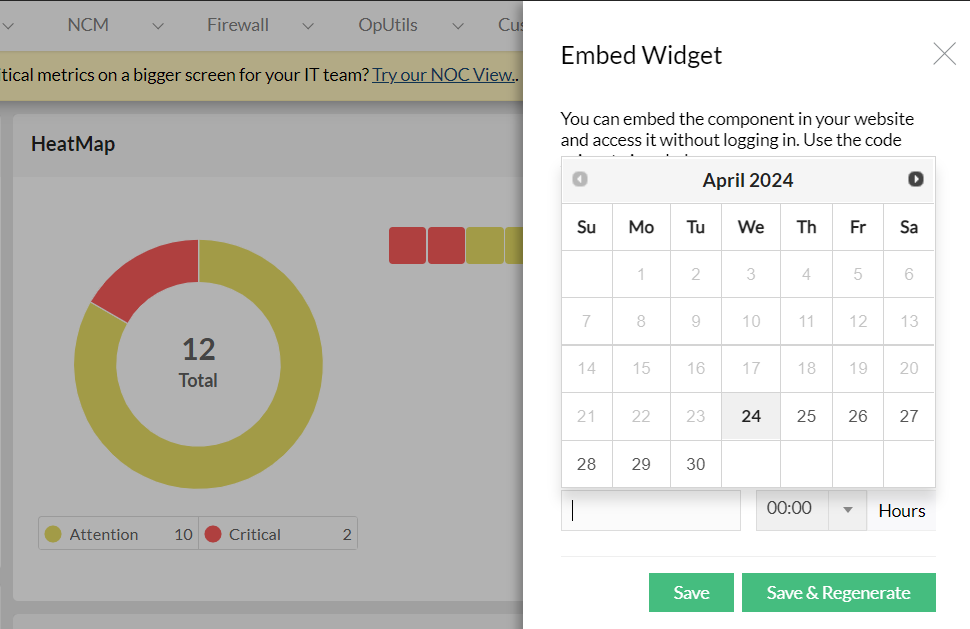
Embedding Widgets with expiry
From version 128234, users can set expiry time for the embedded widgets. If link expiry has not been enabled, the embedded widgets will be accessible forever. If the link has expired, you can extend the embedded widgets validity, or you can set new expiry time, and regenerate the link. To set expiry to embedded widgets,
- Select the Enable link expiry checkbox while embedding a widget.
- Set the expiry date and time.
- Click Save to extend the link's expiry period, or click Save & Regenerate to regenerate a new link with updated expiry period.
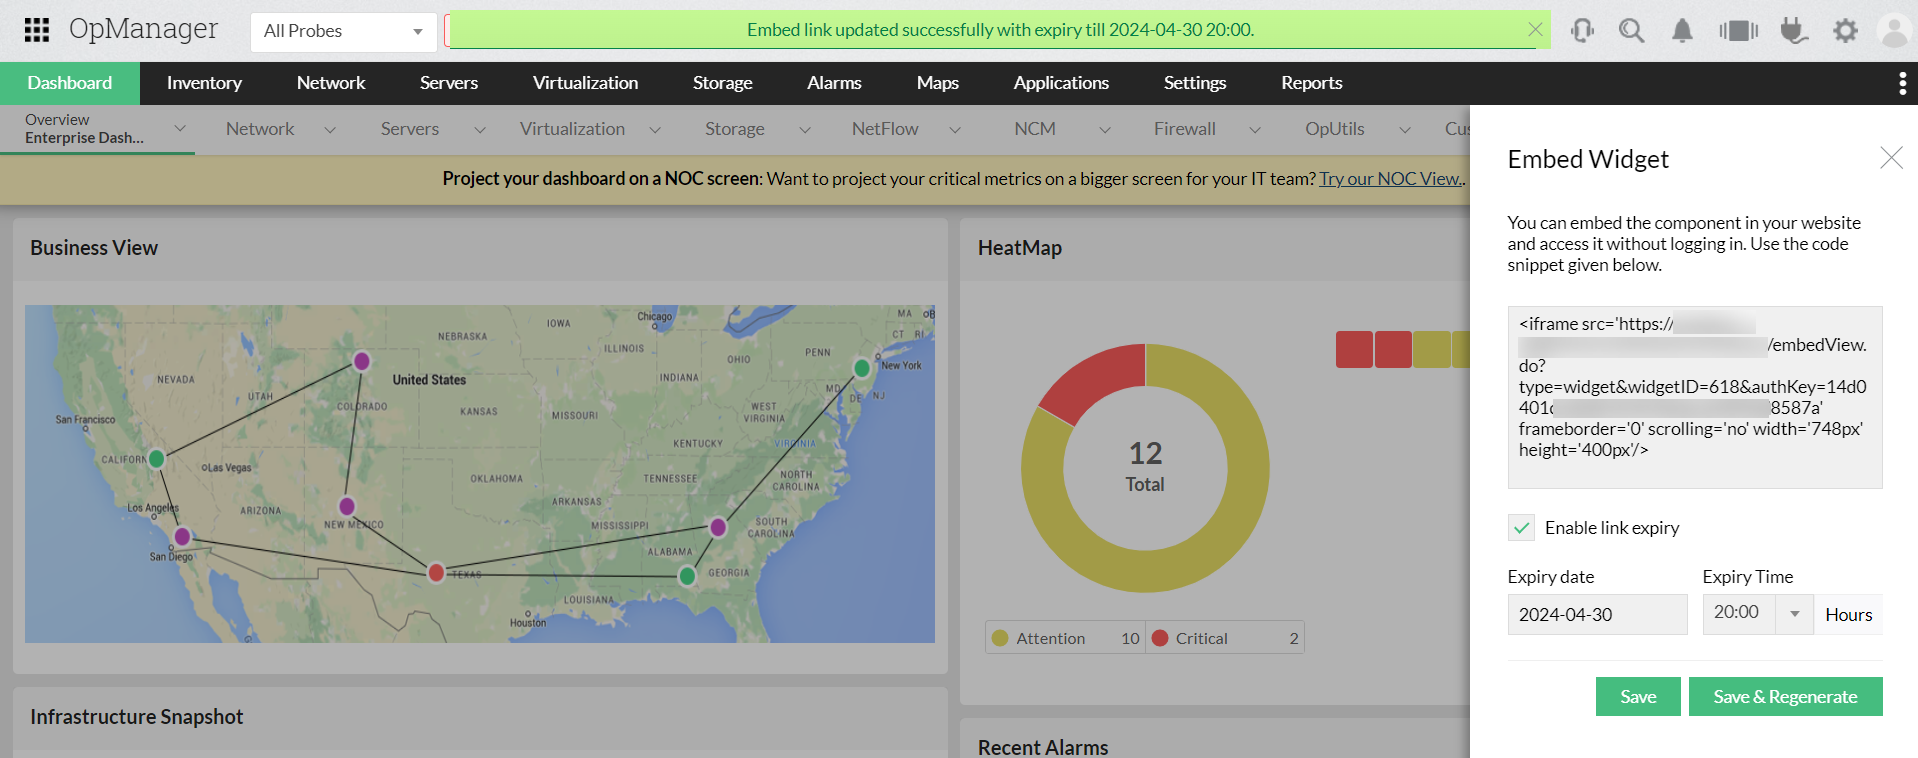
Note: The regenerate private link option generates a new authentication key for a widget. If you click on this option, the previously generated code snippet for the widget will no longer be valid.
Deleting Widgets
To delete a widget go through the steps given below:
- Click on Delete icon available on the widget box. A confirmation window pops up.
- Click OK to confirm deleting the widget.

Duplicating Widgets
You can duplicate widgets that have already been added to use the same widget for another purpose:
- Go to Dashboard -> Custom -> the Custom Dashboard containing the widget that you want to duplicate.
- Hover your mouse pointer over the widget you want to duplicate, and click on the 'Duplicate Widget' icon in the header.
- Select the desired 'Name', time 'Period', 'Devices', 'Interval', and 'GraphUnit', etc, for the duplicated widget.
- Click on the 'Add' button to add the duplicated widget to the Dashboard.


Repositioning Widgets
To reposition widgets:
- Go to Dashboard -> Custom -> choose the dashboard you want to reposition widgets for.
- Drag and drop to change the position of the widgets.
- Click 'Save' on the top right.