How to Install and Uninstall Linux Agent
This guide provides detailed instructions for installing and uninstalling Linux agents, including manual and remote installation methods, prerequisites, system requirements, and agent privileges.
Pre-requisites
- Linux Agent Configuration: Ensure the Linux agent settings are configured know more.
- Privileges Agent installation requires sudo/root permission. After installation, the agent runs with root privileges, except for UI tasks, which run as a normal user.
- Service Compatibility The Linux machine should run under SystemD or SysVinit service, as the agent service is compatible only with these services.
- Supported architectures include x86, x86_64, ARM (32-bit and 64-bit). Please make sure that the 64bit machines should support the 32bit binary execution.
- Required Packages:
- tar package, version 1.29 or above.
- xz or xz-utils, depending on the type of Linux OS.
- libgtk-3-0 or gtk3.x86_64
- libwebkit2gtk-4_0-37 or webkitgtk4-plugin-proces-gtk2.x86_64 or webkitgtk4 or webkit2gtk or webkit2gtk4.1 or webkitgtk6.0 depending on the type of Linux OS.
Manual Linux Agent Installation
Linux agents can be installed manually on computers that need to be managed. The agents should be downloaded onto the target Linux computer before initiating the installation process.
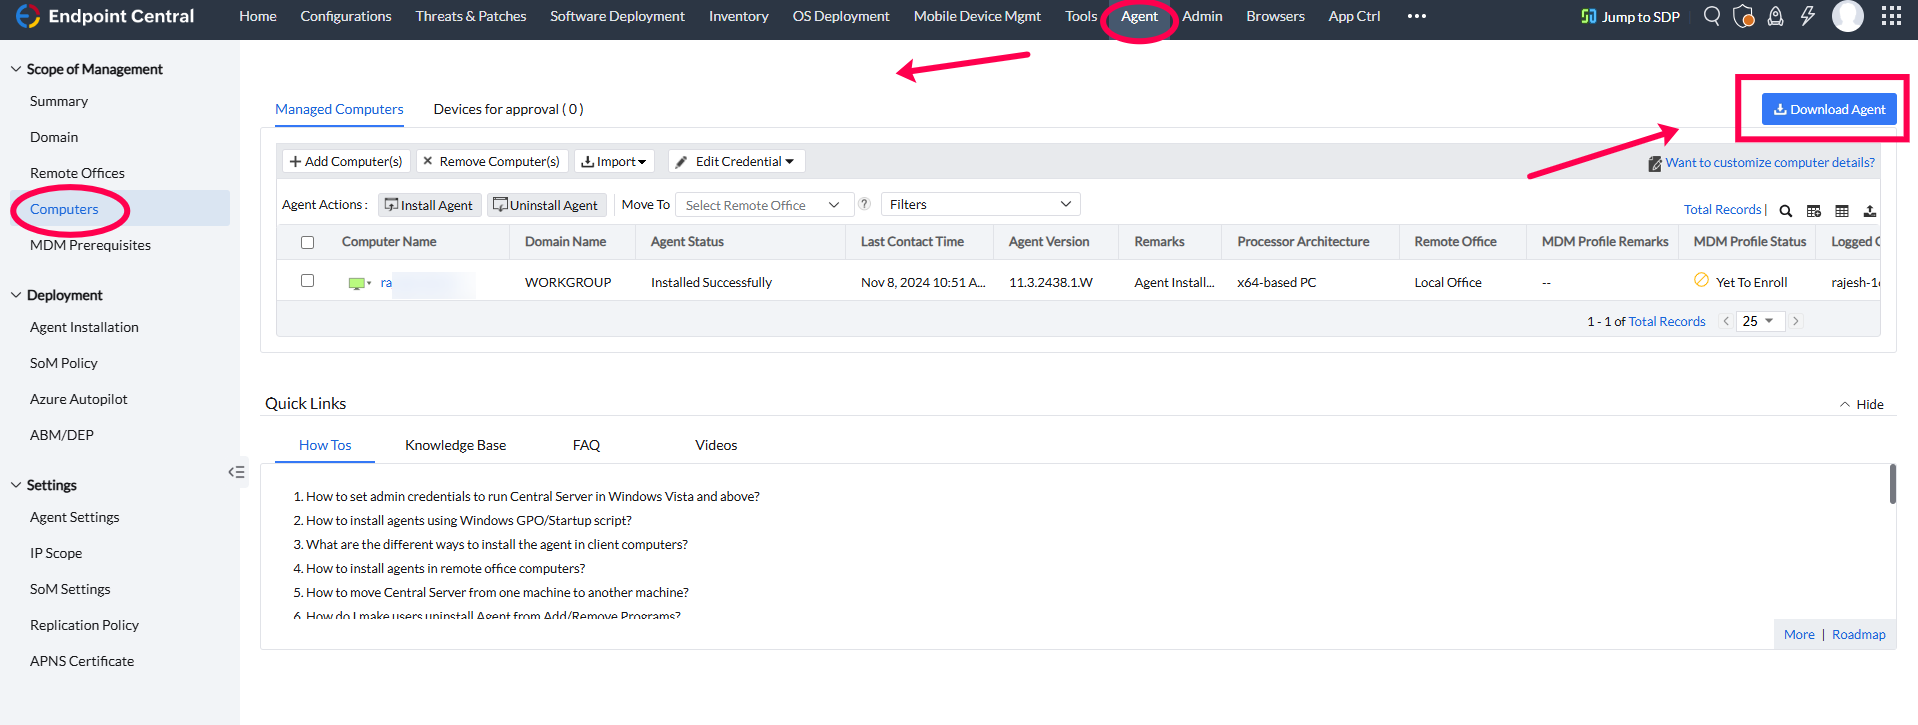
- Navigate to Agent-->Computers Click Download Agent.
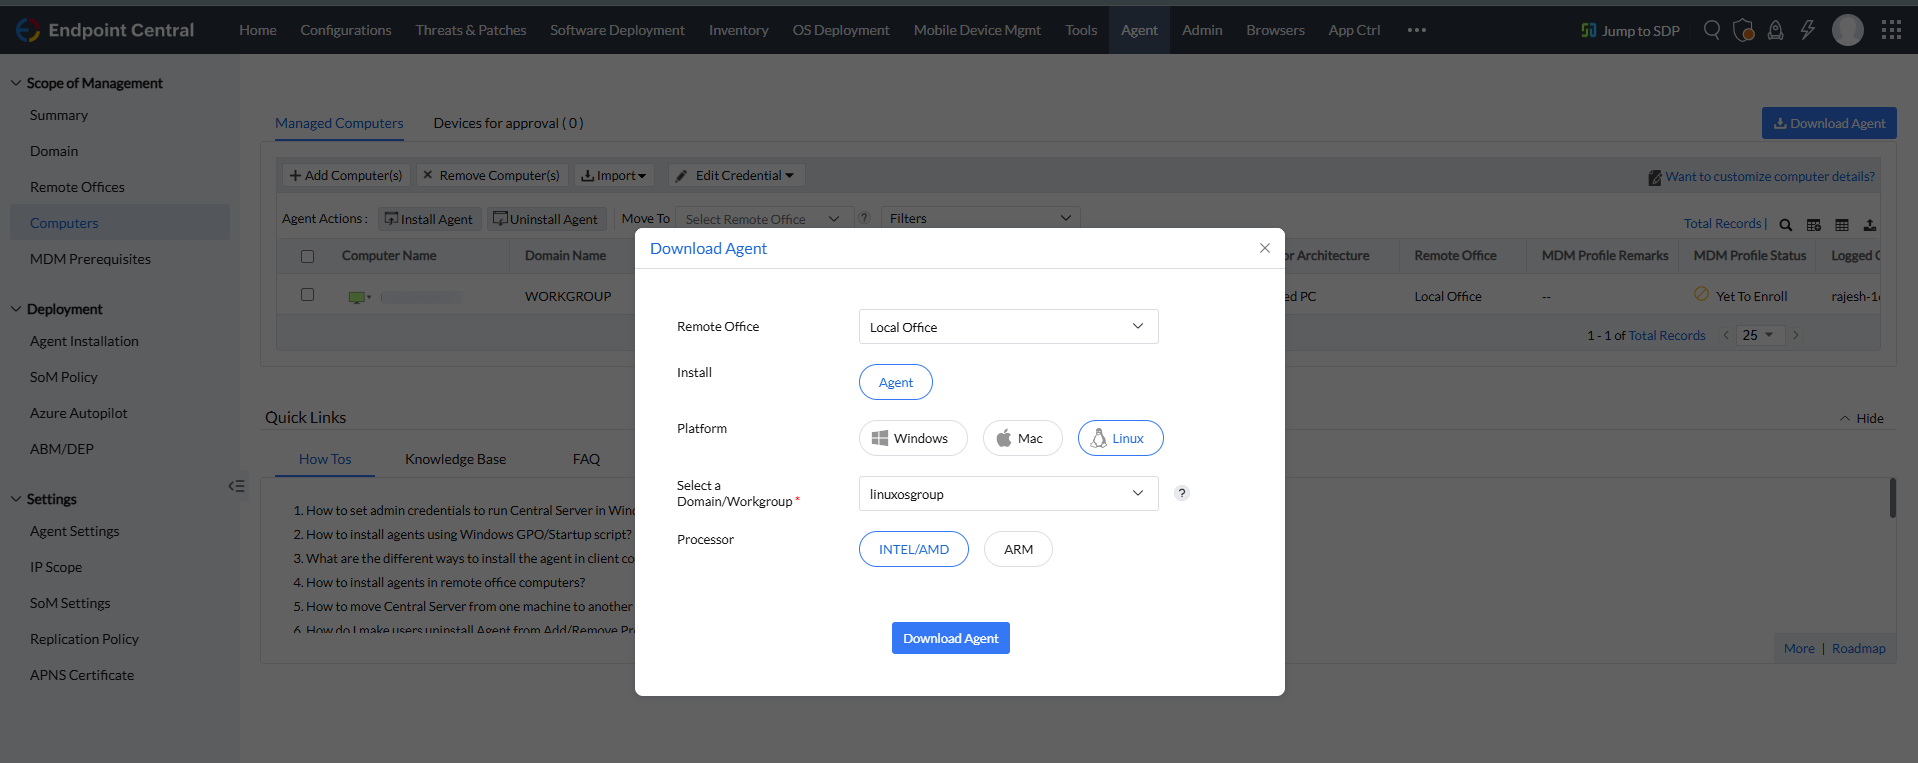
- Select Platform as linux, Select domain/workgroup from the dropdown.
Choose Processor: x86, x64, ARM32, or ARM64.
NoteThe downloaded agent installer name varies based on the processor selected. The following are the agent installer names for each processor type:
- UEMS_LinuxAgent.bin — x86 (32-bit Intel/AMD)
- UEMS_LinuxAgent_x64.bin — x64 (64-bit Intel/AMD)
- UEMS_LinuxAgent_ARM.bin — ARM (32-bit)
- UEMS_LinuxAgent_ARM64.bin — ARM64 (64-bit)
The corresponding ZIP file will be named (remoteoffice_name)_<Agent_Installer_Name>.zip (e.g., (remoteoffice_name)_UEMS_LinuxAgent_x64.zip)
- Copy the Agent to the Target Computer:
- Use
scpto copy the downloaded agent to the remote computer where the agent needs to be installed. - scp (remoteoffice_name)_<Agent_Installer_Name> username@hostname: Path_To_Storage_Directory_If_Needed
- username: Root username of the target computer.
- hostname: Local hostname of the target computer.
- If no path is specified, the agent will be copied to
/home/usernameon the target computer.
- Use
- Install the Agent on the Target Computer:
- Open the terminal and log into the target computer: ssh username@hostname
- Log in as the root user. If not logged in as root, use the
sudocommand and enter the password when prompted to perform each operation.
- Navigate to Downloaded Agent Location:
- Go to the directory where the agent has been downloaded.
Unzip the UEMS Agent:
- Unzip the
(remoteoffice_name)_<Agent_Installer_Name>file using the command:
Command to Unzip the UEMS Agent
- unzip -e (remoteoffice_name)_UEMSLinuxAgent.zip
- Unzip the
- Verify Files:
- Confirm that both
UEMS_LinuxAgent.bin(or the appropriate installer for your architecture) andserverinfo.jsonare in the same directory.
- Confirm that both
Set Executable Permissions:
- As a root user, make the installer executable with the following command (replace
<Agent_Installer_Name>with the applicable file name):
Command to Set Executable Permissions
- chmod +x <Agent_Installer_Name>
- As a root user, make the installer executable with the following command (replace
Run the Installer:
- Execute the installation command as follows (replace
<Agent_Installer_Name>with the applicable file name):
Command to Run the Installer
- ./<Agent_Installer_Name>
- By default, the agent will be installed in the
/usr/local/manageengine/uems_agent/directory. To install the agent in a different folder, use the -d argument with the installer and enter your preferred path:
     eg:  ./UEMS_LinuxAgent_x64.bin -d /opt
 Now agent will install on /opt/manageengine/uems_agent/ path
- Execute the installation command as follows (replace
Installing Linux Agents Remotely from the Web Console
For computers within the LAN, agents can be installed by selecting the desired computers and invoking agent installation through the web console:
Configure Credentials in Linux Agent Settings
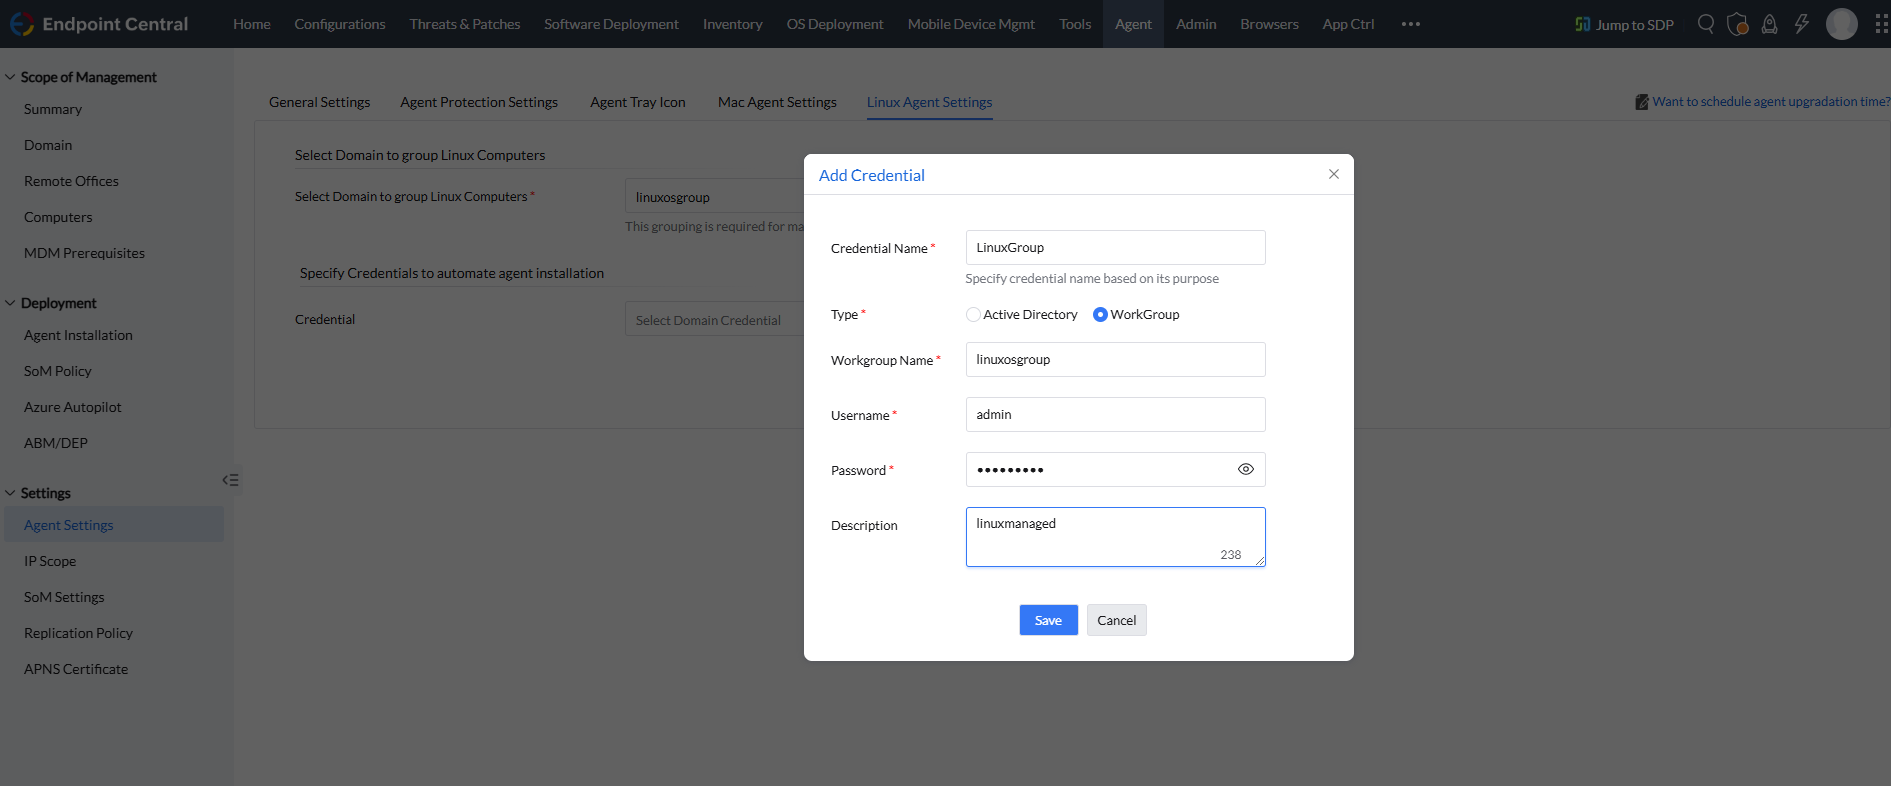
- Go to Linux Agent Settings under Agent Settings on the Agent tab.
- Click Add Credentials to add a new credential.
- Enter Credential Name, Type, Domain, Username, and Password, then click Save.
- Select the credentials and click Save Changes.
Note- These credentials will be used for SSH access to the Linux machine to perform the agent installation. Ensure that the credentials have SSH access and
sudopermissions for installation. They are not used by the agent for any other purpose. - If you are facing trouble with SSH access click here.
- For invoking the installation on client computers, the SSH port (default port 22) should be open on the computers where the agent needs to be installed. The SSH port is used only for agent installation purposes and not for agent-server communication.
- Add the Computer to the Scope of Management (SoM)
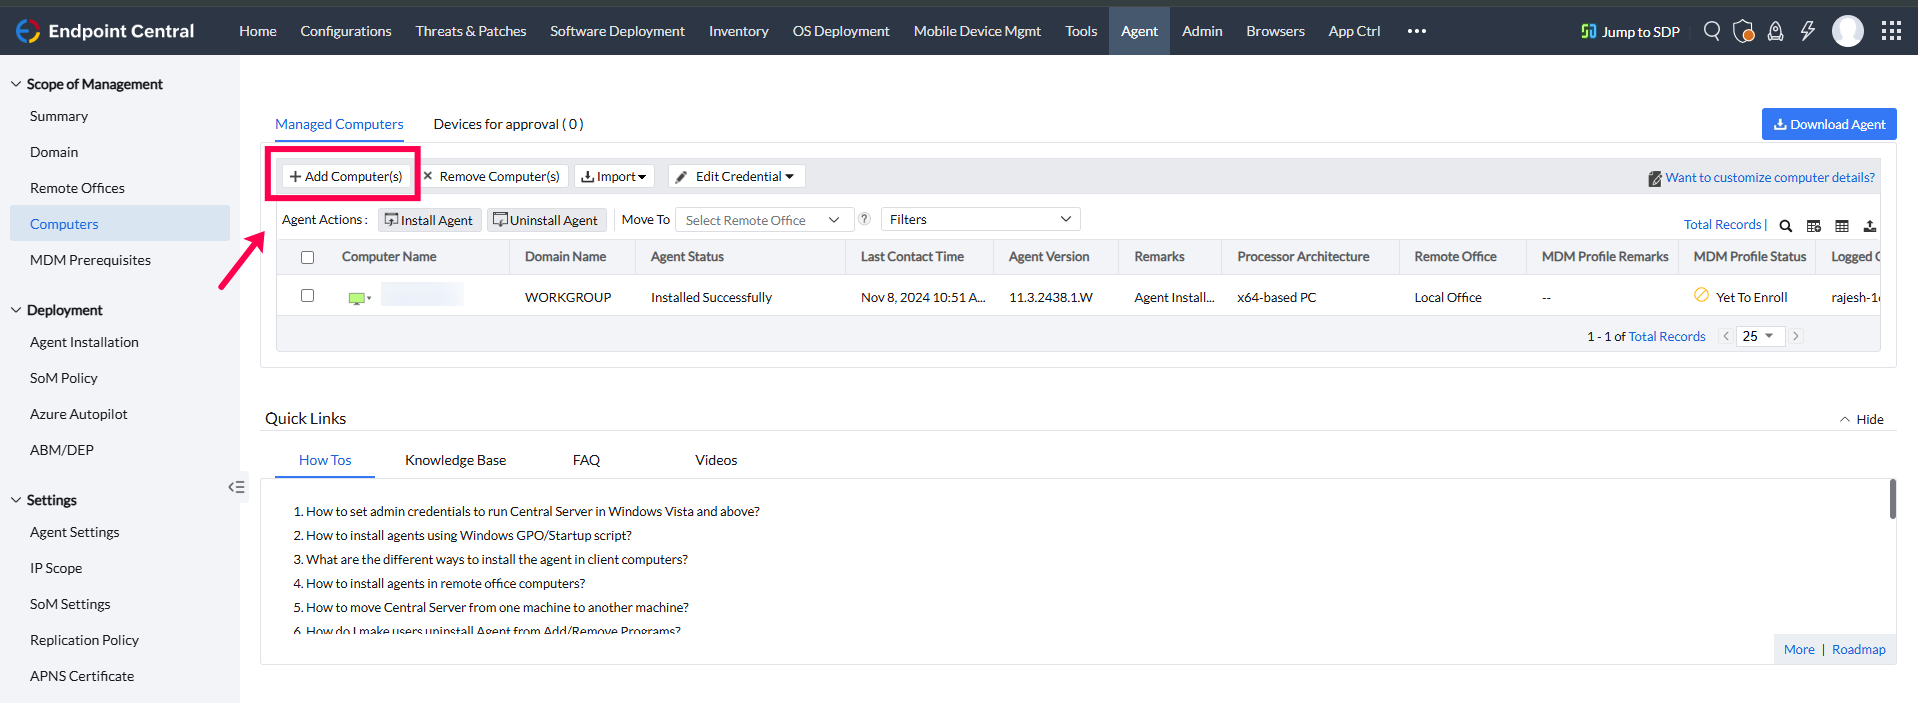
- Navigate to Agent > Computers and click the +Add Computer(s) button to open the Add Computer popup.
- If you've added a domain:
- Choose your domain from the dropdown.
- Select the computer(s) you want to add and click Next.
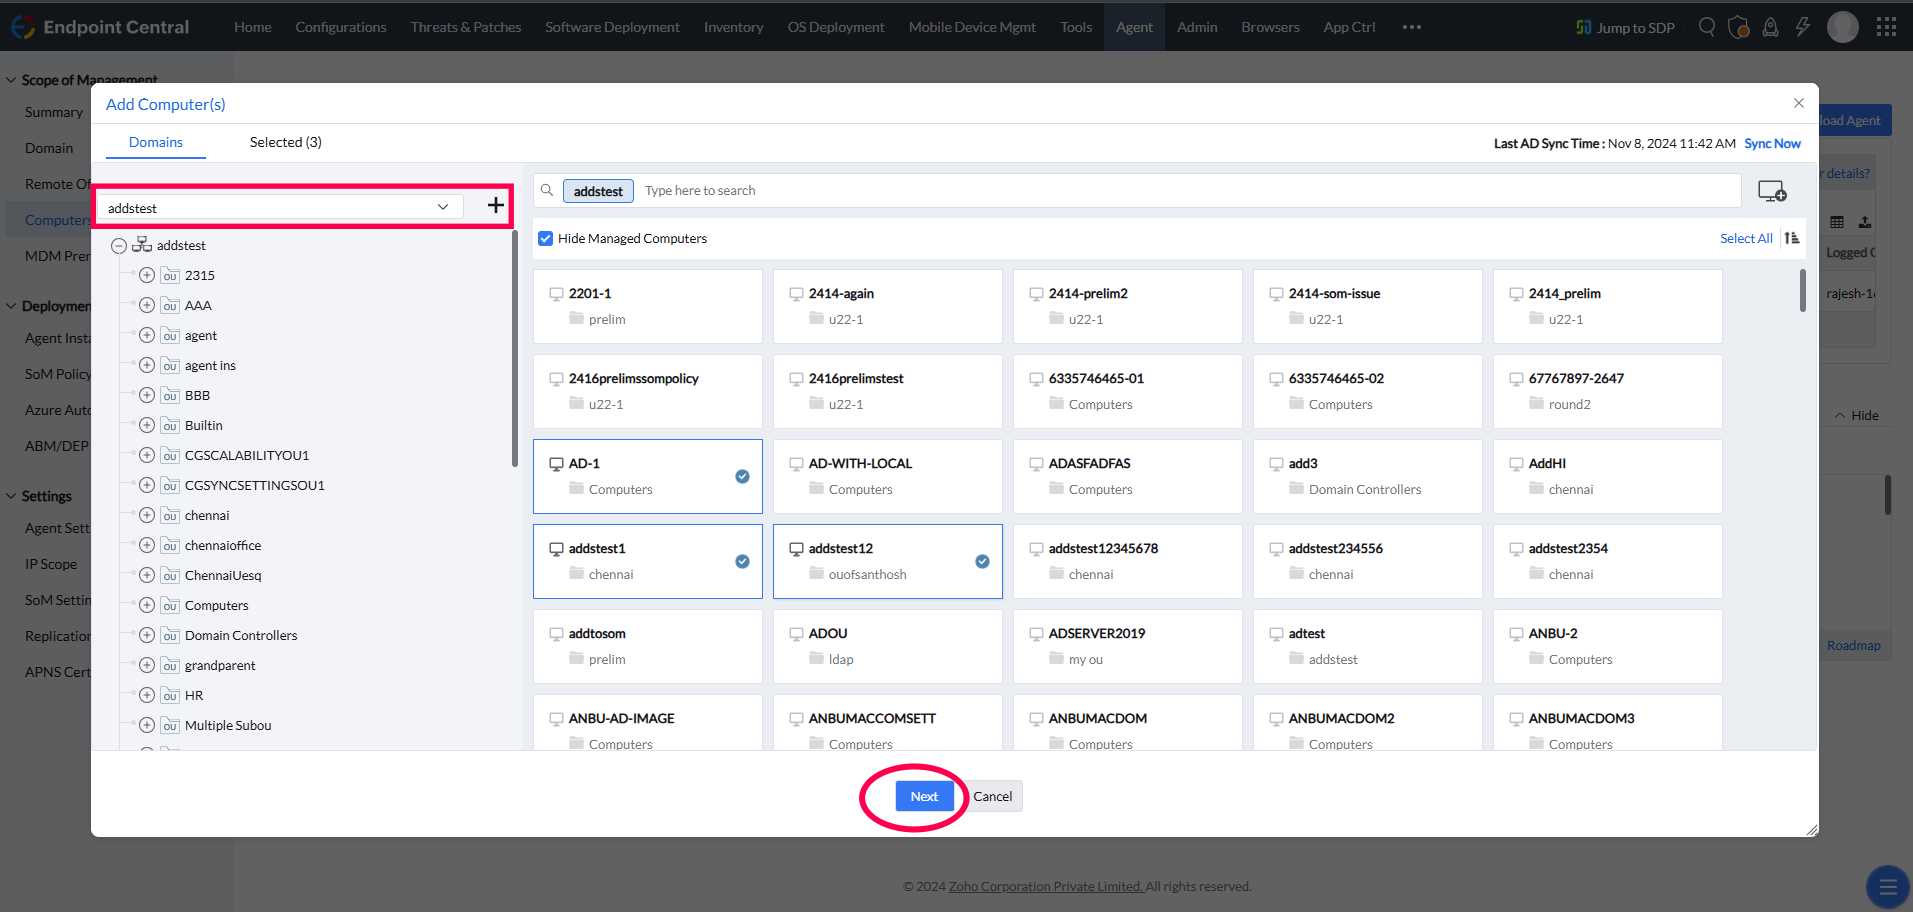
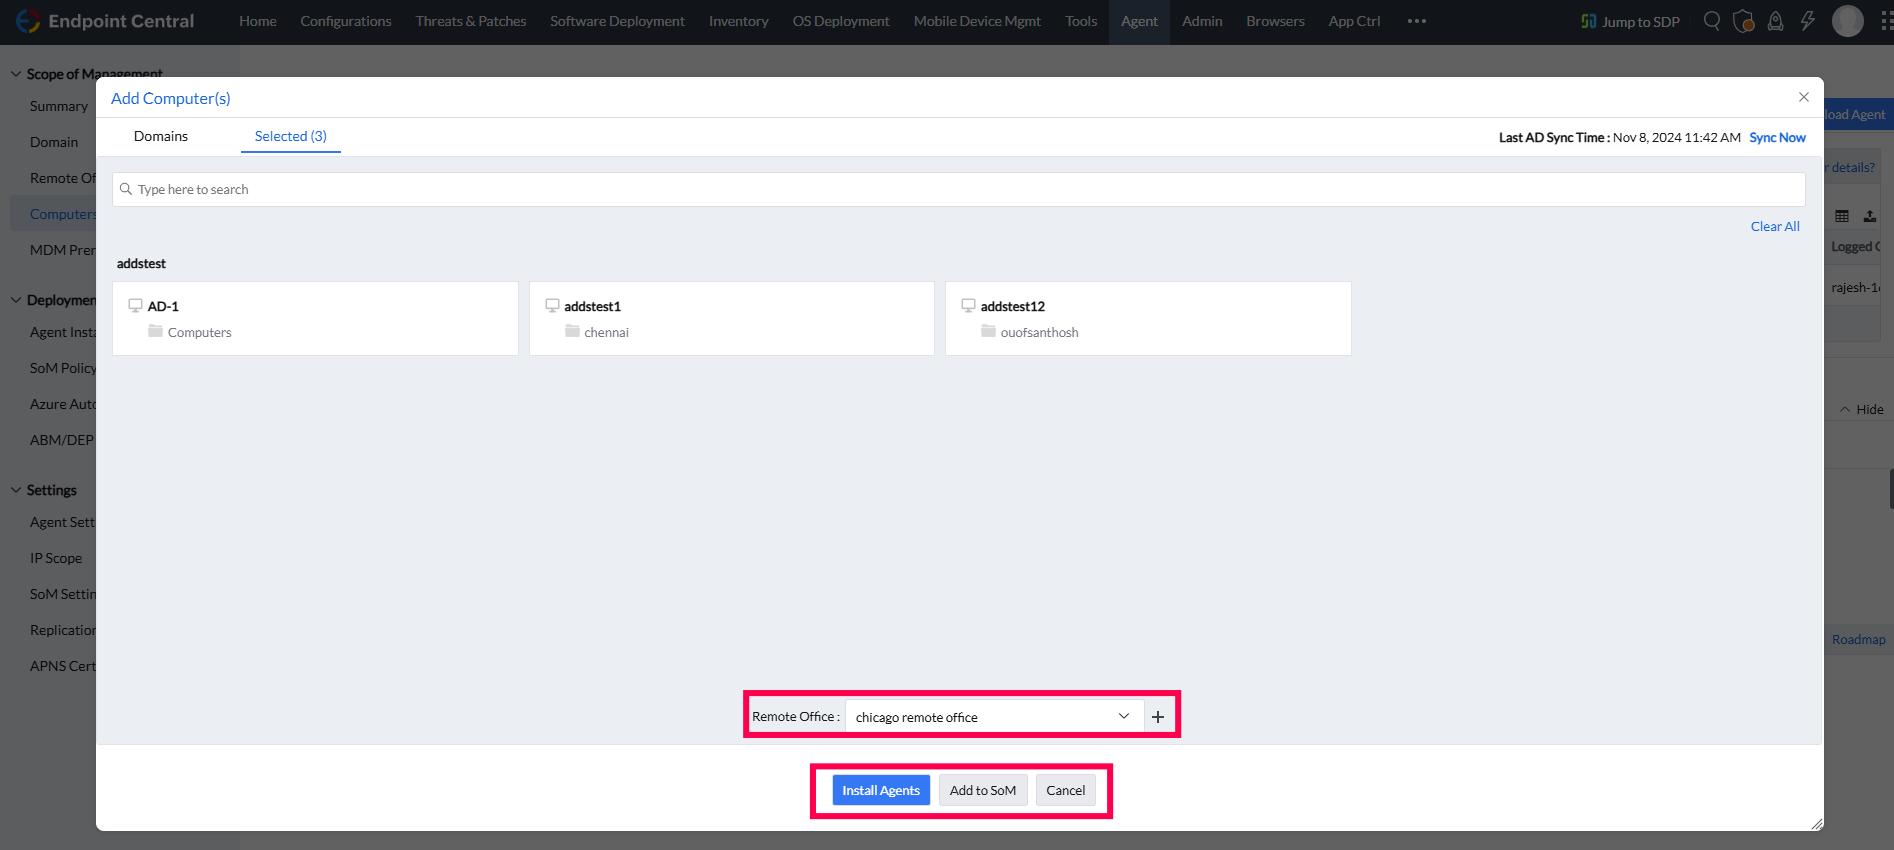
- The selected computer(s) will now list in the next screen. Here, you can:
- Choose the Remote Office from the dropdown.
- Click Install Agents to start installation immediately, or click Add to SoM to add the computer(s) to the Computers page for later installation.
- Alternatively:
- Click the computer icon in the upper-right corner.
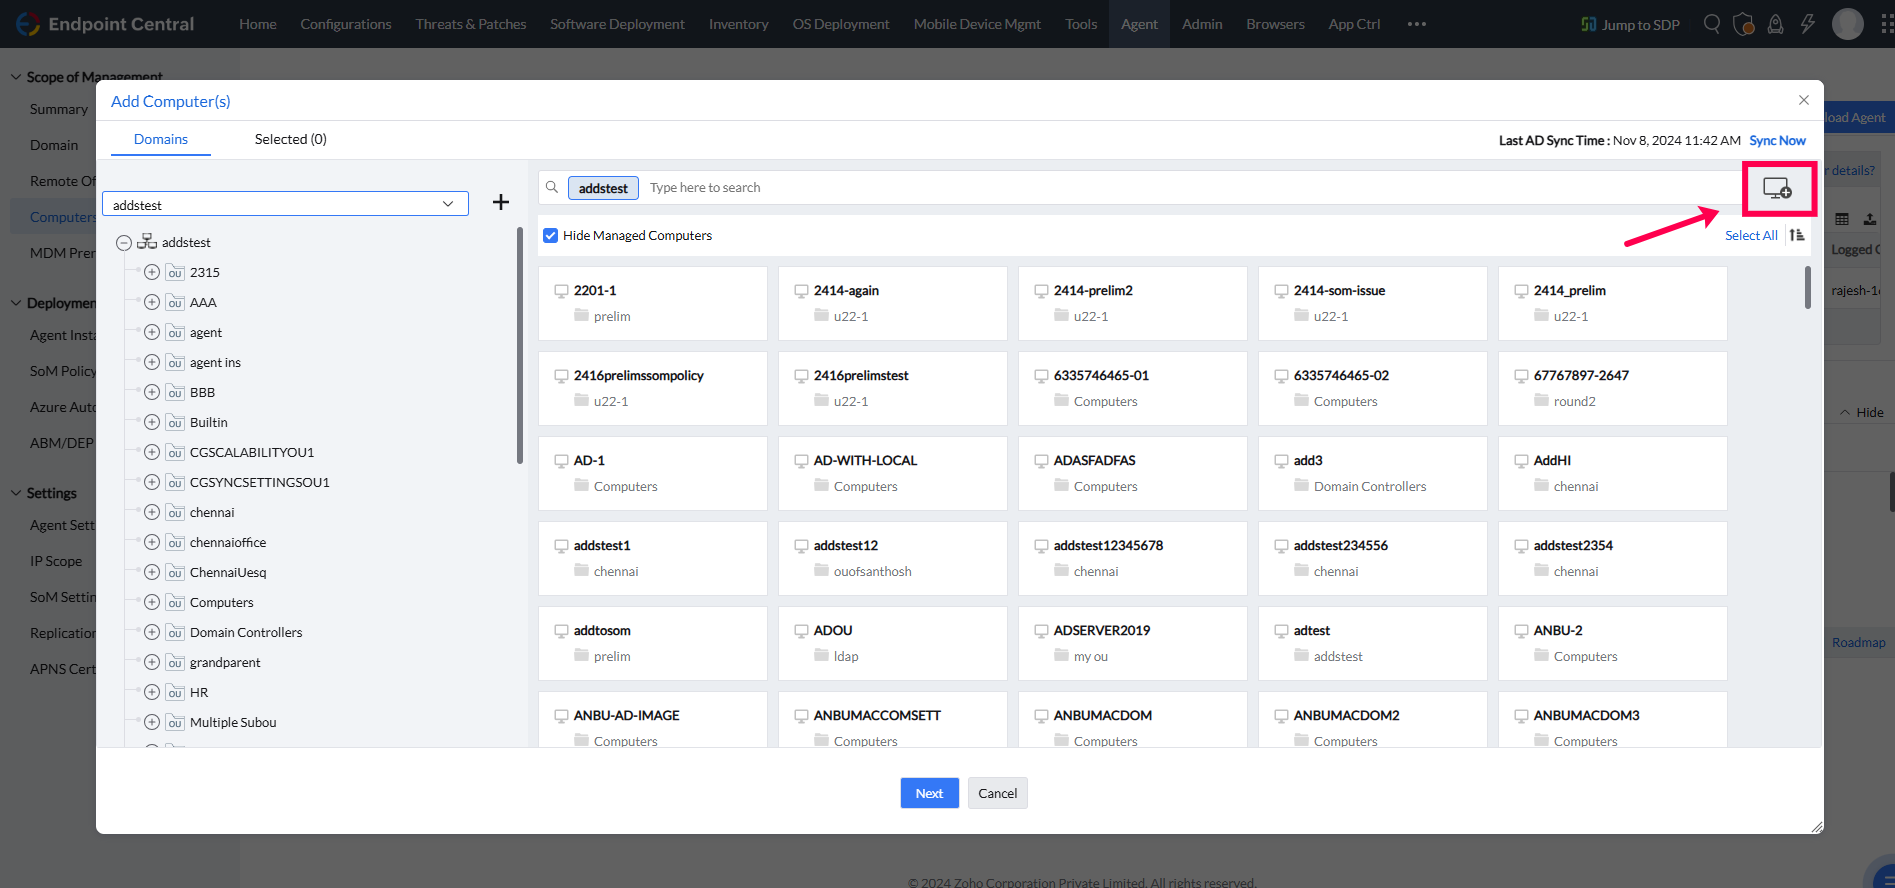
- Enter the name(s) of the computer(s) to add, separated by commas if adding multiple (e.g.,
computer1, computer2). - Press Enter to add the computer(s).
- The selected computer(s) will display in the list. Choose the Remote Office and click Install Agents for immediate installation, or Add to SoM for later installation.

- Click the computer icon in the upper-right corner.
- Navigate to Agent > Computers and click the +Add Computer(s) button to open the Add Computer popup.
- Initiate Agent Installation
- Click the Install Agent Icon in the left corner.
- Agent installation will be initiated.
Installing Linux Agents Using IP Range or SSH Keys
To install Linux agents using a Distribution Server or AWS, follow the steps mentioned on the designated installation page.
Installing Linux Agents Using Linux OS Imaging
To install Linux agents using Linux OS Imaging, follow the steps mentioned on the designated installation page.
How to Uninstall Linux Agent
Manual Uninstallation
- Navigate to the Agent Installation Directory: cd /usr/local/manageengine/uems_agent/
- Set Executable Permissions: chmod +x RemoveUEMSAgent.sh
- Run the Removal Script: ./RemoveUEMSAgent.sh
- OTP Prompt: (if Agent Protection Settings enabled) you will be prompted to choose between GUI or CLI for input and provide the OTP Learn more about Agent Protection Settings.
- Agent will be uninstalled.
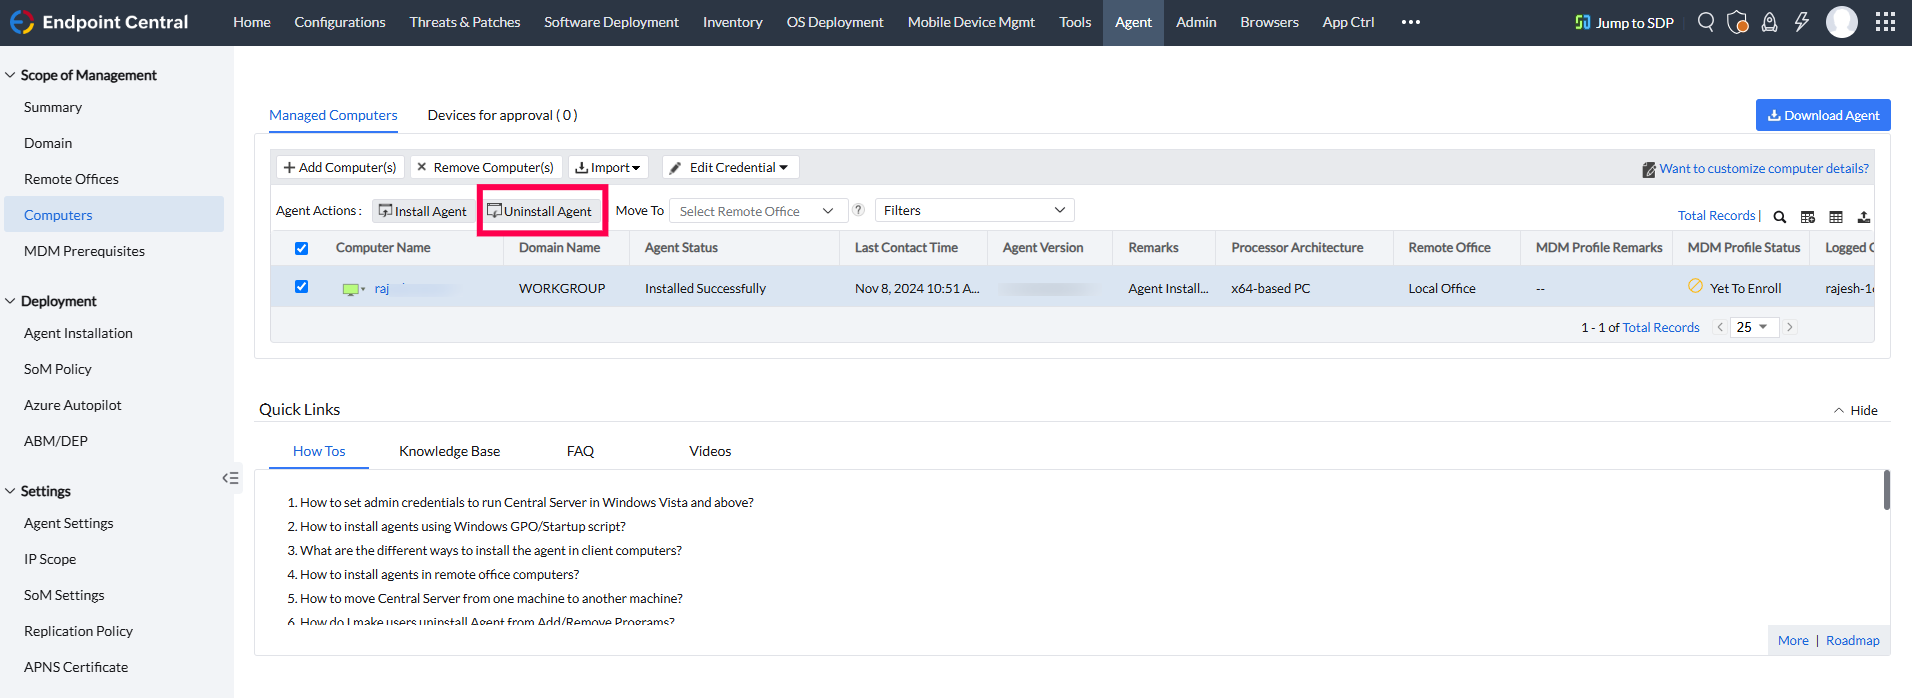
SOM Uninstallation
- Remove from SOM: Removing the computer from SOM will trigger the agent uninstallation on its next refresh cycle or immediately if the NS is live and marked as "green".
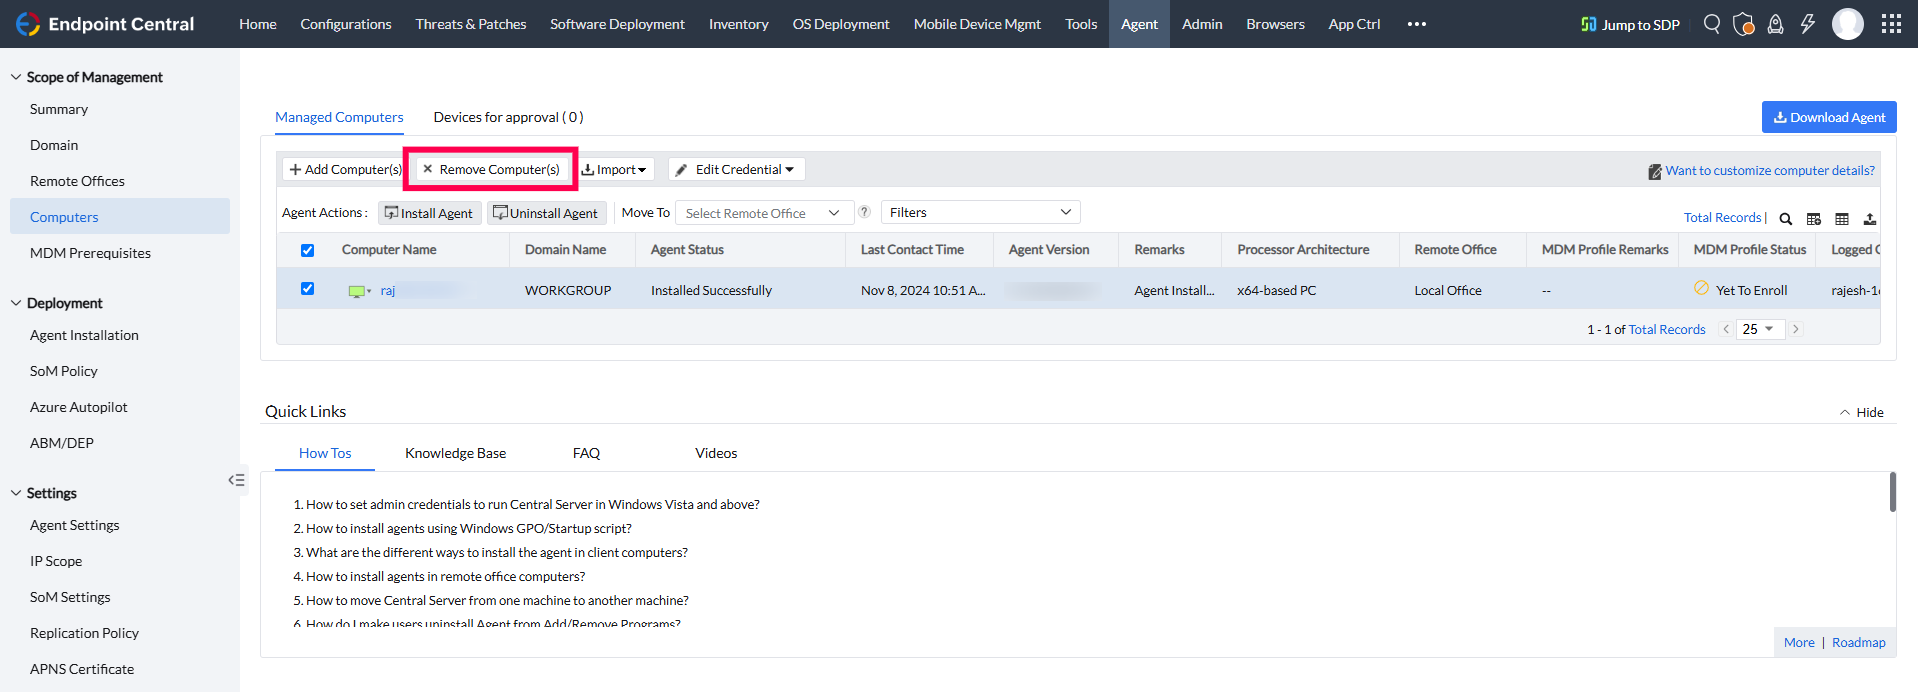
- Uninstall via Server Trigger: Selecting "Uninstall Agent" from the server will initiate an SSH-triggered uninstallation. This is applicable for On-Premises (local & DS) as well as Cloud DS deployments. This option is not available for MSP.
Conclusion
This guide provided the necessary steps to install, configure, and uninstall UEMS Linux agents on supported systems using manual, remote, and distribution-based methods. Follow the outlined instructions for seamless agent management on Linux systems.