Agent is a lightweight software that is installed on the computers that are required to be managed by Endpoint Central. This software will help you implement and execute all the policies distributed to those computers.
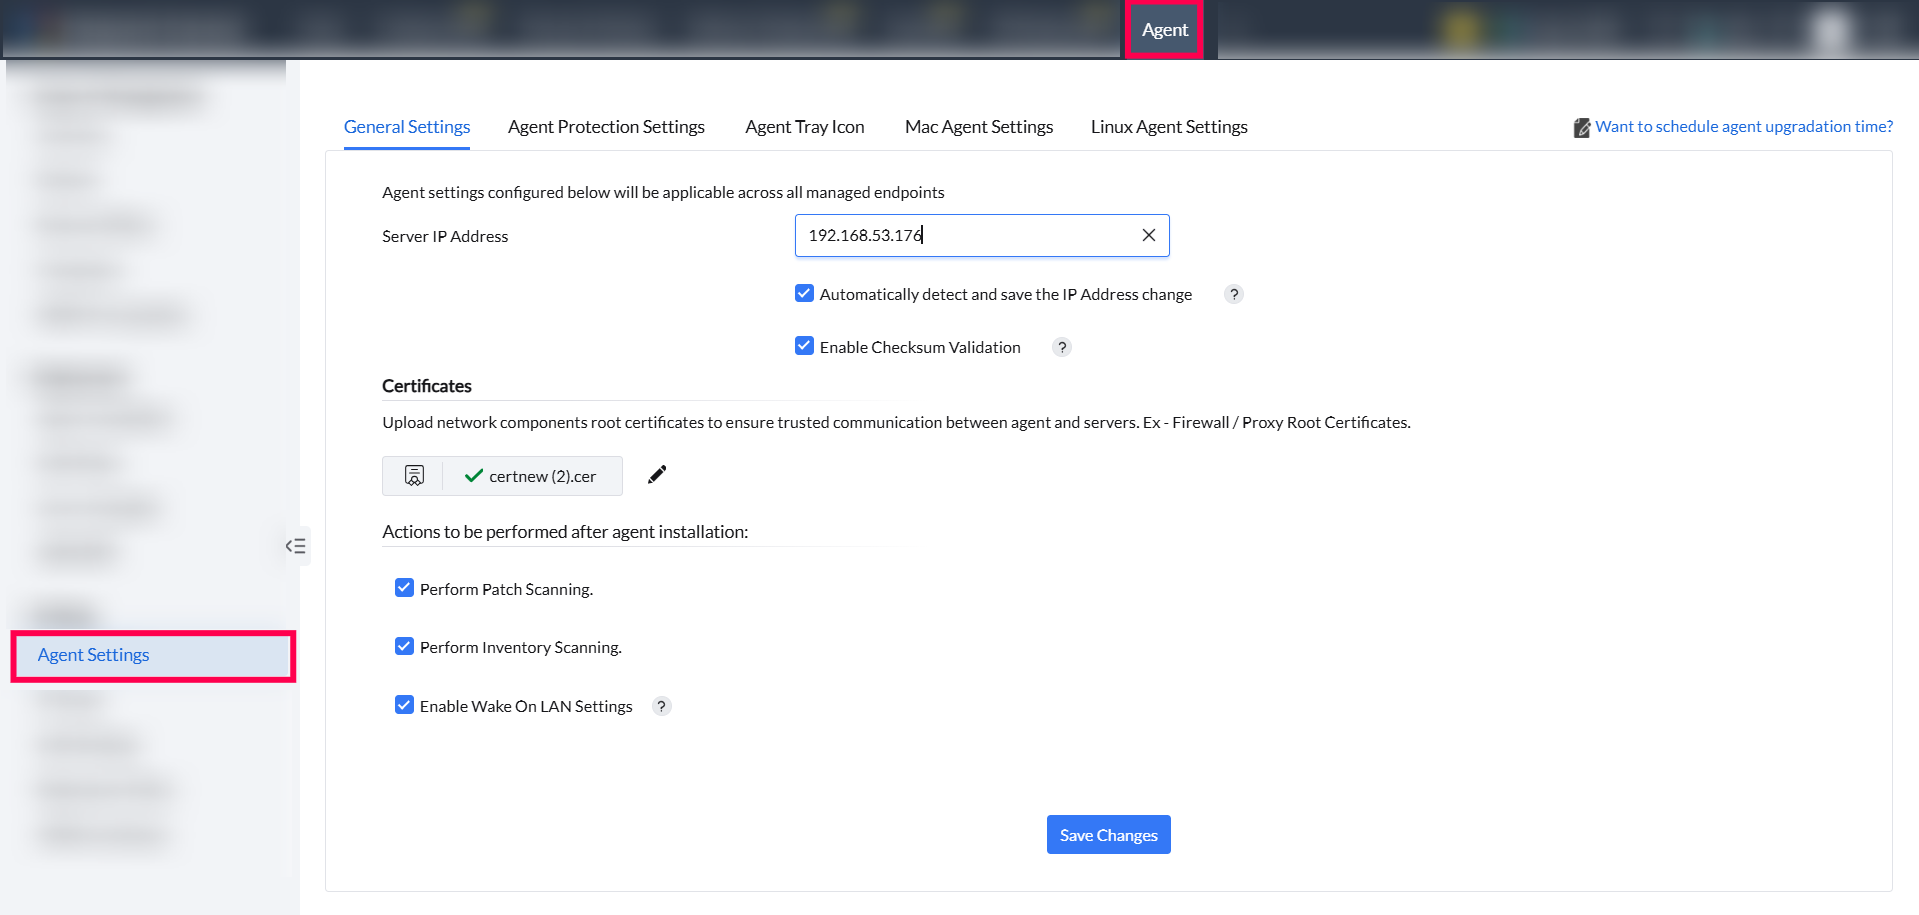
Endpoint Central's agent settings allows you to customize the agent functioning according to your business use-cases. To configure the agent settings, navigate to Agent > Settings > Agent Settings.
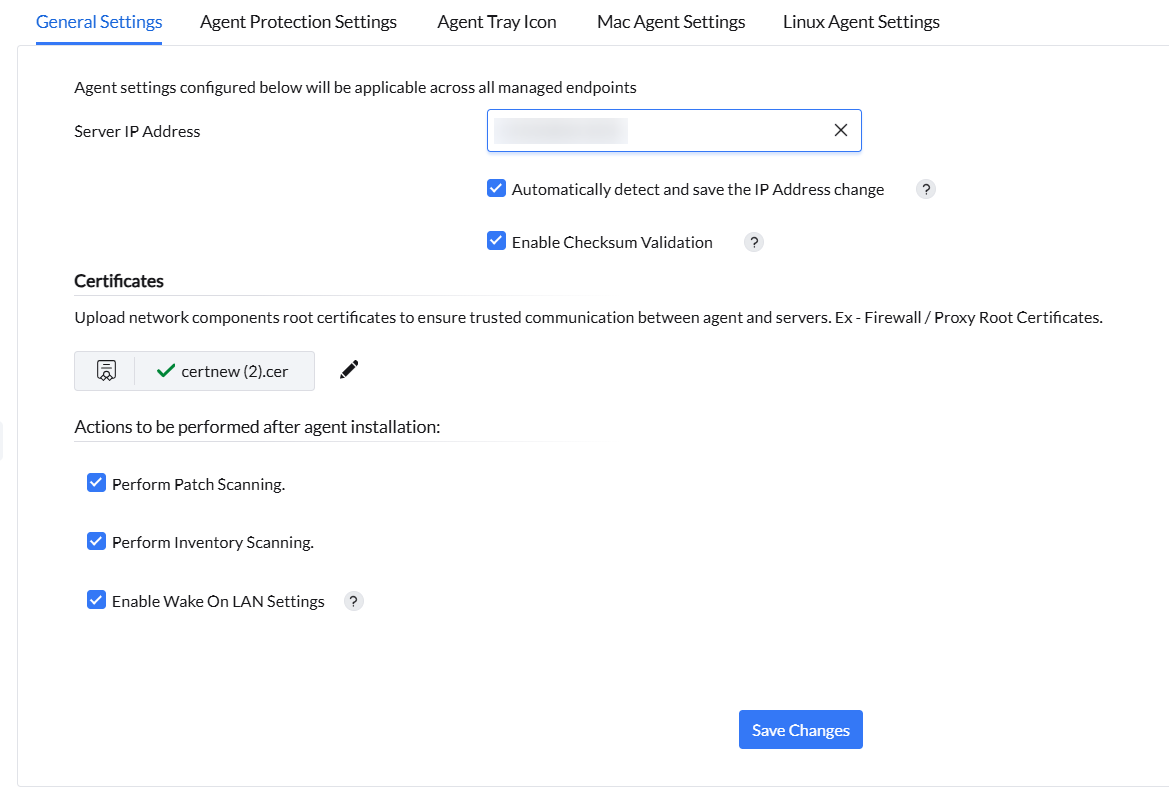
Under General Settings, you can add your central server's IP address. In addition, you can allow your agents to detect automatically and save the updated IP address of the server.
You can allow the agents to perform a checksum validation before downloading any binaries from the server.
You can configure the actions like performing patch scanning, performing inventory scanning, enabling wake on LAN settings, that needs to performed right after your agent installation
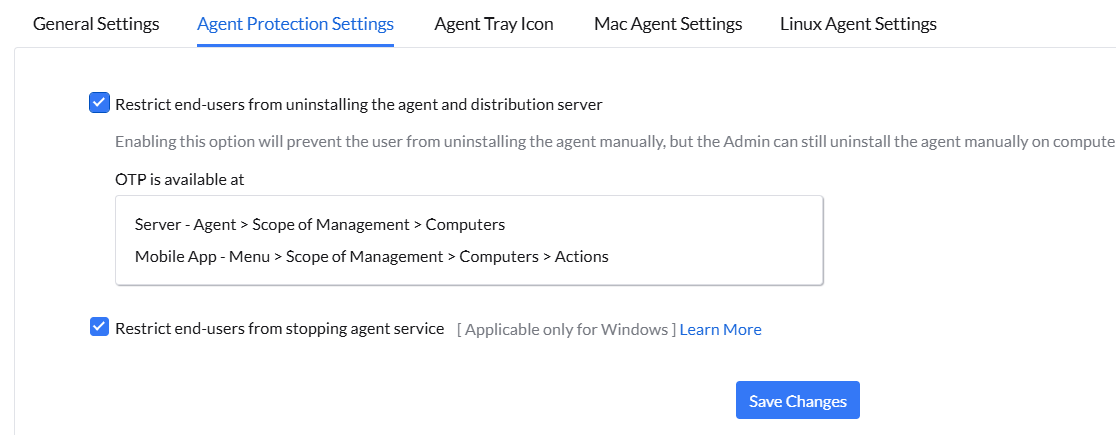
This customization is available to provide a baseline security standards to your agents. This includes restricting end-user from uninstalling the agent on their own and stopping the agent's service.
If you enable the option, "Restrict end-users from uninstalling the agent and distribution server" and click Save, it will prevent the user from uninstalling the agent manually, but the Admin can still uninstall the agent manually on computers through OTP.
The OTP for uninstalling the agent can be viewed on the console by navigating to Agent > Scope of Management > Computers. It can also be viewed in the Mobile App by navigating to Menu > Scope of Management > Computers > Actions
Kindly note that reboot is not necessary after enabling or disabling the agent protection settings.
If you enable "Restrict end-users from stopping agent service" and click Save, Manageengine UEMS-Agent service cannot be found in the Services console. Kindly note that it applies only for Windows.
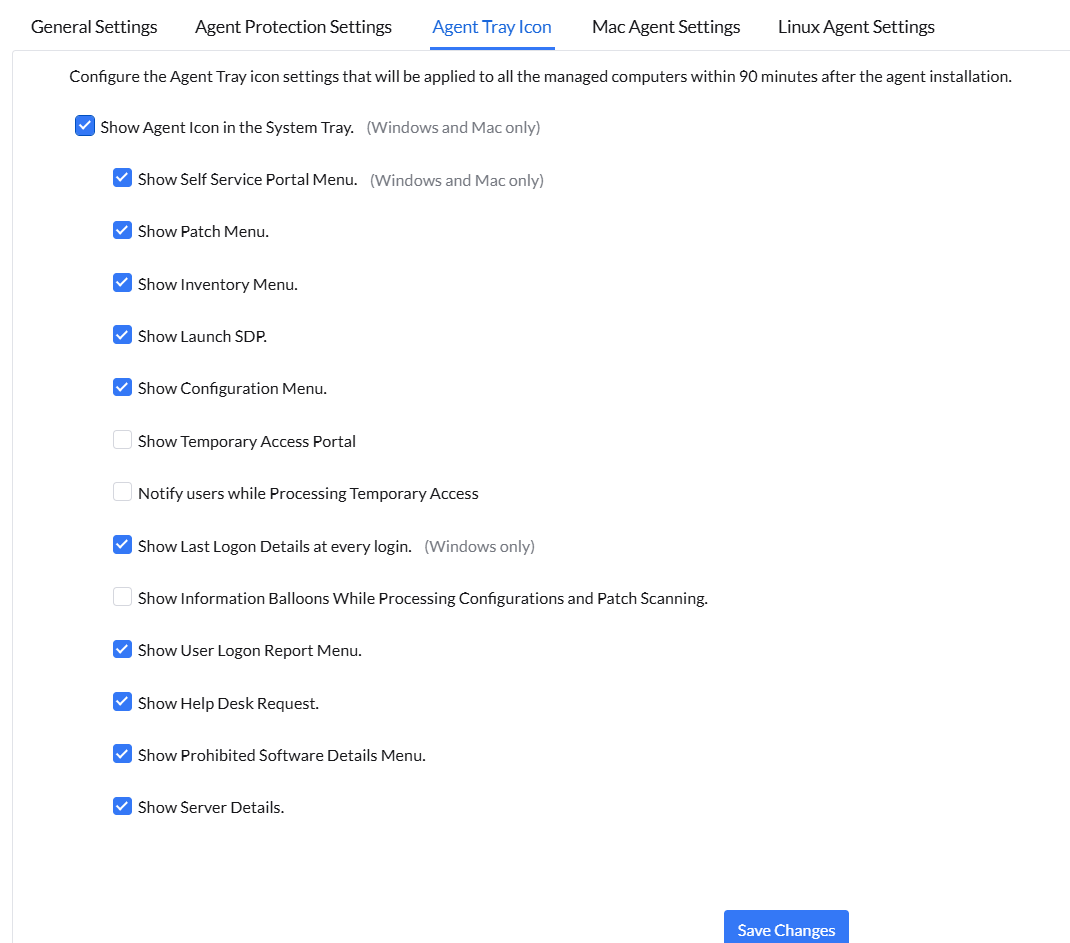
Agent tray icon is a self-service meta functionality that helps end-users to access the required services in order to contact the central server. These include, self service portal, patch scanning, inventory scanning, launching helpdesk, applying configurations on-demand, and troubleshooting agents. To customize this, navigate to Agent > Settings > Agent Settings > Agent Tray Icon. A list of options will be available for you to customize and personalize the end-user's experience.
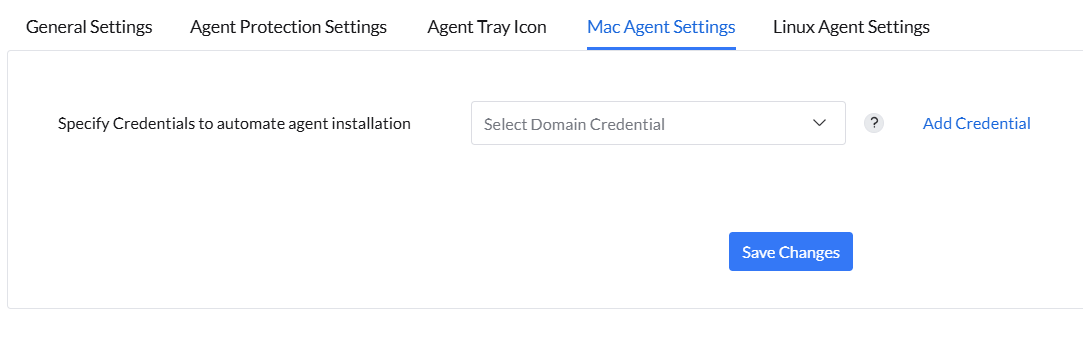
This settings is available to simplify your agent installation process on endpoints running on mac. The provided root credential will be used to install agents across all the mac computers in your network, irrespective of the domain they belong to. Ensure that the user has "sudo" permissions. Make sure that remote login is enabled on all the target mac computers.
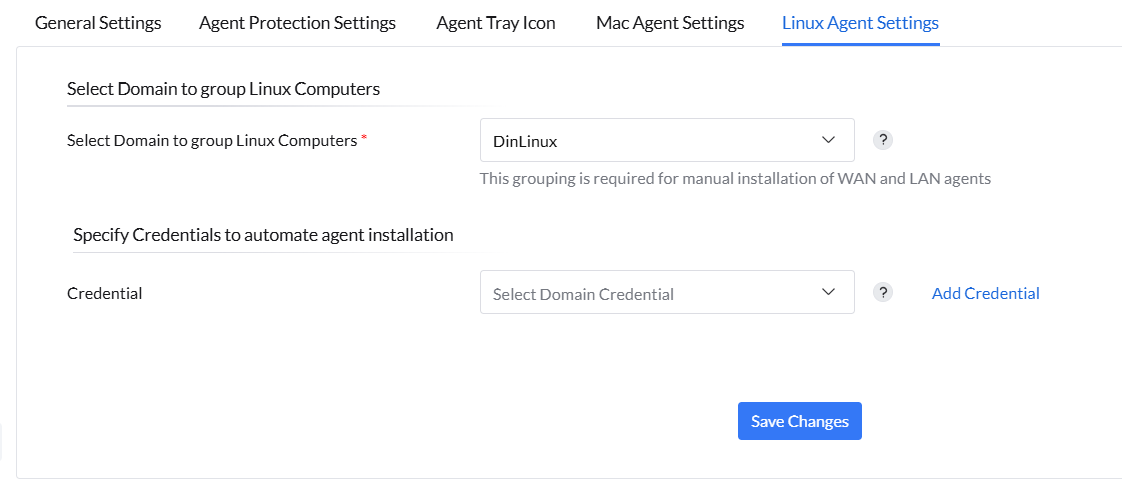
Under this settings, you can group your Linux machines to a domain. The Domain selected here will be used to group all the Linux computers in your network to that domain or workgroup for the LAN/WAN agents that are installed manually. Agents that are pushed remotely from Scope pf Management > Add Computers will be shown under the respective Domain/Workgroup from which they are added. This will facilitate your agent installation process for Linux.
In addition, you can specify a credential to streamline your agent installation process for Linux similar to Mac. This root credential will be used to install agents across all the Linux computers in your network, irrespective of the domain they belong to. Ensure that the user has "sudo" permissions. Make sure that remote login is enabled on all the target Linux computers.