
Viewing the Asset List
Software licenses, PCs, mouse, keyboard, network cables, head sets, memory cards, sound card, and any such IT-related items are termed as assets. Product is the term used to represent an asset group. For example, Compaq PC is an asset component. This component will have all the Compaq PCs bought by your organization grouped under it. If you have bought 20 Compaq PCs, then each of these PCs will have a unique asset name associated to it and will be grouped under the Compaq PC component. As defined earlier, any IT-related item purchased by your firm is termed as asset. A workstation is a term used to indicate a collection of assets, with a physical location and network address. When a PC asset is allotted to a user in your organization or to a department in your organization for a specific purpose and is given a physical or logical location, it becomes a workstation.
You can track your assets with the help of ManageEngine ServiceDesk Plus application. You can view the list of assets owned by your organization if you have already entered the details into the application.
To view the various assets owned by your organization
-
Log in to the ServiceDesk Plus MSP application using your user name and password.
-
Click the Inventory tab in the header pane.
-
Click the Asset Summary link in the left menu under the Views block or click Show All link in the Asset dashboard in the inventory home. This displays the View Assets page where the various asset product name (and type) are listed along with the number of assets available in each of them.
To view the individual assets under each of the asset components
-
In the View Assets page, click on the product name to view the list of assets available in it.
-
In the Assets list page, click the Asset Name to view/edit the details of the specific asset.
Viewing Assets Based on Filters
You can apply filters at various levels while viewing the assets. The View Assets page displays the high level of asset classification, which is the asset product name and type classification. Here you can filter the assets based on the asset Component Type. In the Assets list view page of each product component, you can apply more filters on the assets that need to be displayed, such as viewing only unassigned assets or not in contract assets. You can apply single or two levels of filters to view the list of assets such as viewing unassigned assets belonging to a particular asset component or not in contract asset belonging to a particular asset component.
Whenever you buy an asset, you can add the asset to the existing list. To add a new asset
-
Click the New Asset link in the header pane below the tabs. The New Asset form is displayed and it has two sections: Asset Details and Asset Allocation. If you have added your own custom fields in the new asset form, then there will be a third block Additional Asset details. Alternatively, you can open the New Asset form, by clicking the New button in the Assets list page. The Product Name and the Asset Name are mandatory fields in this form. The product name is a combo box with the list of products names available in the application.
-
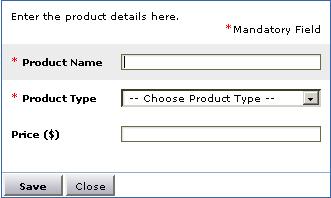
From the Product Name combo box, select the product of your choice. If the product is not available in the list, click Add new link available beside it. (This link will be visible only for the administrator).
-
Enter the Product Name in the pop-up window.
-
From the Product Type combo box, choose the type to which the added product belongs.
-
Enter the Price of the product as mentioned by the vendor.
-
Click Save. The new product is added and selected. If you have entered the price of the product, then the same will be displayed in the Asset Cost field.
-
Enter the Asset Name. This needs to be unique and cannot have duplicate values.
-
The other fields, such as Asset Tag, Asset Serial No., Bar Code of the asset, Vendor Name, Asset Cost (in $), Acquisition Date, and Expiry Date are optional. If you have the respective information and wish to maintain those details, then you can enter the same in the form.
-
You can also indicate if the asset has been leased or not by selecting the check box Is Leased. If the lease start and end date are available then the same should be entered in the Lease Start and Lease End fields by choosing the date from the calender icon.
-
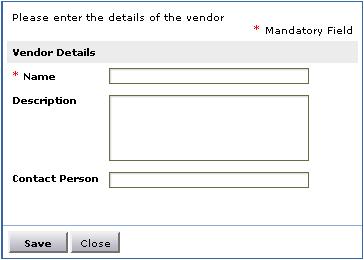
If the vendor name who supplies the asset is not available in the Vendor Name combo box, click the Add new link available beside it (This link will be visible only for the administrator). The Add New Vendor window pops up.
-
Enter the name of the vendor, description, and the name of the contact person in the pop-up window.
-
Click Save. The added vendor is selected and is displayed in the combo box.
-
Enter the relevant information for the Additional Asset details section if it is available.
-
If you want to allocate the asset to a user or department you can do so by entering the required information in the Asset Allocation section. This is also an optional section. Choose department or user from the Allocate To combo box.
-
The Owner Name combo box is filled with the relevant groups of values from which you can choose.
-
Click Save. The added asset will be listed.
To add more assets under the same product name, click the Save and add new button. This saves the added asset and opens the New Asset form with the details of the added asset. Change the required fields and click Save when you are done with adding all the assets. The added assets will be listed. You can import assets from a CSV file.
To import assets from a CSV file
Step 1: Locate the CSV file
-
Click Import from CSV link in the View Assets page. The Asset Import Wizard opens in a pop-up window.
-
Click the Browse button in the wizard.
-
Select the CSV file in the file chooser window and click Open.
-
Click Step 2.
Step 2: Customize Mapping
-
The CSV column names are populated in the select boxes beside each label. Map the ServiceDesk Plus asset details fields with the field names from the CSV file.
-
Click Step 3.
Step 3: Import
-
If you wish to update the details of existing assets, then select the check box If asset already exists, update existing details. If you do not select it, then the already existing asset data will not be overwritten and only new records will be added.
-
Click Import Now button. The values from the CSV file will be imported to the Asset details. Once the import is complete, the data on how many records were added, how many overwritten, and how many failed to import.
If at any point you wish to stop importing from the CSV file, click the Close button.
|
|
Note: Asset Name column will be the identifier for Asset, that is, no two assets can have same Asset Name. An asset will be checked for existence depending on the Asset Name value. |
To edit the asset details
-
In the View Assets page, click the product name.
-
Click the Asset Name in the Assets list page. The asset information is displayed in a editable form.
-
Change the values for the various fields in the form. Except for the Product Name, you can edit all the other fields in the form.
-
Click Update. If you entered wrong information in the form and want to get back to the old details, then instead of Update click Reset.
To make copies of an asset
-
In the View Assets page, click the product name.
-
Click the Asset Name in the Assets list page. The asset information is displayed in a editable form.
-
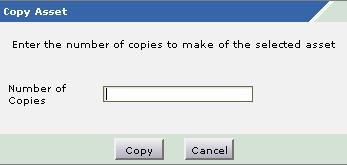
If you wish to make any changes to the asset information, you can do so. Else, just click the Copy button at the end of the form. The Copy Assets window pops up.
-
Enter the number of copies that you wish to make in the field. The maximum asset copies that you can make at a time is 99.
-
Click Copy. The required number of copies of the asset are created and the asset name will be of the format <old asset name> - <number>. The number will start from 0. You can view the list of copied assets in the Assets page.
You can use this feature to add all the existing assets in the same type where all the details of assets will be retained and at the same time the asset name will still be unique.
You can delete assets from the assets list page. To delete assets
-
Click the Product name in the View Assets page to display the assets list page of that product component.
-
In the Assets list view page, select the check box provided beside the asset names that you wish to delete.
-
Click Delete. A confirmation message asking whether to continue with deletion or not is displayed.
-
Click OK to continue with the asset deletion, or else click Cancel. If you click OK, the selected assets are deleted from the assets list.
To allocate assets to users or associate them with workstations
-
Click the Product name in the View Assets page to display the assets list page of that product component.
-
In the Assets list view page, click the asset name which you wish to allocate to a user, or workstation, or department.
-
In the Edit Asset form, in the Asset Allocation section, select workstation, or user, or department in the Allocate To field.
-
In the Owner Name field, select the name of the specific owner (workstation name, or user name, or department name).
-
Click Update.