Creating a connection
Last updated on:
In this page
Overview
A connection in Log360 Cloud provides the actual credentials or authorization details required to access an external service. Once created, connections can be reused across multiple areas of the product, including Custom Widgets, Custom Functions, Marketplace applications, and automated workflows.
This page explains the steps required to create a connection using any supported authentication type.
In the window that opens, click Create Connection.

Setting up an agent-based connection
When creating a connection for an agent-based service, an agent is automatically selected by default. Log360 Cloud attempts to test the connection using this agent. If the test fails (for example, if the agent cannot reach the external service), you will be prompted with options such as Select another agent or Install a new agent.
To continue with an agent-based connection, follow the steps below:
- Select Click here to manually select an agent.
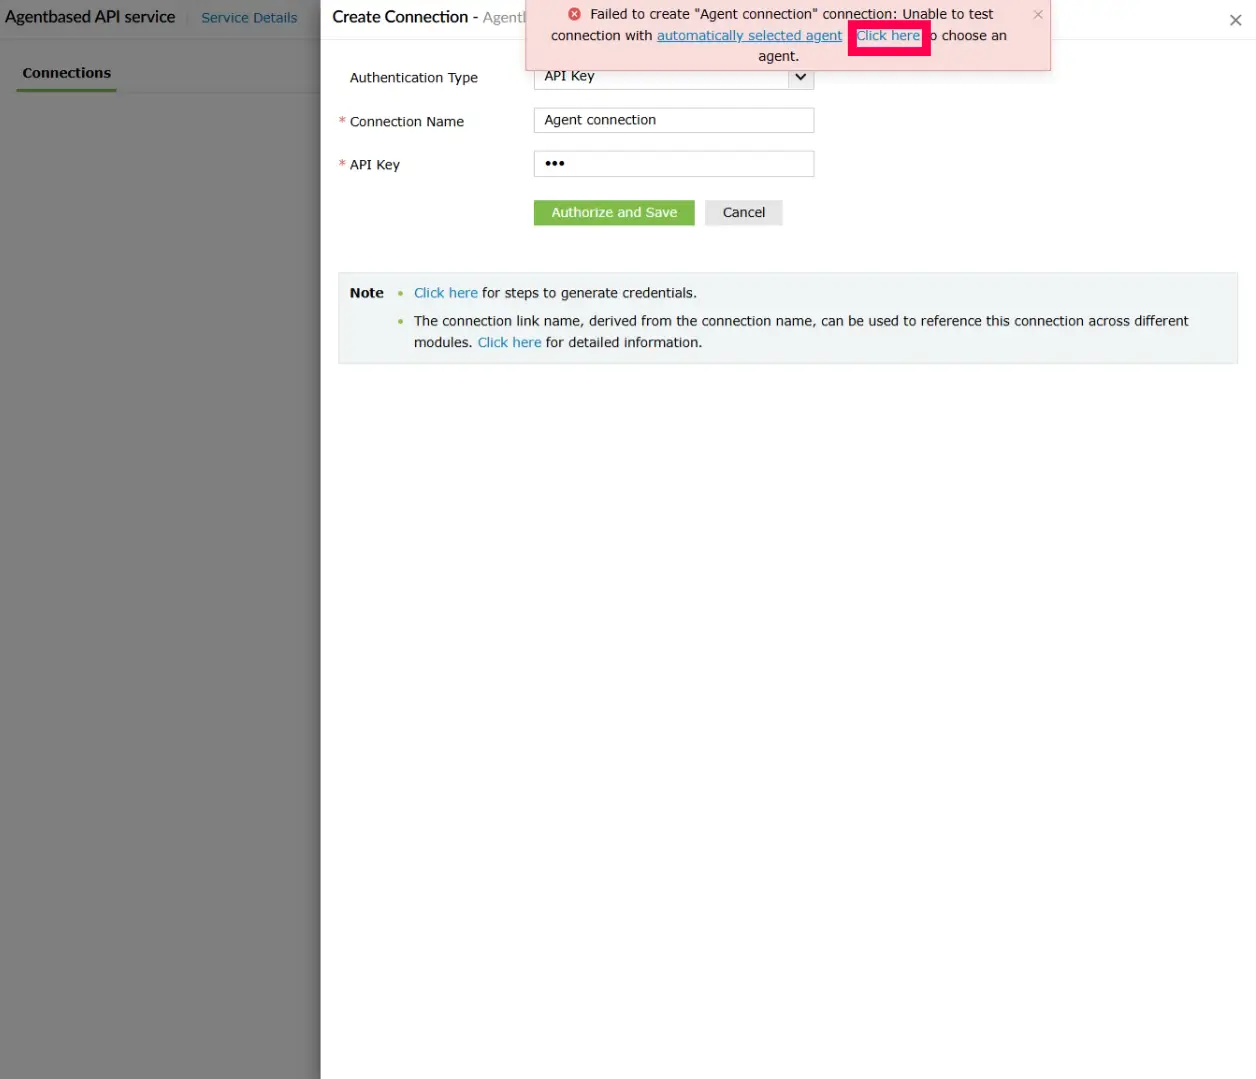
Figure 3: Selecting an agent - In the Select Agent dropdown, choose an available agent.
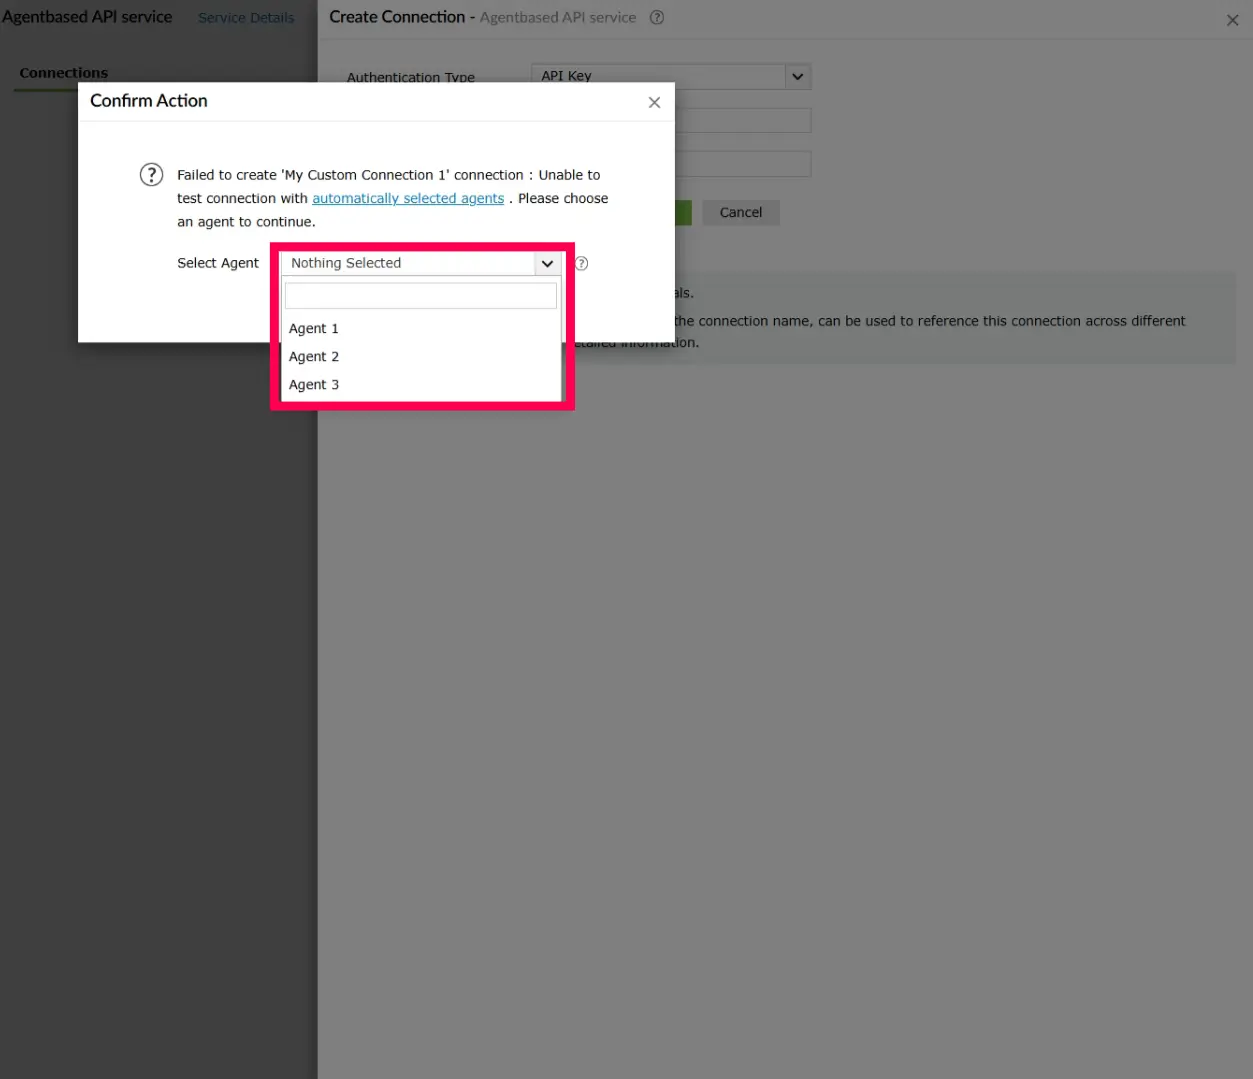
Figure 4: Selecting an agent - Click Proceed to save the changes.
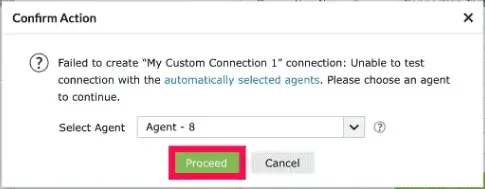
Figure 5: Confirming agent selection
Using API key
Once you click Create and Setup Connection for a custom service that uses API Key authentication, the Create Connection window opens. Follow the steps below to configure and save the connection.
- In the Authentication Type dropdown, API Key is automatically selected. This is based on the authentication type configured when creating the custom service.
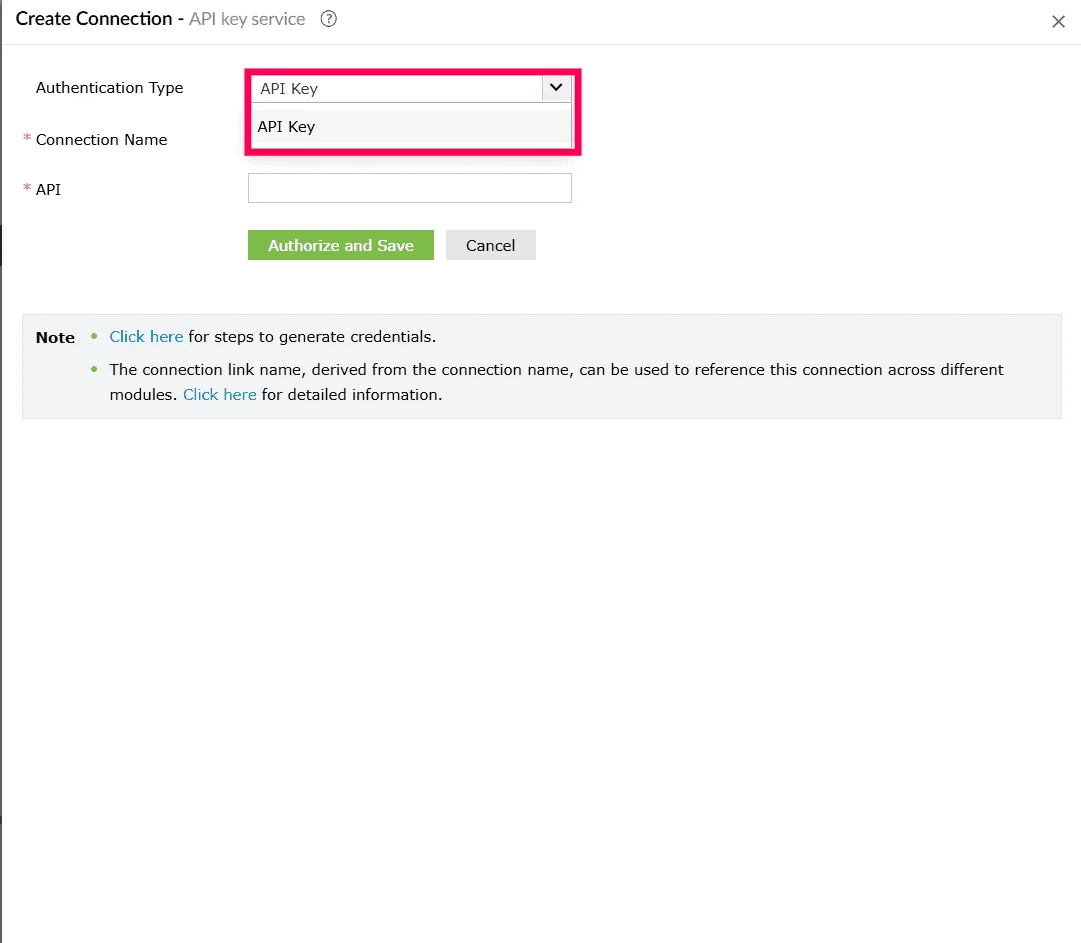
Figure 6: Selecting an authentication type - Enter a Connection Name. This name uniquely identifies the connection within Log360 Cloud and is used when linking the connection to dashboards, custom functions, workflows, and other modules.
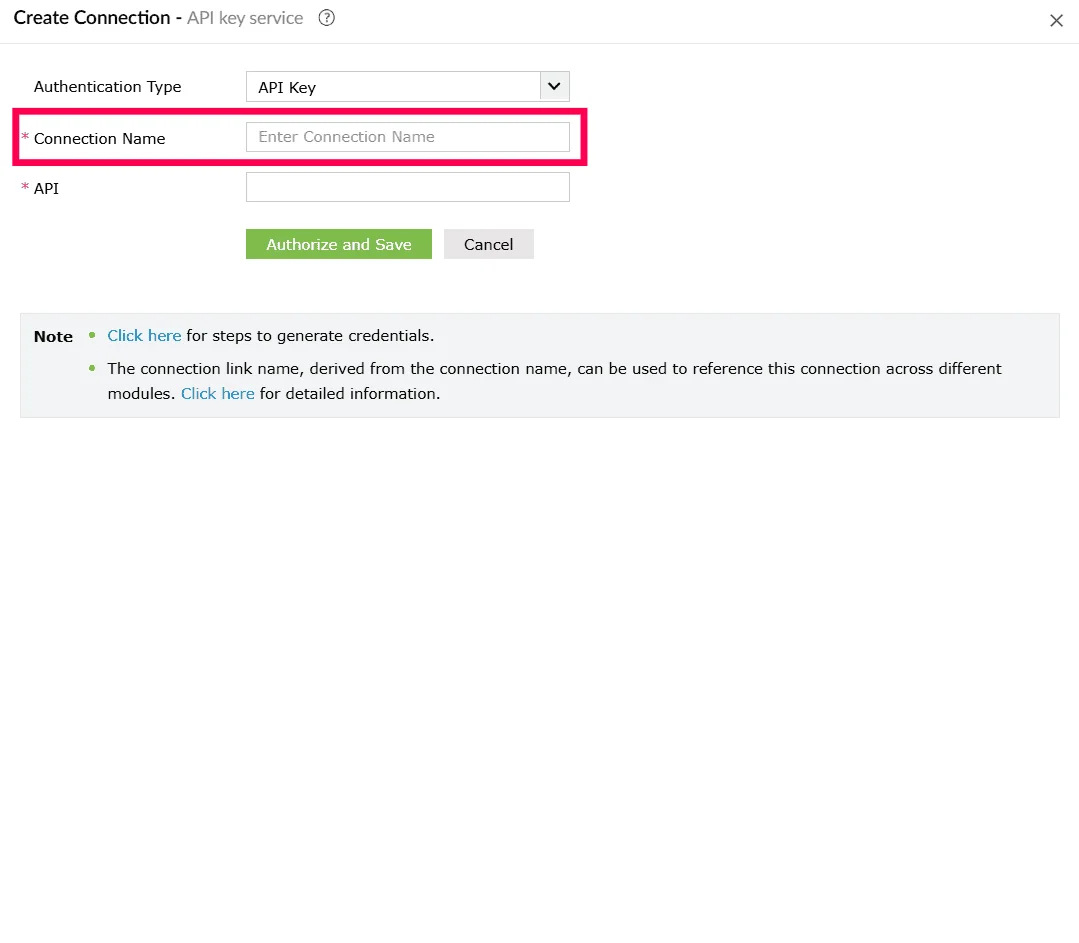
Figure 7: Entering a connection name - Provide the required API Key value as issued by the external service.
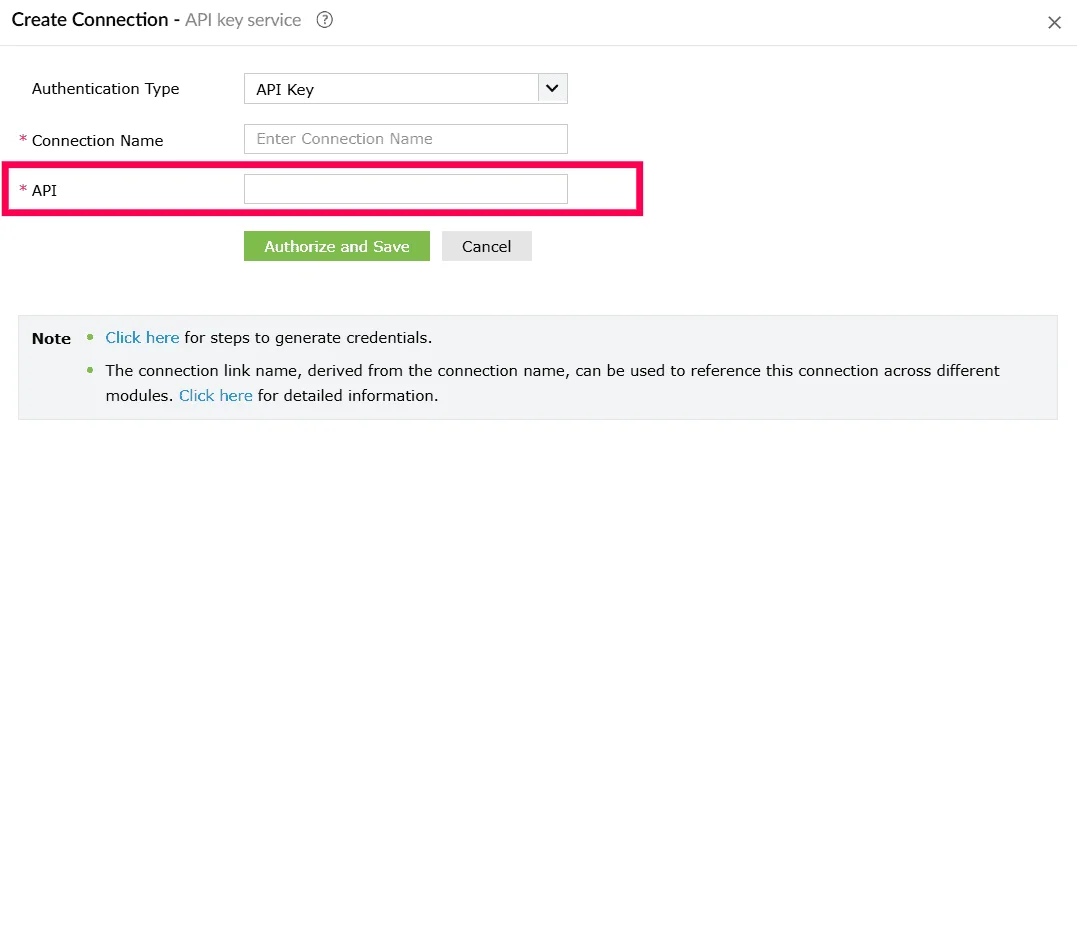
Figure 8: Entering an API key - Click Authorize and Save to validate the credentials and create the connection.
Using basic authentication
Once you click Create and Setup Connection, the Create Connection window opens. Follow the steps below to configure a connection that uses Basic Authentication.
- In the Authentication Type dropdown, Basic Authentication is automatically selected. This is based on the authentication type configured when creating the custom service.
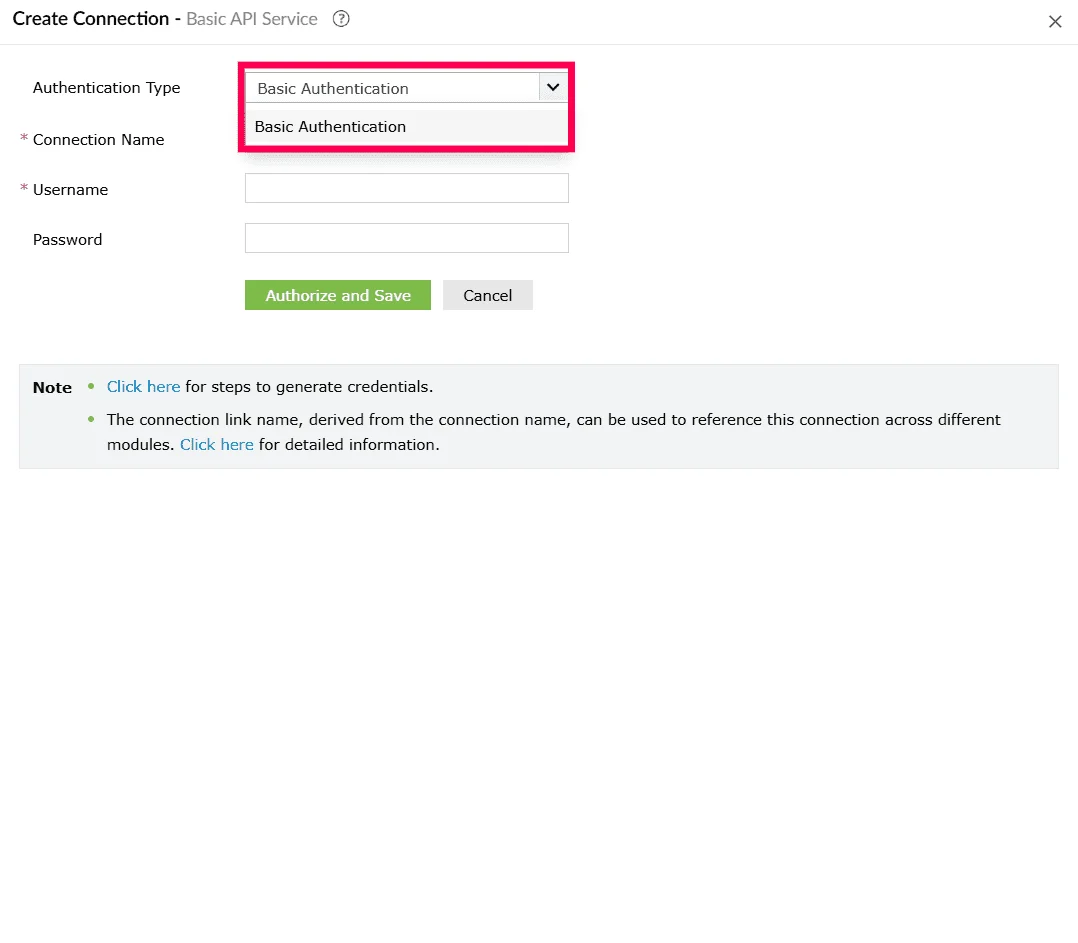
Figure 9: Selecting an authentication type - Enter a Connection Name. This name uniquely identifies the connection within Log360 Cloud and is used when linking the connection to dashboards, custom functions, workflows, and other modules.
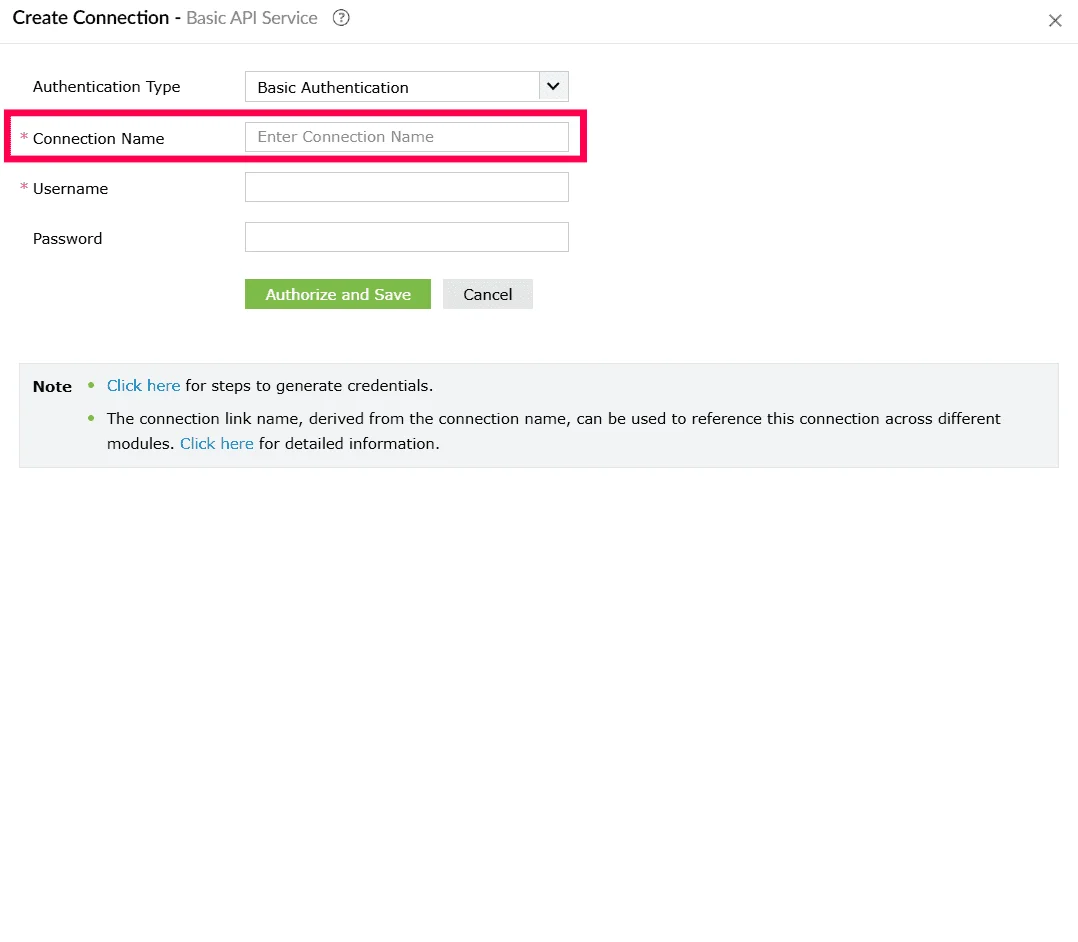
Figure 10: Entering a connection name - Enter the User Name and Password that is used to sign in to the external application.
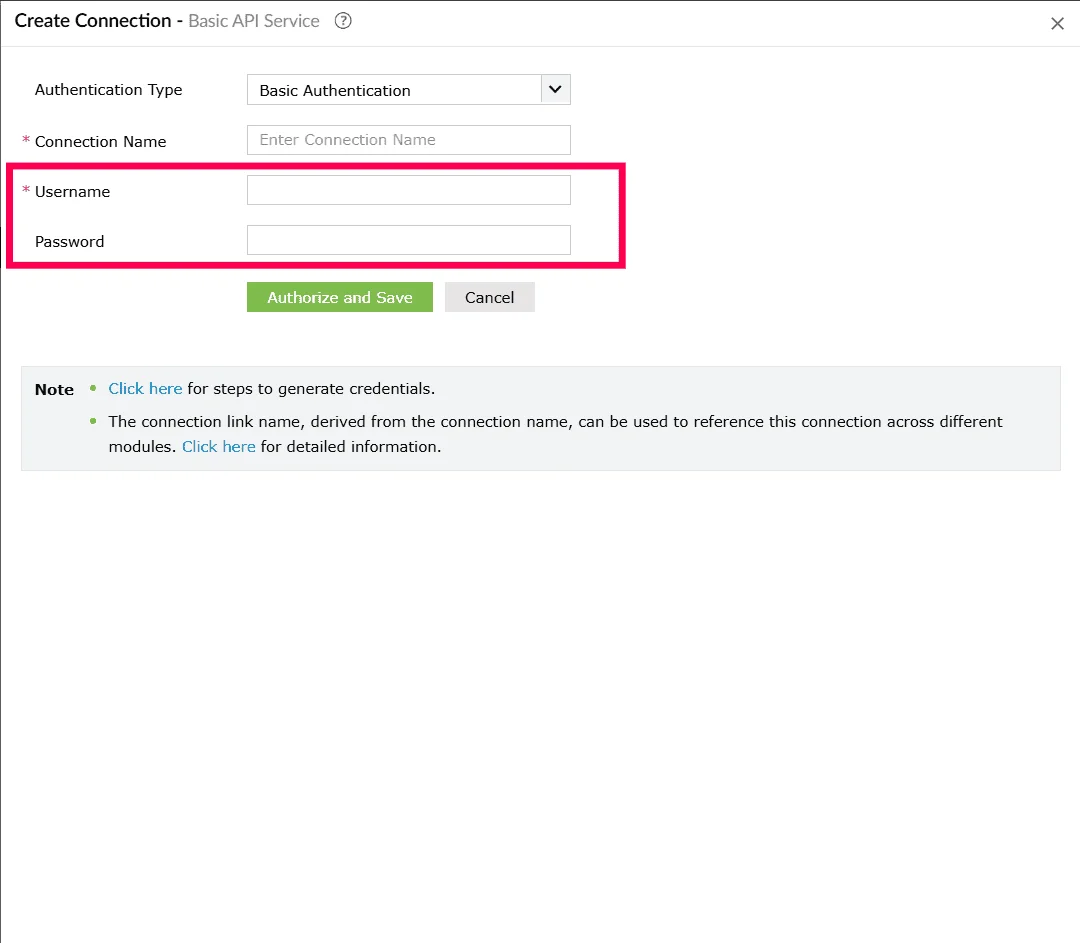
Figure 11: Entering credentials - Click Authorize and Save to validate the credentials and create the connection.
Using OAuth 1
Once you click Create and Setup Connection, follow the steps below to complete the OAuth 1 connection:
- In the Create Connection window, from the Authentication Type dropdown, OAuth 1 is automatically selected. This is based on the authentication type configured when creating the custom service.
- Enter a Connection Name.
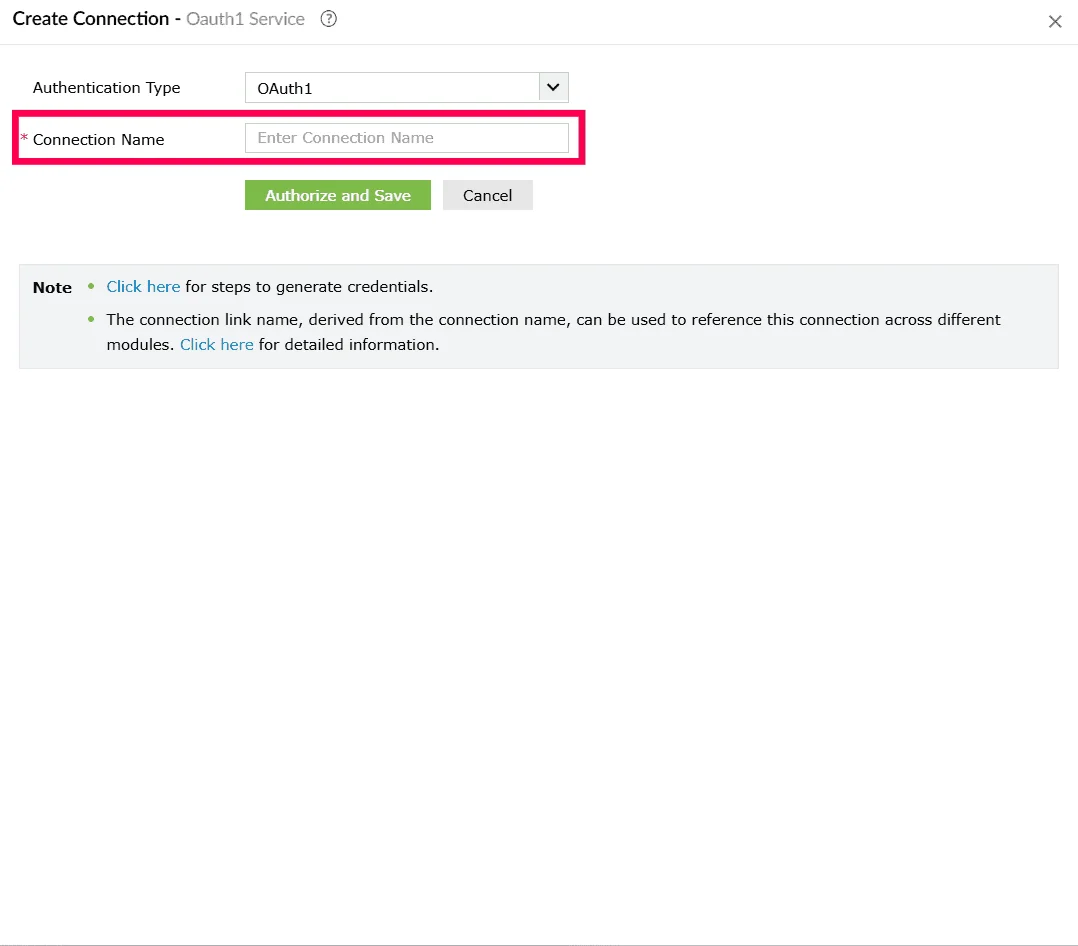
Figure 12: Entering a connection name - Click Authorize and Save.
- You will be redirected to the external service's authorization page. Review the access permissions requested by the application
- Once the authorization is completed, Log360 Cloud establishes the connection and returns you to the product console.
Using OAuth 2
When establishing a connection for a service that uses OAuth 2, the required steps depend on the grant type configured for that service.
The product console supports connections using:
- Automatic configuration
- Manual configuration
- Manual and automatic configuration
- Authorization code with PKCE
- Client credentials
Using OAuth 2 with automatic configuration
Once you click Create and Setup Connection, the Create Connection window opens.
- In the Authentication Type dropdown, OAuth 2 is automatically selected. This is based on the authentication type configured when creating the custom service.
- Enter a Connection Name. This name will identify the connection within Log360 Cloud.
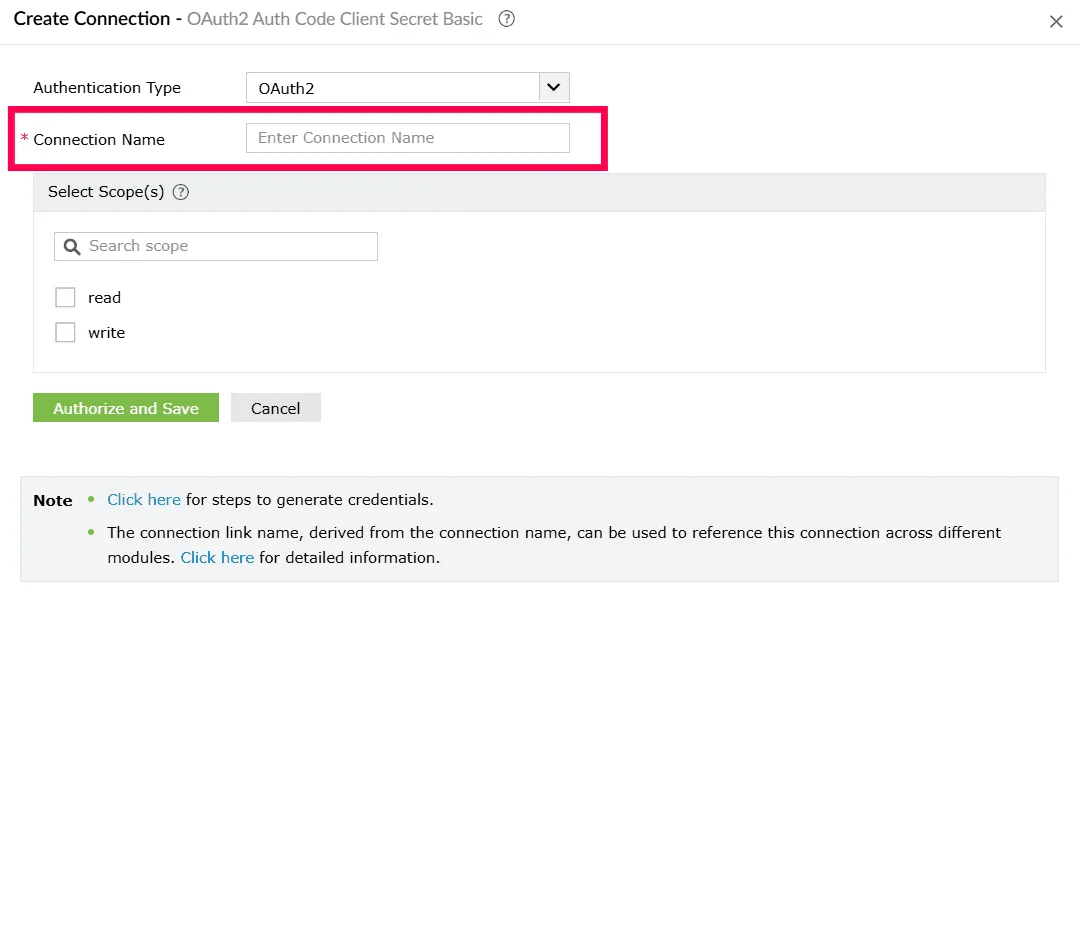
Figure 13: Entering a connection name - Under Select Scope(s), select the checkbox next to the scopes that should be authorized for this connection, such as Read, Write, or Delete, as specified by the external service.
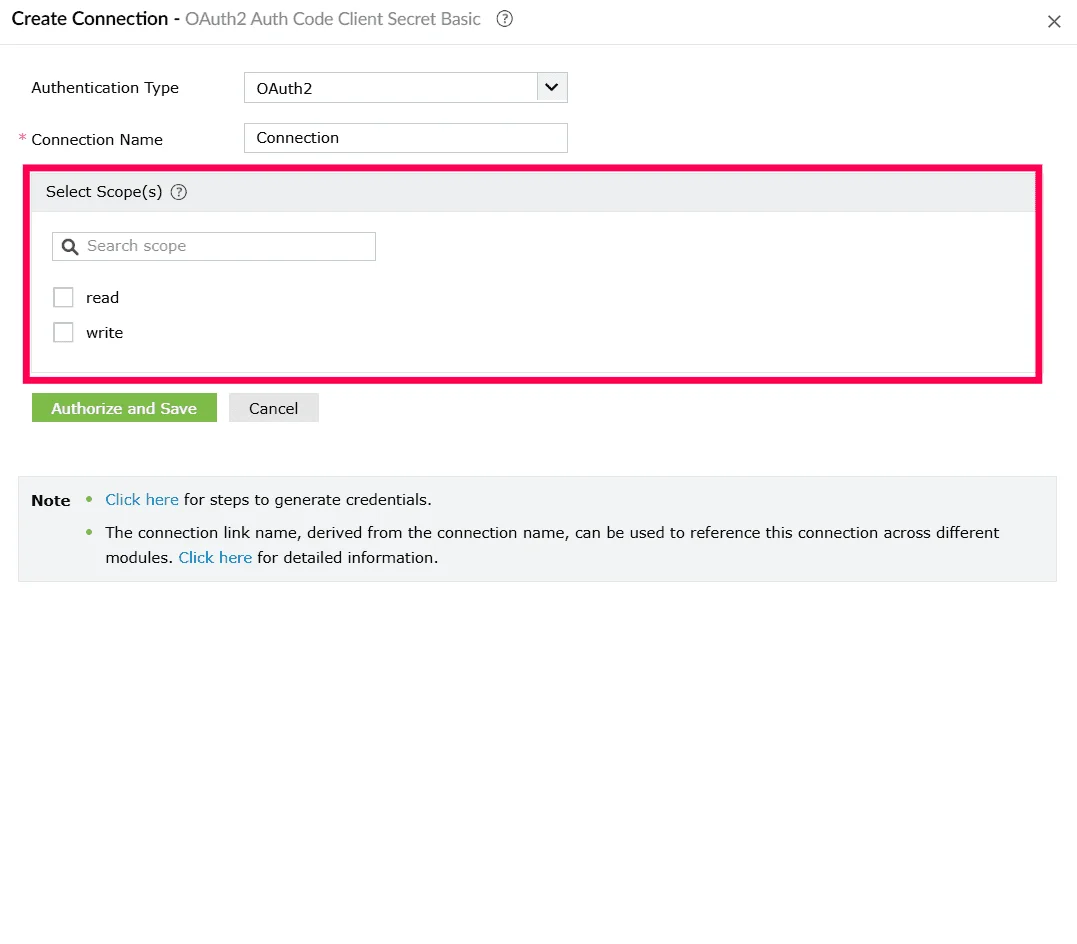
Figure 14: Selecting scopes - Click Authorize and Save to initiate the OAuth 2 authorization flow.
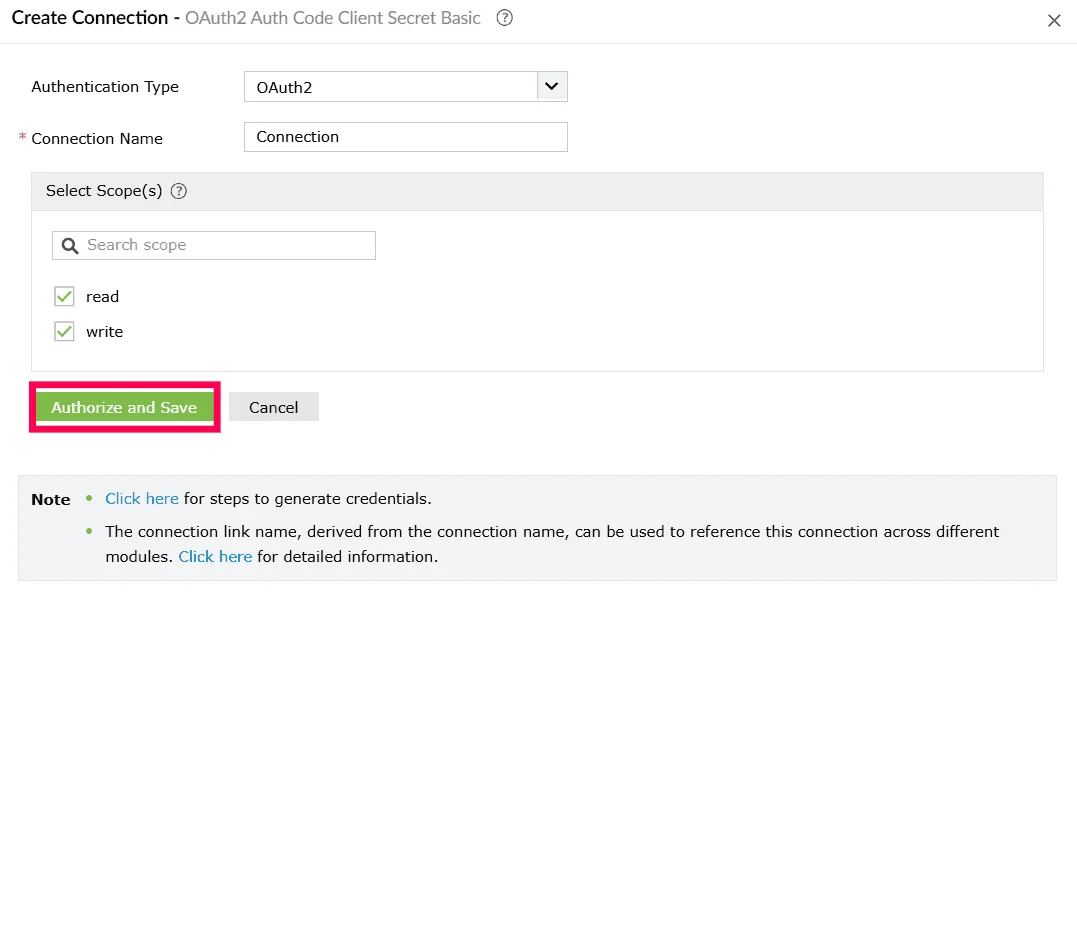
Figure 15: Creating a connection - Complete the authorization in the external service page when prompted. Once the authorization is complete, the connection is created and added to the Connections list.
- After authorization completes, the new connection appears in the Connections page.
Using OAuth 2 with manual configuration
Once you click Create and Setup Connection, the Create Connection window opens.
- In the Authentication Type dropdown, OAuth 2 is automatically selected. This is based on the authentication type configured when creating the custom service.
- Enter a Connection Name. This name will identify the connection within Log360 Cloud.
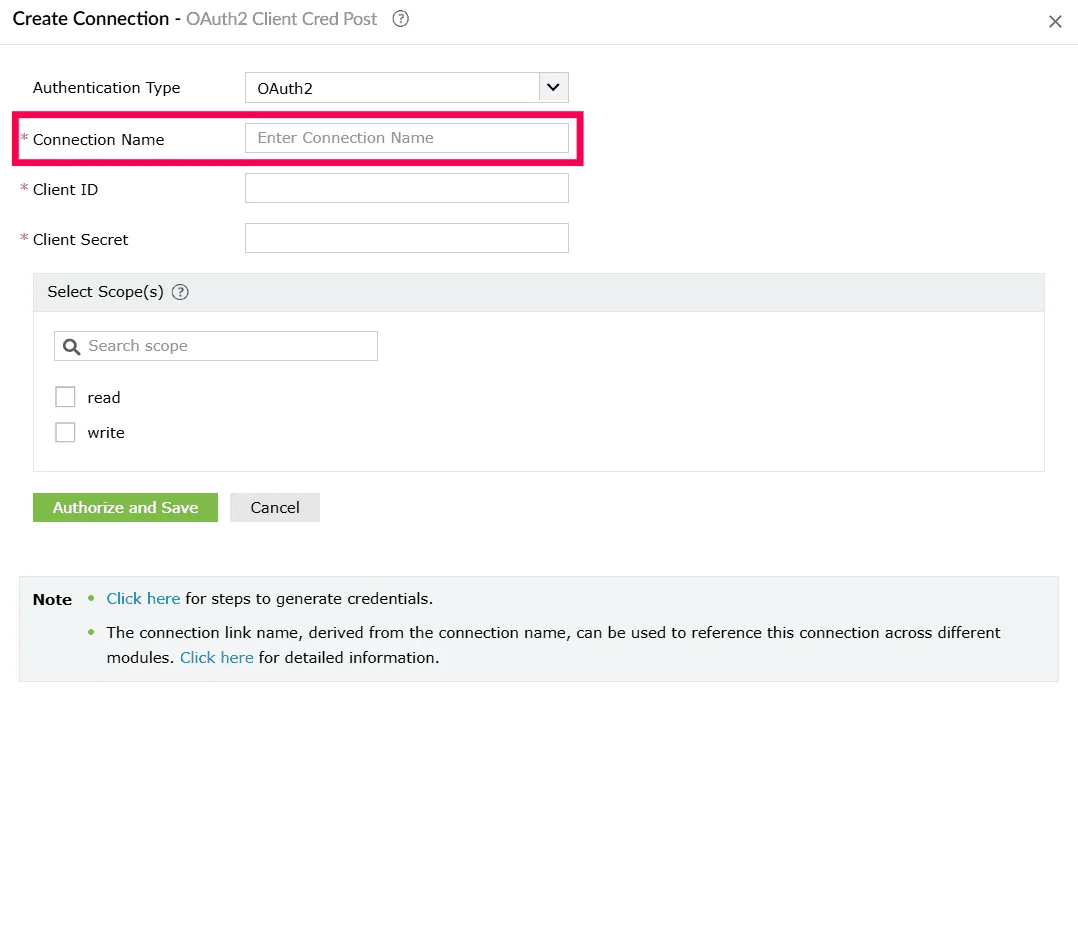
Figure 16: Entering a connection name - Enter the following OAuth fields:
- Client ID - Unique identifier issued by the service provider.
- Client Secret - Secret key issued to your application.
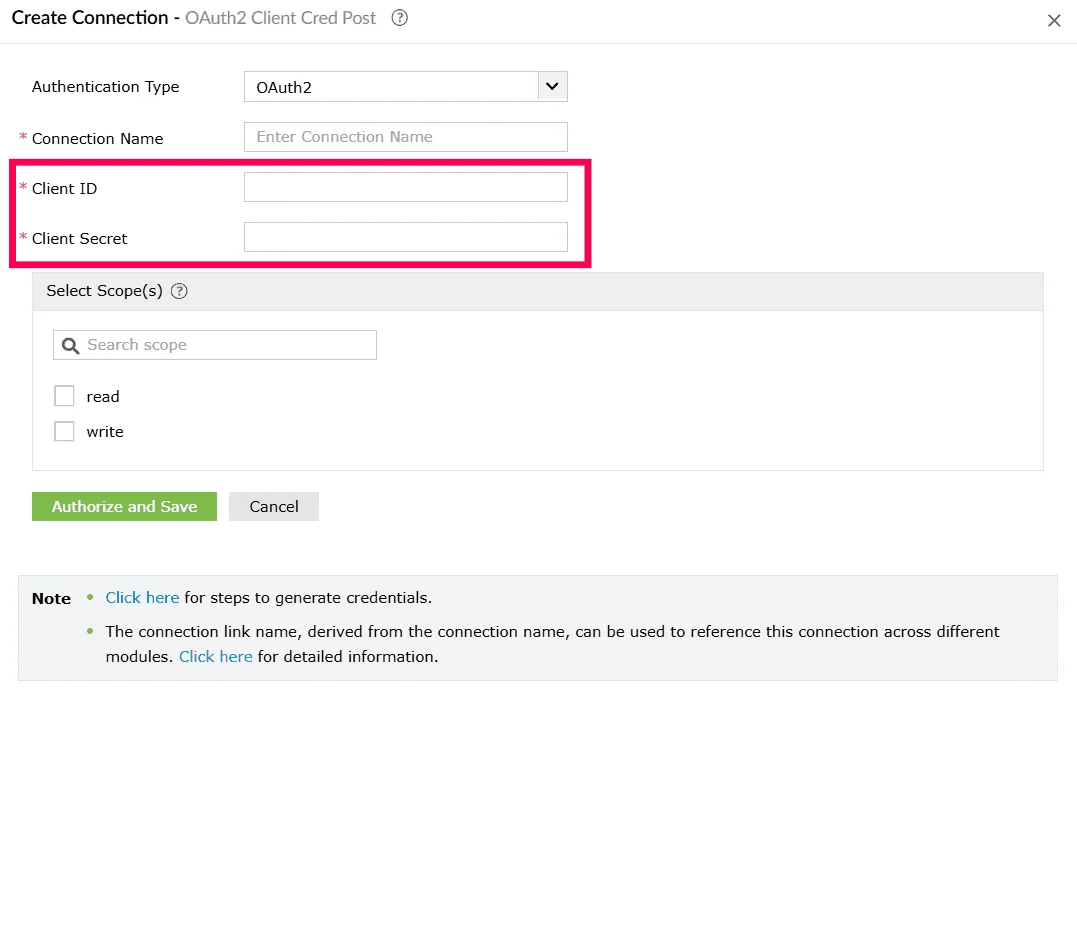
Figure 17: Creating a connection - Under Select Scope(s), select the checkbox next to the scopes that must be authorized for this connection, such as Read, Write, or Delete, based on the permissions required by the external service.
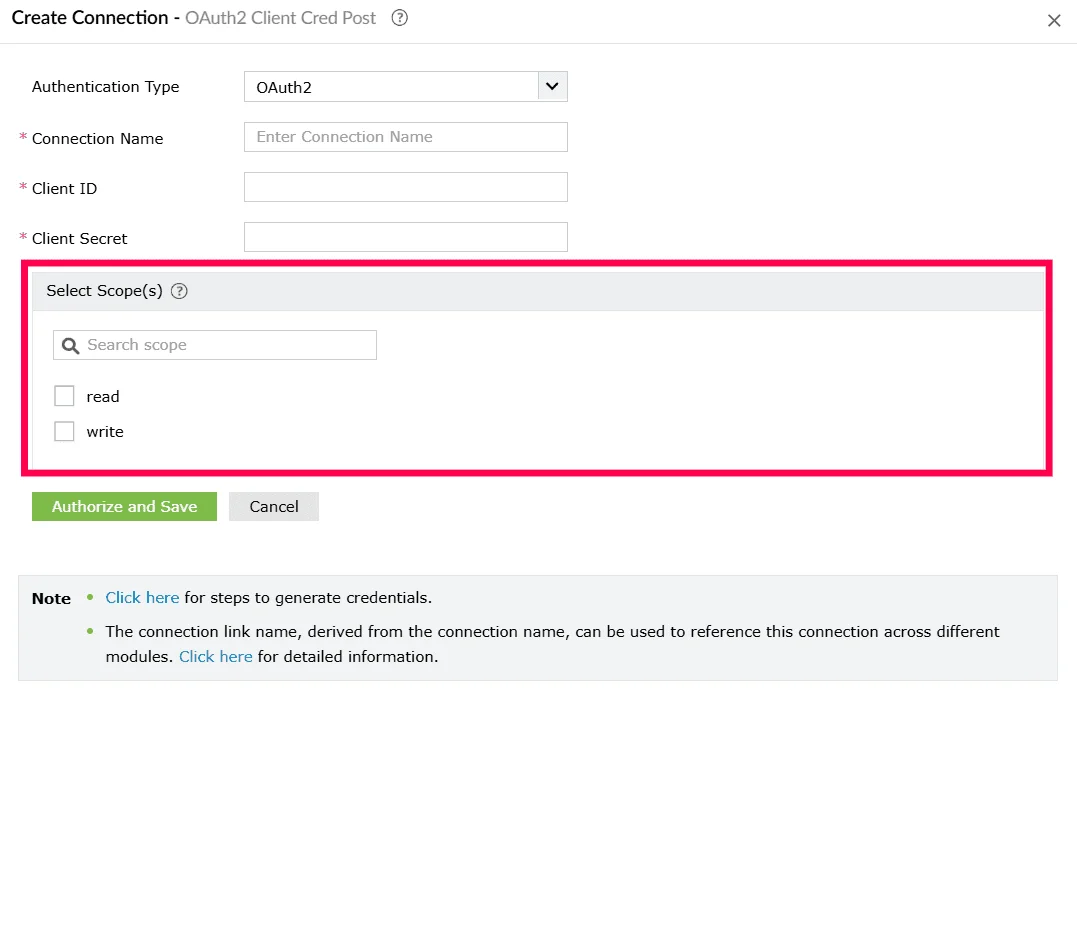
Figure 18: Selecting scopes - Click Authorize and Save to begin the authorization process.
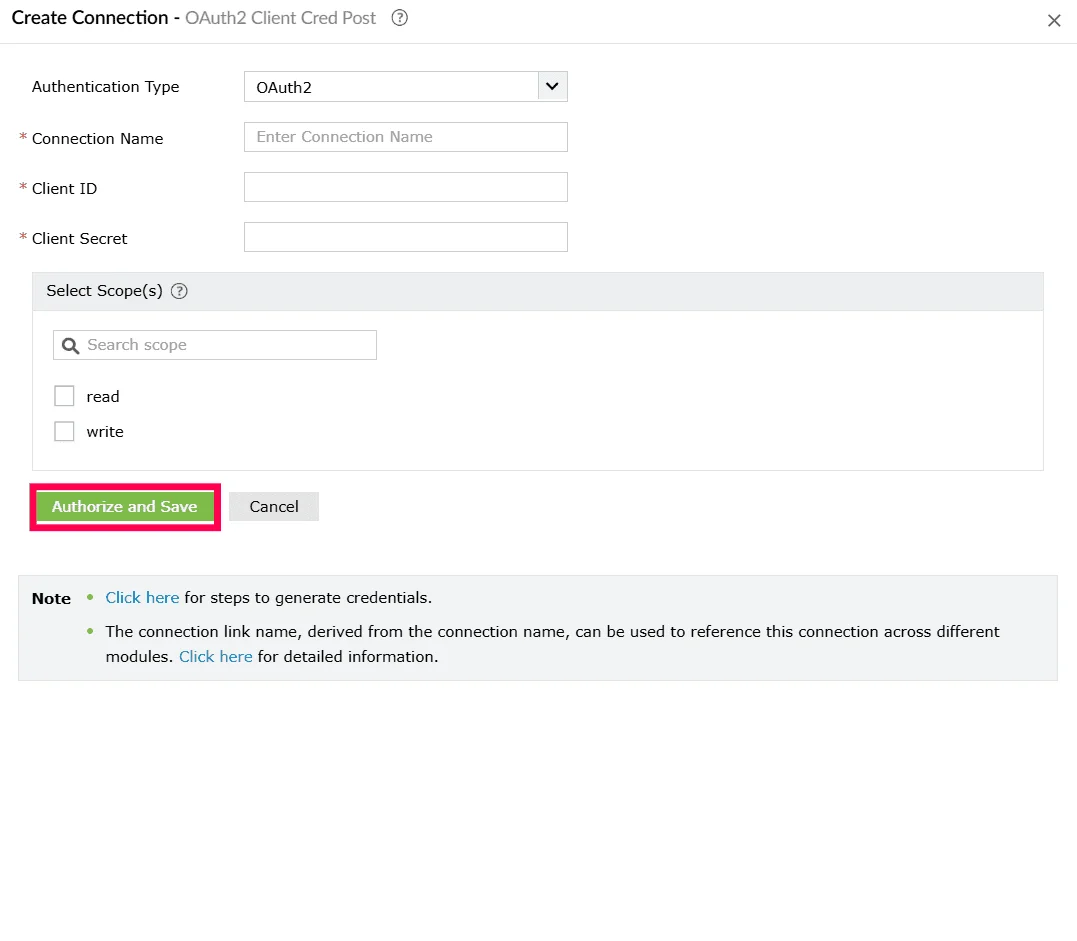
Figure 19: Creating a connection - Complete the authorization in the external service page when prompted. Once the authorization is complete, the connection is created and added to the Connections list.
- After authorization completes, the new connection appears in the Connections page.
Using OAuth 2 with manual and automatic configuration
Once you click Create and Setup Connection, the Create Connection window opens.
- In the Authentication Type dropdown, OAuth 2 is automatically selected. This is based on the authentication type configured when creating the custom service.
- Enter a Connection Name.
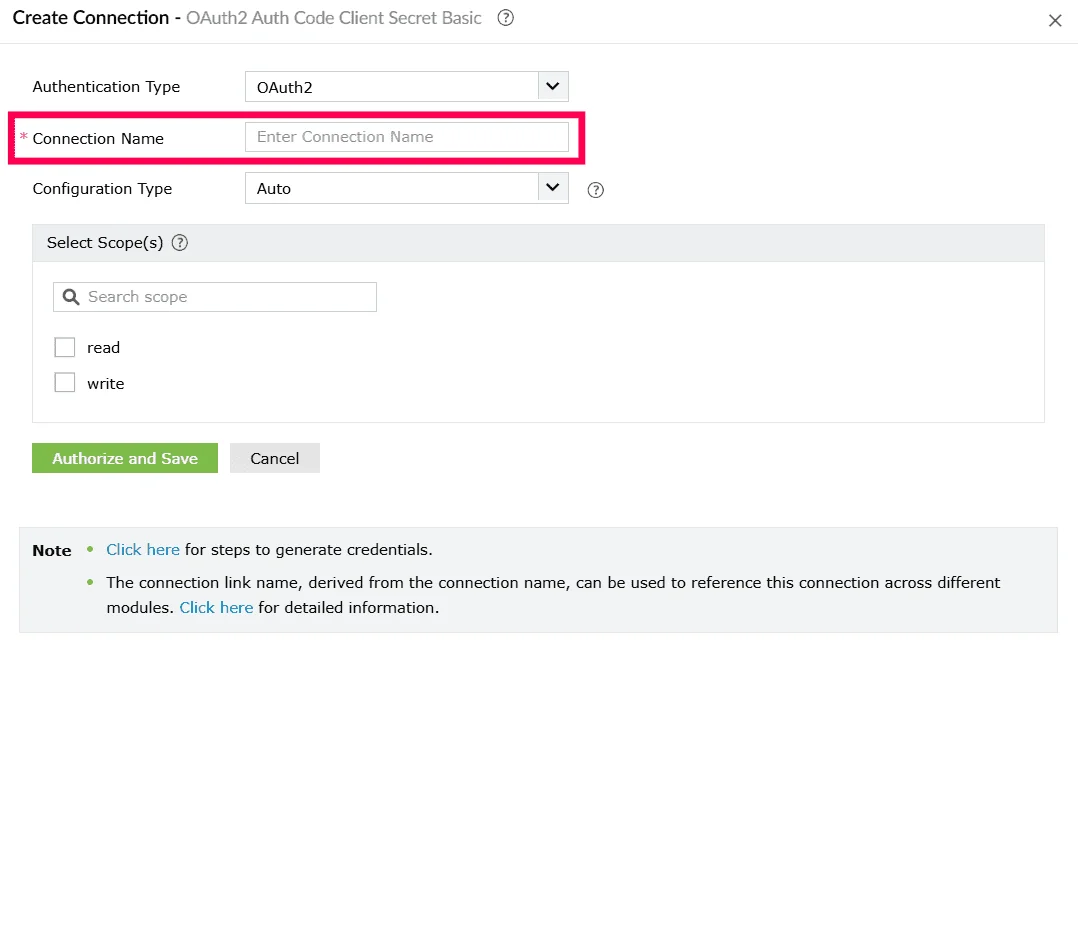
Figure 20: Entering a connection name Note You can proceed with either Auto or Manual configuration, depending on the setup defined for your custom service. - If the Auto configuration method is chosen,
- From the Configuration Type dropdown, choose Auto.
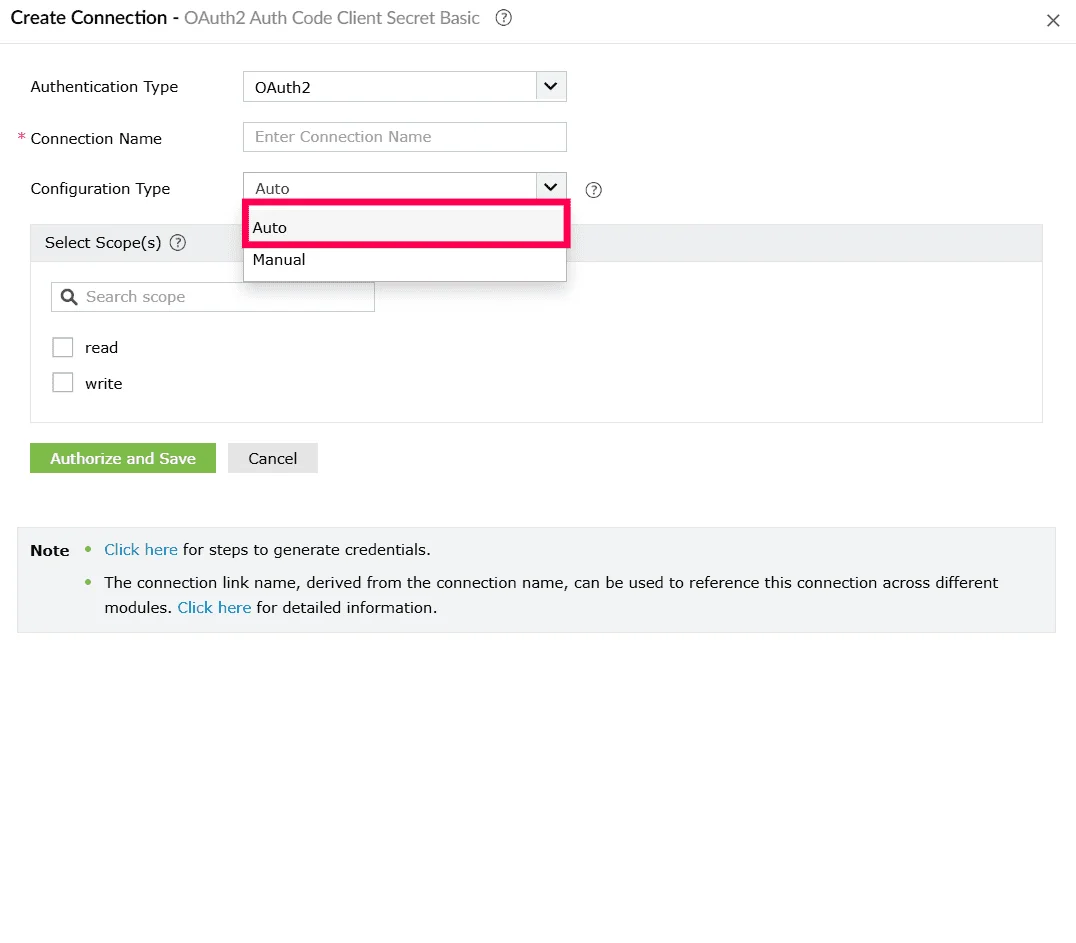
Figure 21: Selecting configuration type - In the Select Scope(s) section, select the checkbox next to the scopes that should be granted for this connection, such as Read, Write, or Delete.
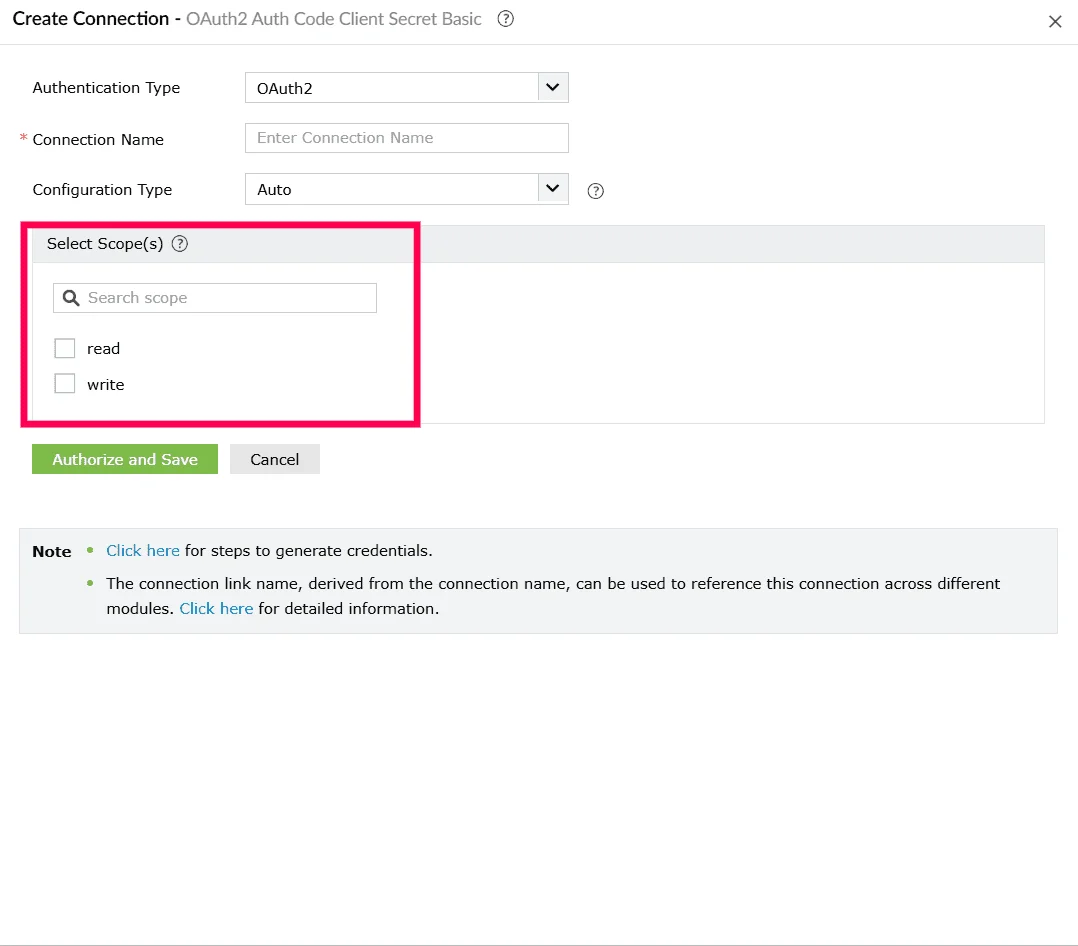
Figure 22: Selecting scopes - Click Authorize and Save to proceed with automatic authorization and complete the connection setup.
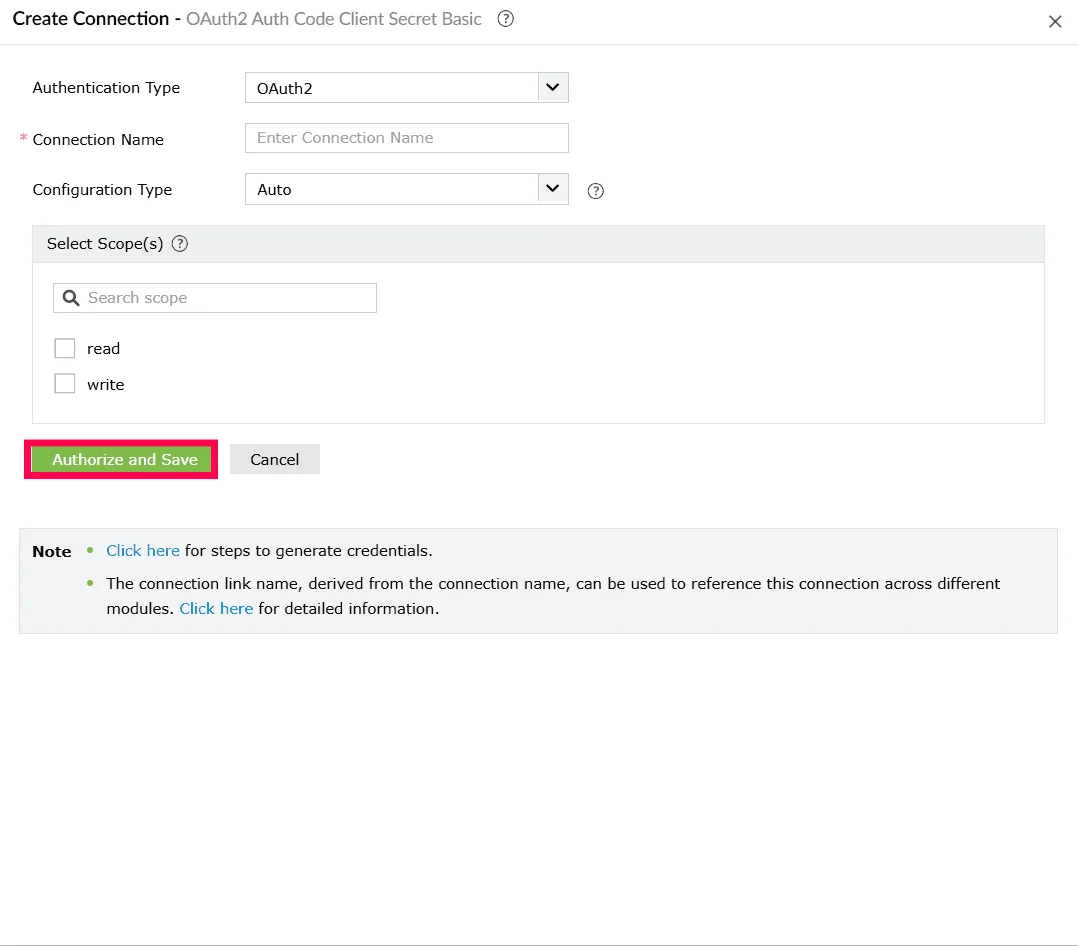
Figure 23: Creating a connection
- From the Configuration Type dropdown, choose Auto.
- If the Manual configuration method is chosen,
- From the Configuration Type dropdown, choose Manual.
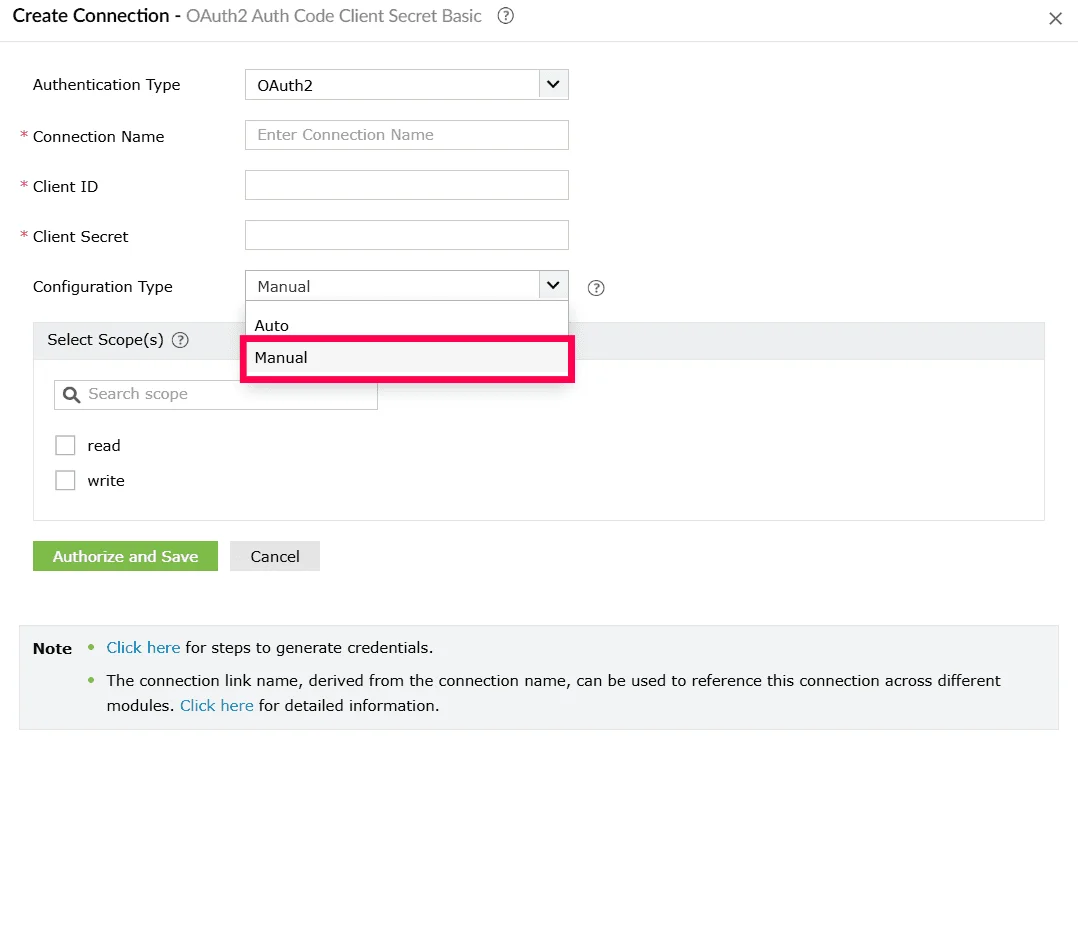
Figure 24: Selecting configuration type - Enter the following OAuth fields:
- Client ID - Unique identifier issued by the service provider.
- Client Secret - Secret key issued to your application.
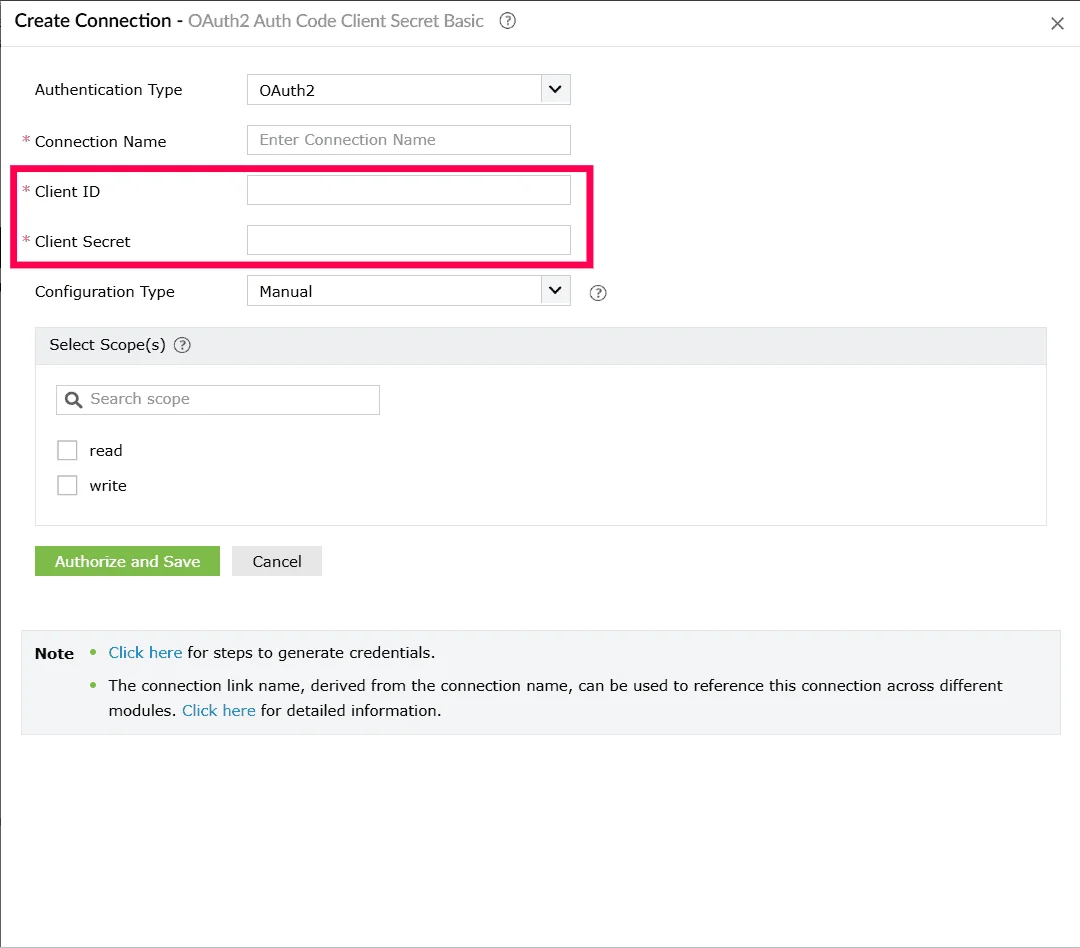
Figure 25: Creating a connection - Under Select Scope(s), select the checkbox next to the scopes that must be authorized for this connection, such as Read, Write, or Delete, based on the permissions required by the external service.
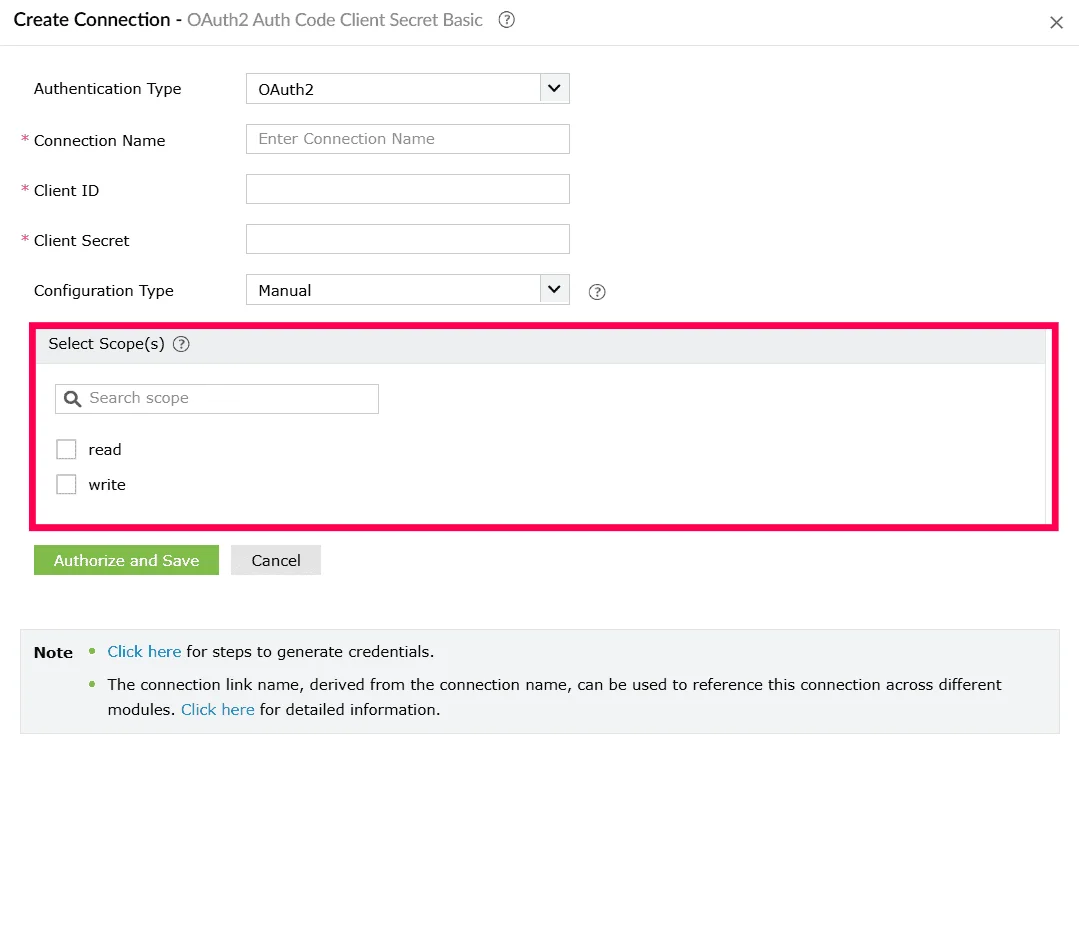
Figure 26: Selecting scopes - Click Authorize and Save to begin the authorization process.
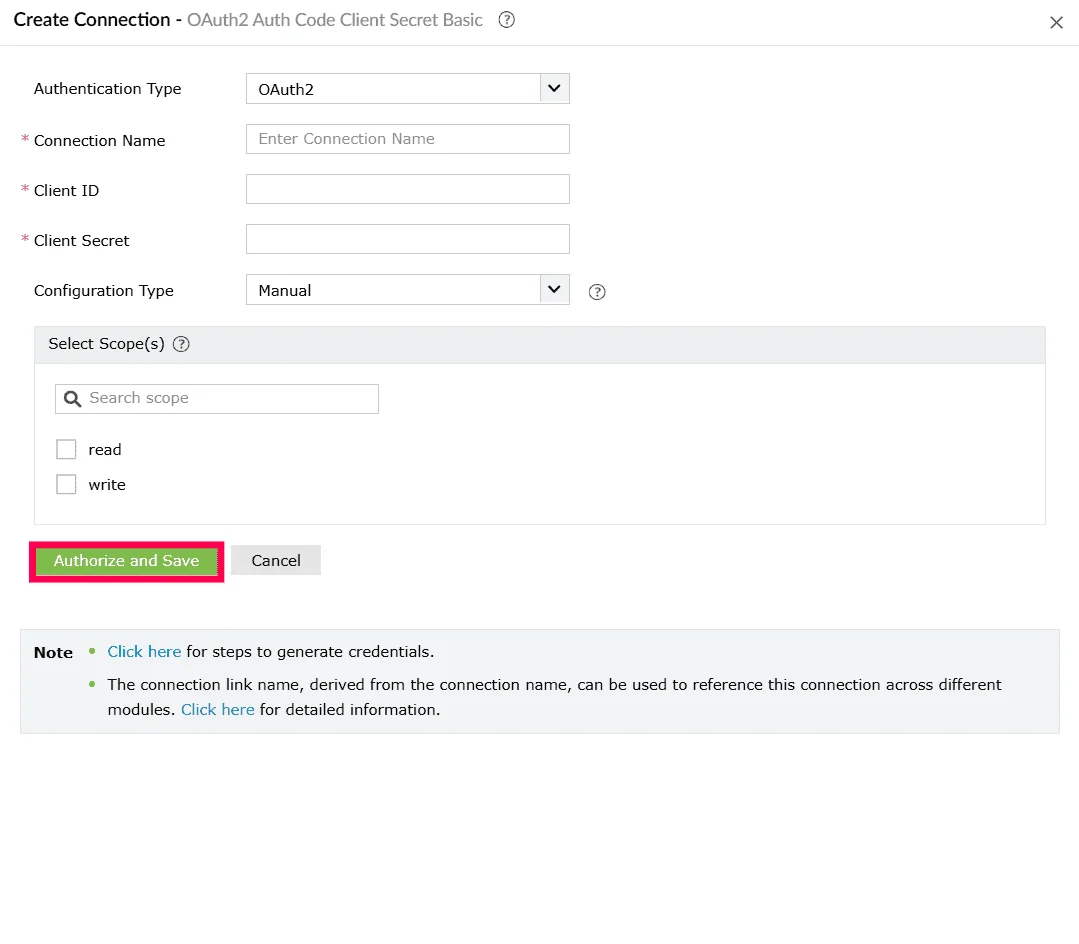
Figure 27: Creating a connection
- From the Configuration Type dropdown, choose Manual.
Using authorization code with PKCE
Once you click Create and Setup Connection, the Create Connection window opens.
- In the Authentication Type dropdown, OAuth 2 is automatically selected. This is based on the authentication type configured when creating the custom service.
- Enter a Connection Name.
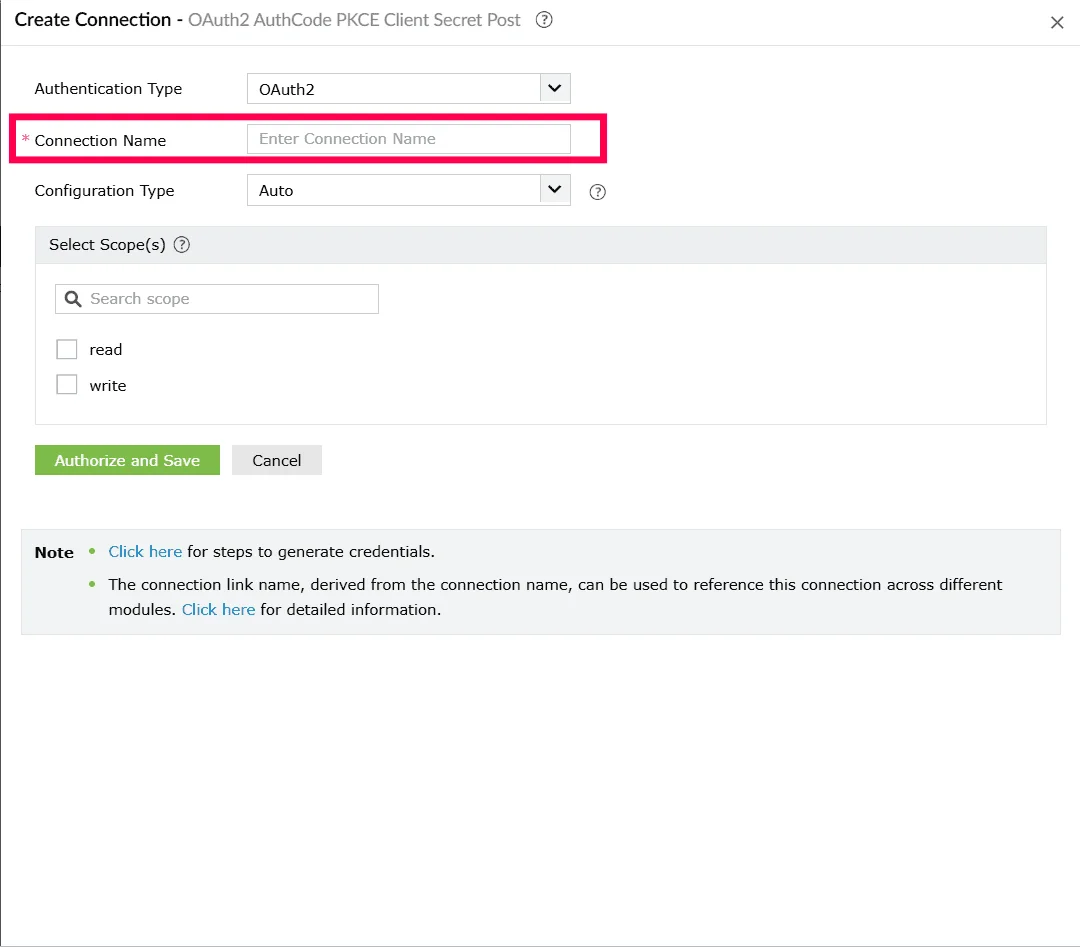
Figure 28: Entering a connection name - From the Configuration Type dropdown, select the configuration method supported by the external service and follow the corresponding steps below:
Using client credentials
Once you click Create and Setup Connection, the Create Connection window opens.
- In the Authentication Type dropdown, ensure OAuth 2 is selected.
- Enter a Connection Name. This name will identify the connection within Log360 Cloud.

Figure 29: Entering a connection name - Enter the following OAuth fields:
- Client ID - Unique identifier issued by the service provider.
- Client Secret - Secret key issued to your application.
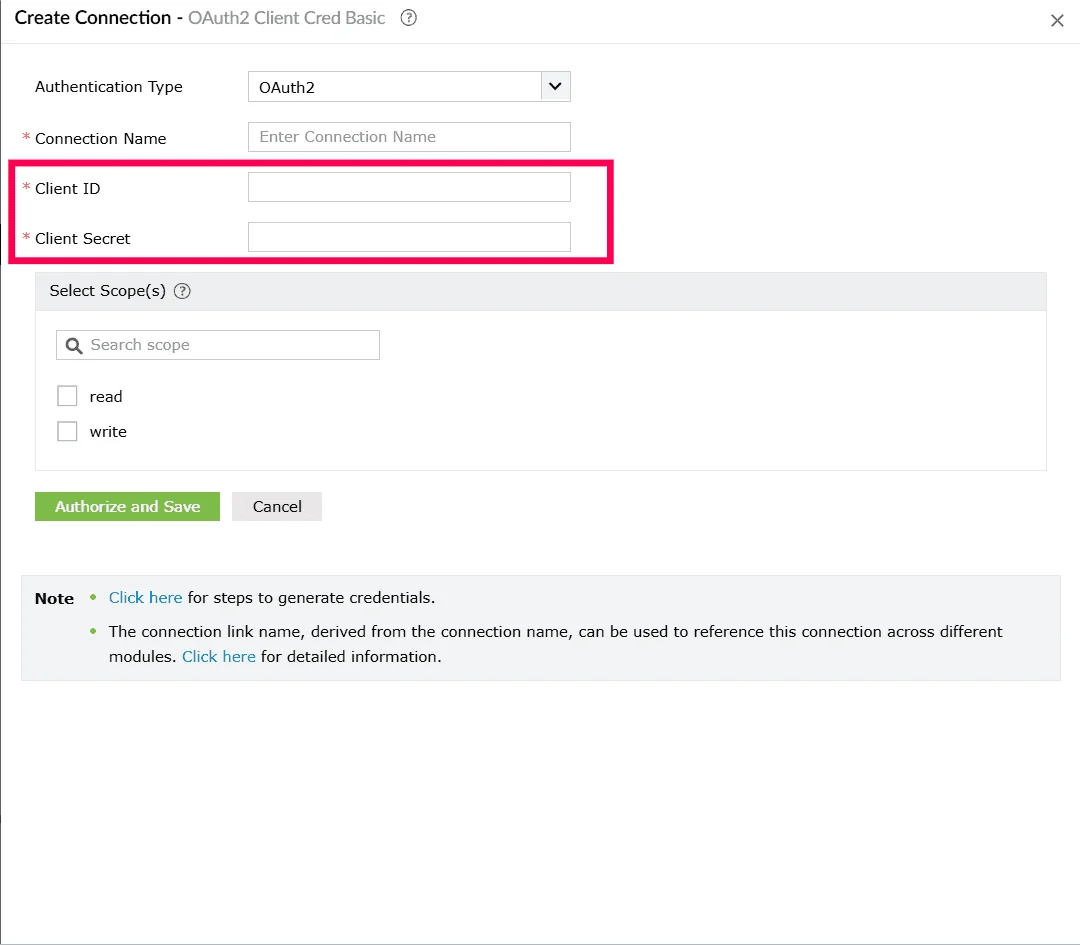
Figure 30: Creating a connection - Under Select Scope(s), select the checkbox next to the scopes that must be authorized for this connection, such as Read, Write, or Delete, based on the permissions required by the external service.
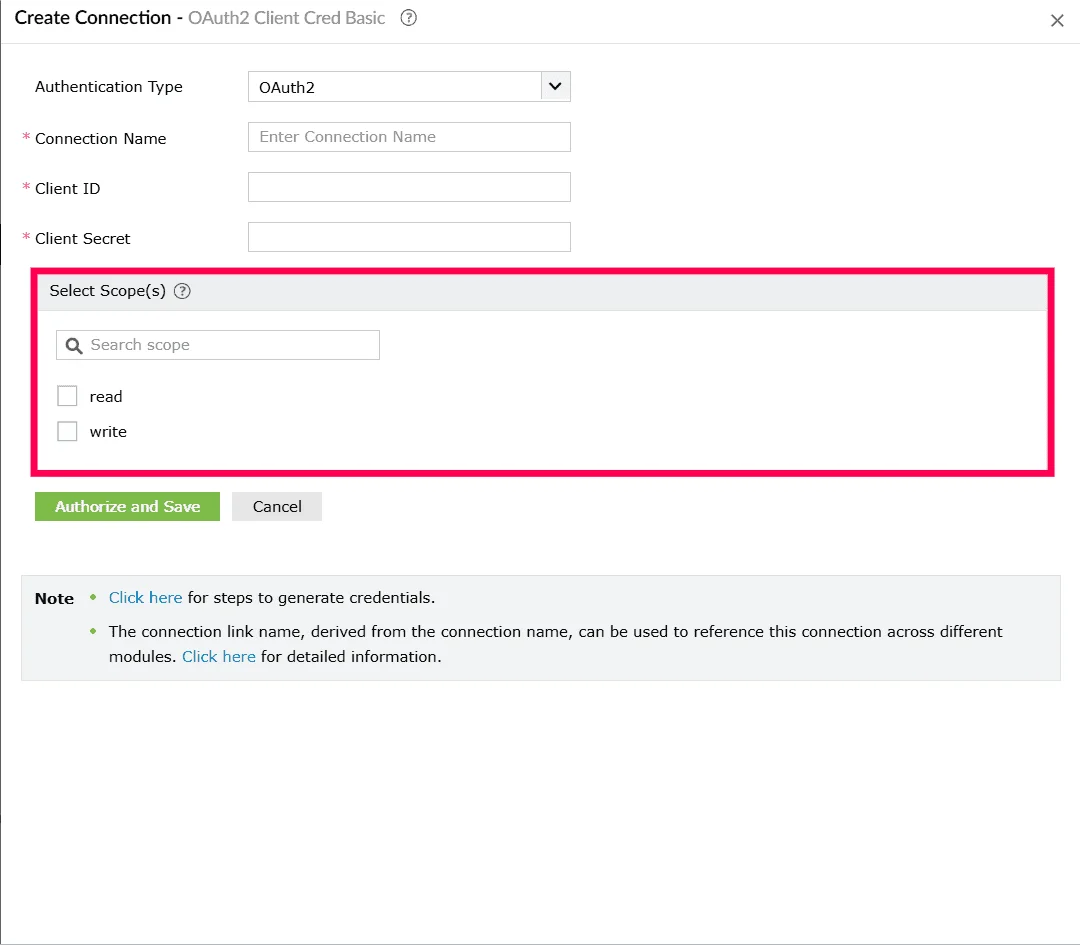
Figure 31: Selecting scopes - Click Authorize and Save to begin the authorization process.

Figure 32: Creating a connection
Using multiple authentication
Once you click Create and Setup Connection, the Create Connection window opens.
- The Authentication Type dropdown allows you to choose the method you want to use for establishing the connection.
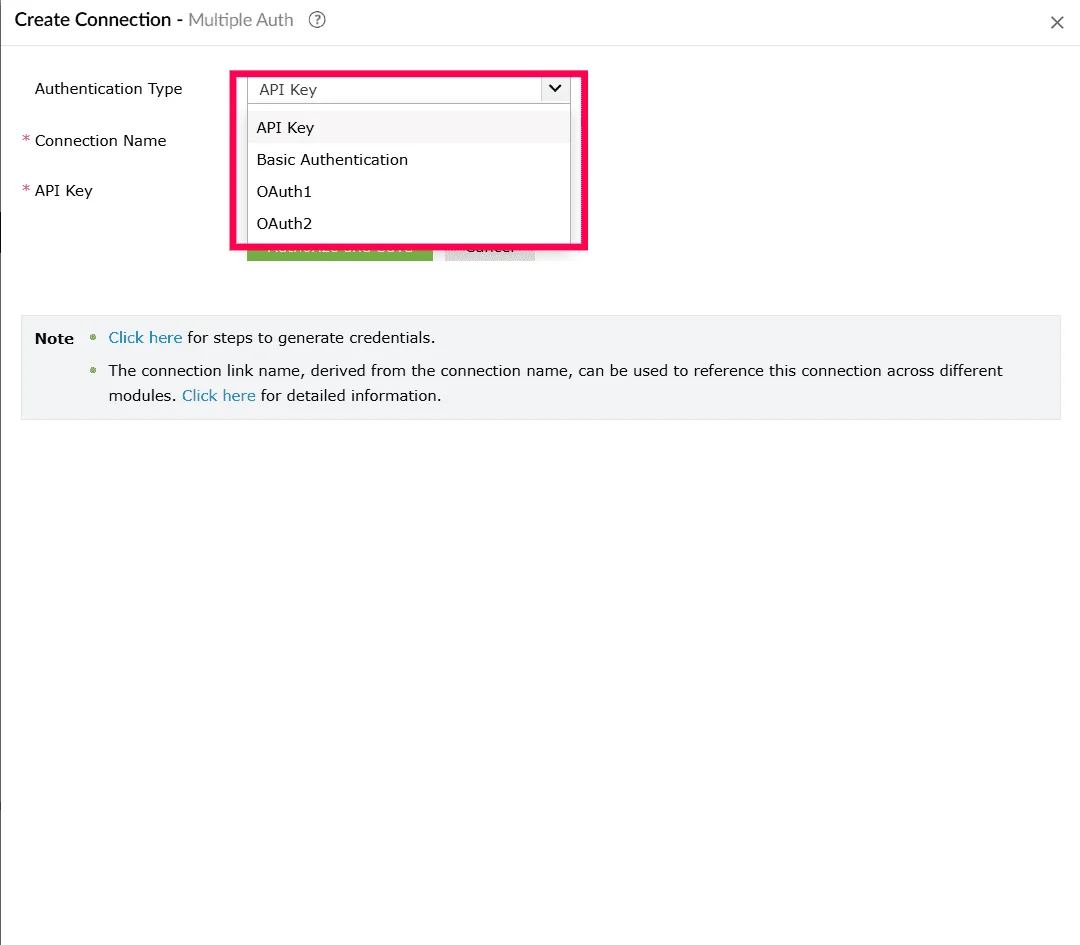
Figure 33: Selecting an authentication type - The fields displayed will automatically vary depending on the authentication method you select.
Note Refer to this section to learn how to create a connection based on the authentication type you've selected.
- After selecting the required authentication method, provide the corresponding details and click Authorize and Save to complete the setup.
Read also
This page explained how to create a connection using various authentication types. For related configuration and management tasks, refer to the following articles: