Integrate OpManager with OpsGenie
Integrating OpsGenie with OpManager brings a powerful synergy to your IT operations and event management strategy. This enables advanced alerting capabilities, ensuring that critical issues are detected and communicated promptly. By combining these strengths, it helps organizations enhance operational efficiency, improve event resolution, and maintain high service reliability.
OpManager can be integrated with OpsGenie using the custom integration option.
Steps to perform in OpsGenie
- Activate Integration
Steps to perform in OpManager
- To Add an Event
- To Add Notes to an Event
- To close an Event
- Associate a notification profile
Steps to perform in OpsGenie
- Login to OpsGenie
To activate integration in OpsGenie, login here.

- Create a Team
Navigate to Teams > Add Team to create a new team. Once the team is created, you will be redirected to the team’s page.

- Add an Integration
Click on Integrations > Add Integration to enable a new integration. A list of available integrations will be displayed.

- Select API Integration
Choose the "API" integration to perform REST operations. Both free and paid options are available—select based on your requirements. Copy the API key.

- Enable Access
Verify if access is enabled. If not, click Edit and enable access. Once created, you will receive integration settings, including the API key and other configuration details.

- Activate the Integration
Click Turn on Integration to activate it.

- Click Save.
Steps to perform in OpManager
- In OpManager, navigate to Settings > Integrations > Custom Integration.
- Enter the Integration Name and add a Decscription.
- Set up integration parameters
- Integration Type: Event Management
- API Endpoint: https://api.opsgenie.com/v2/alerts
- Method: POST
- Headers: Authorization: GenieKey eb2*****************************f56 {copied API Key from opsgenie}
- Payload Type: JSON
- Data Type: Raw
- Body Content:
{
"message": "$message",
"details": {
"displayname": "$displayName",
"Severity": "$stringseverity",
"Category": "$category"
}
}

- Click "Test Action" to check the configuration. Once successful, select "Manage Events" to fetch the event ID. You will get a 'request_id', which can be used to acknowledge and close the particular event on the OpsGenie side.

- API: https://api.opsgenie.com/v2/alerts/$requestId/notes
- Method: POST
- Headers: Authorization:GenieKey eb2*****************************f56 {copied API Key from opsgenie}
- Payload Type: JSON
- Data Type: Raw
- Body Content:
{
"message": "$message",
"details": {
"displayname": "$displayName",
"Severity": "$stringseverity",
"Category": "$category"
}
}

- API: https://api.opsgenie.com/v2/alerts/$requestId/close
- Method: POST
- Headers: Authorization:GenieKey eb2*****************************f56 {copied API Key from opsgenie}
- Payload Type: JSON
- Data Type: Raw
- Body Content:
{
"message": "$message",
"details": {
"displayname": "$displayName",
"Severity": "$stringseverity",
"Category": "$category"
}
}

- Click Save to finalize the configuration.
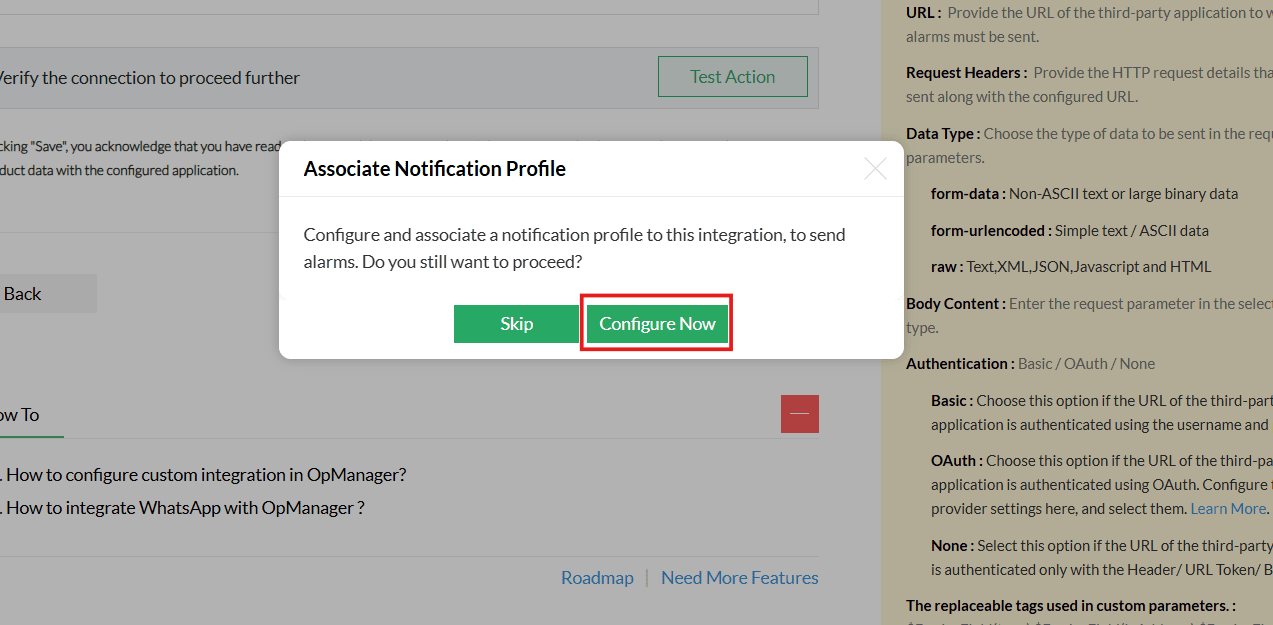
- Click Configure Now under "Associate Notification Profile".
- Select Custom_Integration and choose the profile named "OpsGenie".
- Learn more about configuring criteria, devices, and time window in notification profiles here.
- Click Save.
Refer to the steps below to configure multiple notification profiles.
Follow the steps below to configure the notification profile:
- Go to Settings > Notifications > Notification Profiles > Add
- Select Custom_Integration and choose the profile named "OpsGenie".

- Learn more about configuring criteria, devices, and time window in notification profiles here.
- Click Save.
Verifying the Integration
Trigger a real-time alert in OpManager. Then, log in to your OpsGenie interface to verify the alert has been logged as an event.
Know more about the integrations offered by OpManager
Know more about dynamic variables used in request body
Thank you for your feedback!