Install APM Insight .NET and .NET Core Agent
For seamless onboarding, you can use the APM Insight AutoProfiler to automatically discover and instrument .NET applications running on your server.
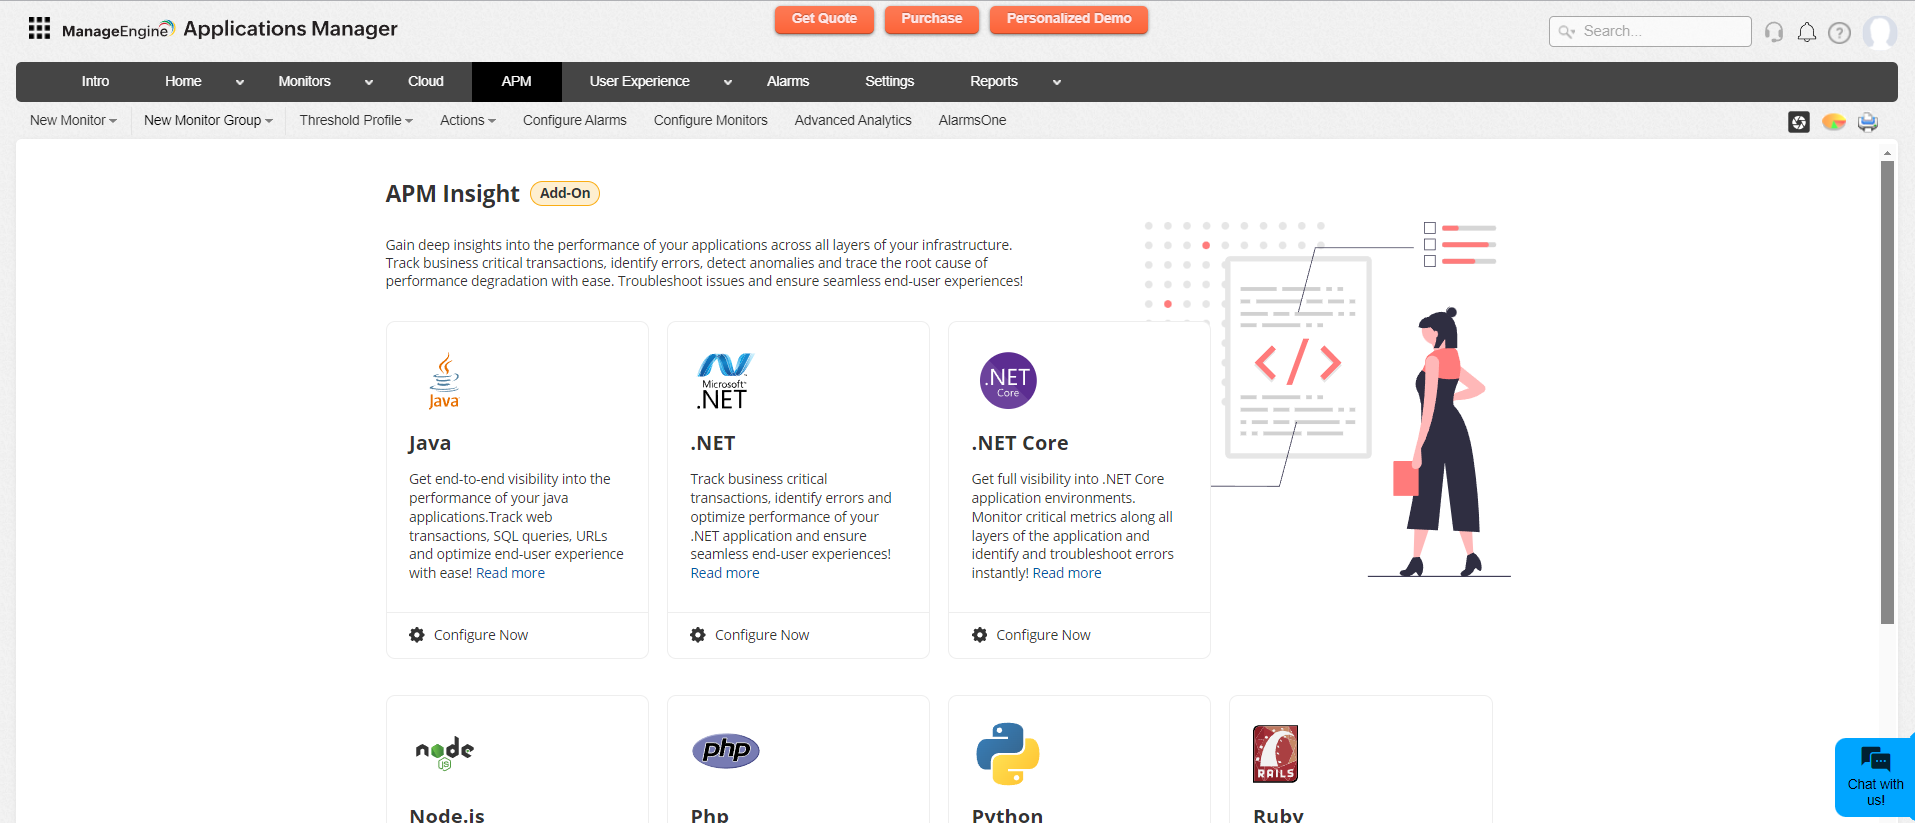
To add a new .NET Agent monitor in Applications Manager, go to the APM tab → Add New Monitor → .NET . Based on the version of the build you are using, follow the steps given below to add a .NET Agent monitor:
- Guided installation - Build version 172100 and above
- Manual installation - Build versions below 172100
Note:
- Make sure to uninstall any third-party profilers before installing the APM Insight .NET agent.
- It is recommended to run a checksum validation to verify the integrity of the downloaded agent. Learn more
- Monitoring the application in a SharePoint/Multi-Domain Assembly Mode Environment requires specific workaround changes due to security concerns. This is especially true in scenarios where the same code runs in different domains. Learn more.
- For non-desktop Windows server types, the GUI tools of the .NET Agent are inaccessible due to platform constraints. In such cases, users can access the features through the configuration files located in C:\ProgramData\DotNetAgent:
- appfilter.conf , windows_appfilter.conf and standalone_appfilter.xml - Utilize these files to include/exclude selective applications from monitoring. Refer to this KB for more information.
- custom_instrumentation.json - Use this file for manual custom instrumentation.
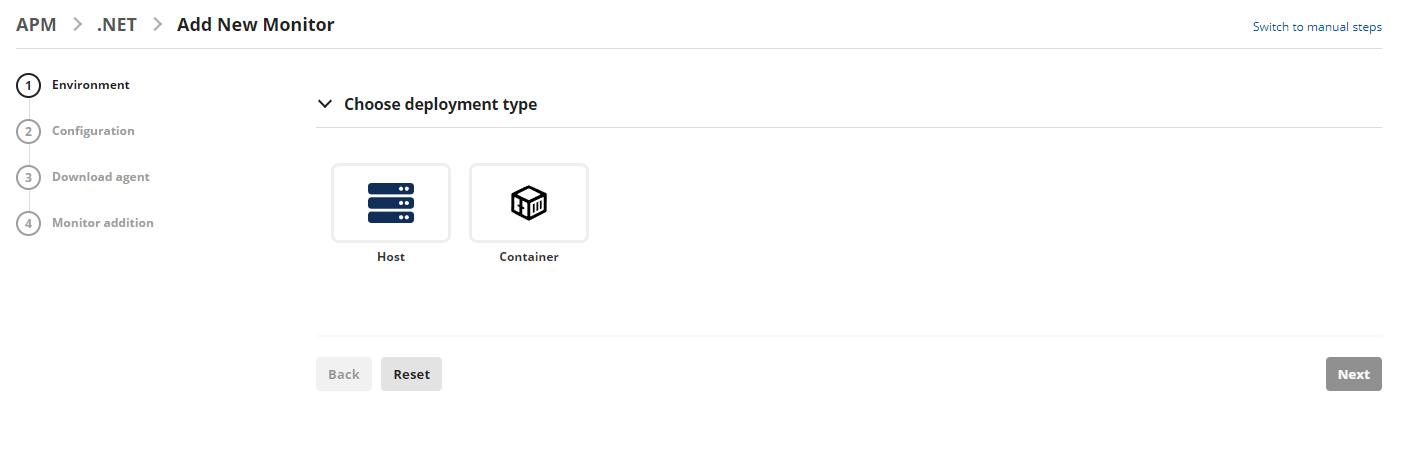
Add a new .NET Agent monitor - Guided Installation (Build version 172100 & above)
Choose between 'Host' and 'Container' based on the deployment type of your .NET application and click Next.
Review and select the required options in the configuration tab based on your applications's environment. The Advanced Settings dropdown displays the details of your Applications Manager build such as the protocol, host, port, and APM Insight license key.
Note: Ensure that the Applications Manager URL is reachable from the application server. If not, use the EDIT option to provide the accessible IP address or hostname for the agent to connect and communicate with the Applications Manager.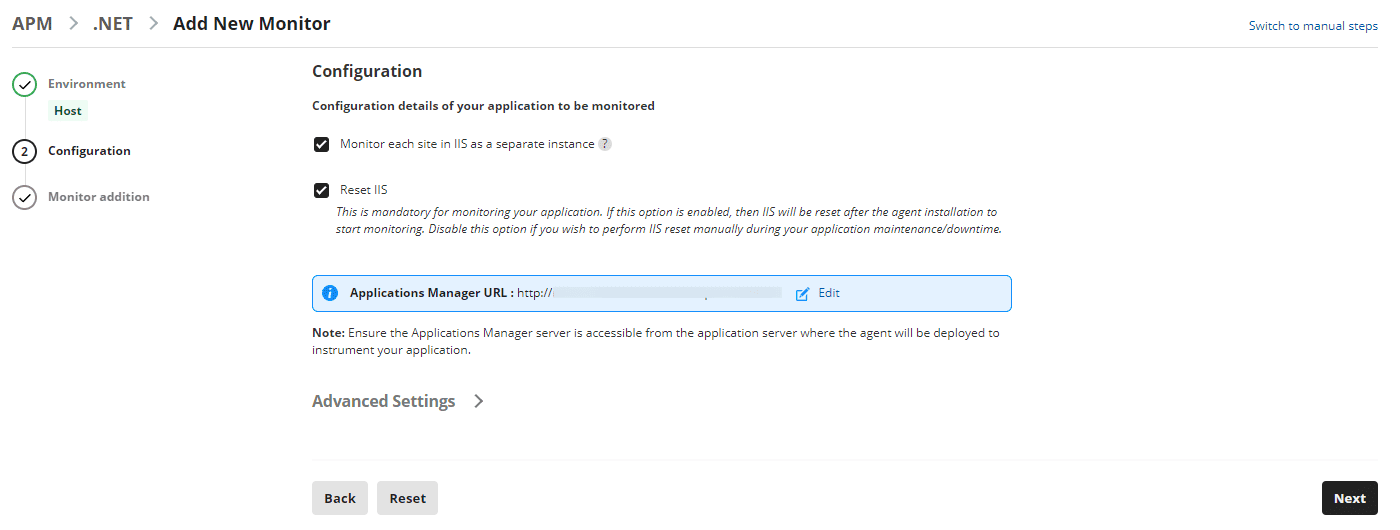
Click on Next.
Go to the server where the application is installed, open Windows PowerShell with administrator privileges, and execute the command displayed in the Monitor Addition view to complete the agent installation.
Note: This command internally downloads the guided-installation PowerShell script and .NET Agent from Applications Manager to complete the agent installation.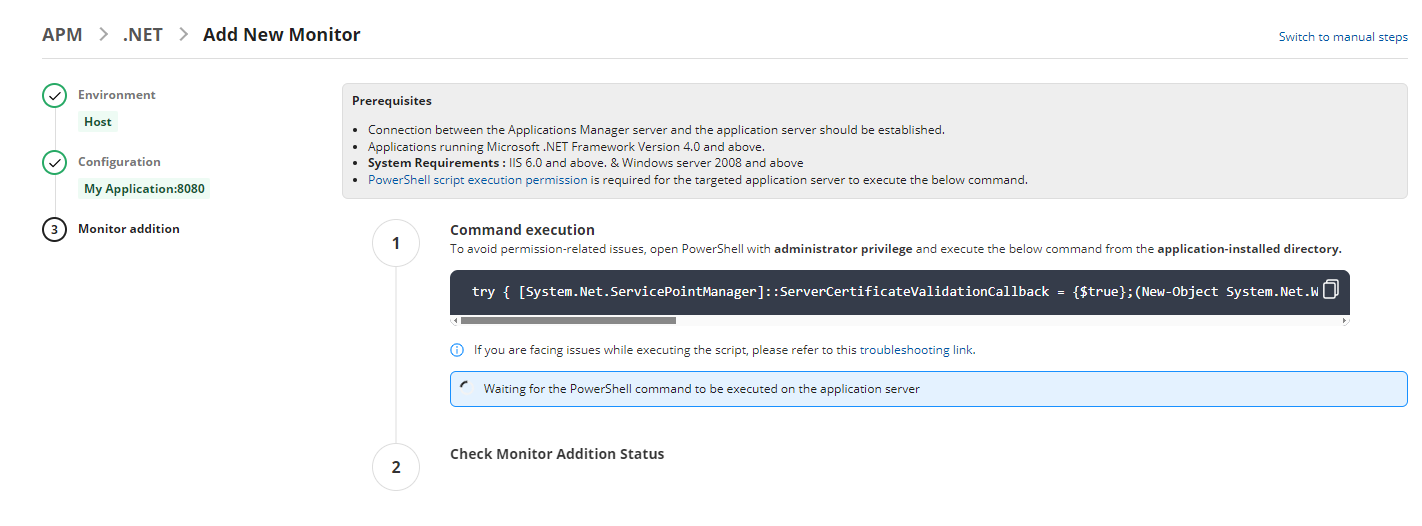 Note: Use the Switch to manual steps option in the Applications Manager UI if any environmental issues cause command execution failure, to follow the Manual Installation steps.
Once the agent installation is successful, please perform some transactions to start monitoring your .NET application.
Note:
- By default, the IIS RESET command will be executed by the agent unless it is unchecked in the APM GUI while adding the monitor. In that case, ensure IIS RESET is performed manually during your application's downtime.
- The monitor will be added in Applications Manager only when some transactions are performed in your .NET application after IIS RESET.
Add a new .NET Agent monitor - Manual Installation (Build versions below 172100)
The .NET agent can be installed in build versions below 172100 using either of the following methods:
Direct installation
- Download the latest APM Insight .NET agent (apminsight-dotnetagent.msi) file.
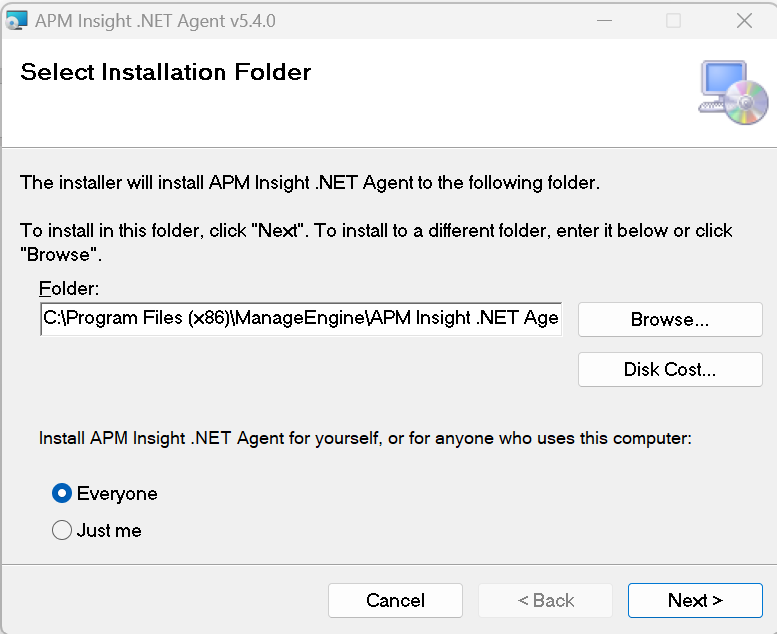
- Execute the .msi file. This opens a "Select installation folder" window.
Click on Browse and select the folder path to install the .NET Agent. Click Next.
In the next window, under the Startup Options, check the Start the Agent after installation check-box if you wish to start the agent. Click Next to start the installation of the agent.
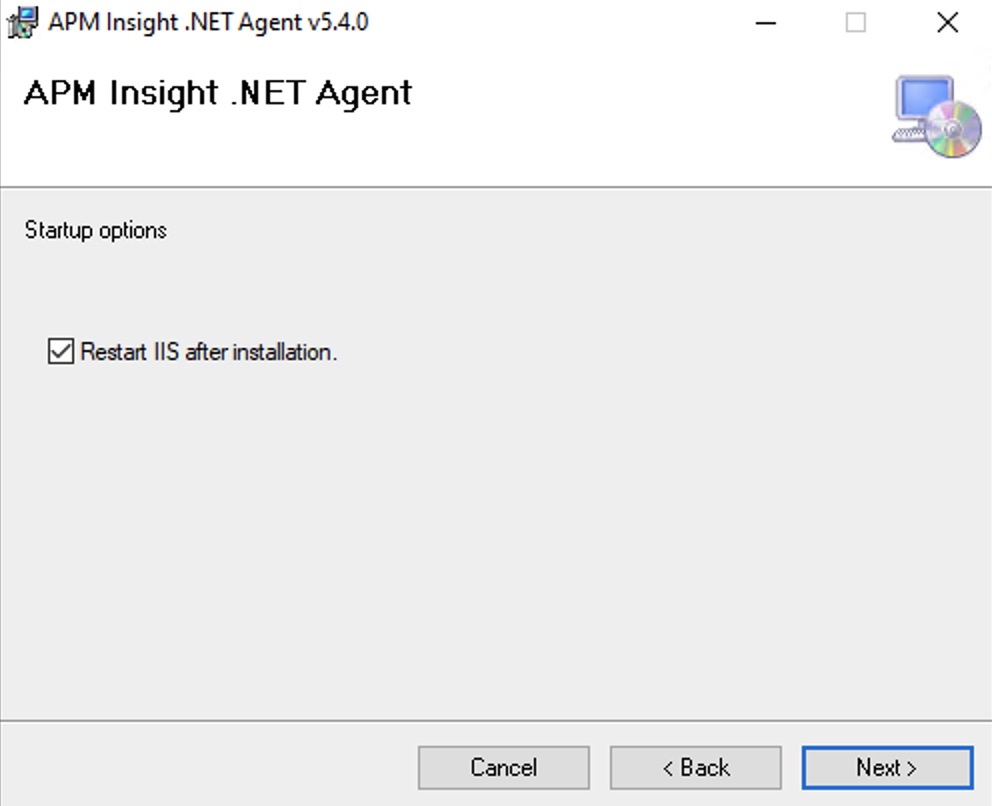
Note: This will restart IIS to start the agent.
The configuration window will appear before the installation is completed. Configure Applications Manager's License Key, Host, and Port, along with optional proxy authentication settings if the environment is behind a proxy.
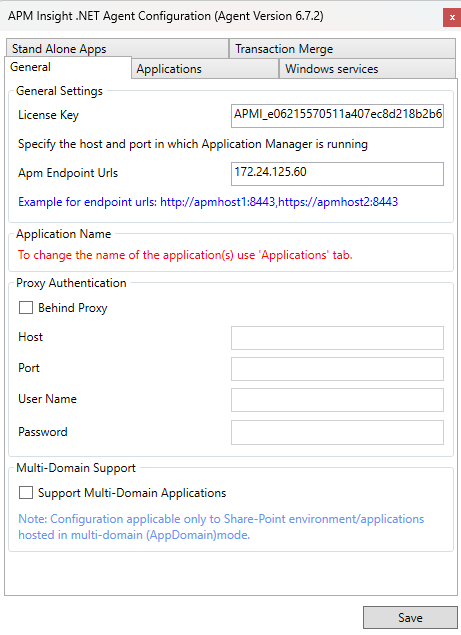
For version 7.0.2 and above
Note:
- To monitor an application in a SharePoint or Multi-Domain Assembly Mode environment, enable the Support Multi-Domain Application option. This may slightly increase CPU utilization due to single-domain conversion.
- Data Exporter will be installed while installing the agent.
- Click the Save button to complete the installation.
Installation via command line
If you would like to monitor a Windows Core environment or similar environments, you may find it easiest to install the .NET agent via the command line. Follow the below steps to install via command line:
- Download the latest APM Insight .NET agent (apminsight-dotnetagent.msi) file.
- Open the command prompt and navigate to the path where you have downloaded the .msi file.
Execute the following command to install the agent:
For version 7.0.2 and abovemsiexec -i apminsight-dotnetagent.msi license.key=<Your_License_Key> apm.host=<https/http>://<APM_HOST>:<APM_PORT> apm_exporter_host=<DATA_EXPORTER_HOST> apm_exporter_status_port=<DATA_EXPORTER_STATUS_PORT> apm_exporter_data_port=<DATA_EXPORTER_DATA_PORT> editconfig=false iisreset=true /log apm_install.log /quietGiven configurations are optional:
- apm_exporter_host
By default, DATA_EXPORTER_HOST=localhost - apm_exporter_status_port
By default, DATA_EXPORTER_STATUS_PORT=20021 - apm_exporter_data_port
By default, DATA_EXPORTER_DATA_PORT=20022
For versions below v6.7.1 to v6.9.2
msiexec -i apminsight-dotnetagent.msi license.key=<Your_License_Key> apm.host=<https/http>://<APM_HOST>:<APM_PORT> editconfig=false iisreset=true /log apm_install.log /quietFor version 6.5.1 to 6.7.0
msiexec -i apminsight-dotnetagent.msi license.key=<Your_License_Key> apm.host=<APM_HOST> apm.port=<APM_PORT> apm.protocol.https=True editconfig=false iisreset=true /log apm_install.log /quietCommand-line arguments:
editconfig - The agent will open the edit configuration window by default. Set this to false to install the agent without opening the edit configuration window.
iisreset - Agent will reset IIS by default. Set this to falseto install without resetting IIS.Note: The agent can monitor the applications only after running the iisreset command.- apm_exporter_host
- Once the installation is complete, perform some transactions to start monitoring.
Now the APM Insight .NET agent is ready and all the ASP.NET applications (such as WCF) running on the server will be monitored. After some transactions are performed, the collected data should be available in the APM tab of Applications Manager's web client within a few minutes. All .NET web applications hosted on the IIS will be monitored. Perform some transactions to start monitoring.
