Login Settings
Overview
The ADSelfService Plus Login Settings page lets you customize the login page and regulate access to the product. The page has three tabs: General, Single Sign-On, and Smart Card Authentication. This guide covers the General tab, where you set user login access rights, CAPTCHA behavior, and other login-page options. Open it under Admin > Customize > Login Settings.
Configuration instructions
Login Settings options
- Navigate to Admin > Customize > Login Settings and stay on the General tab.
- In the Login Settings section, select or clear the options you want (see the table below).
- For an option that has an inline link (for example Configure now, Configure directory list, Select attribute list, Customize, or Configure), click the link and complete the dialog that opens.
- Click Save.
| Option | What it does |
|---|---|
| Hide self-service admin login | Hides the admin login portal so end users see only the end-user portal. Recommended for security. |
| Allow/Restrict admin portal access based on IP addresses | Limits admin portal access by IP address. Click Configure now to set Allowed IP addresses or Restricted IP addresses. Available when Hide self-service admin login is enabled. |
| Show the directory selection drop-down menu in the web portal's login page | Lets users pick their directory on the web login page. Click Configure directory list to choose which directories appear. |
| Show the directory selection drop-down menu in the mobile app and mobile portal login screen | Does the same for the mobile app and mobile portal login screen. Click Configure directory list to choose the directories. |
| Enable other unique attributes to log in to the product | Lets users sign in with a unique attribute such as employee number, email, or mobile number. Click Select attribute list to choose the AD attribute. |
| Enable user disclaimer | Shows a disclaimer users must accept before they reach the portal. Click Customize to edit the text. |
| Prevent hackers from finding out valid users | Runs a mock verification so attackers cannot tell which usernames are valid. Click Configure to set what appears during the mock process, such as Random security questions or an Email verification link. |
Important: Enabling Hide self-service admin login is recommended so end users cannot reach the admin login portal. IP-based restriction requires this option to be enabled.
Note: Choose a login attribute whose value is unique across the directory (for example sAMAccountName, email, or telephone number). If two users share the value, neither can log in, and multi-valued attributes such as objectGUID or distinguishedName cannot be used.
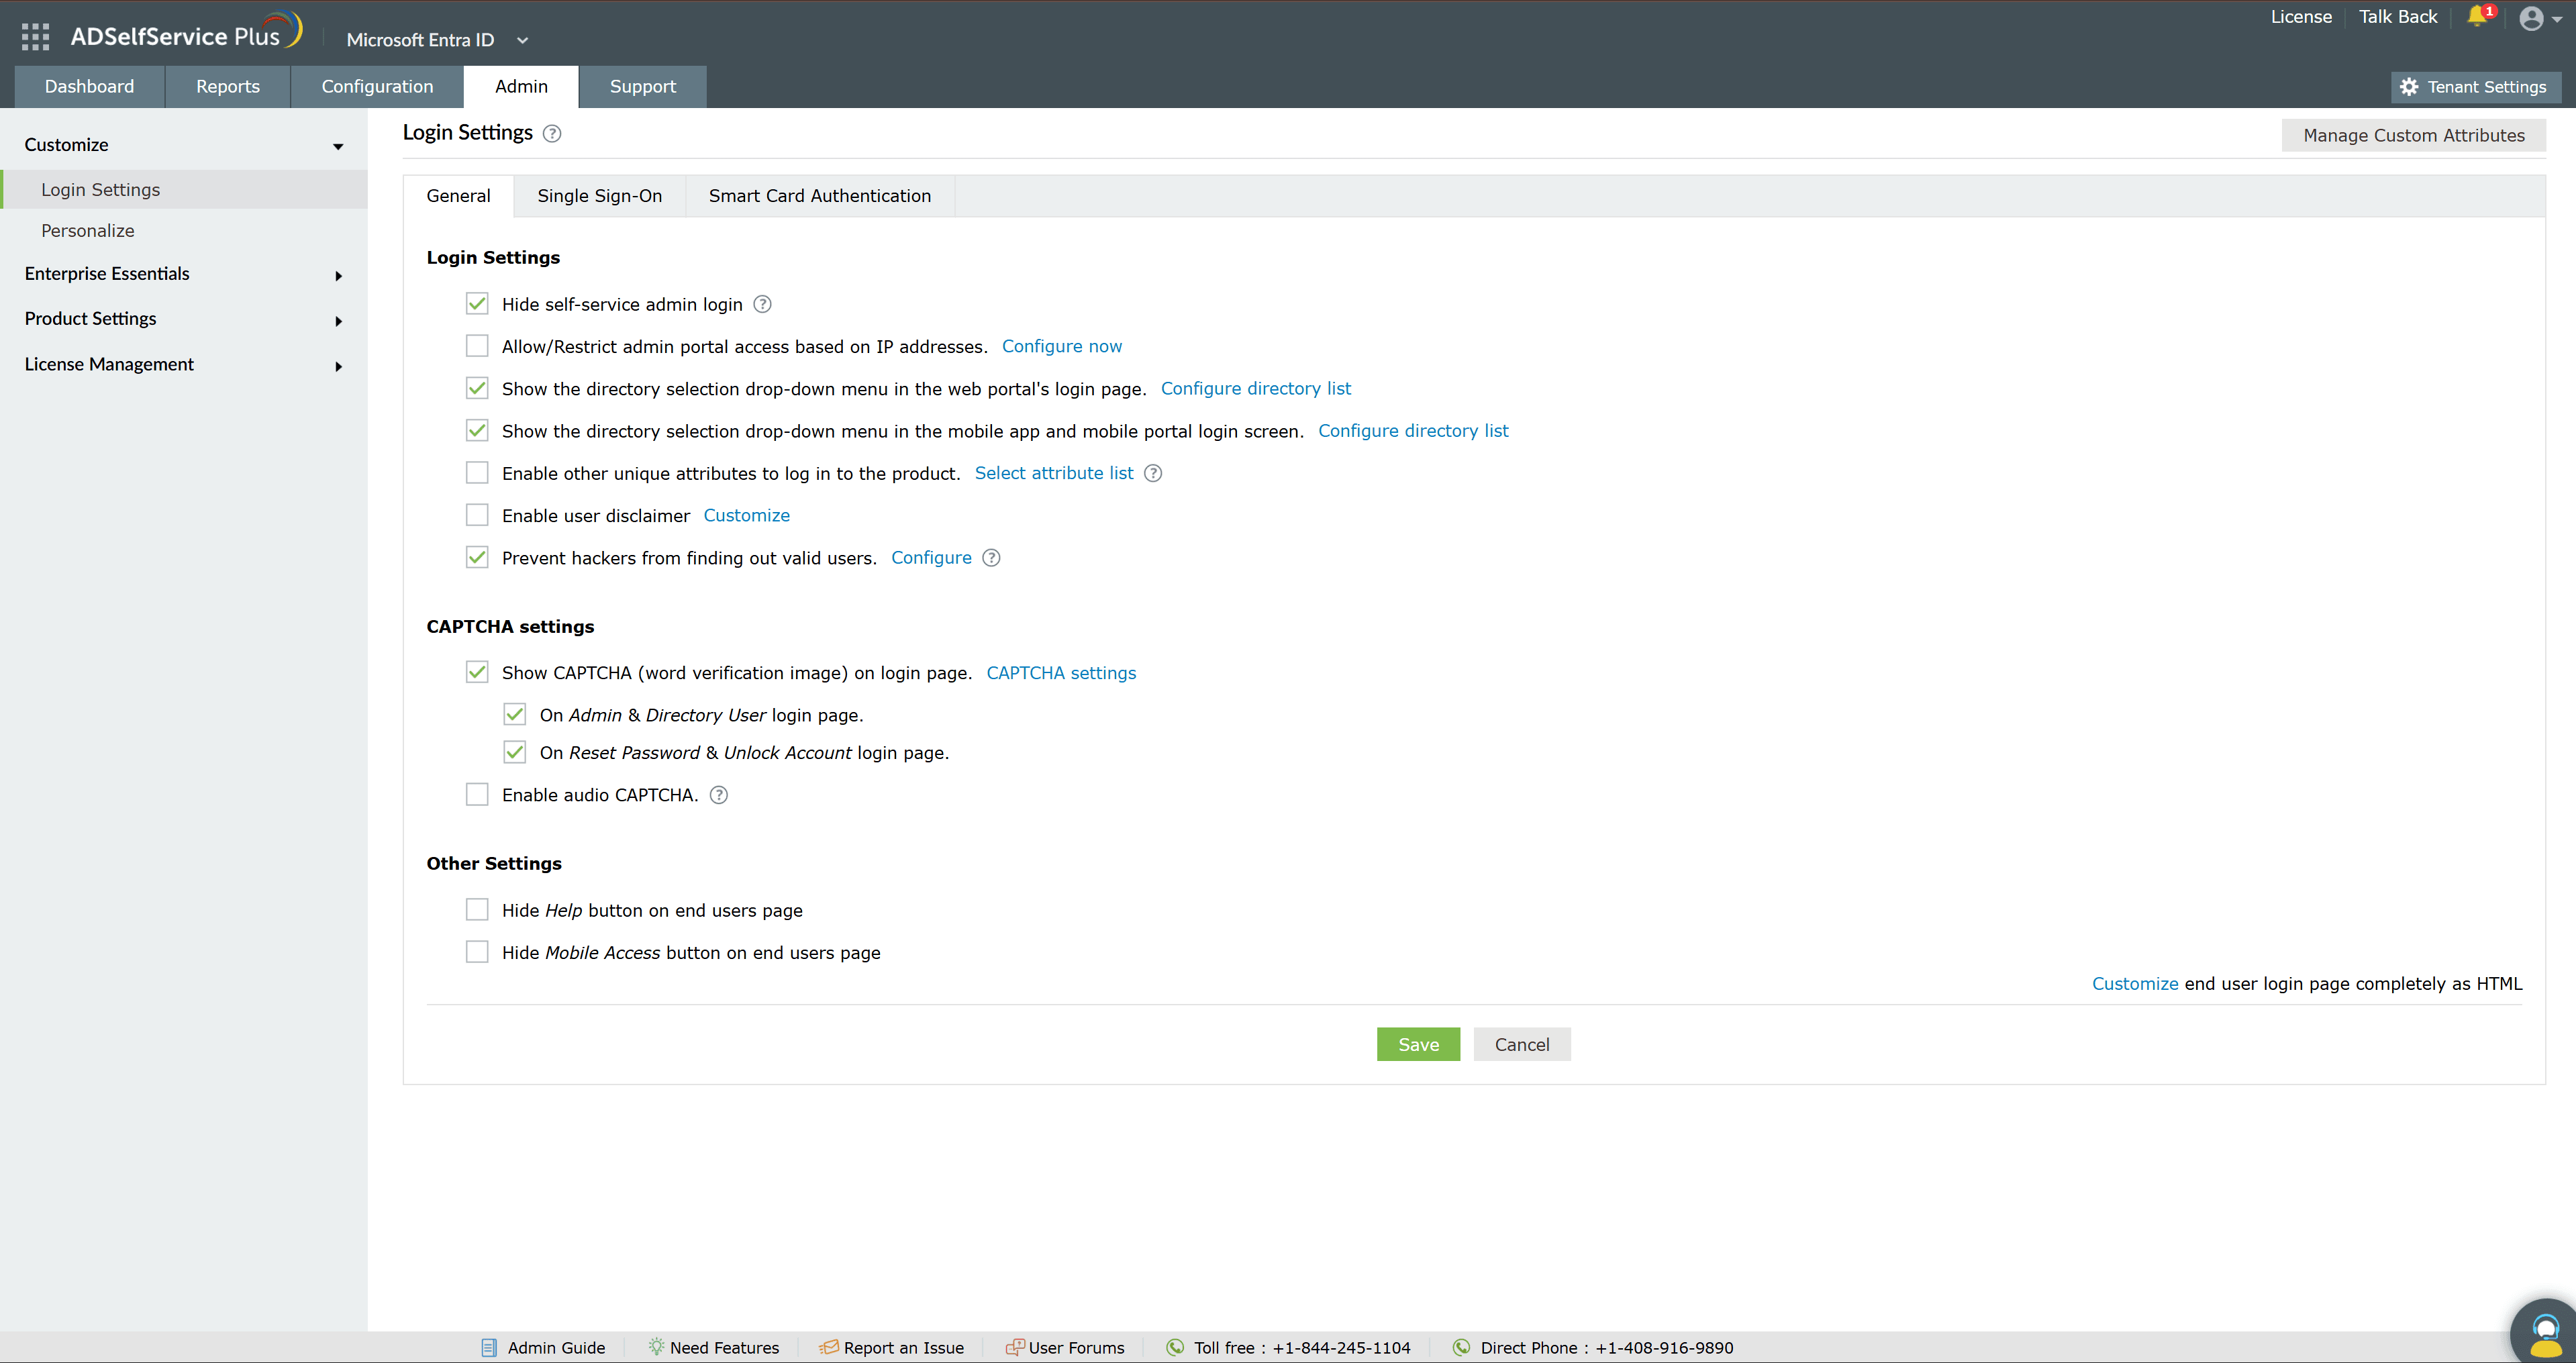
CAPTCHA settings
In the CAPTCHA settings section, add a word-verification image to the login pages to defend against bot-based brute-force attacks.
- Select Show CAPTCHA (word verification image) on login page.
- Choose where CAPTCHA appears: on the Admin and Directory User login page, and on the Reset Password and Unlock Account login page.
- Click CAPTCHA settings to choose Show CAPTCHA every time or Show CAPTCHA after invalid login attempts. For the latter, enter the number of allowed invalid attempts and the time, in minutes, before the count resets.
- To help visually impaired users, select Enable audio CAPTCHA.
- Click Save.
Other Settings
In the Other Settings section, choose what to hide from the end-user portal, then click Save:
- Select the option to hide the Help button on the end users page.
- Select the option to hide the Mobile Access button on the end users page.
Customizing the end-user login page as HTML
To fully control the end-user login page, click Customize next to end user login page completely as HTML at the bottom right of the tab, then enable End User Login HTML Customization. Edit DomainLogin.html in the installation folder (default \webapps\adssp\html\DomainLogin.html) and save. To revert, disable End User Login HTML Customization.
Tips
- Enable Hide self-service admin login to keep end users out of the admin portal, and combine it with IP-based restriction for tighter control.
- Use Show CAPTCHA after invalid login attempts to balance security and convenience instead of showing CAPTCHA on every login.
- Use Manage Custom Attributes (top right of the tab) to define the custom attributes you can then offer as login attributes.