Restrict Users
In this page we discuss
The users who can be restricted from using the License
License management involves restricting users who fall under the following six categories:
-
Users with expired accounts
-
Users with disabled accounts
-
Inactive Users
-
Deleted Users
-
Service Accounts
-
Smart Card Users.
1.Users with expired accounts:
User accounts that are created for a shorter period of time (e.g. in the case of a temporary employee) will expire. There’s no point in maintaining an expired account, so a user with an expired account automatically will be stripped of their license.
2.Users with disabled accounts:
Administrators have the right to disable a user account, for instance in the case of a user leaving the organization. By disabling a user account, the administrator denies that user access to the ADSelfService Plus portal.
3.Inactive Users:
ADSelfService Plus’ License Management feature allows administrators to block users who have been inactive for a specified time period (any number of days). This feature helps administrators take precautionary steps to prevent any disarray in the organization.
4.Deleted Users:
Just as the License Management feature restricts inactive users, it can also prevent deleted users from accessing the ADSelfService Plus portal. As in the cases above, there’s no need to waste licenses on users who have been deleted from the organization.
5.Service Accounts:
A service account is a user account that is created explicitly to provide only the required security permissions to services that are running. Resetting the password for a service account will stop the service from running. To avoid such cases, service accounts are restricted from accessing the ADSelfService Plus portal.
6.Smart Card Users:
Users can use a smart card to authenticate themselves in AD. Administrators can restrict smart card users from accessing the ADSelfService Plus password management portal to save licenses.
Note :
When a user gets restricted,then the entire database related to that particular user is lost.The user will be restricted from following locations:
- From All Reports
- Login
- Auto Enrollment
- Enrollment Notification
- Organization Chart and Employee Search
- Self Update Manager List
- Technician List
Configuring the License Management Feature
The license management feature can be configured to restrict users either manually or automatically.
Restrict Users Manually:
-
Navigate to Admin → License Management → Restrict Users
- Click the Restrict Users from the right corner of the page.

-
Select the required Domain
-
Select the desired OUs (if you want to restrict users from a particular OU).
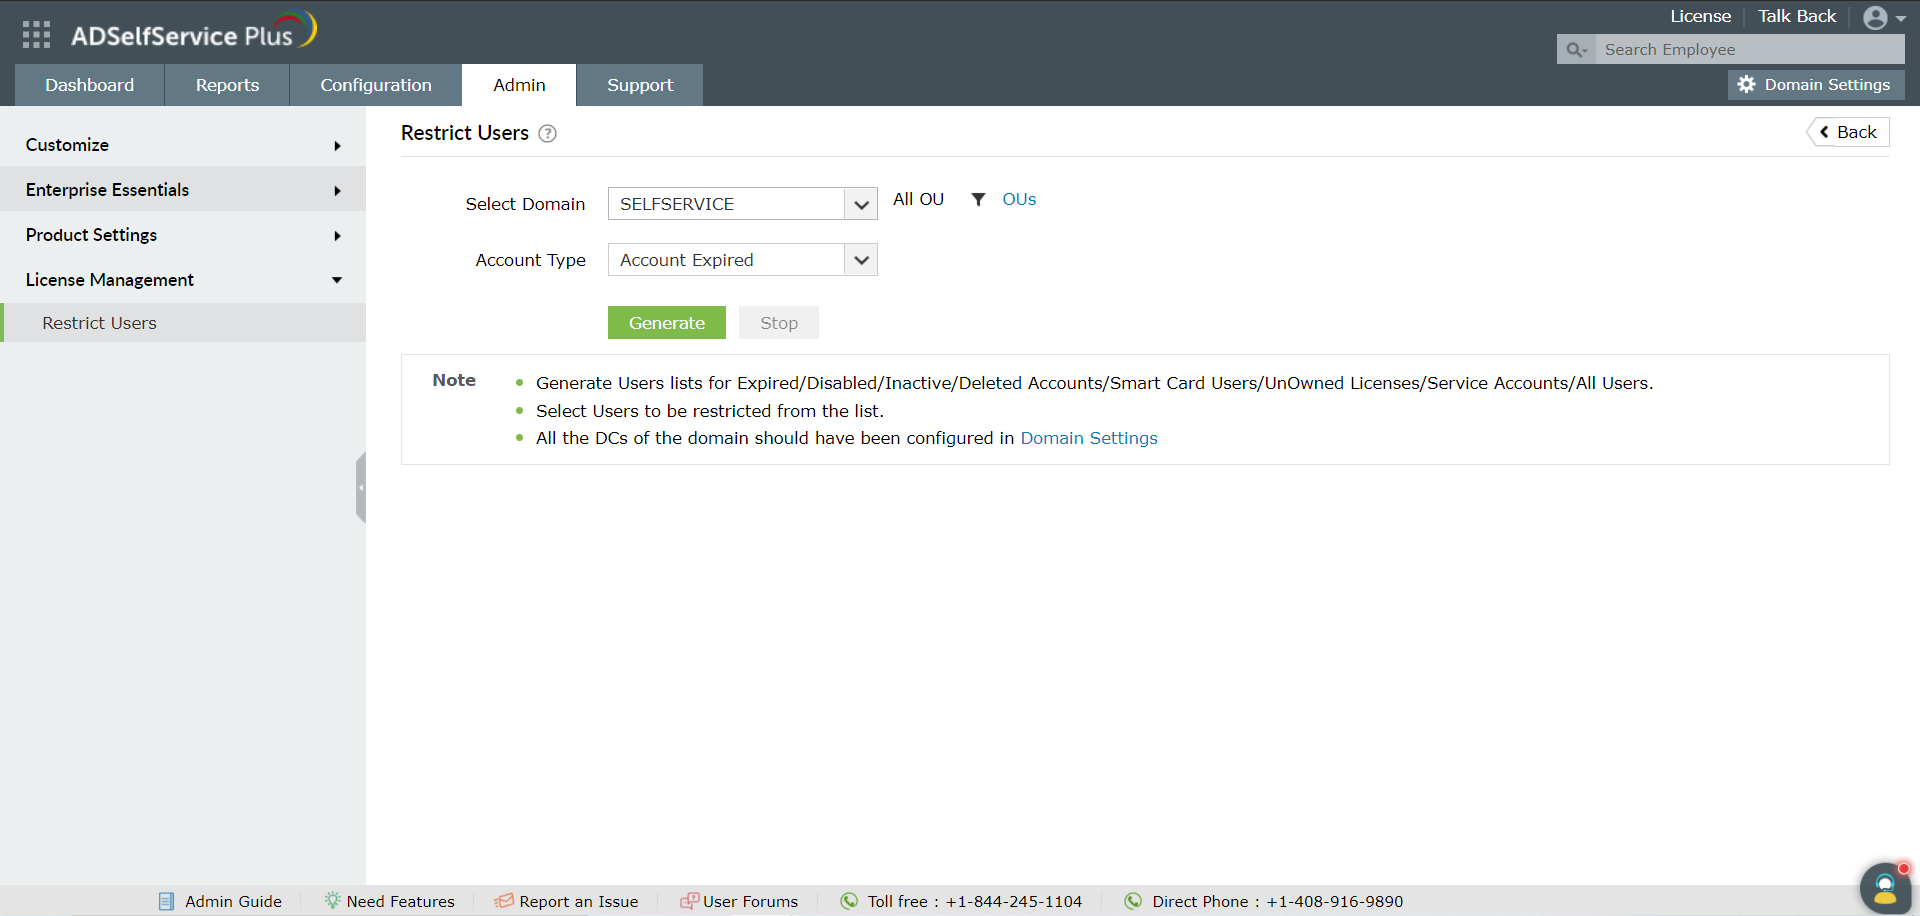
-
From the Account Type drop-down menu select the type of users you want to restrict.
-
Click Generate. A list of users of the selected type will be generated.
-
Select the users you want to restrict. You can select all the users at once or a particular user.
-
Click Restrict
Once restricted, the user will not be able to log in or perform any actions using ADSelfService Plus. The enrollment data of the user will be deleted too.
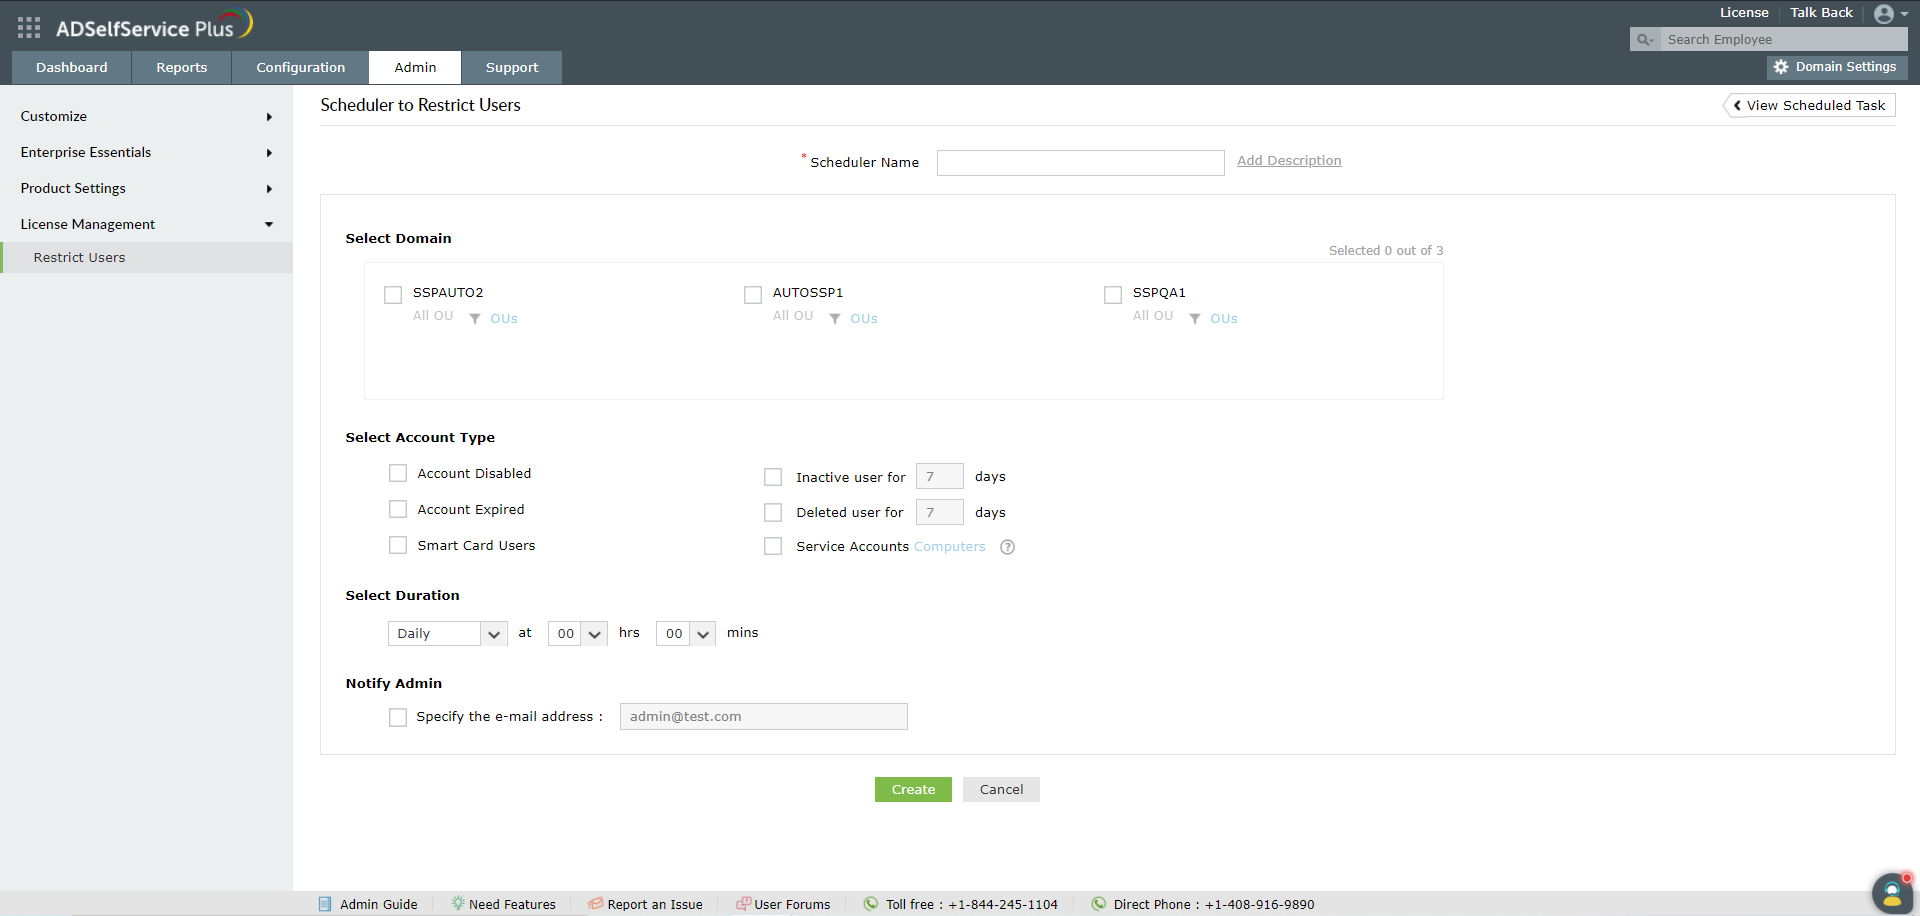
Restrict Users Automatically
-
Navigate to Admin → License Management → Restrict Users
-
Click Schedule to Restrict/Unrestrict from the top righ corner. You will be taken to the Restrict Users Scheduler page
-
Click Add New Scheduler
-
Enter a Name and Description for the scheduler
-
Select the domain and the desired OUs
-
Now select the type of users that you want to restrict
-
Specify the duration for running the scheduler
-
You can also specify a email ID to which the restricted users list will be sent periodically
-
Click Create
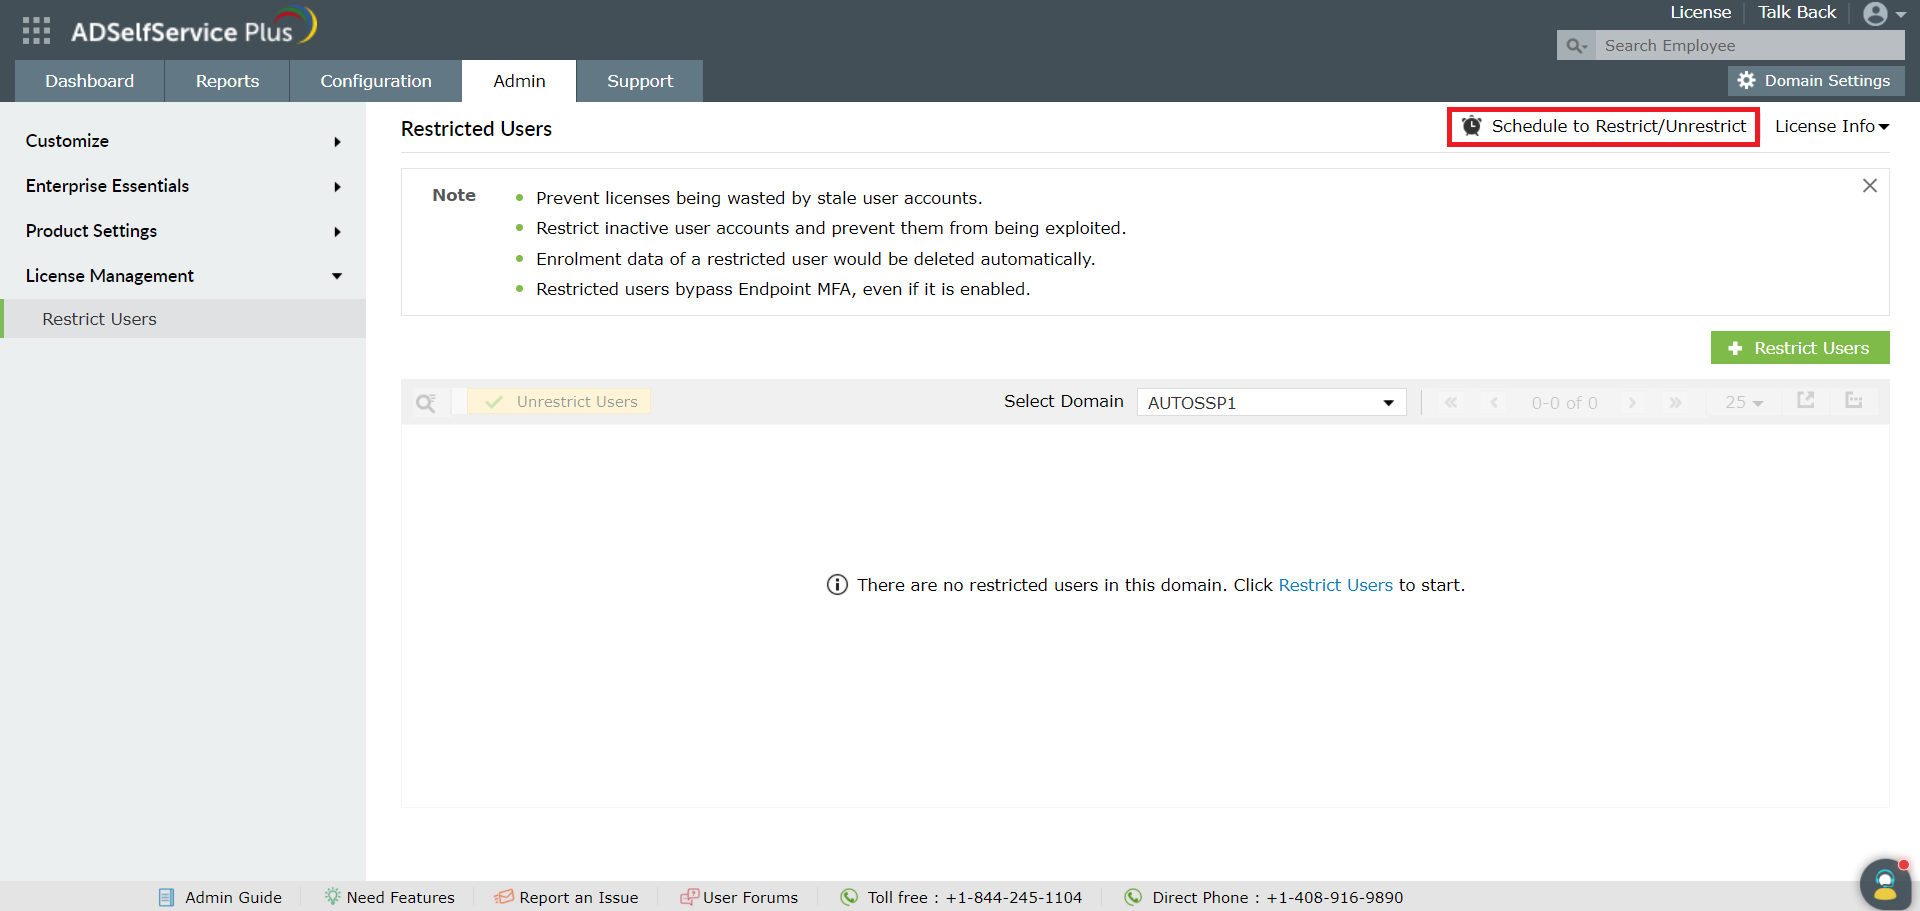
Enabling A Restricted User
Once restricted, the user will not be able to log in or perform any actions using ADSelfService Plus. The enrollment data of the user will be deleted too.
-
Navigate to Admin → License Management → Restrict Users. The restricted users list will be displayed
-
Select the users you want to reinstate
-
Click Unrestrict Users
-
A message box will appear stating that the user was successfully reinstated
Note:
- When a user gets reinstated,the administrator has to re-enroll that particular user (since the information associated with the restricted users gets lost)
Reinstate Users Automatically:
-
Navigate to Admin → License Management → Restrict Users.
-
Click Schedule to Restrict/Unrestrict from the top righ corner. You will be taken to the Restrict Users Scheduler page
-
Click Unrestrict Users tab.
-
Select the Domain you want to set up auto reinstation.
-
Select Enable scheduler to unrestrict users.
-
Select the types of users.
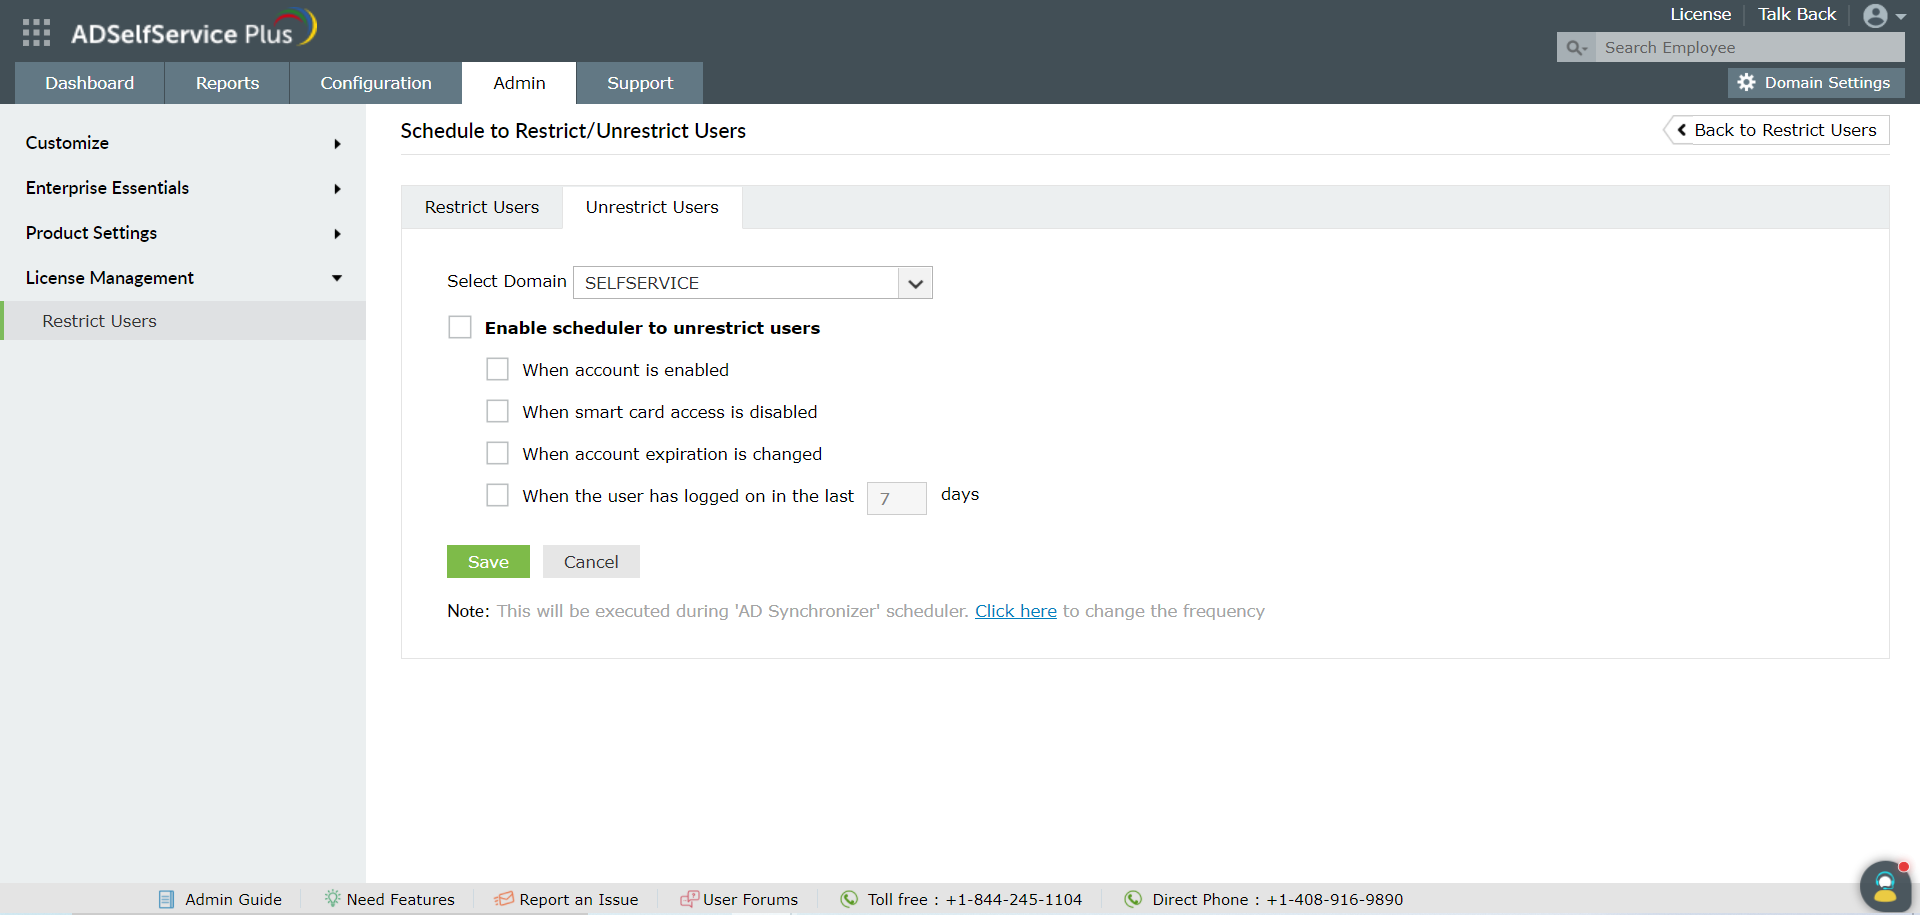
-
Click Save.
Don't see what you're looking for?
-
Visit our community
Post your questions in the forum.
-
Request additional resources
Send us your requirements.
-
Need implementation assistance?
Try OnboardPro
 ADManager Plus
 ADAudit Plus
 Exchange Reporter Plus
 M365 Manager Plus