September 16, 2026
Custom Module Workflow Enhancements
Workflow Automation for Custom Modules
- Workflow automation is now supported for custom modules. You can apply a workflow through a custom module template, mark it as default in the workflow list view, or apply it through business rules.
- You can configure up to 10 workflows for each custom module. The existing limits for nodes and connectors remain unchanged.

Focus Mode in Workflows
- You can now focus on the connections of a selected node. Focus mode highlights its source and target nodes or connectors and fades the rest of the workflow, making complex workflow paths easier to trace and understand.
- Focus mode is available across all supported workflow modules.

Custom Module Action Nodes Enhancements
Custom modules now support Field Update, Action Sequence, Zoho Circuit, and Zoho Flow actions in triggers and workflows.

Field Update
- You can configure field update actions to update fields in custom module records.
Action Sequence
- You can configure Action Sequences for custom modules. Custom modules are also available in the Action Sequence list view.
Zoho Circuit
- You can configure Zoho Circuit actions for custom modules. Custom module support is also available in the Zoho Circuit list view and execution list view.
- To configure the integration, go to Setup > Apps & Add-ons > Integrations > Third Party Integrations > Zoho Circuit. Know more.
Zoho Flow Action
- You can configure Zoho Flow actions for custom modules. Custom modules are also available in the Zoho Flow action list view and in module selection for supported custom actions such as notifications and webhooks.
Triggers for Announcements
- Configure triggers to execute automated actions across ServiceDesk Plus Cloud and third-party applications when announcements are created, edited, or deleted.
- Supported actions include notifications, custom functions, and webhooks.
- You can do this under Setup > Automation > Triggers > Announcement.


Announcement Settings
- Choose pre-filled values in announcements created from a request, problem, change, or release details page. Enable the Apply template defaults for announcements created from selected modules option under Setup > General Settings > Advanced Portal Settings > Announcement Settings.
- When this option is enabled, the announcement template's defaults are shown. Otherwise, the defaults are replaced with the record's default field values (such as title and ID).

Zoho Flow Actions Enhancements
- You can now configure Zoho Flow actions and action sequences for the Problem and Release modules, and use them in corresponding triggers and workflows.


Insert Solution in Request Reply
Insert Solutions in Request Replies
- Technicians can now insert one or more solutions directly while replying to requests, allowing them to quickly reuse relevant knowledge base content without leaving the reply editor.
- Use Insert Solution to add solution manually from the knowledge base or use Zia to receive solution suggestions.

Referred Solutions in Archived Requests
- Archived request conversations and resolutions will now retain the referred solutions.
- The Referred in Requests section on the solution details page now lists archived requests in which the solution was referenced in the Resolution. Use the Archived Requests filter to view them.
Rich Text Additional Field Support
- Rich text additional fields are now supported in custom modules. You can create up to two rich text fields.
- In Custom Modules, form rule actions (show, hide, enable, disable, mandate, or non-mandate) are now supported for Attachment and Rich Text additional fields.
Software Additional Fields
- SDAdmin and AssetConfig roles can now create additional fields for software under Setup > Customization > Additional Fields.
- Supported field types are Single-line, Multi-line, Numeric, Pick List, Multi-Select, Date/Time, Date, Email, Phone, Currency, Web URL, Lookup, and Multi-Lookup.
- These fields are displayed in the software add form.
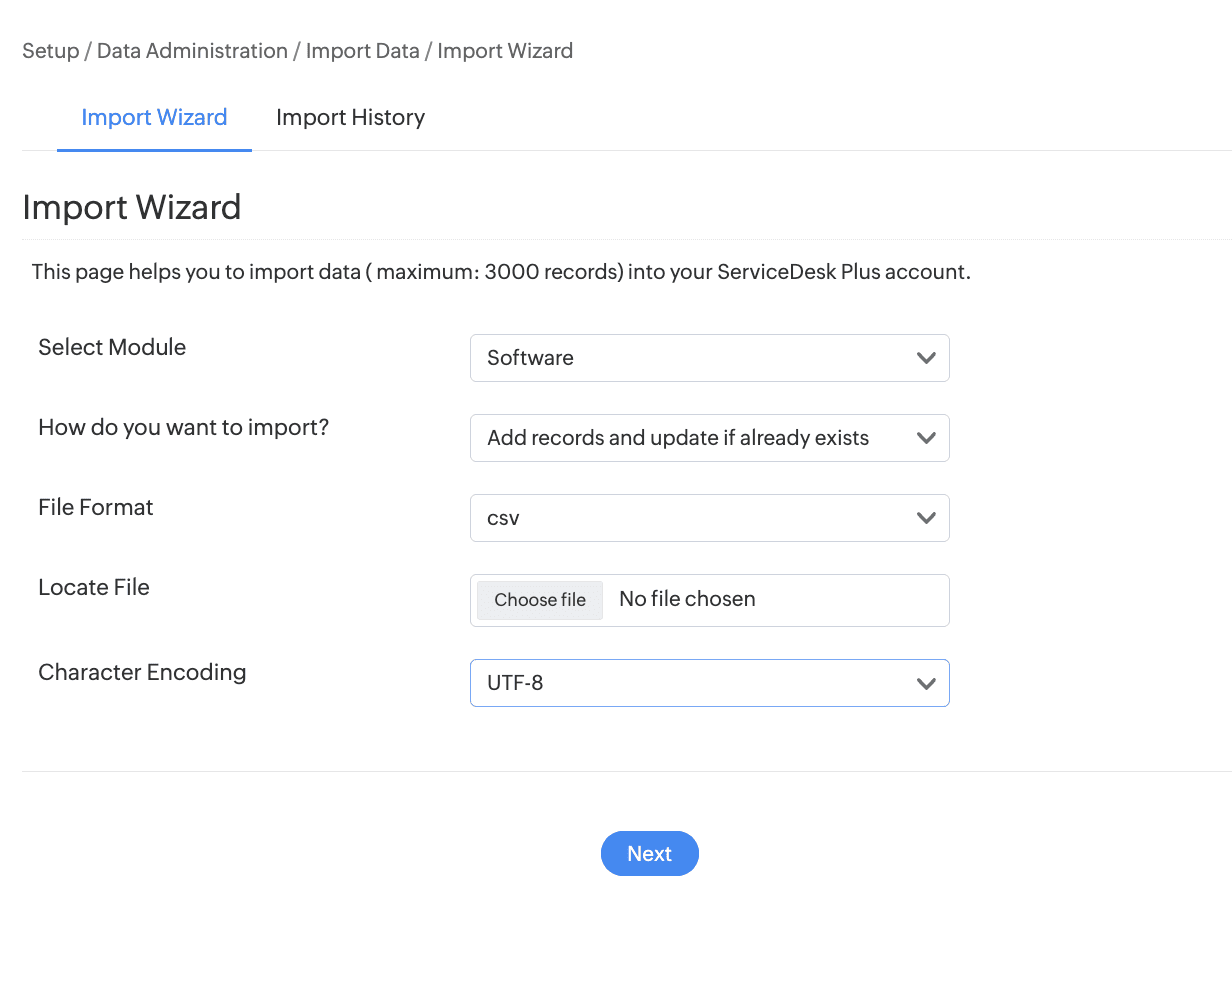
- Import software from Setup > Data Administration > Import Data.
- Generate custom tabular reports based on software additional fields.

Technician Group Support for Change Roles
- You can now assign a technician group to a change role, besides users and technicians.
- To configure a technician group for a change role, go to Setup > Customization > Change Management > Change Role. Create or edit a role and select Technician Group as the user type.
- For an existing change role, changing the user type to Technician Group removes all existing role assignments in Changes that are in the Submission stage.


Assign Technician Groups to Change Roles
- After associating a change role with a change template, you can assign a technician group to the role from the change details page.
- The available technician groups are based on the site associated with the change. Only one technician group can be assigned to each change role.
- When a user attempts to update an assignment associated with a modified change role, a message indicates that the existing assignment has been cleared, and the corresponding role field is highlighted to prompt reassignment.
- Changes made to role assignments are recorded in the change history.

Technician Group Roles in Automations
Technician group change roles can be:
- Updated by using the Field Update action.
- Used as criteria across automation rules.
- Used in Form Rule actions to set, clear, add, or remove field values and options dynamically.
- Technician groups can be configured in notifications and approvals.

September 10, 2026
Fine-Grained Report Settings
Report settings can now be configured at two levels: global and individual report. This ensures consistency and precise control over reports.
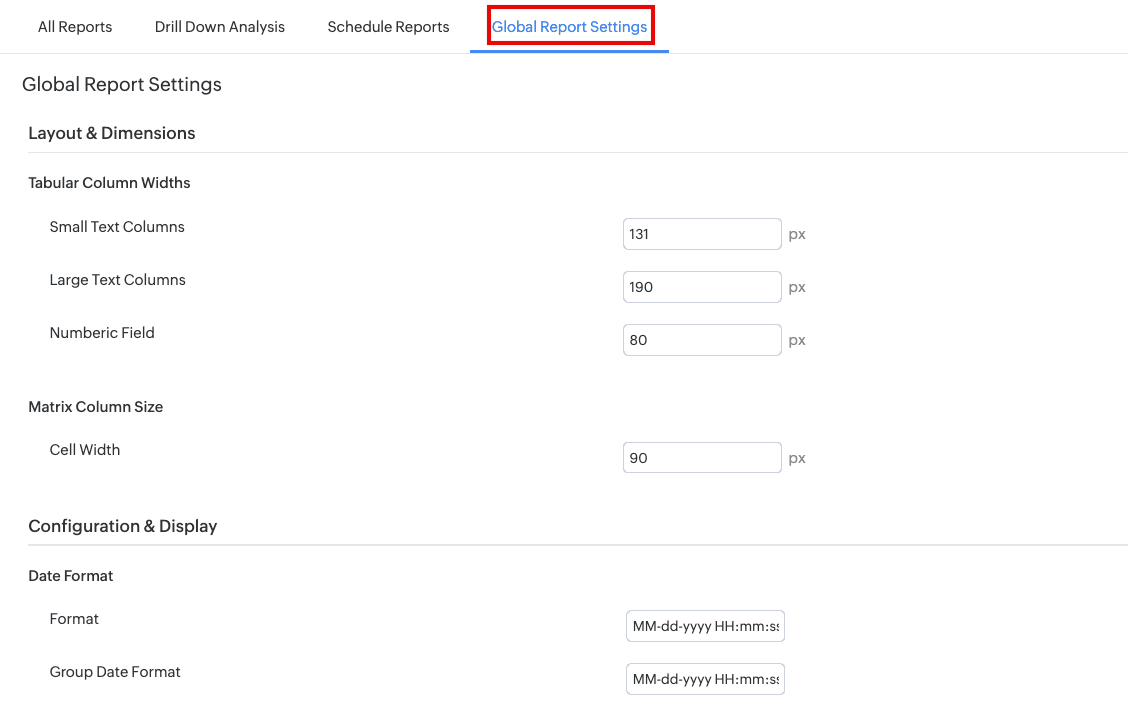
Global Report Settings
- Global report settings apply to all reports by default. Note that only SDAdmins can configure them.
- The following fields are introduced:
| Field | Description |
|---|---|
| Multiline Field Length Limit | Set the maximum character length for rich text fields in reports. |
| Exclude report header in exported files | Hide headers in specific report exports and scheduled reports. |

Individual Report Settings (Tabular and Matrix Reports Only)
- Users with SDReport and Update Report permissions can personalize display settings for each report individually under Report Settings in the report wizard.
- They can choose between global and personalized settings but cannot edit the global ones.

Scheduled Reports Enhancement
In scheduled reports configuration, a new Skip sending email if report has no data option is introduced. Enabling this option will not trigger email notifications if the scheduled report has no data.

Behavior Changes
Report Settings is now renamed as Global Report Settings and restricted to SDAdmins only.
SLA Breach Prediction by Zia
- Zia now predicts potential SLA breaches for new requests and when the subject, description, site, or SLA of an existing request is updated. The prediction is based on historical request data, including the subject, description, and past average elapsed time of similar requests.
- Zia assigns a confidence level to each prediction to help technicians identify high-risk requests and prioritize actions.
- To enable SLA Breach Prediction, go to Setup > Zia > Artificial Intelligence > Predictive Features.
- Technicians can now view prediction confidence levels under AI Insights in the request details page right pane and in the request list view to prioritize actions and improve SLA compliance.


SLA Breach Prediction Notifications
- Administrators can now configure a confidence level threshold to identify potential SLA breaches and select users to notify when the prediction confidence level meets or exceeds the configured threshold.
- To configure SLA Breach Prediction notifications, go to Setup > Automation > Notification Rules > Request and enable SLA Breach Prediction.


AI Insights in Request Details page
- AI Insights is now available in the right pane of the request details page and displays AI-driven insights for each request, including Sentiment Analysis and SLA Breach Prediction.
- You can show or hide AI Insights section by customizing the technician layout from Setup > Layouts > Details Page Layout > Technician Layout Customization > Customize. To learn more, click here.


Behavior Changes
- The Sentiment Analysis section is now available under AI Insights in the right pane of the request details page instead of Associations.
- SLA Breach Prediction is available in the US, EU, and IN data centers.
- Resolution assist using similar requests is now available for the IN data center, in addition to the US and EU data centers, for all editions.