Connect Supabase data with Analytics Plus
Connect Supabase to Analytics Plus to analyze operational data such as incidents, service events, application telemetry, and infrastructure records. You can import selected tables or query results, schedule regular synchronization, or use Live Connect to analyze current source data without storing it in Analytics Plus.
On this page
- Import Supabase data
- Schedule data import
- Import rollback
- Live Connect
- Manage data source settings
- Manage table synchronization settings
- Resolve synchronization failures
- Blend Supabase data with other sources
- Import data into an existing table
Import Supabase data
Configure the connection
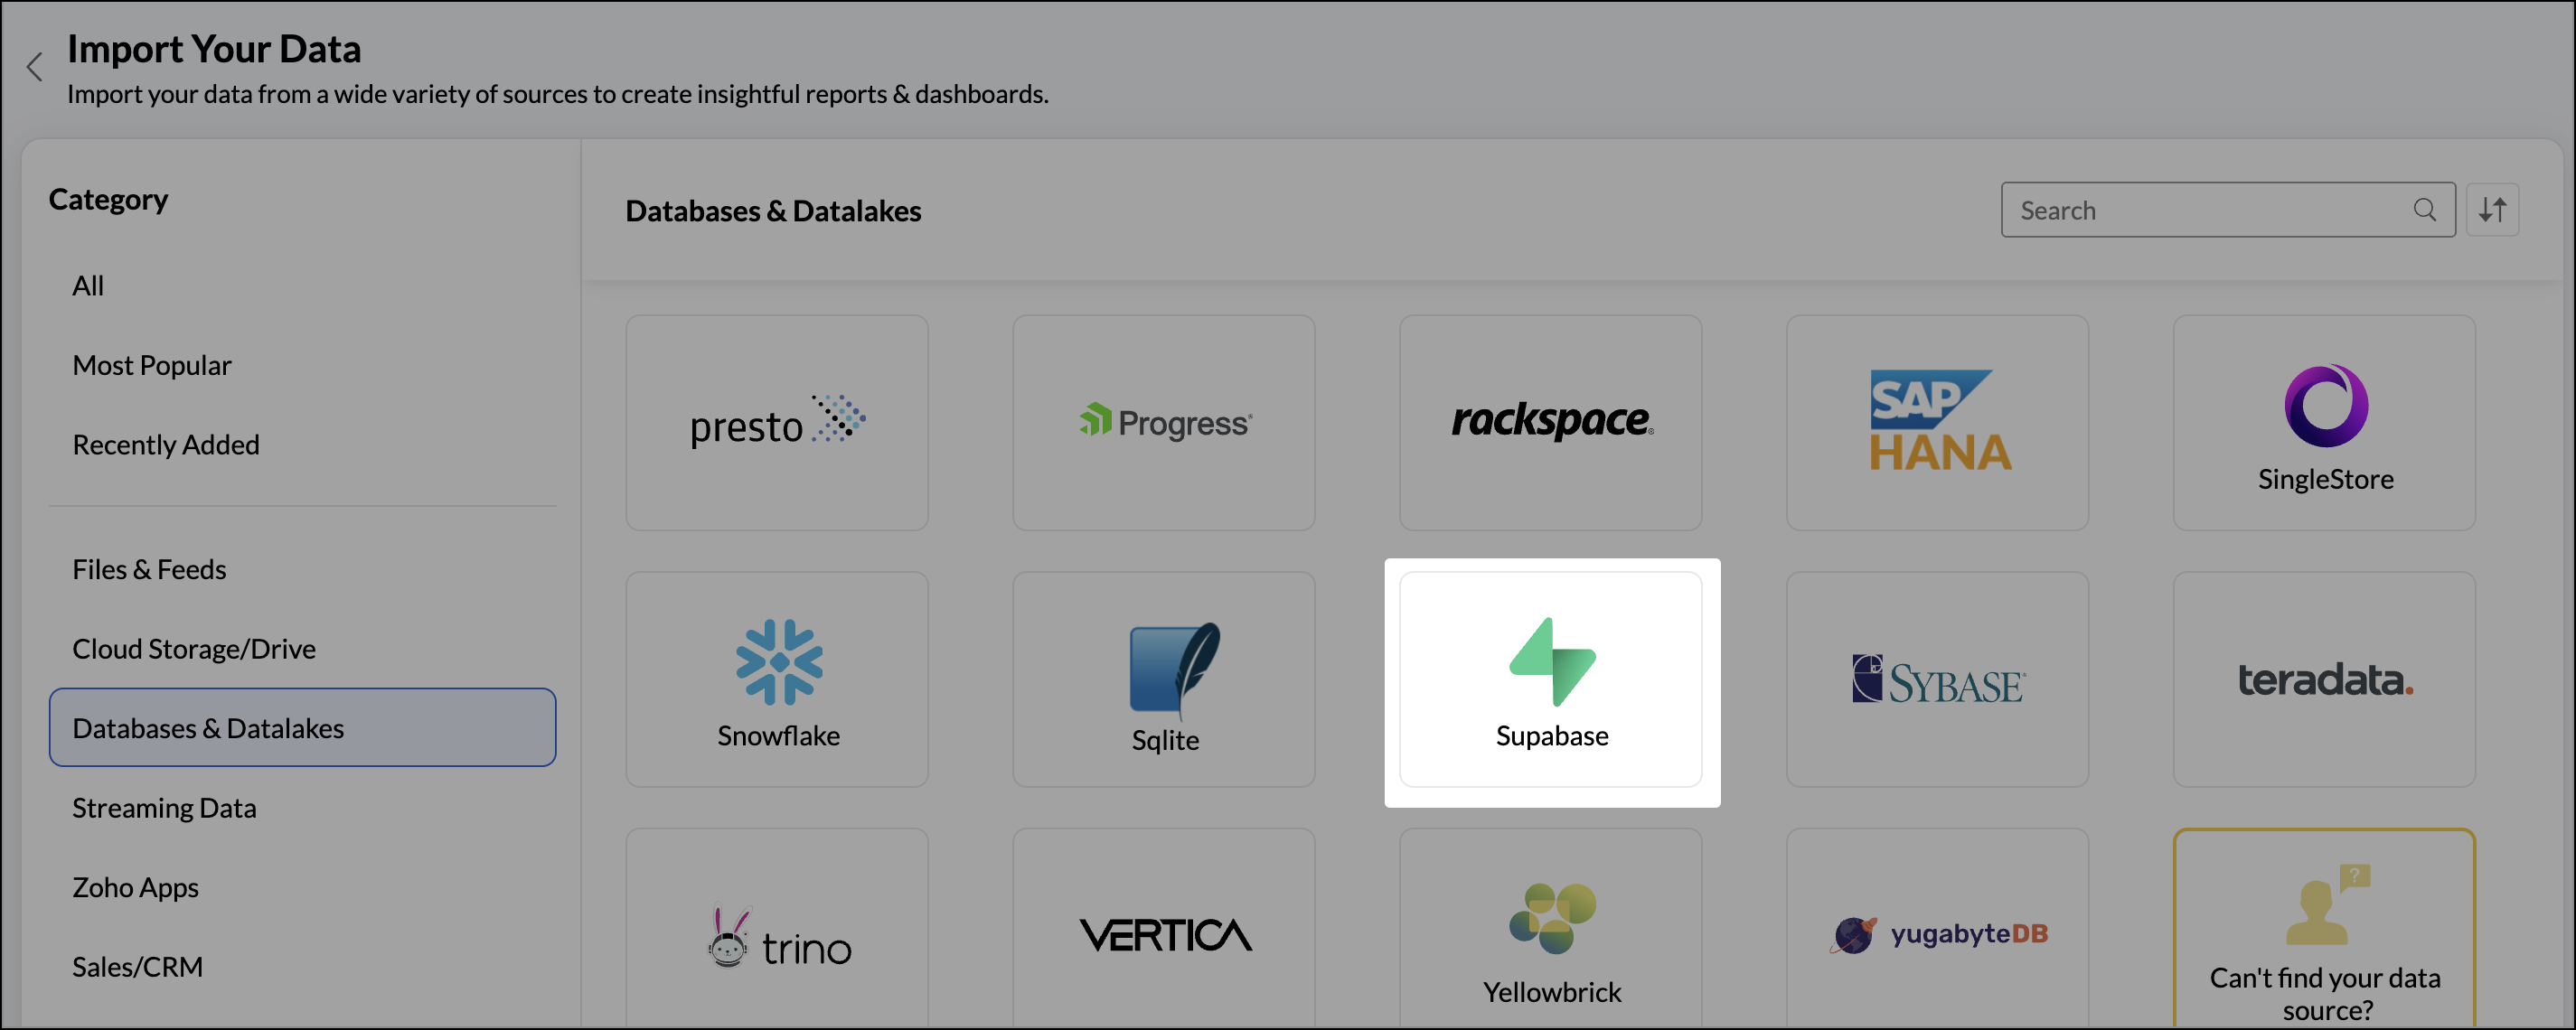
- Open the required workspace, click Import Your Data, and select Databases & Datalakes.
- Select Supabase.
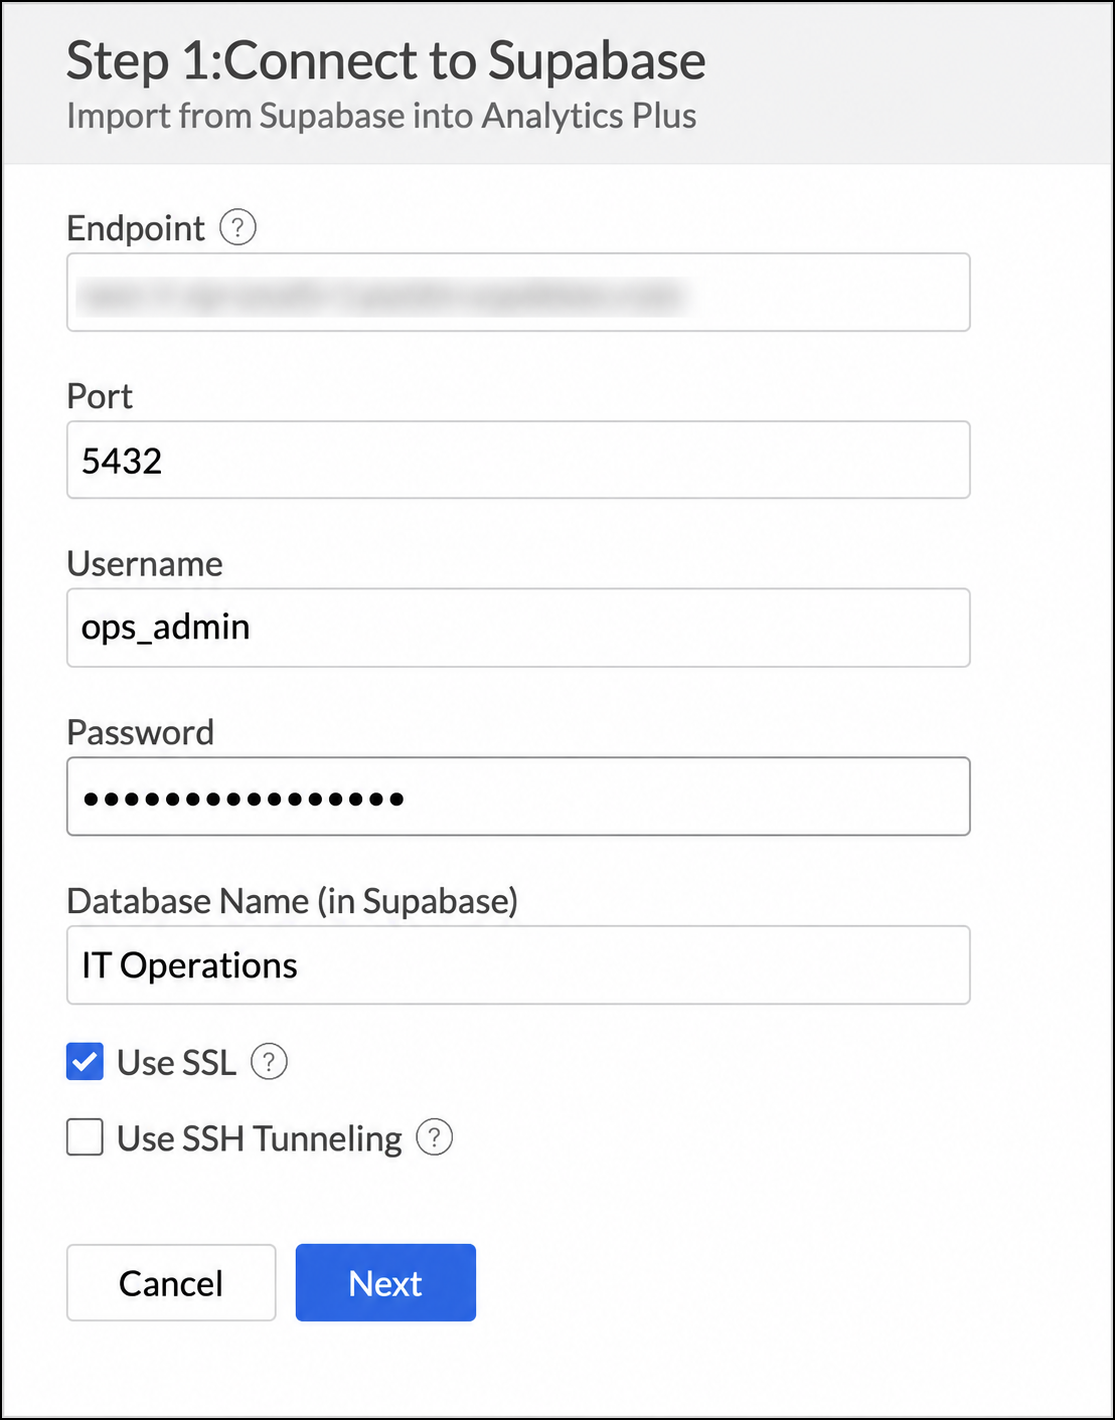
- Enter the Endpoint, Port, Username, Password, and Database Name for the Supabase database.
- Select Use SSL if the connection requires SSL. Configure SSH tunneling when it is required for the database connection.
- Click Next.
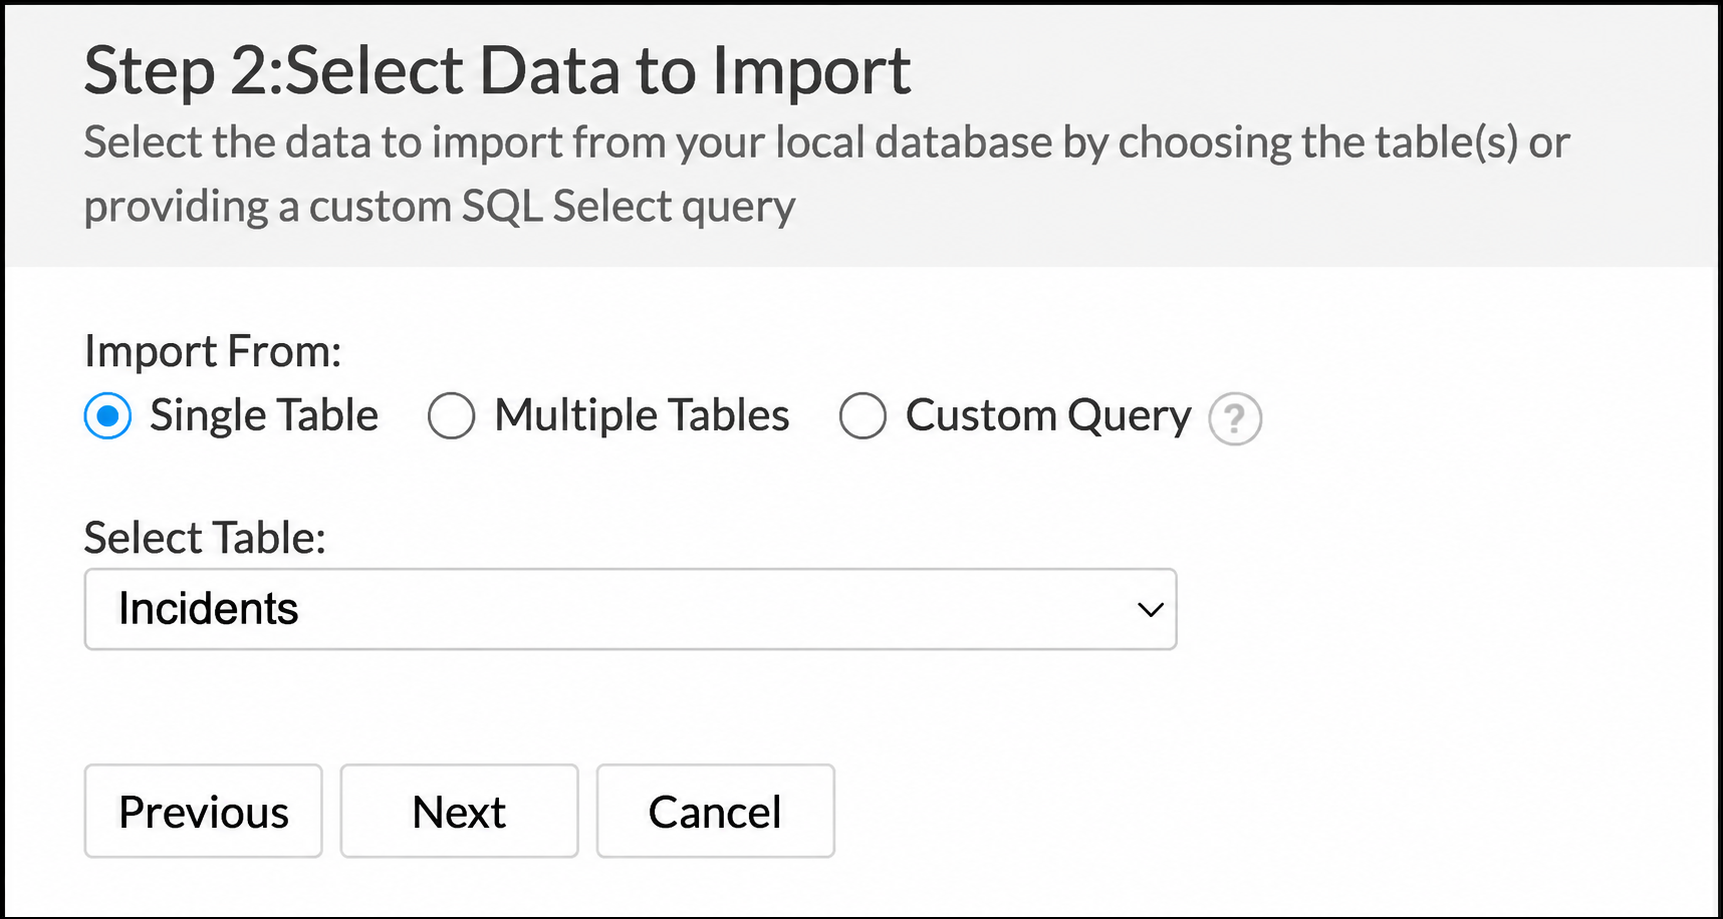
Choose data to import
Choose one of the following import methods:
- Single Table: Import one table from Supabase.
- Multiple Tables: Import several tables in the same setup.
- Custom Query: Import the result of a SQL SELECT query.
Single table
- Select Single Table, choose the table to import, and click Next.
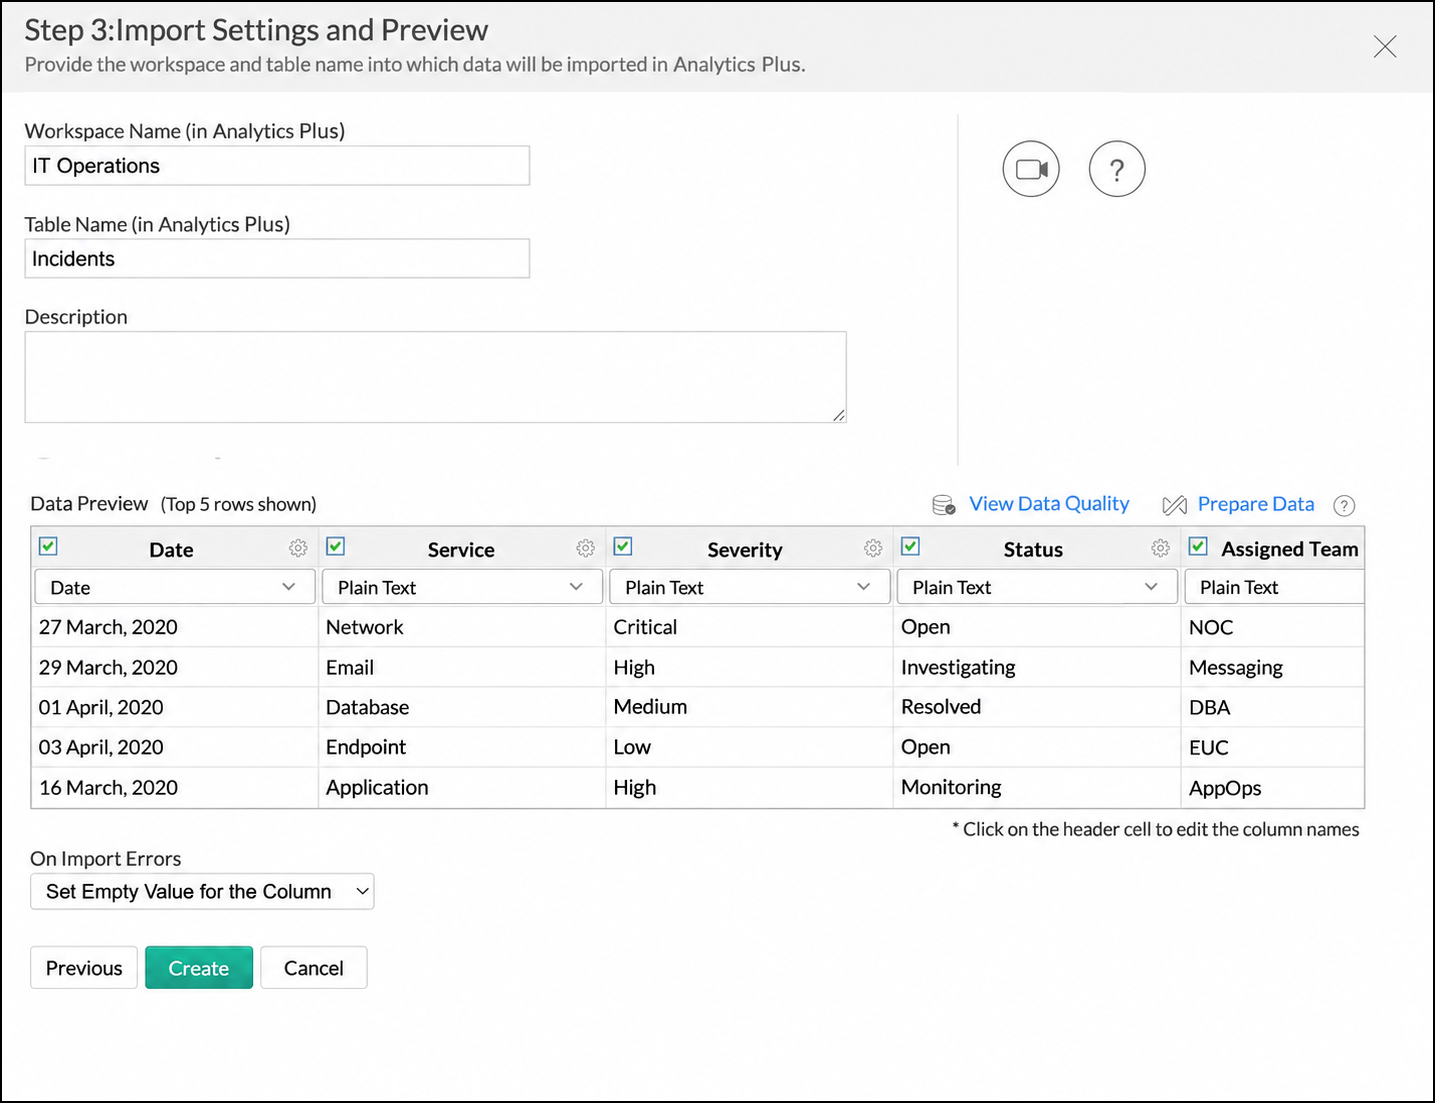
- In Import Settings and Preview, enter the workspace name, table name, and an optional description.
- Review the data preview. Clear the checkbox beside a column that you do not want to import, and change a column name or data type when needed.
- Under On Import Errors, choose whether Analytics Plus should set an empty value, skip affected rows, or stop the import.
- Click Create.
Multiple tables
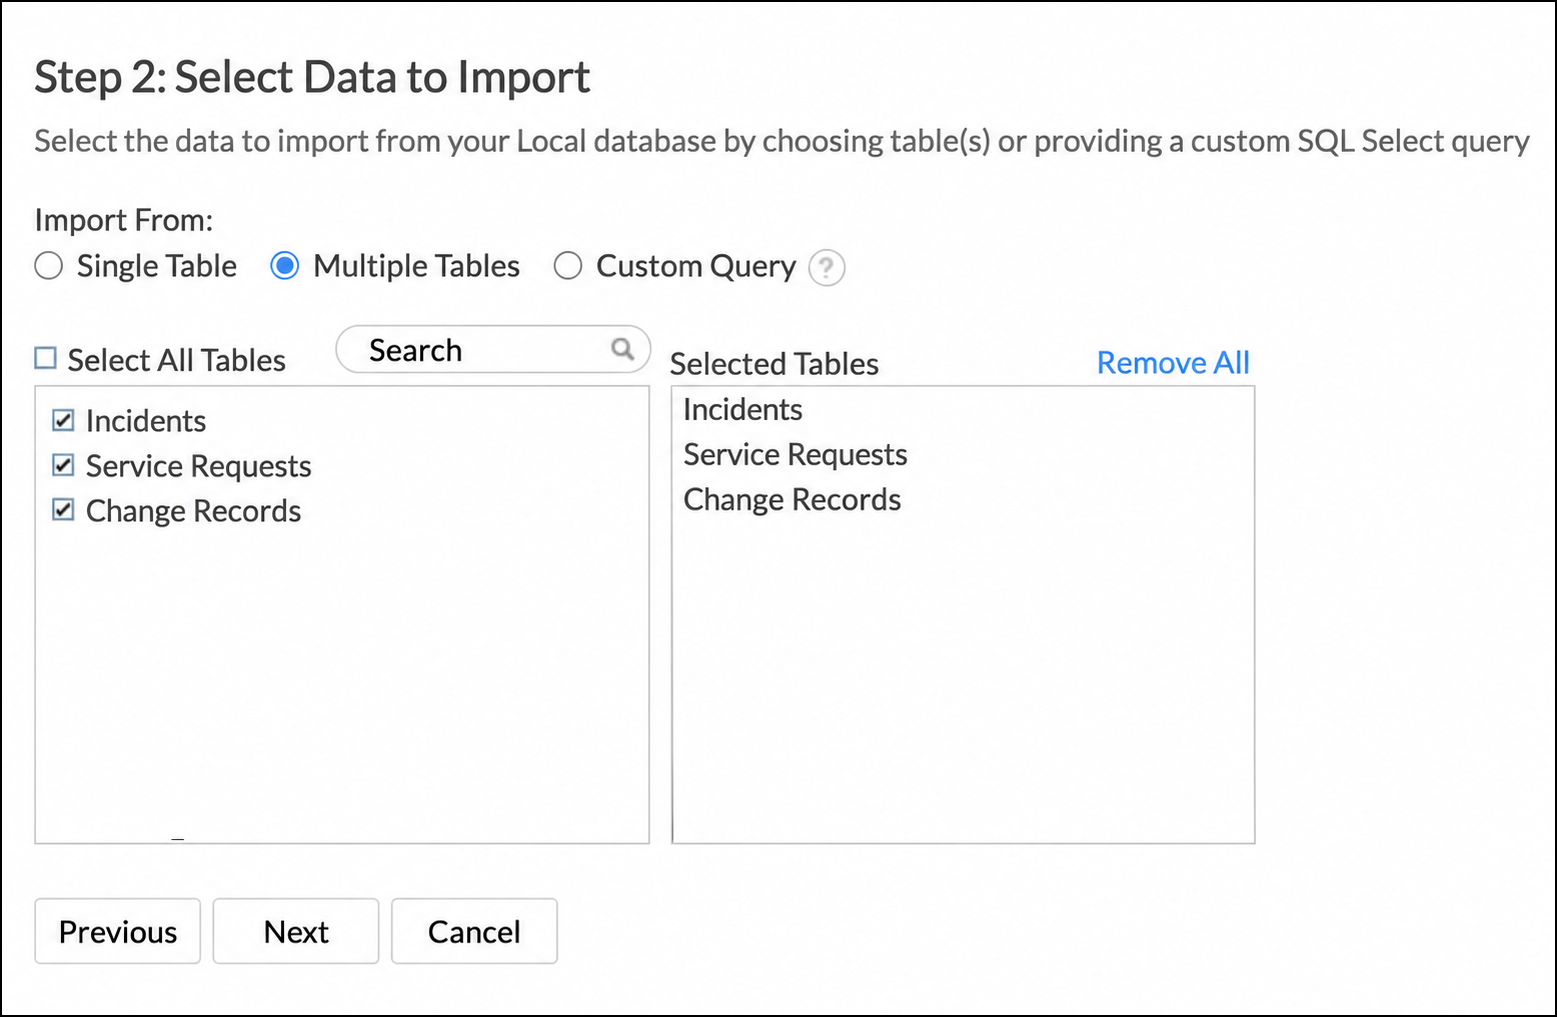
- Select Multiple Tables.
- Select the required tables, confirm that they appear under Selected Tables, and click Next.
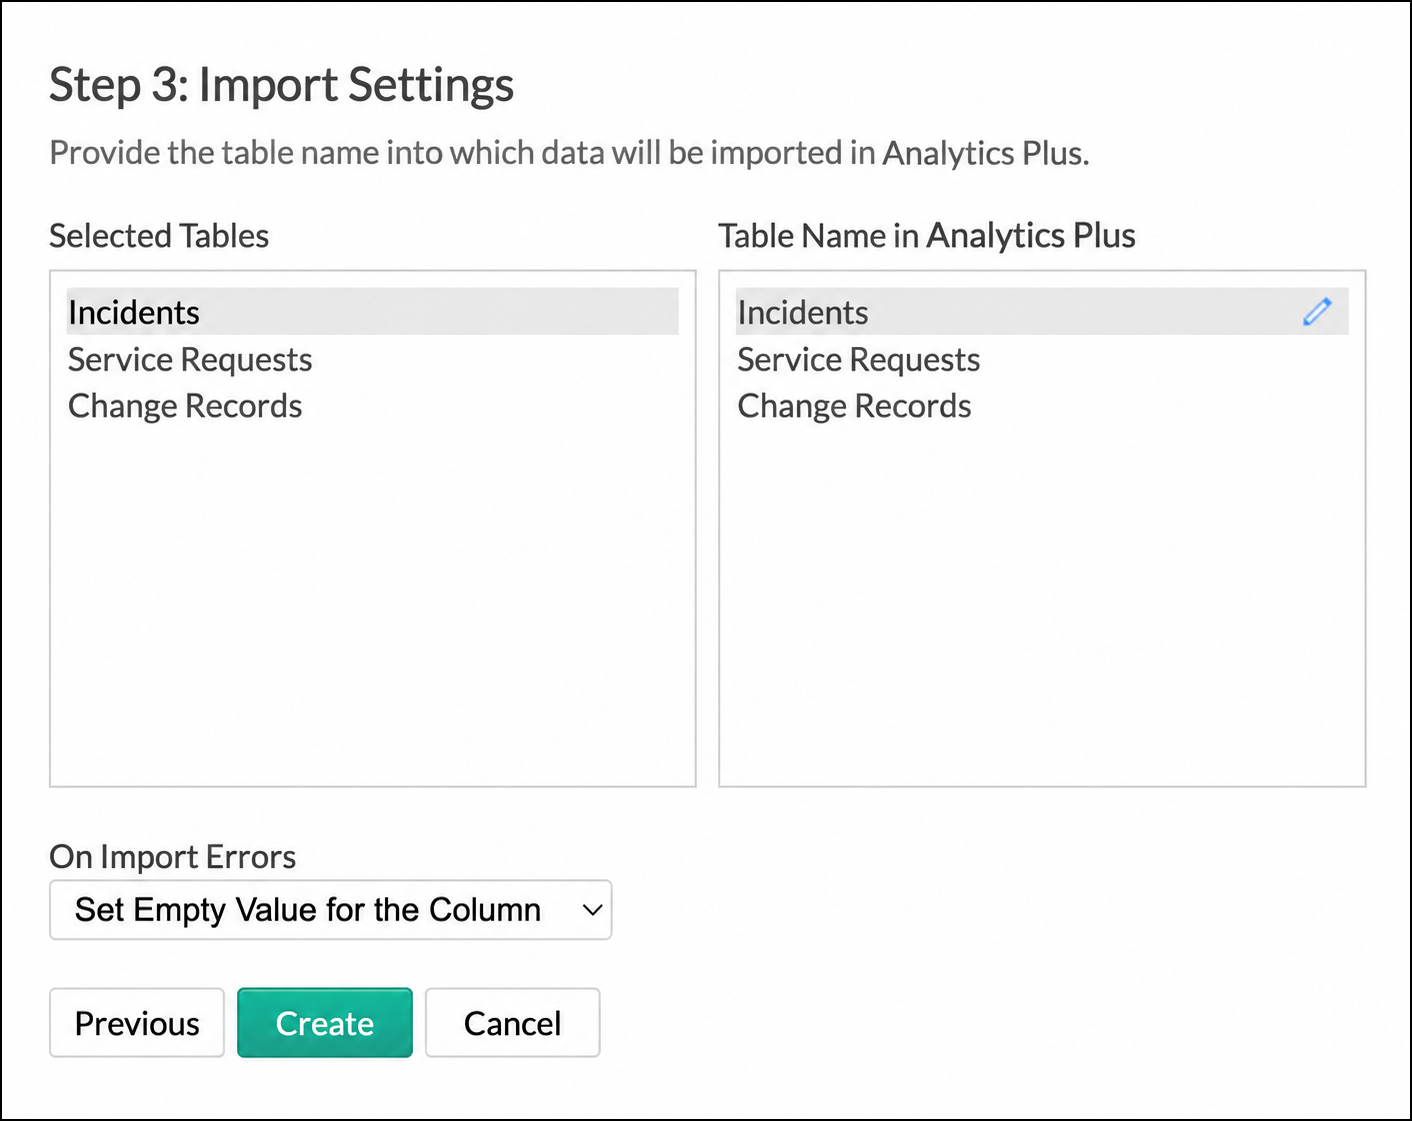
- Enter the workspace name and an optional description.
- Review and, if required, edit the destination table names.
- Choose how import errors should be handled, and click Create.
Custom query
- Select Custom Query.
- Enter a SQL SELECT query and click Next.
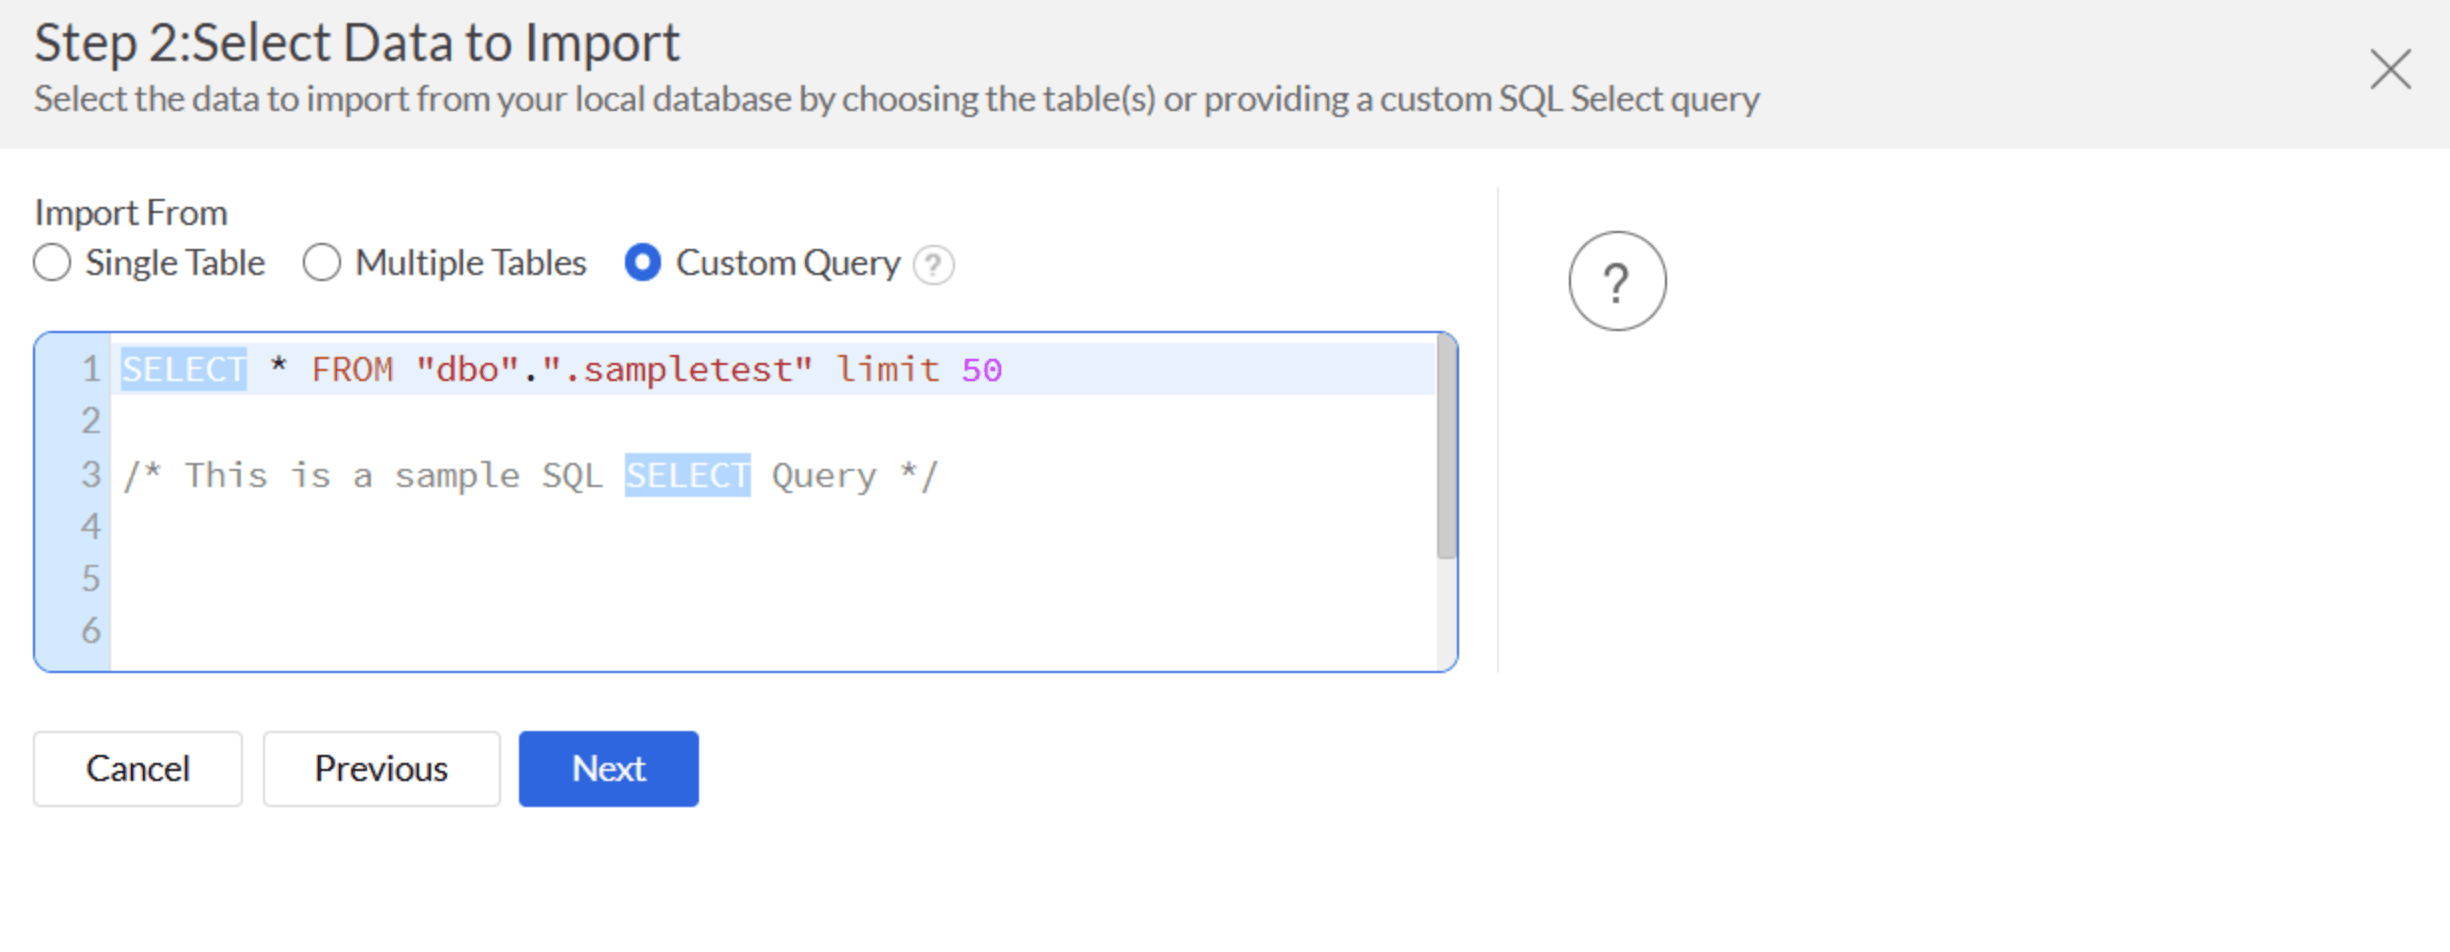
- Complete the workspace, table, preview, column, and error-handling settings as you would for a single-table import.
- Click Create.
Schedule data import
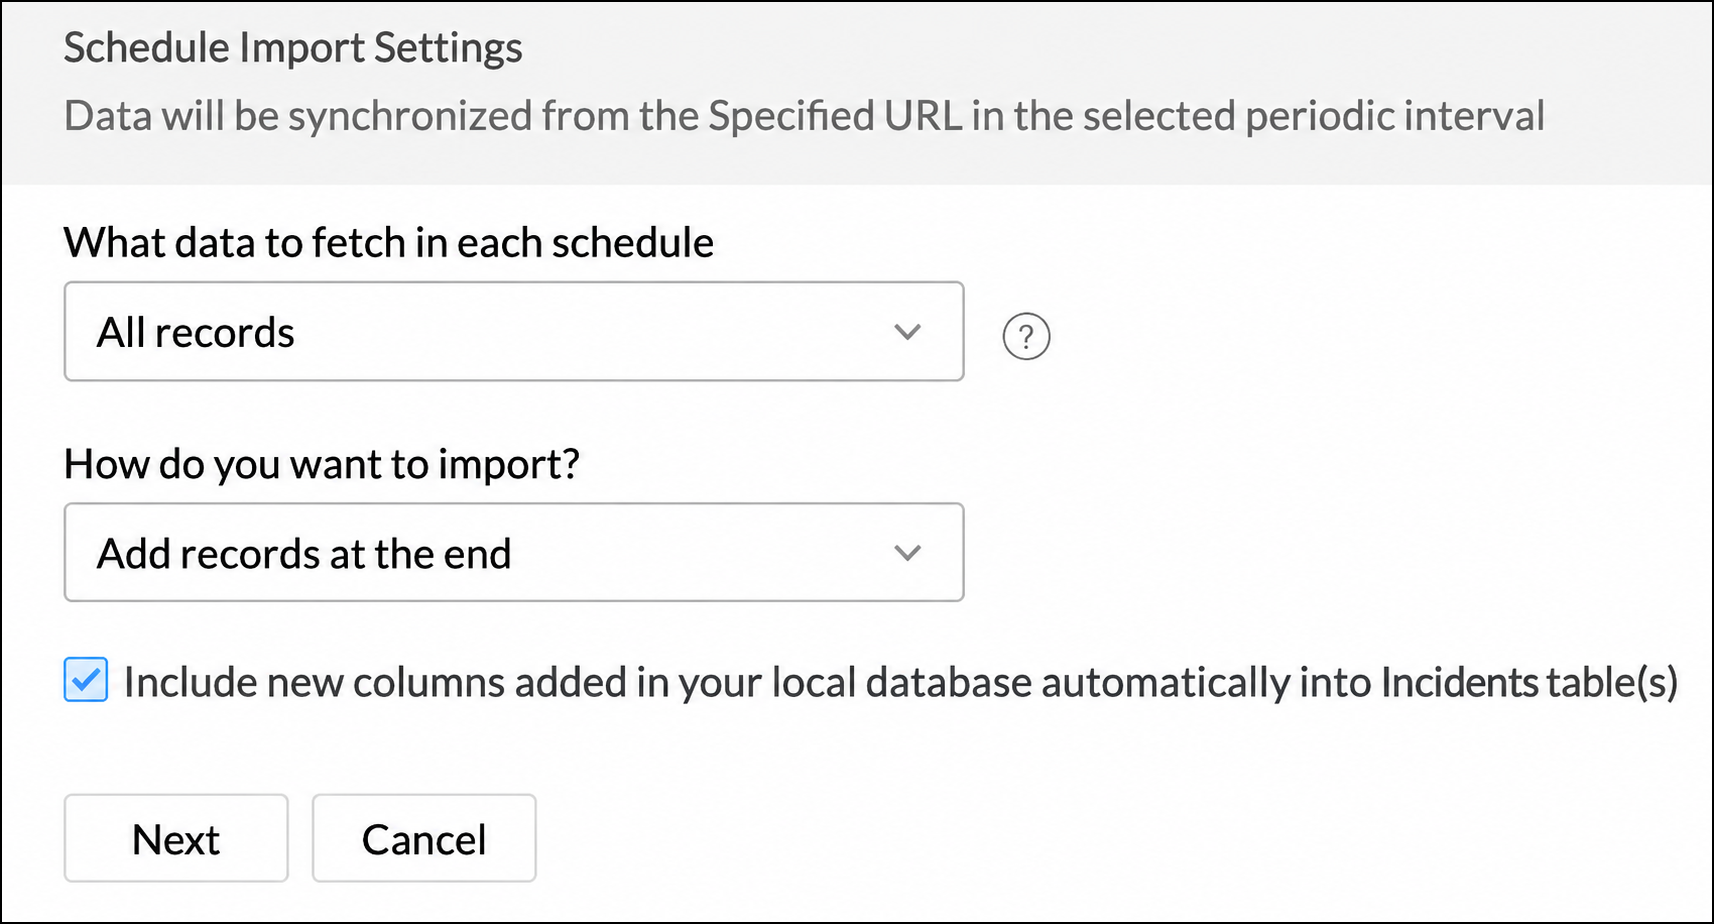
During the initial setup, choose whether every scheduled synchronization should fetch all records or only new and modified records.
All records
When you fetch all records, choose one of these import strategies:
- Add records at the end: Append every fetched row to the destination table.
- Delete existing records and add: Replace the destination table's existing data with the latest fetched data.
- Add records and replace if already exists: Match records using selected columns, replace matching records, and add new records.
You can also choose to include new columns that are added to the Supabase table after the import is configured.
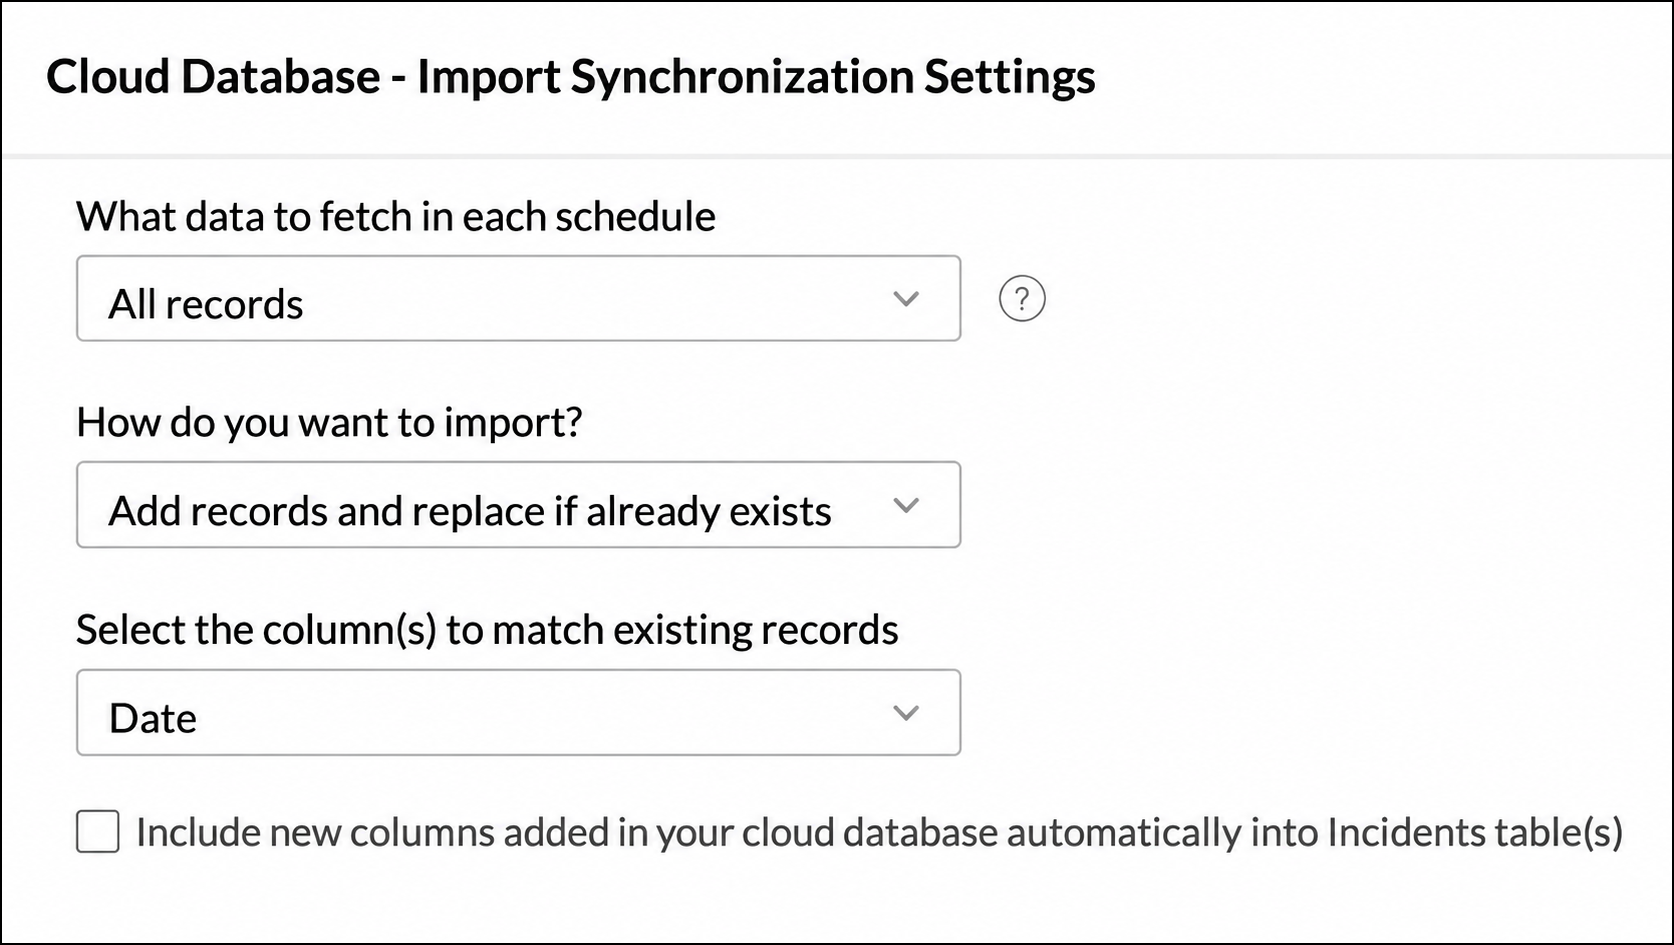
New and modified records
Choose incremental fetch when each synchronization should import only records added or modified after the previous successful fetch. Configure the column Analytics Plus should use to identify new or updated records. For setup details and supported data types, see Incremental Fetch.
Data synchronization frequency
Choose the synchronization interval that suits the rate at which the Supabase data changes. Available scheduling choices include hourly intervals, daily, weekly, monthly, and Not Scheduled. You can also configure notifications for consecutive import failures and select the administrators or users who should be notified.
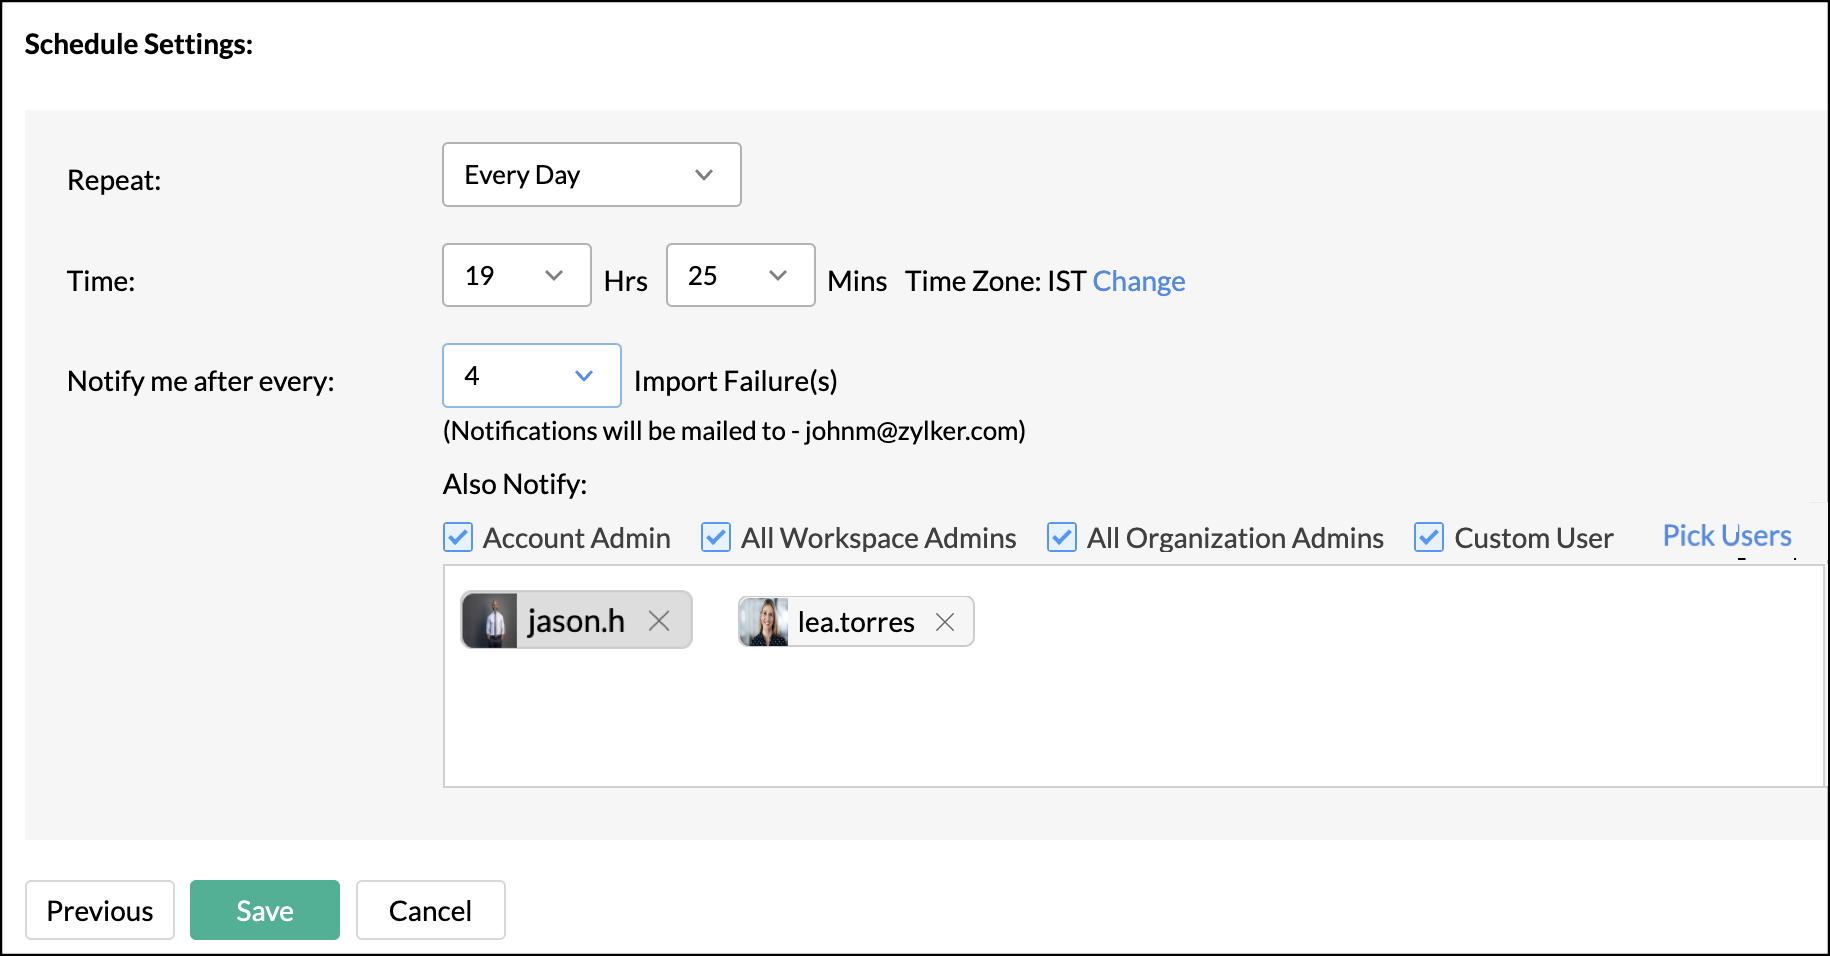
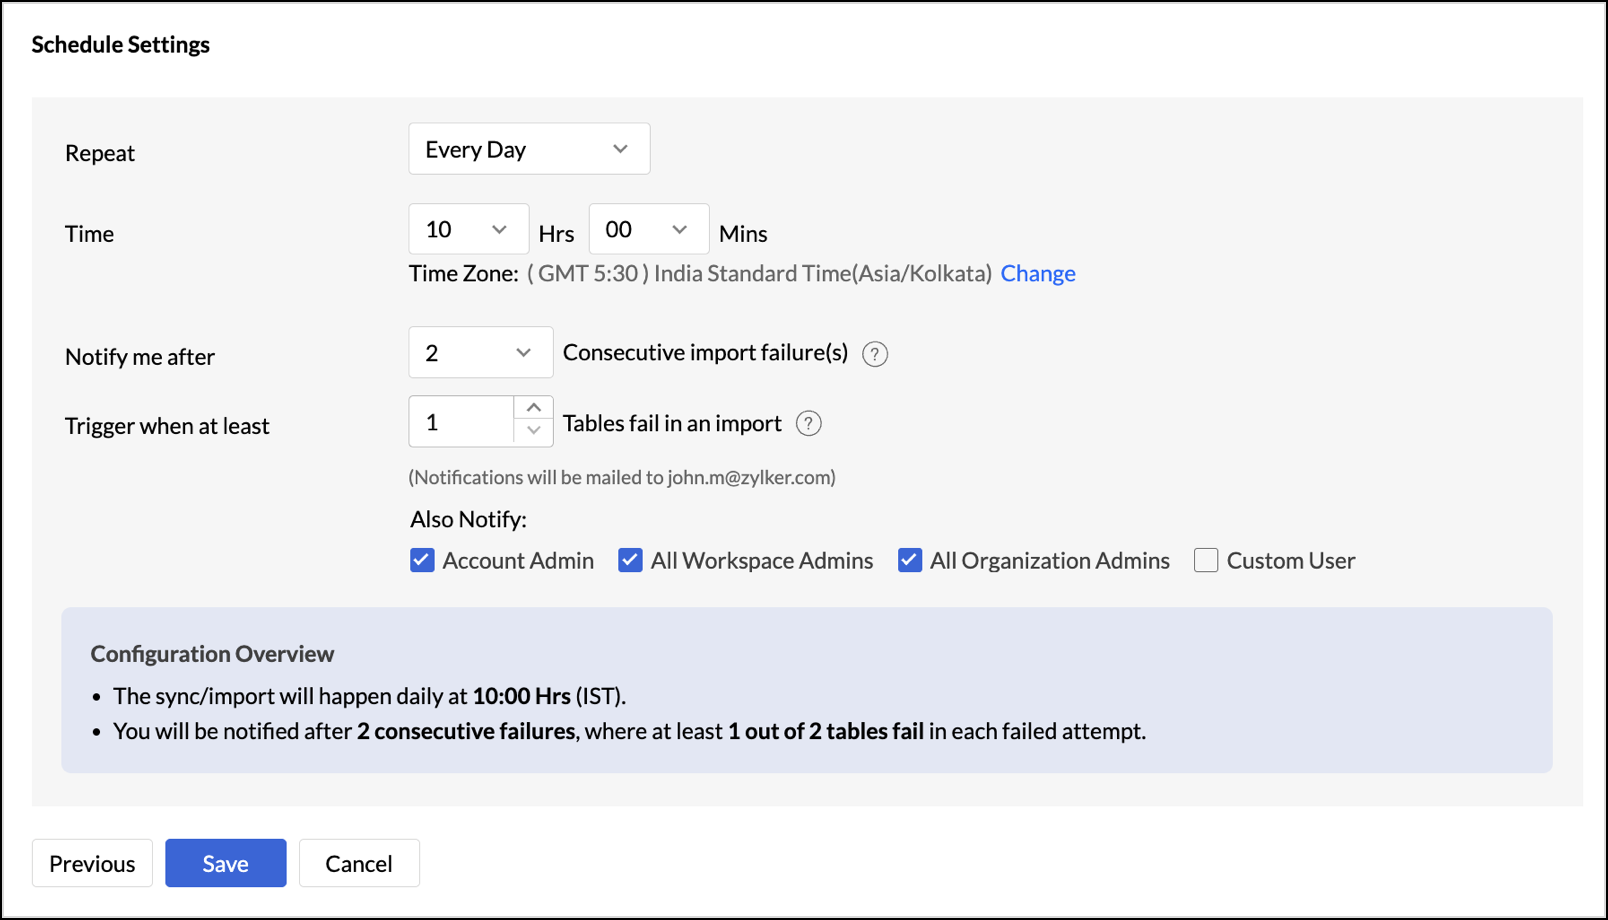
For information about configuring more than one synchronization schedule, see Multiple Sync Schedules.
Import rollback
Users with the required administrative or custom-role permission can roll back the most recent import within four hours. A rollback removes the rows and columns added by that import while preserving formulas, lookup relationships, and other table configuration. Columns deleted by an import are not restored.
- Open the imported table.
- Click Import Data and select Last Import Details.
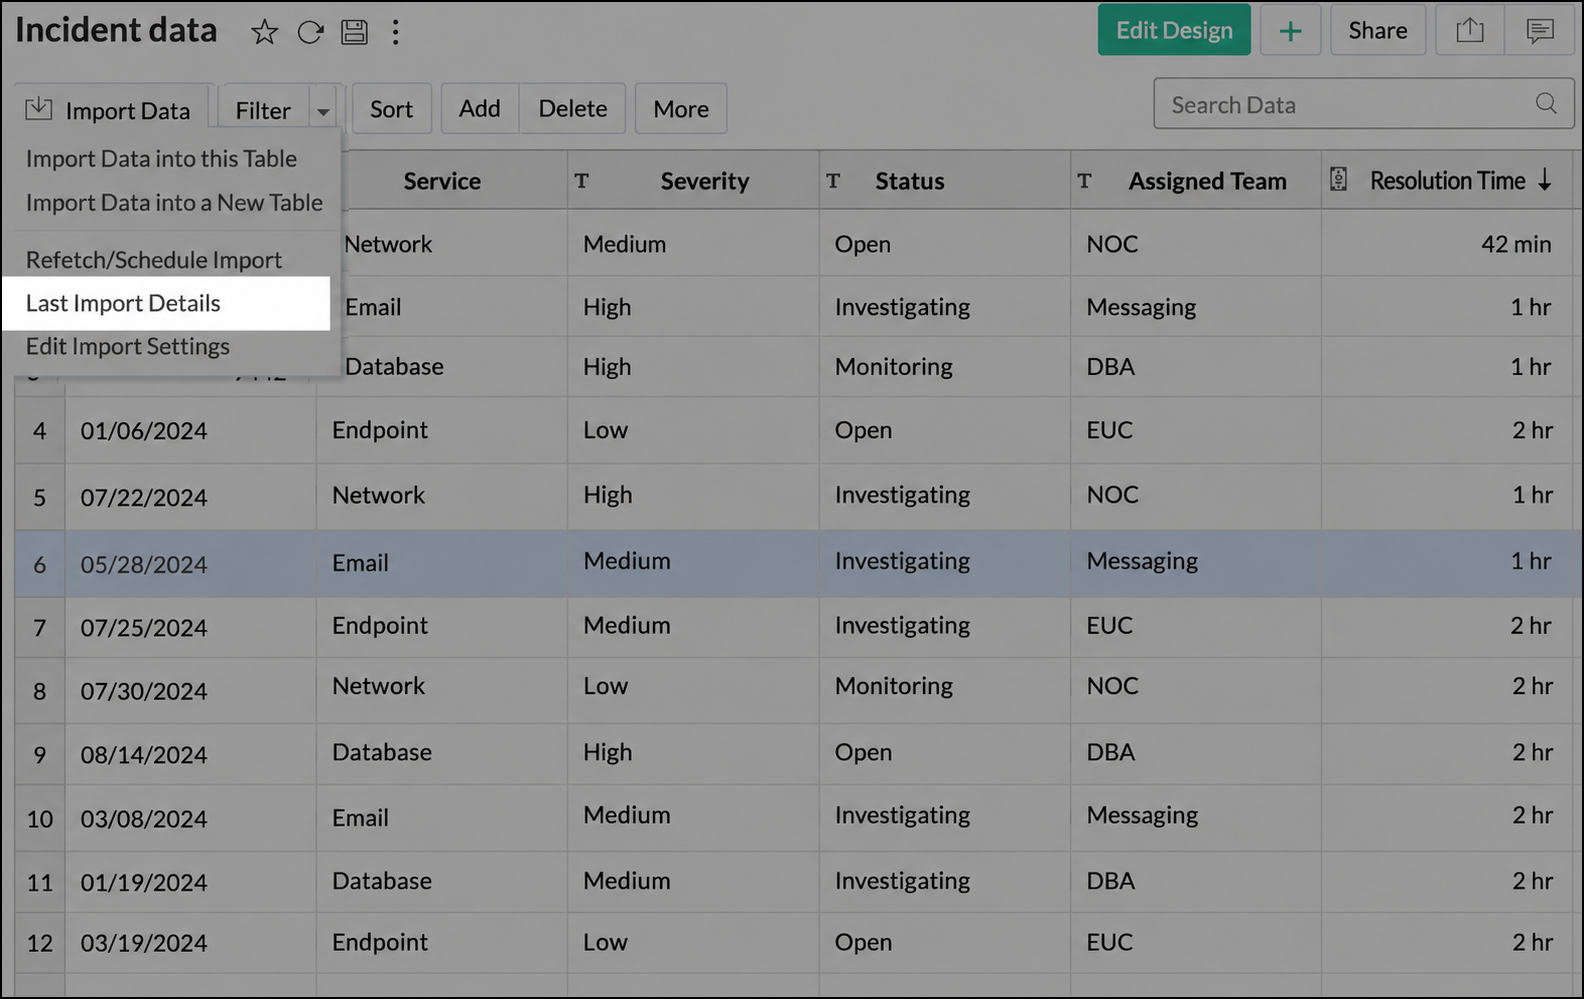
- Review the import summary and click Rollback.
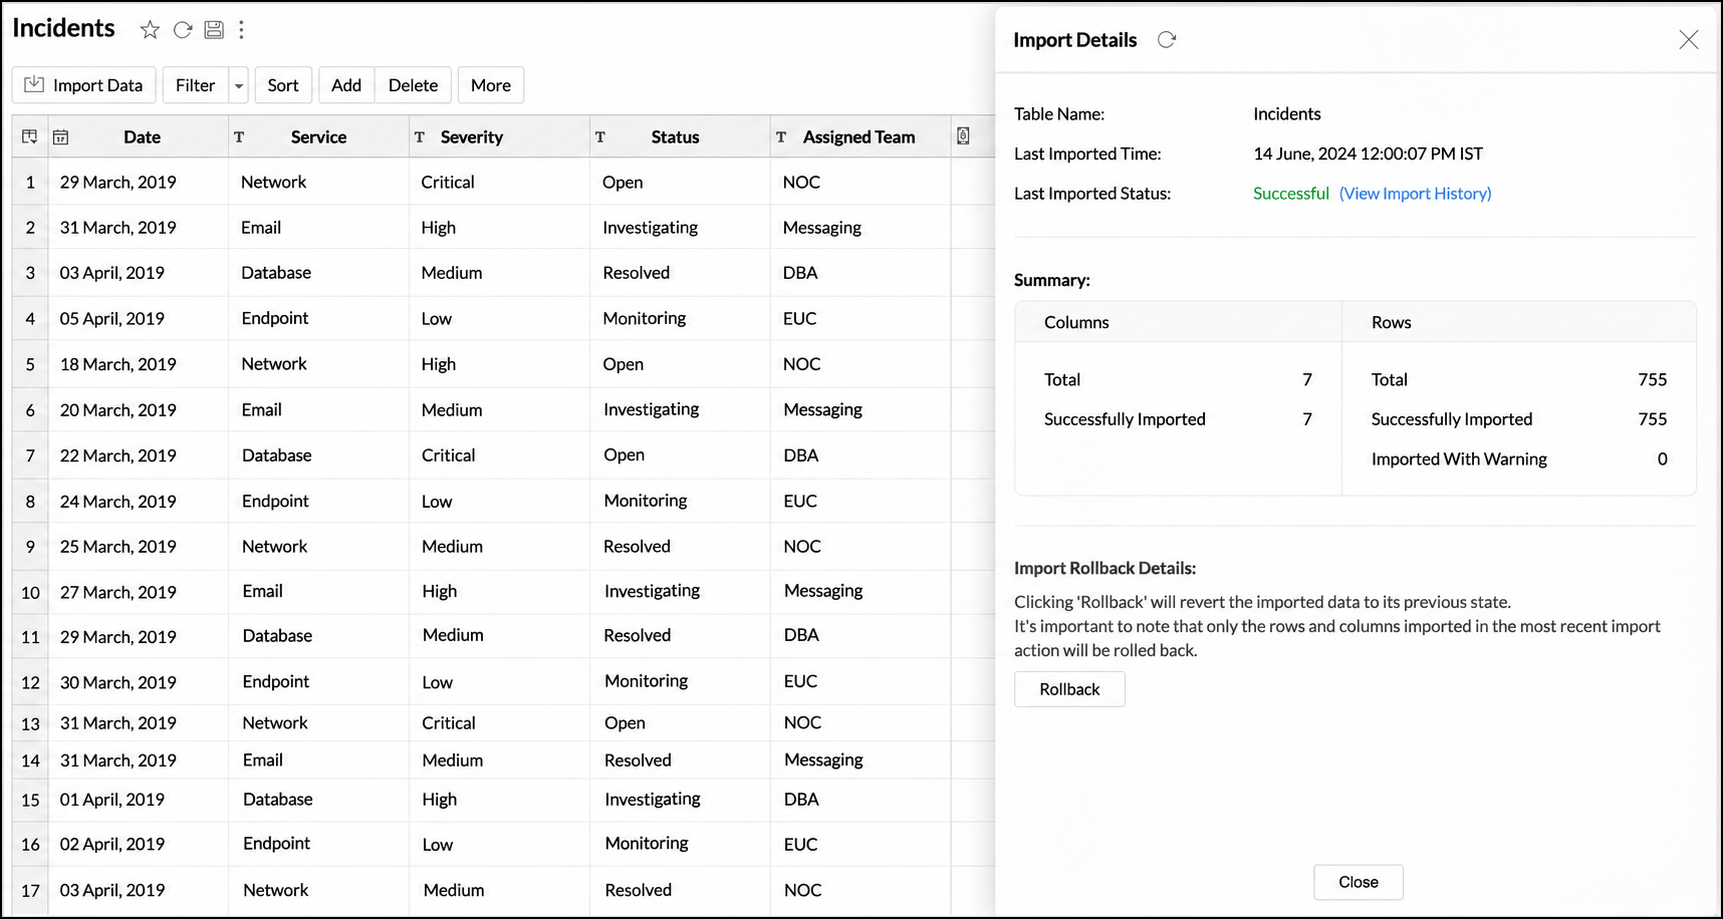
- Confirm the action. Analytics Plus records the rollback status in the import details.
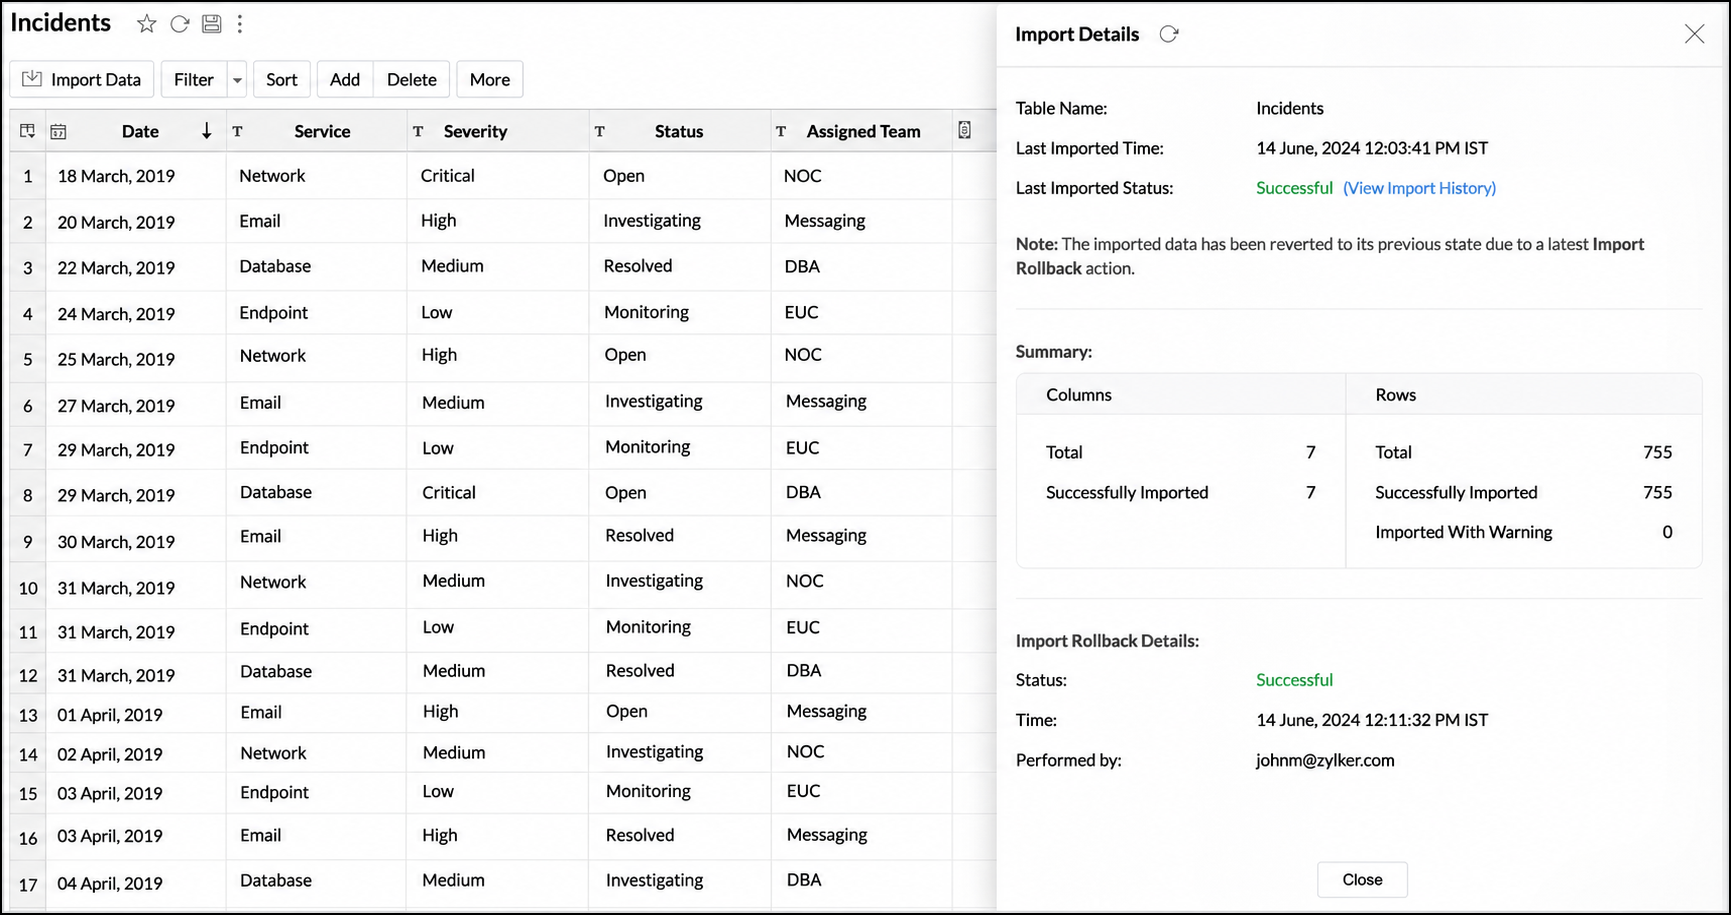
For more information, see Import Rollback.
Live Connect
Use Live Connect when reports and dashboards should query the current Supabase data directly. In this mode, the source data is not imported and stored in Analytics Plus. Report loading time depends on the Supabase database's response time and performance.
- Open Import Your Data, select Databases & Datalakes, and choose Supabase.
- Select the Live Connect option.
- Enter the required connection details and continue.
- Select the tables required for reporting and complete the setup.
Manage data source settings
Administrators can open Data Sources in the workspace and select the Supabase source to review its connection settings, synchronization status, and available actions.
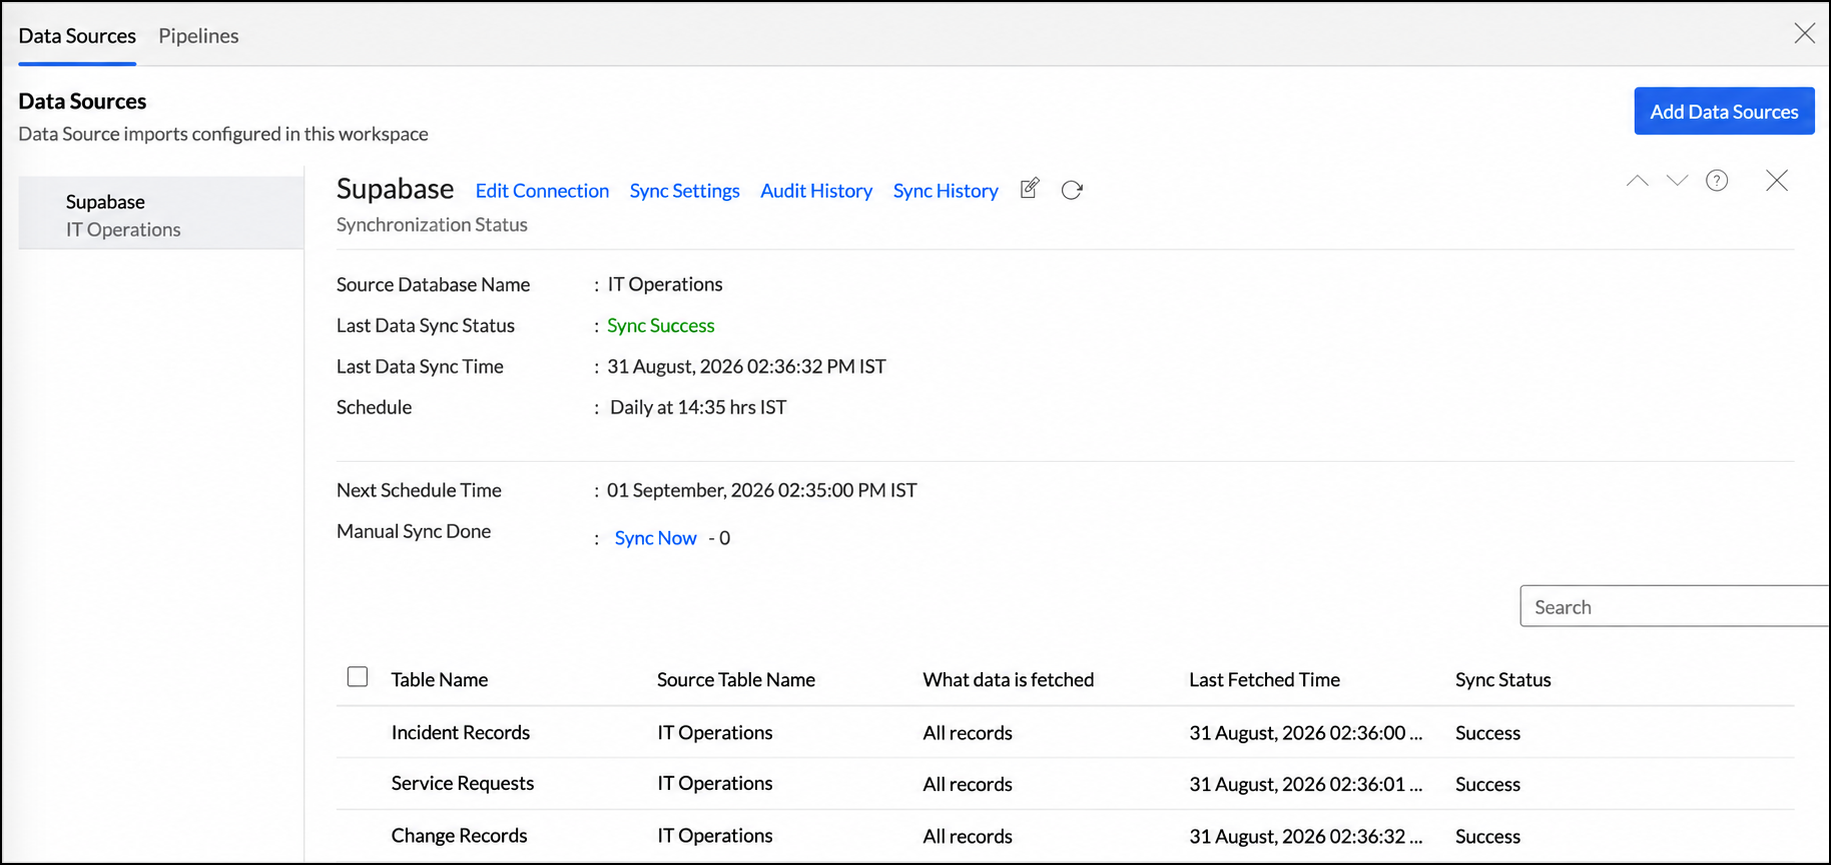
Edit connection
Click Edit Connection to update the Supabase endpoint, port, credentials, database name, or connection security settings. Save the changes after verifying the updated connection.
Sync settings
Click Sync Settings to change what data is fetched, the import strategy, the synchronization frequency, or failure-notification settings.
Audit history
Click Audit History to review user and system actions performed on the data source, including when an action occurred and the administrator who performed it.
| Type | Action | Description |
|---|---|---|
| User Action | Data Source Creation | Records the administrator who configured the Supabase connection. |
| Table Creation | Records the new tables added to the workspace. | |
| Remove Table from Data Source | Records tables removed from the data source. | |
| Edit Setup | Records connection changes such as reauthentication or enabling or disabling SSH. | |
| Import Settings | Records changes to the data-fetch settings. | |
| Sync Settings | Records changes to the data-synchronization settings. | |
| Table-level Sync Now | Records the data fetched when a table-level synchronization is started manually. | |
| System Activities | Schedule Import | Records data fetched at scheduled intervals. |
Sync history
Click Sync History to review data-synchronization activity. Successful synchronizations are displayed in green. Failed synchronizations are displayed in red along with the reason for the failure and the action required to resolve it.
Manage table synchronization settings
Use the table list in the data source settings to manage individual synchronized tables:
- Sync Now: Import recent source changes immediately using the fetch method configured for the table. For tables configured to fetch only new records, you can also choose a full data fetch.
- Edit: Choose whether each synchronization should fetch all source records or only new and modified records.
- Delete: Stop synchronizing the table. The table, its lookup relationships, and reports created from it remain in the workspace.
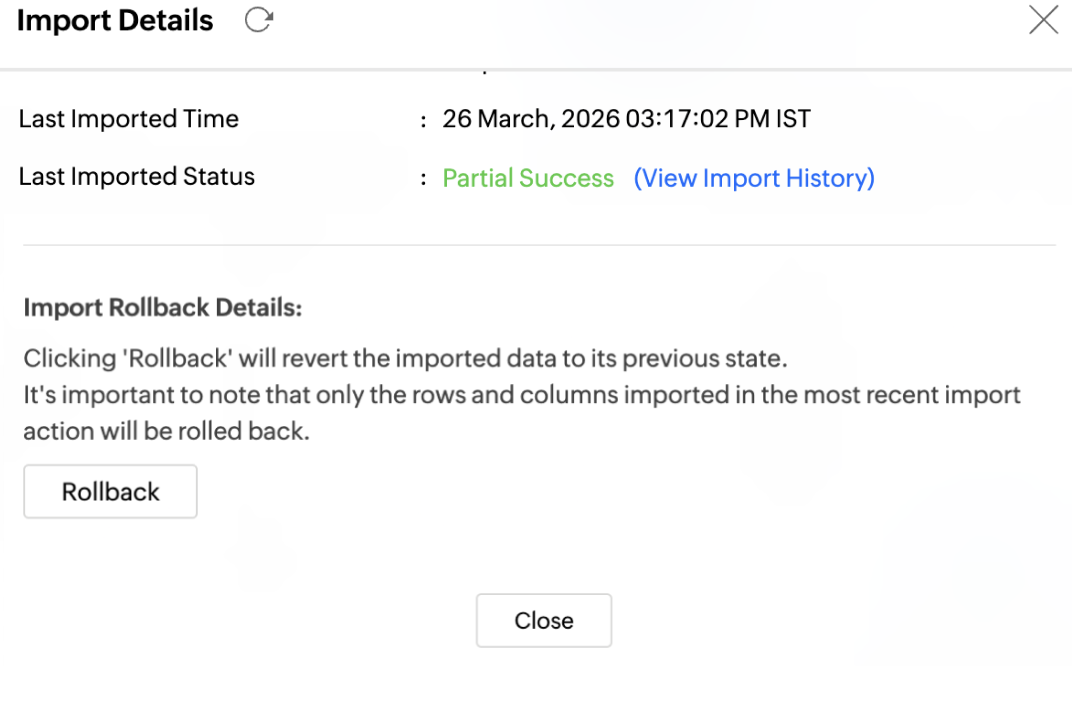
- Info: Review the import summary, including successfully imported records and records that encountered errors.
Resolve synchronization failures
A synchronization can fail when connection credentials are invalid or expired, the source is unavailable, or source data no longer matches the configured destination data types. Analytics Plus displays an in-app notification with the reason for the failure and the corrective action. If email notifications are enabled, the configured administrators and users are also notified after the failure threshold is reached.
- Open Data Sources and select the Supabase source.
- Review Sync History and the affected table's import details.
- Correct the connection, source data, column mapping, or synchronization settings indicated by the failure.
- Use Sync Now to verify that synchronization succeeds.
Blend Supabase data with other sources
You can import data from files, feeds, cloud storage, other databases, and supported applications into the same workspace as the Supabase data. When data is imported into an existing workspace, Analytics Plus identifies columns with compatible data types and suggests possible lookup relationships. You can also use query tables to combine data from multiple tables in the workspace.
To add Supabase data to an existing workspace, click the Create icon in the side navigation panel and select New Table/Import Data. Select Supabase and complete the connection and import steps described on this page.
Import data into an existing table
- Open the destination table in Analytics Plus.
- Click Import Data and select Import Data into this Table.
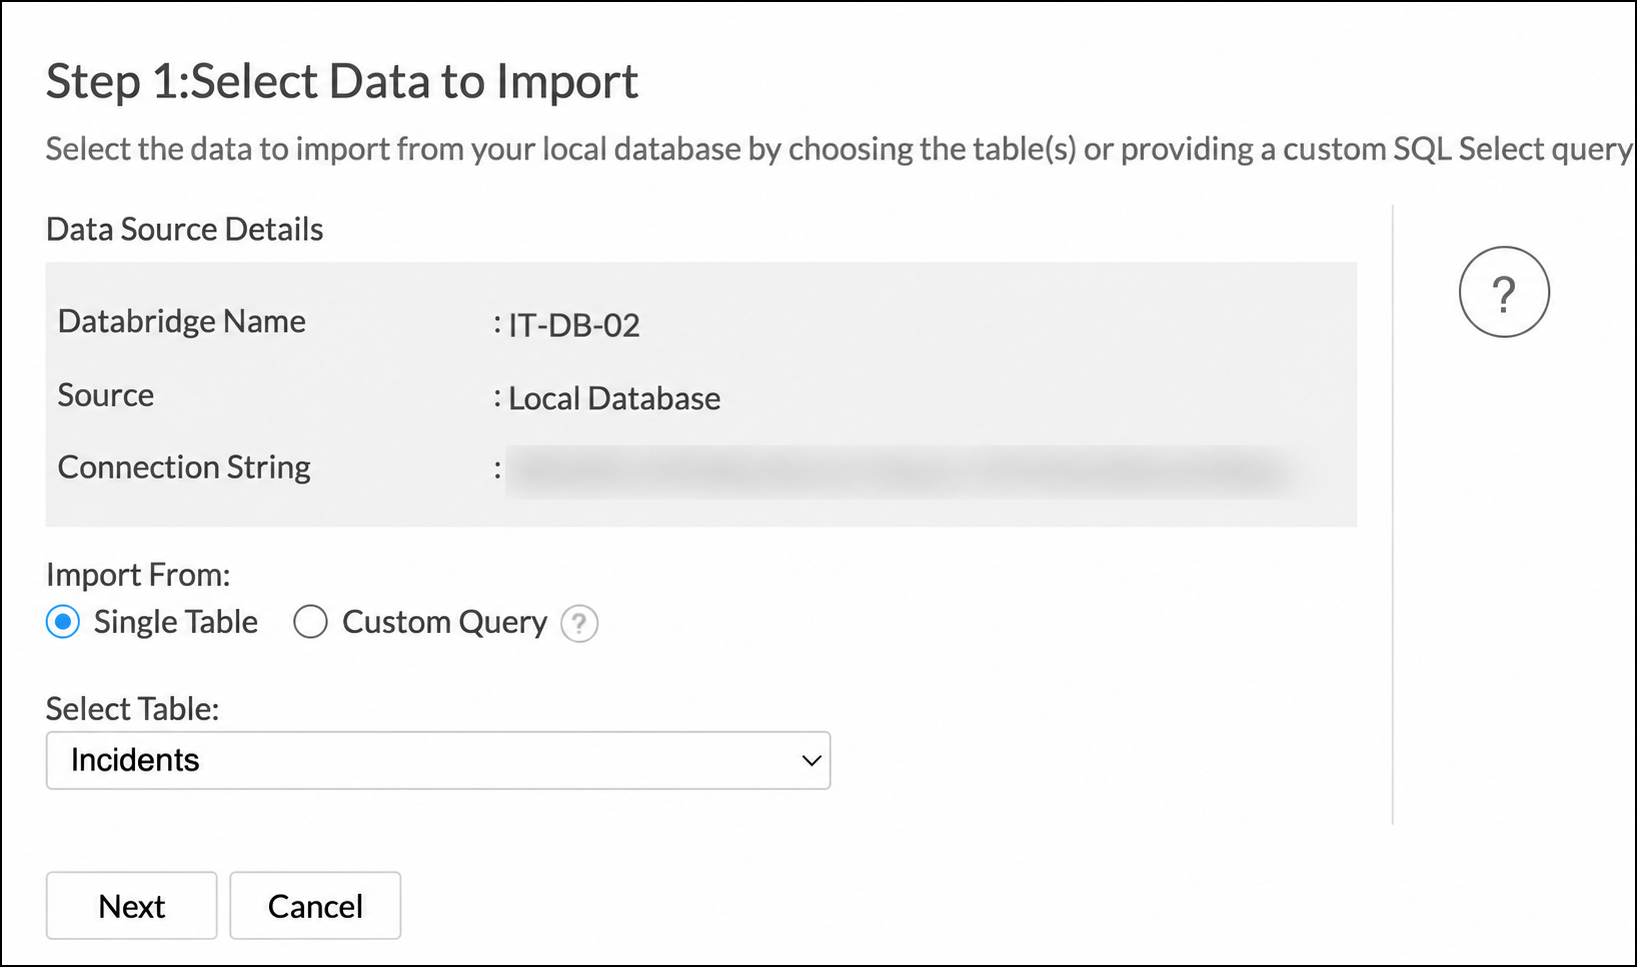
- Select the configured database source, choose Single Table or Custom Query, and then select the source table or enter the query.
- Choose how the incoming records should be added to the existing table, map the source and destination columns, and specify how Analytics Plus should handle import errors.
- Review the import summary and click Import.
Analytics Plus adds the selected Supabase data to the existing table using the configured import behavior.