Configuring SAML-based SSO with Microsoft Azure in Analytics Plus
Analytics Plus supports SAML-based Single Sign-On (SSO) configuration with Microsoft Azure, enabling users to authenticate using their Azure (Microsoft Entra ID) credentials. This setup streamlines user access and strengthens security through centralized identity management.
Note: To perform this configuration, users must have permission to create applications in Microsoft Azure.
Azure Identity Provider (IdP) Parameters
The following IdP-specific parameters from Azure are required to configure SAML authentication in Analytics Plus:
- X.509 Certificate (Base64)
- Login URL
- Logout URL (Optional)
This section explains how to configure SAML-based SSO with Microsoft Azure in Analytics Plus.
- Create an Enterprise Application in Azure
- Configure SAML-based SSO
- Configure Azure SAML Details in Analytics Plus
- Complete SAML Setup in Azure
- Assign Users to the Application
- Verify SSO Integration
Create an Enterprise Application in Azure
Follow the steps below to start the configuration in Azure:
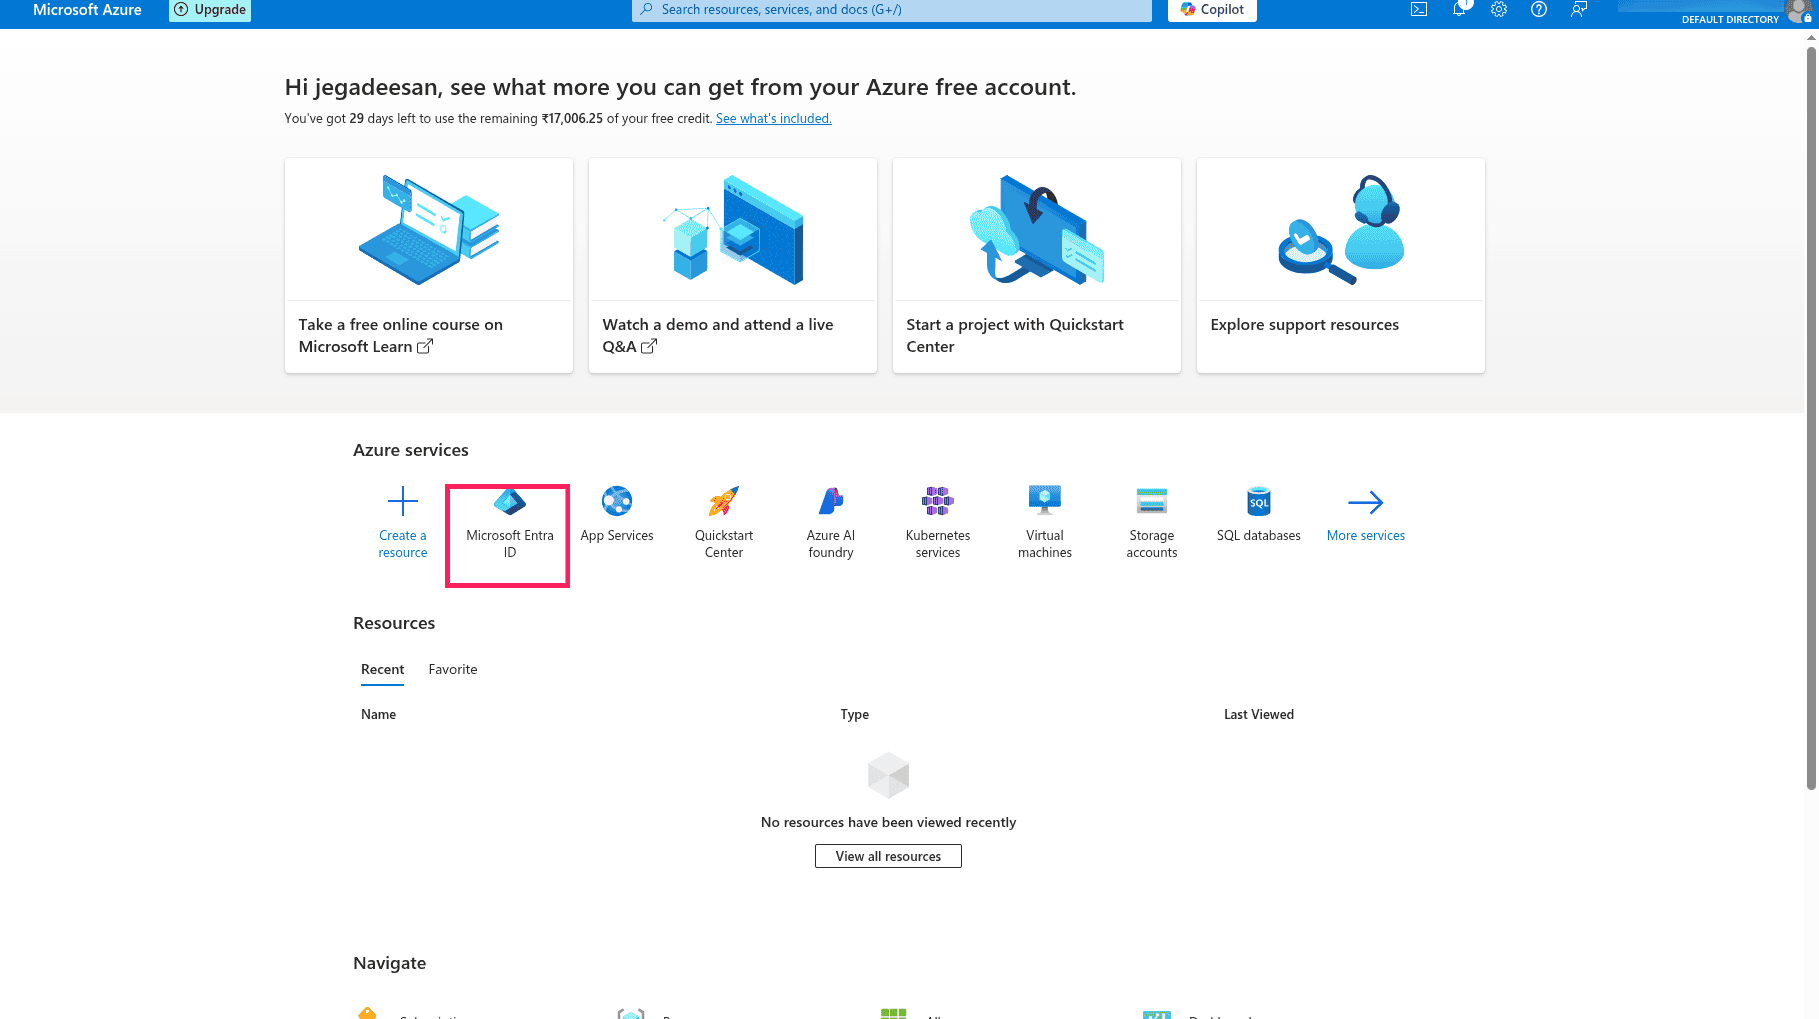
- Sign in to the Microsoft Azure Portal.
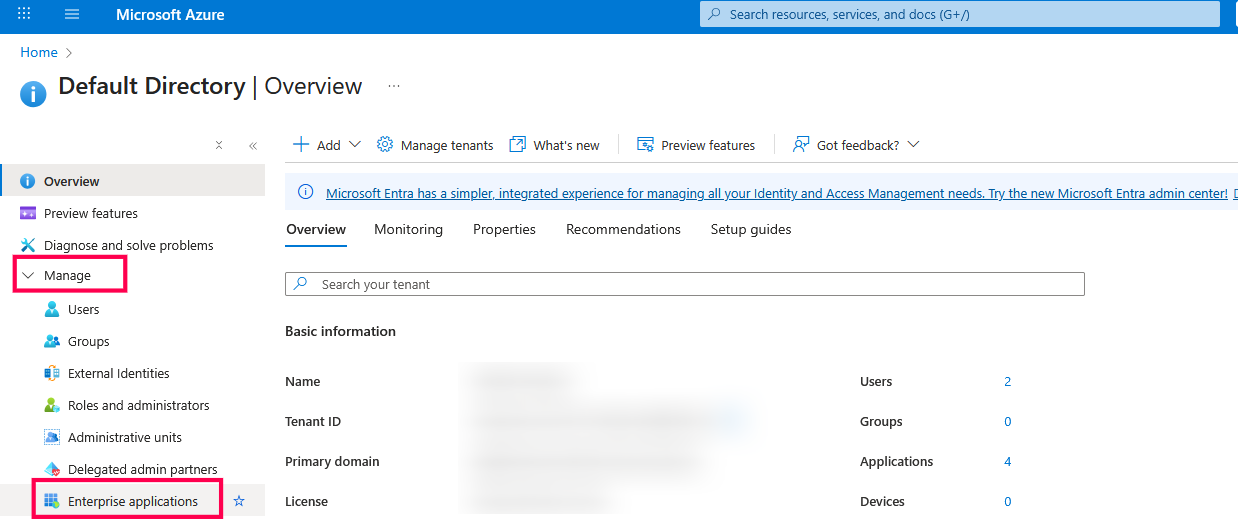
- Navigate to Microsoft Entra ID >> Manage >> Enterprise Applications.
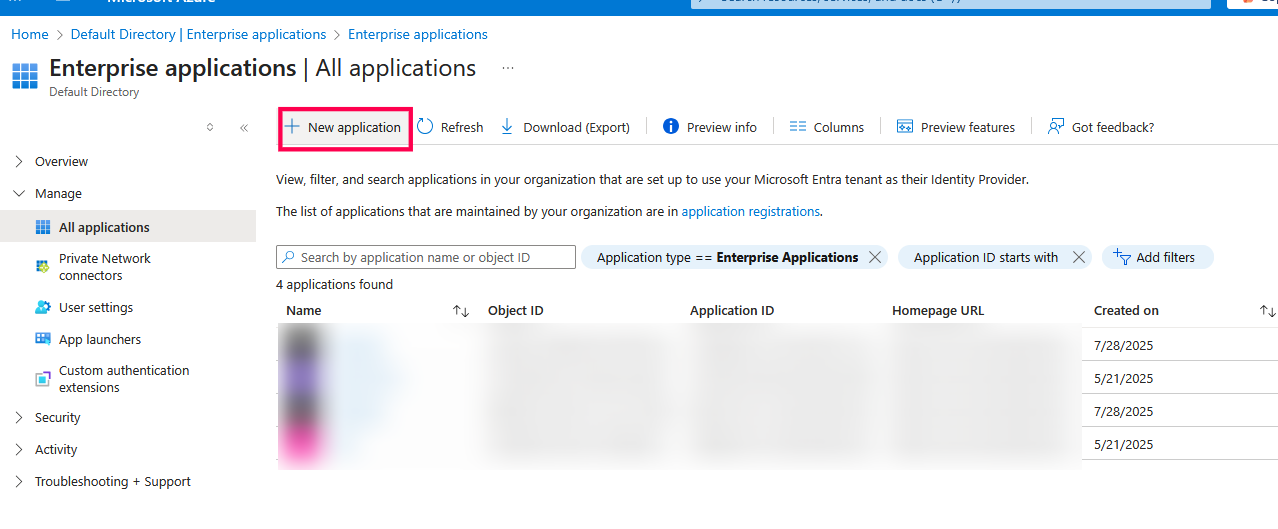
- In the dialog box that appears, click + New application and select Create your own application.
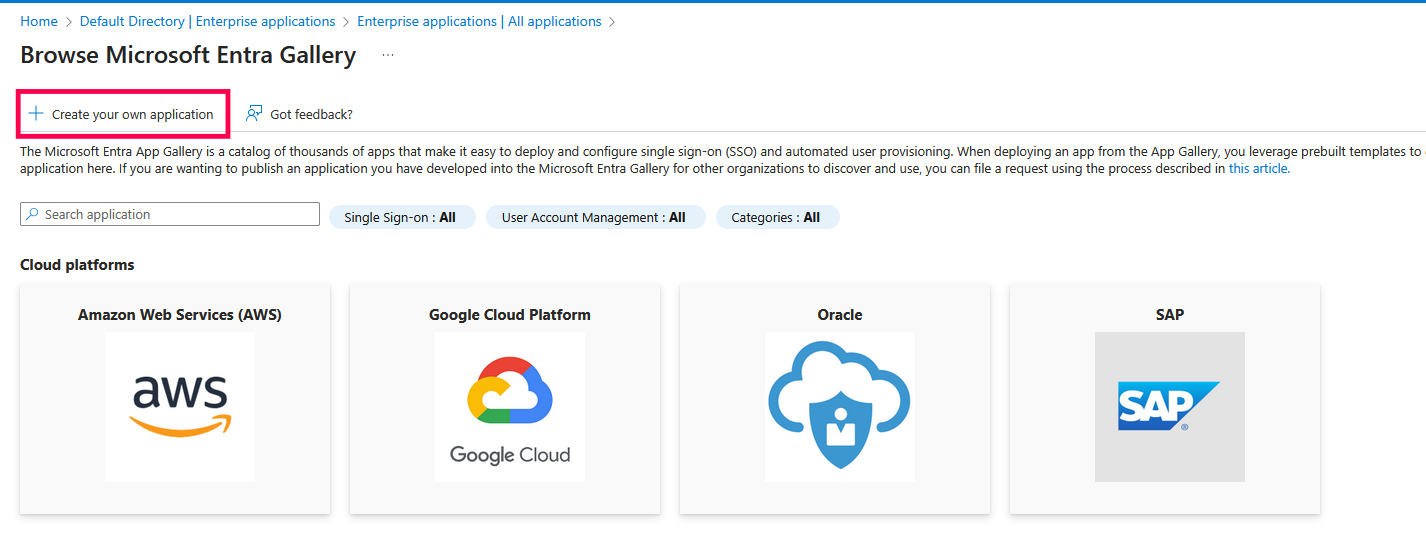
- Provide a name (for example, Analytics Plus) and choose Integrate any other application you don't find in the gallery (Non-gallery).
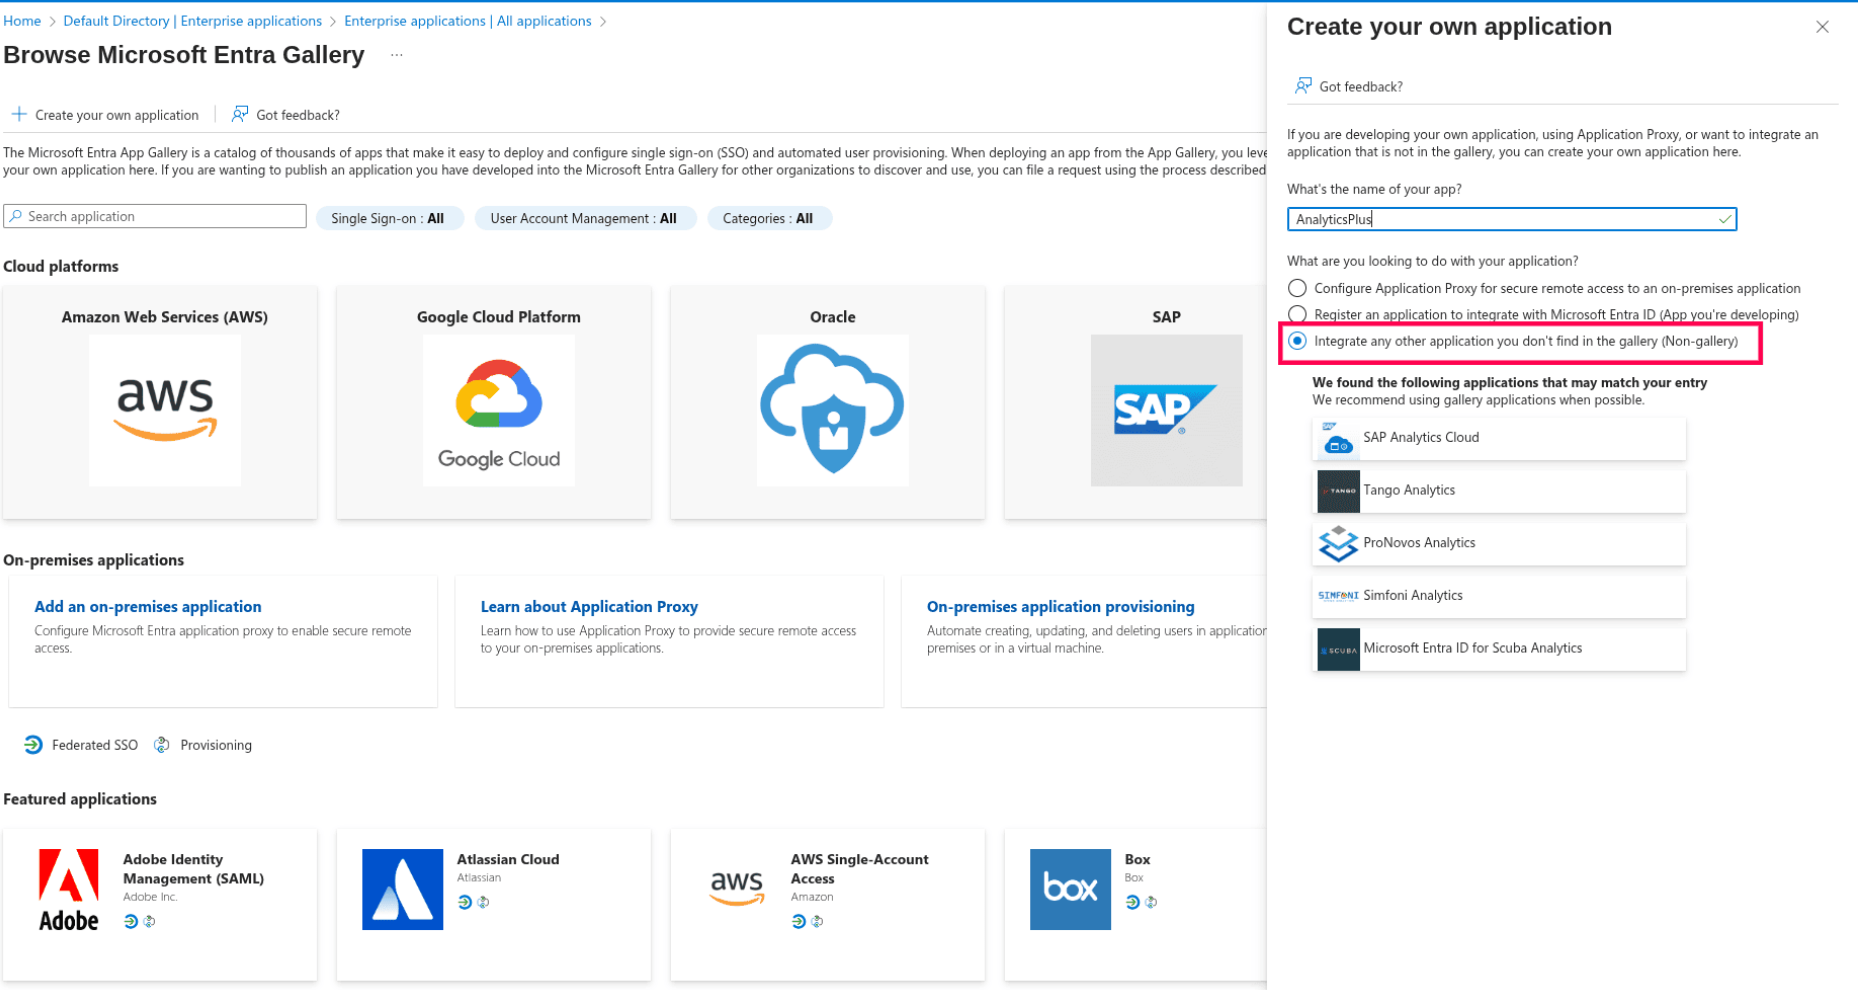
- Click Create.
Configure SAML-based SSO
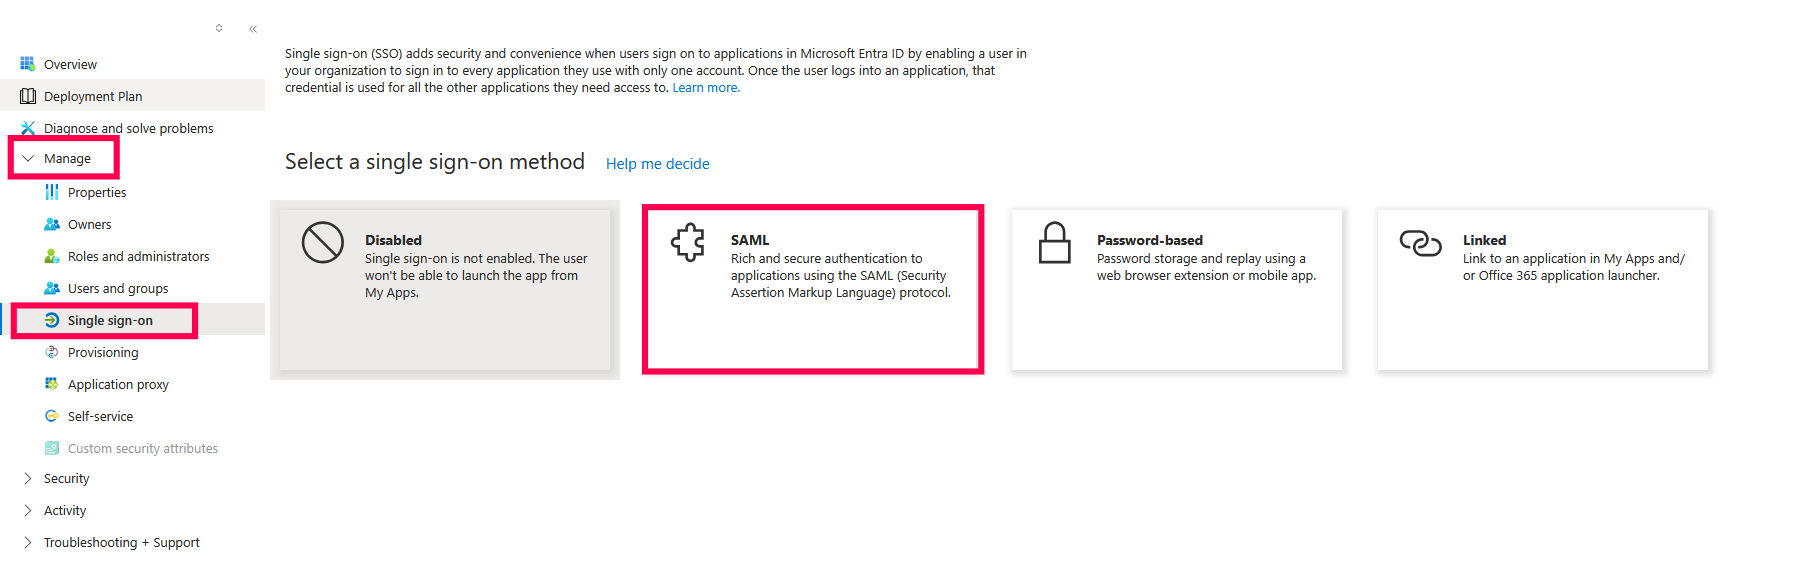
- Open the newly created application and navigate to Single sign-on > SAML.
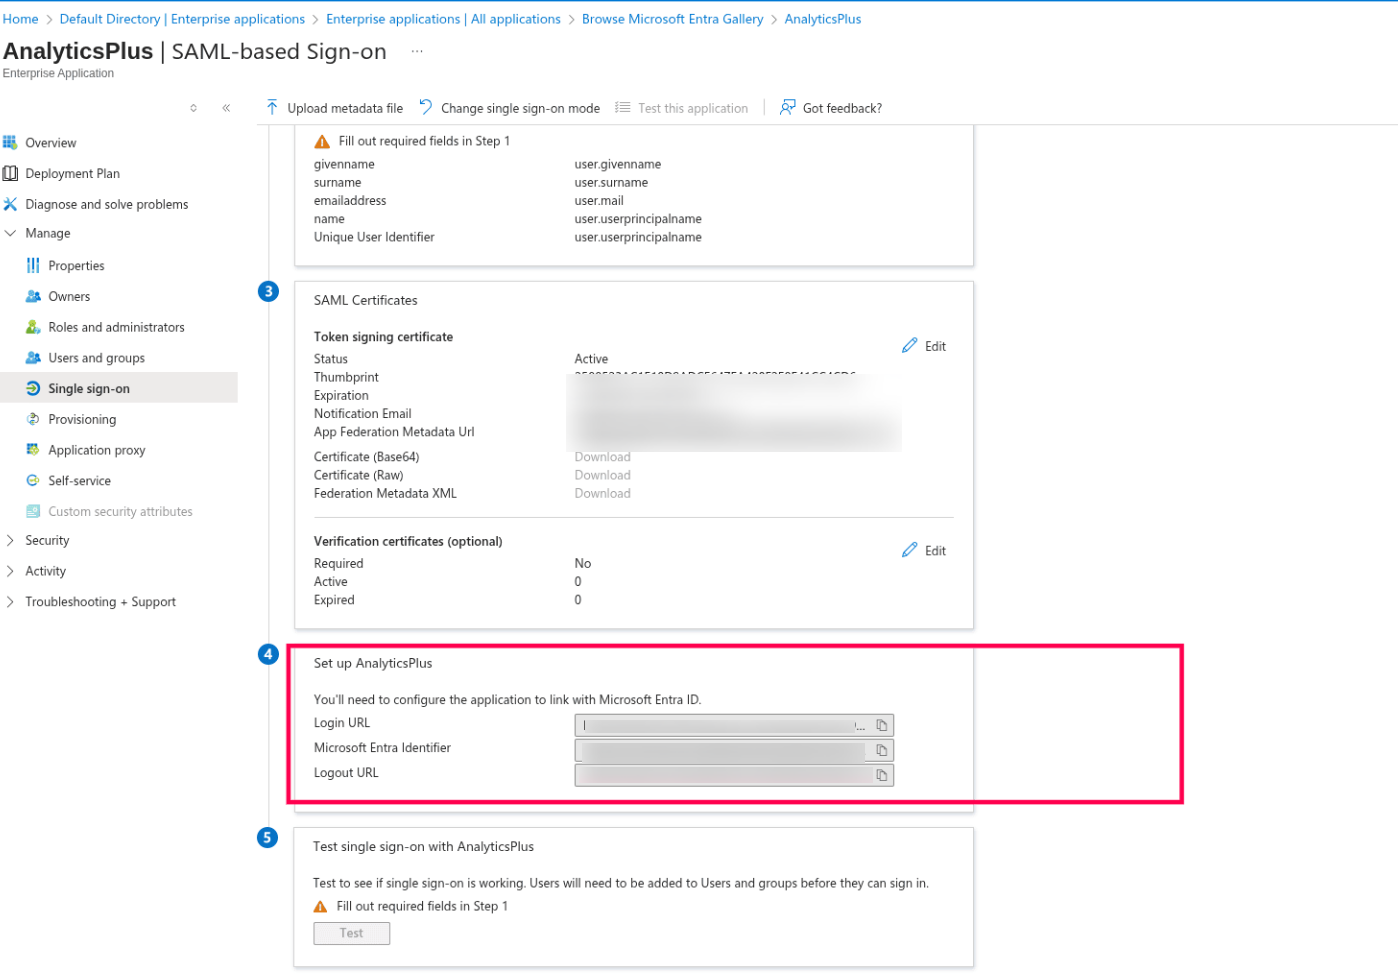
- Scroll down to the Set up Analytics section, copy the Login URL and Logout URL, and enter them in the Analytics Plus application.
Configure Azure SAML Details in Analytics Plus
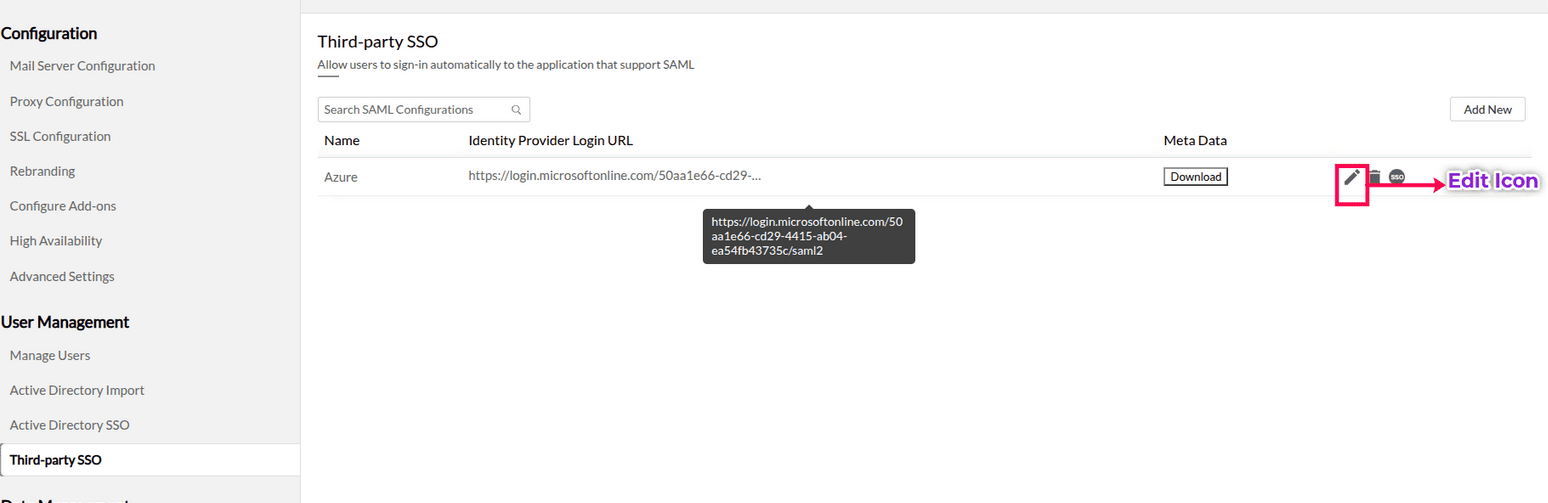
- Log in to the Analytics Plus application and navigate to Settings >> User Management >> Third-party SSO. Configure the Login URL, Logout URL, and upload the sample certificate .
- After configuring third-party SSO, download the metadata.xml file from the Analytics Plus application.
- Open the downloaded file and copy the Entity ID and the SSO/Assertion Consumer Service (ACS) URL.

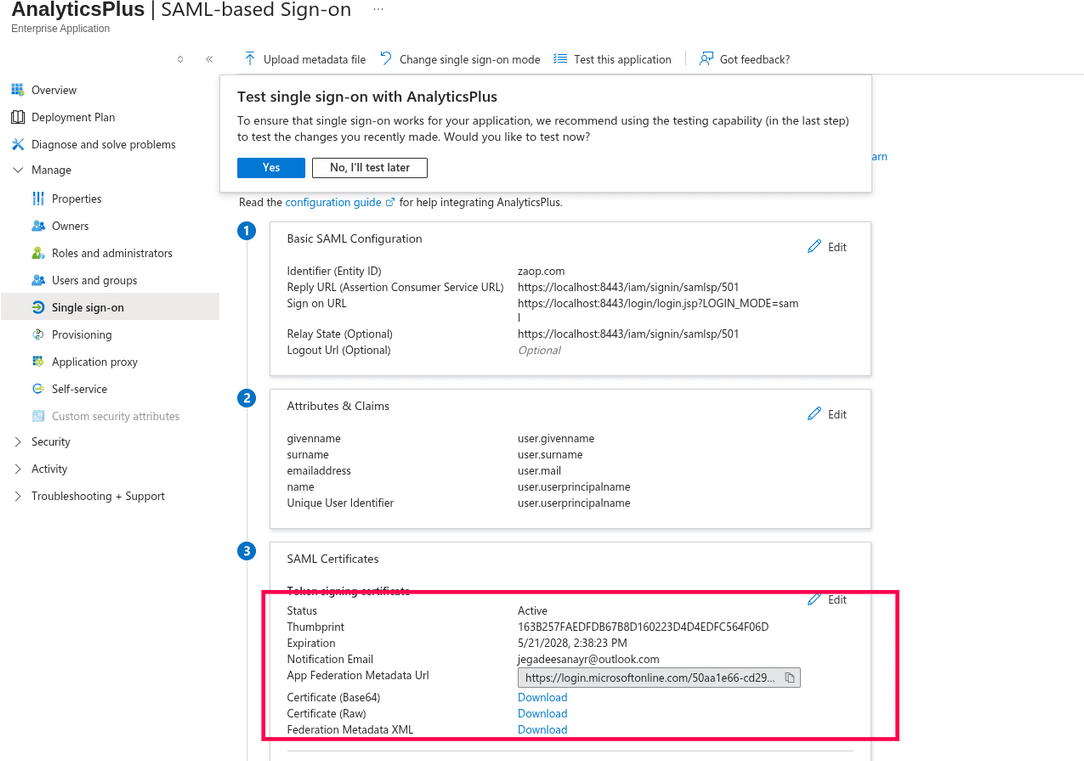
Complete SAML Setup in Azure
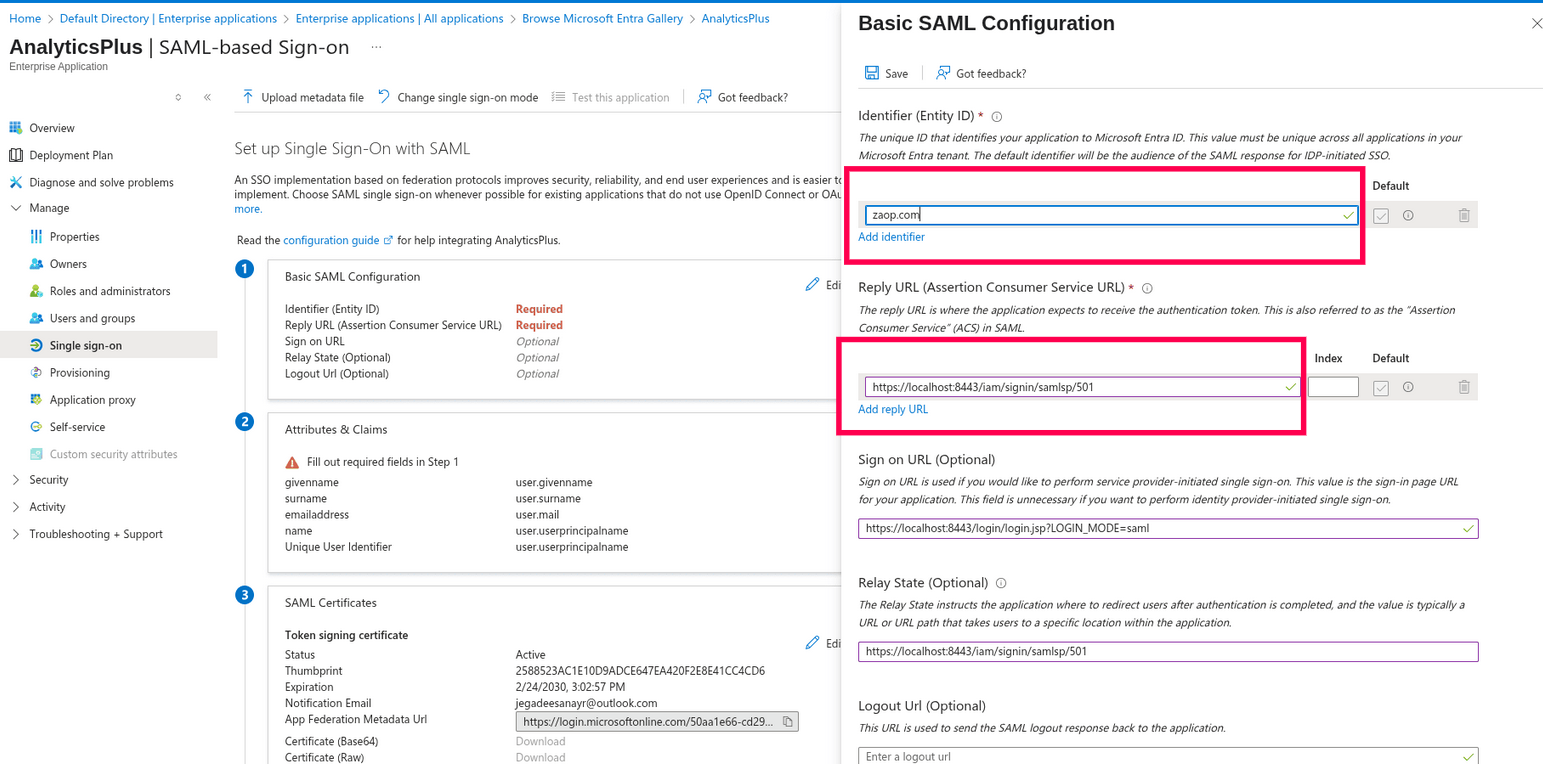
- In Microsoft Azure, select Set up Single Sign-On. In the Basic SAML Configuration section, click Edit.
- Enter the copied Entity ID in the Identifier field and the copied ACS URL/SSO URL in the Reply URL field, then click the Save icon.
- Scroll down to the certificate section and download the certificate in Base64 format.
Verify SSO Integration
- Return to the SAML Authentication page in Analytics Plus.
- Click the Edit icon and upload the downloaded certificate in the Public Key field.
- Ensure the certificate is in one of the following formats: .cer, .crt, .cert, or .pem (Base64 encoded).
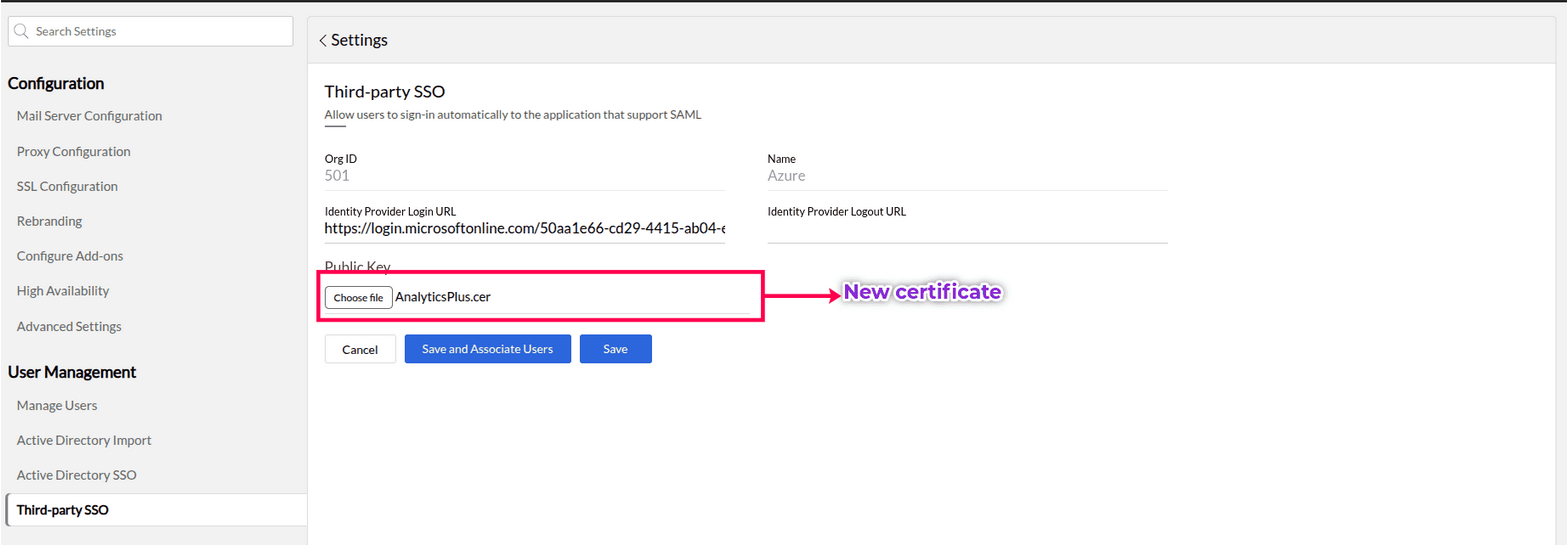
- Click Save.
Once the above steps are completed, SAML will be successfully configured, and you can proceed to enable SSO with Azure.
Note: You can follow the instructions in the following article to assign users to the application.