Installing AppCreator on AWS
What Does This Page Cover?
Learn about deploying ManageEngine AppCreator on AWS and the steps required for the deployment.
Availability:
Installing ManageEngine AppCreator on AWS is accessible in both trial (30 days) and paid pricing plans.
Overview
As an organization, you might want to host your on-premise AppCreator on Cloud Service Providers (CSP) such as Azure or AWS. To do so, you can either create an instance (in case you don't have one) and install it or directly deploy a pre-configured instance from the marketplace. Here, the instance can be either a Windows base or a Linux base.
You can deploy ManageEngineAppCreator on AWS (instance) easily in the below two ways.
Regions that support marketplace deployment
Currently, we support ManageEngineAppCreator marketplace installation in the following regions.
| US East (N. Virginia) |
| US East (Ohio) |
| US West (N. California) |
| US West (Oregon) |
| Canada (Central) |
| EU (Frankfurt) |
| EU (Ireland) |
| EU (London) |
| EU (Paris) |
| Asia Pacific (Singapore) |
| Asia Pacific (Sydney) |
| Asia Pacific (Seoul) |
| Asia Pacific (Tokyo) |
| Asia Pacific (Mumbai) |
| South America (Sao Paulo) |
| Middle East (Bahrain) |
Install AppCreator from Marketplace
A pre-configured virtual machine image, Amazon Machine Image (AMI), that contains the operating system (OS) and AppCreator preinstalled, will be available in the AWS Marketplace. The below steps will guide you to deploy AppCreator on AWS.
Step 2: Sign in to your AWS account and access the AWS Marketplace. Search for ManageEngine AppCreator and click on the ManageEngine AppCreator BYOL card.
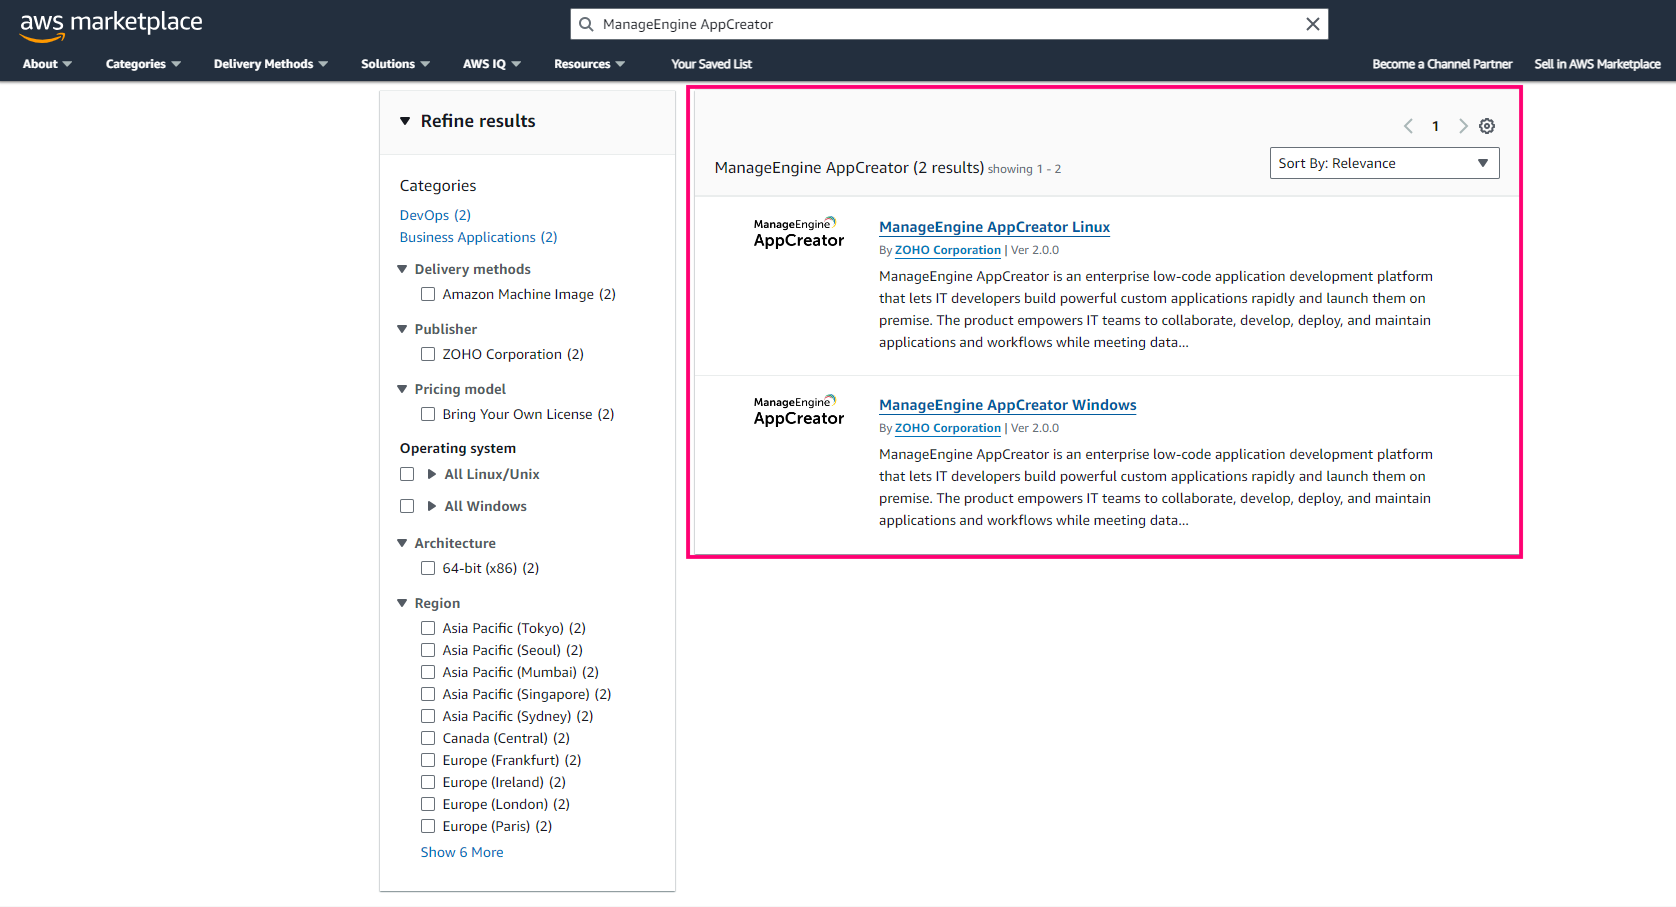
Step 3: Click the Continue to Subscribe button beside the ManageEngine AppCreator BYOL card.
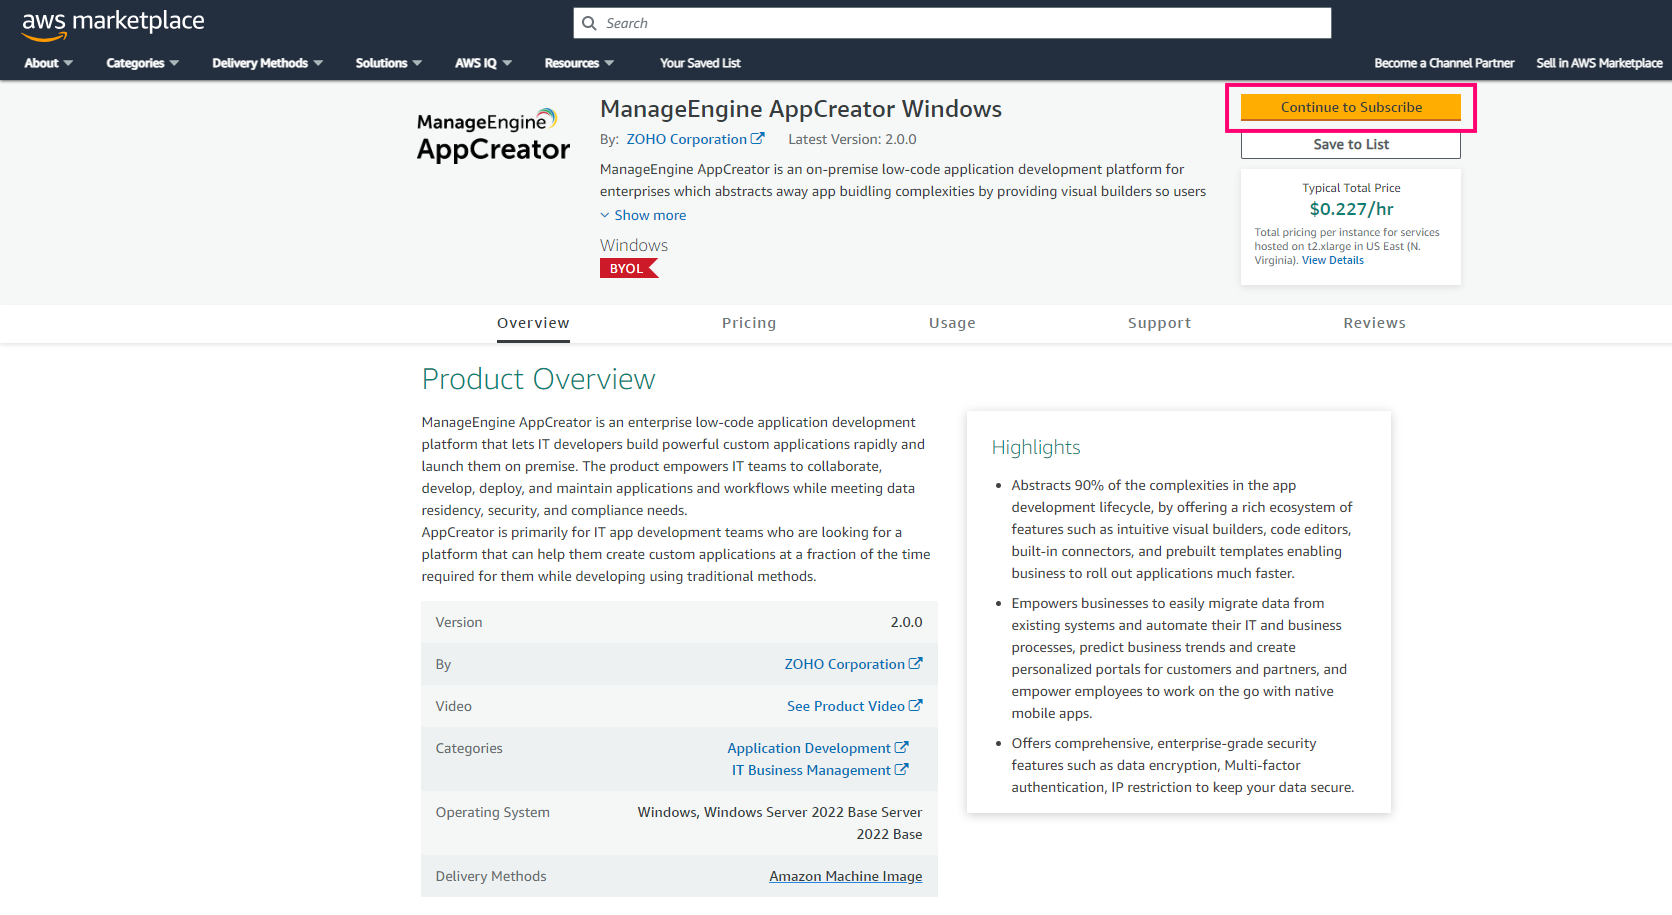
Step 4: Subscribe to the software by accepting the terms and conditions in the page that appears, and click the Continue to Configuration button.

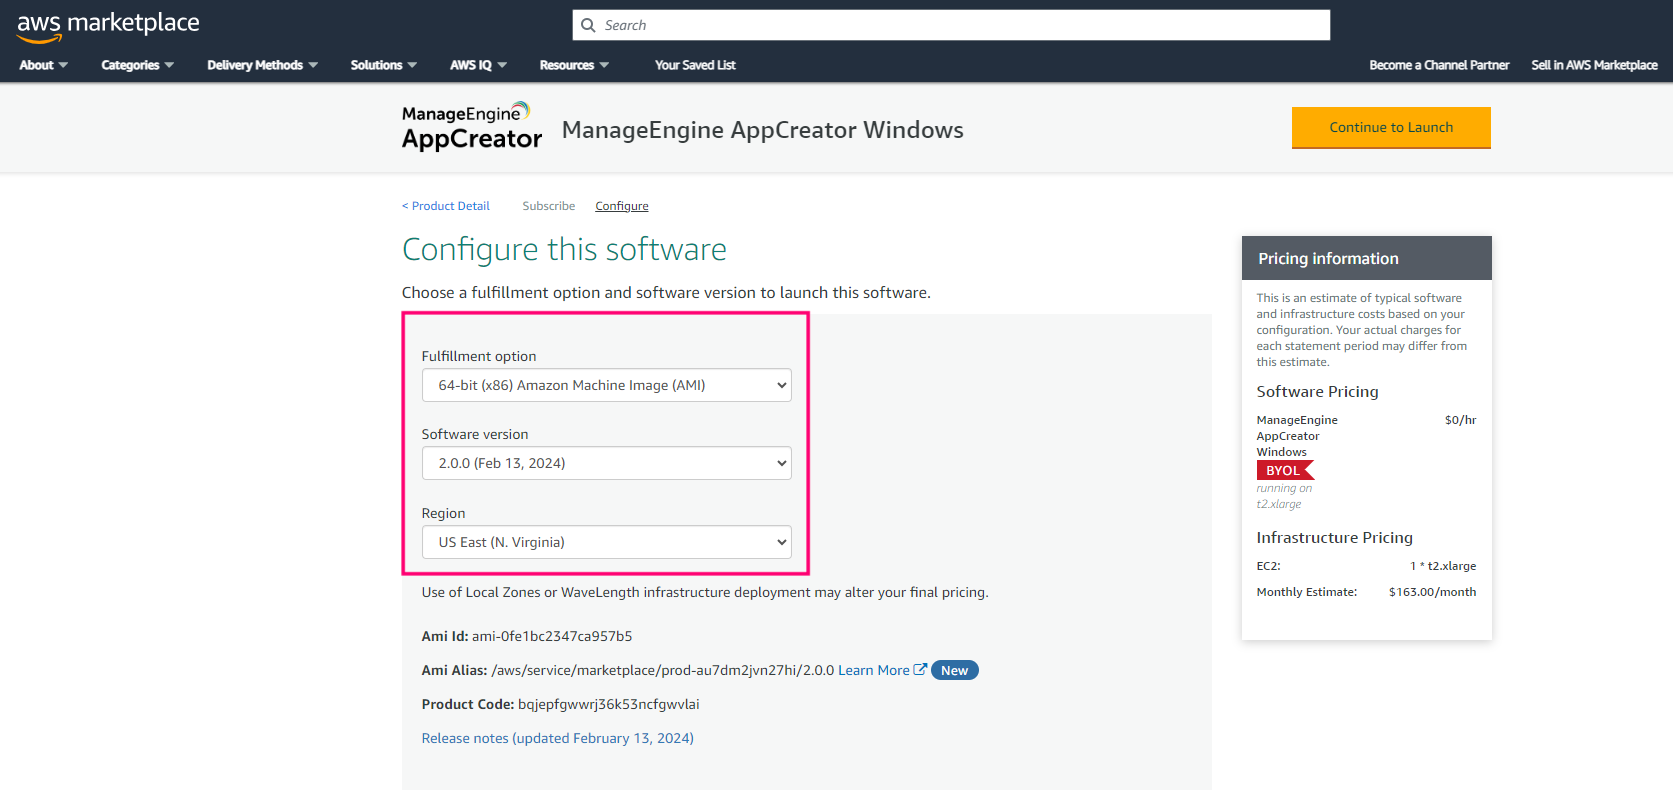
Step 5: Specify the Fulfillment option, Software version, and Region, and click the Continue to Launch button.
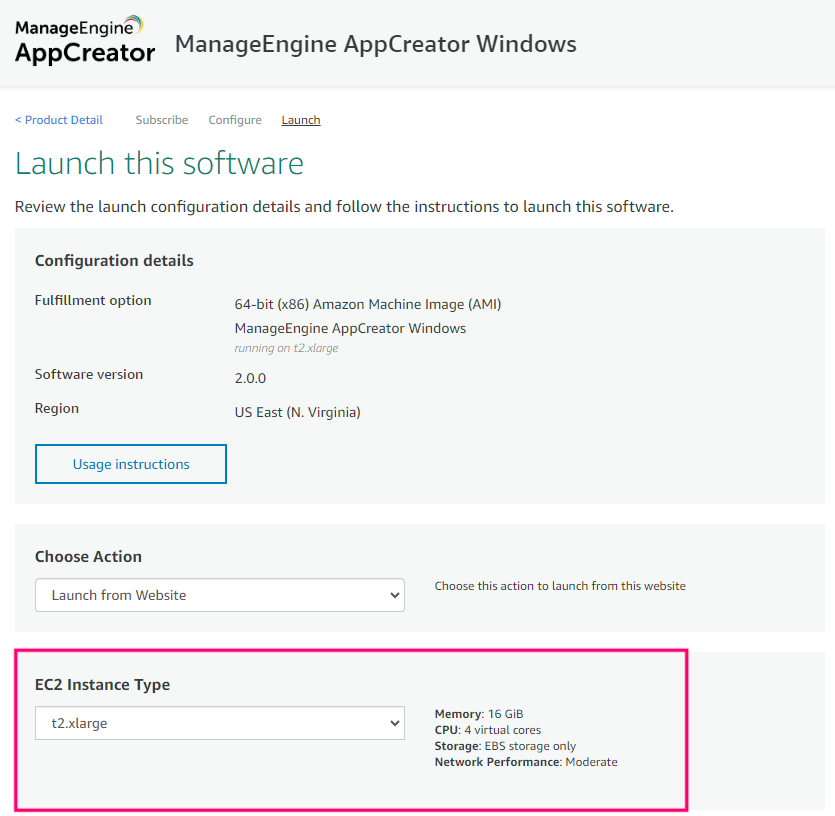
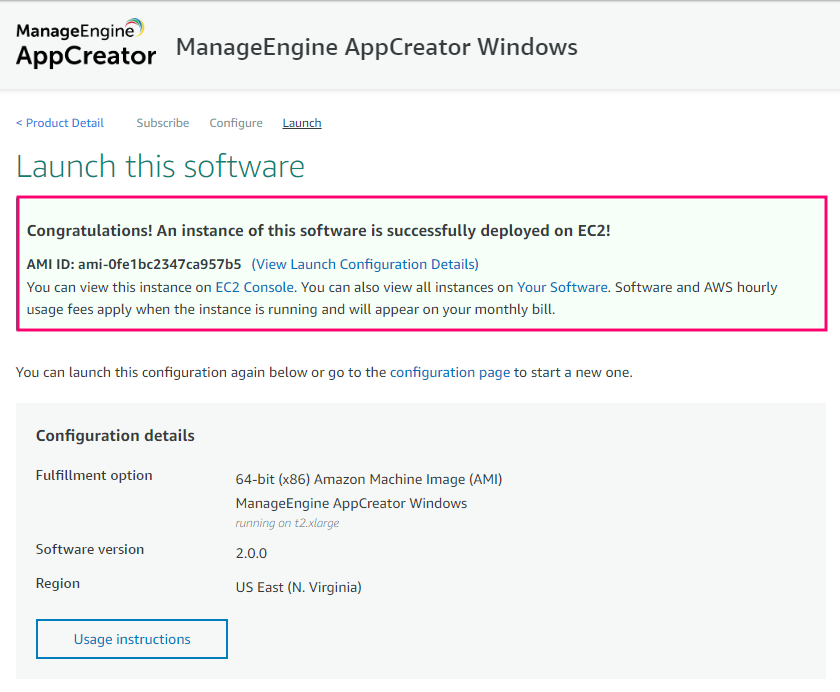
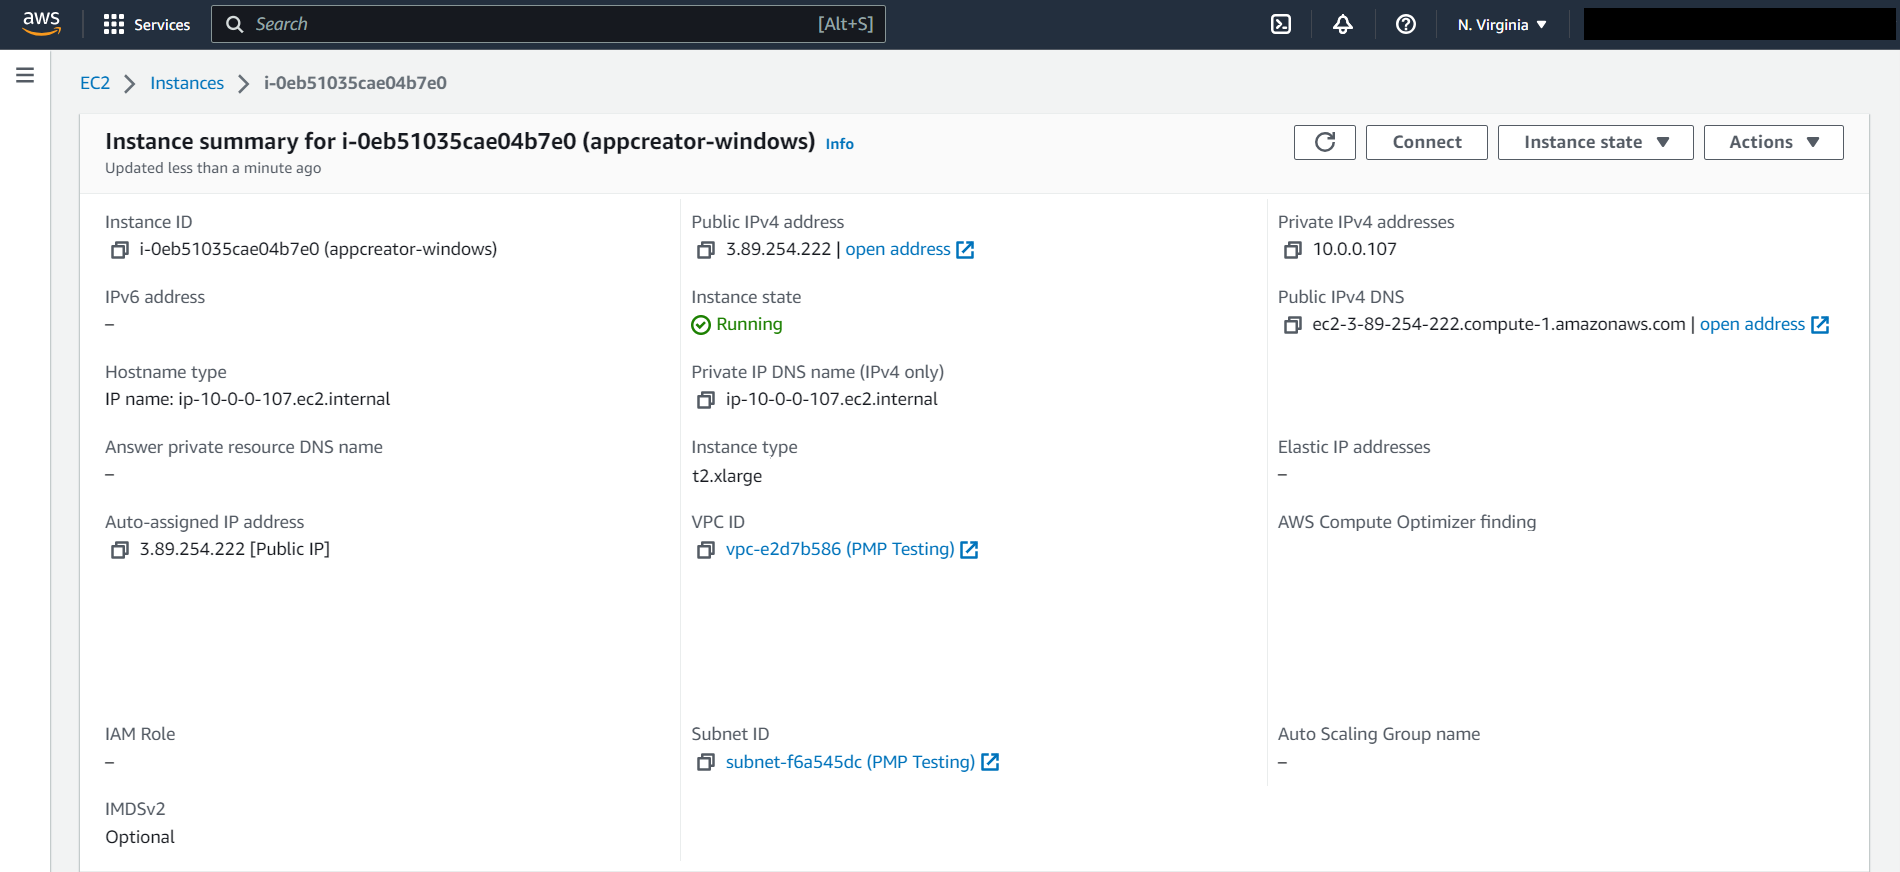
Step 9: You can click EC2 Console (highlighted in blue in the above image) and view the Instance Summary as shown in the below image.
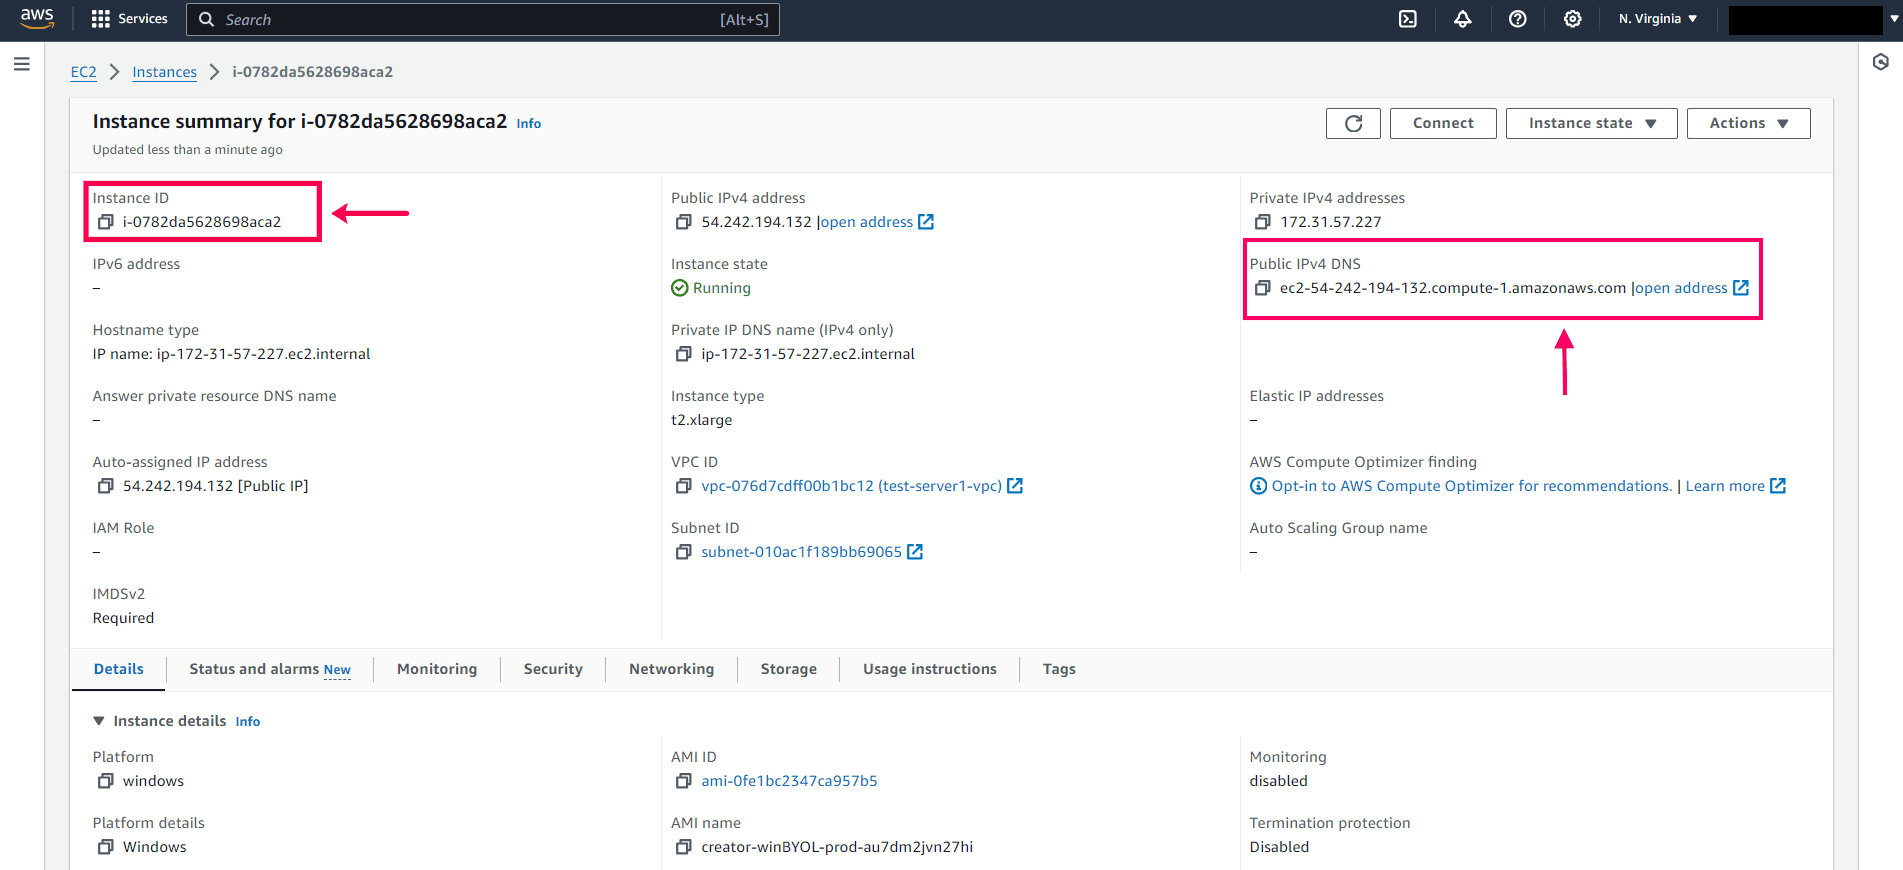
- In order to access AppCreator, you need to access your browser and type in the 'Public DNS' value in the URL format given below, in which you need to replace the <public_DNS> with the instance public DNS copied from the Instance Summary page.
- If you want to access AppCreator by the instance IP, then you need to run the changeHostName command.
- The default username for logging in will be admin and the password will be the AWS EC2 instance ID. These credentials must be changed after your first login. You can refer to the above image.
Create and install AppCreator on EC2 instance
You can also manually install AppCreator after creating an instance. The steps to create an instance are as follows.
- Login to your AWS management console.
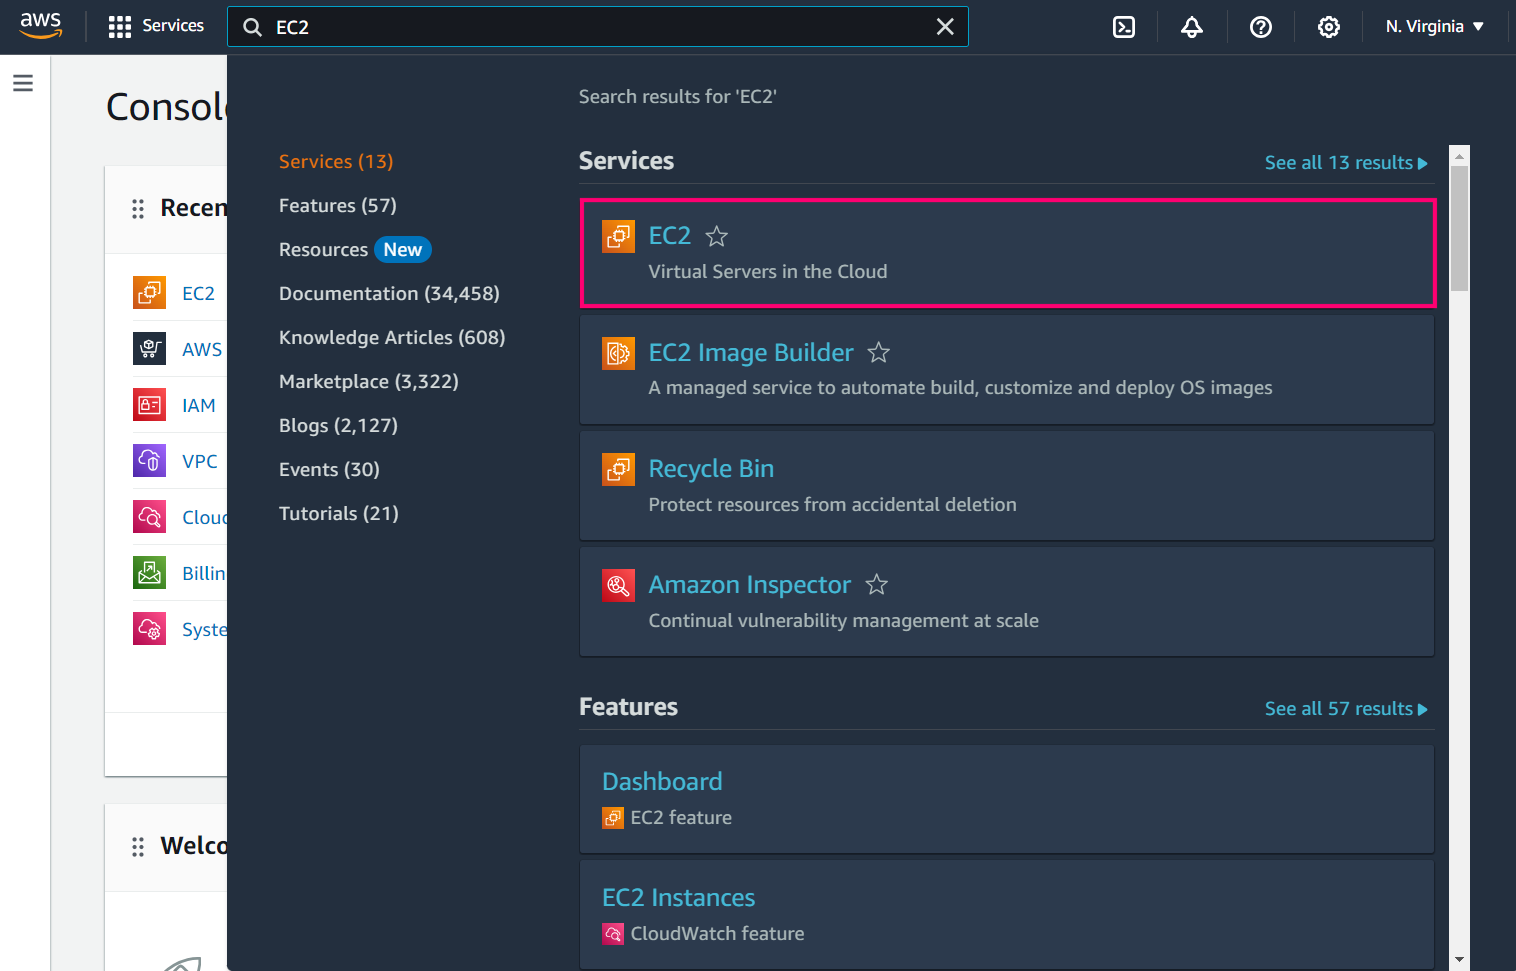
- Enter "EC2" in the search bar at the top and click the first EC2 service that appears in the search results. The EC2 dashboard will appear.
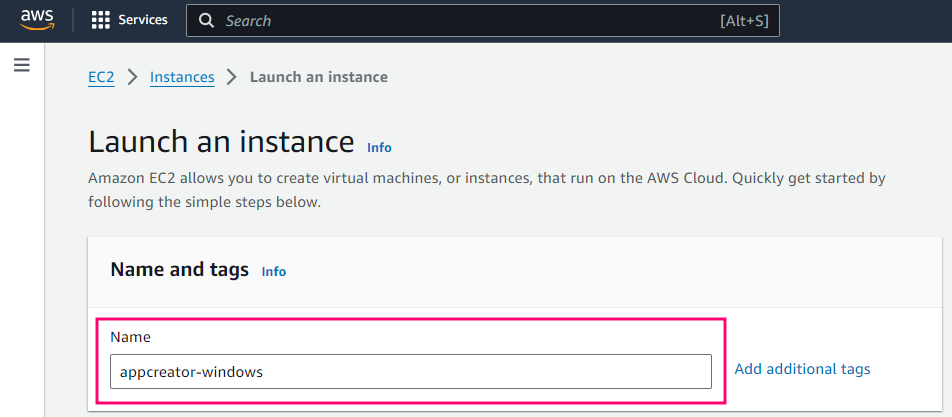
Click the Launch Instance button. You'll be redirected to the Launch an instance page.

Name your instance as required.
Select the OS image as required. Here, we've chosen the Windows AMI.
You can click here to know the recommended OS types.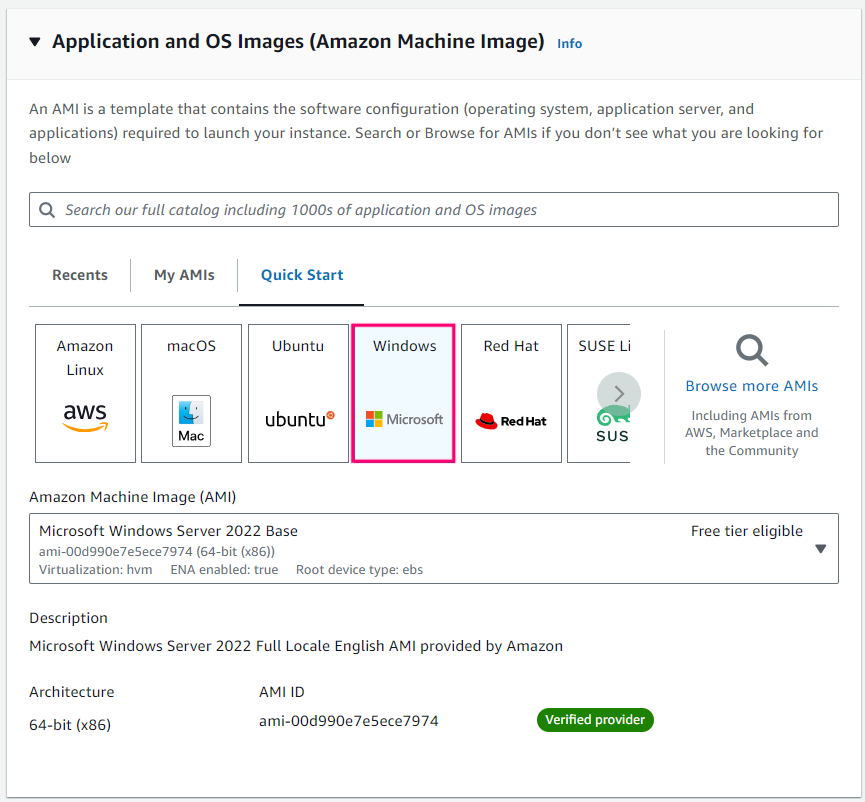
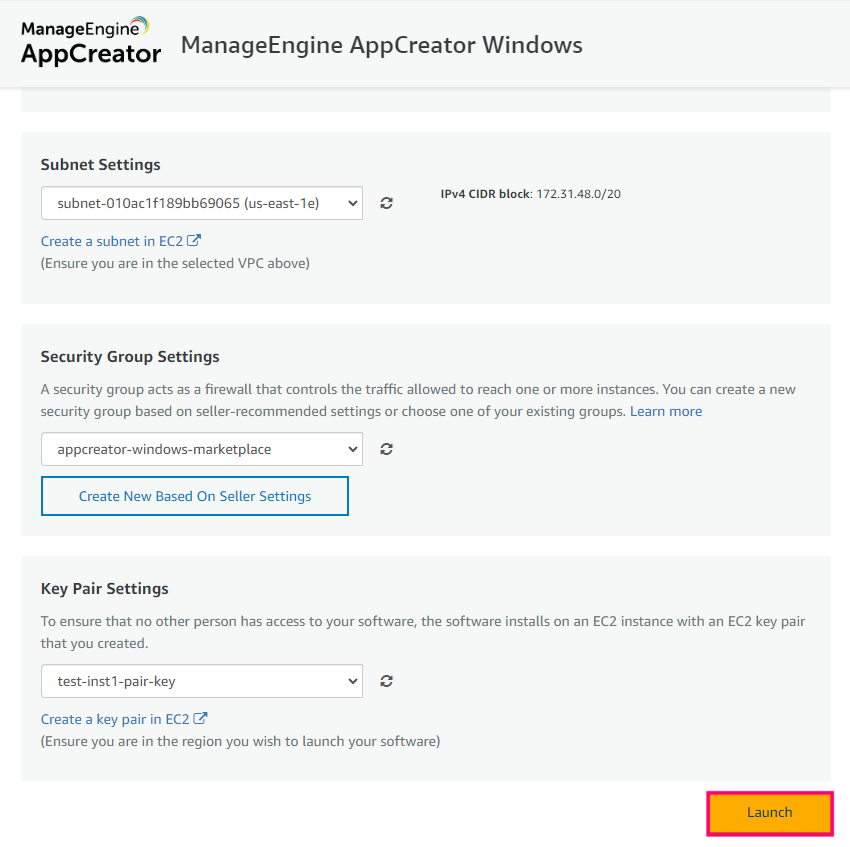
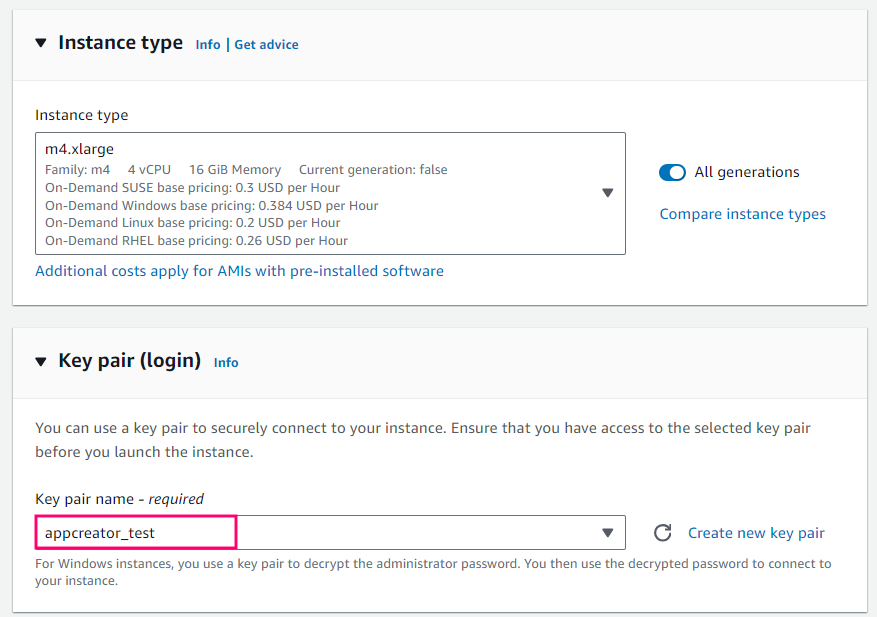
Select the instance type based on your requirements and AppCreator's recommended configuration, and specify a name for the key pair. This key pair is used to securely connect to your instance.
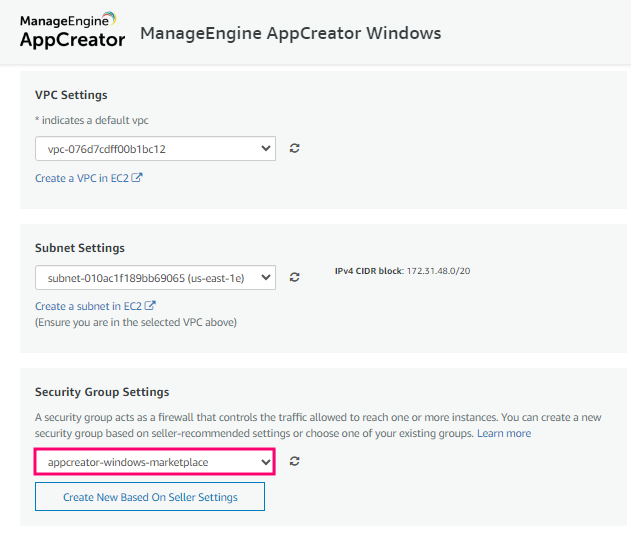
Select your VPC, Subnet, and Security Group settings. To edit your Security Group settings, you can click Edit beside Network Settings.
Note: If you want to connect to your instance, you need to either choose Enable for the option Auto-assign Public IP or attach an elastic IP (Static IP) to your instance after your instance is deployed.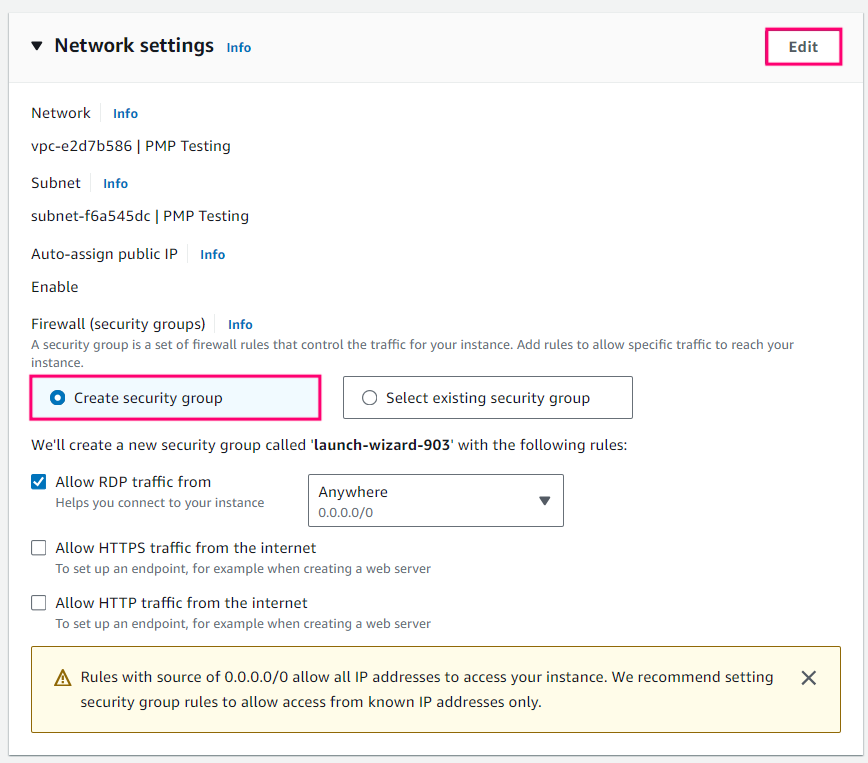
To create a new security group (if you don't have one), select the Create Security Group option, then click the Add security group rule.
- Alternatively, you can navigate to your instance security group and add an inbound port rule to AppCreator server port after the instance creation.
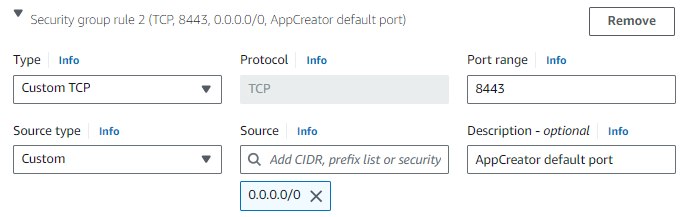
- Ensure that inbound access to AppCreator port (default: 8443) is allowed in the AWS security group and also at the machine's firewall (if enabled). Inbound security rule for the AWS security group can be configured by navigating to the respective security group associated with the instance
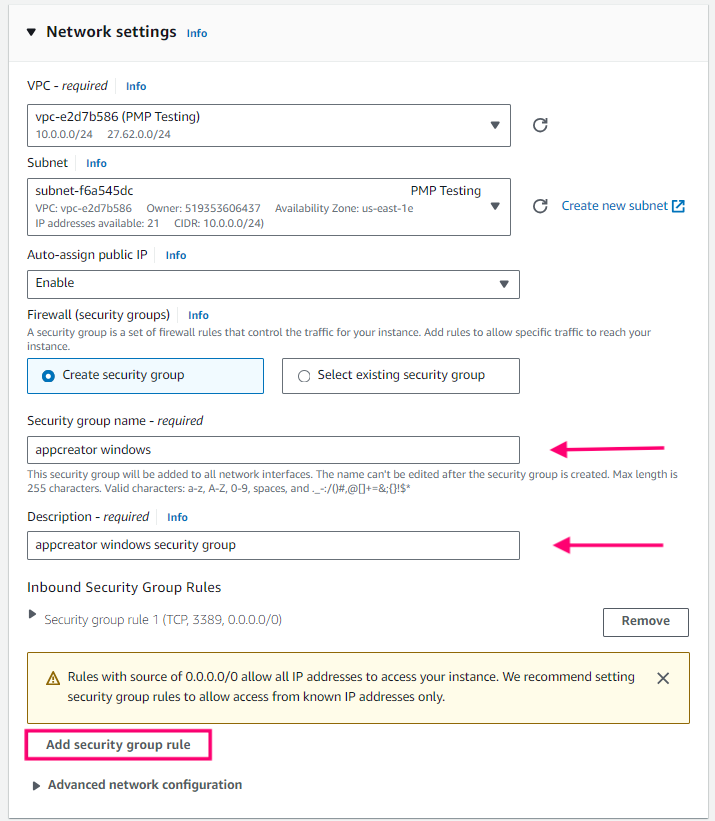
Specify the security group rules as required.
Under Security Group, the default values chosen for the Security Rule: RDP for Windows, SSH for Linux, are the recommended values.
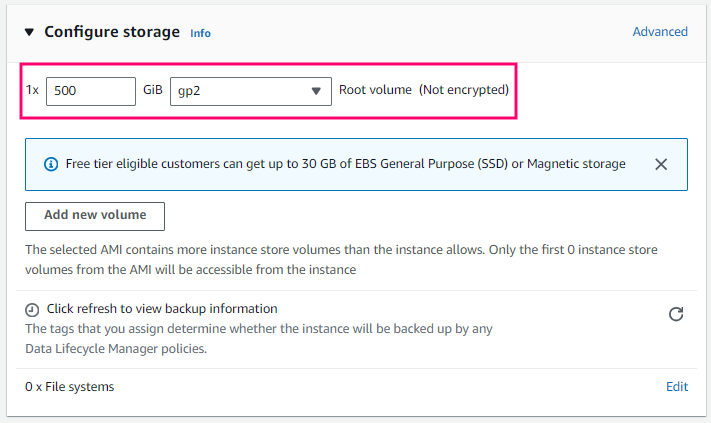
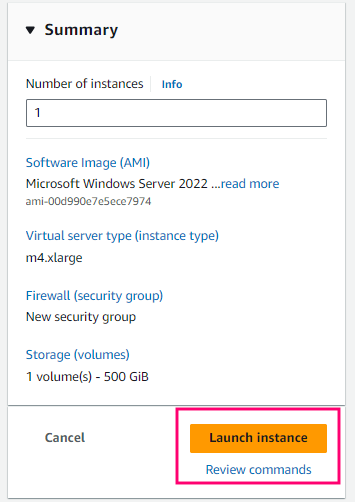
Specify the storage details as required.
View the summary details on the right side of your screen and click Launch instance. ManageEngine AppCreator instance launch will be successfully initiated.
After the successful deployment of the instance in your AWS account, you can view the details on the Instance summary page.
Access your instance and install AppCreator by following the steps mentioned here.
Note:
- When installing AppCreator on a separate instance on a Linux OS, ensure that the fontconfig package is installed.
- After installation, if you want to access AppCreator from any device via internet, then you need to set instance public IP or public DNS as the hostname by running the changeHostName command. After hostname configuration, you can access AppCreator by typing the following URL in your browser:https://<configured-hostname>:<AppCreator port>
where <configured-hostname> is the hostname that is configured using the changeHostName command.
Prerequisites
- Access to an Amazon AWS account.
- Click here to know more about recommended machine configurations.
Points to note
- When purchasing AppCreator from Marketplace, the AMIs are created with a disk storage of 30 GiB for Windows and 8 GiB for Linux. The storage can be increased later if required.
- Below are the folders where AppCreator will be installed when purchasing from Marketplace:
- Windows:C:\Program Files\ManageEngine\AppCreator
- Linux:/opt/ManageEngine/AppCreator
- Windows:
- For Linux marketplace installations, the firewall rules are pre-configured for SSH and ManageEngine AppCreator using Ubuntu's default firewall configuration tool UFW (Uncomplicated Firewall) However, you can configure the firewall as per your requirement.
- In the case of Linux marketplace installation,
- Ensure to use sudo when executing the server commands.
- Use the server commands to manage your AppCreator server.
- Alternatively there is also a AppCreator.service system service which starts AppCreator on system boot and can also be used to manually start and stop the appcreator service. Below are the respective commands:
- To start the service:sudo systemctl start AppCreator.service
- To stop the service:sudo systemctl stop AppCreator.service
- To enable the service:sudo systemctl enable AppCreator.service
- To disable the service:sudo systemctl disable AppCreator.service
- To start the service:
- For Windows marketplace installation, you can refer this page.