- Overview
- Configuration
Workday
Automate identity and access management with Workday and ADManager Plus integration
Integrating Workday to your Active Directory using ADManager Plus allows organizations to streamline identity and access management by automating user lifecycle processes. This integration ensures that changes made in Workday, such as new hires, role changes, or employee exits, are automatically synchronized with Active Directory, Exchange, Microsoft 365, and other connected systems.
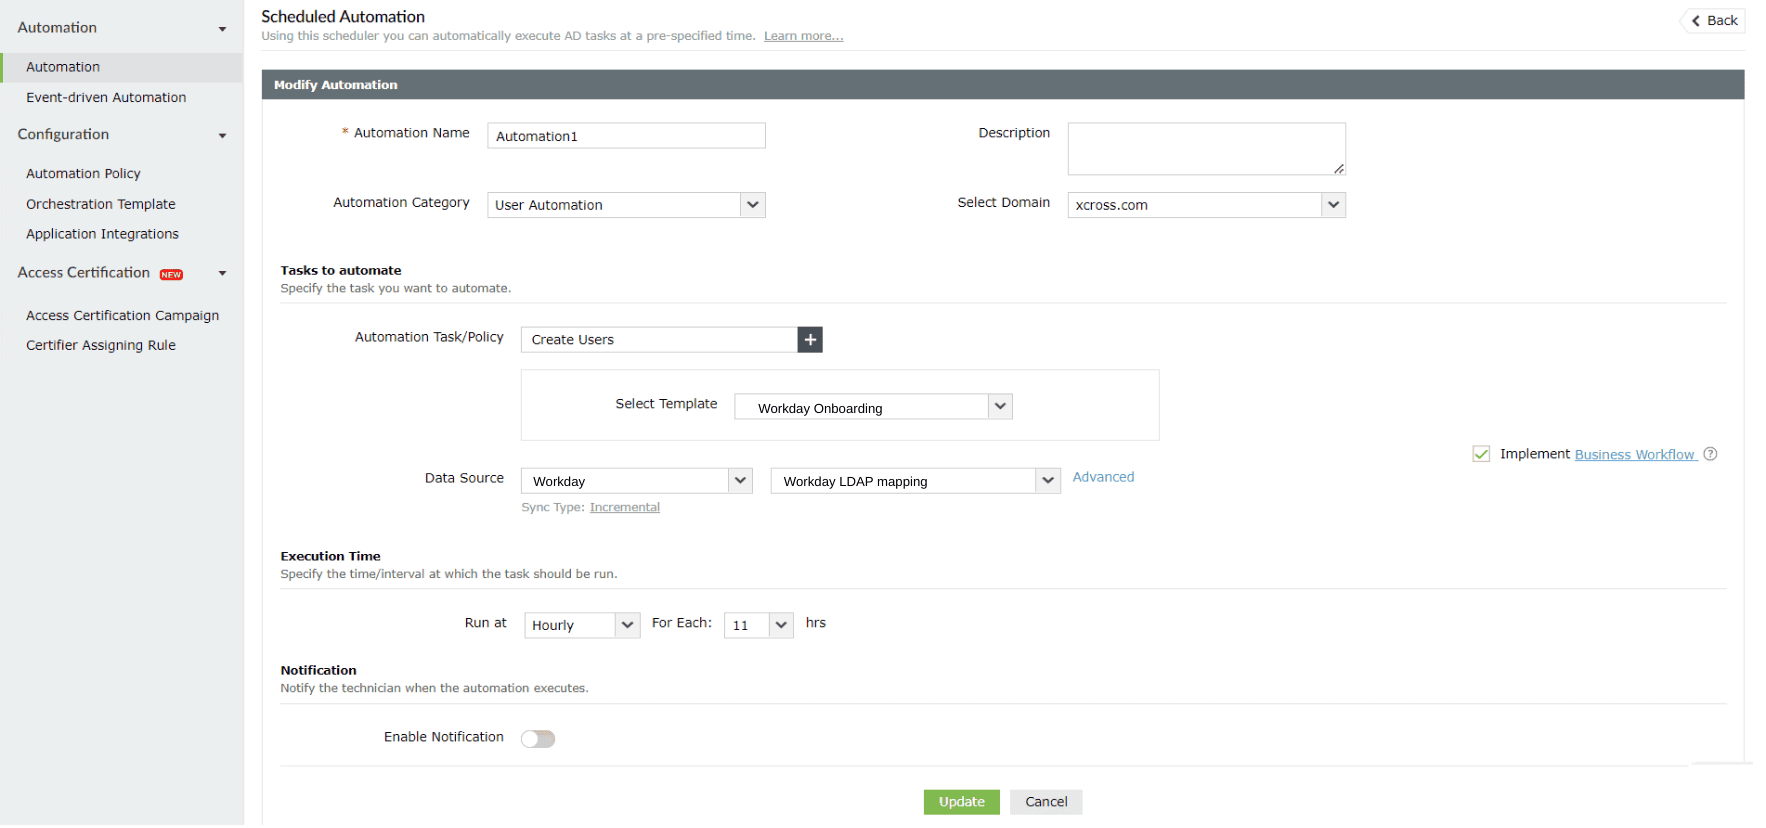
Automate user provisioning
Automate bulk user creation, modification, and deletion without using a single line of PowerShell script.
Role-based access controls
Automatically assign and update permissions for users in Workday HCM based on role changes in AD, ensuring that access rights are accurate and aligned with job responsibilities.
Effective offboarding
Streamline the deactivation of user access and permissions, ensuring secure and compliant removal of accounts when employees leave the organization.
How to configure Workday integration in ADManager Plus
Prerequisites
- Workday uses basic authentication credentials to authorize API request.
- Authentication credentials required: Enter the Username and Password obtained from Workday.
Privileges
To import users (Inbound action) : Ensure the account used for authorization has permission to read all user accounts.
To perform any action or query in Workday (Outbound action): Ensure the account used for authorization has permission to perform the desired action.
Note: ADManager Plus comes with a preconfigured set of APIs that helps perform basic actions with the integration. If the action you require is not available, please gather the necessary API details from Workday API documentation to configure under inbound or outbound webhooks to perform the required actions.Authorization configuration
- Log in to ADManager Plus and navigate to Directory/Application Settings.
- Go to Application Integrations, then search and select Workday.
- Toggle the Enable Workday Integration button on.
- Toggle the Enable Workday Integration button on.
- In the Workday Configuration page, click Authorization.
- Enter the authentication credentials.
- Click Configure.
Inbound webhook configuration
Inbound webhook enables you to fetch user data from Workday and move it to ADManager Plus. The attribute mapping configured in this section can be selected as the data source during automation configuration to perform the desired action on the list of users received from the API response. To configure an inbound webhook for Workday:
- Under Inbound Webhook, click Workday Custom Endpoint Configuration.
- In the Endpoint Configuration tab, an endpoint, Workday USERS ENDPOINT, comes preconfigured with an Endpoint URL, API Method, and Body Message fields to fetch user accounts from Workday. Note: Endpoint to get the list of workers: https://impl-services1.wd501.myworkday.com/ccx/service/hebrewseniorlife2/Human_Resources.
If you would like to use a new endpoint to import users, you can configure one using the + Add API endpoint button and filling in the required fields as per Workday API references. Click here to learn how.
Note
- You can add macros to your endpoint configuration to dynamically change it as per your requirement using the macro chooser component.
- Refer to the Workday API references and configure additional headers and parameters, if required.
- In the Body Message, enter the username and password under the SOAP Security header.
- Sample Request body message : WordayRequest_Sample.xml
- To know more about how to configure the request, refer to Workday's API details.
- Since Workday uses the SOAP API, a csv file that contains the path details of Workday attributes is required. Import the CSV file into the Response Parser field. Check this sample CSV to construct the CSV file
- When the workers list response is received by multiple paginated calls, you can enable pagination by Settings tab (under the endpoint configuration name) -> Enable "Repeat calling this endpoint" -> Configure Repeat Call Configuration as Increase Page (the column name present in CSV which the mapped with the path of "Page" field in the response xml - /Envelope/Body/Get_Workers_Request/Response_Filter/Page)
- Once done, click Test & Save. A response window will display all the requested parameters that can be fetched using the API call. Click Save.
- Click Data Source - LDAP Attribute Mapping to match endpoints and to map AD LDAP attributes with the respective attributes in Workday.
- Click + Add New Configuration and perform the following:
- Enter the Configuration Name and Description and select the Automation Category from the drop-down menu.
- In the Select Endpoint field, select the desired endpoint and a Primary Key that is unique to a user (for example, employeeIdentifier). Note: When multiple endpoints are configured, this attribute must hold the same value in all the endpoints.
- In the Attribute Mapping field, select the attribute from the LDAP Attribute Name drop-down menu and map it with the respective column in Workday.
- Click Save.
- Configure an automation with the required action, repeat frequency, and the above configured attribute mapping configuration.

[ADManager Plus also enables you to customize the attribute format within Workday]
Outbound webhook configuration
Outbound webhook enables you to update the changes made in AD using ADManager Plus to Workday and synchronize them with AD. To configure an outbound webhook for Workday:
- Under Outbound Webhook, click Workday Webhook Configuration.
- Click + Add Webhook.
- Enter a name and description for this webhook.
- Decide on the action that has to be performed and refer to Workday's API references for the API details, such as the URL, headers, parameters, and Body Message that will be needed.
- Select the HTTP method that will enable you to perform the desired action on the endpoint from the drop-down menu.
- Enter the endpoint URL.
- Configure the Headers, Parameters, Message Type, and Body Message in the appropriate format based on the API call that you would like to perform.
- Click Test and Save.
- A pop up window will then display a list of AD users and groups to test the configured API call. Select the desired user or group over which this API request has to be tested and click OK. This will make a real-time call to the endpoint URL, and the selected objects will be modified as per the configuration.
- The webhook response and request details will then be displayed. Verify them for the expected API behavior and click Save.
- The configured webhooks can be integrated into Orchestration Templates—enabling scheduled or event-driven automation—to consecutively perform the action configured in the outbound webhook among of actions on a group of users or on individual users.