Help Center
Quick Start
- Overview
- System requirements
- Minimum privileges required
- Default port configuration
- Installing DataSecurity Plus
- Uninstalling DataSecurity Plus
- Starting DataSecurity Plus
- Launching DataSecurity Plus
- Configuring your solution
- Licensing details
- Applying a license
File Auditing
- About File Auditing
- Domain configuration
- File server configuration
- Failover cluster configuration
- NetApp server configuration
- Nutanix server configuration
- Workgroup configuration
- Amazon FSx configuration
Setting up File Audit
Dashboard
Reports
Alerts
Configuration
Storage Configuration
File Analysis
- About File Analysis
- Domain configuration
- File server configuration
- Workgroup configuration
- SMB File Server Configuration
- On-Demand Reports
Setting up File Analysis
Dashboard
Reports
Alerts
Configuration
Data Risk Assessment
- About Data risk assessment
Setting up Data risk assessment
Dashboard
Reports
Ownership analysis
Configuration
Endpoint DLP
- About Endpoint DLP
Setting up Endpoint DLP
Reports
Alerts
Prevention policies
Configuration
Cloud Protection
- About Cloud Protection
- Gateway Server Installation Steps
- Gateway Configuration in Endpoint
- Gateway Cluster Configuration
- Gateway Server Management
- Certificate Authority Configuration
- Two-way SSL configuration
- Manage Certificate Trust Store
- Threat Analytics Database
- Manage Banned Applications
- Manage Authorized Applications
- Regenerating gateway server access key
- Updating gateway server
- Gateway Server Failover
- Load Balancer Configuration
- Global Insight
- Application Insight
- User Insight
- Shadow Application Insight
- Banned Application Insight
- Cloud App Discovery
- File Upload & Download Reports
- Control Policy reports
- General Reports
- Application Insights
- Shadow Domain Insights
- Banned Domain Insights
- GenAI Insights
Setting up Cloud Protection
Dashboard
Reports
Control Policies
Storage Configuration
Administrative settings
- Technician configuration
- Notification filters
- Manage agent
- Agent settings
- SIEM integration
- Business hours configuration
- Two-factor authentication
- Workgroup configuration
- Security policy
Email configuration
General settings
- Connection
- Personalize
- DataSecurity Plus Server
- Privacy Settings
- Disk utilization
- Schedule Retention Policy
Release notes
2026
2025
2024
2023
2022
2021
2020
2019
2018
2017
2016
2015
Troubleshooting
- HTTP communication failure
- Dormant DataEngine
- Secure Gateway server failure
- RPC communication failure
- Cloud Protection Gateway server failure
- Known issues and limitations
- Known errors and solutions
- Report discrepancy in File Analysis
Guides
- Agent document
- How to Migrate/Move DataSecurity Plus
- How to apply SSL certificate
- How to automate DataSecurity Plus database backup
- How to set alerts in DataSecurity Plus
- How to secure your DataSecurity Plus installation
Amazon FSx configuration
Overview:
Amazon FSx for Windows File Server is a fully managed, native Windows file system service that lets you move your Windows-based applications requiring shared file storage to AWS.
DataSecurity Plus' File Audit component extends the provision to audit and review Amazon File Systems to keep you informed on how your data is accessed. Here's the list of events that can be audited:
- Files modified
- Files deleted
- Files renamed
- File extension changes
- Files moved
- Read access
- Permission changes
- Failed attempt to read a file
- Failed attempt to write a file
- Failed attempt to delete a file
- Folder owner changes
This guide takes you through the steps involved in configuring your Amazon FSx Windows file systems for auditing in DataSecurity Plus.
Prerequisites:
Create a user in IAM console:
- Sign in to your AWS Management console and open the IAM console.
- In the navigation menu, select Users, and then click Add users.
- Enter the User name for the new user, and click Next.
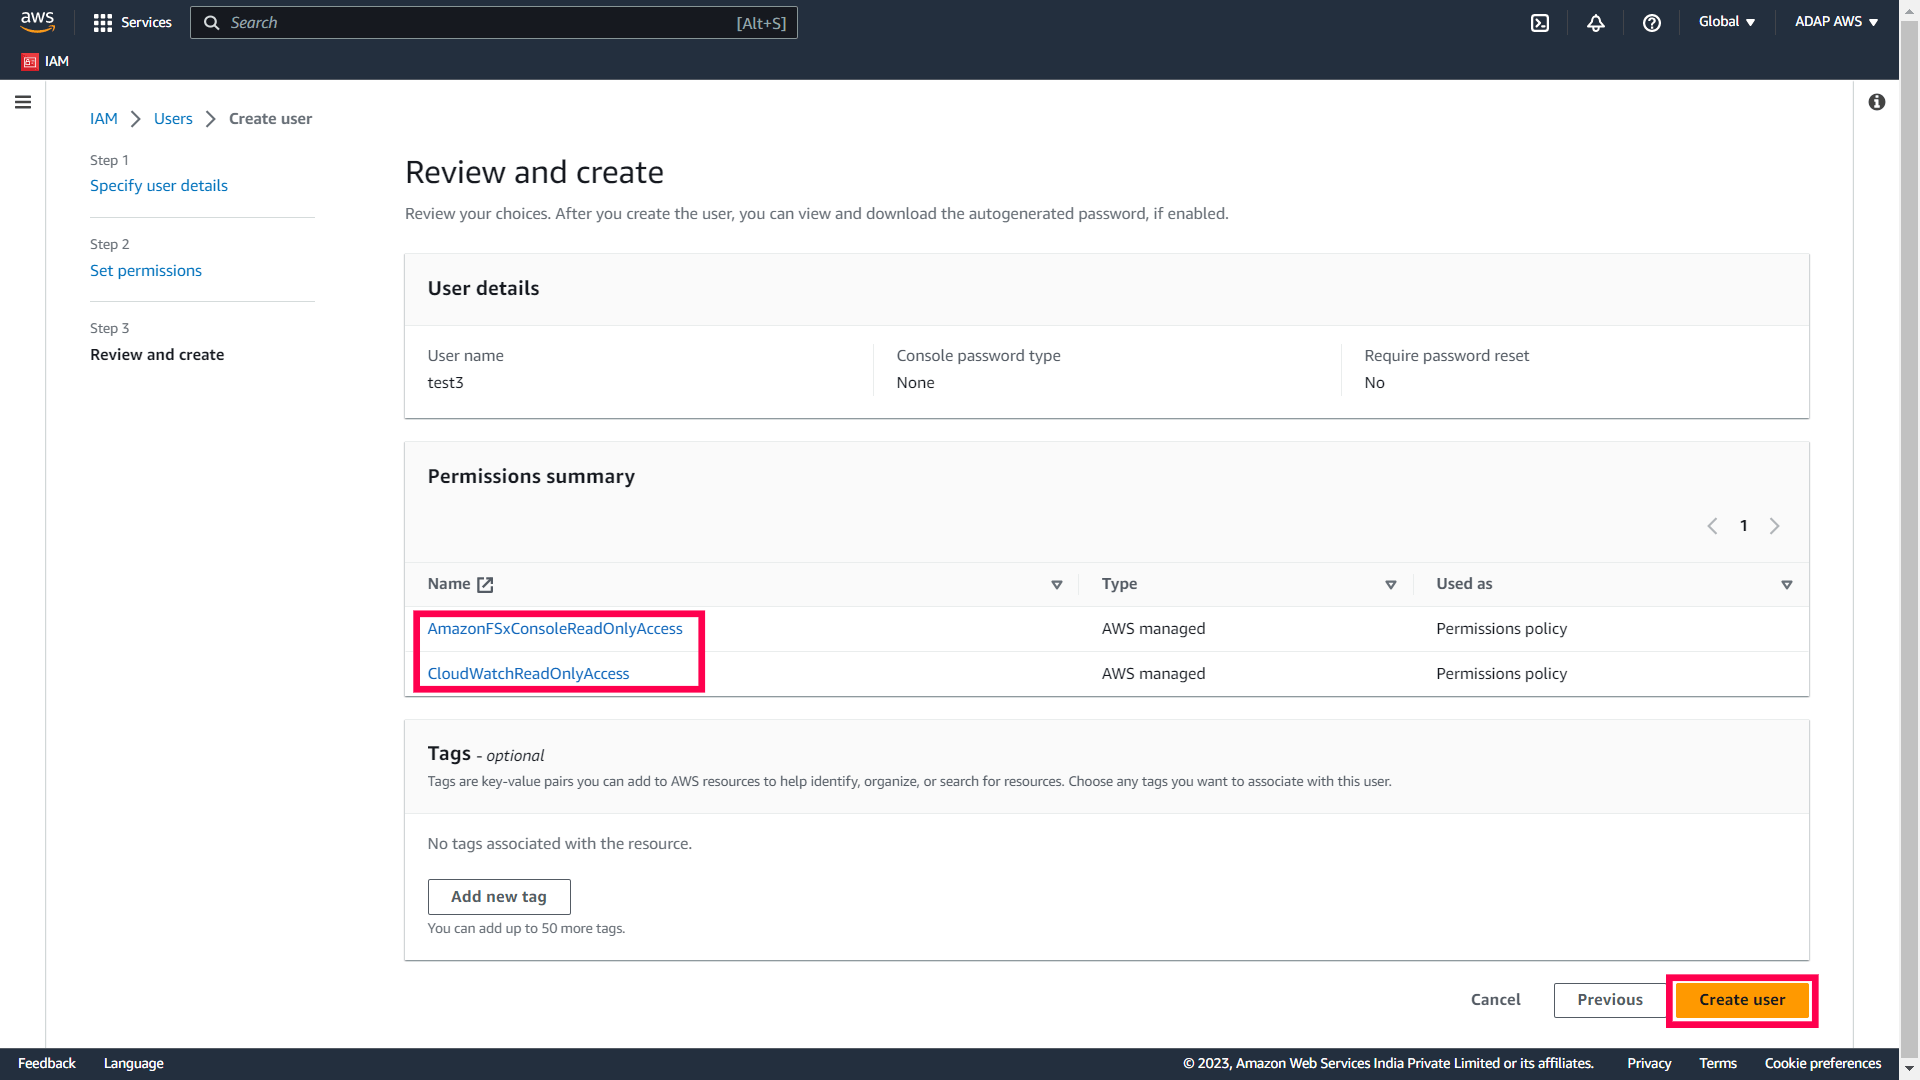
- On the Set permissions page, select Attach policies directly.
- Find and attach the following policies to this user:
- AmazonFSxConsoleReadOnlyAccess policy
- CloudWatchReadOnlyAccess policy
- Click Next.
- Review your choices and click Create user.
- Once the user is created, select the user and click the Security credentials tab.
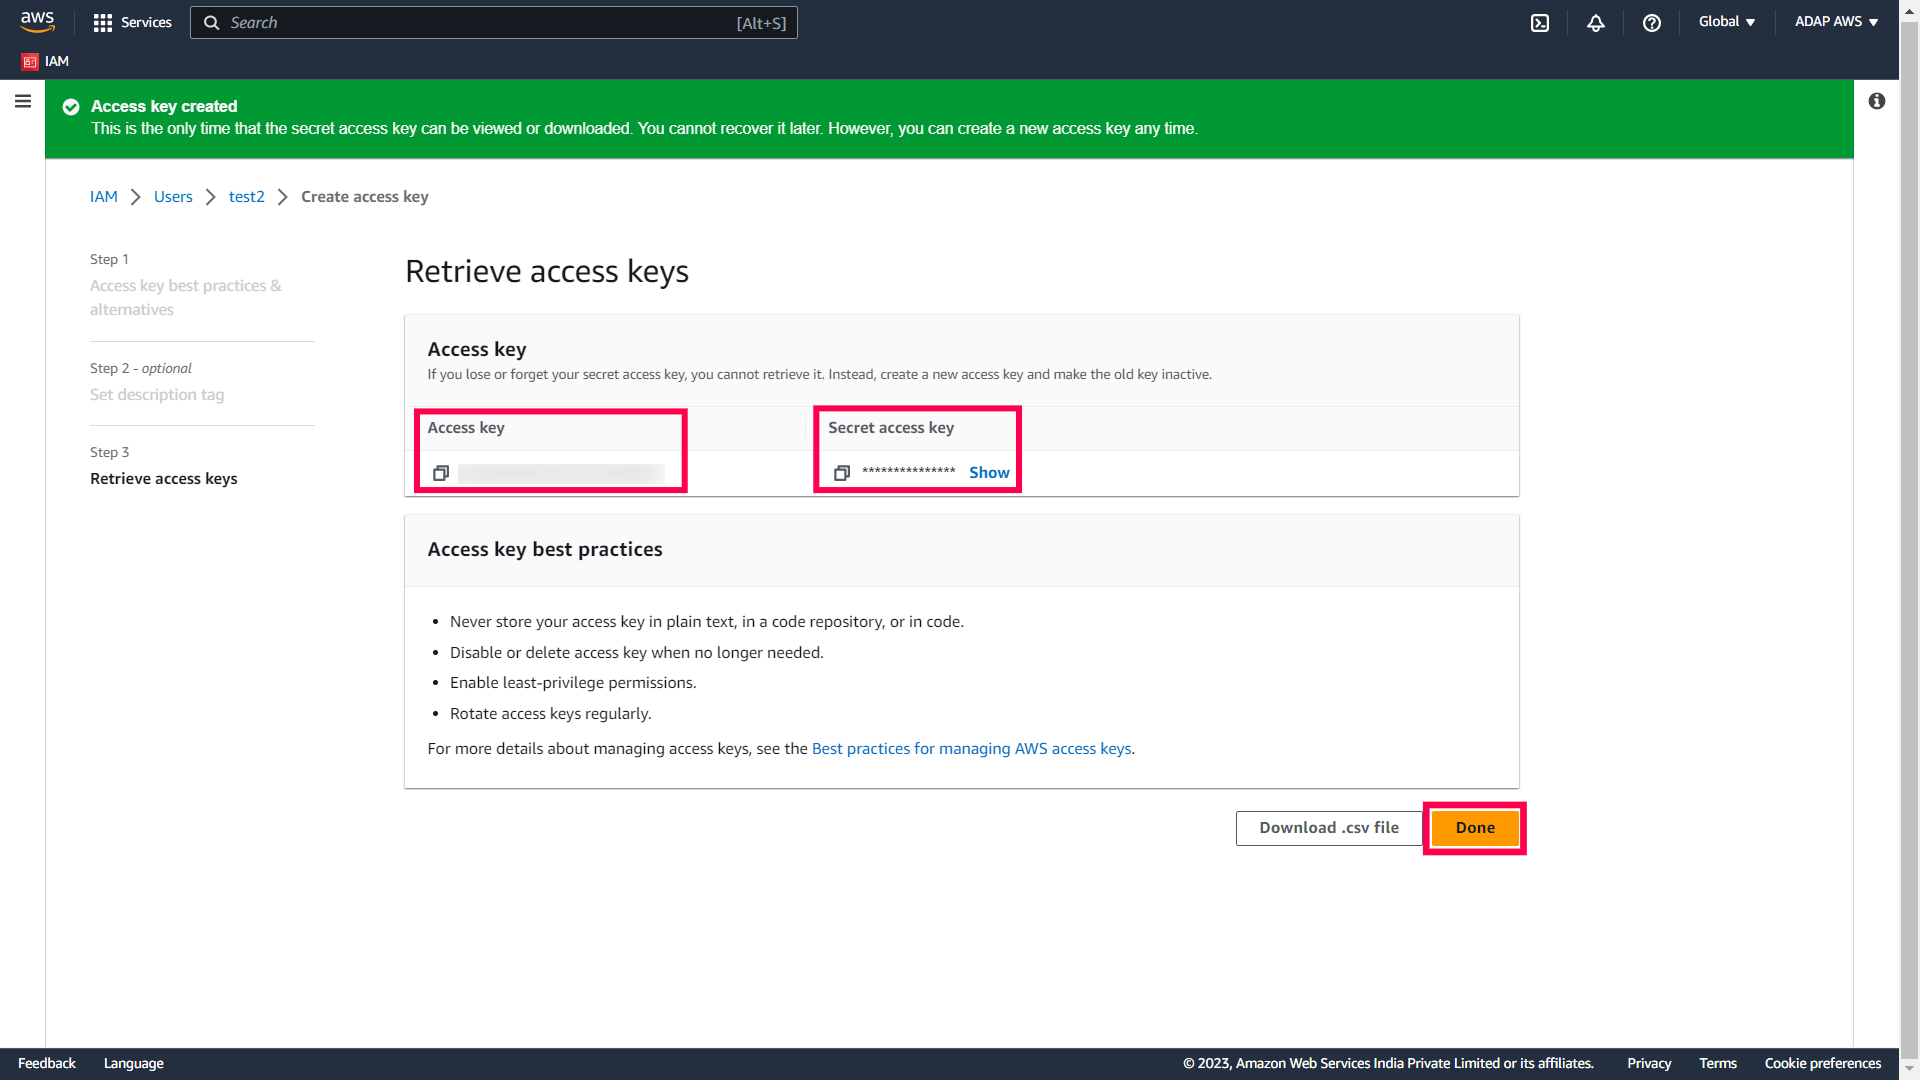
- On the Access keys panel, click Create access key, select Other as your use case, and click Next.
- Set a suitable description tag value if required and click Create access key.
- Once the key is created, you can view the user's Access key and the Secret access key. Copy them to your clipboard as you will need them to configure Amazon FSx in DataSecurity Plus, and click Done.
Enable file access auditing on the Amazon FSx file system:
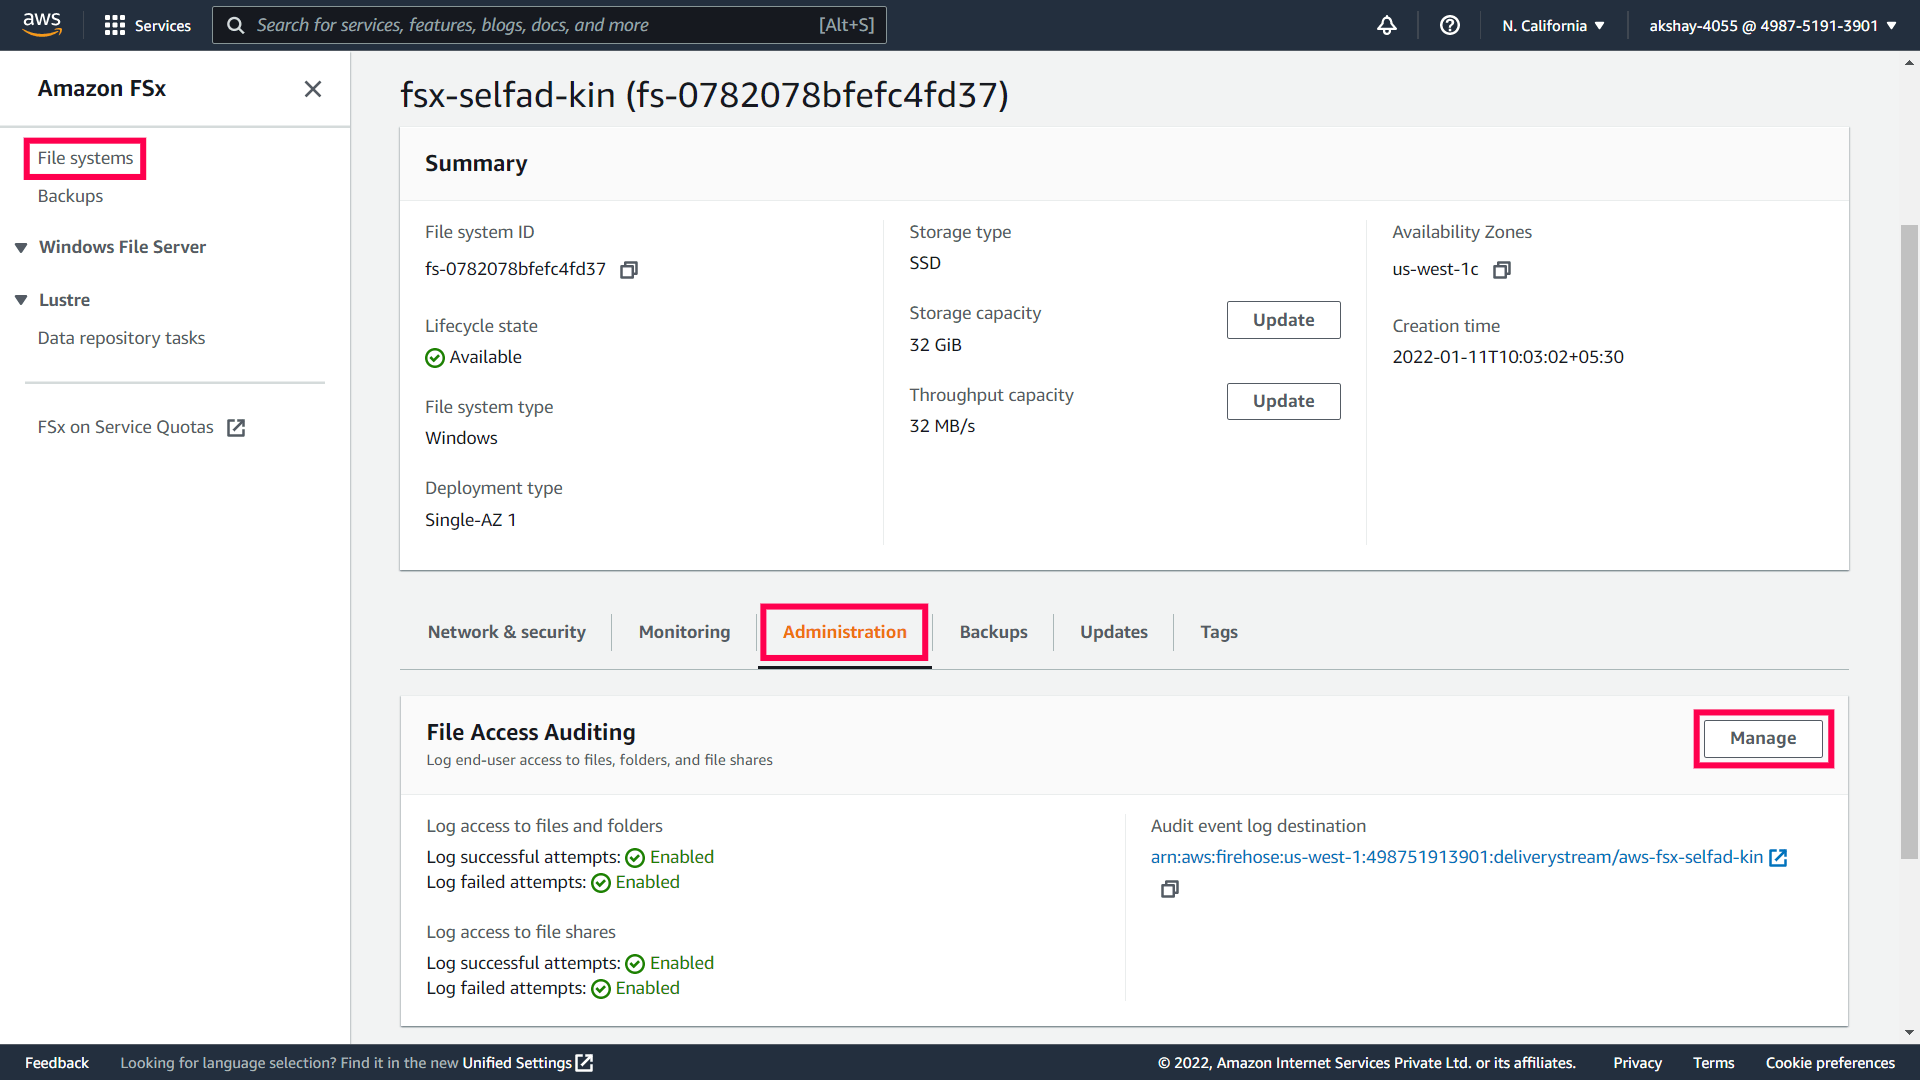
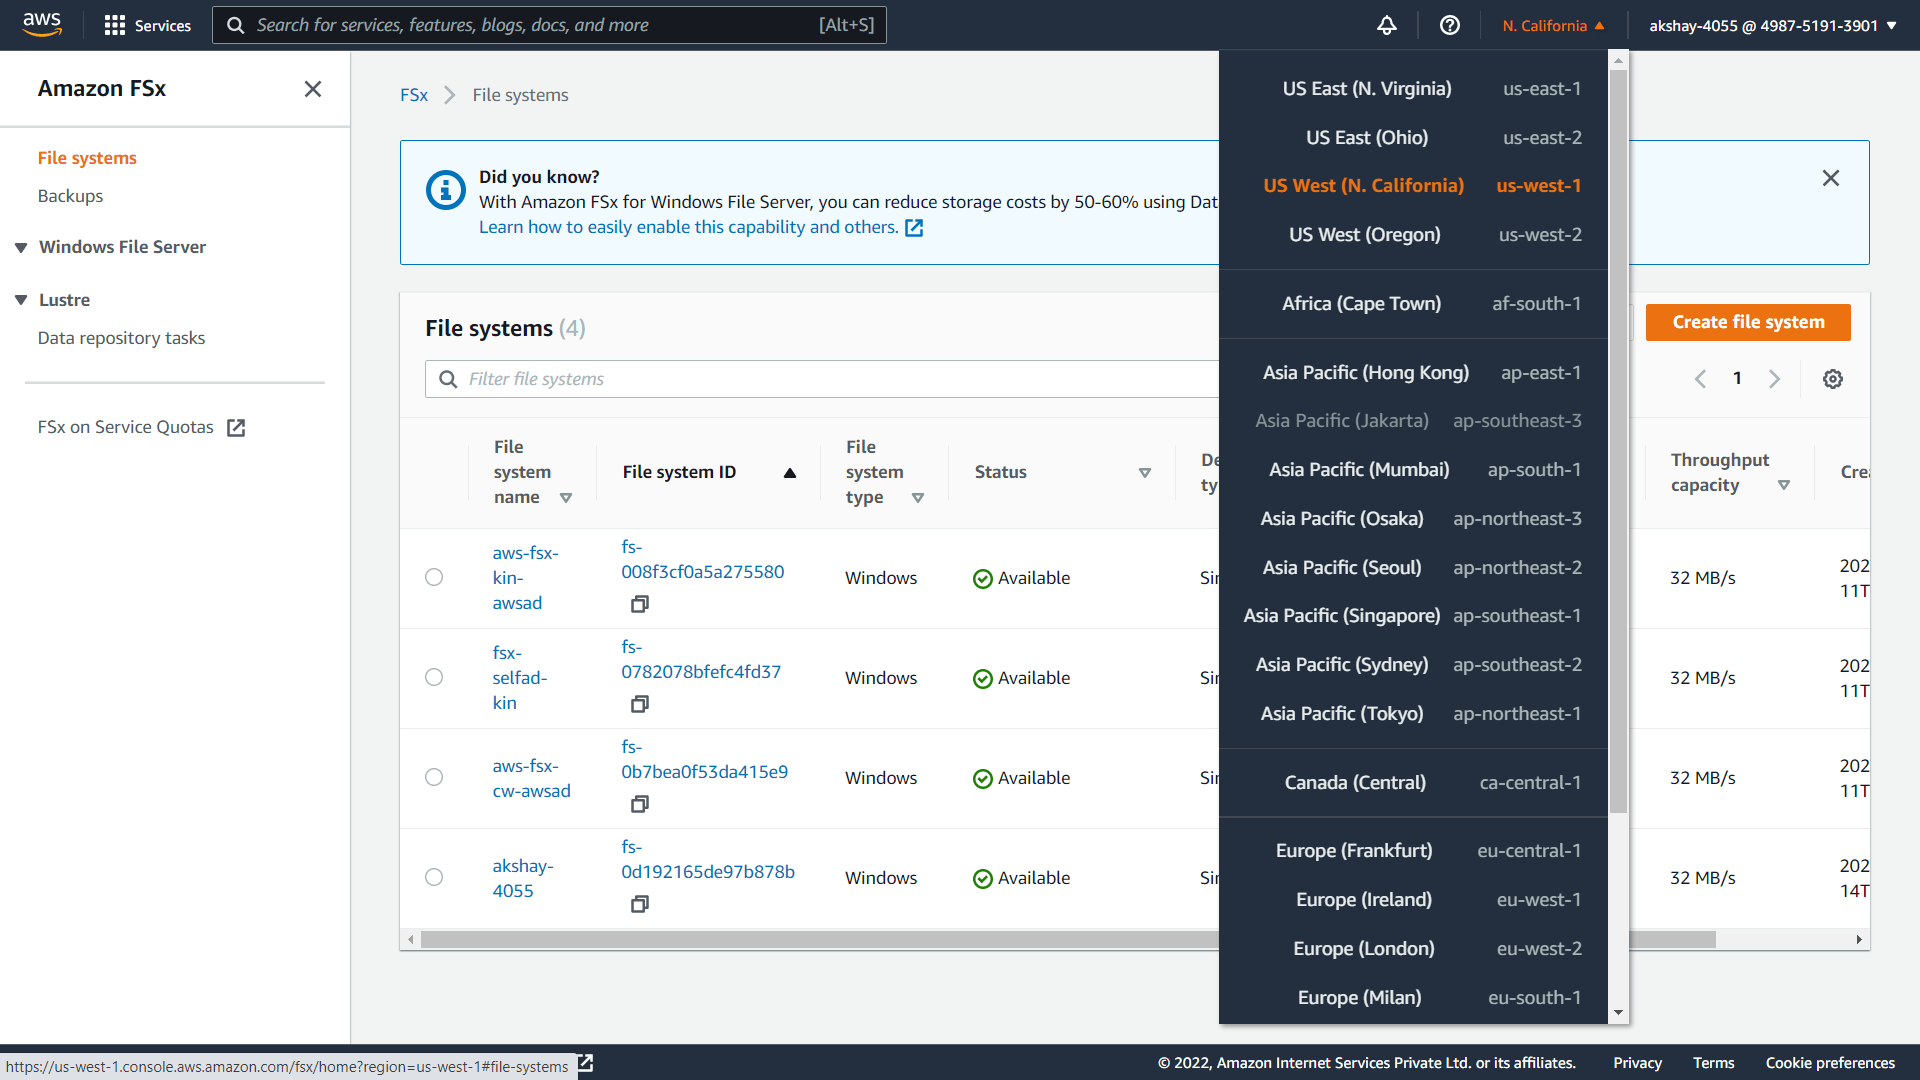
- Open the Amazon FSx console.
- Navigate to File systems and select the Windows file system for which you want to enable auditing.
- Select the Administration tab.
- On the File Access Auditing panel, click Manage.
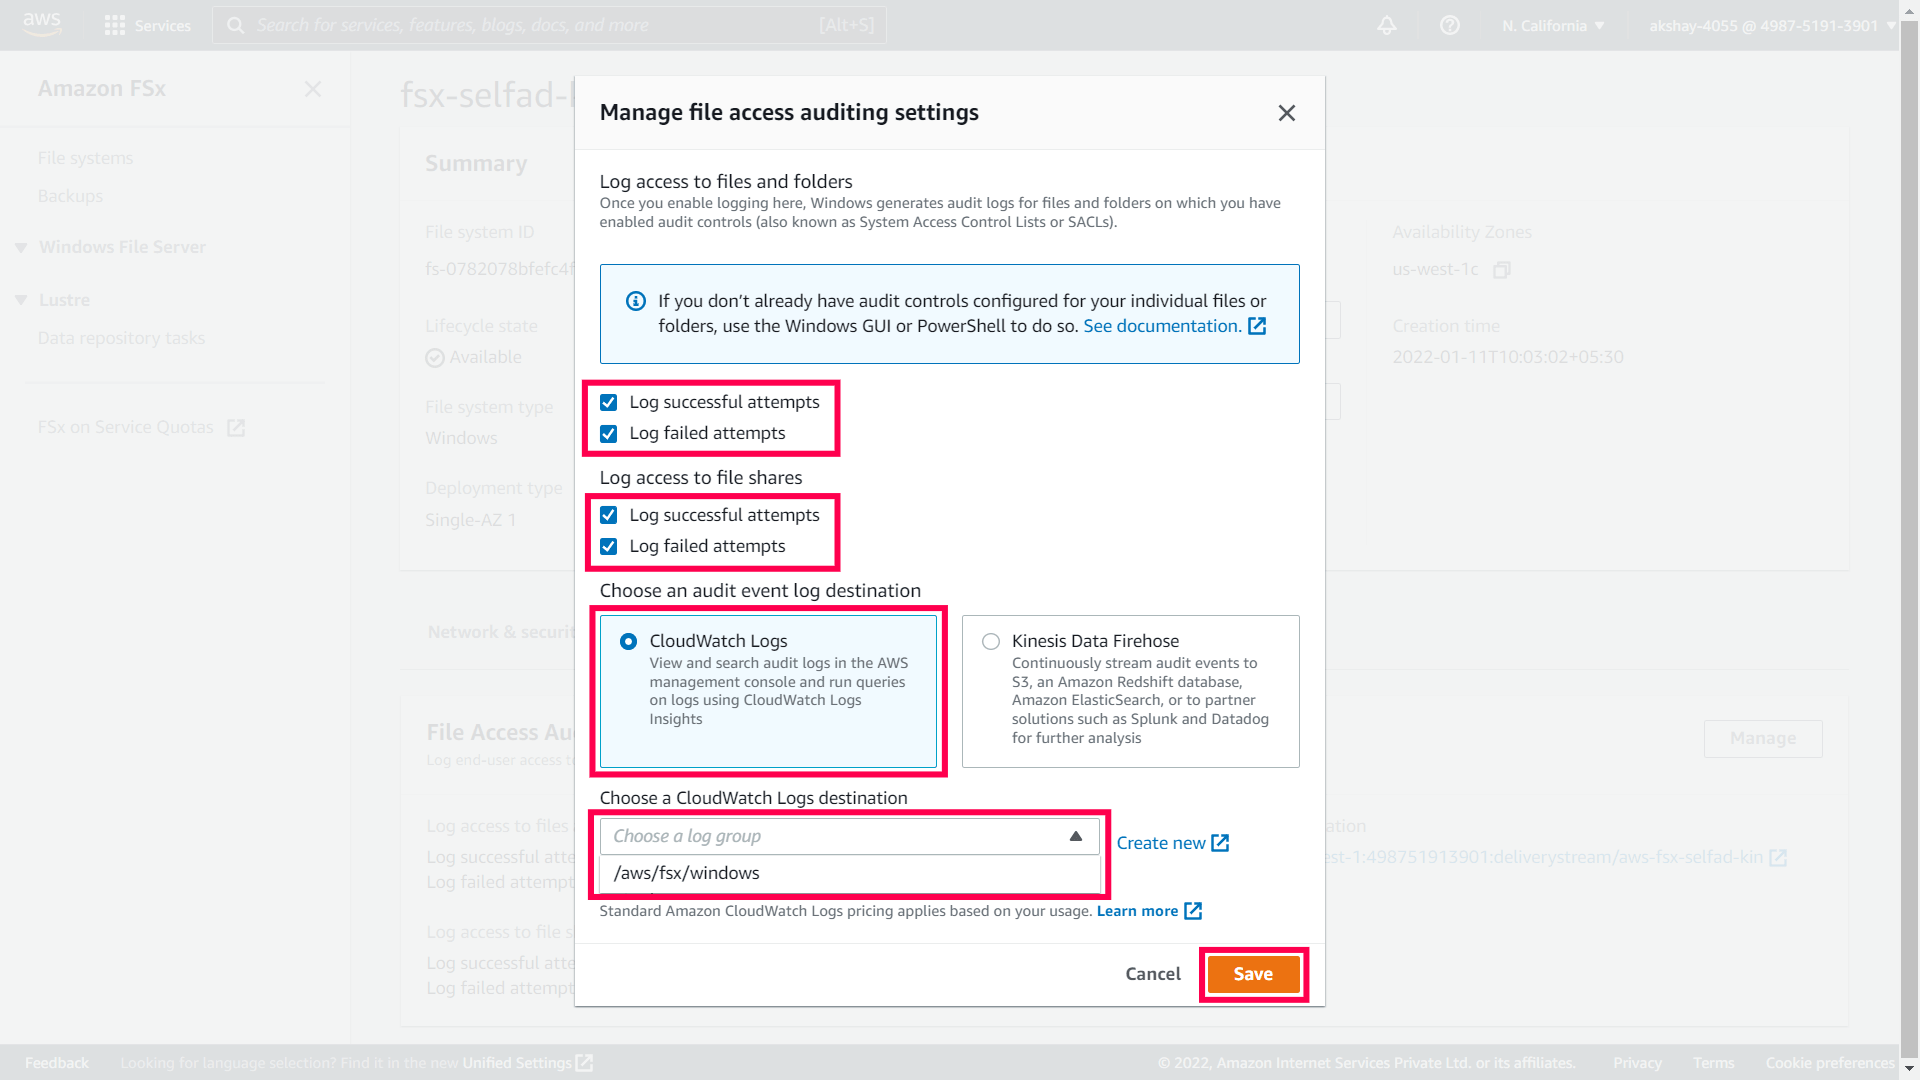
- On the Manage file access auditing settings dialog, enable logging of both successful and failed attempts for Log access to files and folders and Log access to file shares.
- Select CloudWatch Logs as your audit log destination and then choose the default log stream, /aws/fsx/windows.
- Click Save.
- From the navigation bar on the top, click the region list to the left of your account information and note the region code. For example: us-west-1. You will need this later when configuring Amazon FSx in DataSecurity Plus.
The Amazon FSx file system can be used with either a self-managed Microsoft Active Directory (AD) or an AWS Managed Microsoft AD. You can configure the required audit policies manually by following the steps under Manual audit policy configuration.
Manual audit policy configuration
- Open Active Directory Users and Computers.
- Right-click the domain and select New > Group.
- In the New object - Group window that opens, type in “DataSecurityPlusFS” as the Group name, check Group scope: Domain Local and Group type: Security. Click OK.
- Right-click the newly created group, then select Properties > Members > Add. Add all the Windows file servers that you want to audit as a member of this group. Click OK.
- Using domain admin credentials, log in to any computer that has the Group Policy Management Console (GPMC) on it.
- Go to Start > Windows Administrative Tools > Group Policy Management.
- Depending on whether you are using a Self-managed Microsoft AD or an AWS Manged Microsoft AD, follow the steps:
- Self-managed Microsoft AD
In the GPMC, right-click the domain in which you want to configure the Group Policy. Select Create a GPO and Link it here. In the New GPO window that opens, type in “DataSecurityPlusFSPolicy” and click OK.
- AWS Managed Microsoft AD
In the GPMC, right-click the OU with the same name as your domain (the OU created by AWS that you have "Edit" access for). Select Create a GPO and Link it here. In the New GPO window that opens, type in “DataSecurityPlusFSPolicy” and click OK.
- Select the DataSecurityPlusFSPolicy GPO. Under Security Filtering, select Authenticated Users. Click Remove. In the Group Policy Management window that opens, select OK.
- Select the DataSecurityPlusFSPolicy GPO. Under Security Filtering, click Add and choose the security group DataSecurityPlusFS created previously. Click OK.
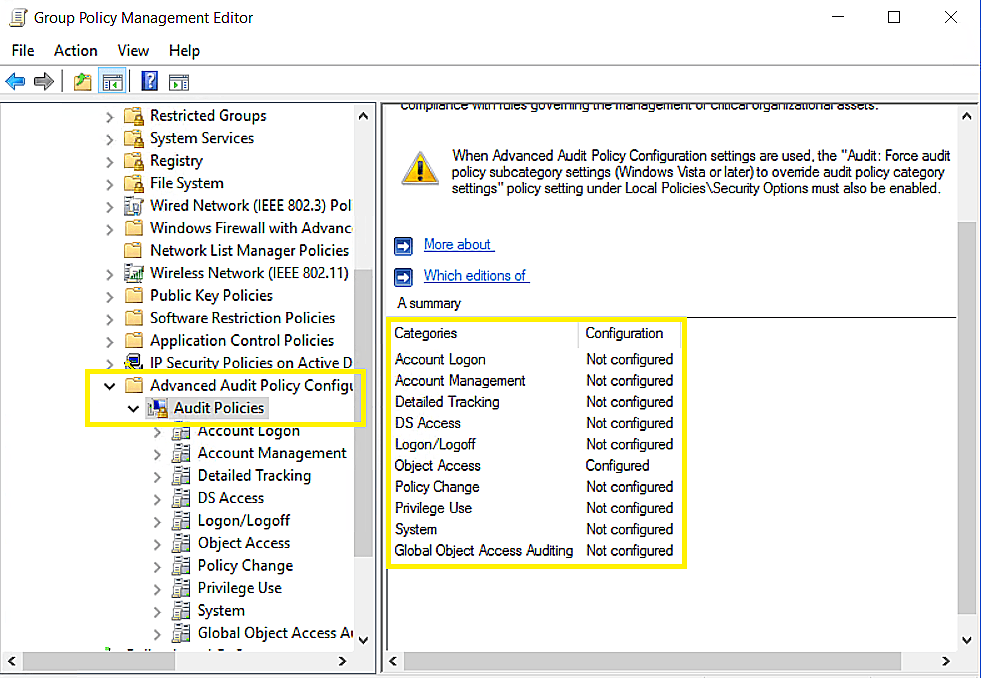
Configure advanced audit policies
Advanced audit policies help administrators exercise granular control over which activities get recorded in the logs, helping cut down on event noise. We recommend configuring advanced audit policies on Windows Server 2008 and above.
- To set this up, edit <DataSecurityPlusFSPolicy> by right-clicking on the policy and selecting Edit.
- Navigate to Configuration > Windows Settings > Security Settings > Advanced Audit Policy Configuration > Audit Policies, and configure the following settings.
Category Sub category Audit events Purpose Object Access - Audit File System
- Audit File Share
- Audit Handle Manipulation
- Success, Failure
- Success
- Success, Failure
- File share auditing
Policy Change - Audit Policy Change
- Authorization Policy Change
- Success, Failure
- Success
- File permission change auditing
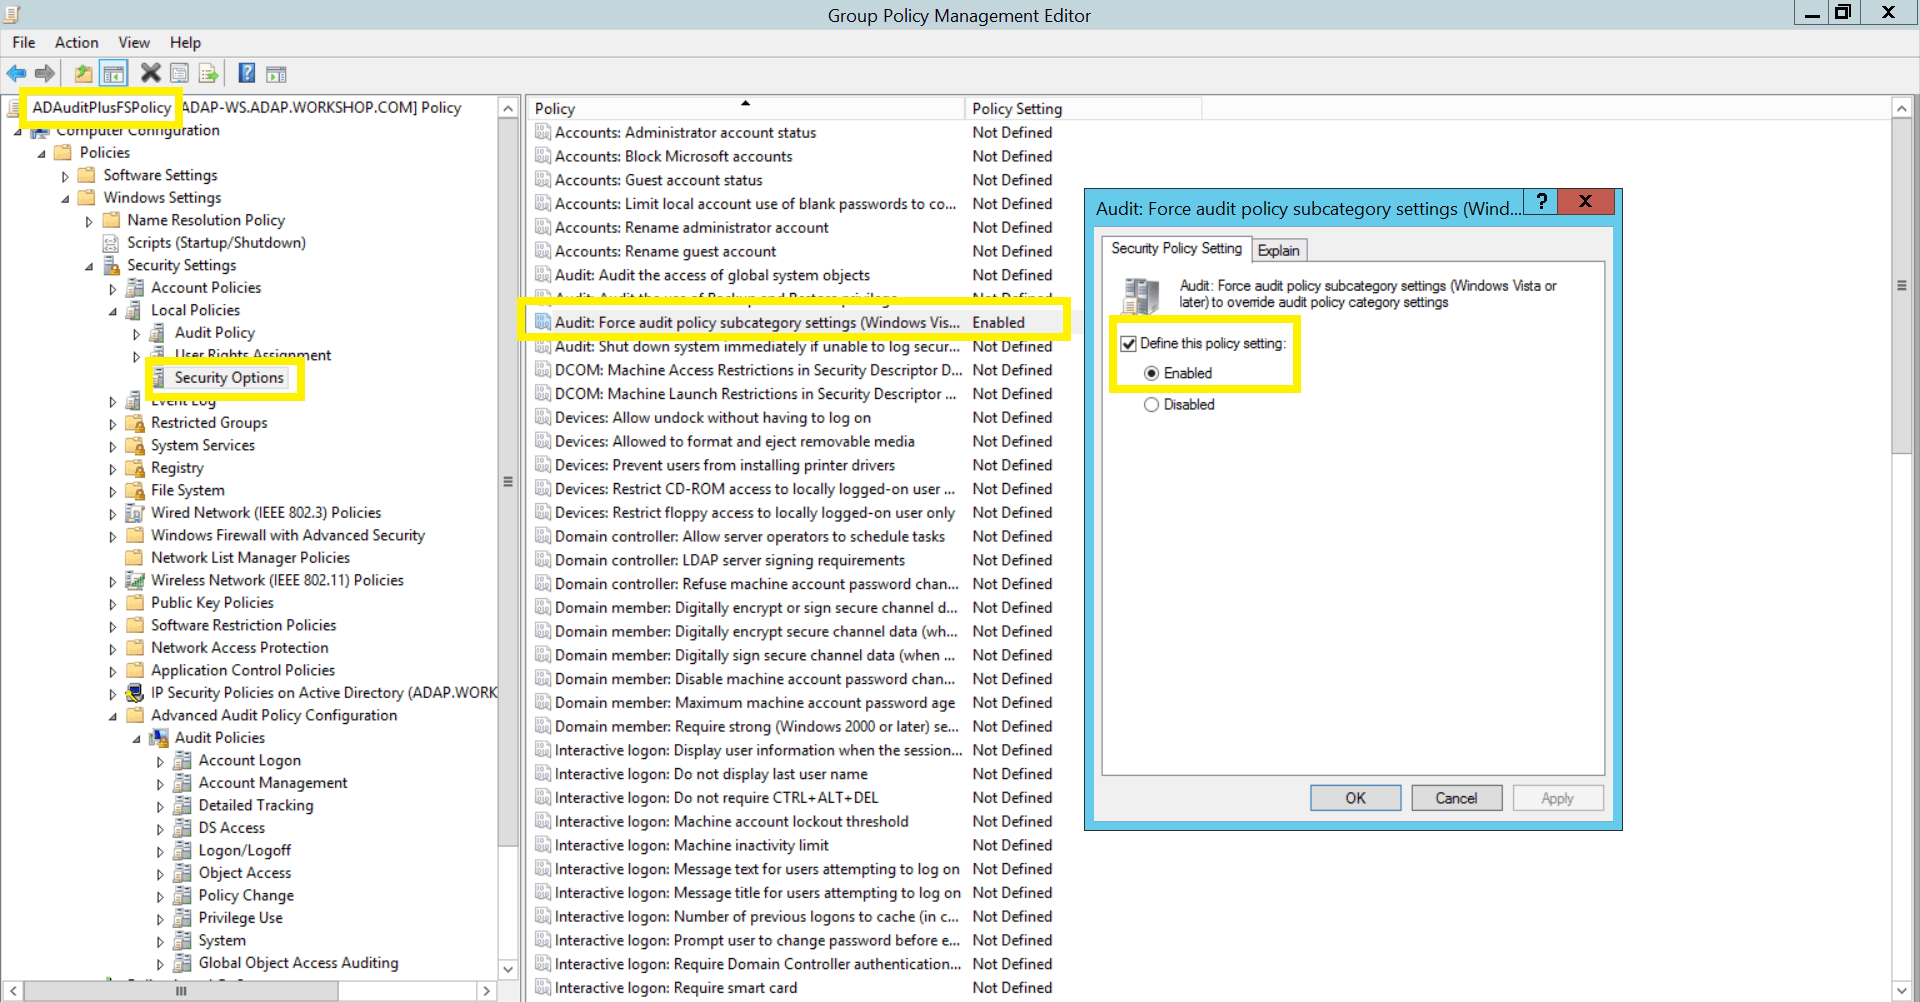
Force advanced audit policies
When using advanced audit policies, ensure that they are forced over legacy audit policies.
- Enable Force audit policy subcategory settings in <DataSecurityPlusFSPolicy>.
- Navigate to Computer Configuration > Windows Settings > Security Settings > Local Policies > Security Options > Audit: Force audit policy subcategory settings (Windows Vista or later) to override the audit policy category settings.
Configure object level auditing
DataSecurity Plus automatically configures object-level auditing for both Self-managed and AWS Managed Microsoft AD if you have assigned sufficient privileges for the user configured under domain settings. Otherwise, you can manually configure object-level auditing by following the steps below:
Note: To audit, move, or rename, file extension changes, and other activities on a specific file or folder, permissions must be manually configured with full control enabled.
Configuring object level auditing manually
Using Windows shares
- Right-click the share folder that you want to audit, select Properties, and then click the Security tab > Select Advanced > click the Auditing tab > For the Everyone group, add the following entries:
To audit Principal Type Access Applies To File/folder changes Everyone Success, Failure - Full Control
This Folder, sub folders, and files Folder permission and owner changes Everyone Success, Failure - Take ownership
- Change permissions
This folder and sub folders File read Everyone Success, Failure - List folder / Read data
Files only Folder read failure Everyone Failure - List folder / Read data
This folder and sub folders - Click OK to finish setting the required SACLs for the selected share.
Configure Amazon File System in DataSecurity Plus
Self-managed Microsoft AD
If you are using your Amazon FSx file system with a self-managed Microsoft AD you can directly proceed with the steps to configure a file system.
AWS Managed Microsoft AD
If you are using your Amazon FSx file system with an AWS Managed Microsoft AD, follow these steps to associate DNS aliases with your file system:
- In your AD, find the computer object associated with the Amazon FSx file system and copy its DNS name.
- Sign in to your Amazon FSx console and navigate to the target file system.
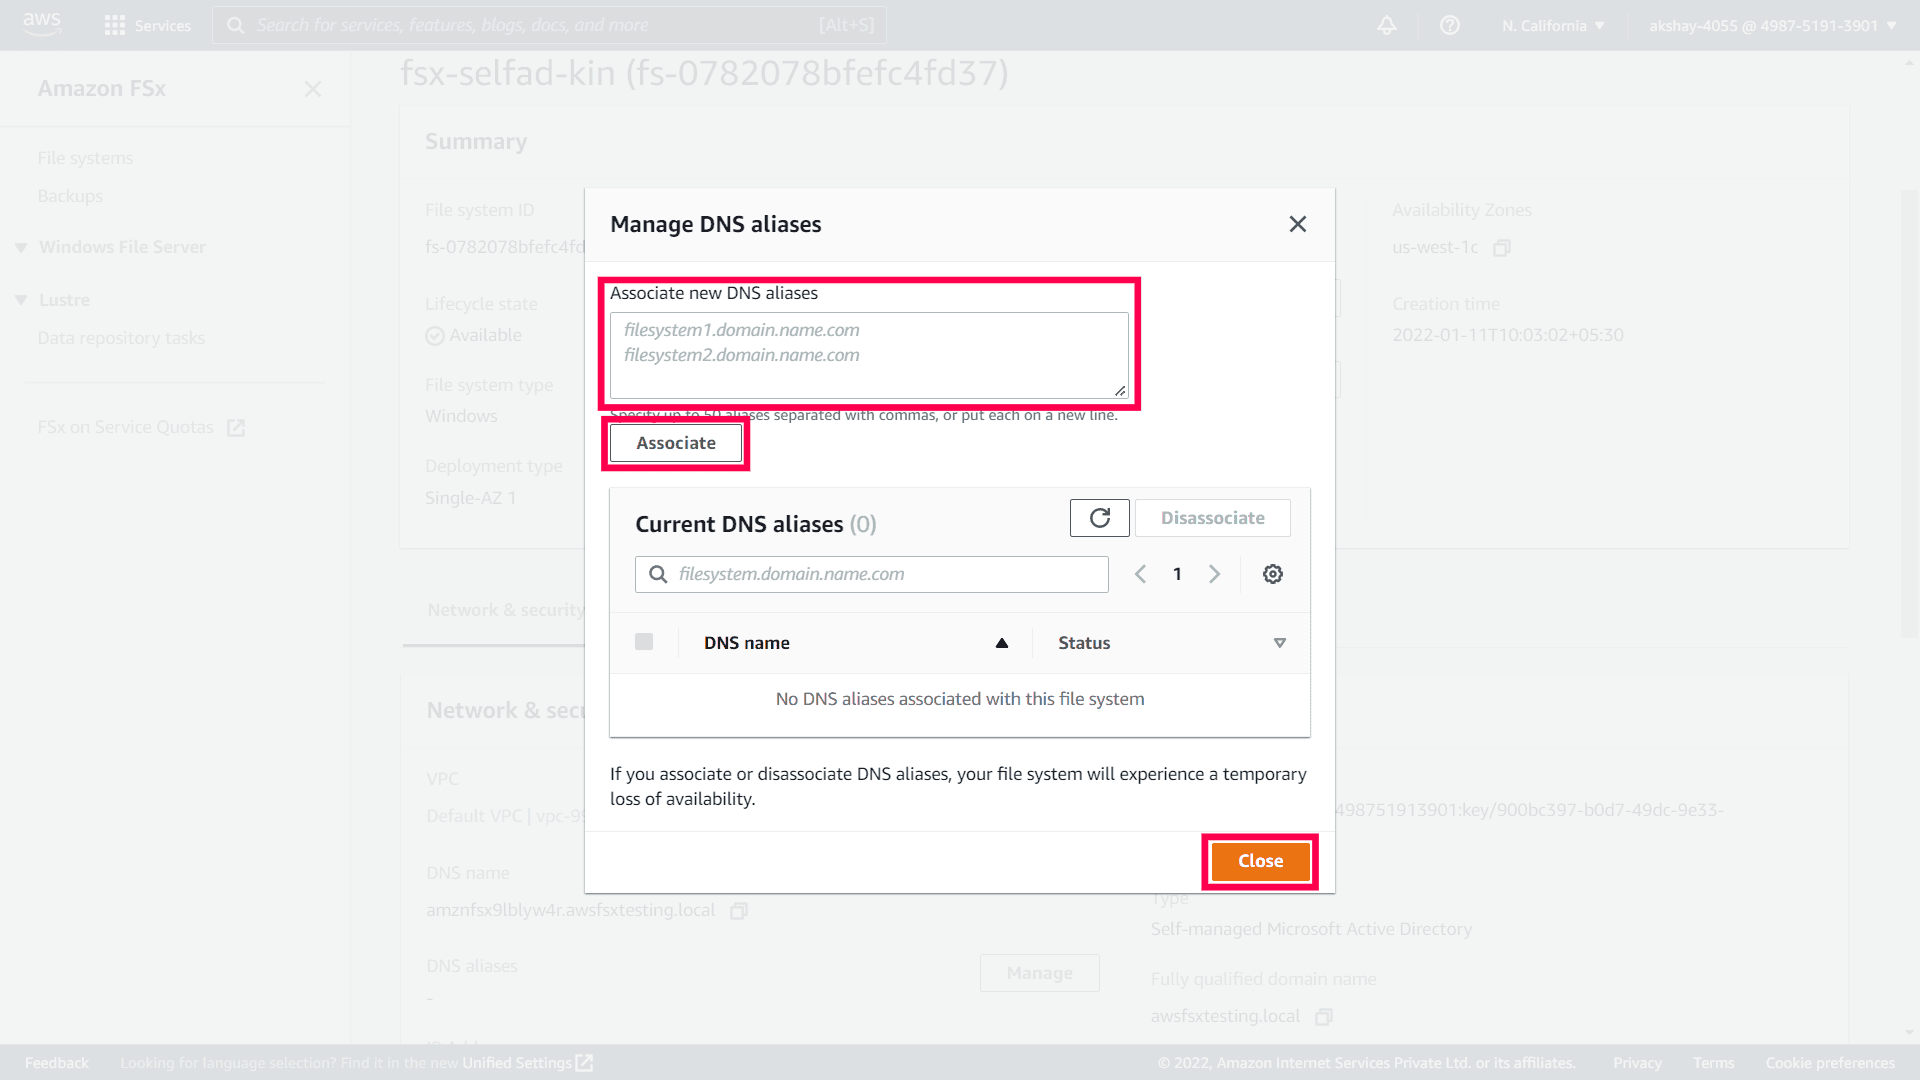
- On the Network & security tab, click Manage next to DNS aliases to open the Manage DNS aliases dialog box.
- In the Associate new aliases box, enter the DNS name that you had copied earlier.
- Click Associate.
- Wait for the alias to become Available and then click Close.

When the DNS alias becomes available, your file system will be listed for selection in your DataSecurity Plus console. You can continue with the steps to configure a File system.
Configuring a region in Cloud Account Settings
To configure an Amazon File System in DataSecurity Plus, you must first configure the region where the file system resides.
- Login to your DataSecurity Plus web console.
- Go to Admin Console > Admin > Cloud Account Settings.
- Click +Add Region in the top right corner.
- On the Add Region page, enter the Region code and the AWS user's Access key and Secret Access key that you had copied earlier (step 10 in Create a user in IAM).
- Click Save.
Configuring a File System
After configuring the region, you can then configure a file system. Here's how:
- Go to File Audit > Configuration > Amazon File System.
- Click +Add File System.
- Select the preferred domain and region from the Domain and Region dropdowns and click Next.
- Select Filesystem(s) that you want to audit and click Next.
- Select Share(s) that you want to audit and click Next.
- Review the Amazon Details and the shares you selected and click Configure.
Updating Amazon File System and Region
Editing Access key and Secret Access key
- Go to the Cloud Account Settings page: Admin Console > Admin > Cloud Account Settings.
- Choose the region(s) that you want to edit.
- Click the key icon corresponding to the chosen region.
- Enter the Access key and Secret Access key of the AWS user that you want to change it to.
- Click Save.
Deleting a region configuration
- Go to the Cloud Account Settings page: Admin Console > Admin > Cloud Account Settings.
- Choose the region(s) that you want to delete.
- Click the delete icon to the right of the search bar.
- Select OK to delete the region configuration from DataSecurity Plus.
Modifying the data fetch interval
By default, a file system will be audited once every 15 minutes. However, users can choose to change this data fetch interval. Here's how that works:
- Go to the Amazon file systems configuration page: Admin Console > File Audit > Configuration > Amazon FSx.
- Click Change Data Fetch Interval, choose an interval you want the configured file systems to be audited, and click Save.
Note: By default, two file systems will be audited simultaneously. Any additional file systems will be queued and processed after one slot becomes available.
Adding/Removing Amazon File System configurations
Users have the option to add/remove shares for auditing from a configured file system. Here's how you can do that:
- Go to the Amazon File Systems configuration page: File Audit > Configuration > Amazon File System.
- Select the Amazon file system you want to update. Here, you can:
- Add shares by clicking the Add Share link and selecting the share(s) you want to add and clicking Add Shares.
- Remove shares by clicking the Remove Share link and selecting the share(s) you want to remove and clicking Update.
Deleting Amazon File System configurations
To delete an Amazon File System configuration:
- Go to the Amazon File Systems configuration page: File Audit > Configuration > Amazon File System.
- Choose the Amazon file system(s) that you want to delete.
- Click the delete icon to the right of the search bar.
- Select OK to delete the Amazon file system configuration from DataSecurity Plus.
Note: Once deleted, servers will no longer be audited. However, previously audited data will be retained.
Troubleshooting
File system not found
- If you are using an Amazon FSx file system with a self-managed Microsoft AD:
- Check if the DNS name of the file system found in the Amazon FSx console is mapped to the computer object in AD that AWS created.
- Update the computer object by following the steps below and try fetching the file system again.
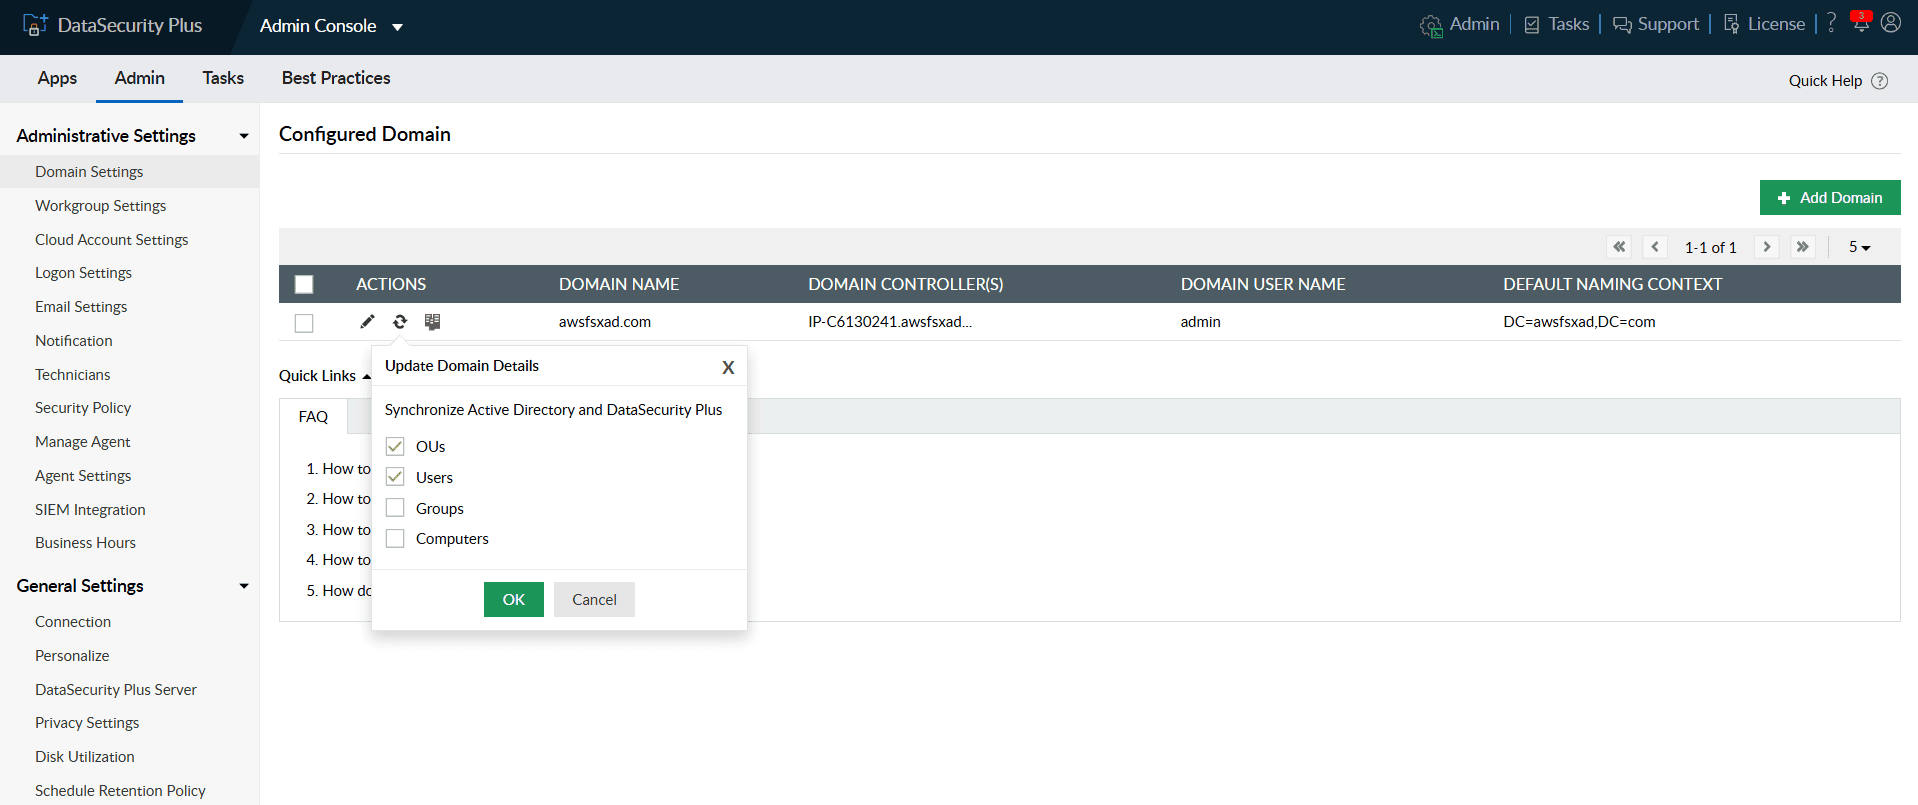
- In the DataSecurity Plus console, go to Admin menu from the dropdown and navigate to Domain Settings.
- On the Domain Settings page, click the Refresh icon to update the domain details.
- From the list of objects, select the category you want to update: OUs, Users, Groups, Computers.
- Click Save.
- If your are using an Amazon FSx file system with an AWS-Managed Microsoft AD:
- AWS creates a file system with a DNS name that is different from the DNS name of the computer object in AD. Follow these steps to associate the AD computer's DNS name with your file system.
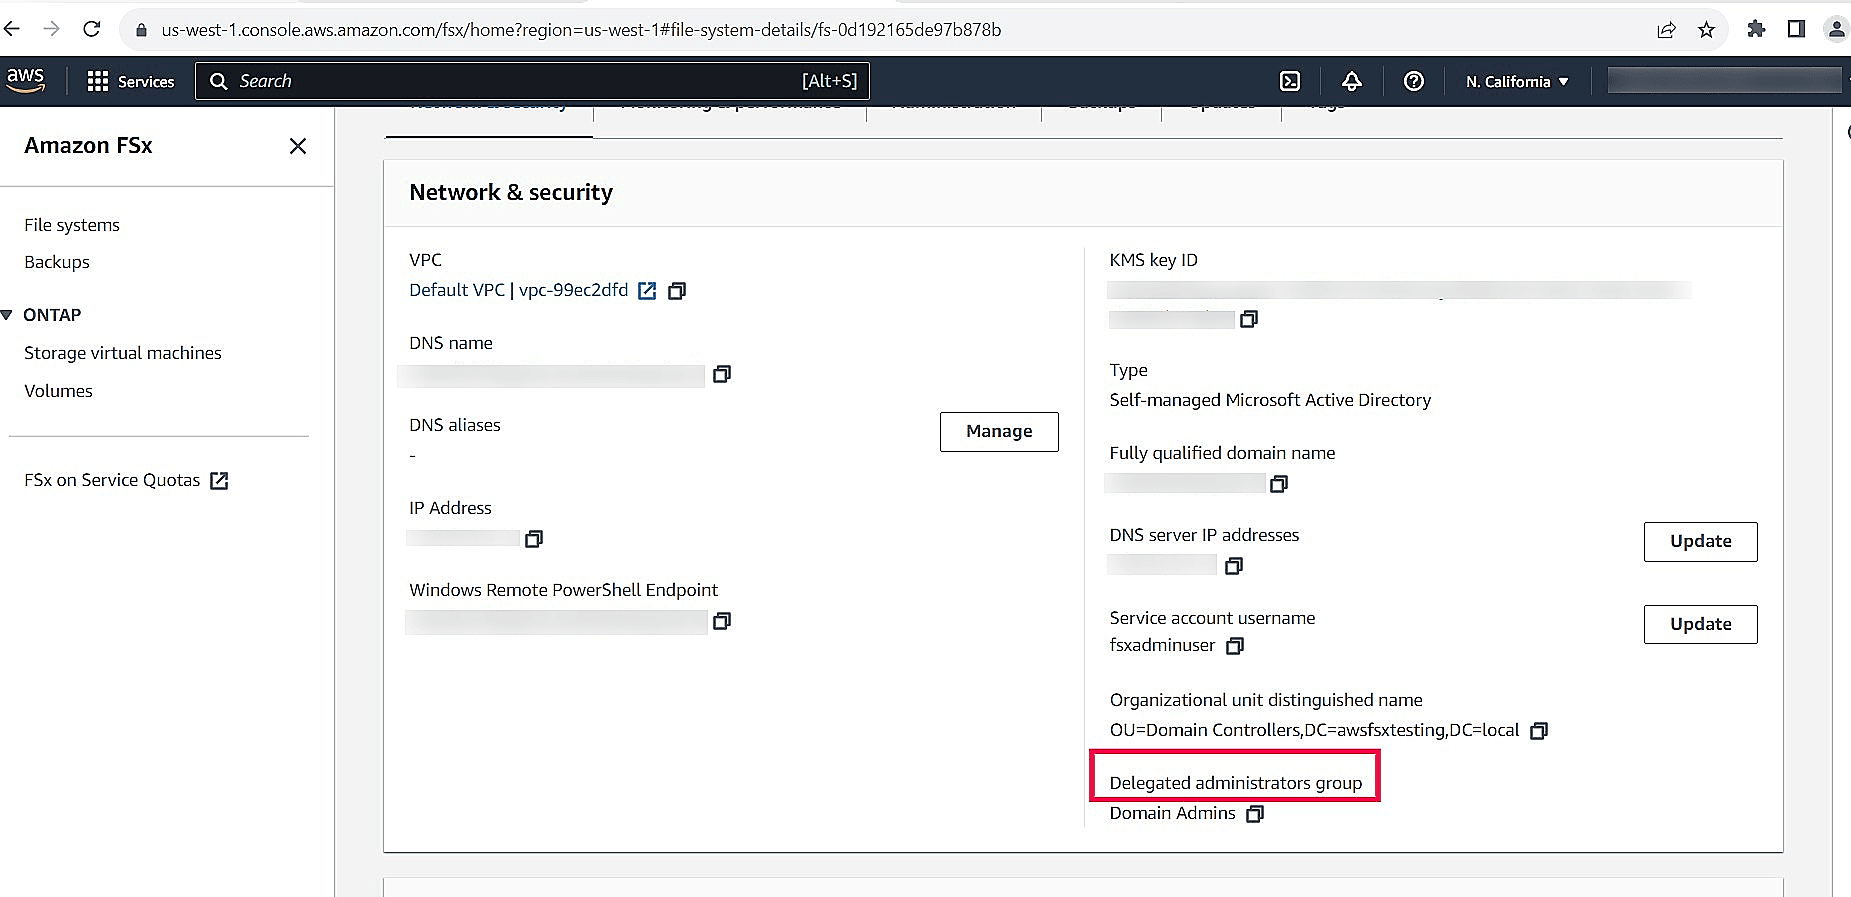
Access denied
- Check if the user configured in the Domain Settings page in DataSecurity Plus has sufficient privileges to access the shares using the MMC snap-in.
- Add the user directly to the Delegated administrators group for the specific file system shown in the Amazon FSx console.
The Timestamp is not updated / No data is received
- Check if there is proper internet connection on the server where DataSecurity Plus is installed.
- Go to the CloudWatch Logs destination folder of the target file system and verify if the latest logs are present in the AWS console.