
- Free Edition
- Quick Links
- Active Directory Auditing
- Active Directory auditor
- Active Directory monitoring
- Account lockout analyzer
- Login monitoring software
- Active Directory change notifier
- User logon audit reports
- AD logon logoff tracker
- User logon failure auditing
- Login history tracking tool
- AD change auditor
- Insider threat detection software
- Permissions change auditing
- Entra ID reporting
- Privileged user monitoring
- User behavior analytics tool
- Active Directory security monitoring
- Group Policy auditing tool
- GPO change auditor
- Entra ID auditing
- Audit user account management
- OU change auditor
- Audit group membership changes
- Active Directory auditing and reporting tool
- GPO reporting tool
- Remote desktop monitoring software
- PowerShell logging and auditing
- Azure password protection auditing
- Azure sign-in risk detection
- File Server Auditing
- Windows Server Auditing
- Employee Tracking
- Workstations Auditing
- Compliance Auditing
- Other features
- SIEM Integration
- Windows DNS - Schema Auditing
- Windows security event log monitoring
- SIEM audit solution
- Schedule Active Directory change reports
- Reports from Archived Data
- Aggregated summary reports
- AD new/old attribute changes
- Audit trail
- Audit Active Directory LAPS
- Scheduled Reports & Alerts
- Account lockout examiner
- Industry
- Documents
- Success Stories
- Related Products
- Log360 (On-Premise | Cloud) Comprehensive SIEM and UEBA
- ADManager Plus Active Directory Management & Reporting
- EventLog Analyzer Real-time Log Analysis & Reporting
- ADSelfService Plus Identity security with MFA, SSO, and SSPR
- DataSecurity Plus File server auditing & data discovery
- Exchange Reporter Plus Exchange Server Auditing & Reporting
- M365 Manager Plus Microsoft 365 Management & Reporting Tool
- RecoveryManager Plus Enterprise backup and recovery tool
- SharePoint Manager Plus SharePoint Reporting and Auditing
- AD360 Integrated Identity & Access Management
- AD Free Tools Active Directory FREE Tools
How to add a domain controller?
At times, you might want to have an additional domain controller to balance the load, and increase fault tolerance. This page elaborates the steps needed to add a domain controller to your Active Directory (AD) environment.
Step 1: Install Active Directory Domain services (ADDS)
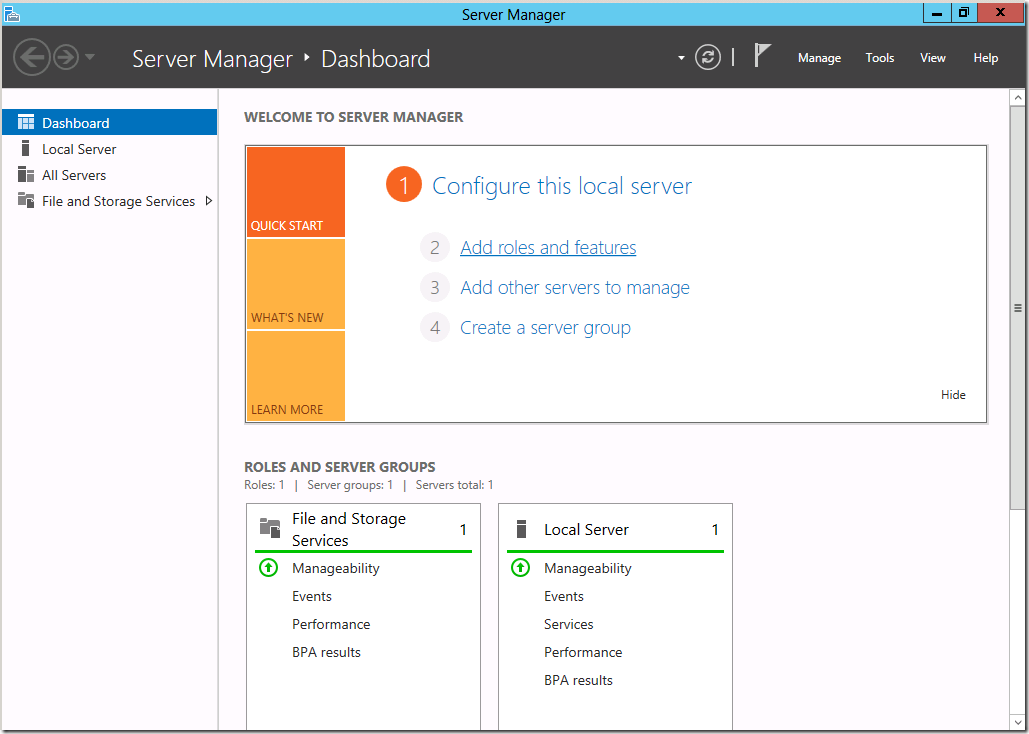
- Log into your Active Directory Server with administrative credentials.
- Open Server Manager → Roles Summary → Add roles and features.
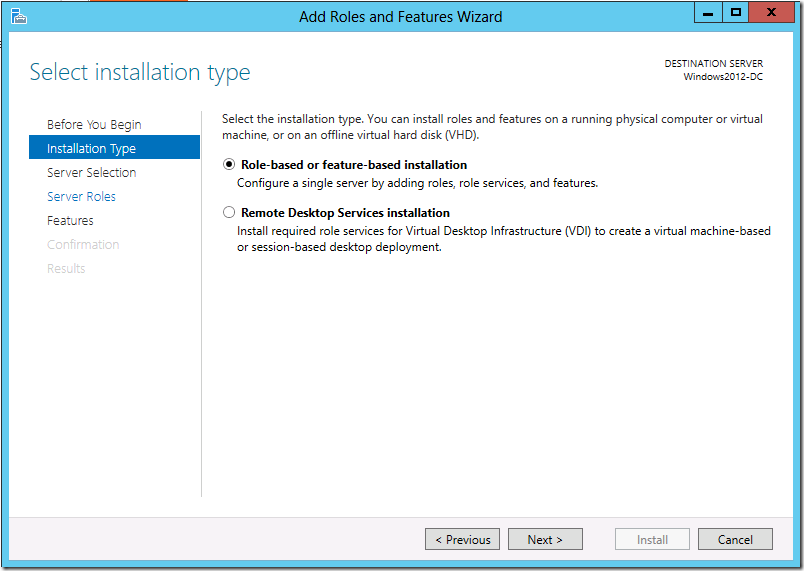
- The "Before you begin" screen, which pops up next, is purely for an informational purpose. You may read through it and click "Next".
- Select the installation type. If it is a virtual machine based deployment, choose Remote Desktop Services installation. Else, choose Role-based or Feature-based installation.
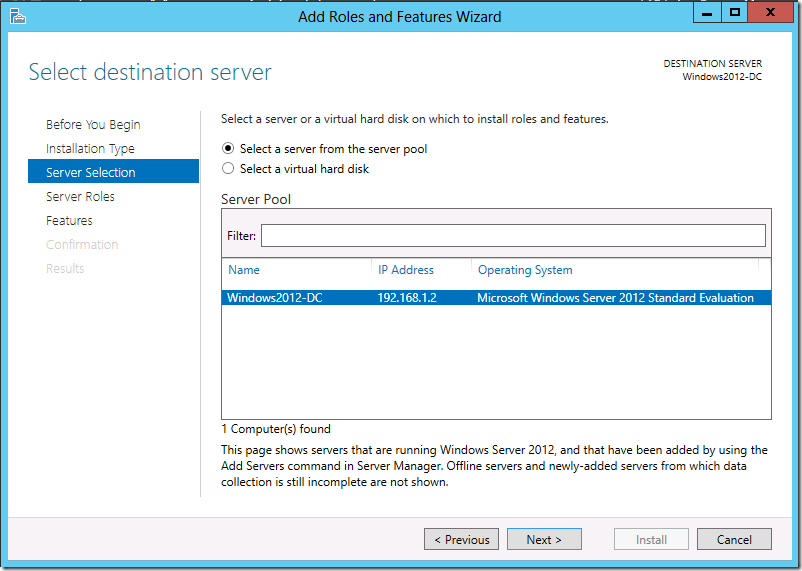
- Now, select the destination server on which the role will be installed. Ensure the IP address displayed is that of the selected server. Else, close the Server Manager and retry.
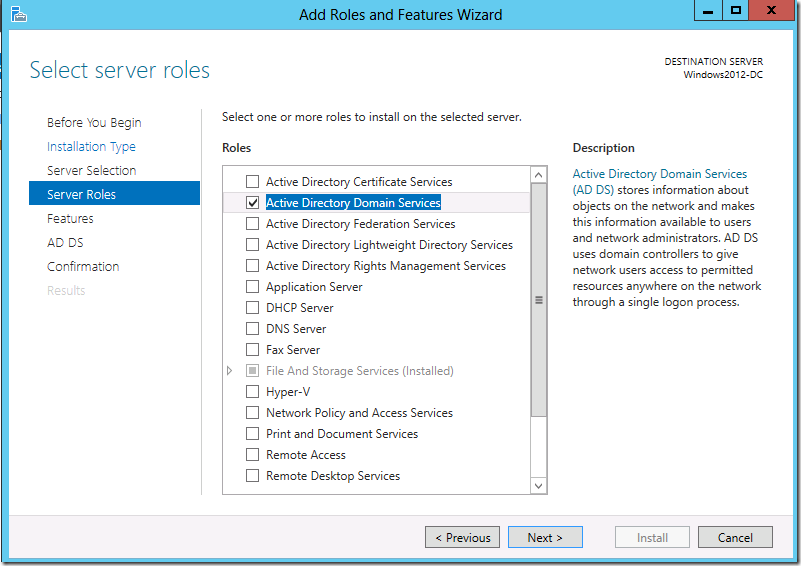
- Select the roles you want to install on this server. The basic requirement to promote this server into a domain controller is Active Directory Domain Services.
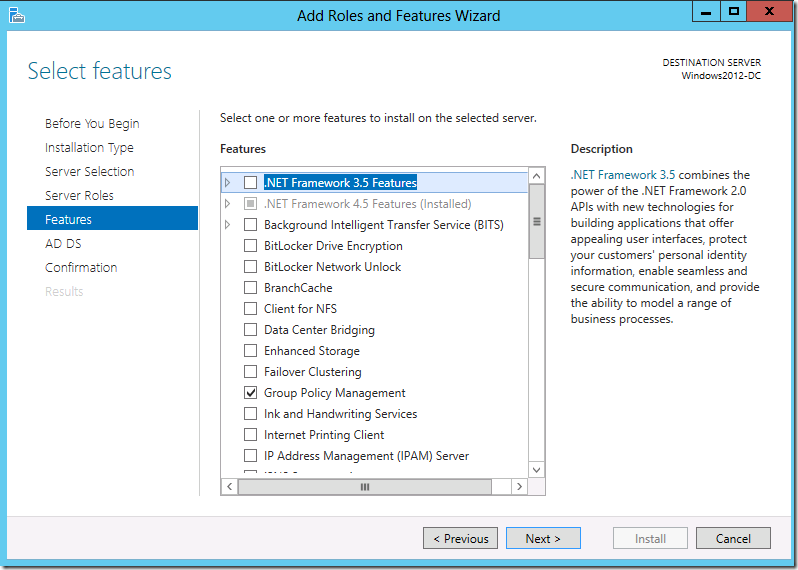
- The features for this role are ready to be installed. The basic features required for this service are selected by default. Click next.
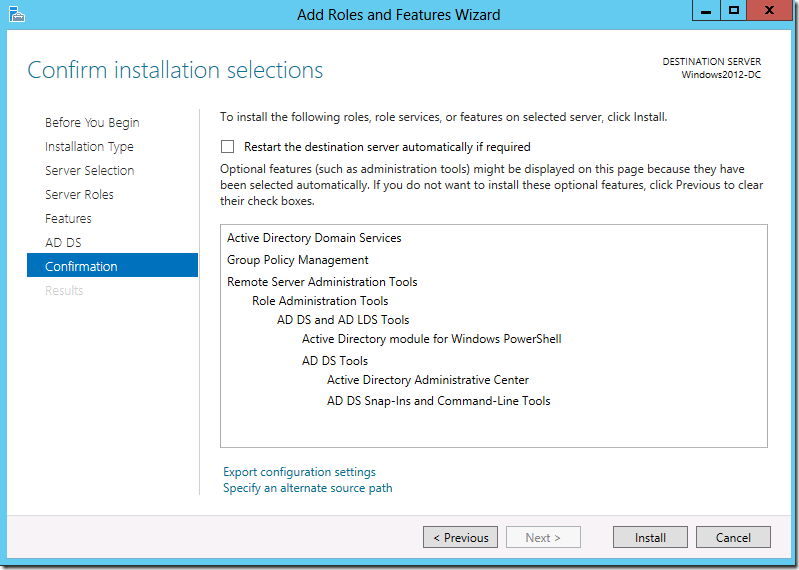
- Confirm your installation selections.
Note: It is recommended to select the "Restart the destination server automatically if required" option. - Click the Install button. Once installation is complete, close the window.
Step 2: Promote the server to a domain controller
Note: The following actions can be performed only if the user belongs to the Domain Admins group.
- Once the ADDS role is installed in this server, you will see a notification flag next to the Manage menu. Select "Promote this server to a domain controller"

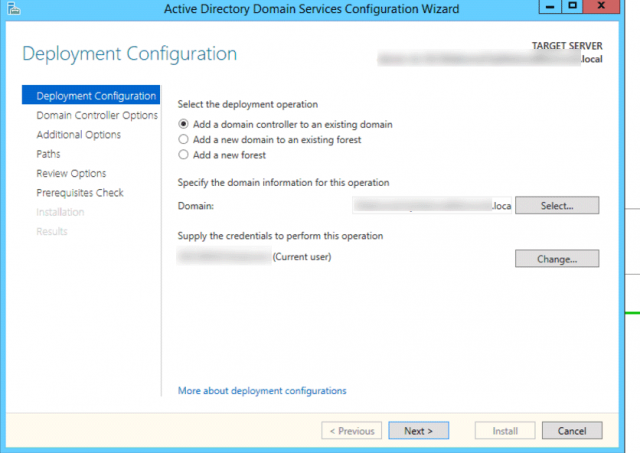
- This fires up the ADDS configuration wizard. On the Deployment configuration page, select "Add Domain controller to an existing domain" . You need to specify the name of the domain in which the new DC will be added.
- The "Domain controller options" page appears next. Options to make this DC a DNS server and a Global Catalog are selected by default. You can choose to make this DC a read-only DC if you want. Select the site name for the DC and a unique password for the DSRM mode.

- Note: DSRM mode helps gain access to an environment if all domain administrator accounts lose access or in case of DC failure.
- Since a DNS Server is being configured as part of our efforts, you’ll be warned that a delegation for this DNS server cannot be created. This can be safely ignored.
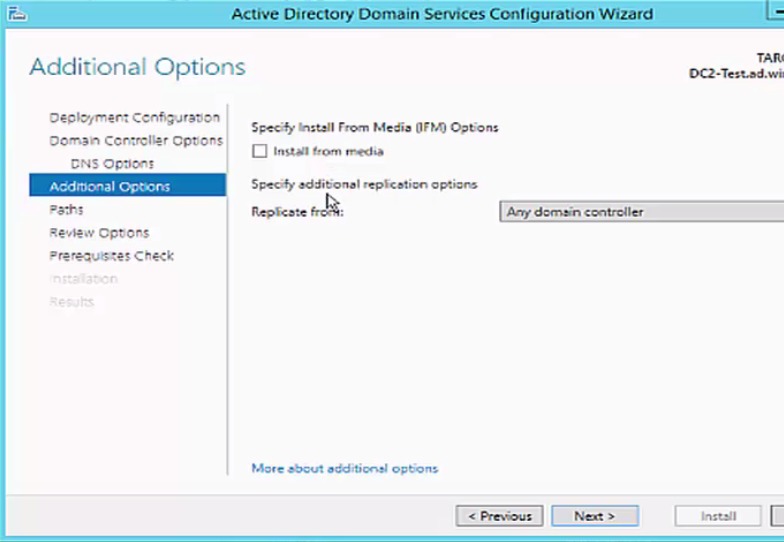
- Additional options: Choose where you want your DC to replicate from. Active Directory can replicate from any domain controller or a specific one.
- On the "Paths" page, confirm the location for ADDS database files, log files and SYSVOL. You can either use the default < location or folder or selection→, or select another folder of your choice.
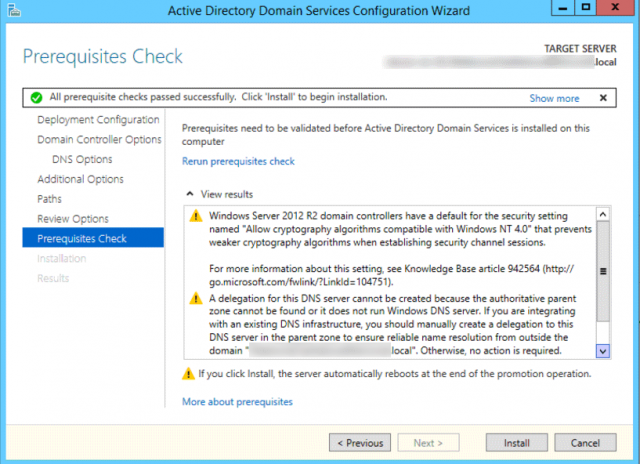
- Review your selections in the next screen and click Next. Windows will then perform a prerequisites check. Once it is done, click Install.
Your system will be rebooted after replication has taken place. Verify the health of the new domain controller by running dcdiag /v from the command line.