Steps to deploy a policy using Endpoint DLP Plus
Step 1
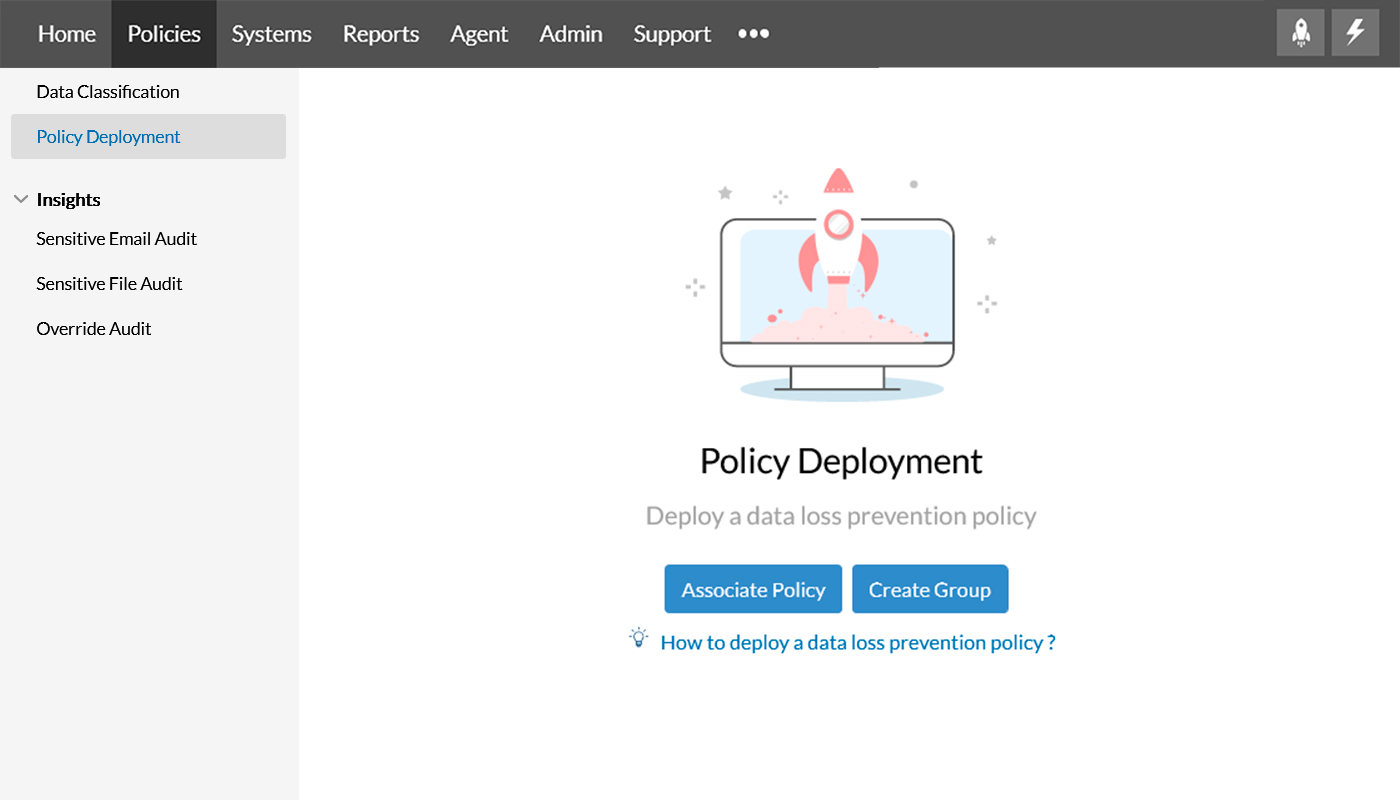
In the product console, select Associate Policy by navigating to the Policy Deployment section in the Policy tab.

Step 2
Nominate the custom group in the Select Custom Group field per the enterprise's need. Refer this page to create a Custom group.

Step 3
Choose the Data Rule created in the Data Classification section. Refer this page to create a Data Rule.
Note: If there are multiple Data Rules, the rules defined inside each Data Rule is applied as a combination of all the rules. Thus, if your data matches any of the rules, it will be classified as sensitive.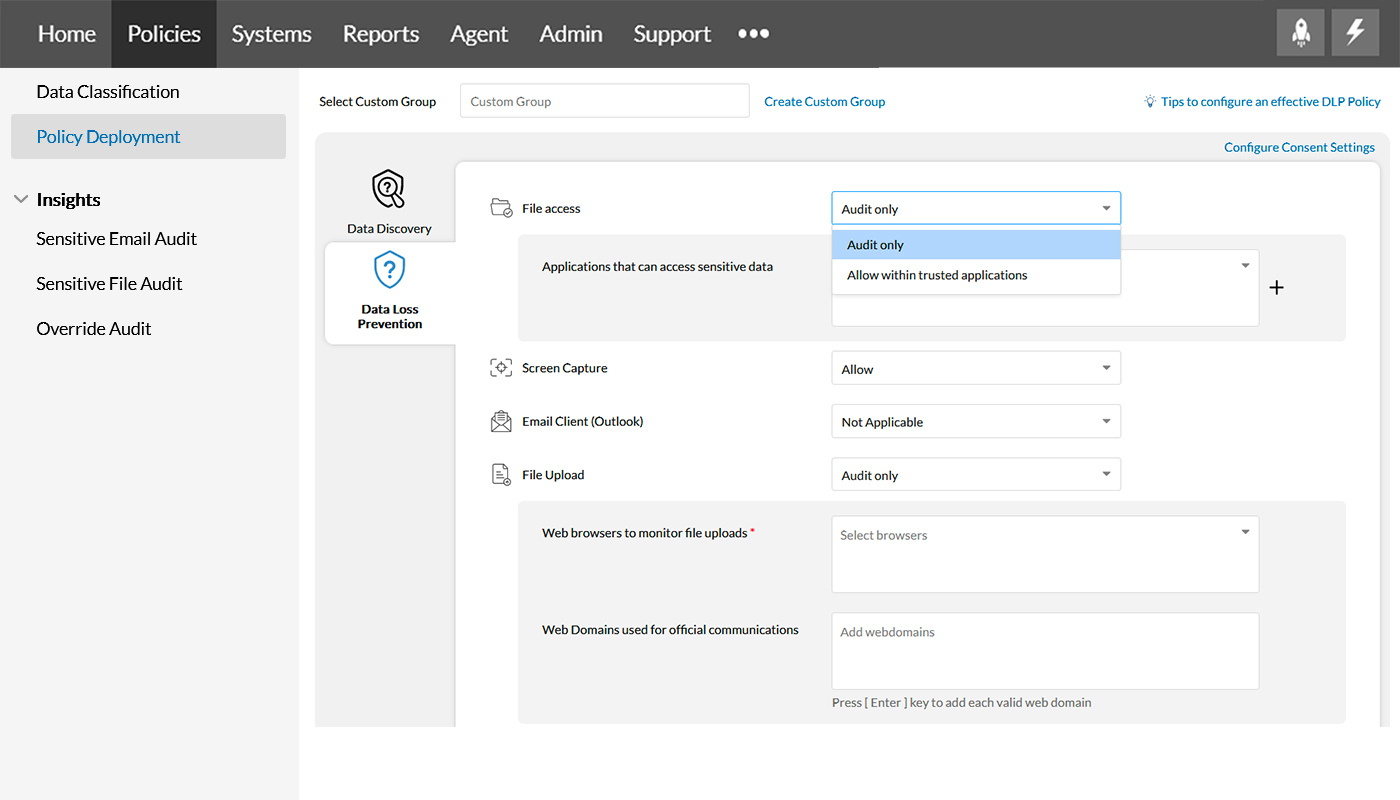
Step 4
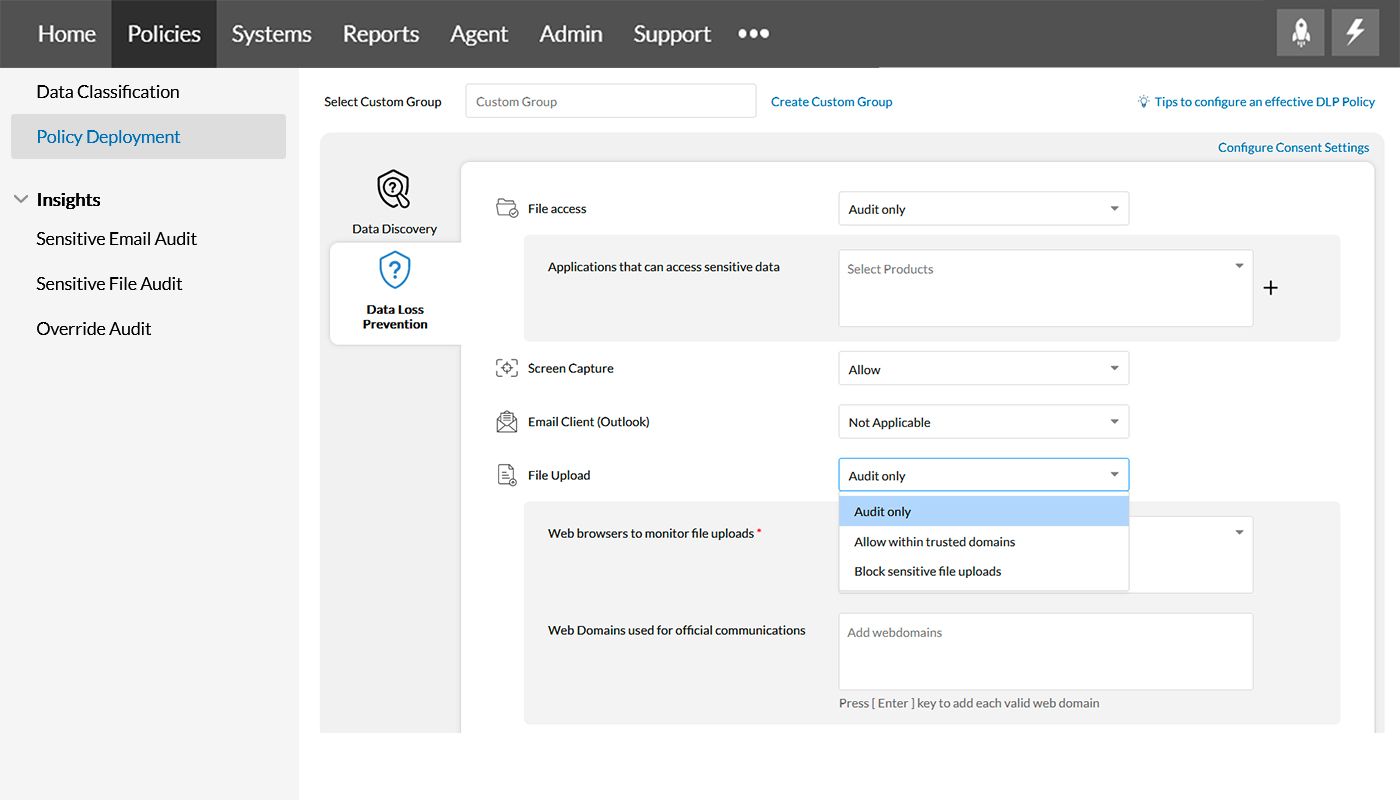
In Data Loss Prevention, File access allows you to choose applications for sensitive file access using Audit only and Allow within trusted applications.
Step 5
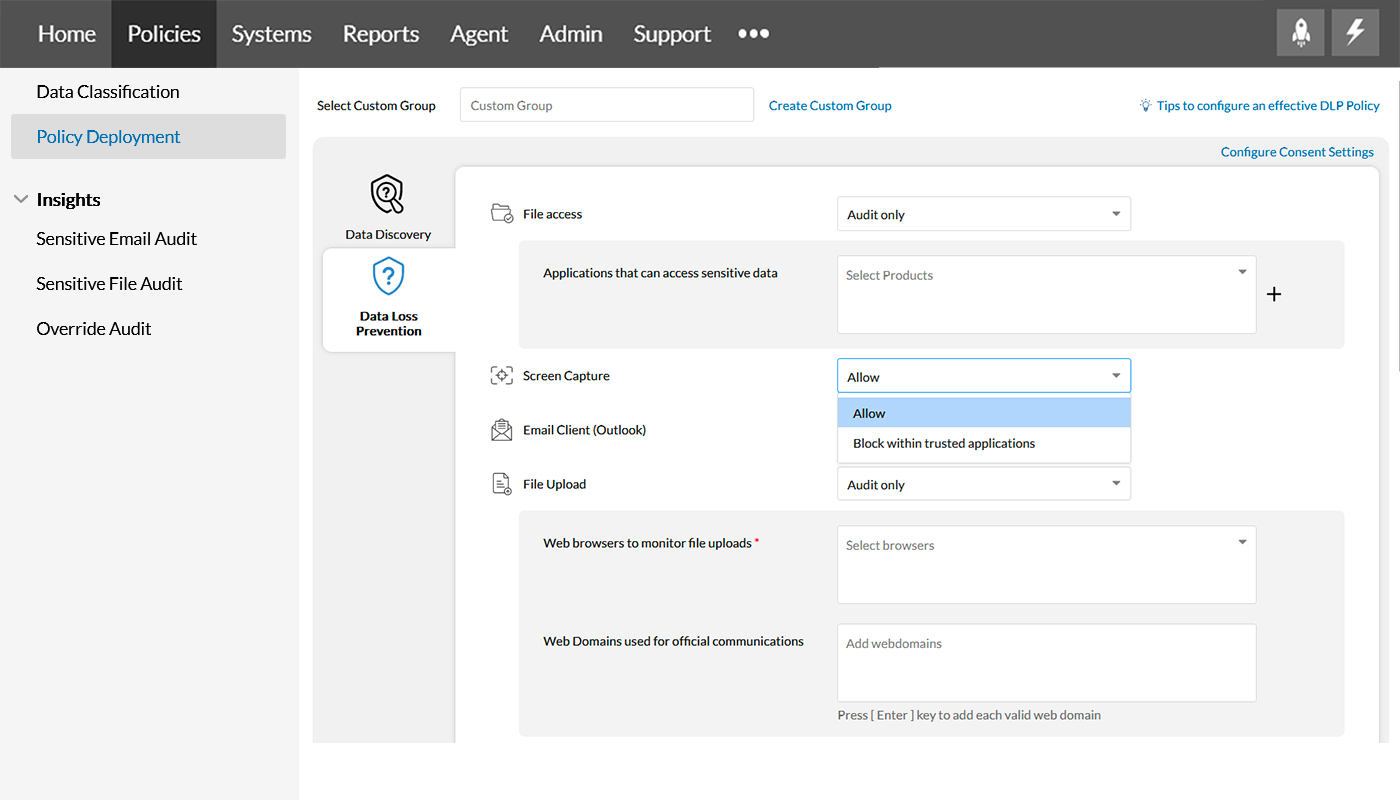
Screen capture restricts taking the screenshot of sensitive files using the options; Allow and Block within trusted applications.
Step 6
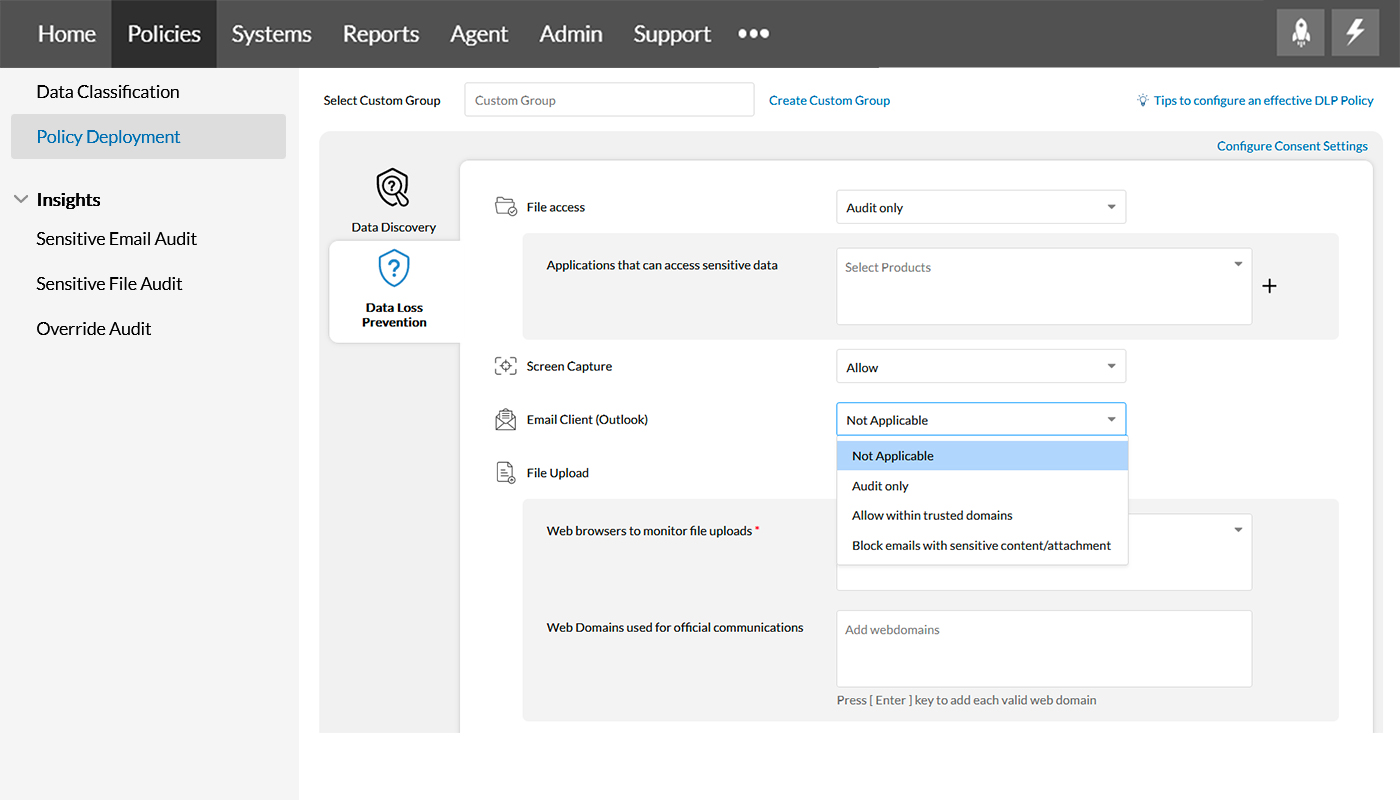
Email clients prevent sensitive enterprise data from exposure via emails, be it a part of the email content or the subject itself, using options Not Applicable, Audit only, Allow within trusted domains, and Block emails with sensitive contents/attachments. Know more about email security here.
Step 7
File upload controls uploading sensitive enterprise data to the cloud via web browsers by leveraging the options, Audit only, Allow within trusted domains, and Block sensitive file uploads.
Step 8
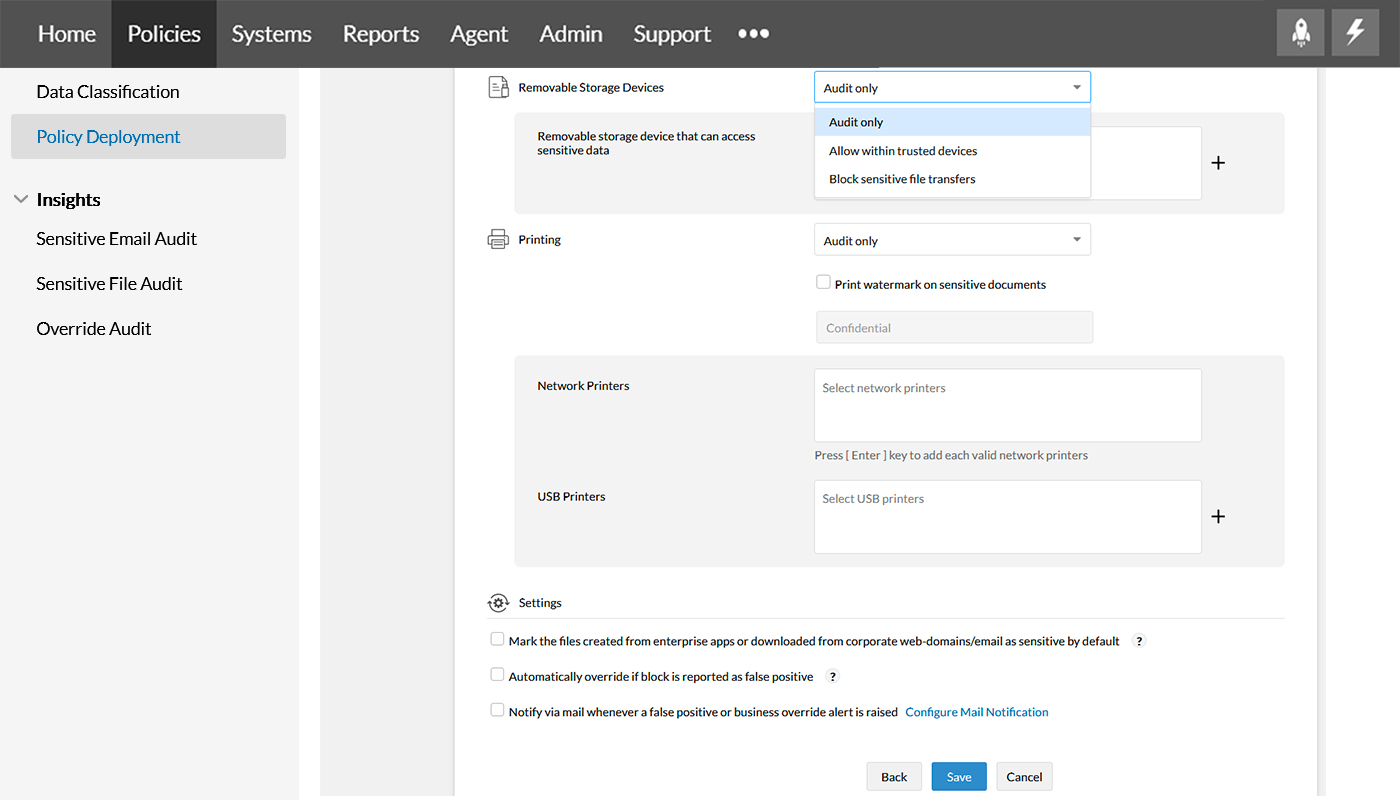
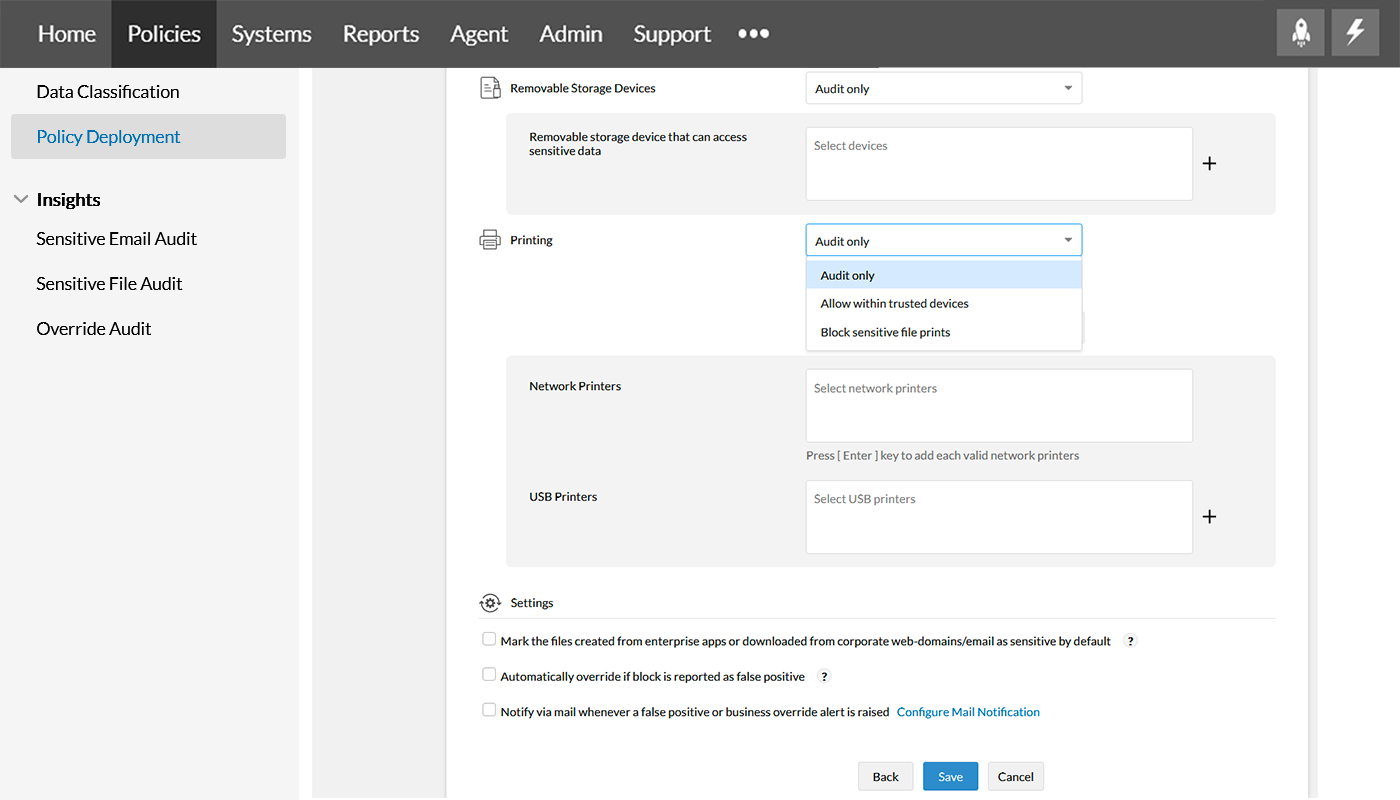
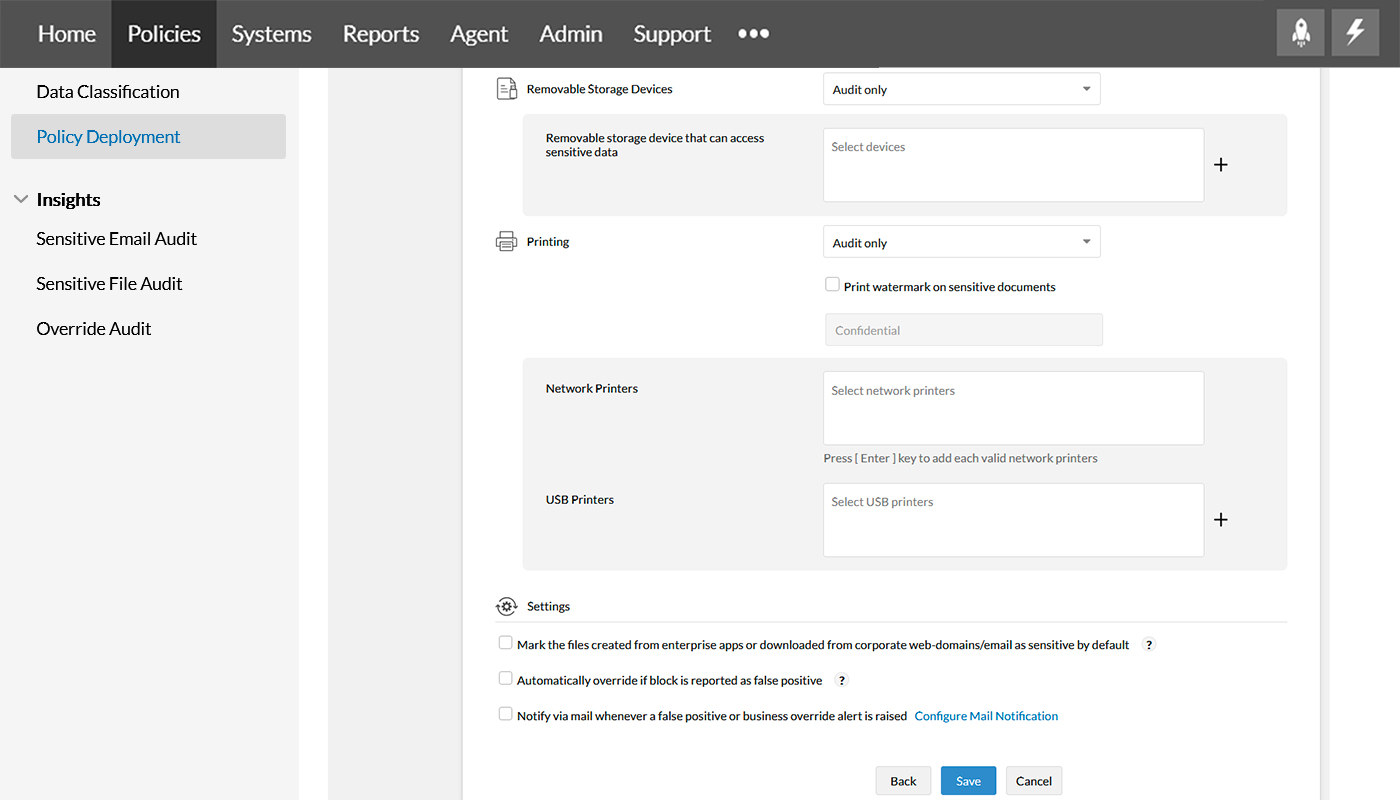
Removable storage devices ensure critical enterprise data stays inside the network by restricting unmonitored storage devices using options, Audit only, Allow within trusted devices, and Block sensitive file transfers. Know more about managing storage devices here.
Step 9
With network printers and USB printers around, you can manage the way a sensitive file is printed using these Printing options, Audit only, Allow within trusted devices, and Block sensitive file prints.
Step 10
Under Settings, you can mark files as sensitive when downloaded/created from enterprise apps, overturn false positives and notify via mail when such false positive overturn alerts are raised.
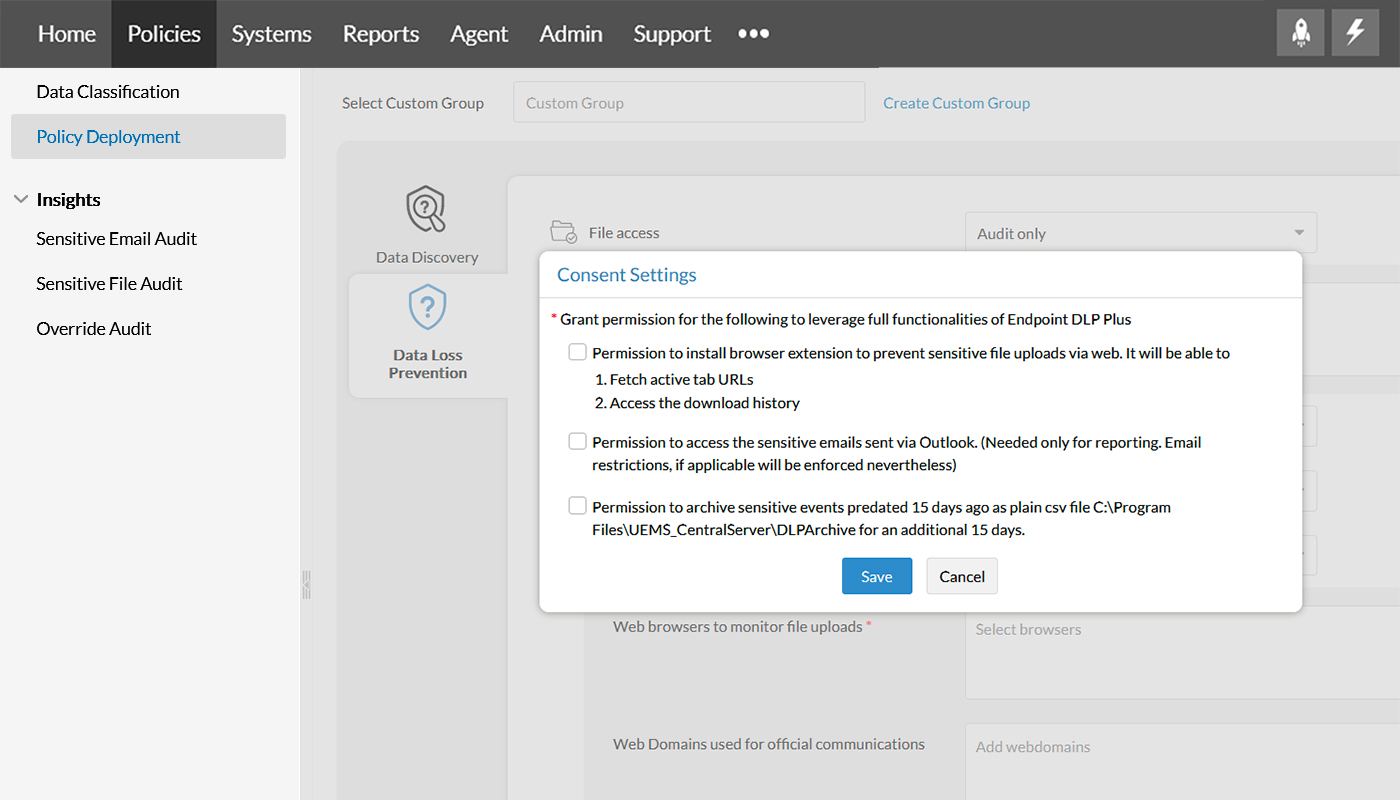
Step 11
Click on Configure Consent Settings and grant permissions for Browser extension option, access sensitive emails using Outlook, and archive sensitive events.
- Audit only:
Files are allowed for access by the selected applications/domains/devices, but each instance and the file access is logged and archived.
- Allow within trusted applications/domains/devices:
Allows access of files only from the applications/domains/devices that the organization permits.
Note: Enables Clipboard restriction that blocks the application/domains/devices from copying the file contents.
- Not Applicable:
Restricts complete access.
- Block emails with sensitive contents/attachments:
Restricts sensitive files or contents included in the mail.
- Block sensitive file transfers/uploads/prints:
Restricts storage devices/web browsers/printers from accessing sensitive files.