Create playbooks
Last updated on:
In this page
Overview
The Playbooks capability in Log360 Cloud enables administrators to build visually and automate response workflows that act on alerts, incidents, or incident evidence.
The playbook builder, powered by the QNTRL Circuit , provides an intuitive drag-and-drop interface to build, test, and validate automation workflows end-to-end.
Each playbook is composed of logical components called States that define specific actions or conditions. These states can be arranged sequentially or configured to branch dynamically based on logical criteria.
Steps to create a playbook
- Navigate to the Settings tab → Playbook → Manage Playbooks. Click on the Create Playbook button.
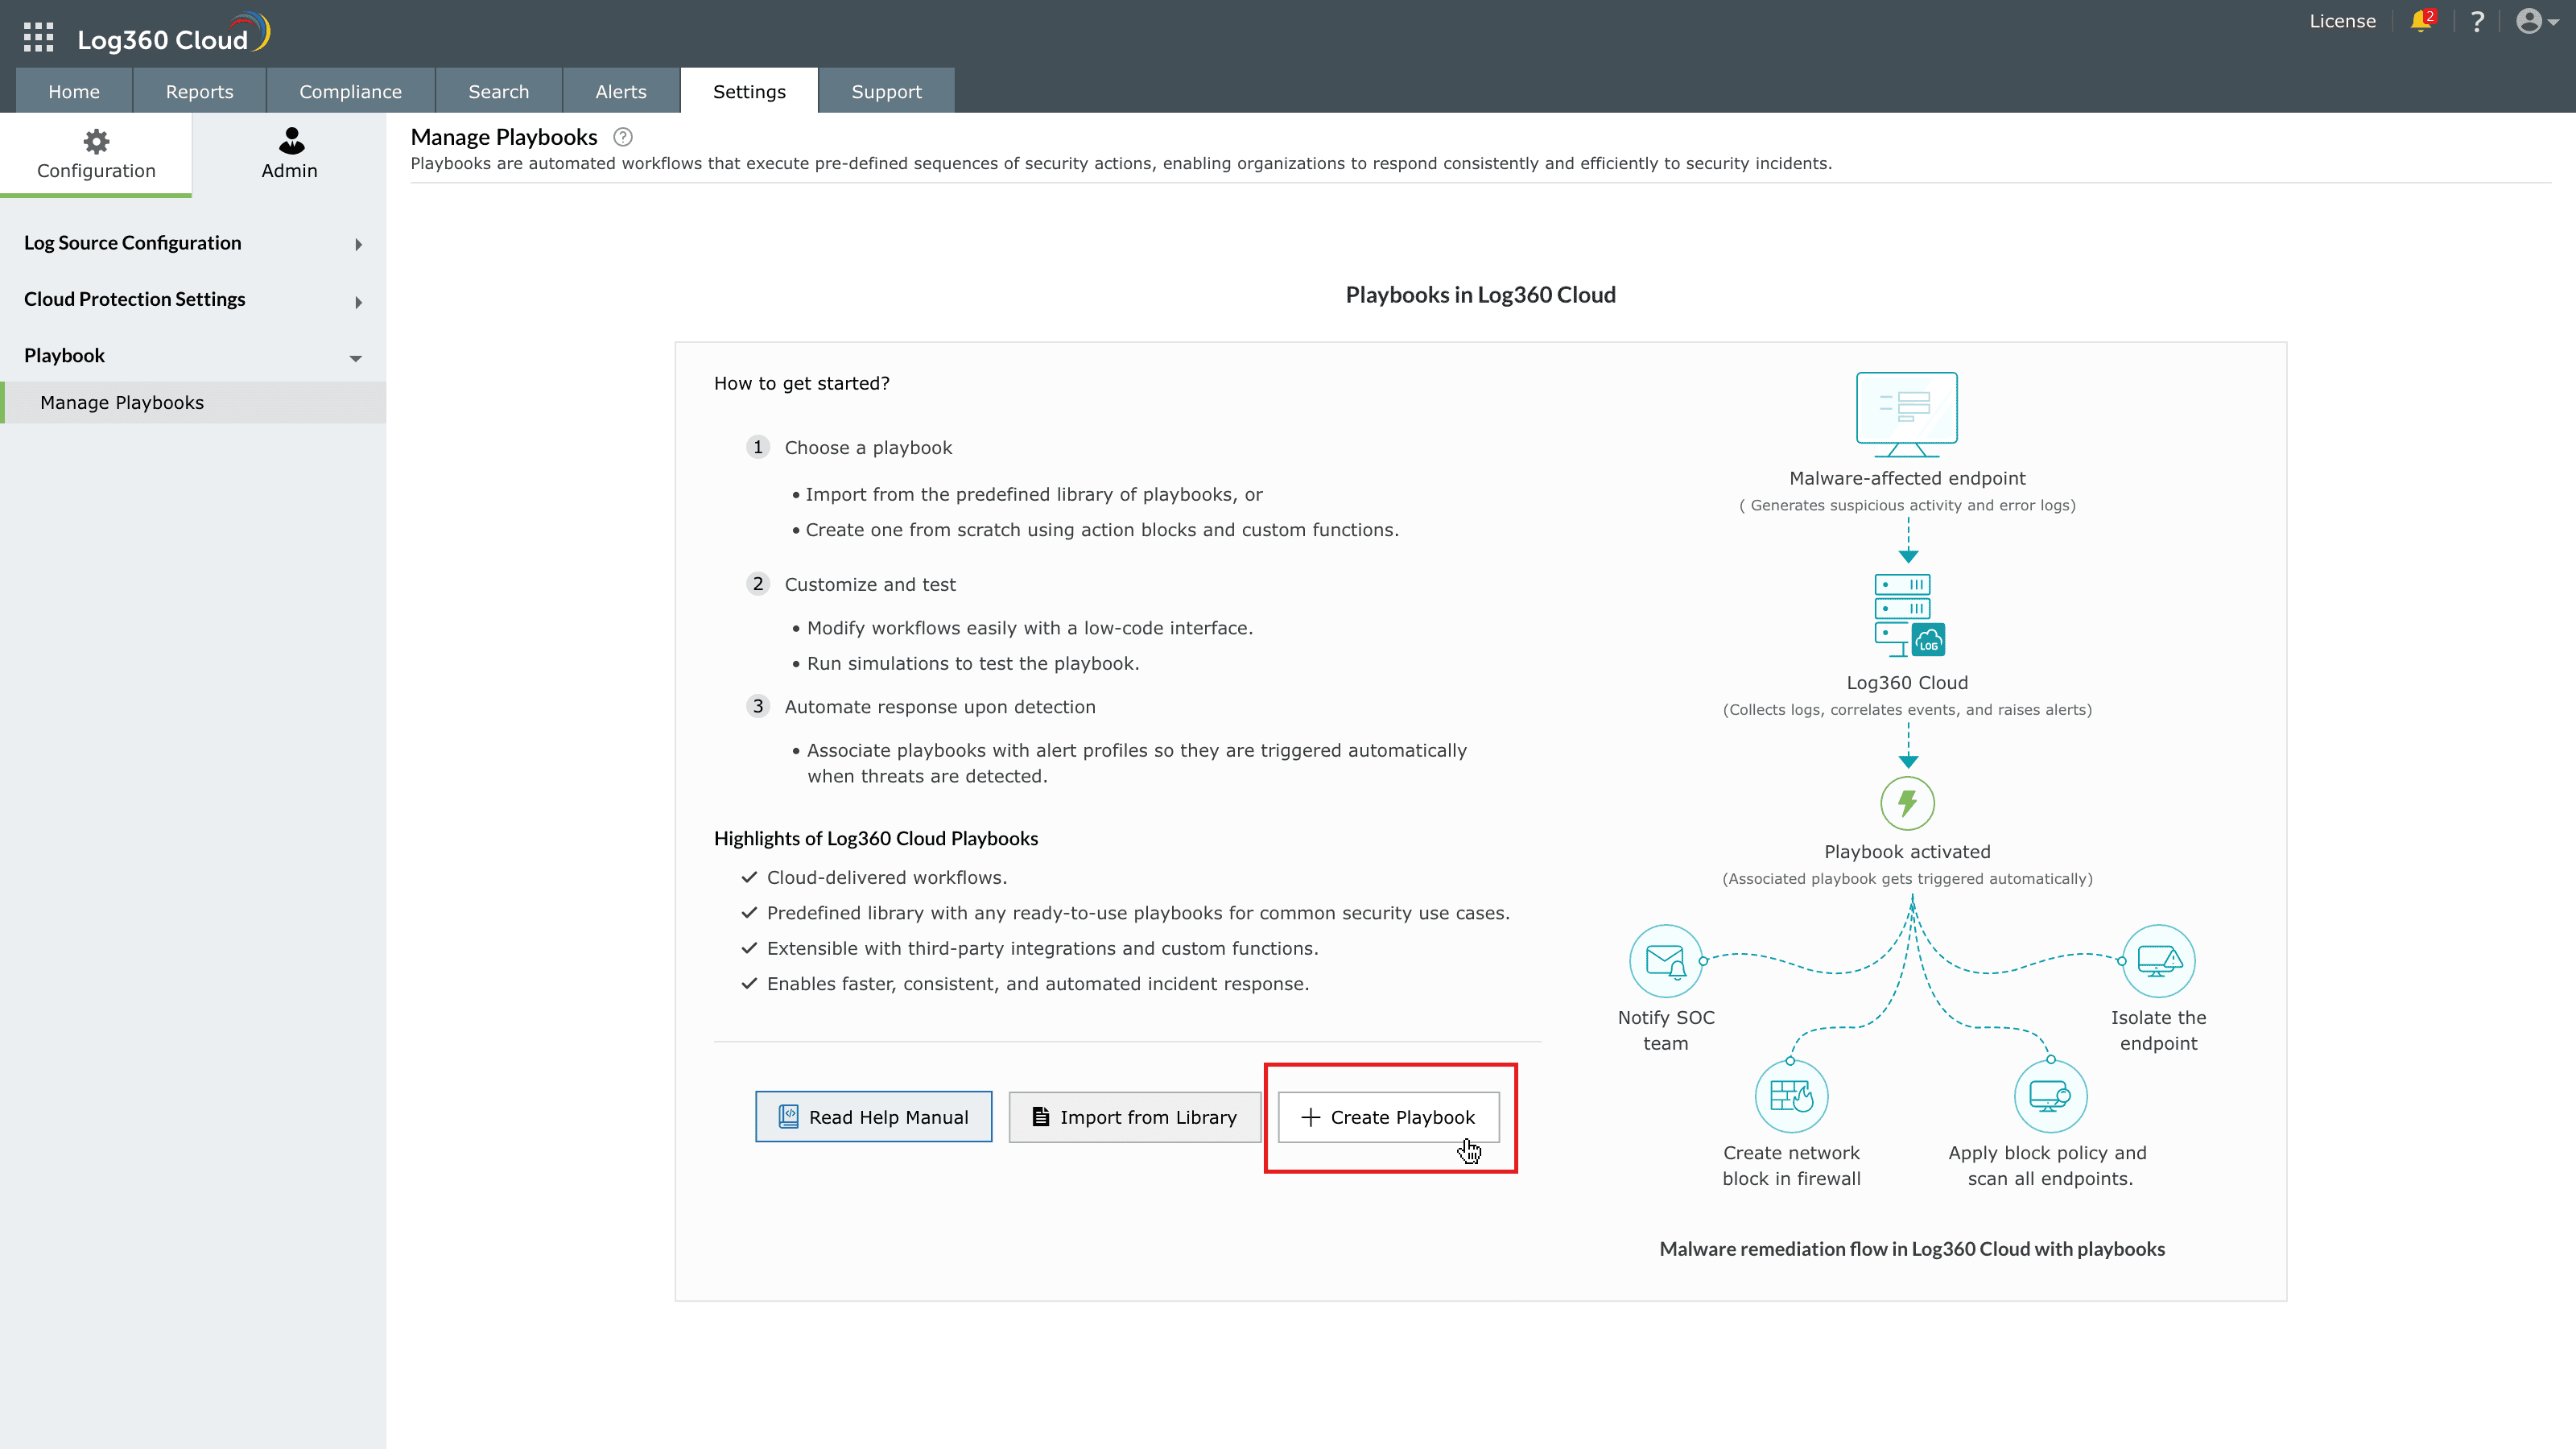
Image : Create a playbook in ManageEngine Log360 Cloud - The Create Playbook pane slides open as shown in the below image.
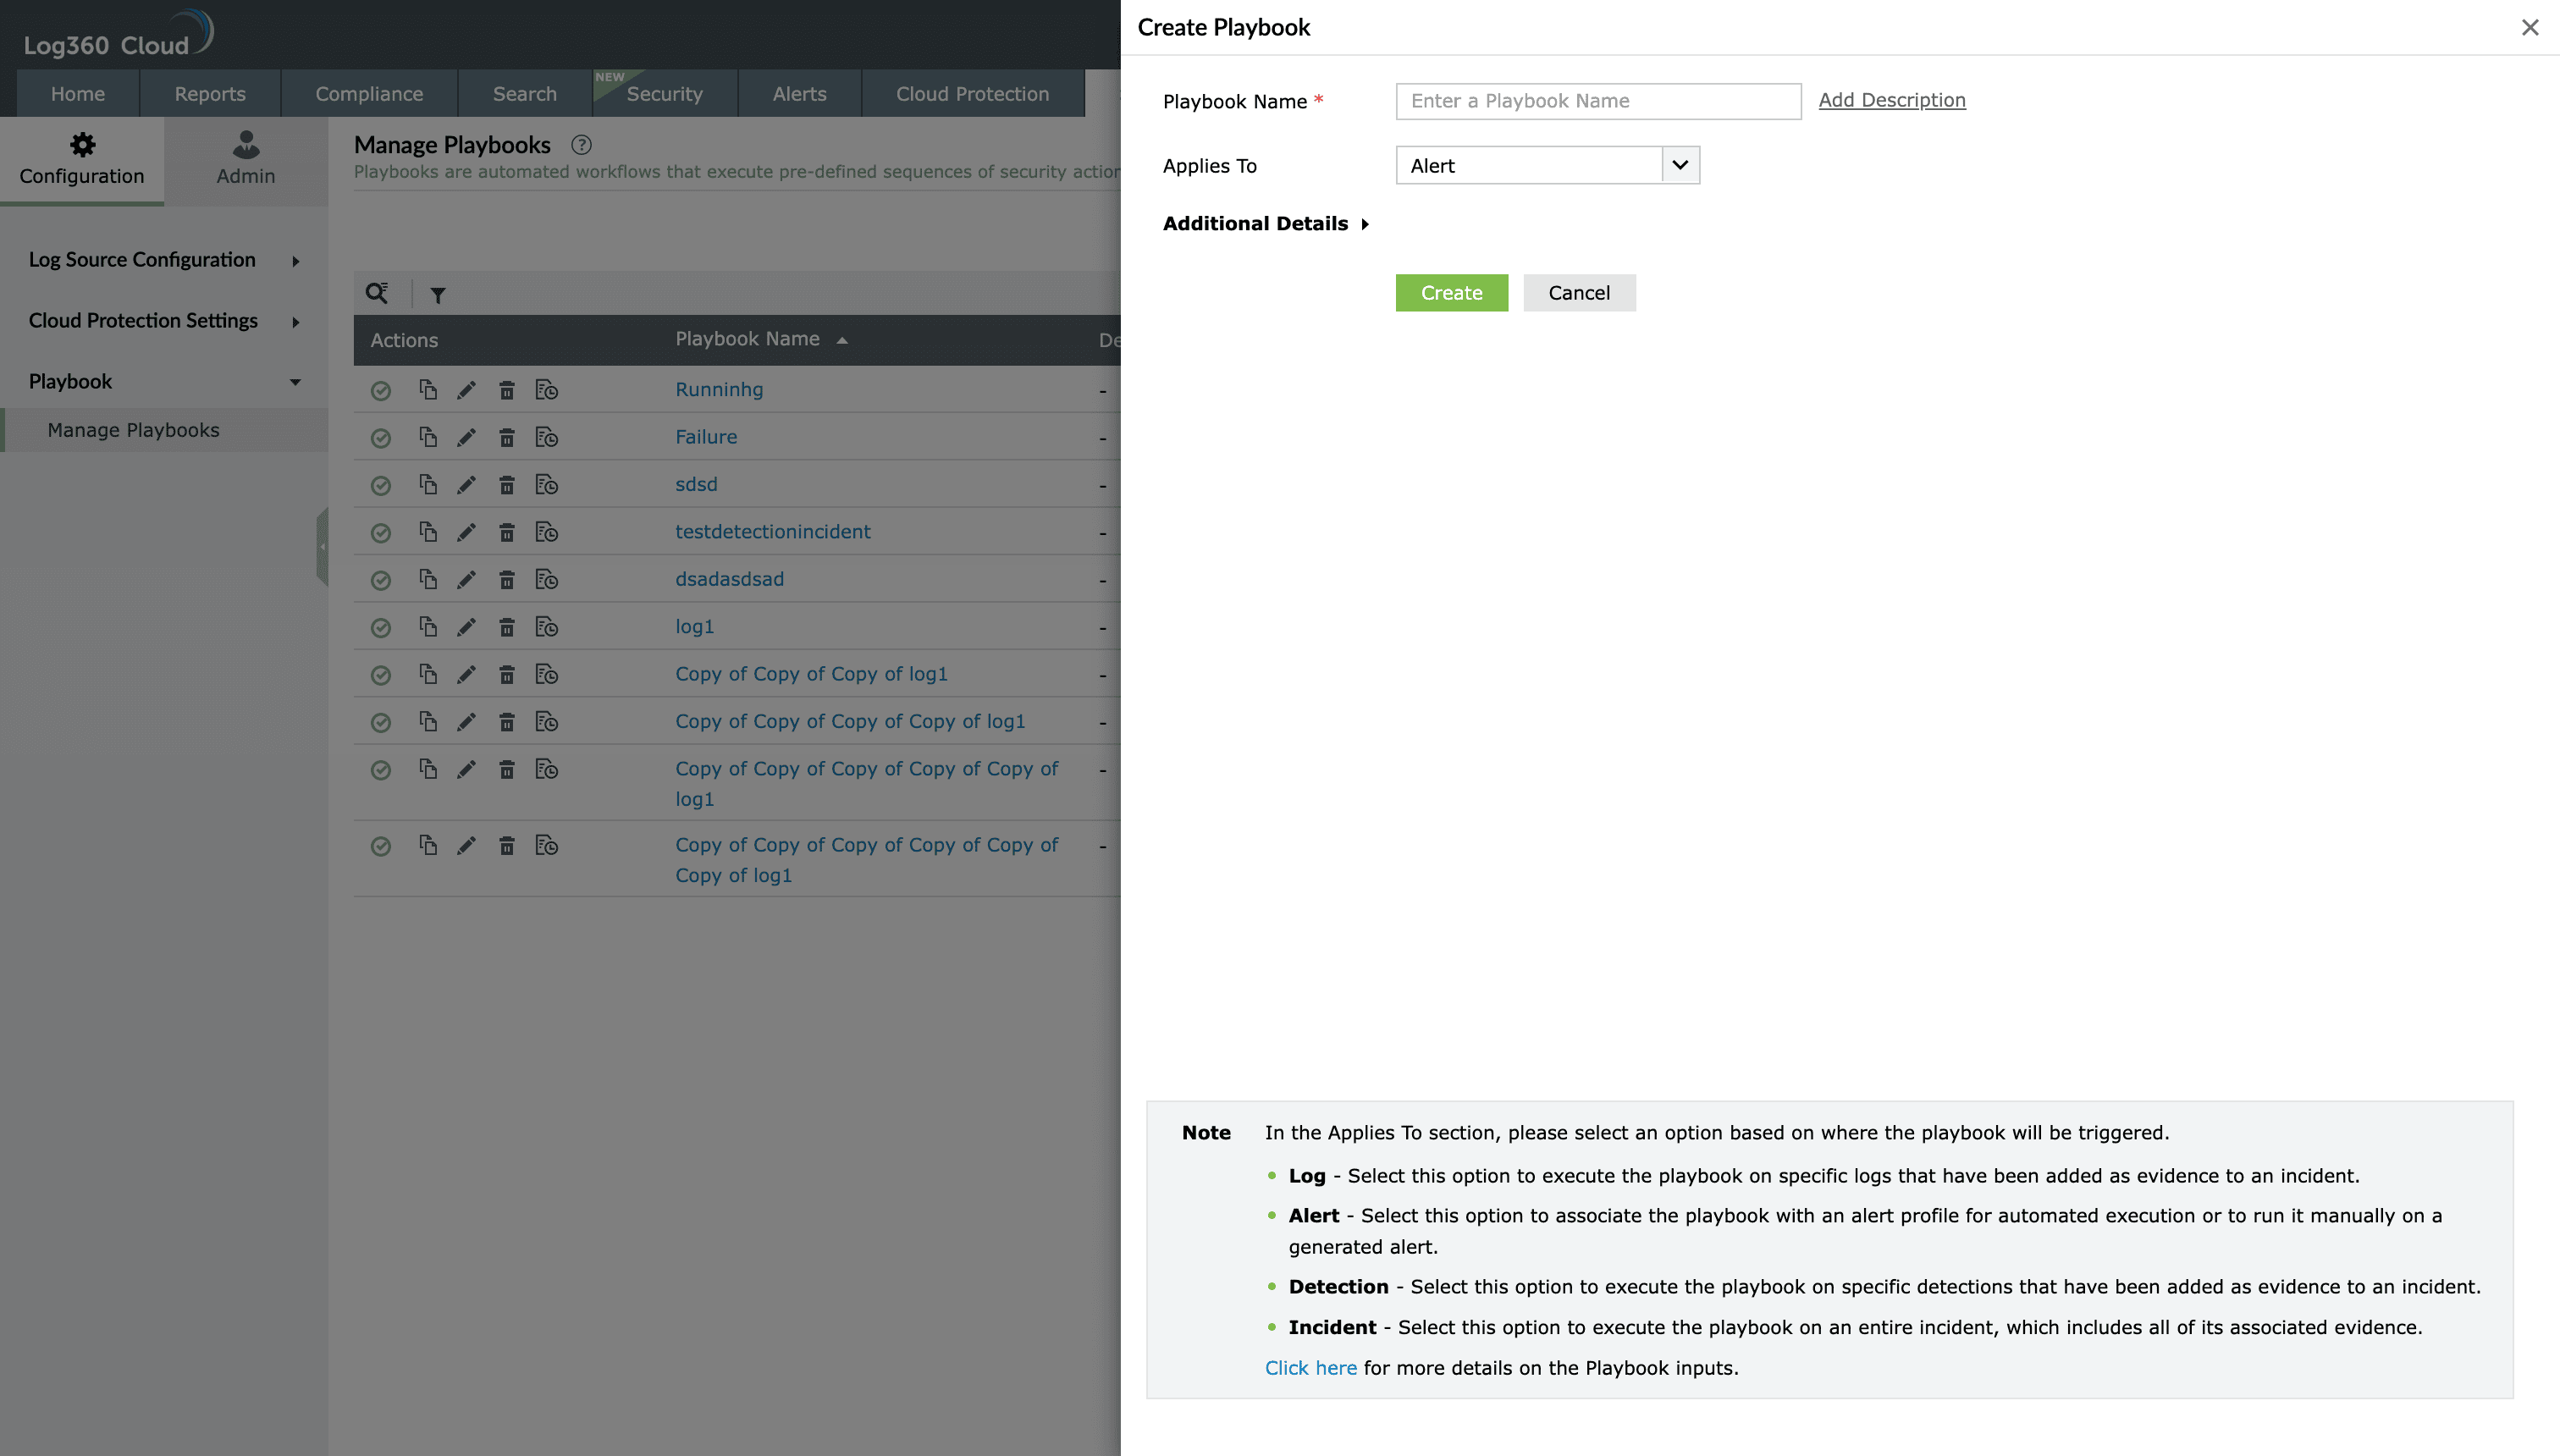
Image : Creating a playbook in ManageEngine Log360 Cloud - In the Playbook name field, provide a unique name for the playbook.
- Optional- Click on Add Description to include information about the playbook's functionality.
- From the Applies to dropdown, select the context in which this playbook should run. It will determine where and how it can be executed:
- Alert:
The playbook can be associated with alert profiles and automatically executes when the alert condition is met.
- Detection:
The playbook can be run for rule-based alerts and for detections added as evidence to an incident.
- Incident:
The playbook applies to entire incidents, allowing analysts to perform full-scope remediation that can include entities, evidence, and alerts linked to that incident.
- Log evidence:
The playbook operates on log-level records or evidence retrieved during investigations.
- Alert:
- Click on the Additional Details drop-down to add contextual information for the playbook you are creating. Below are the additional details you can configure for a playbook.
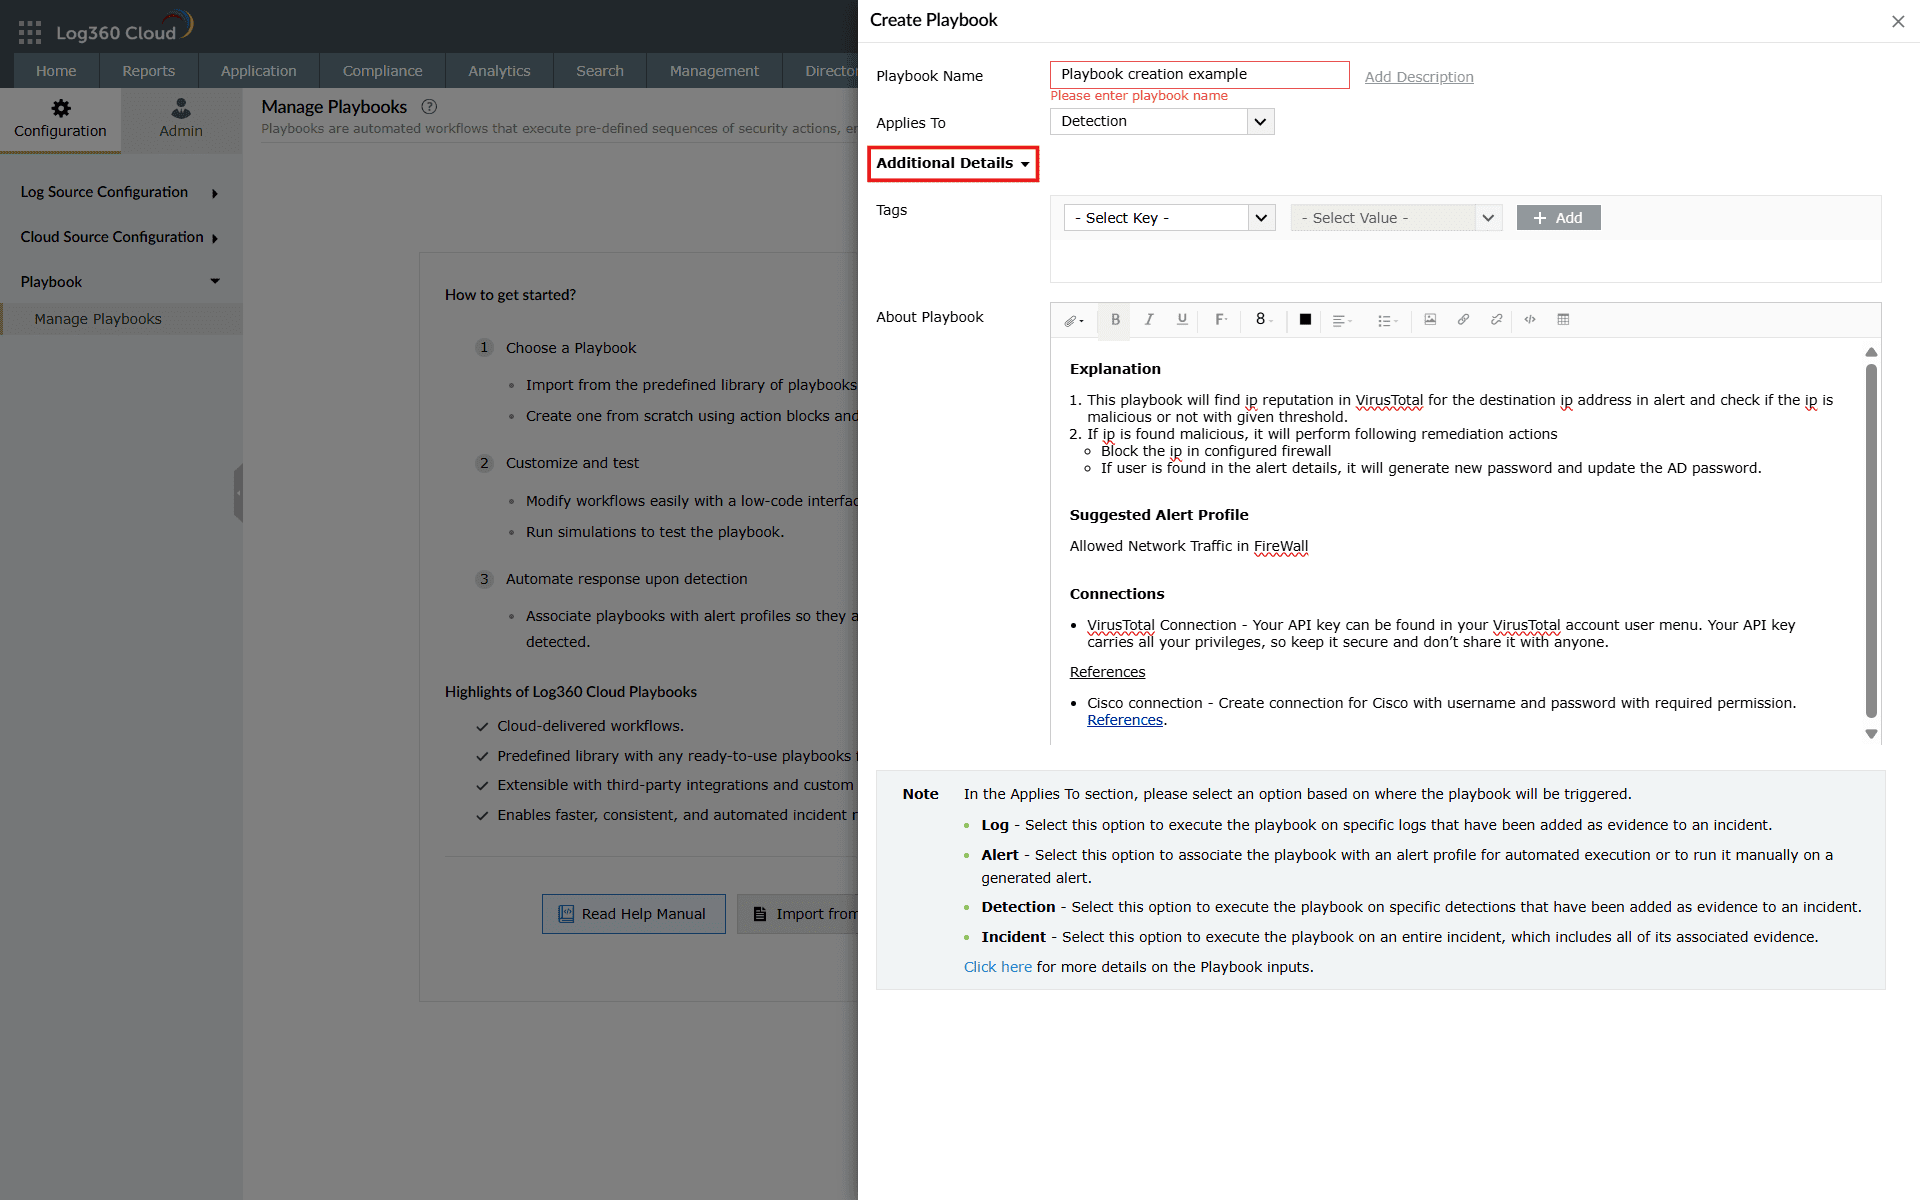
Image : Additional details of a playbook for contextual details - You can add Tags to classify the playbook using the MITRE ATT&CK or MITRE D3FEND frameworks. Tags not only enable consistent threat and defense mapping across automated workflows, but also serve as a filtering and enhanced search mechanism, helping you quickly locate specific playbooks based on tactics, techniques, or operational context.
- When MITRE ATT&CK is selected, you must select a Tactic and optionally a Technique. Both are added separately in their designated fields, as shown below.
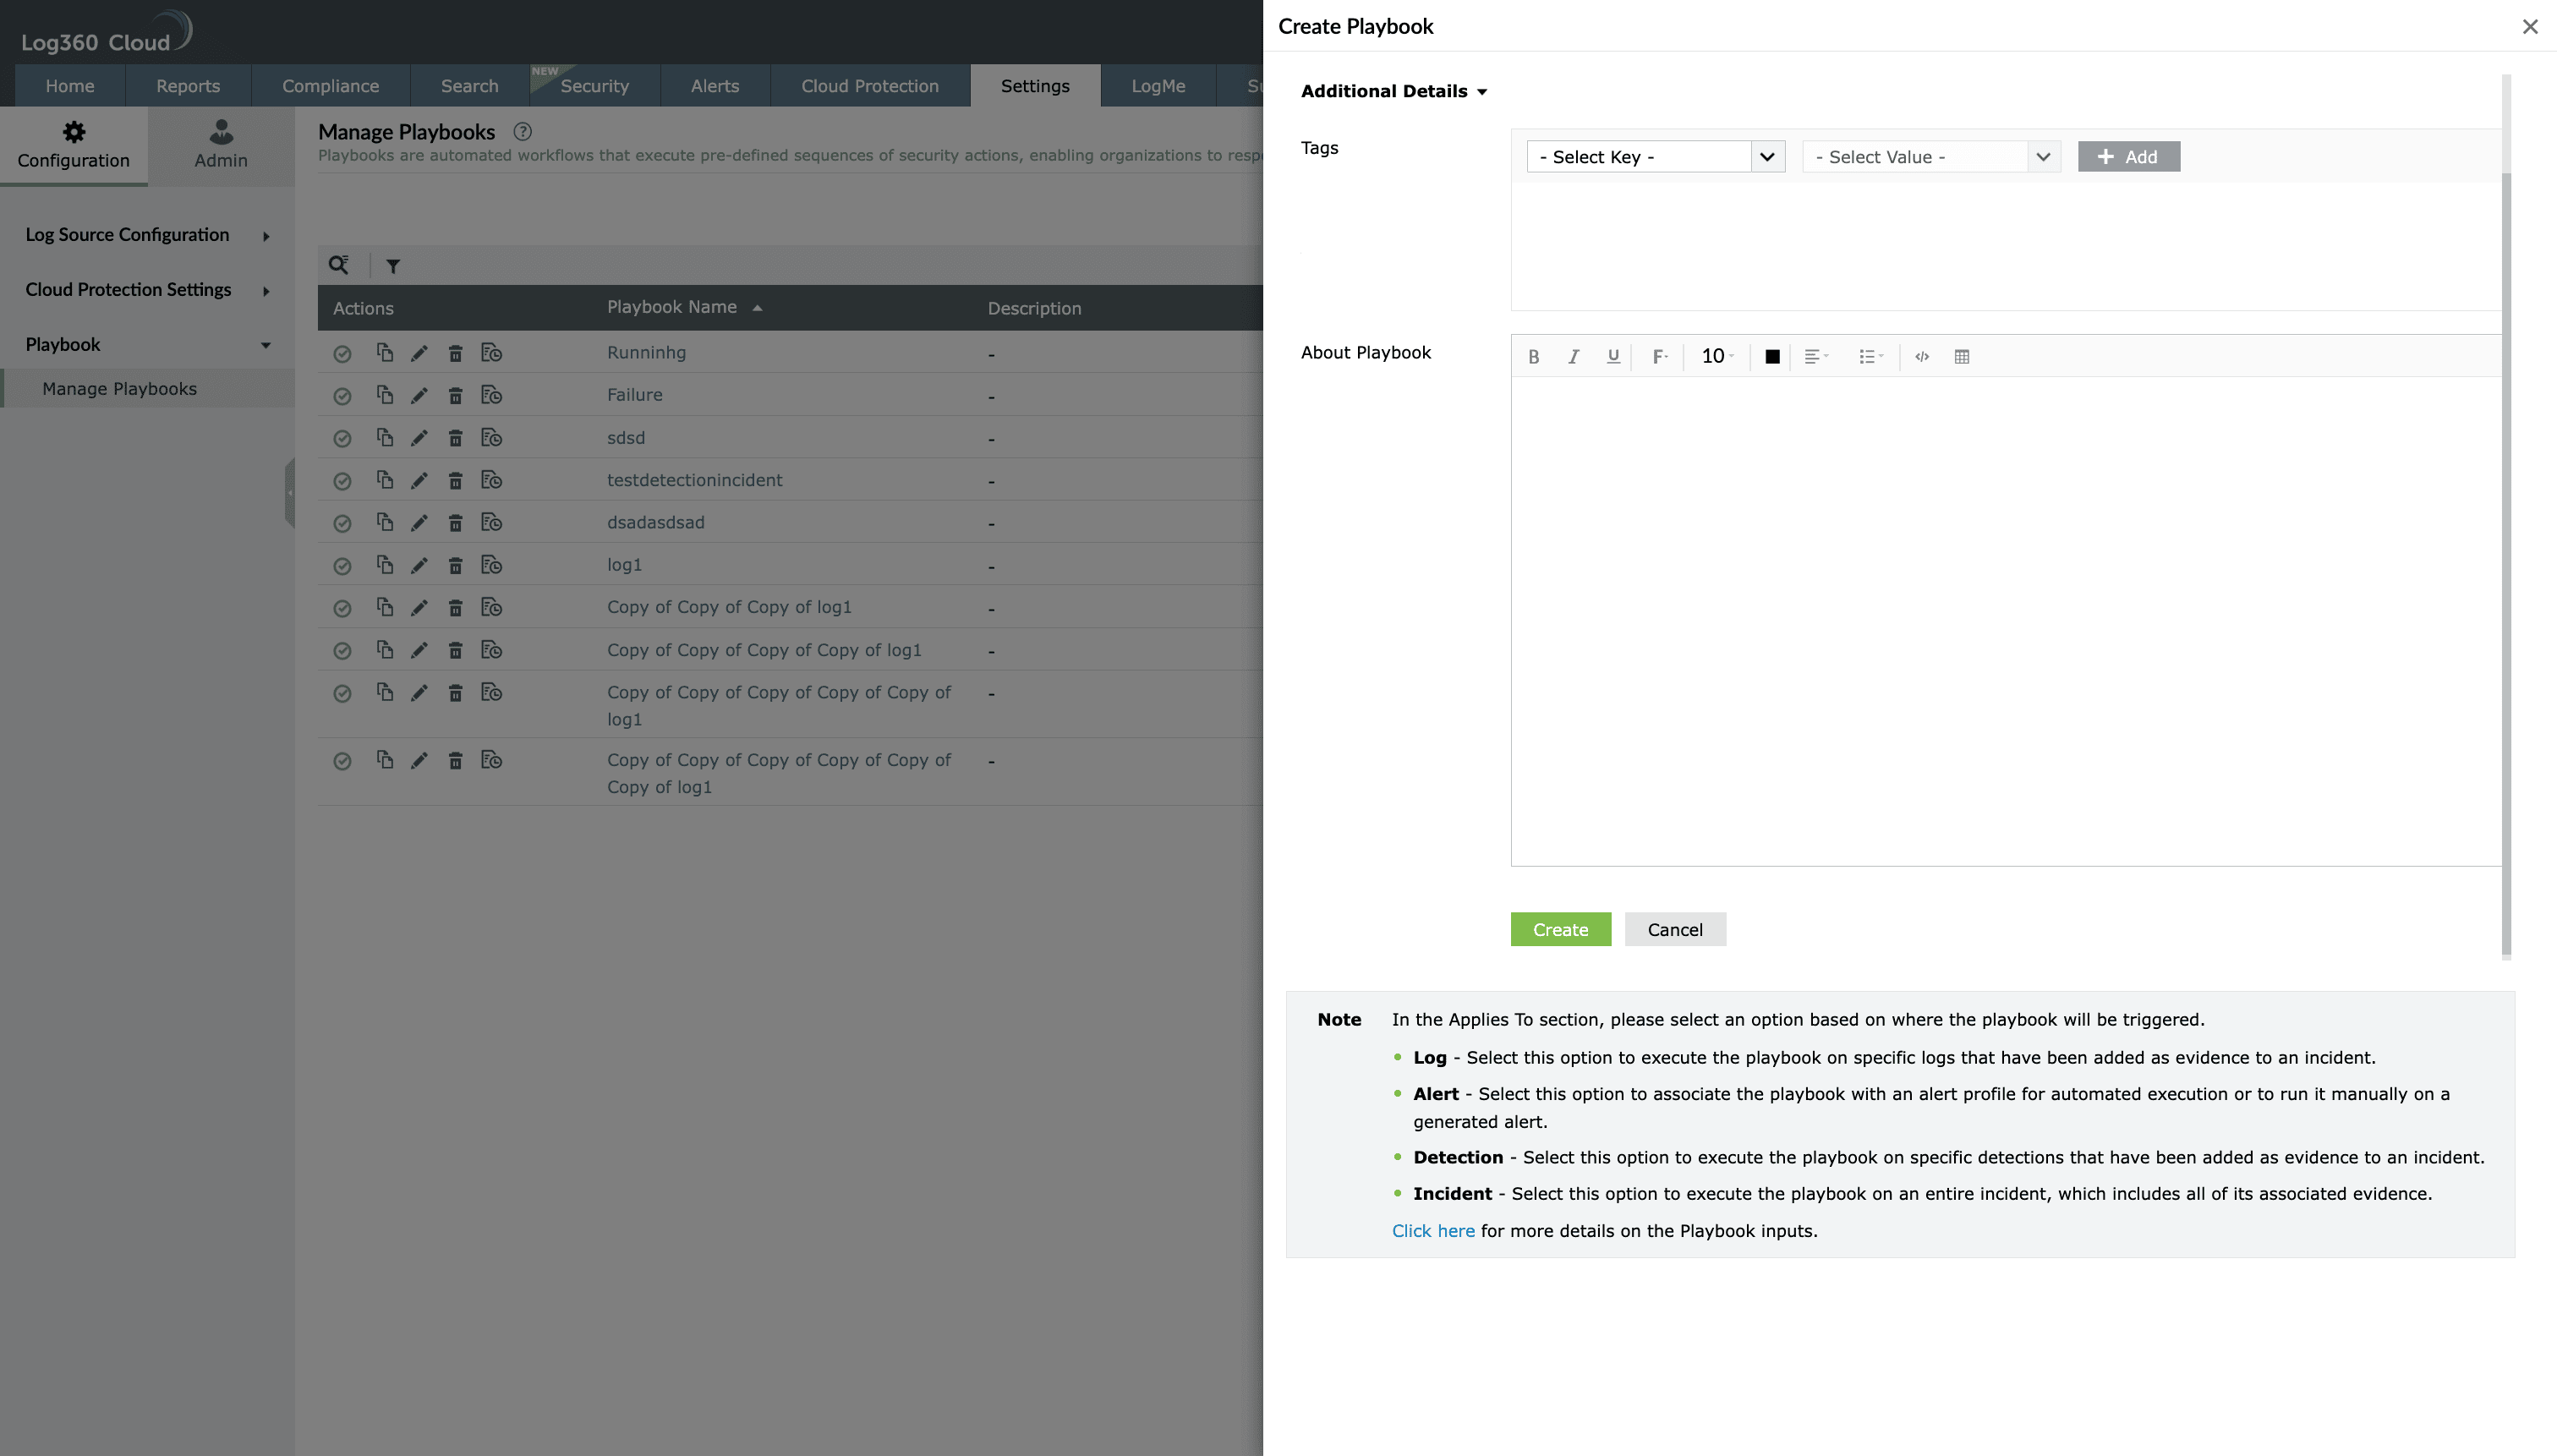
Image : Adding MITRE ATT&CK Tactics and Techniques for a playbook tags - When MITRE D3FEND is selected, you can select a Technique and optionally a Sub-technique.
- In both cases, clicking on the Add button associates the chosen mapping to the playbook.
- Other options in tags include Entity and Log Type.
- The Entity determines which system, device, or user the playbook acts upon.
- If a playbook is designed to work with a specific log source, you can add the Log Type as a tag. This helps you quickly filter and search for the relevant playbooks at the time of association.
- When MITRE ATT&CK is selected, you must select a Tactic and optionally a Technique. Both are added separately in their designated fields, as shown below.
- In the text box provided for Playbook Details, you can enter a detailed breakdown of the playbook such as explanation, action performed, connection used, etc to save its contextual information.
- Once all details are entered, click on Create.
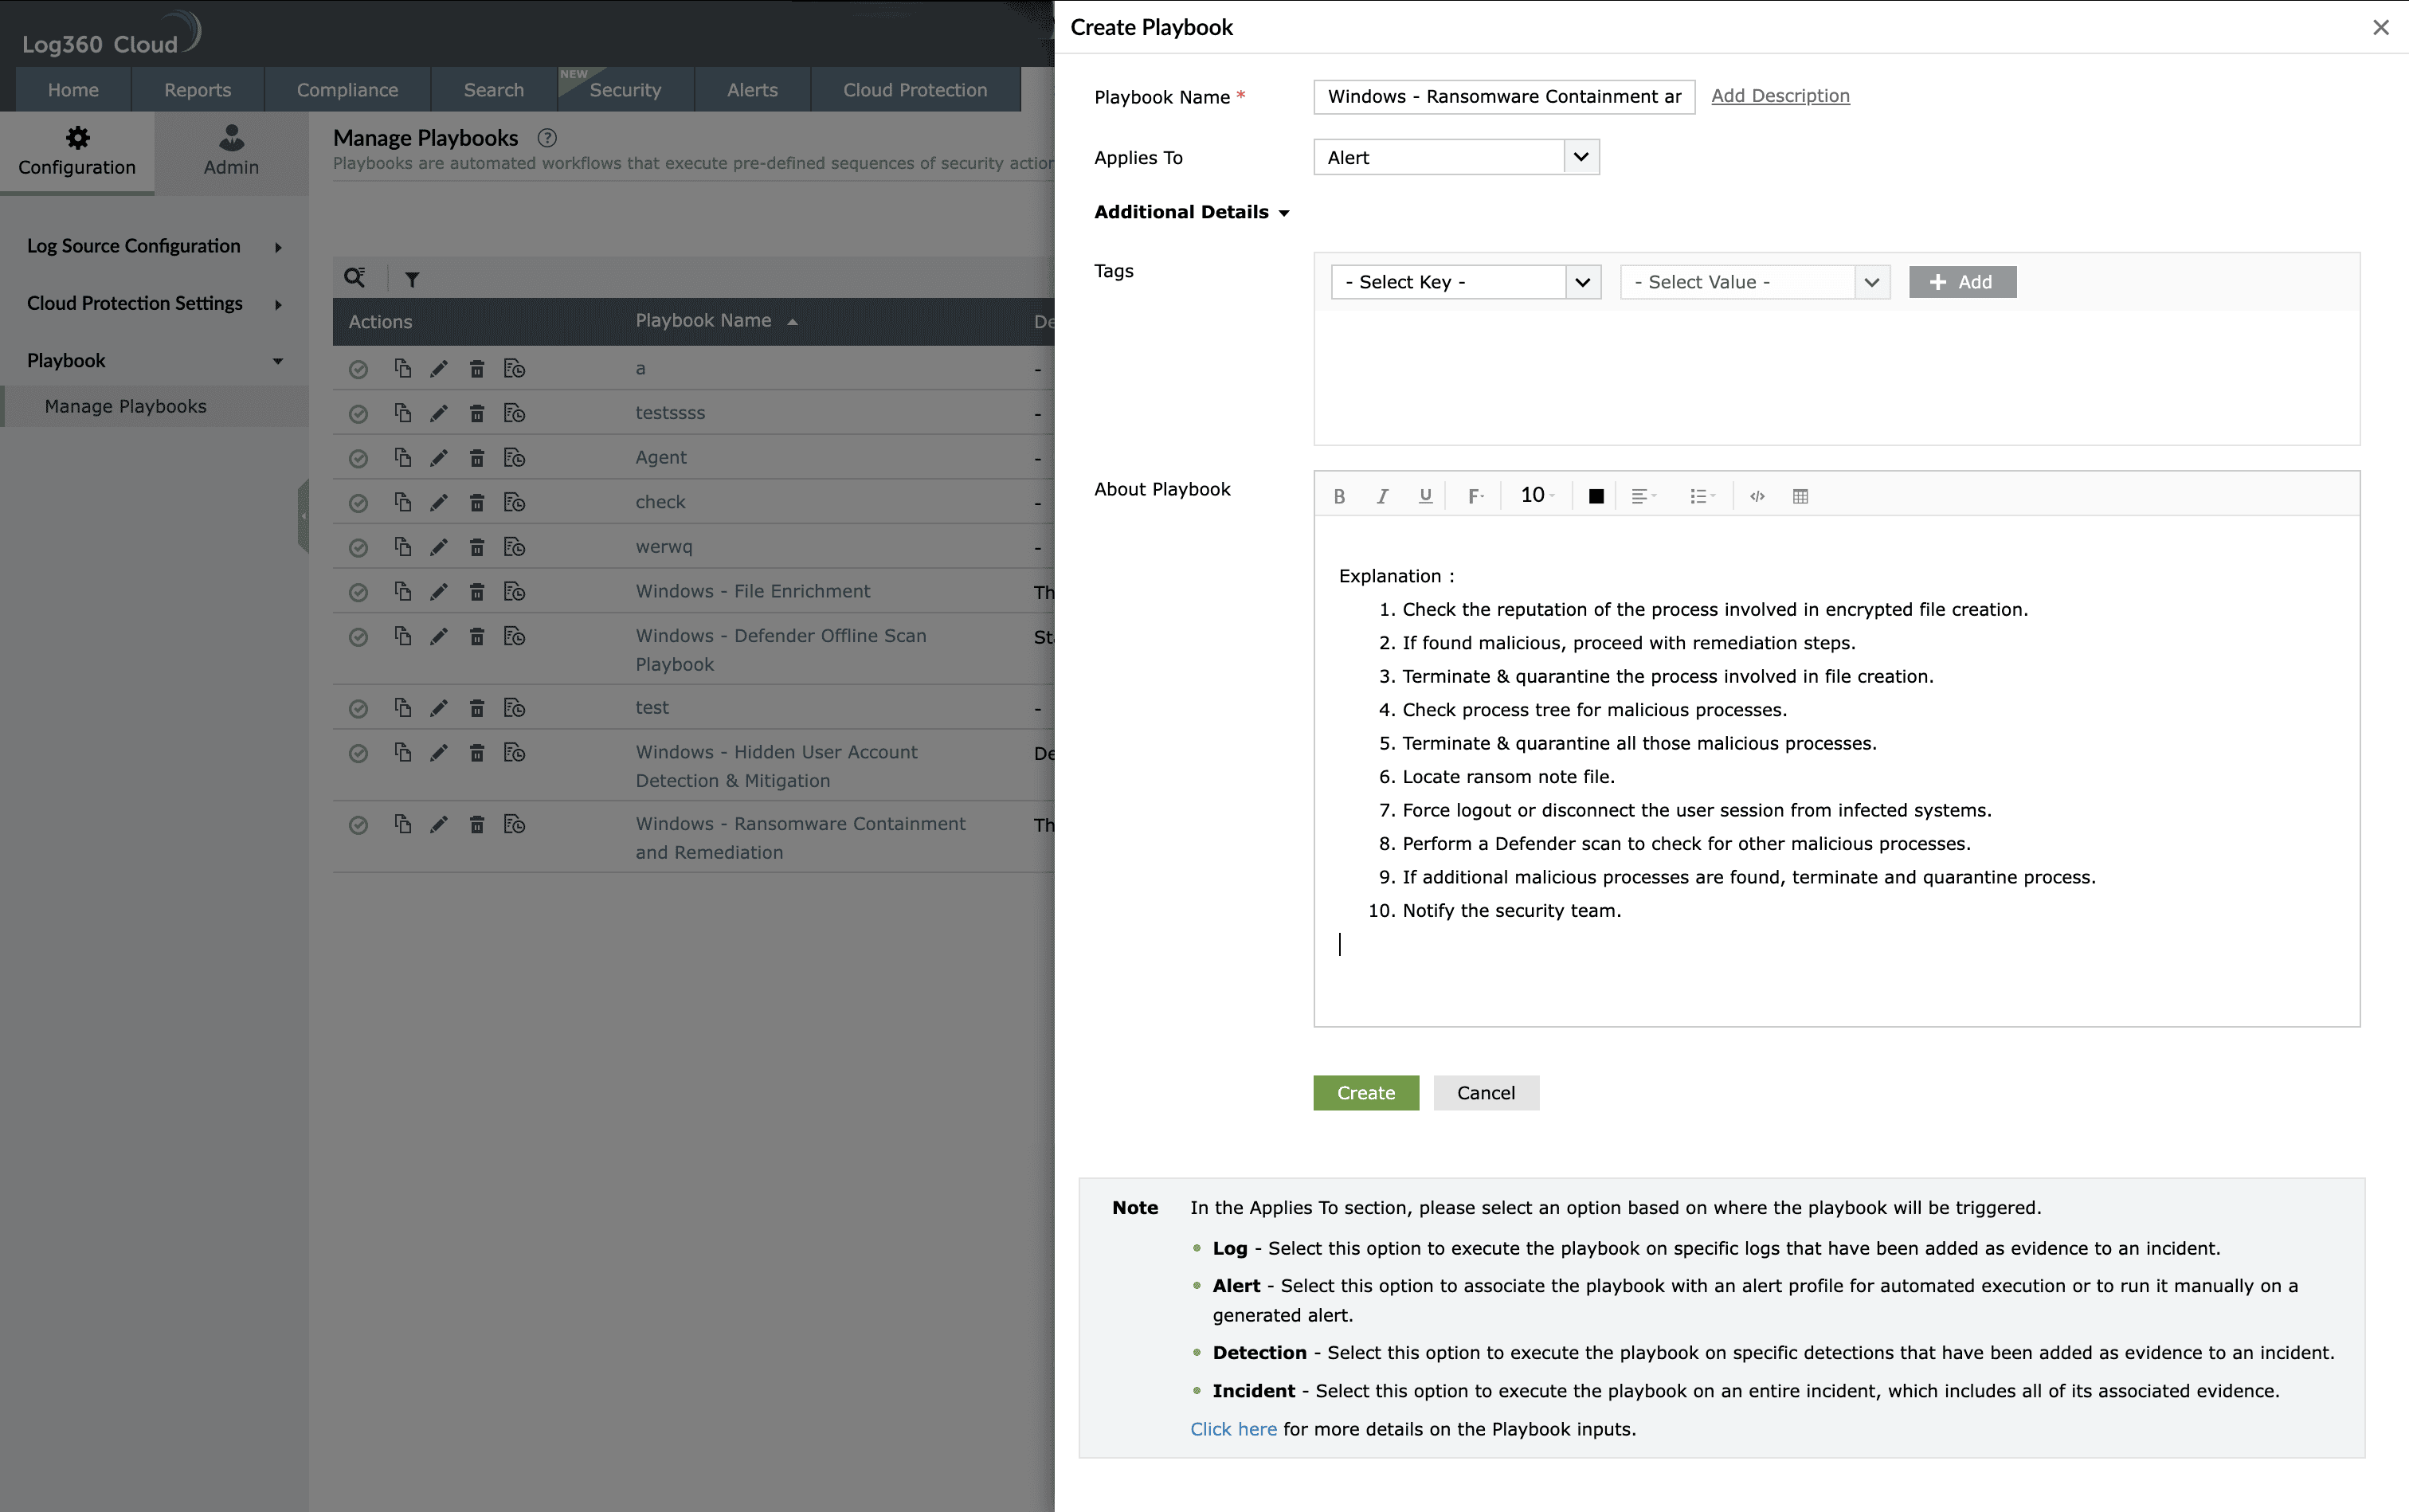
Image : Creating a playbook in ManageEngine Log360 Cloud - The Playbook builder interface opens, displaying a visual canvas in the center and an action panel on the right, where you can select a state and configure its properties.
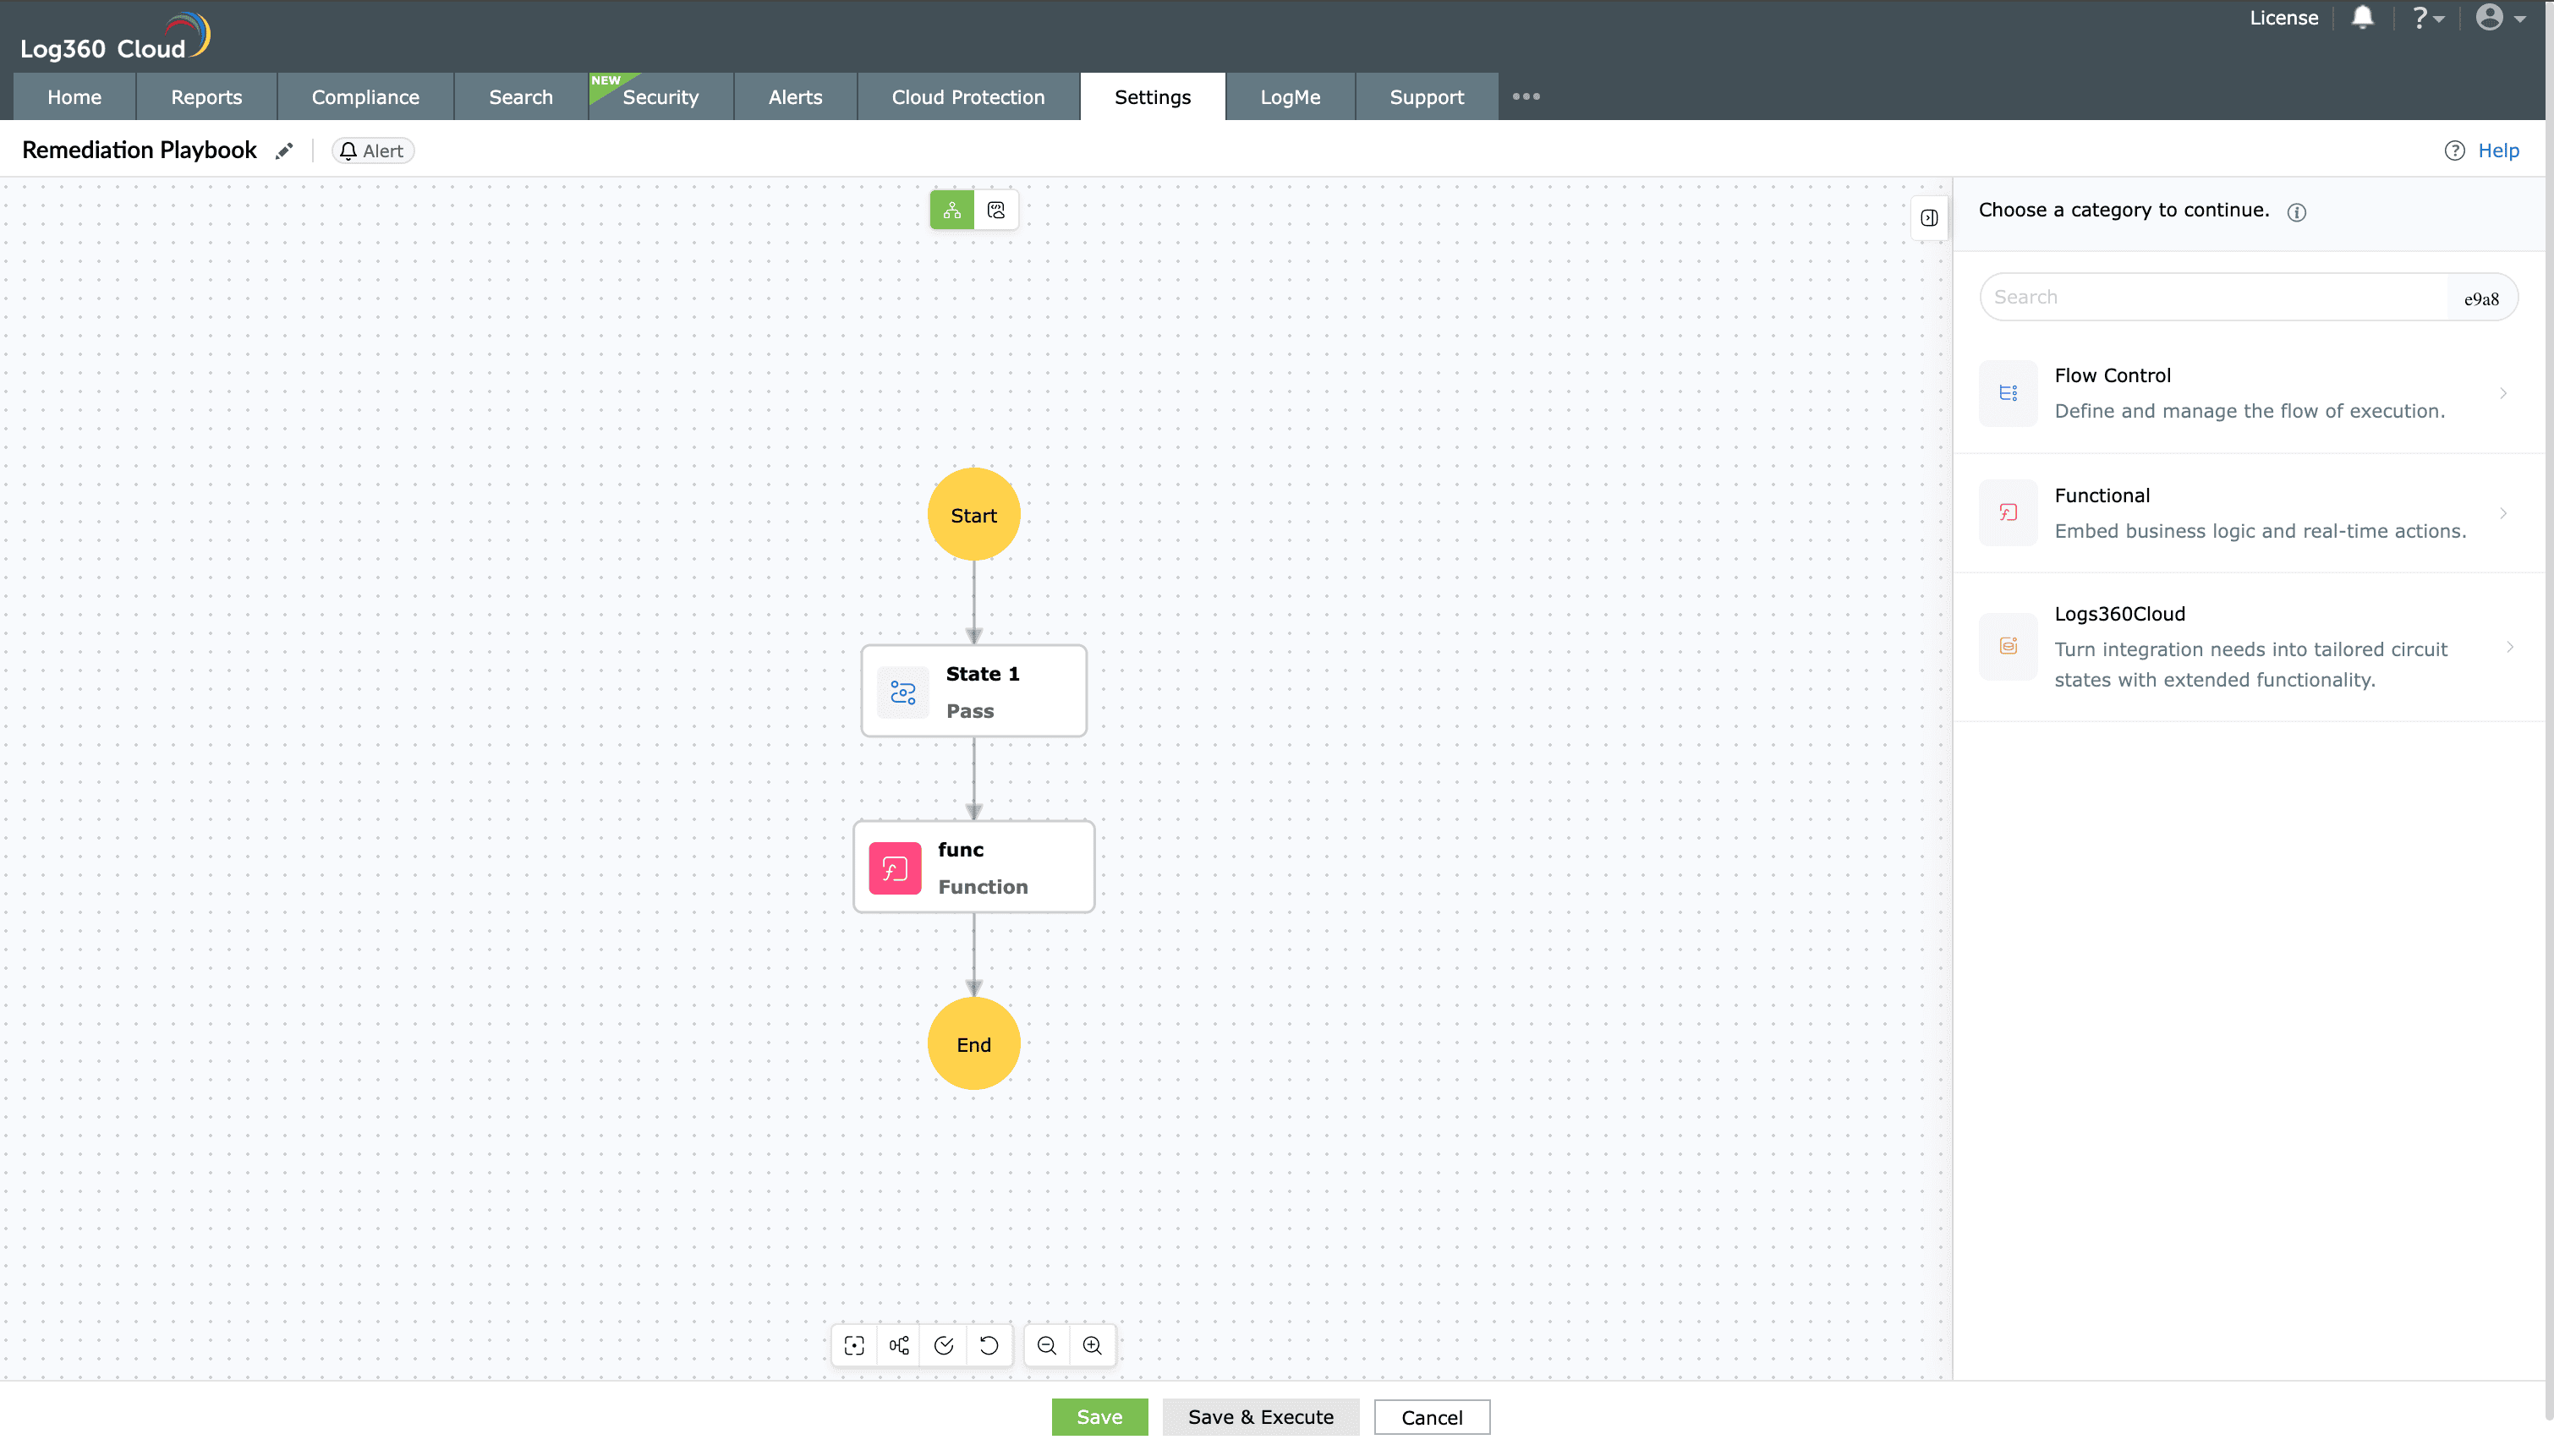
Image: Playbook builder interface in Log360 Cloud - Clicking on the Edit icon
 as highlighted below will take you back to the Playbook Details pane.
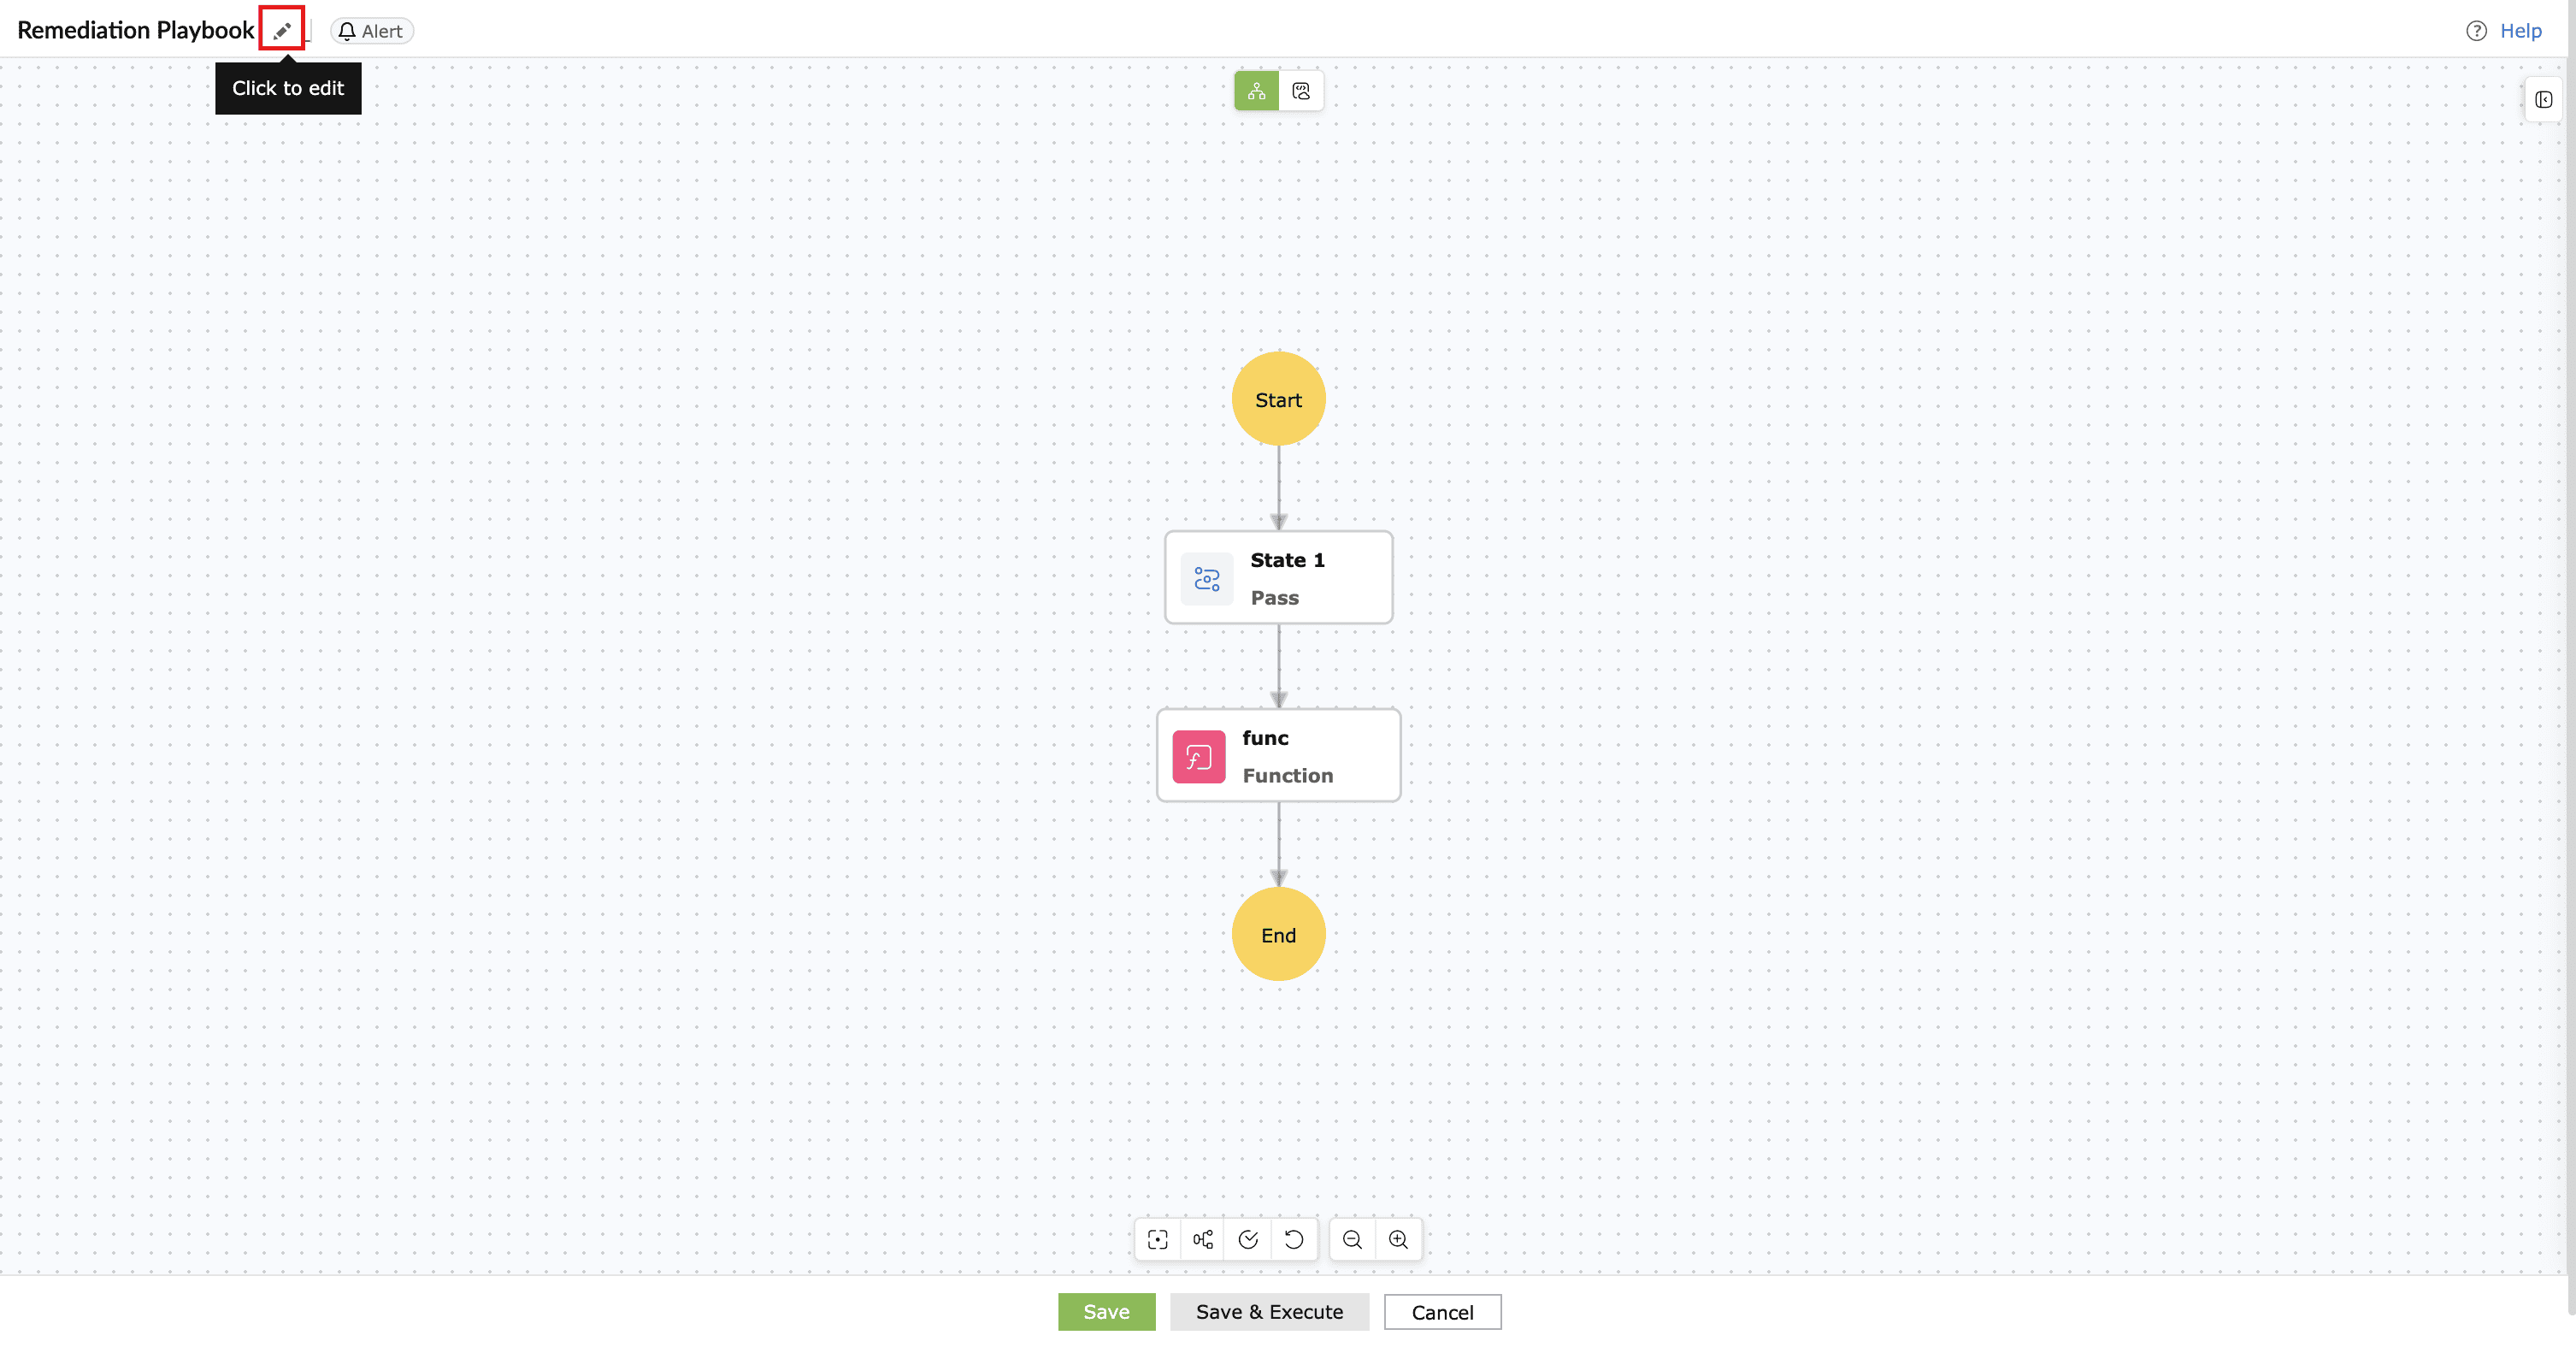
Image : Edit icon located in the playbook name field - From the action palette, drag and drop the required blocks (states) onto the canvas. Each block represents a state within the playbook. Common block types include:
- Flow control states: Examples include Pass, Branch, Parallel, Wait, Batch, Success, and Failure. Used to control execution flow.
- Functional states: Used to execute custom functions, invoke other playbooks, and integrate with external applications.
- Platform and endpoint states: Log search, alert handling, incident management, risk evaluation, service/process management, machine actions, script execution, and network actions
For a complete description of each state and its behavior, see Understanding playbook states.
- Click on any block to configure its properties in the right configuration pane.

Image : Configurations pane available for each block - Configuration tab: Defines the configurations of the block. These fields vary from each block to another, based on the block nature.
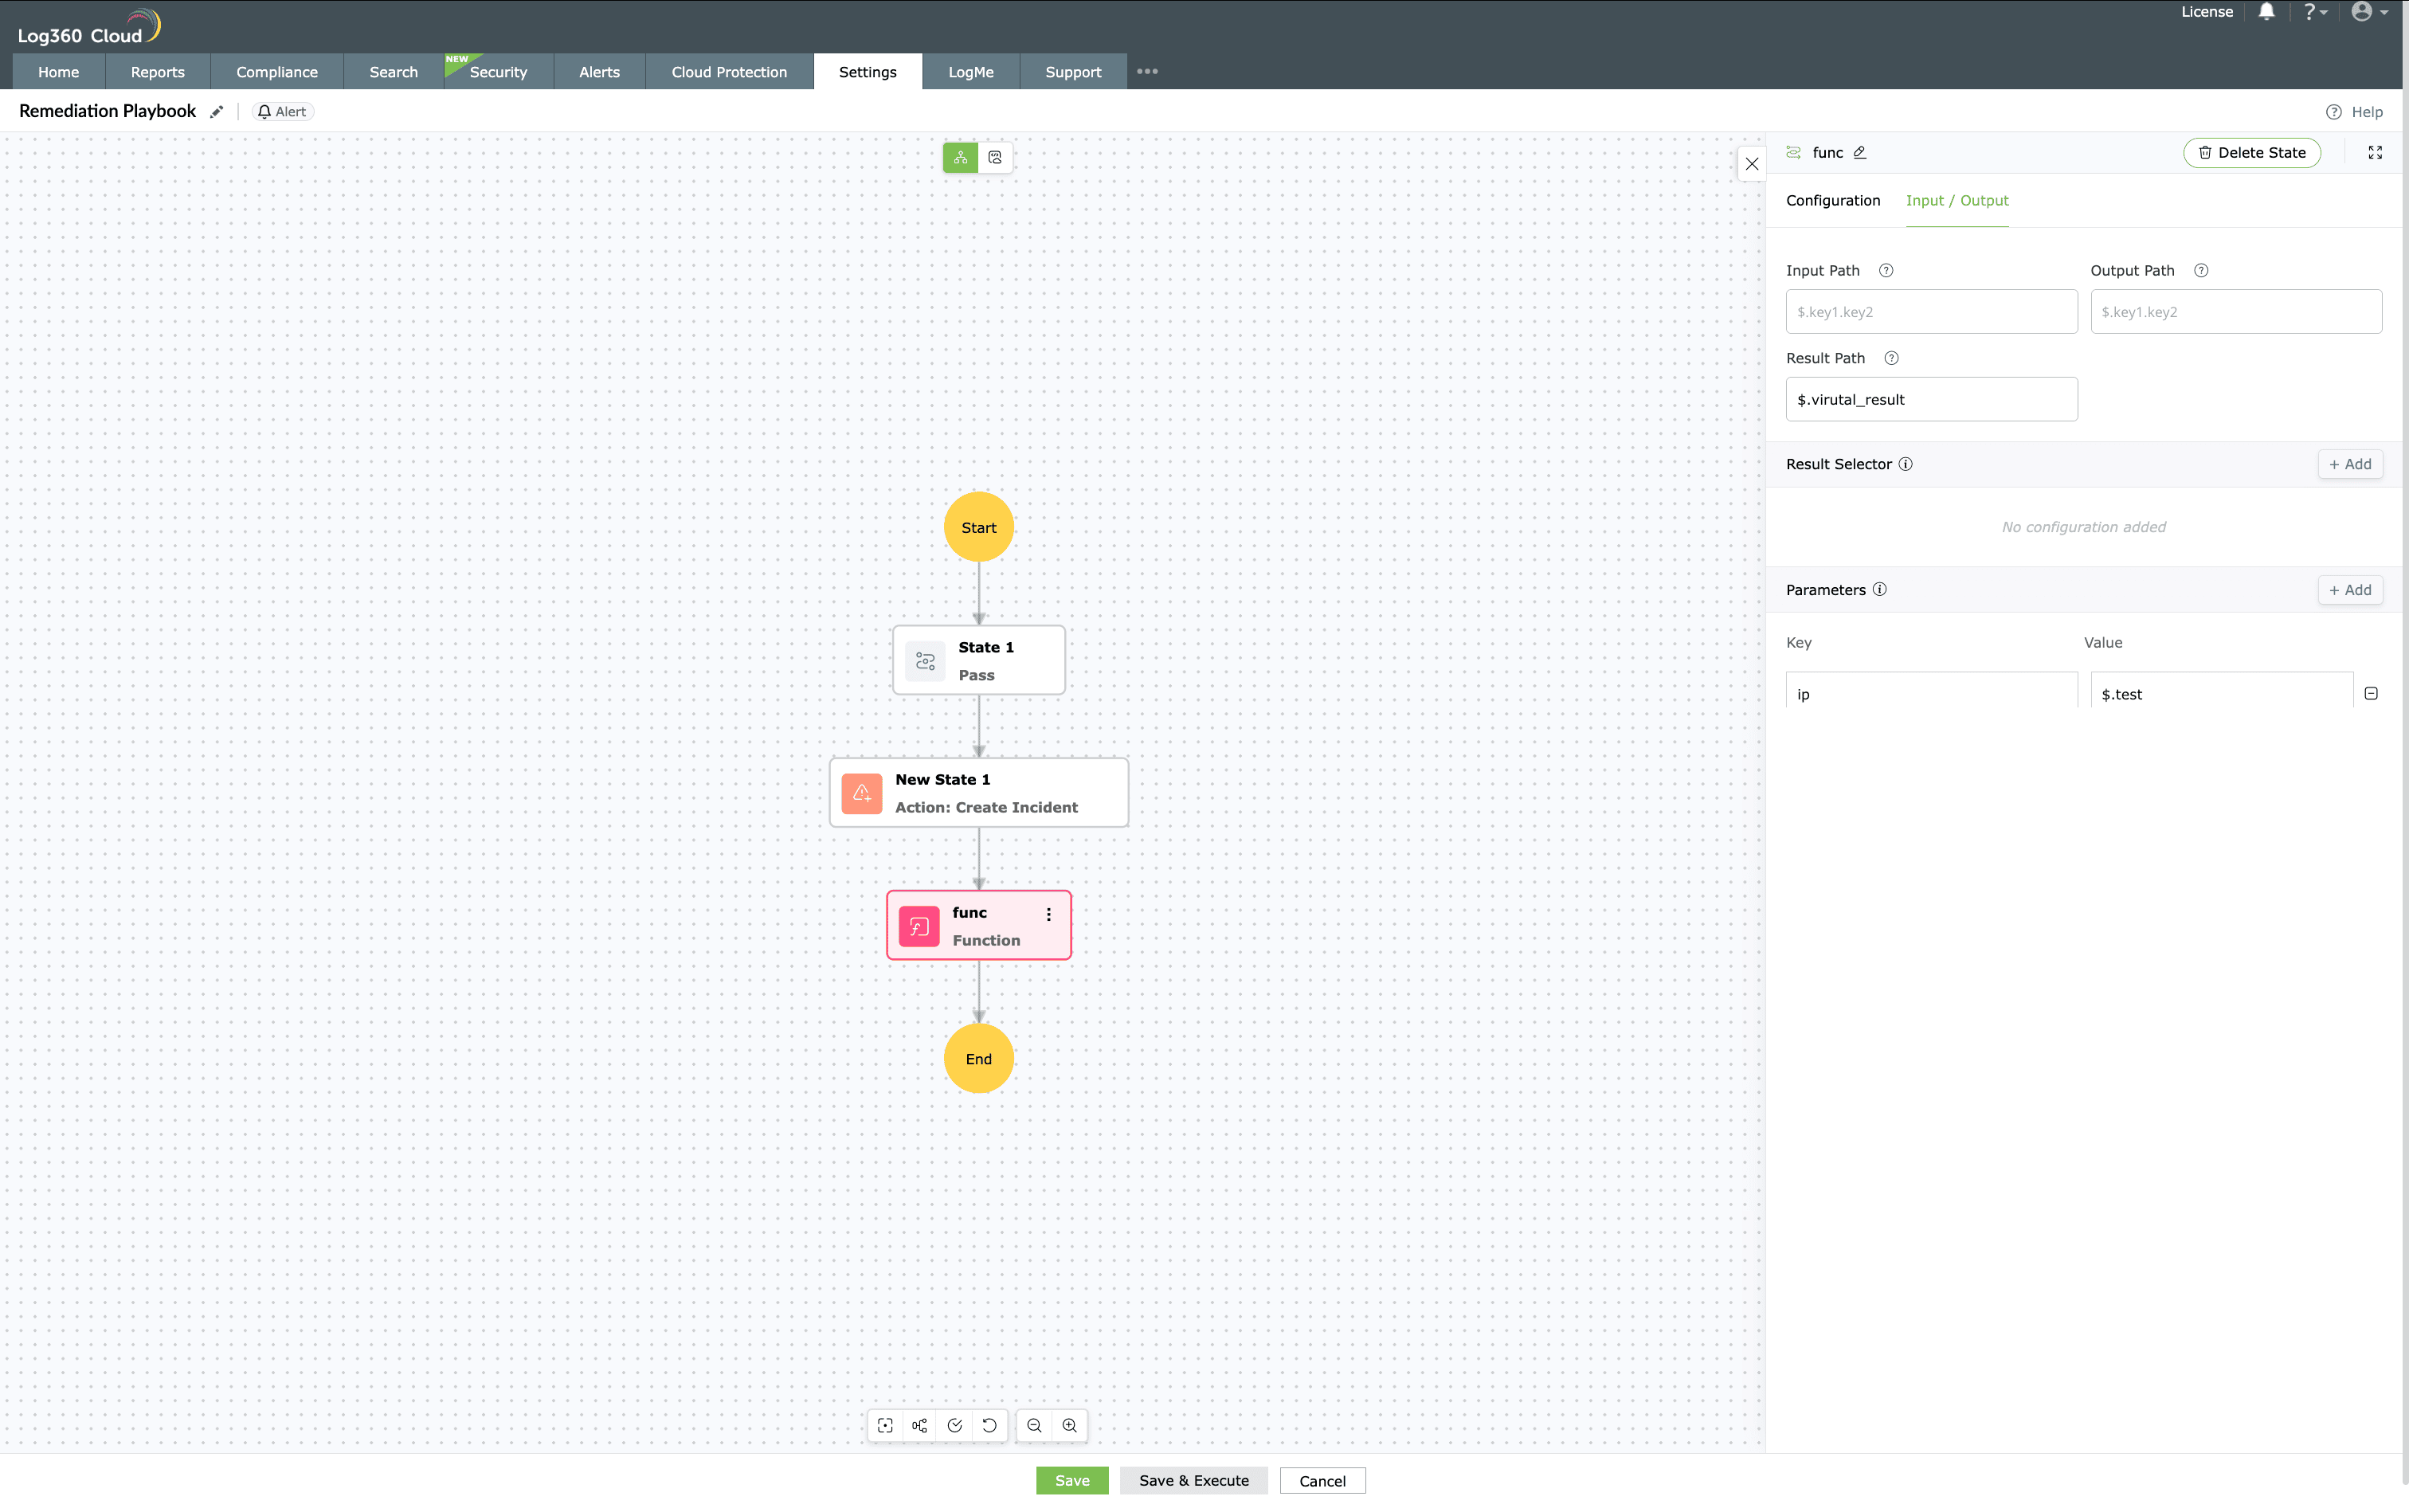
Image : Input/Output tab in the pane - Configuration tab: Defines the execution settings of the selected block. The fields displayed here vary depending on the state type. For example, in a Create Incident state, you can configure fields such as Incident name, Description, Severity, Status, Assignee, Evident type, Evident ID, and Next state.
- Input/output: Each state in the builder includes an Input/Output tab to define how data moves between actions.
- Input path: Specifies the JSON path from which the state retrieves its input data. If left blank, the parent context data (alert, detection, or incident) is used.
- Output path: Defines where the state's output will be stored for use by later states.
- Result path: The variable name under which the state's output is saved.
- Result selector: Filters or extracts specific fields from the action's response, allowing only the required data to be stored.
- Parameters: Lists the input variables required for the state. Use Add parameter to include new variables.
- Delete state: Removes the selected state from the playbook.
- Configuration tab: Defines the configurations of the block. These fields vary from each block to another, based on the block nature.
- Continue adding, linking, and configuring states until the workflow sequence of the playbook is complete.
- Use the Zoom in/out options in the toolbar to adjust visibility.
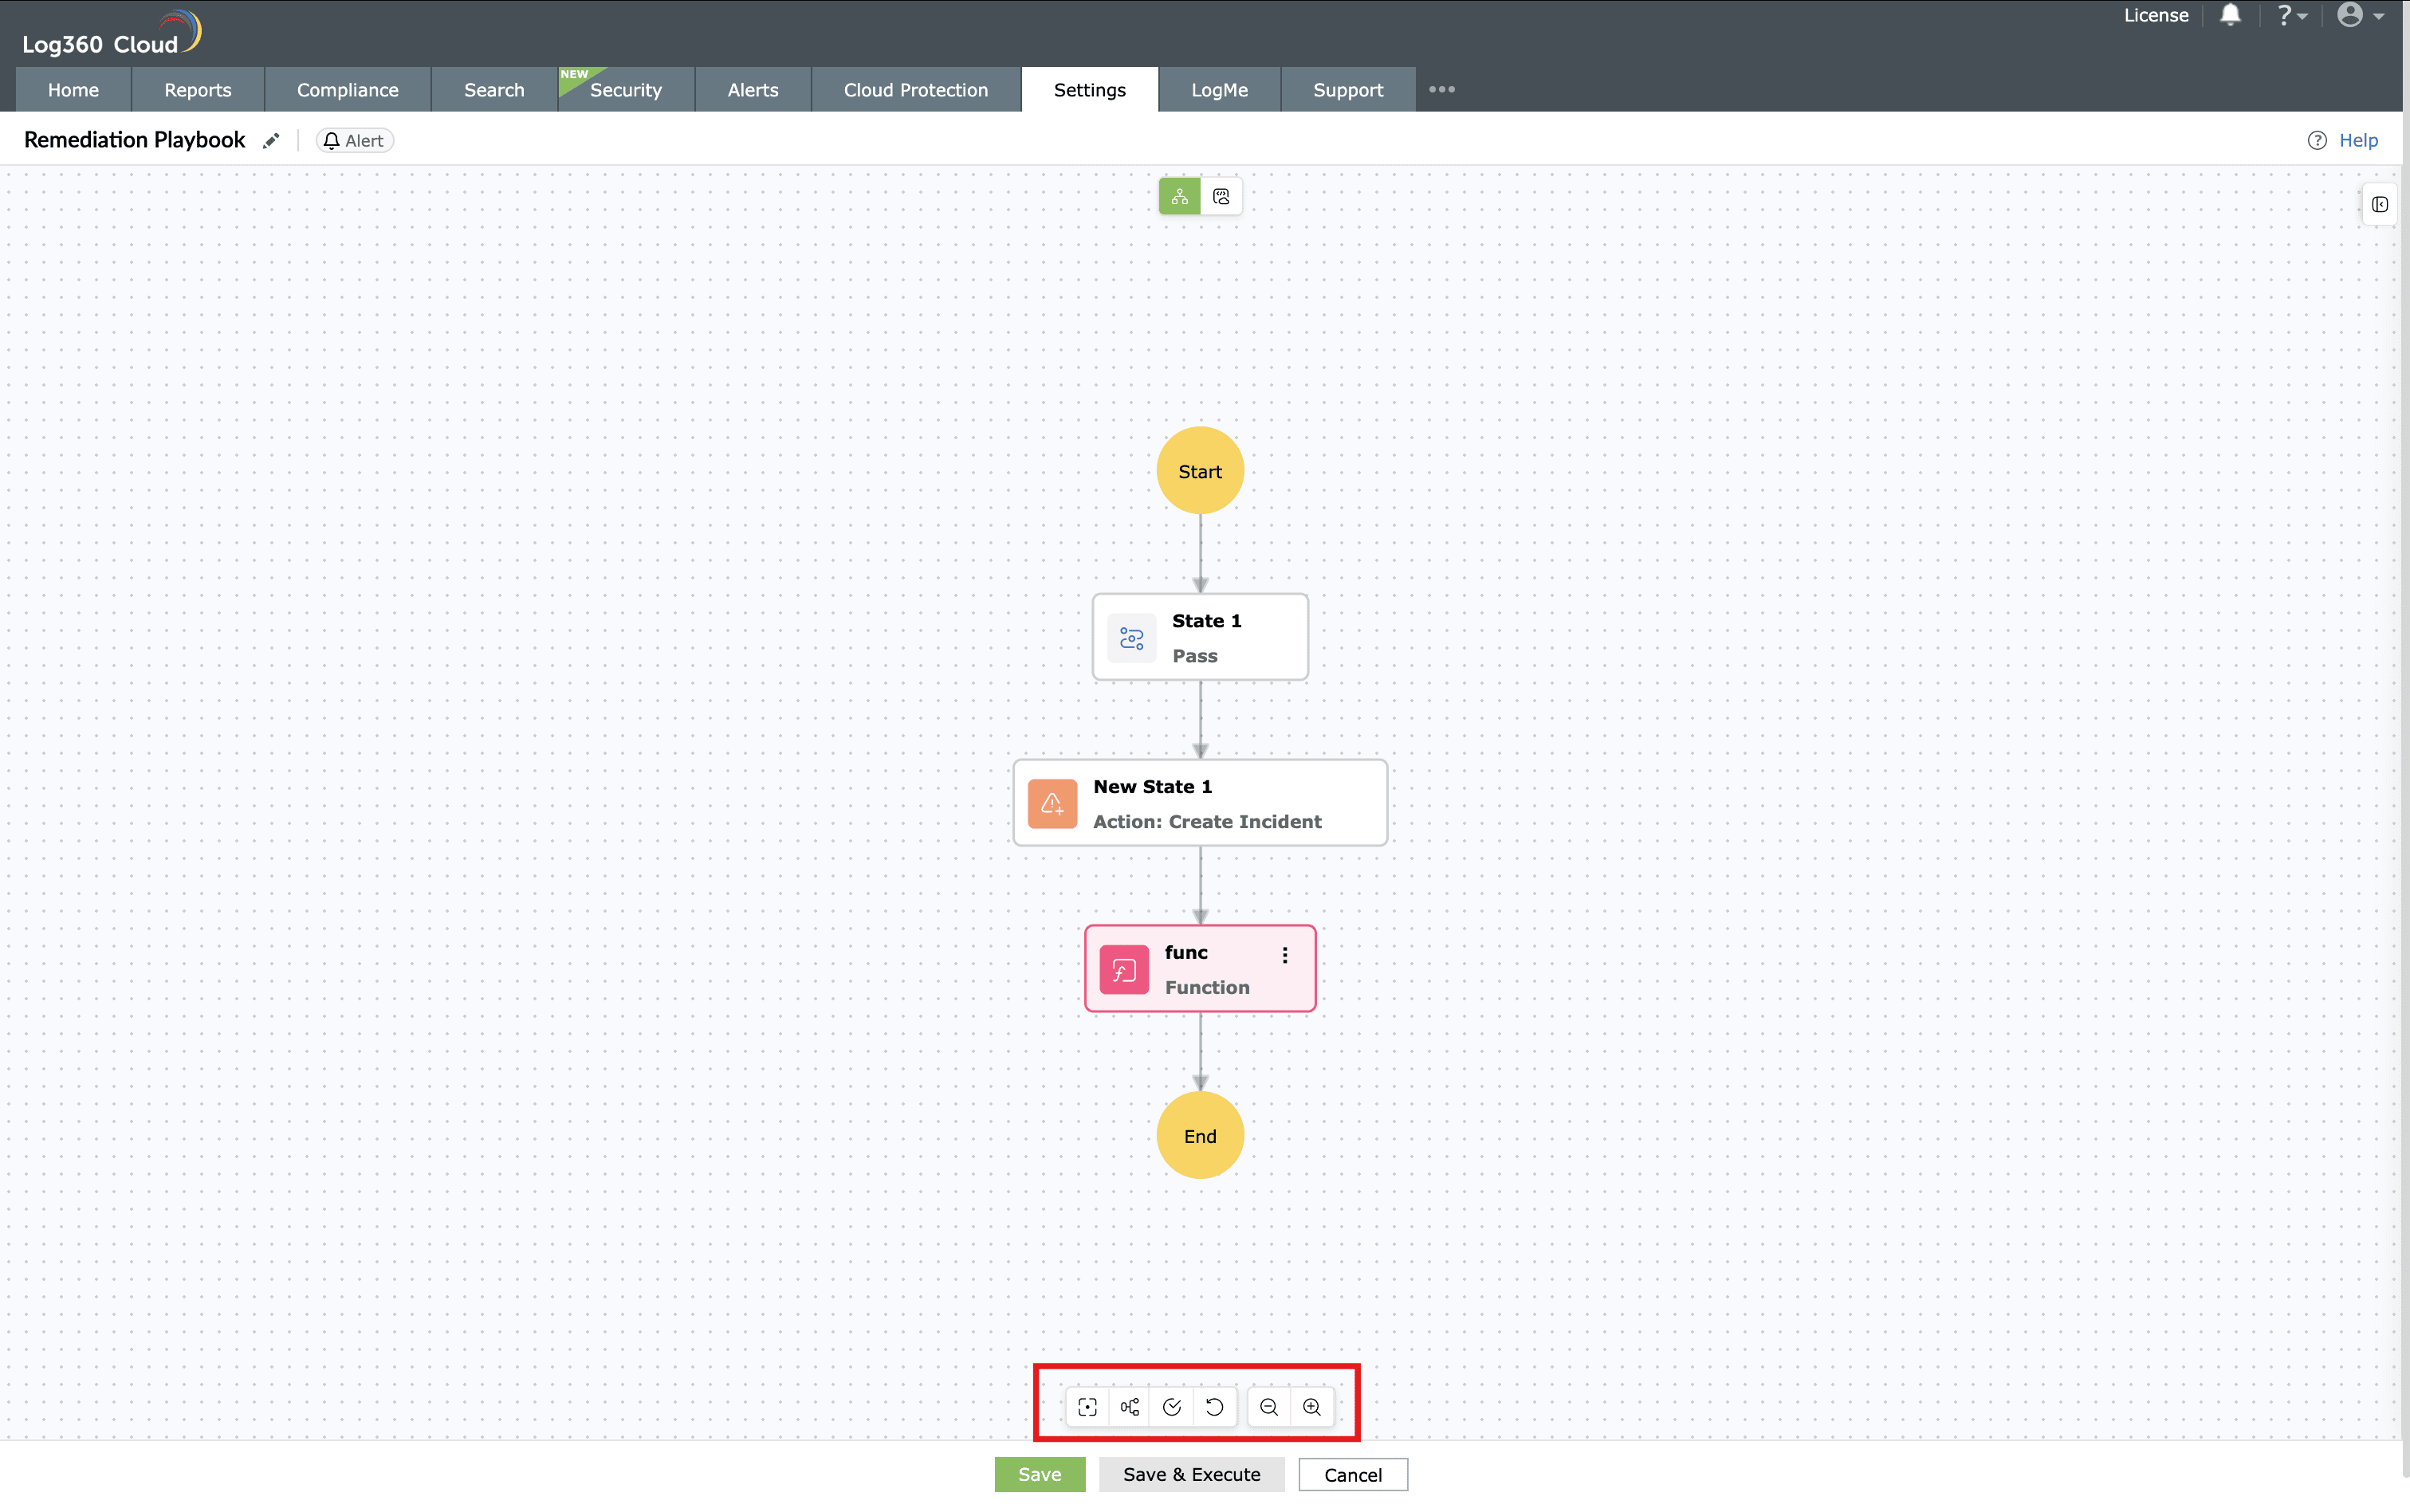
Image : Toolbar to increase efficiency in building playbook
- Use the Zoom in/out options in the toolbar to adjust visibility.
- After successful validation, click on Save.
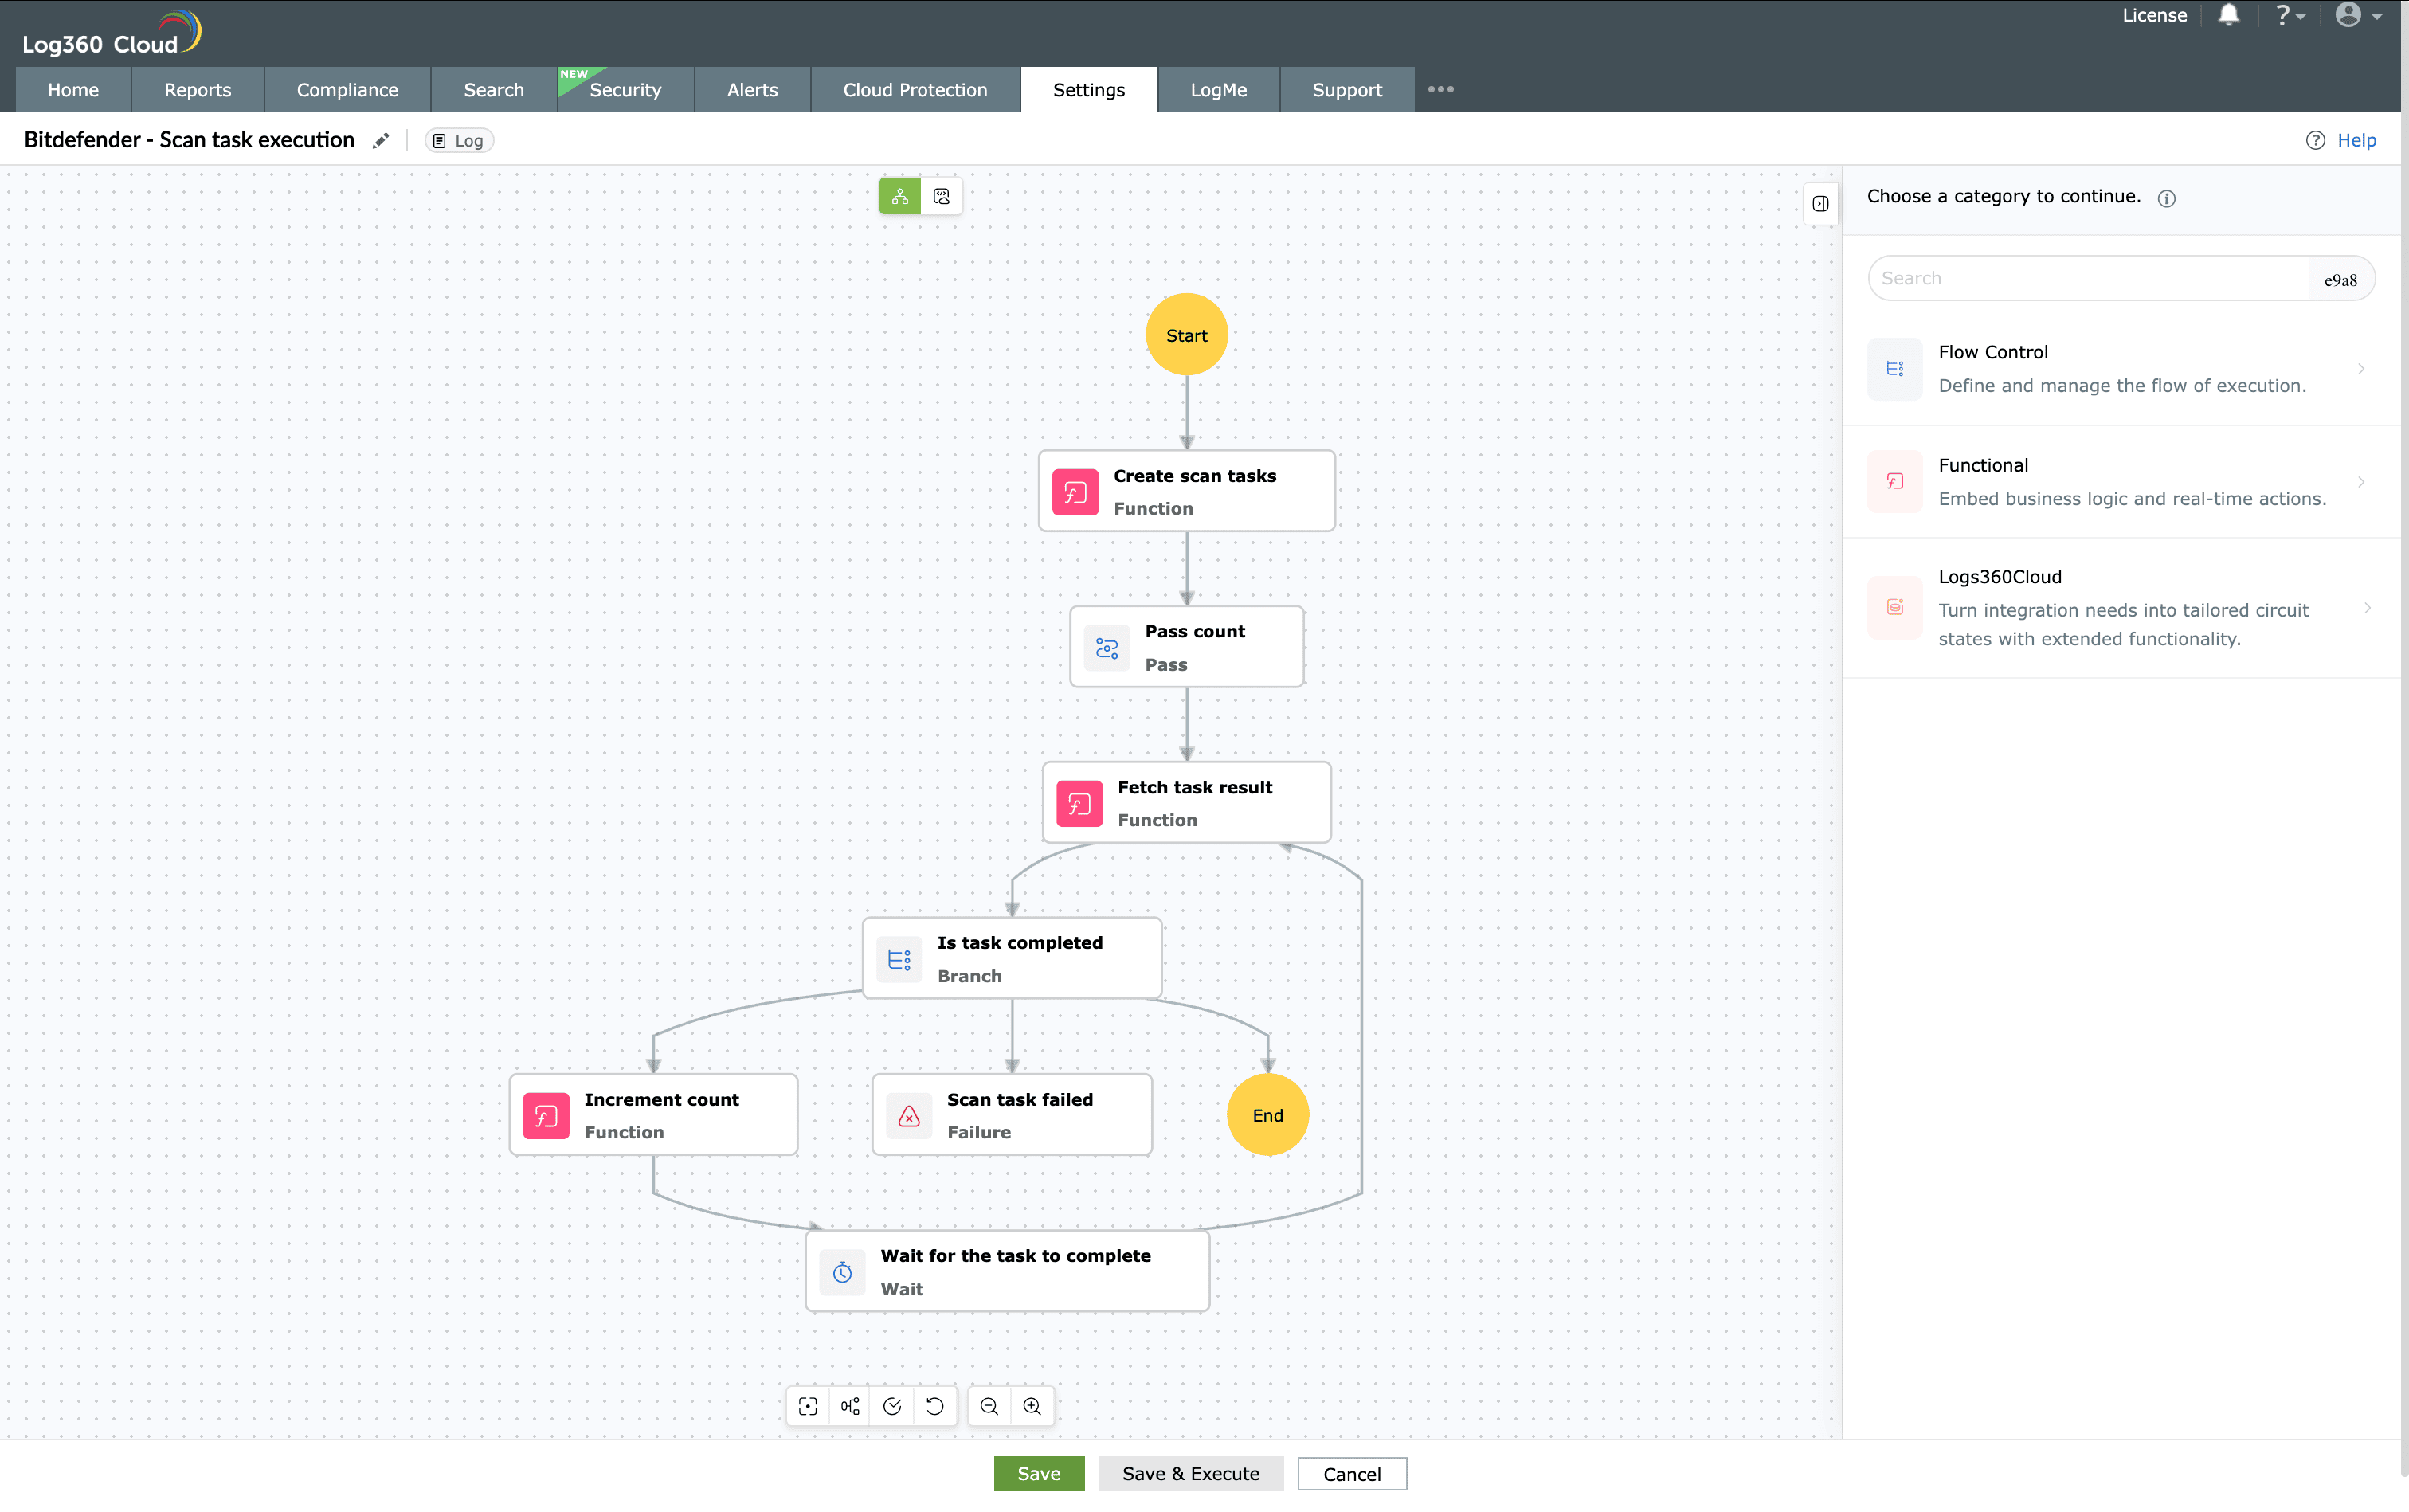
Image : Save the playbook created - The playbook will be saved under the Manage playbooks list.
- Optionally, click Save and Execute to test the playbook immediately.
- The test execution window opens, allowing you to run the playbook in real time and review it carefully.
- The input data fields vary depending on the Applies to type selected:
- For Log-based playbooks, you can add required log fields to test how the playbook responds during execution.
NOTE A maximum of only 300 fields can be configured for testing the playbook.
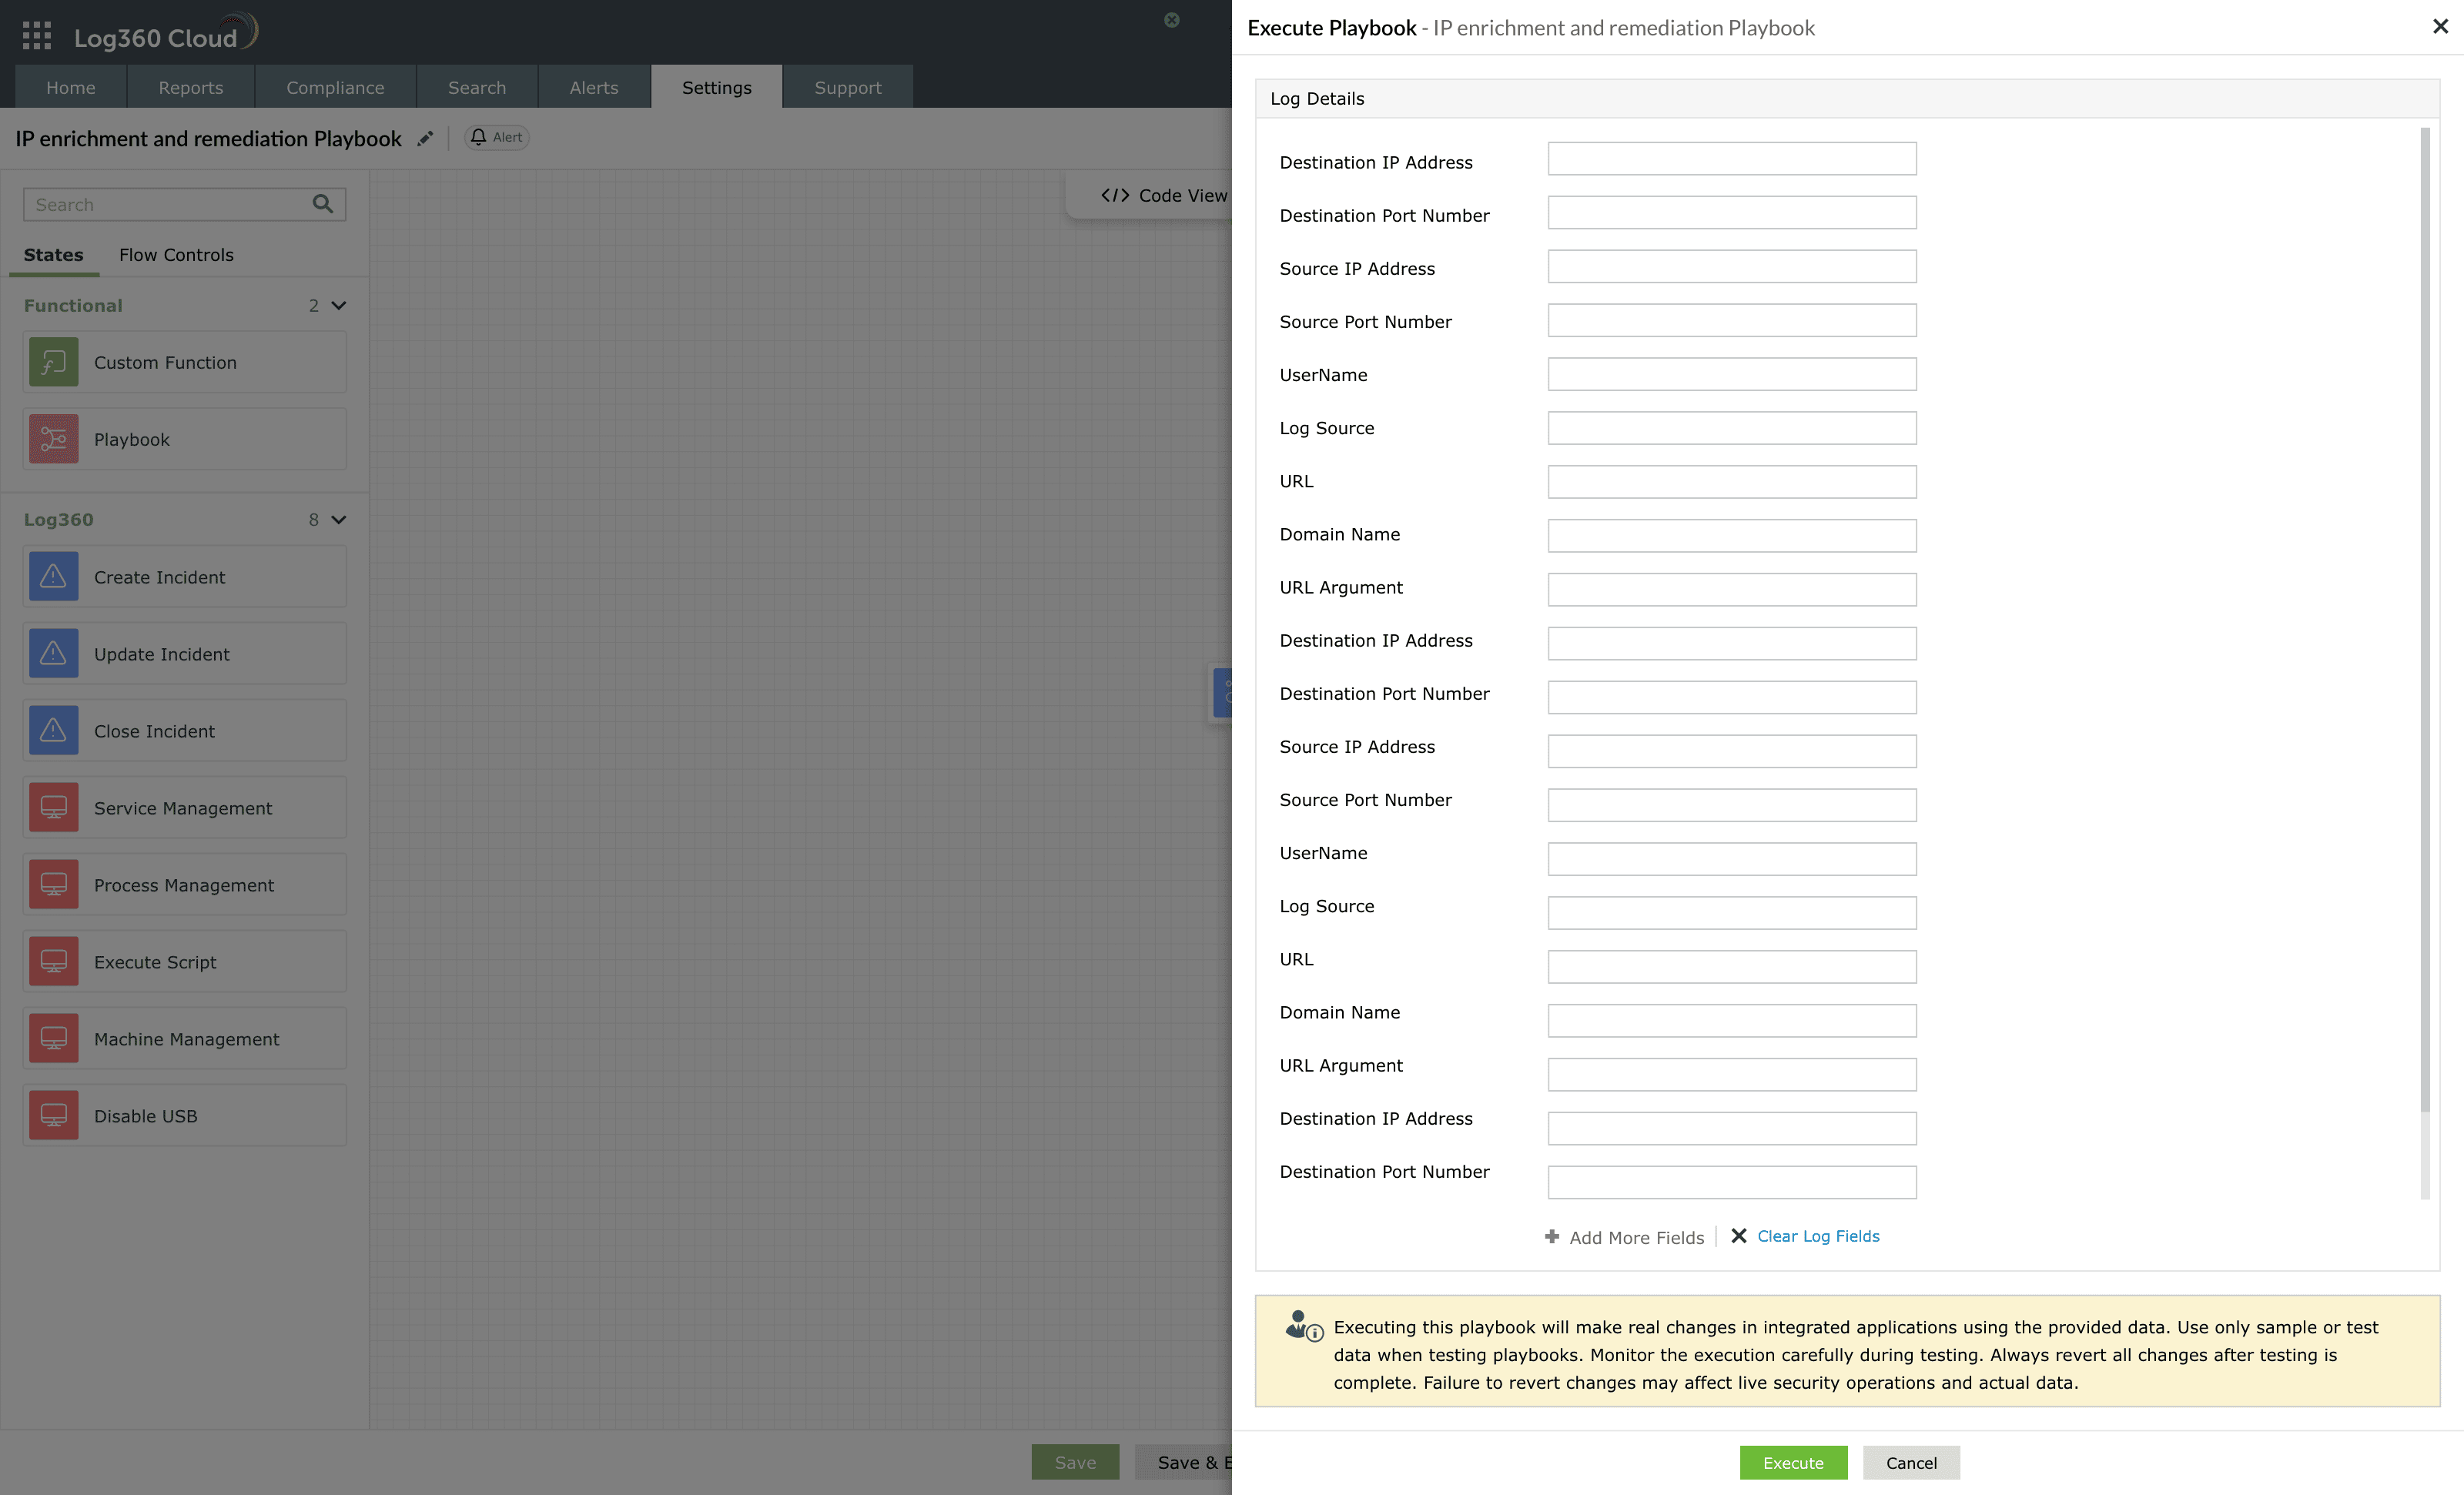
Image : Execution of log-type playbook - For Alert-based playbooks, you can select a sample alert and associated logs. When an alert profile is selected, the most recent alert generated under that profile is automatically taken as the input for testing.
- Alternatively, you can manually fill in the alert details form. In this case, you can also add extra log entries or clone an existing log entry to test how the playbook responds to alerts with thresholds enabled.
NOTE
- You can add a maximum of only 10 log details in the log entries of an alert-type playbook.
- Changing the alert type will remove all the current test data.
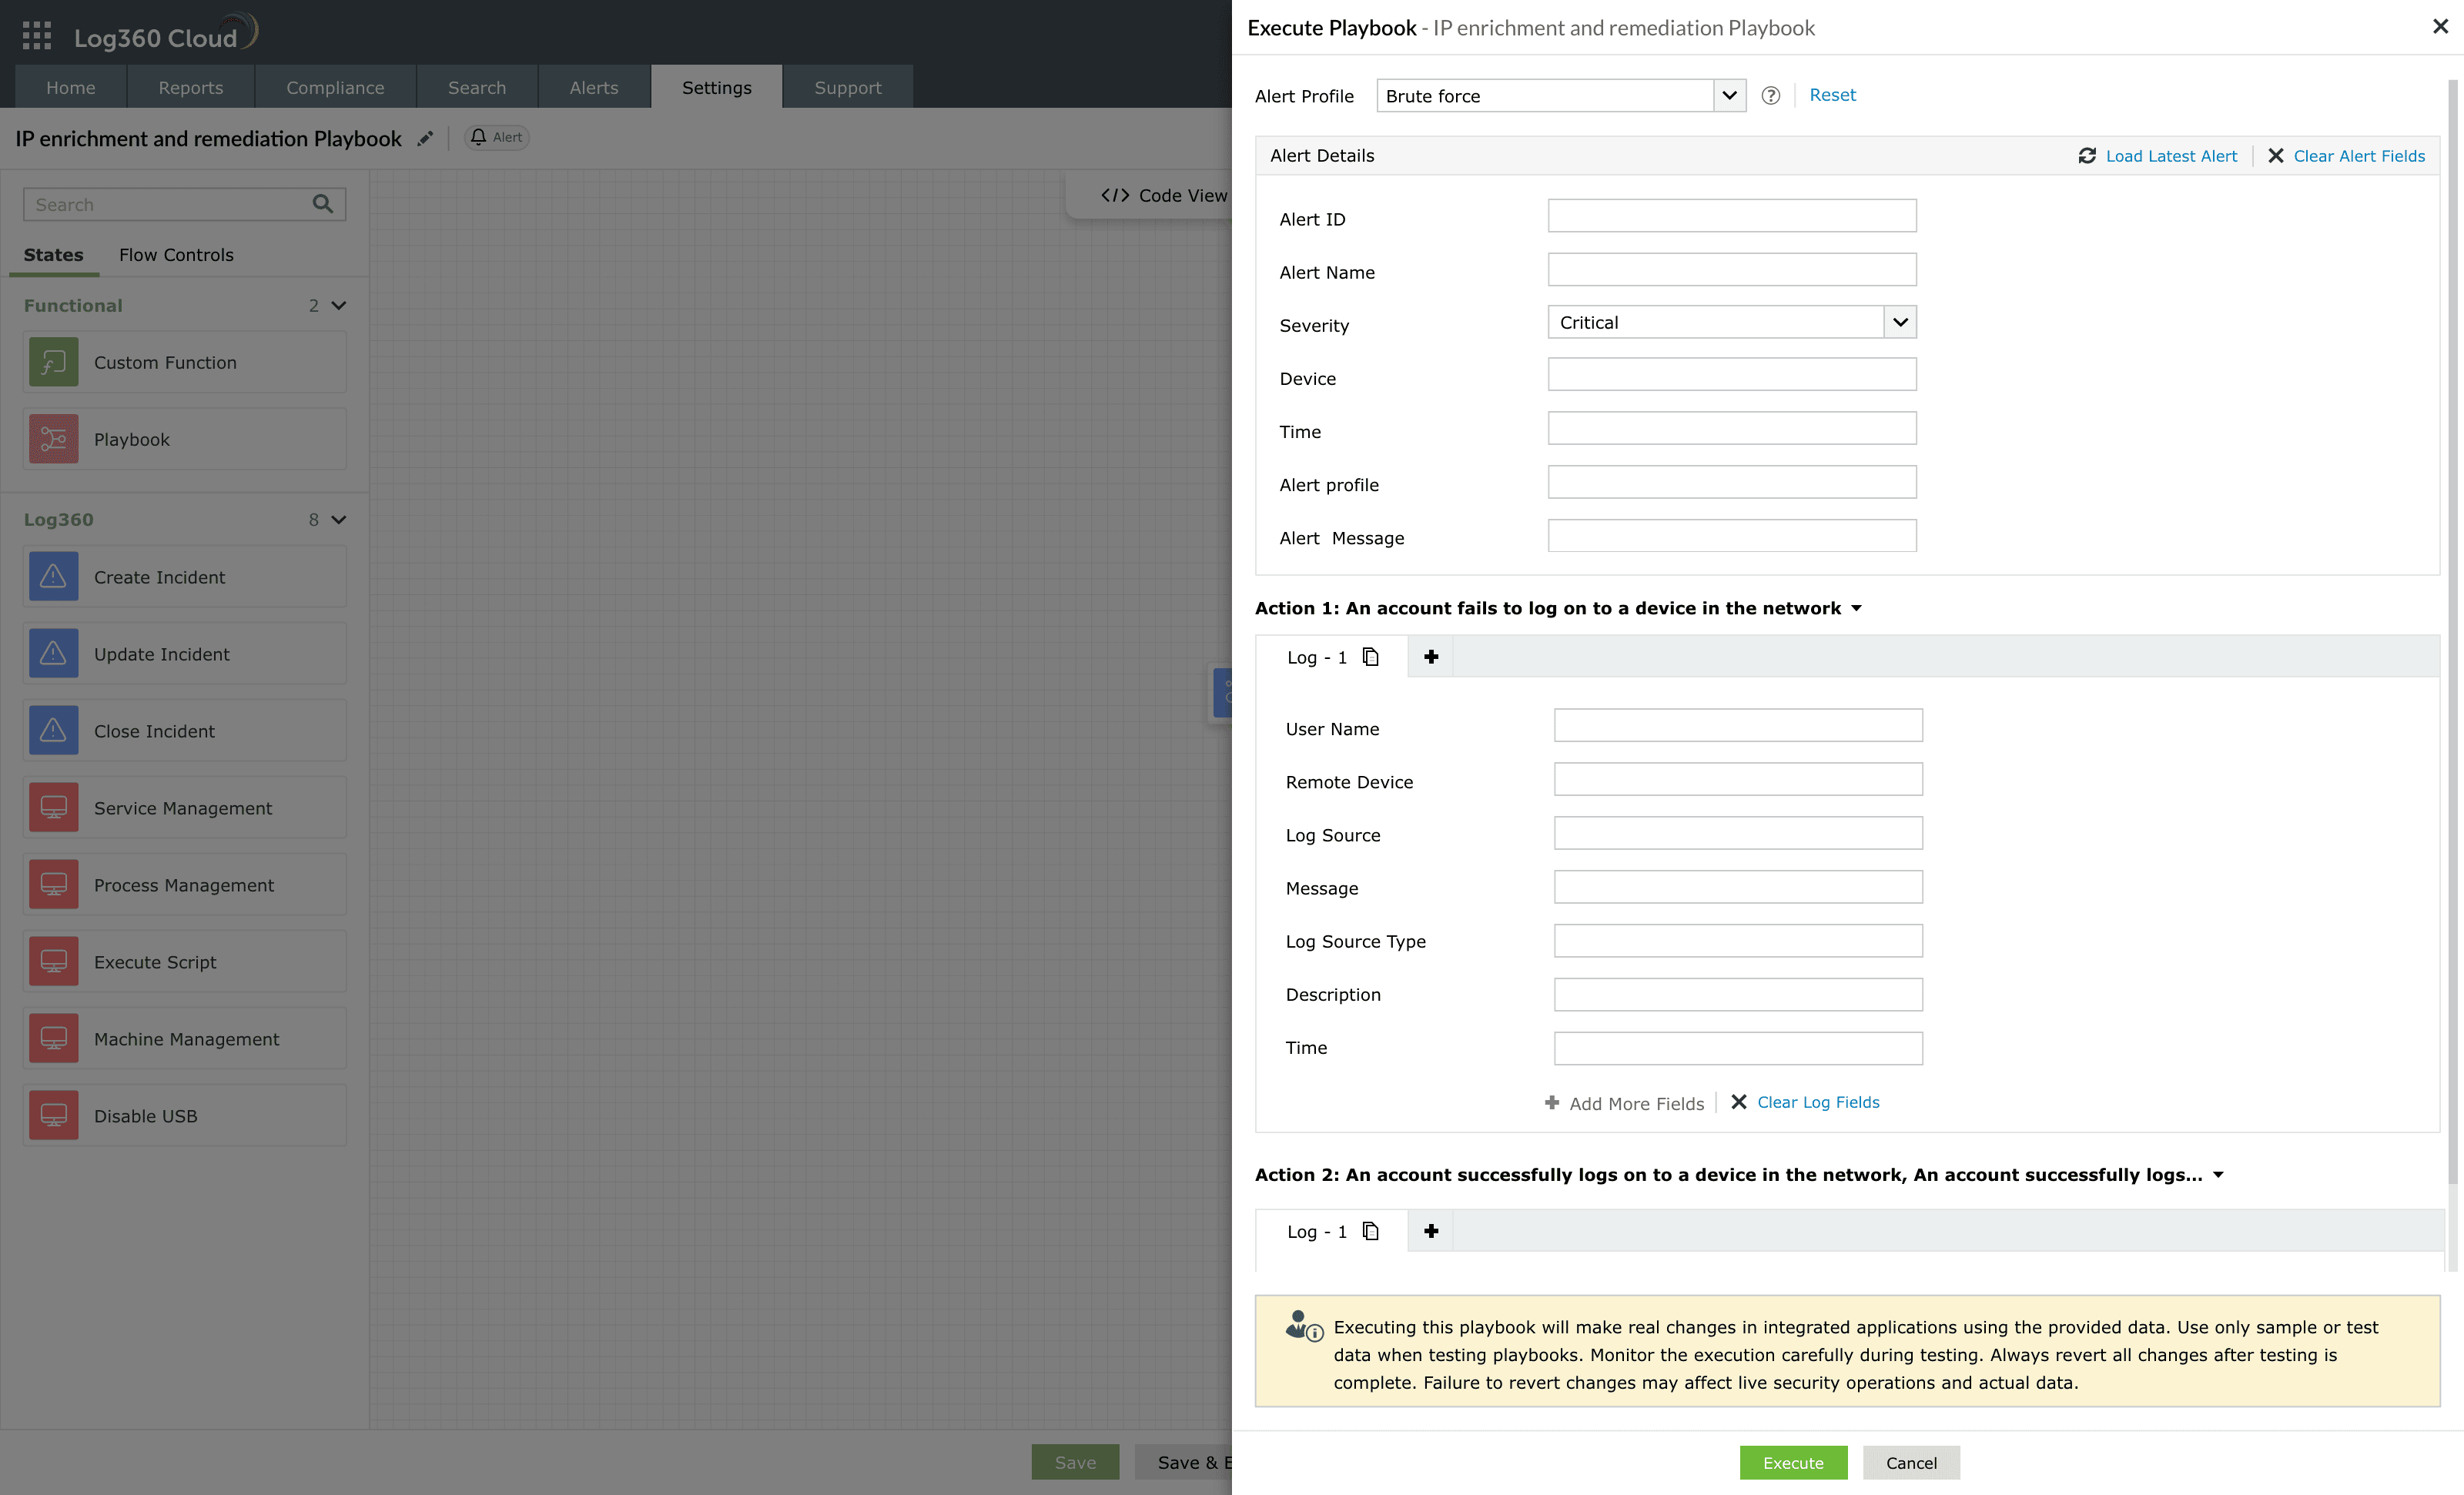
Image : Execution of alert-type playbook - For Detection-based playbooks, selecting an existing rule from the Security Rule drop-down automatically loads the most recent detection generated for that rule as the test input.
- Changing the rule will remove all the current test data.
- Similar to alert-type playbooks, you can add actions for these playbooks.
NOTE
- You can add a maximum of only 5 actions.
- You cannot add an action when a detection rule is selected. Reset to test the playbook with custom rules.
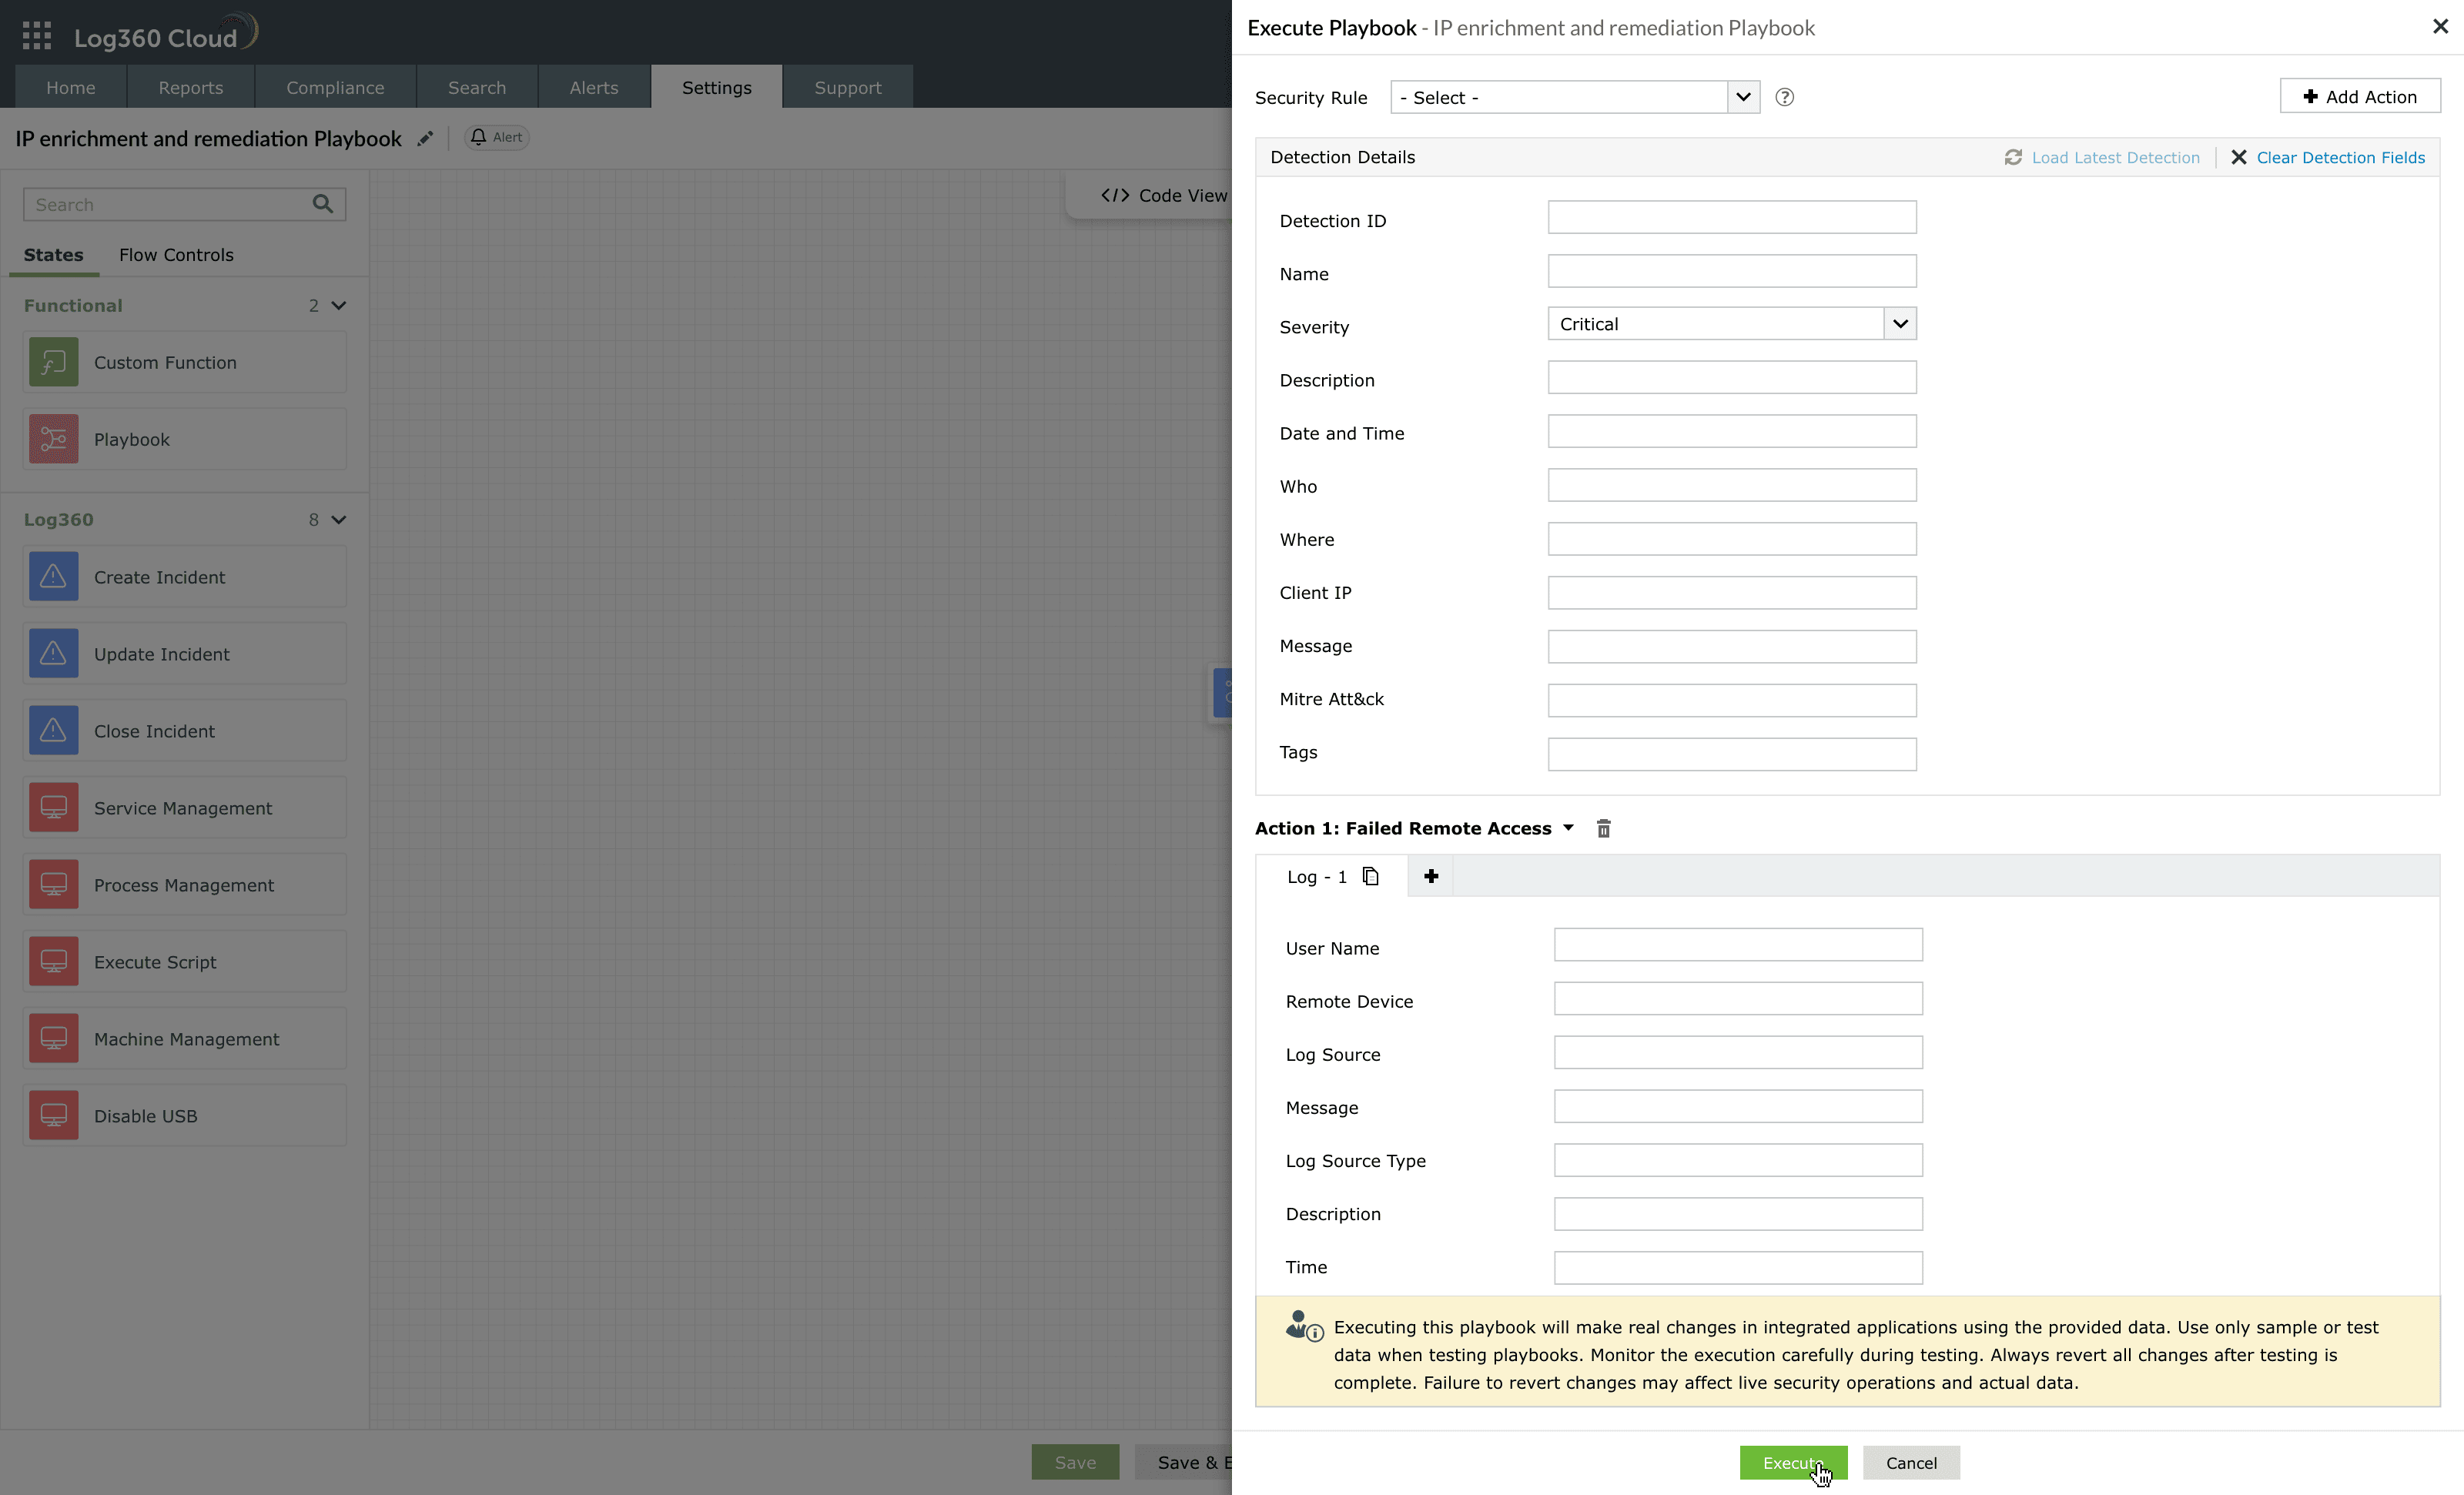
Image : Execution of detection-based playbook - For Incident-based playbooks, you can test using a sample of series of incidents containing linked alerts and evidence(s).
NOTE You can add a maximum of only 10 evidences.

- For Log-based playbooks, you can add required log fields to test how the playbook responds during execution.
- The test mode helps validate the workflow of the playbook and ensures all actions execute as expected before saving and using it.
- After testing, click on Execute to initiate the official execution of the playbook.
- The below Confirm Execution pop-up box appears. Click on Proceed.
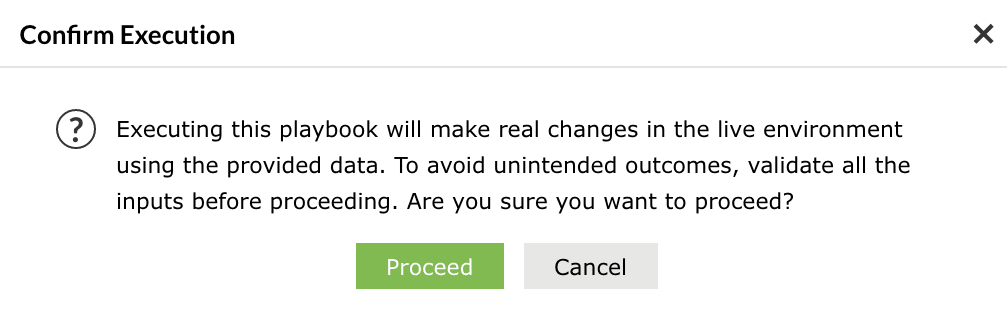
After testing and confirming the playbook's validity, you can then monitor the execution results.
Best practices
- Use meaningful names for playbooks and states for easier maintenance.
- Group frequently used actions into sub-playbooks for modularity and reuse.
- Use dynamic variables or field mappings instead of static values to maintain flexibility across executions.
- Add concise descriptions to complex blocks to help analysts understand their purpose.
- Always test playbooks in a non-production environment using sample or dummy data.
- Review Execution history periodically to track performance, identify recurrent failures, and optimize logic.
- Maintain playbooks as modular workflows instead of long linear ones for easier troubleshooting.
- Regularly verify API credentials, tokens, and endpoints used by integrated actions.
- Standardize MITRE ATT&CK/DEFEND tagging to ensure consistent categorization and reporting across automation playbooks.
Read also
This document explained how to create a new playbook in Log360 Cloud, configure its workflow using the builder interface, and validate its behavior before deployment. To continue, see the following pages: