Adding technicians
Last updated on:
In this page
Overview
Centralized Technician Management in Log360 allows you to create and manage technician accounts from a unified console. Instead of configuring technicians individually in each child component, you can integrate them in the product console and delegate access across supported components.
This section guides you through adding technicians using either product authentication or Active Directory (AD) authentication, with roles and access permissions applied centrally. You can also create technician groups by importing users from AD groups or OUs to streamline delegation.
Adding a Centralized Technician
You can add technicians in Log360 either using product authentication or Active Directory (AD) authentication. Once added, roles and access permissions can be delegated across supported components from the same interface.
Using product authentication
- In your account, navigate to the Settings tab.
- Under Admin Settings, select Technicians & Roles.

Figure 1: Navigating to Technicians and Roles - Click the + Add Technician at the top-right corner.
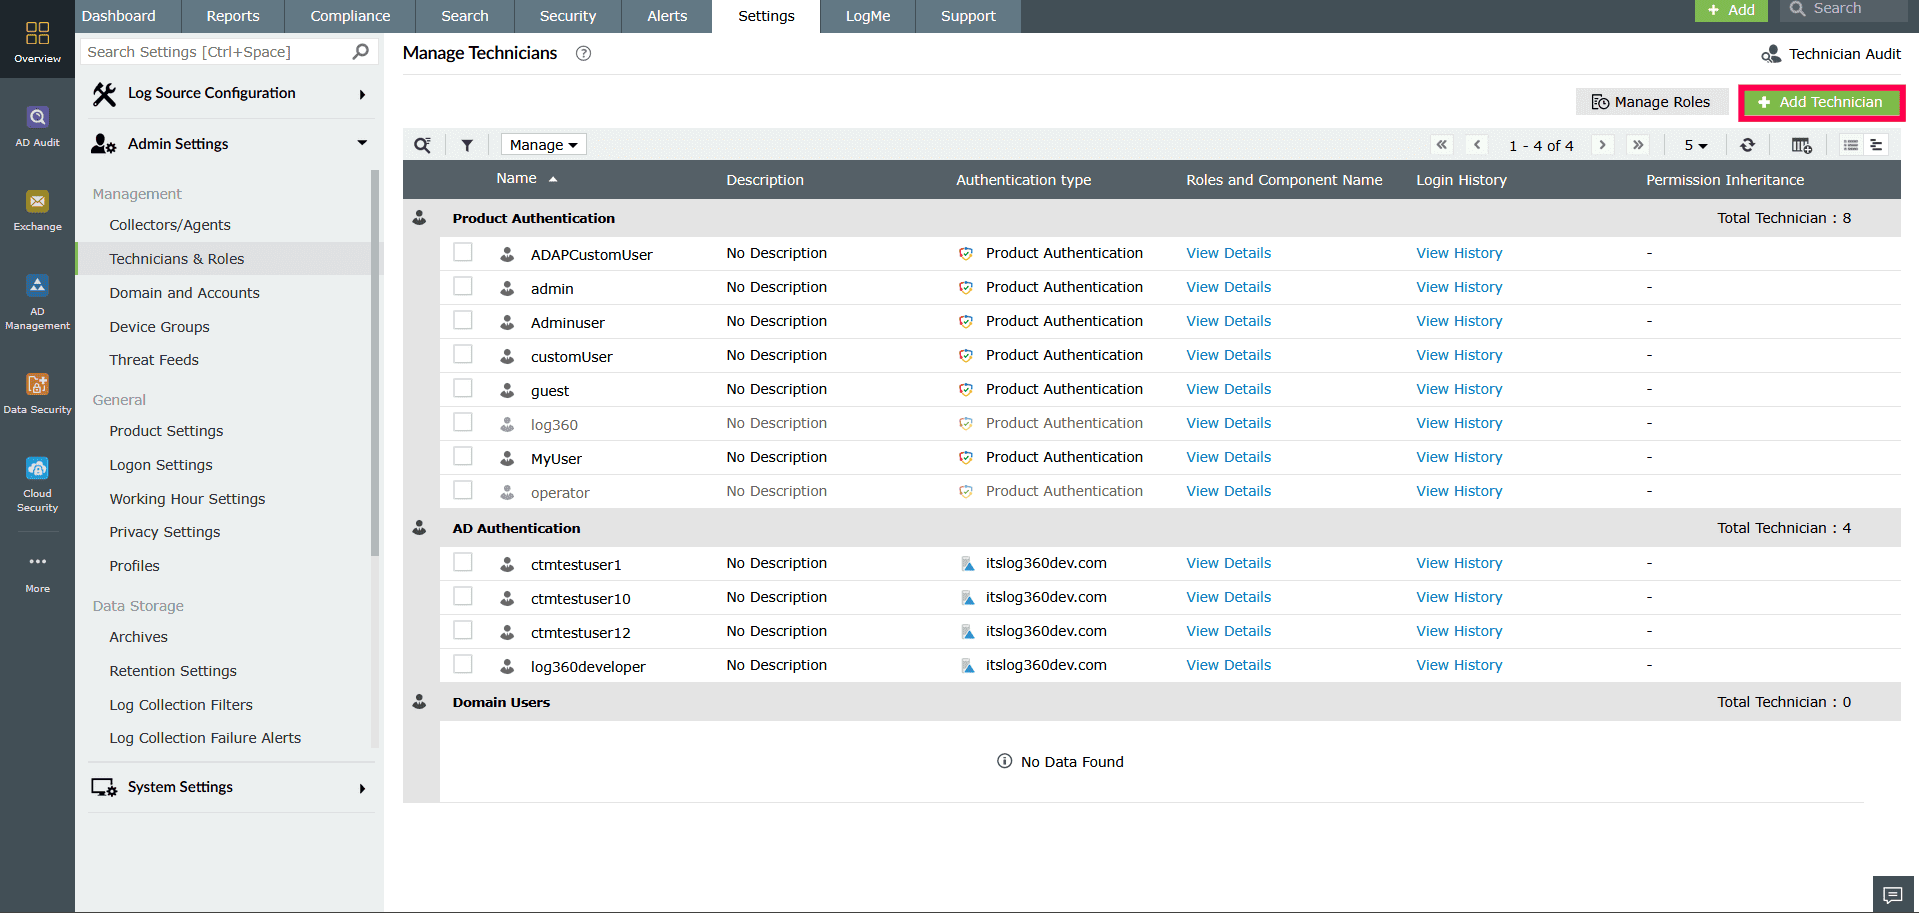
Figure 2: Adding a centralized technician - In the Authentication Type dropdown, select Product Authentication.
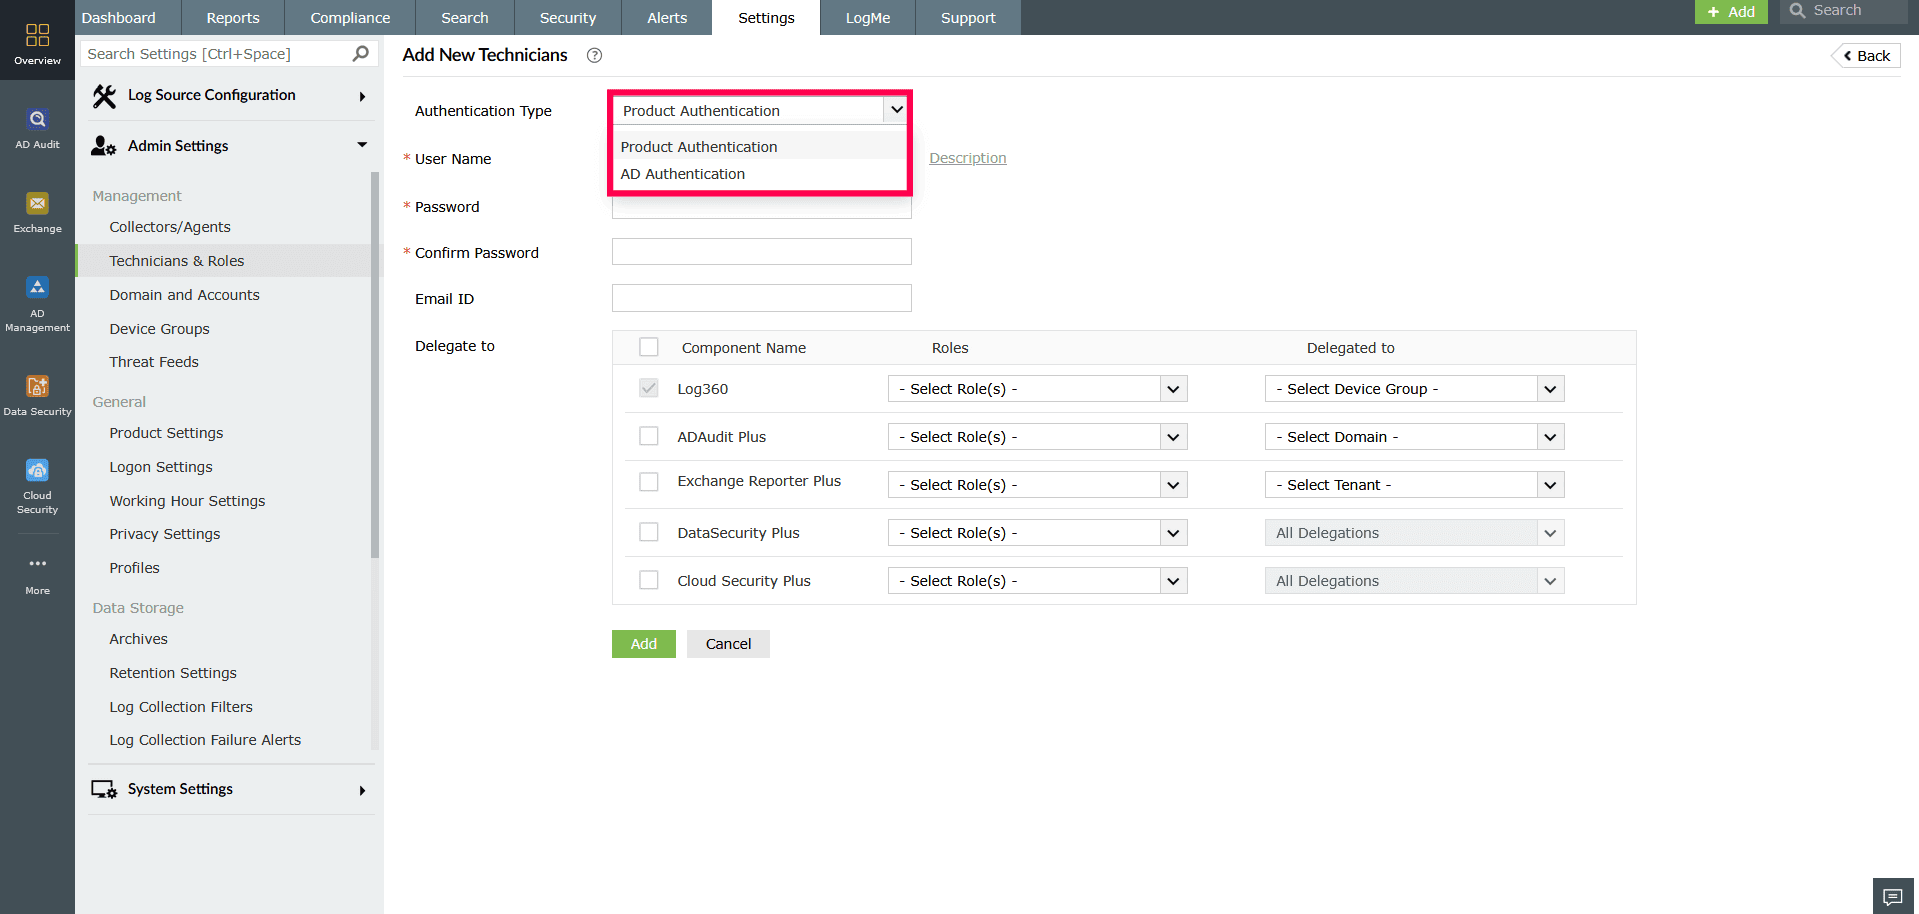
Figure 3: Selecting Authentication Type - In the User Name field, enter a name for the technician. You can optionally add a description using the Description button.
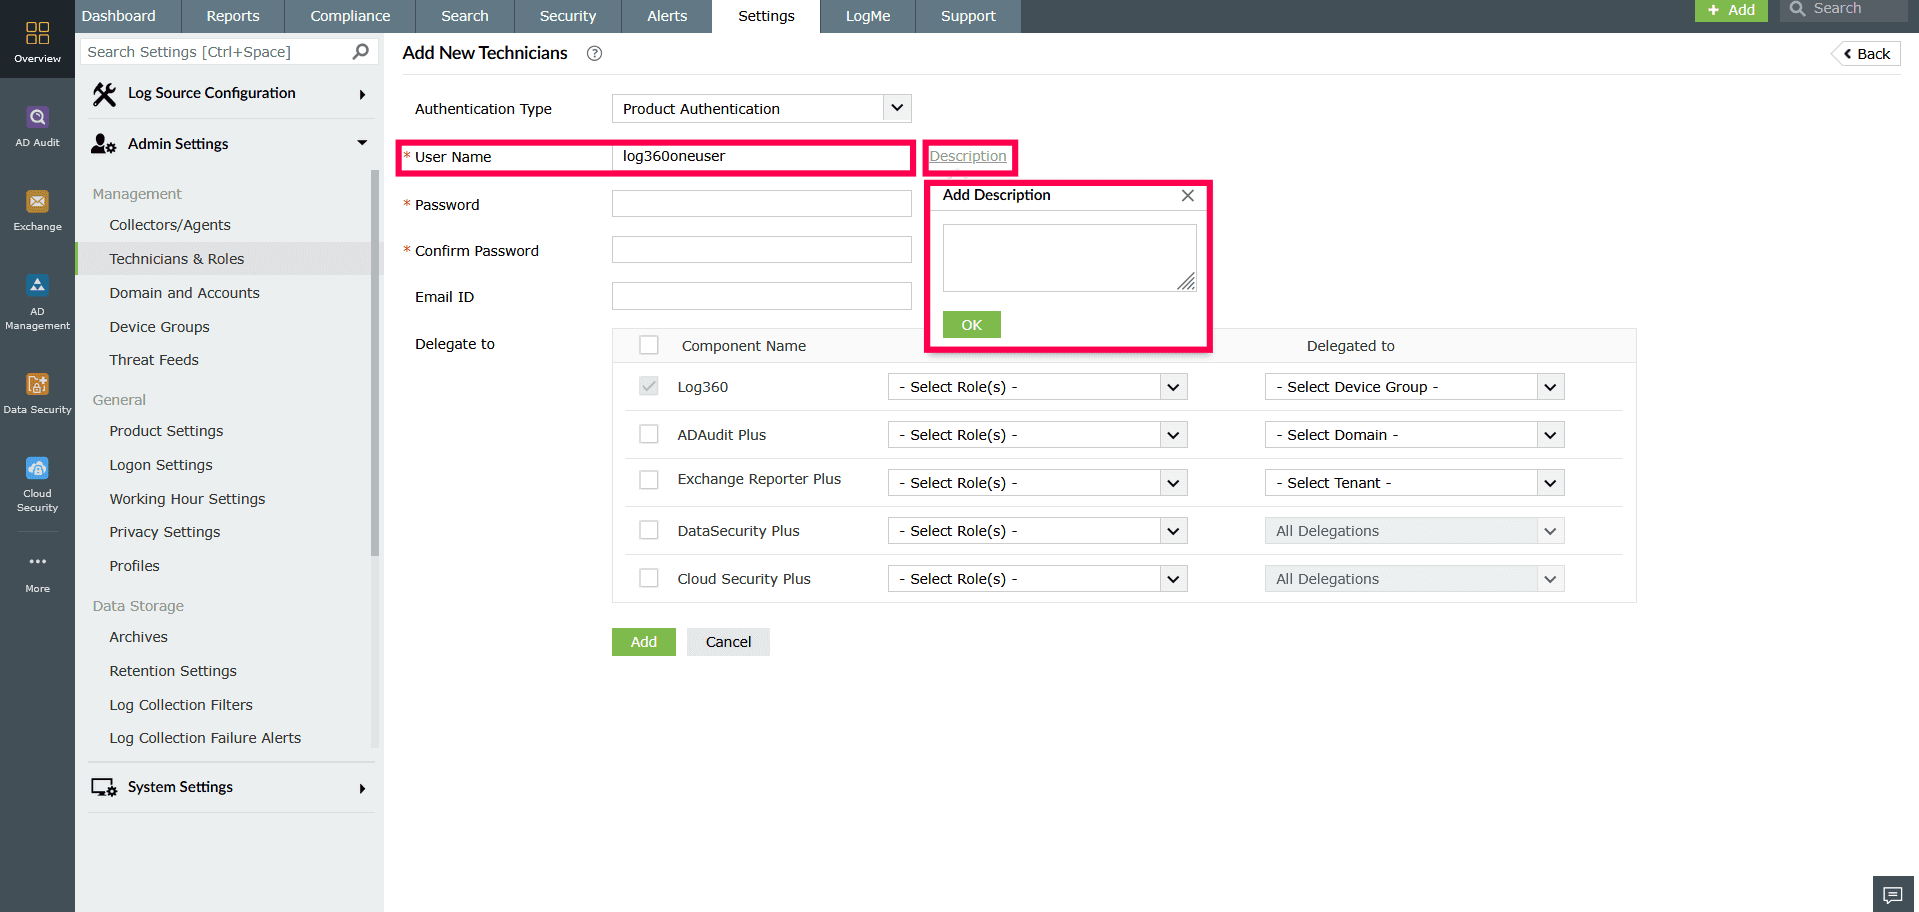
Figure 4: Configuring Technician settings - Enter and confirm a new password in the respective fields.
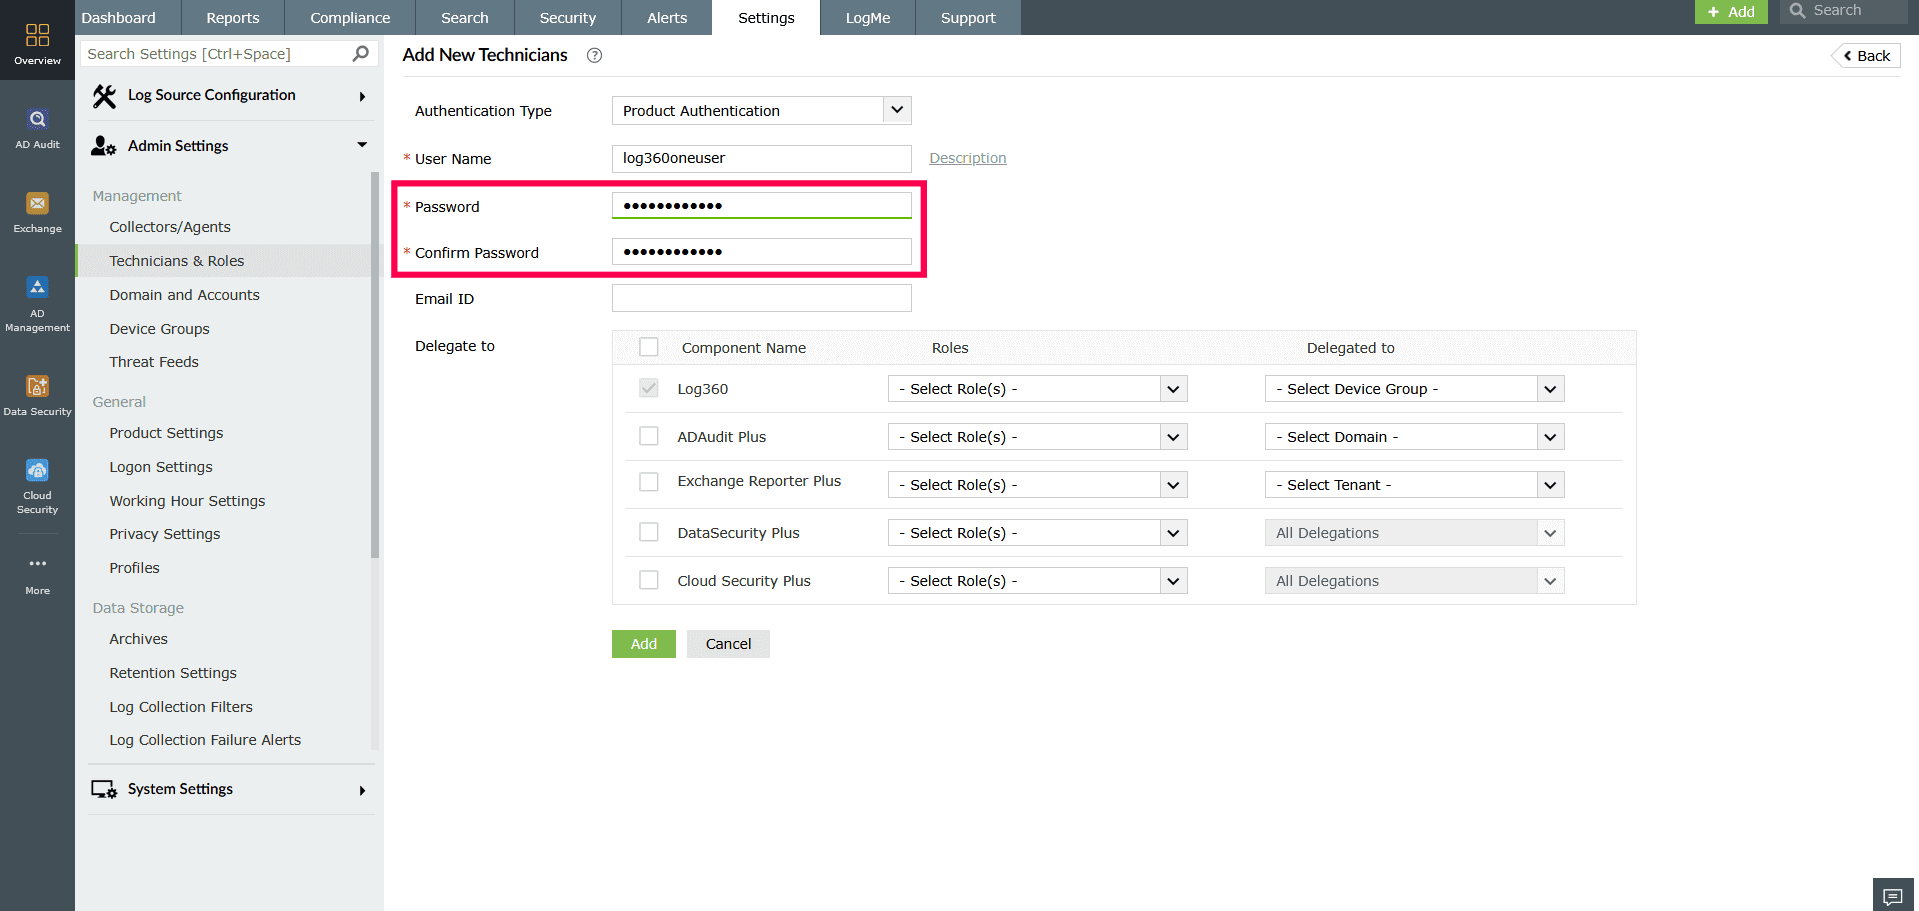
Figure 5: Configuring Technician settings - Provide a valid email address of the technician in the Email ID field. This is an optional field.
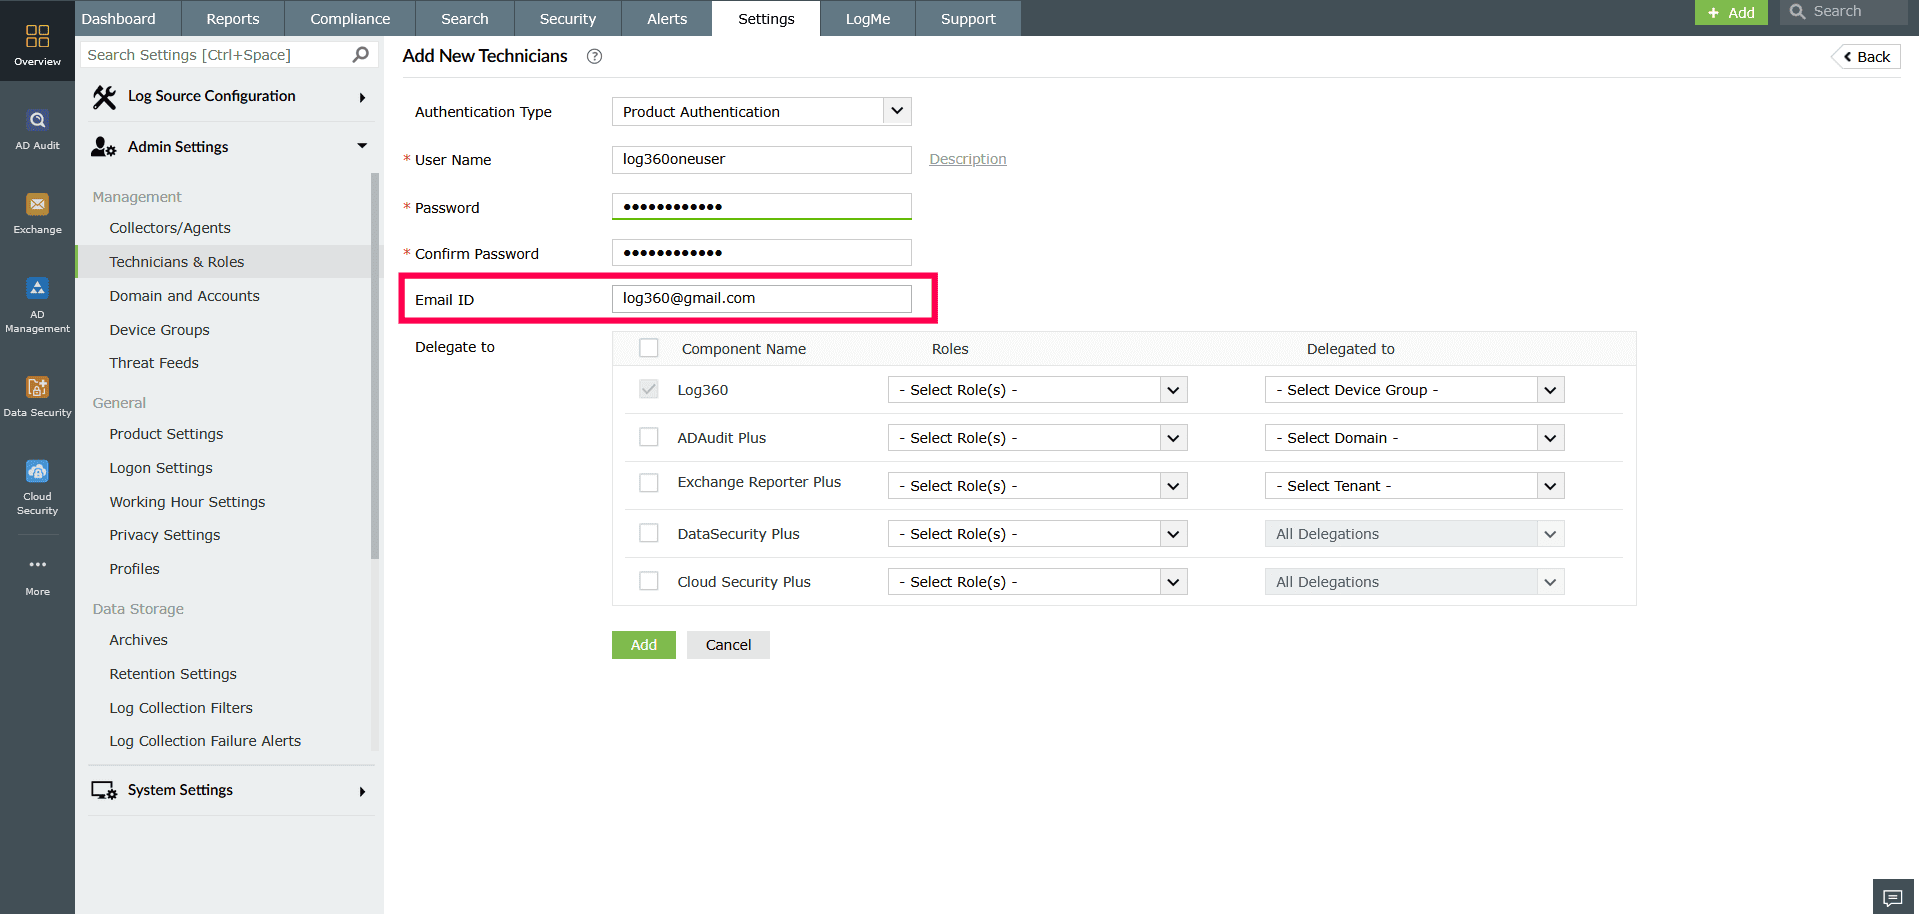
Figure 6: Configuring Technician settings - To assign roles for Log360:
- Use the Roles dropdown to assign the technician's role.
NOTE Refer to this section to create and manage roles
- Use the Device groups dropdown to specify the groups the technician should have access to. Once done, click Add.
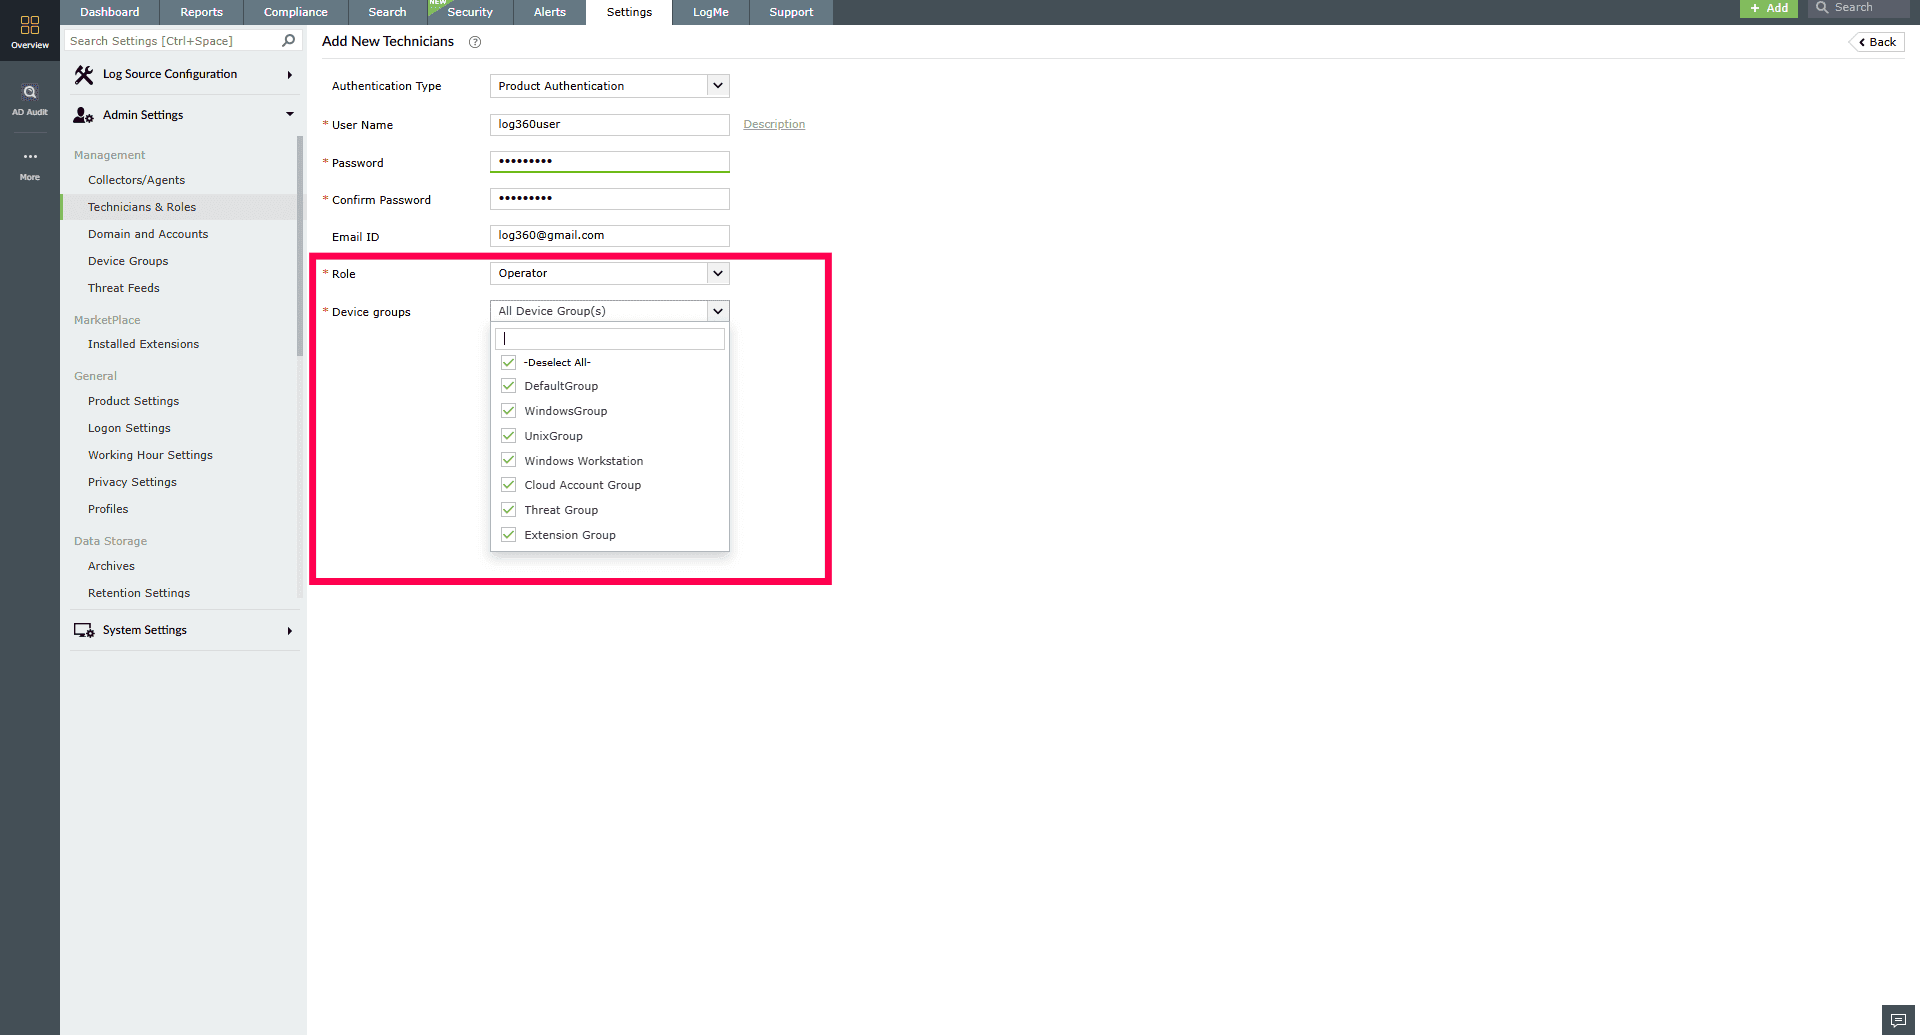
Figure 7: Selecting device groups
- Use the Roles dropdown to assign the technician's role.
- If components are integrated, you can delegate access to specific roles and entities in each component:
- In the Delegate to section, select the checkbox next to the components you want the technician to access.
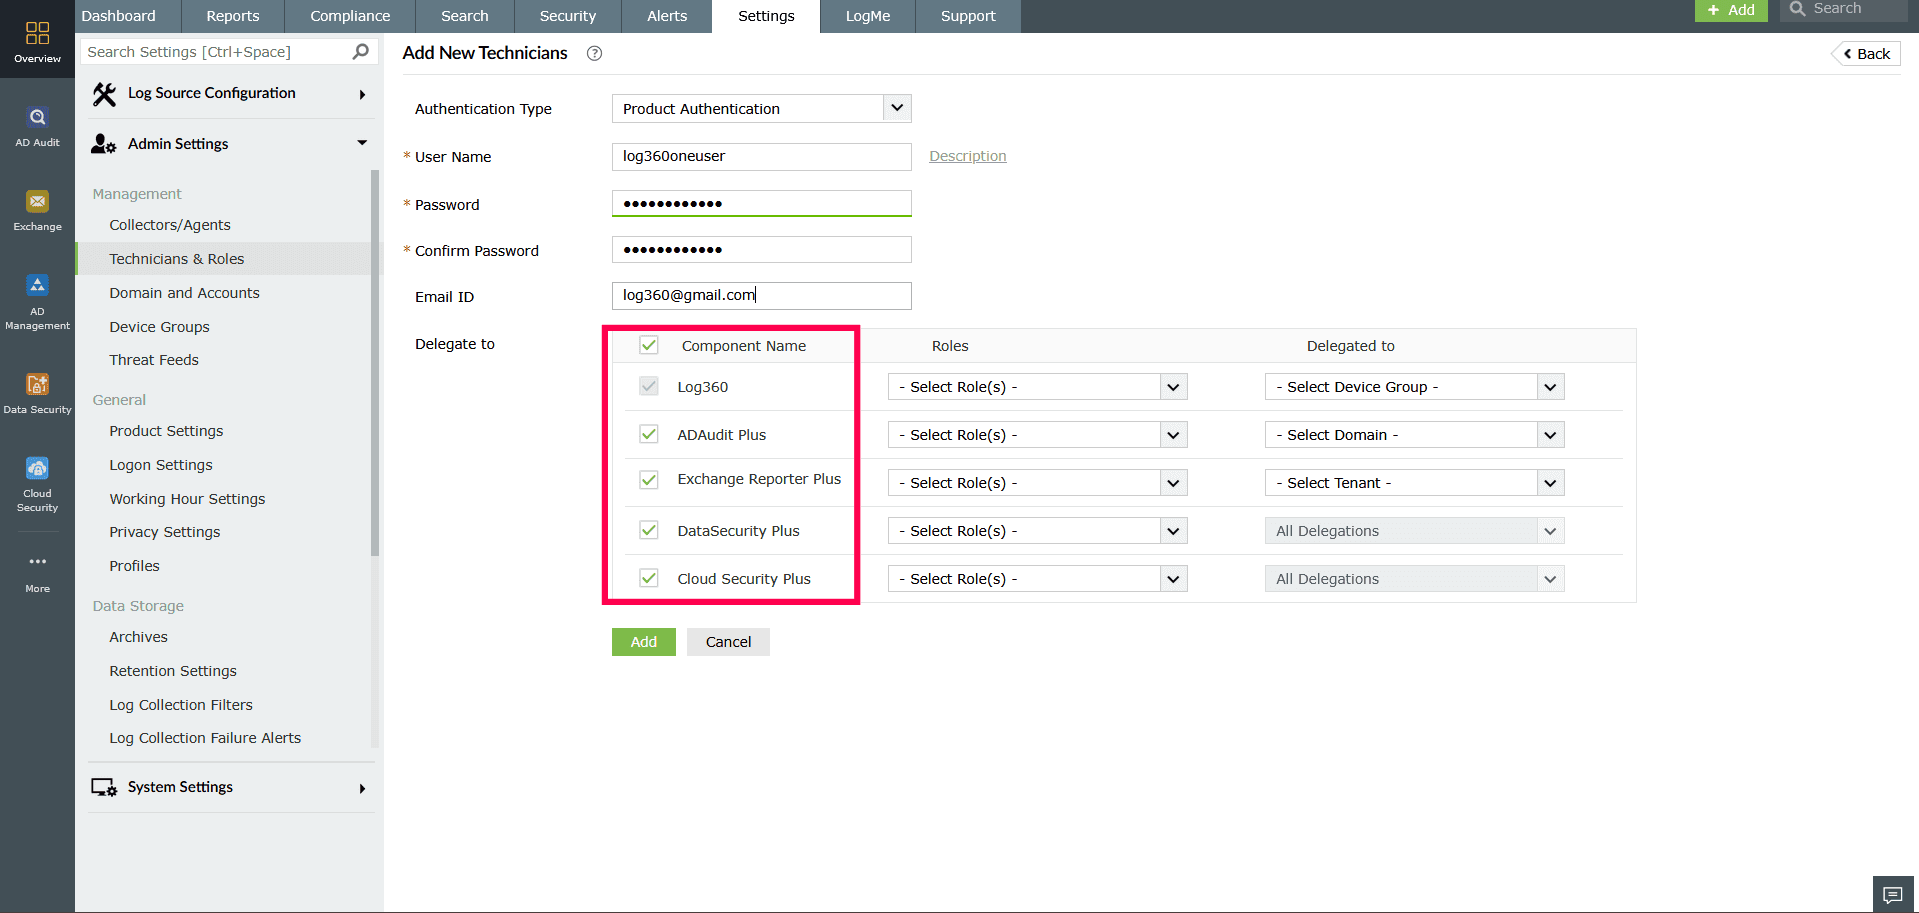
Figure 8: Selecting components - For each selected component:
- Assign the Role by selecting the role from the Roles drop-down
- Specify the delegated entity using the appropriate dropdowns provided for each component.

Figure 9: Assigning roles and delegations for integrated components
NOTE To integrate components with the product, refer to this help document.
- In the Delegate to section, select the checkbox next to the components you want the technician to access.
- Once done, click Add to complete the technician setup.
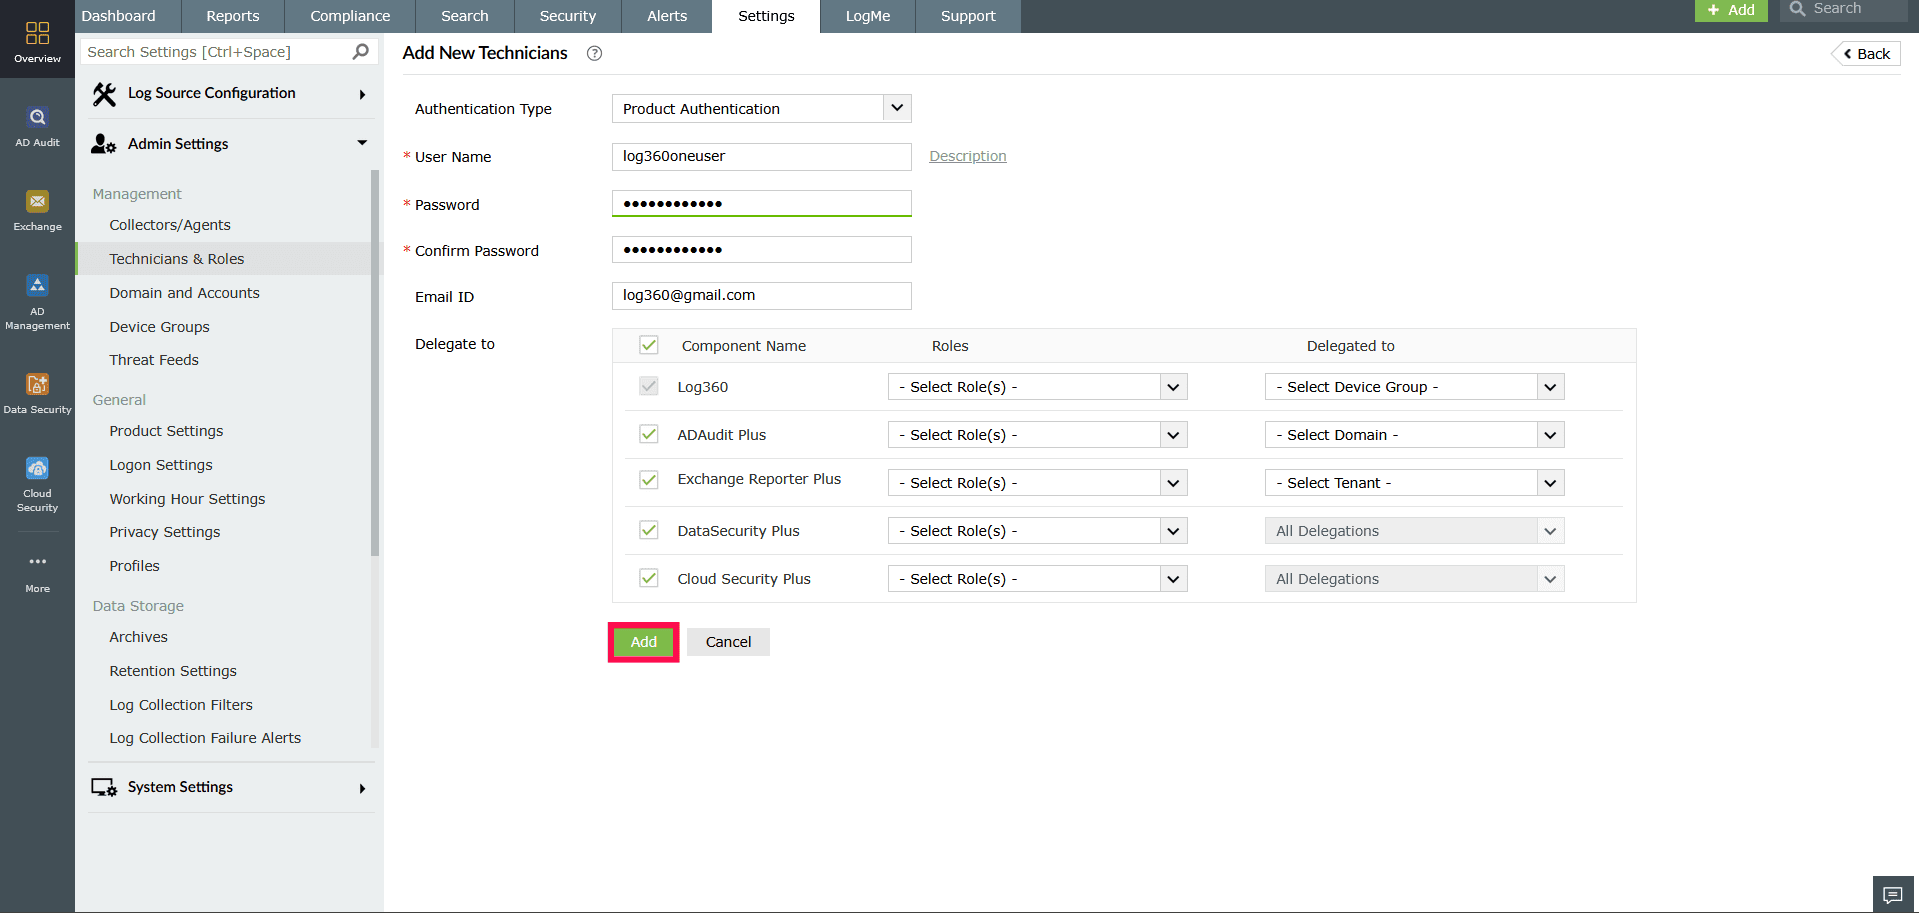
Figure 10: Adding a new technician
Using Active Directory (AD) authentication
- In the Add New Technicians page, from the Authentication Type dropdown, select AD Authentication.
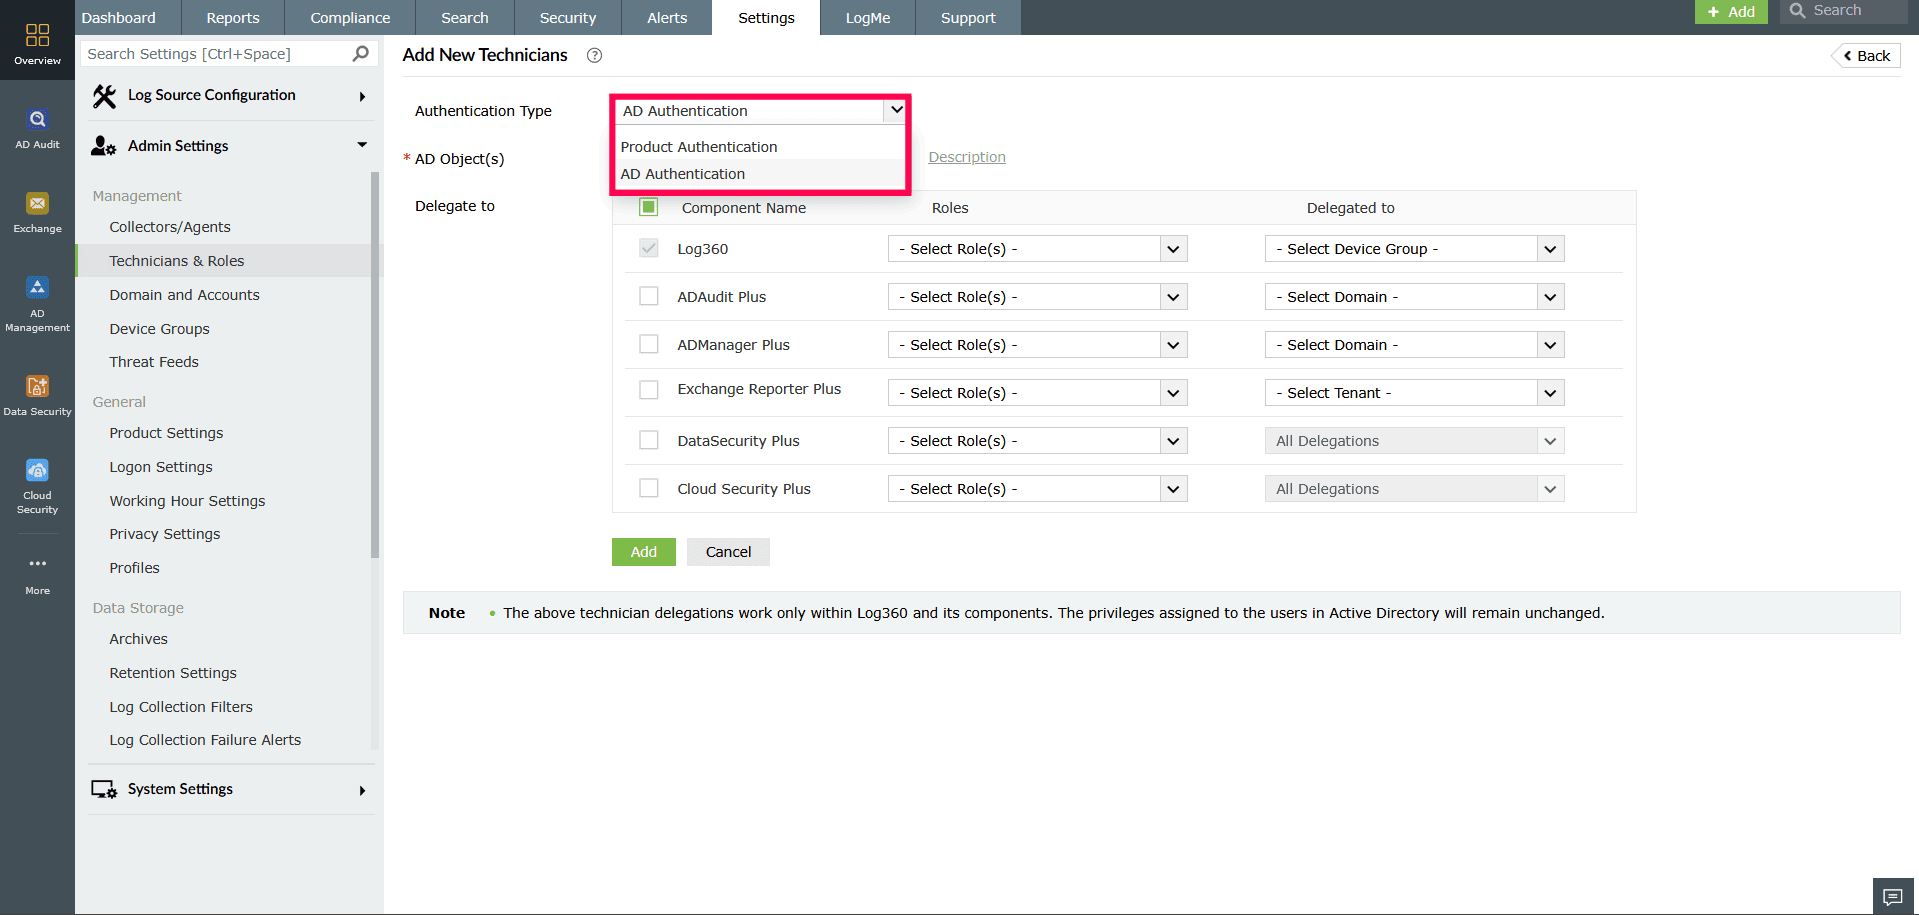
Figure 11: Selecting Authentication Type - In the AD Object(s) field, select the required user(s) from Active Directory. Use the
 icon to add users after selection. You can optionally add a description using the Description button.

Figure 12: Configuring Technician settings - In the Select AD Object(s) window, use the Select Domain drop-down to choose the AD domain from which you want to assign users as technicians.
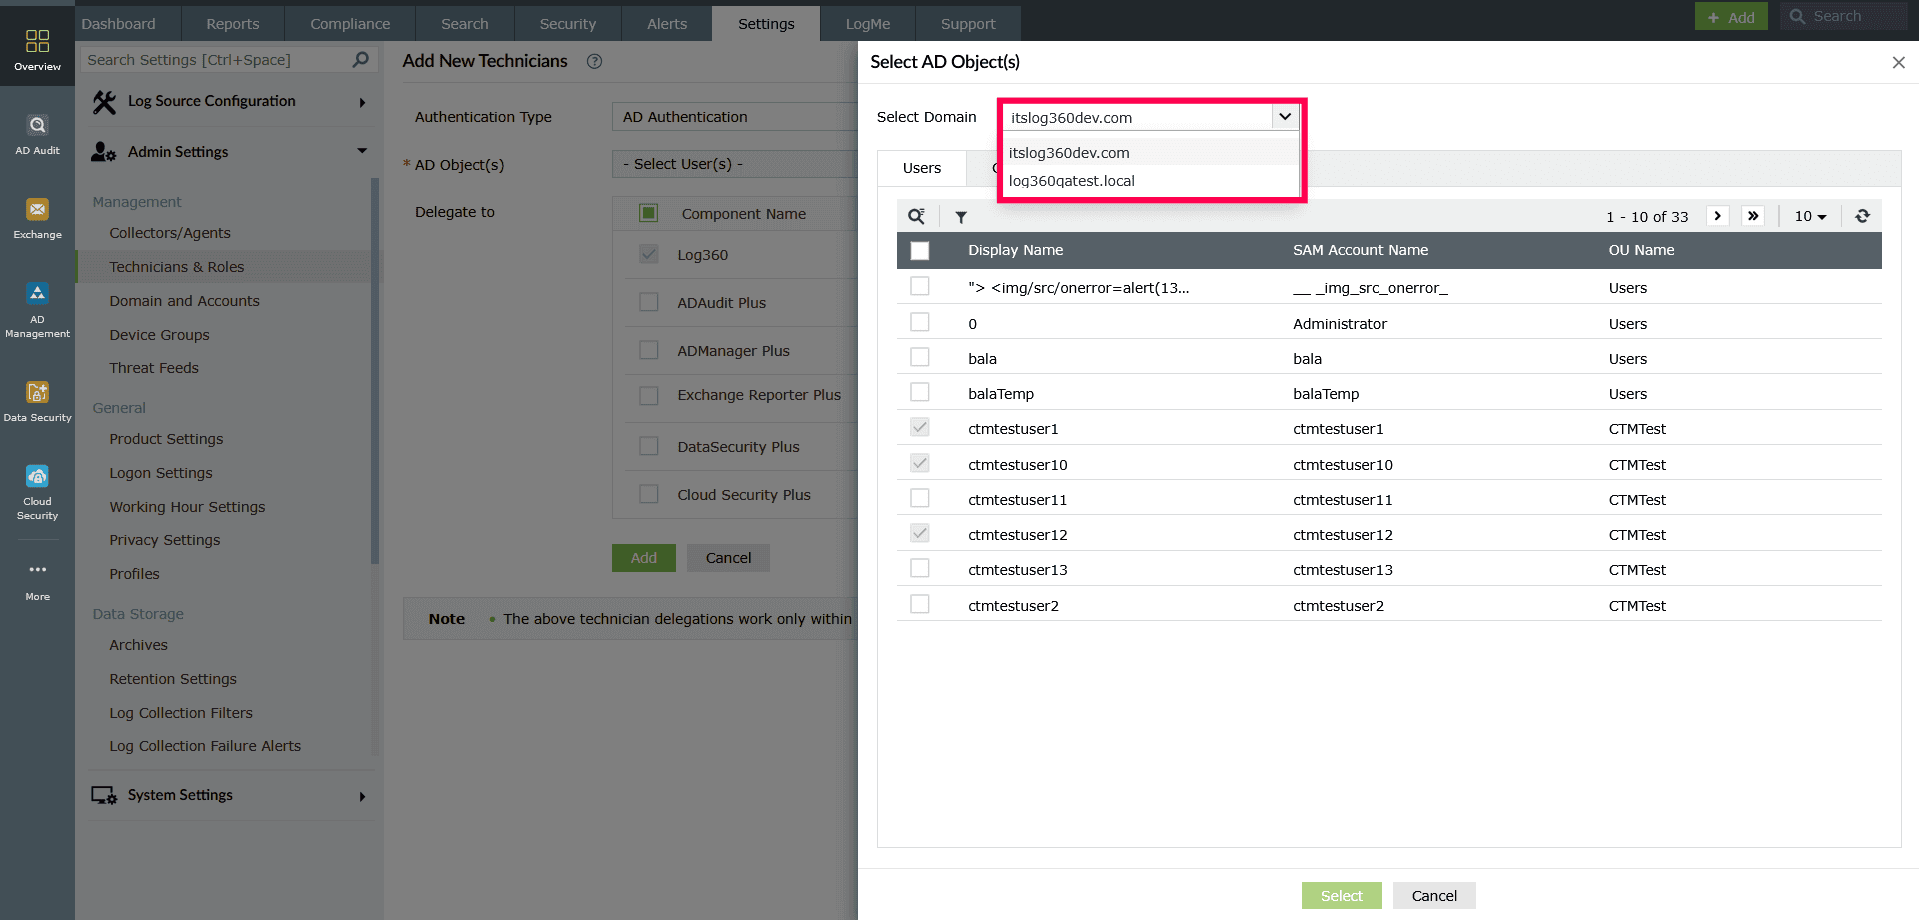
Figure 13: Selecting a domain - In the Users tab, select the user(s) of your choice by selecting the checkbox(es) under the Display Name field.
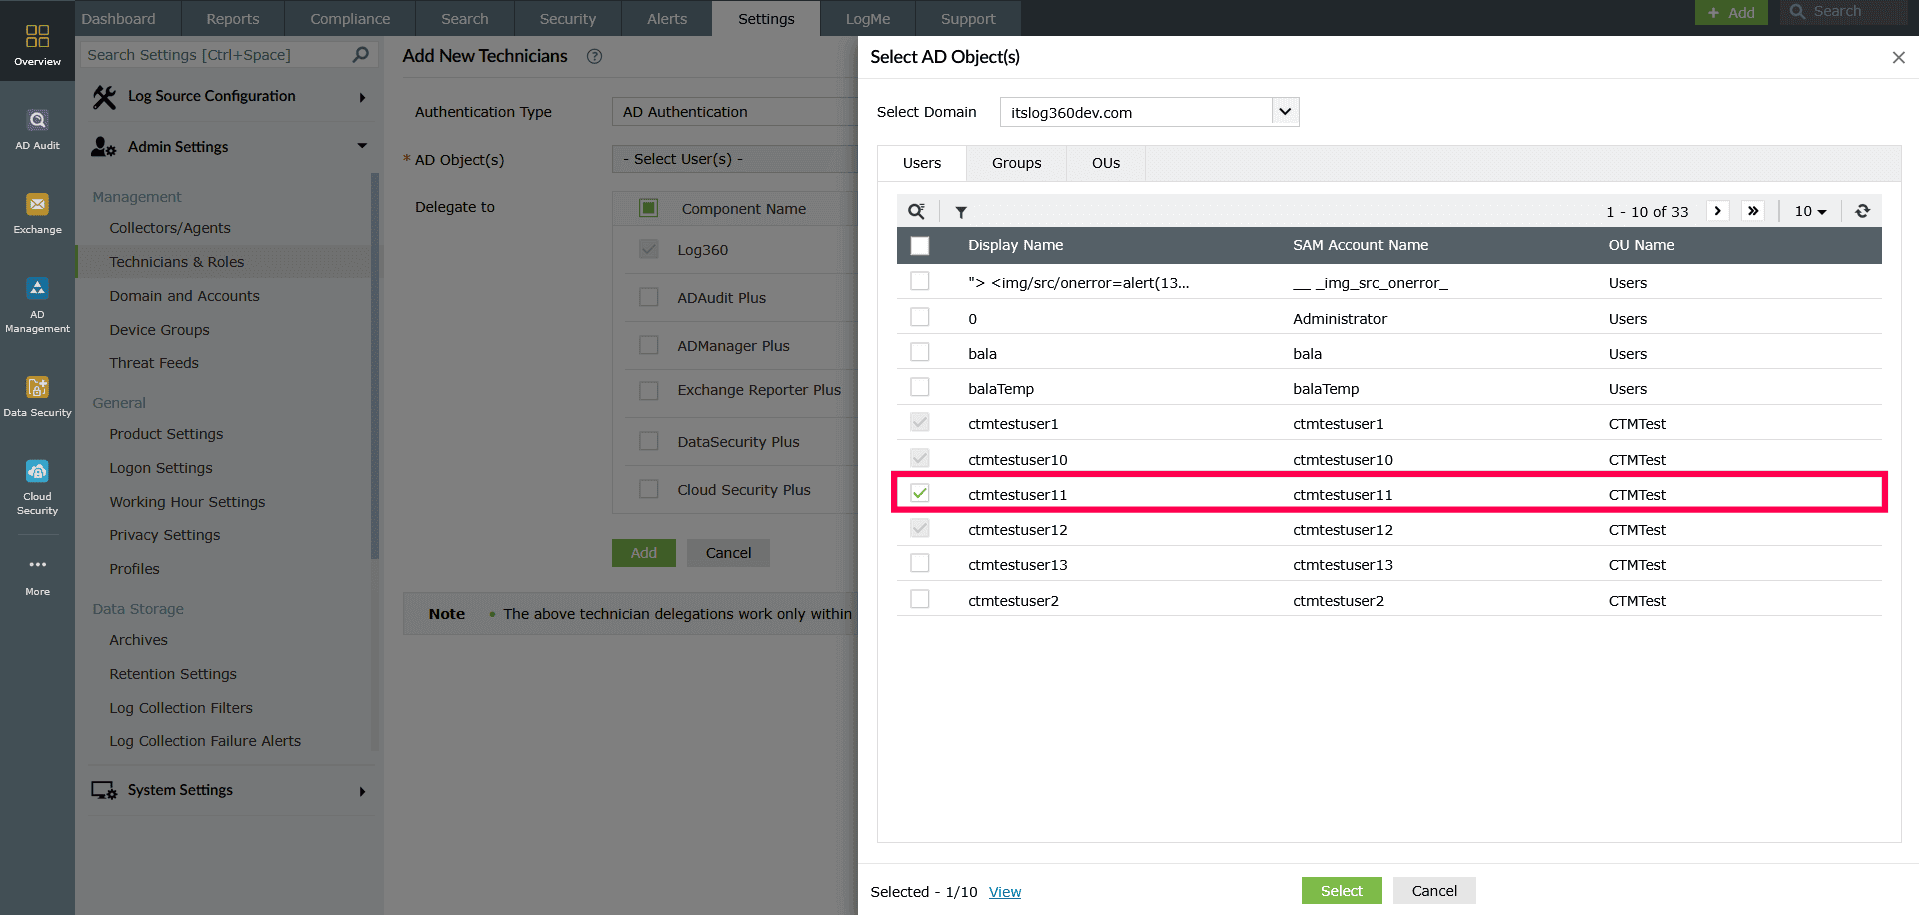
Figure 14: Selecting user(s) - You can also use the
 icon to locate specific users.
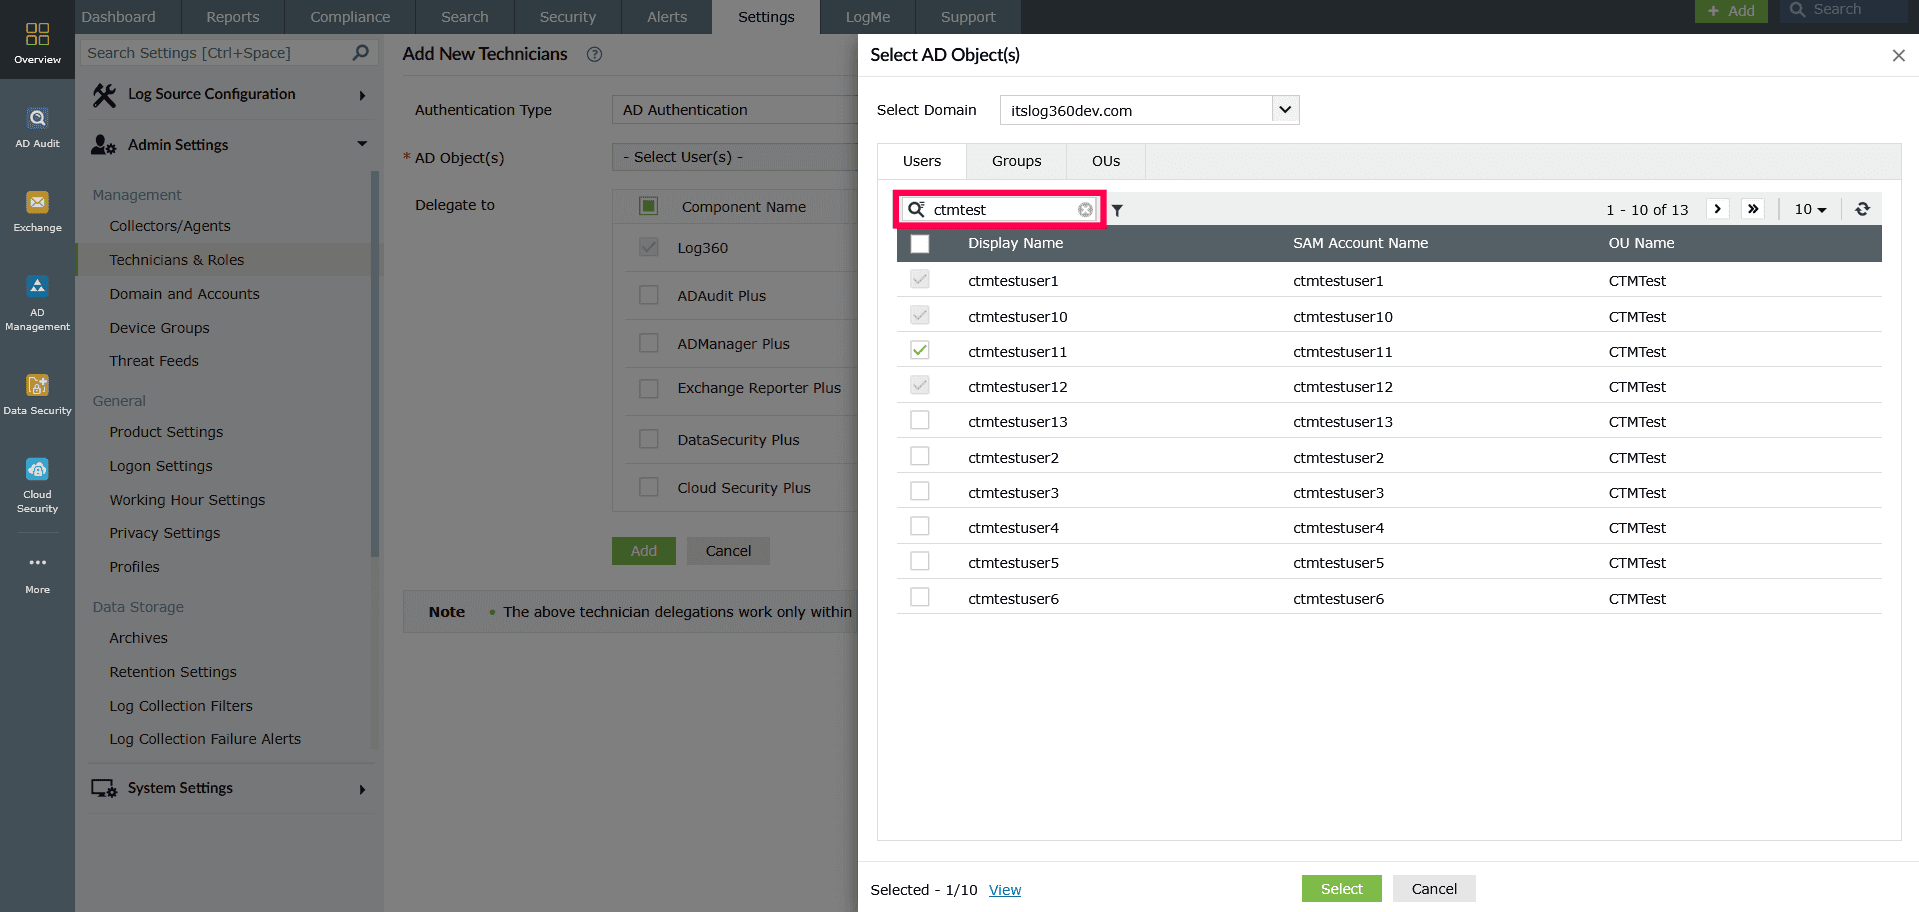
Figure 15: Search option for finding specific AD users - Use the
 icon to refine user selection.
 - Once you click the icon, an OU structure window appears.
- In the OU tree, check the box next to the specific OU that contains the users you wish to assign as technicians. Click Apply to save the changes.
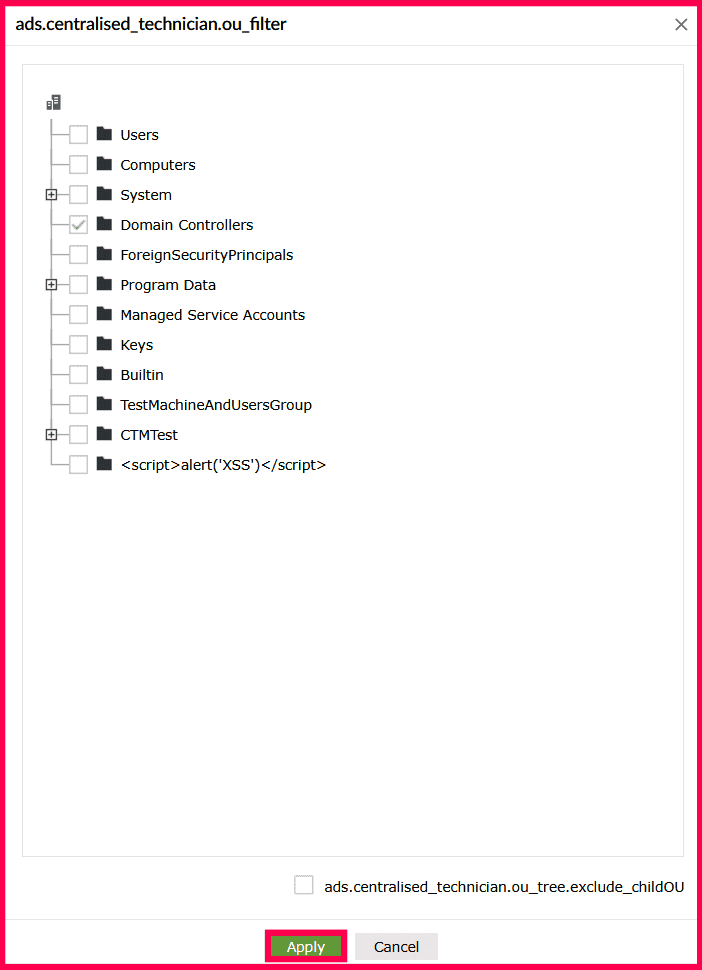
Figure 16: Filter option to refine the list of AD users NOTE- Some OUs include child OUs. For example, selecting the Program Data OU also includes its child OU, such as Microsoft, and all users within both.
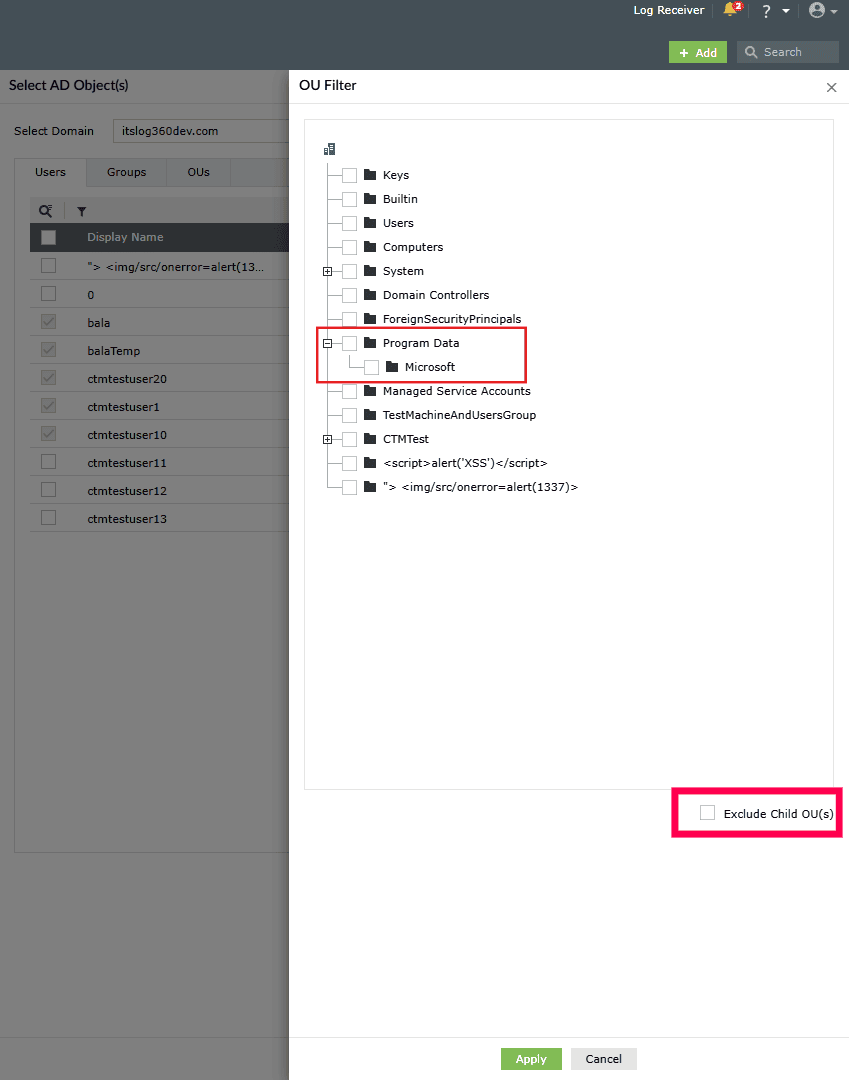
Figure 17: Auto-inclusion of OU and its Child OU - If you want to exclude these child OUs, select the checkbox next to Exclude Child OU(s) at the bottom of the OU tree.
- Some OUs include child OUs. For example, selecting the Program Data OU also includes its child OU, such as Microsoft, and all users within both.
- In the Select AD Object(s) page, click Select to add the chosen user(s).
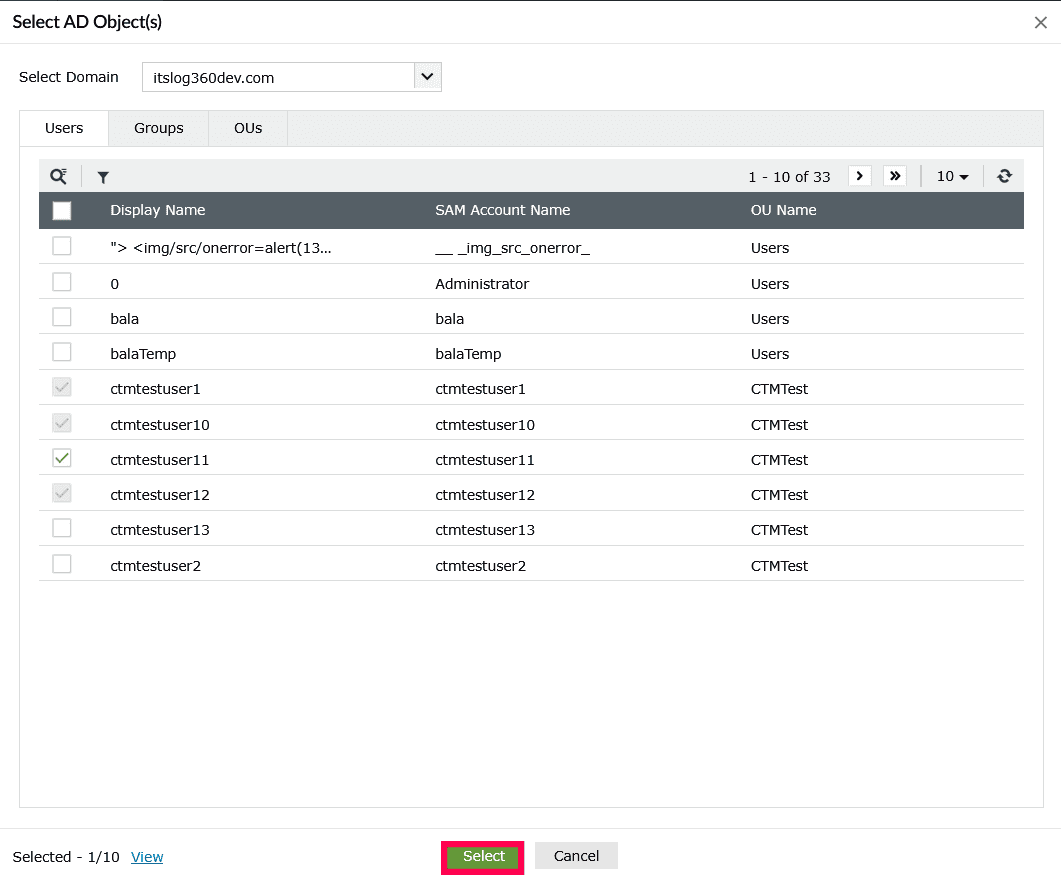
Figure 18: Selecting AD Object(s) - Follow the same steps outlined in steps 8- 10 of the previous section to assign roles and delegate entities.
Adding a centralized technician group/ OU
- In the Add New Technicians page, from the Authentication Type dropdown, select AD Authentication.
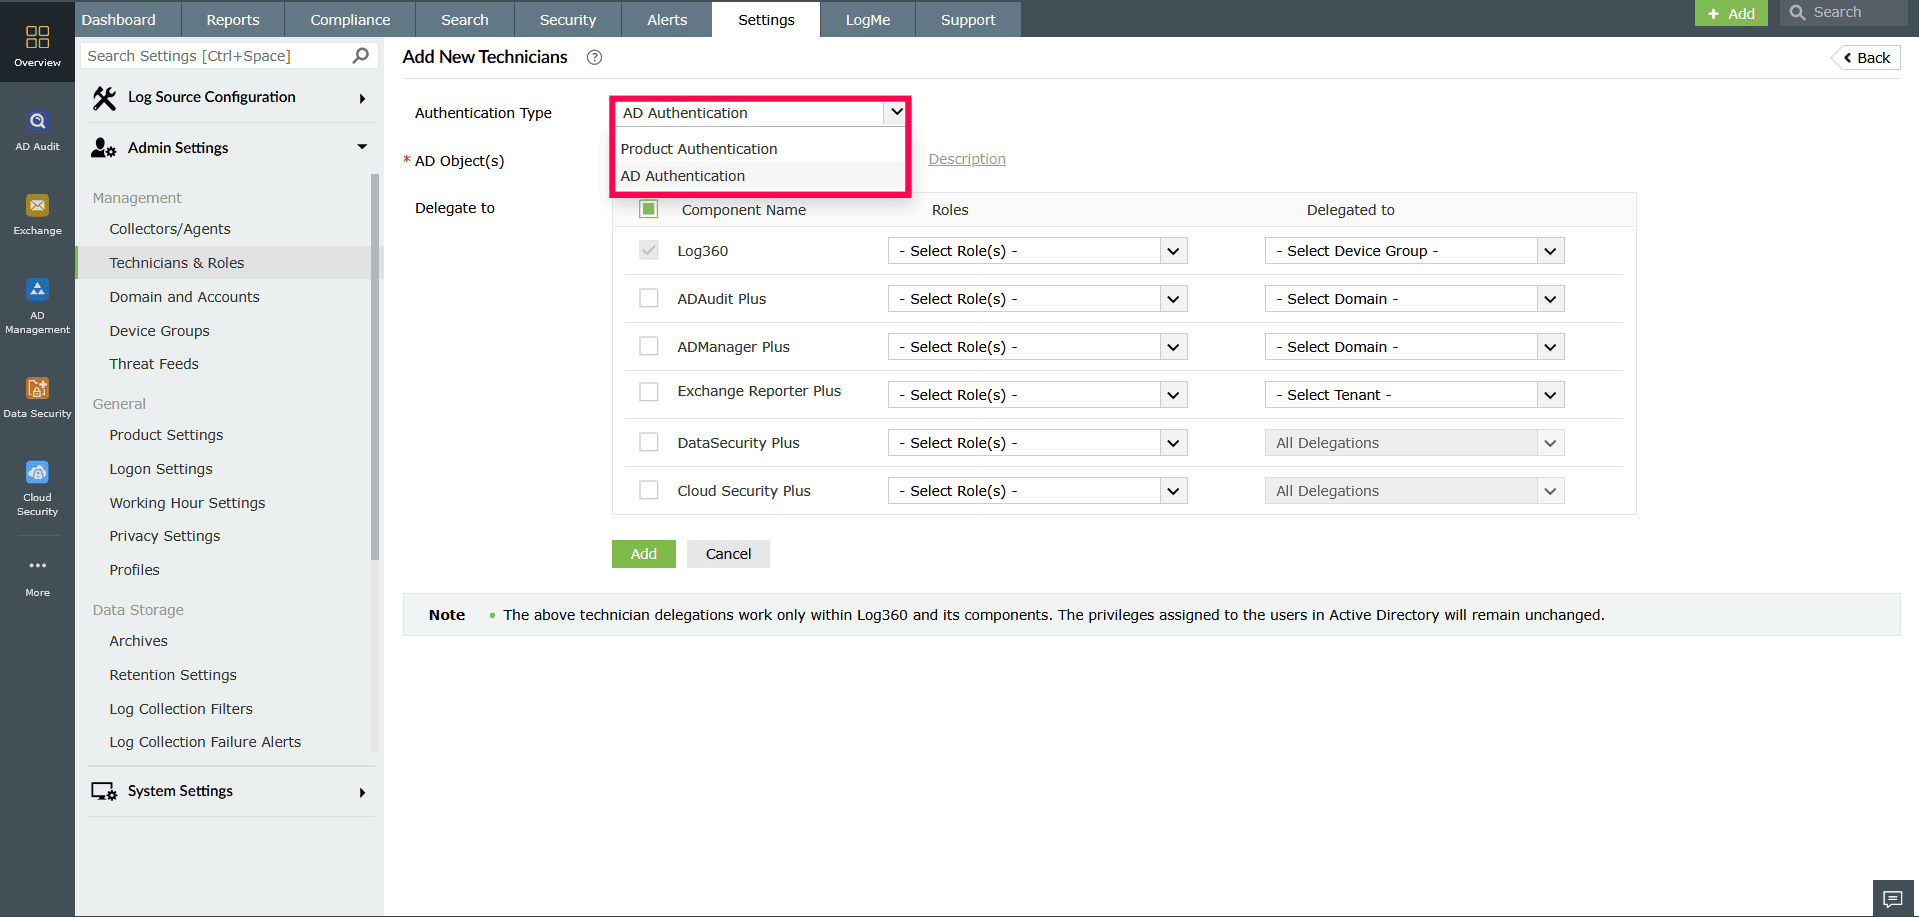
Figure 19: Selecting authentication type - In the AD Object(s) field, select the required user(s) from Active Directory. Use the icon to add users after selection. You can optionally add a description using the Description button.
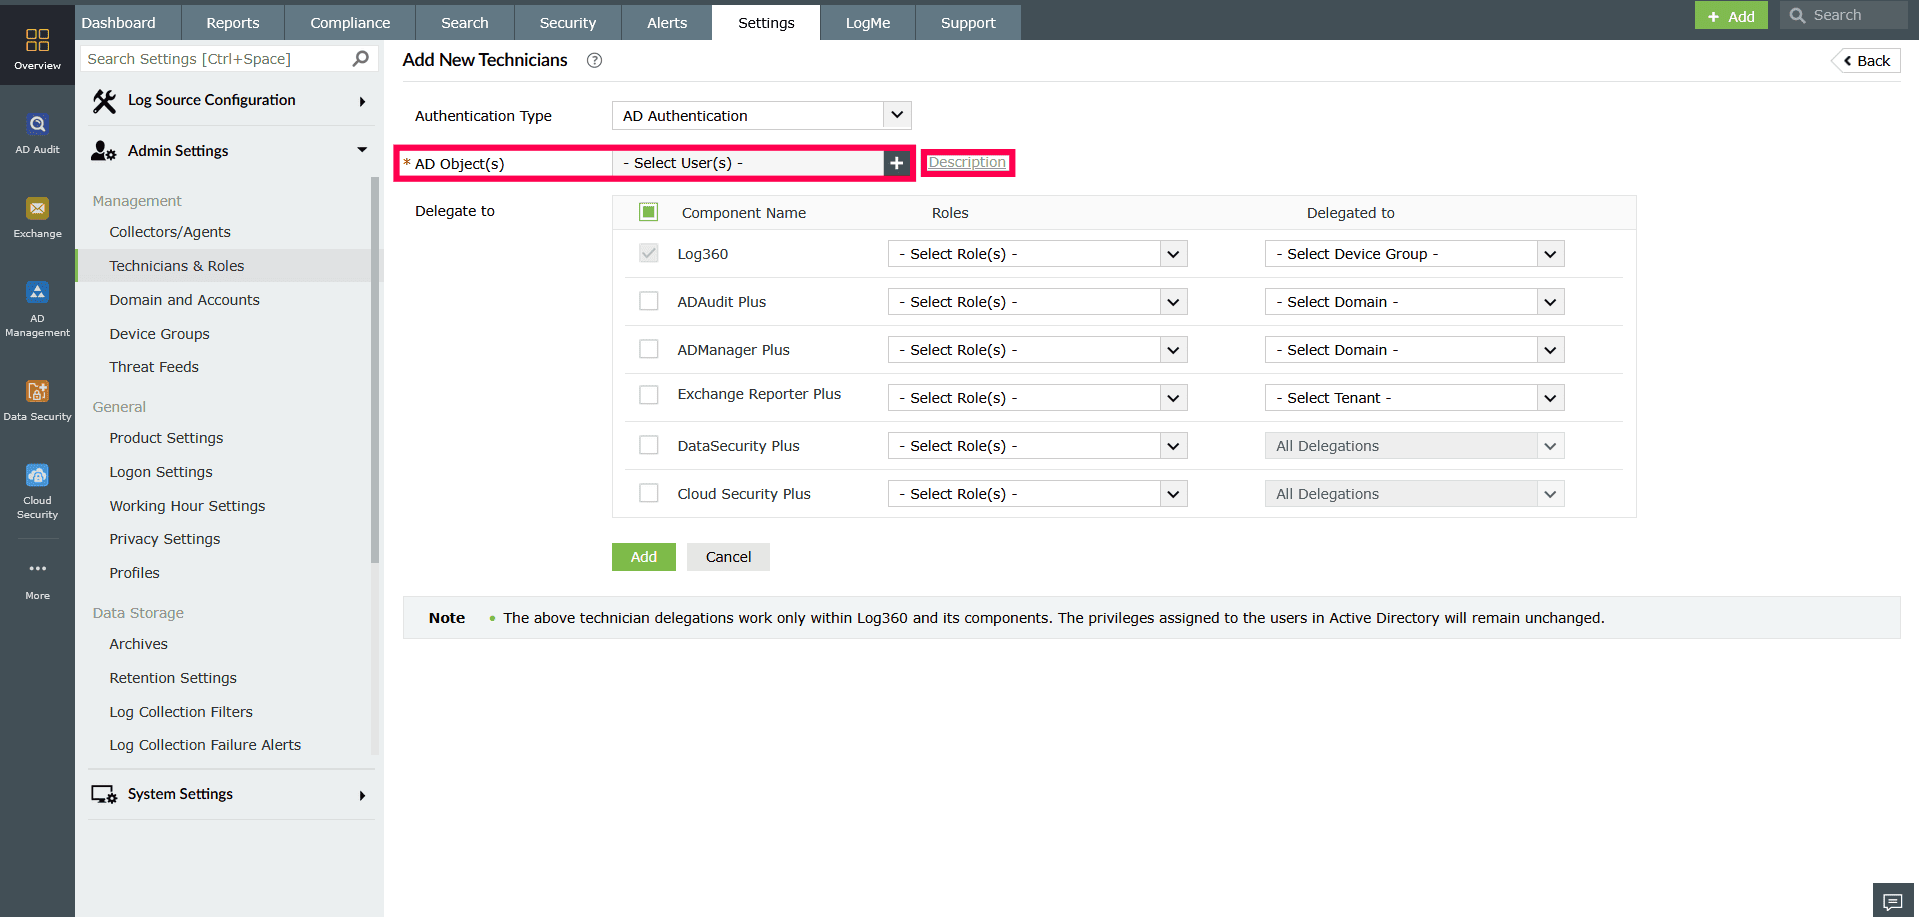
Figure 20: Configuring Technician settings - In the Select AD Object(s) window, use the Select Domain drop-down to choose the AD domain from which you want to assign users as technicians.
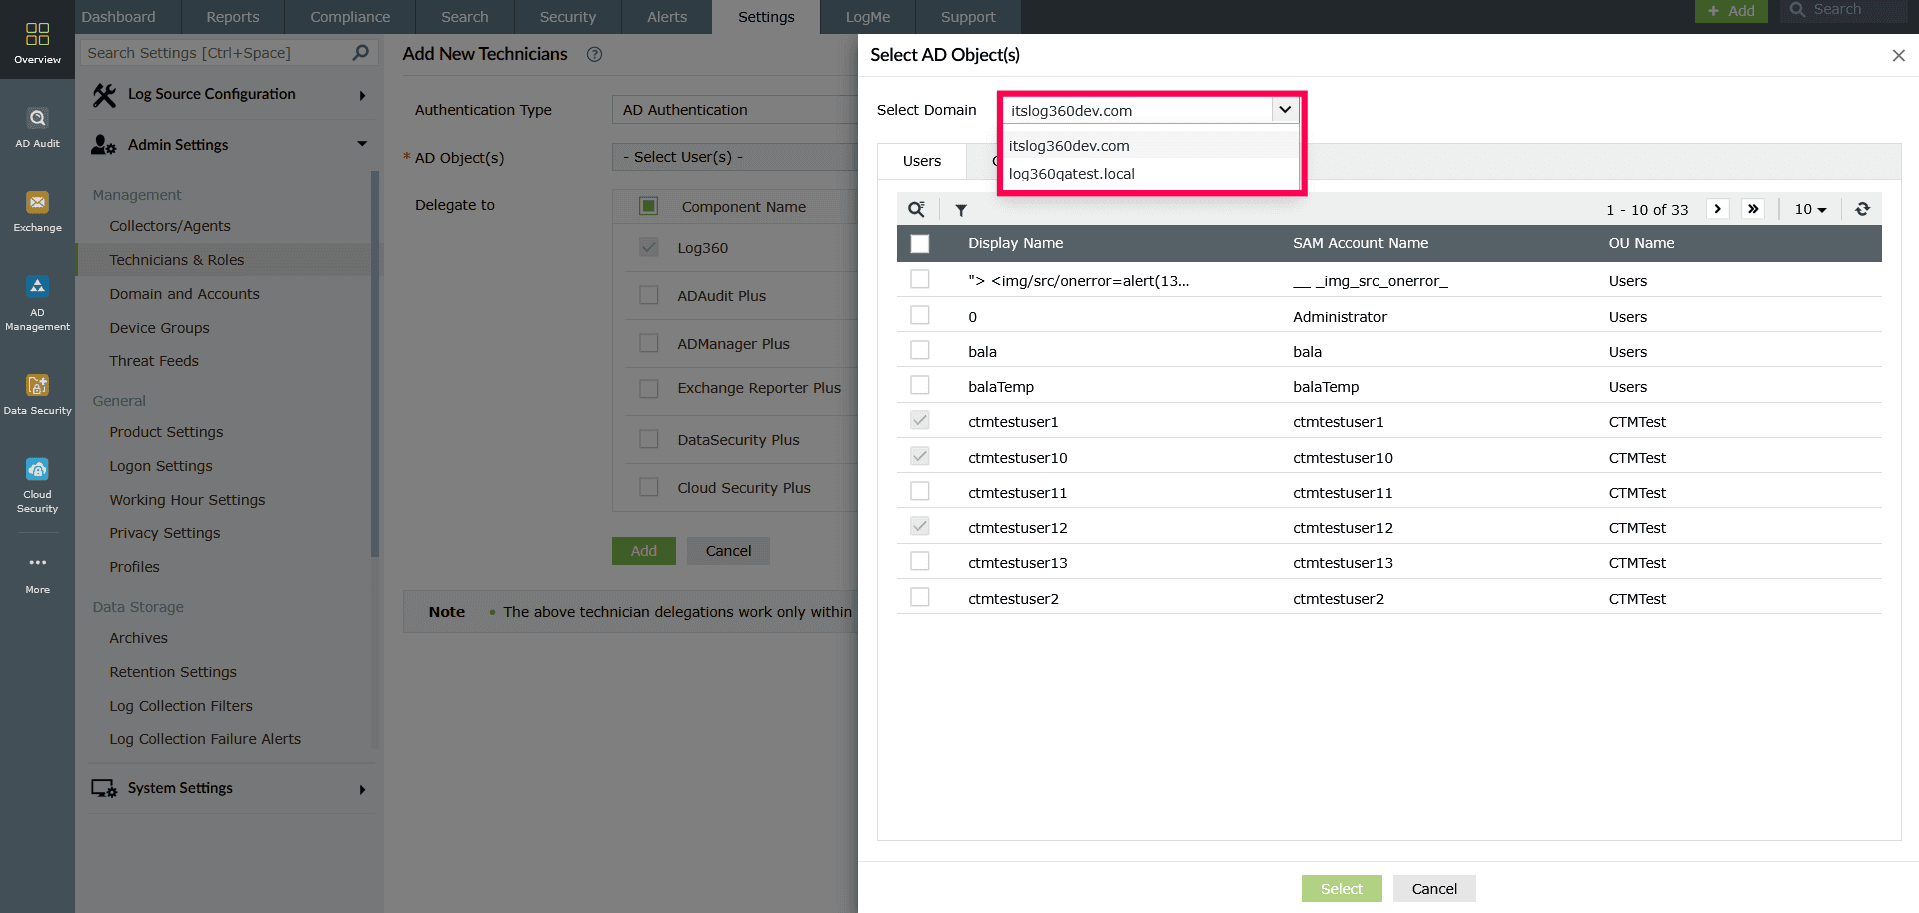
Figure 21: Selecting a domain - The Groups tab displays all AD groups in a tabular format along with their descriptions. You can use the search icon to locate a specific group.
NOTE If an Active Directory (AD) user belongs to a configured group or OU, they will be recognized under that group when logging into the Log360 console. However, the user will not be able to log in directly to any of the child components.
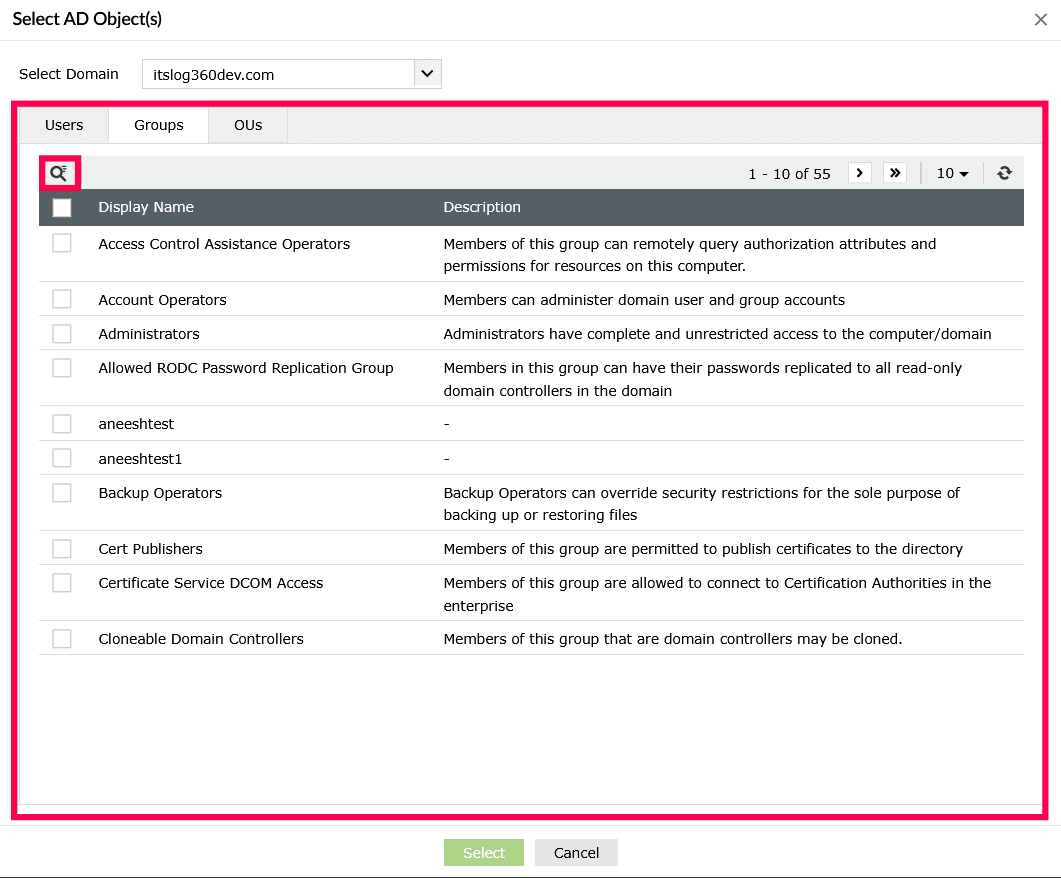
Figure 22: Group tab settings - The OUs tab lists all Organizational Units in either:
- Click Table View which displays OUs in a list with their distinguished names. Use the icon to find an OU.
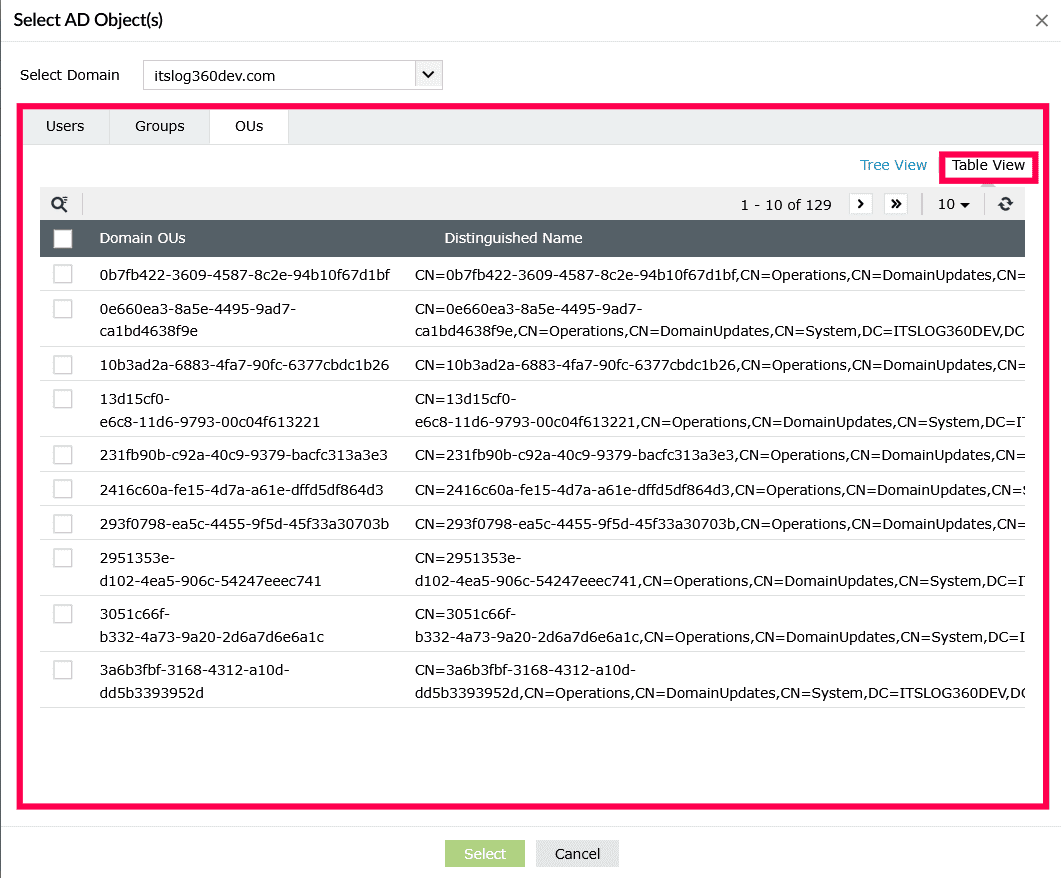
Figure 23: Table view of OU tab - Click Tree View which displays OUs in a hierarchical tree structure.
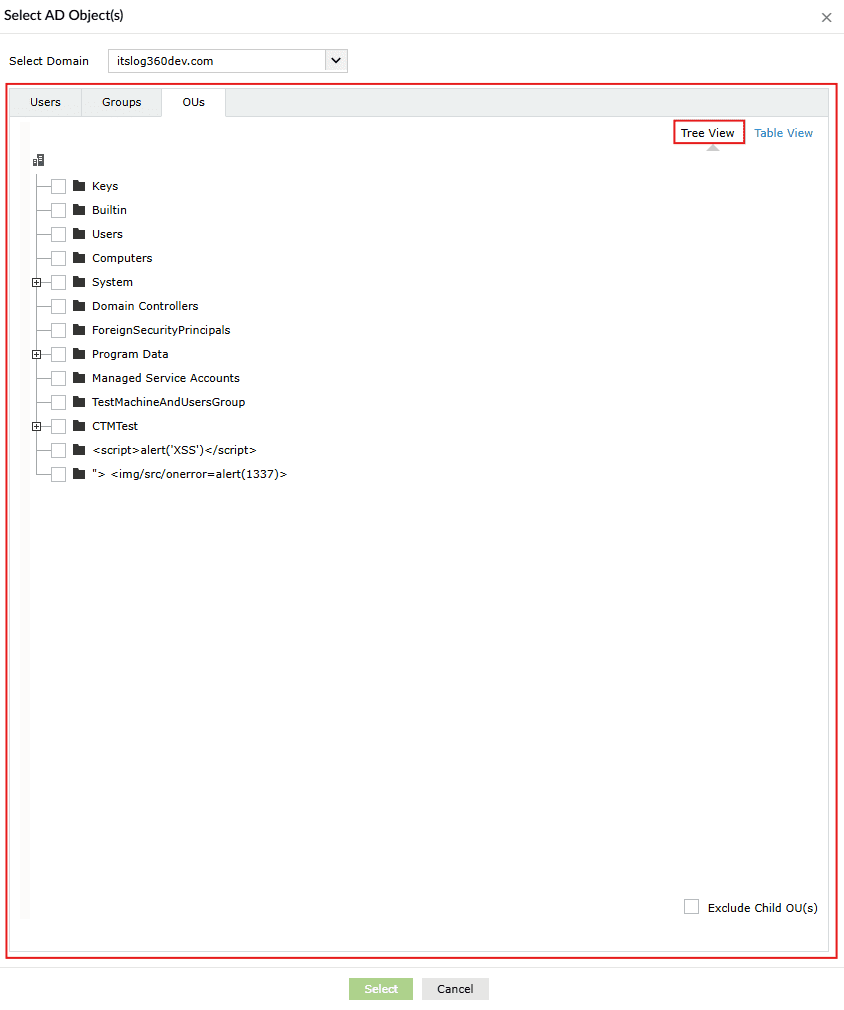
Figure 24: Tree view of OU tab - You can exclude all child components of a selected OU by checking the Exclude Child OU at the bottom of the tree.
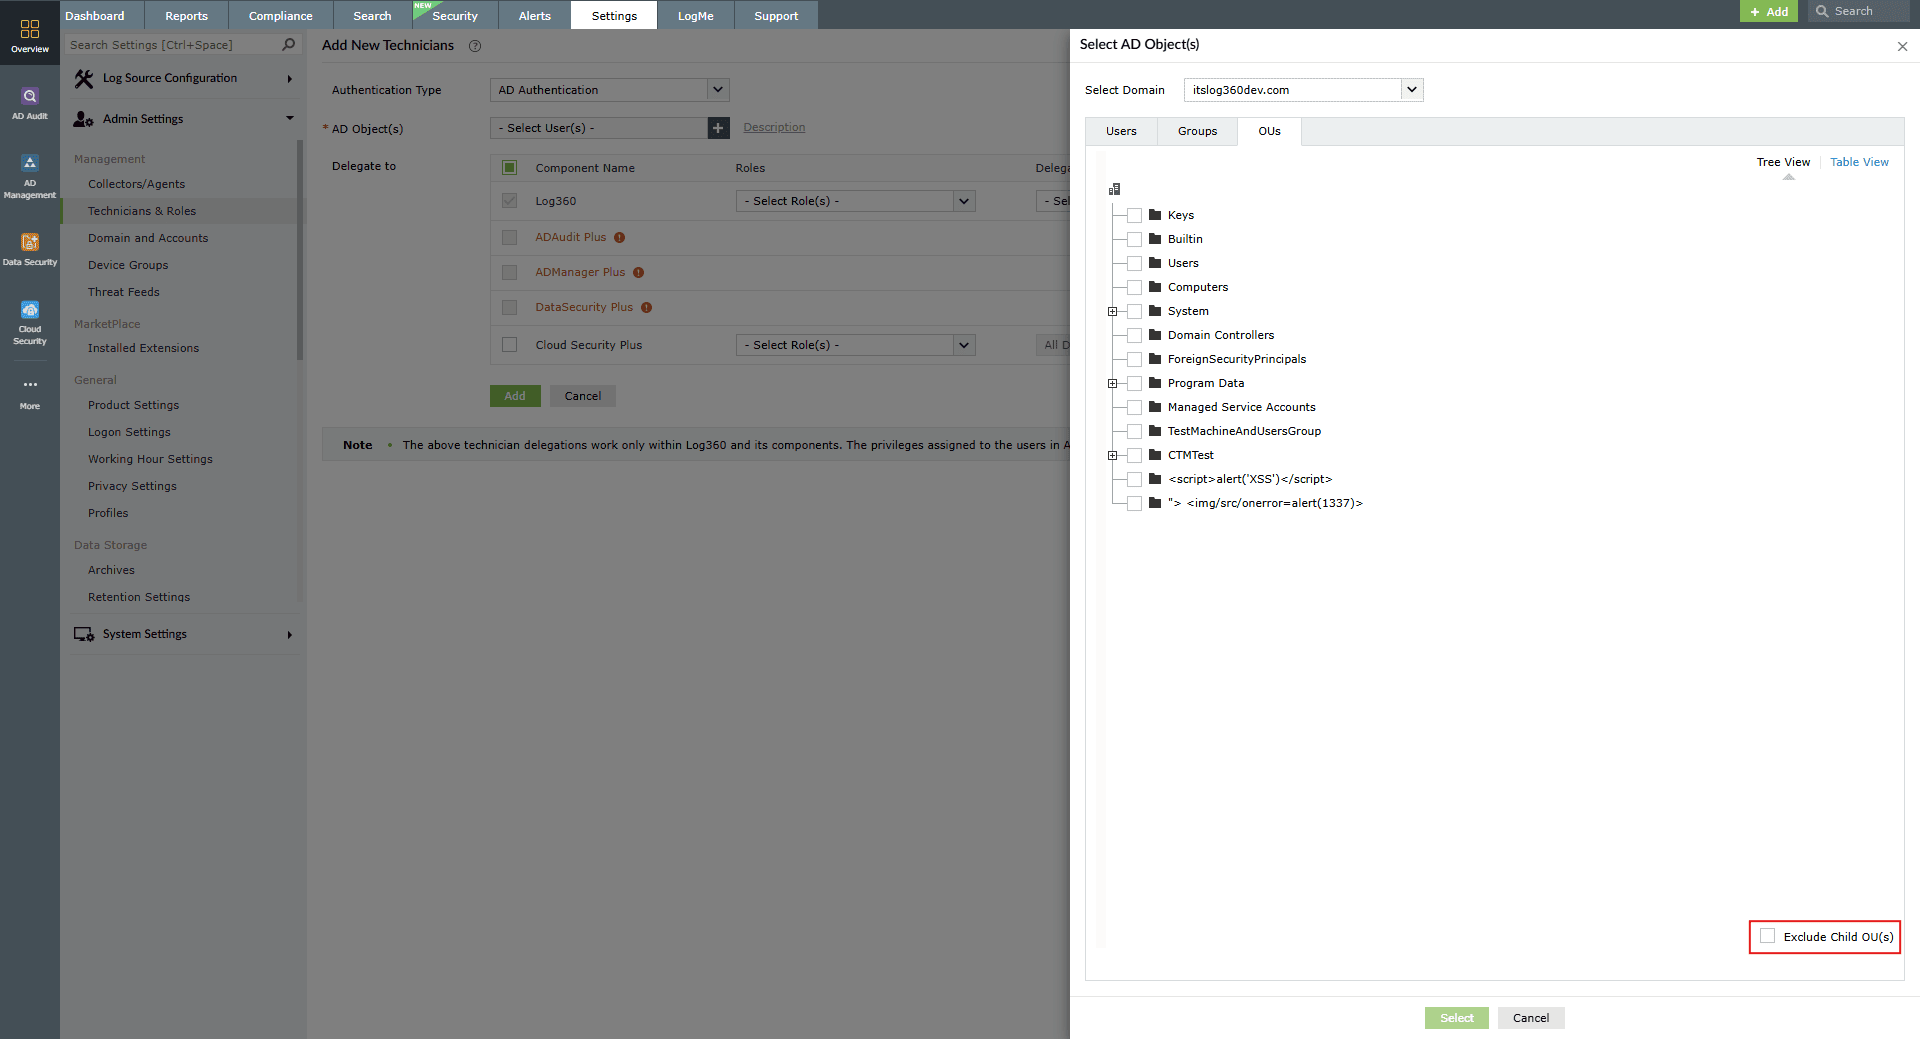
Figure 25: Excluding Child OU
- Click Table View which displays OUs in a list with their distinguished names. Use the
- Select the checkbox next to required group or OU and click Select to add it.
- Follow the same steps outlined in steps 8- 10 of this section to assign roles and delegate entities.
Read also
This section detailed how to add technicians individually or by importing technician groups and Organizational Units (OUs) using Active Directory authentication. To learn more about managing technicians, creating and managing roles, refer to the following articles: