Setting up Investigation Agent
Last updated on:
In this page
Overview
The Investigation Agent in Log360 uses the same AI configuration as Zia Insights. You can enable the capability using either Azure OpenAI or OpenAI. Only one provider can be active at a time, and all AI-driven investigation features will rely on the currently enabled model.
This page explains how to access the Investigation Agent and the configuration steps required to configure Azure OpenAI or OpenAI.
Accessing Investigation Agent
- Log in to the product console.
- Go to the Settings tab, and select Admin.
- Navigate to Zia and select Configuration.
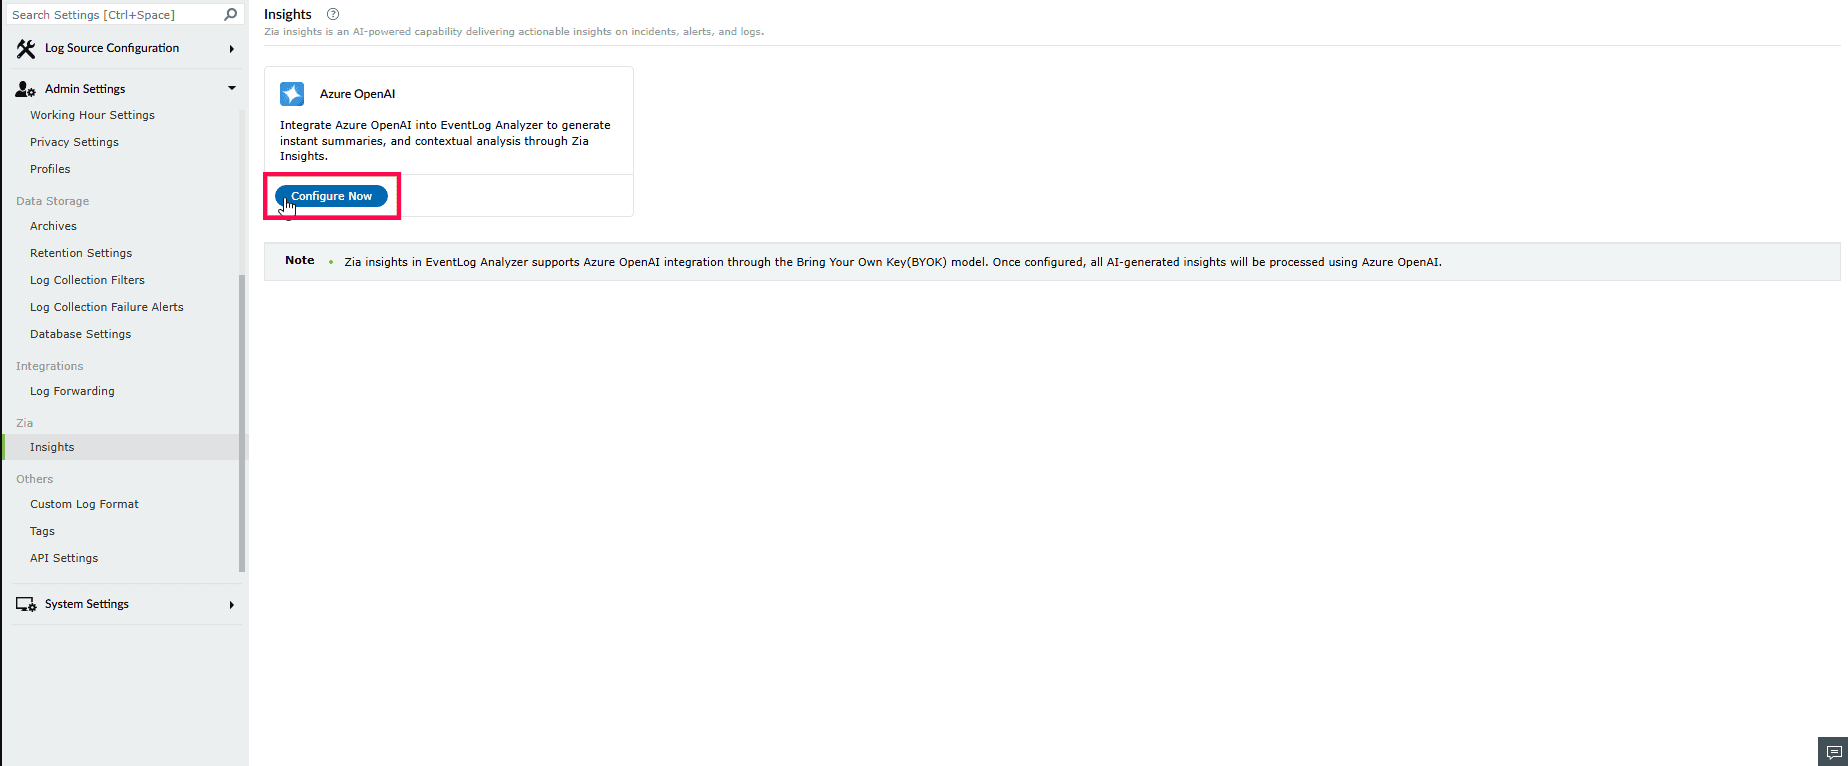
Figure 1: Navigating to Zia - In the Zia page, choose either Azure OpenAI or OpenAI and click Configure Now.
NOTE Only one provider can be enabled at a time.
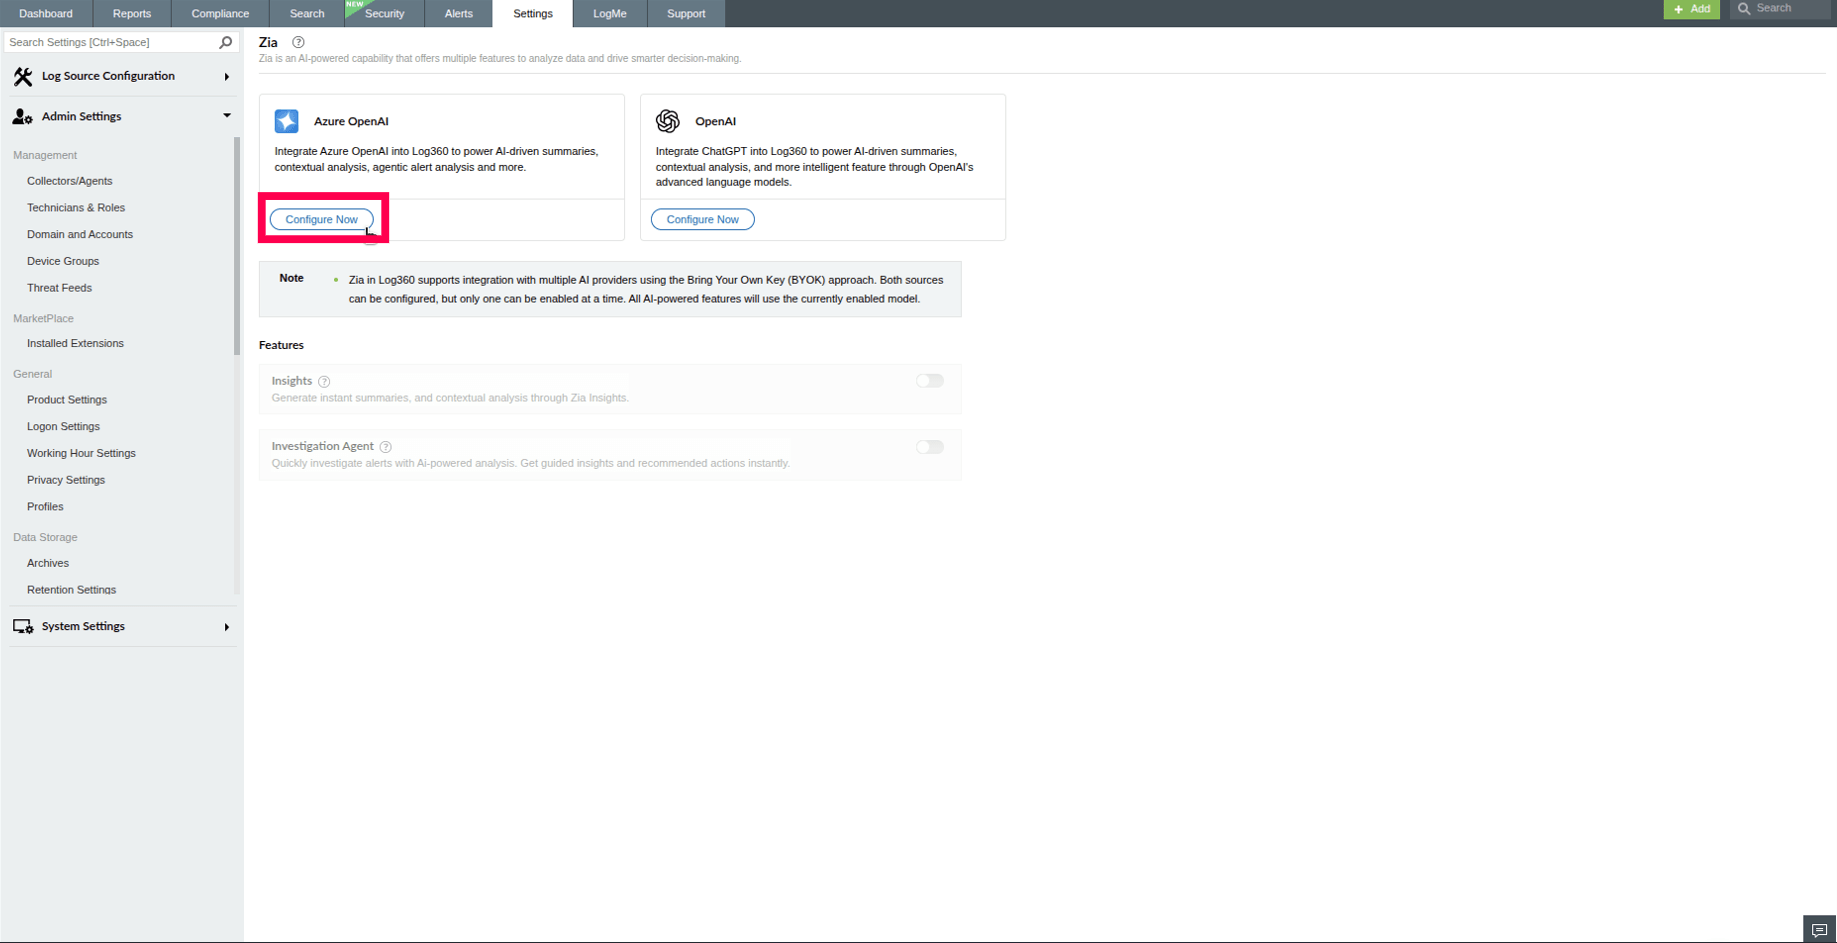
Figure 2: Configuring AI service - A configuration window appears.
- If you select Azure OpenAI, enter the following details obtained from your Azure Portal:
- Endpoint URL
- DeploymentName
- API Key
NOTE Refer to the following pages to configure Azure OpenAI: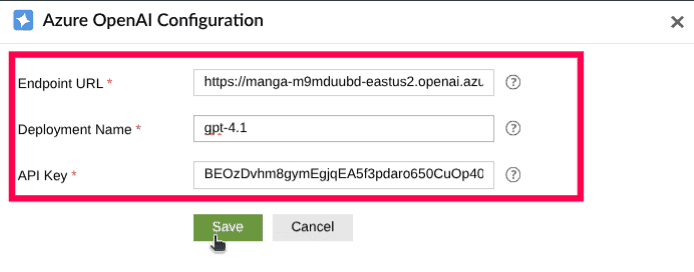
Figure 3: Configuring Azure OpenAI - Click Save to complete the initial setup.
- If you select OpenAI, select the Model from the dropdown.
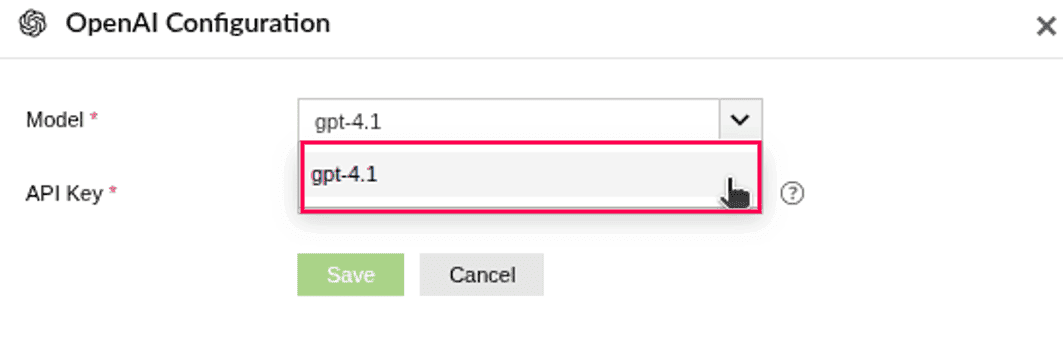
Figure 4: Selecting a model - Enter the API Key.
NOTE Refer to this section to configure OpenAI.
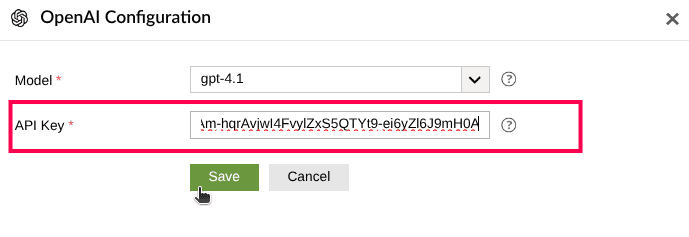
Figure 5: Entering API key - Click Save to complete the initial setup.
- After configuring Azure OpenAI or OpenAI:
- Use the Insights toggle to enable or disable the Investigation Agent.
NOTE You may enable both Insights and Investigation, or only one, based on your requirements.
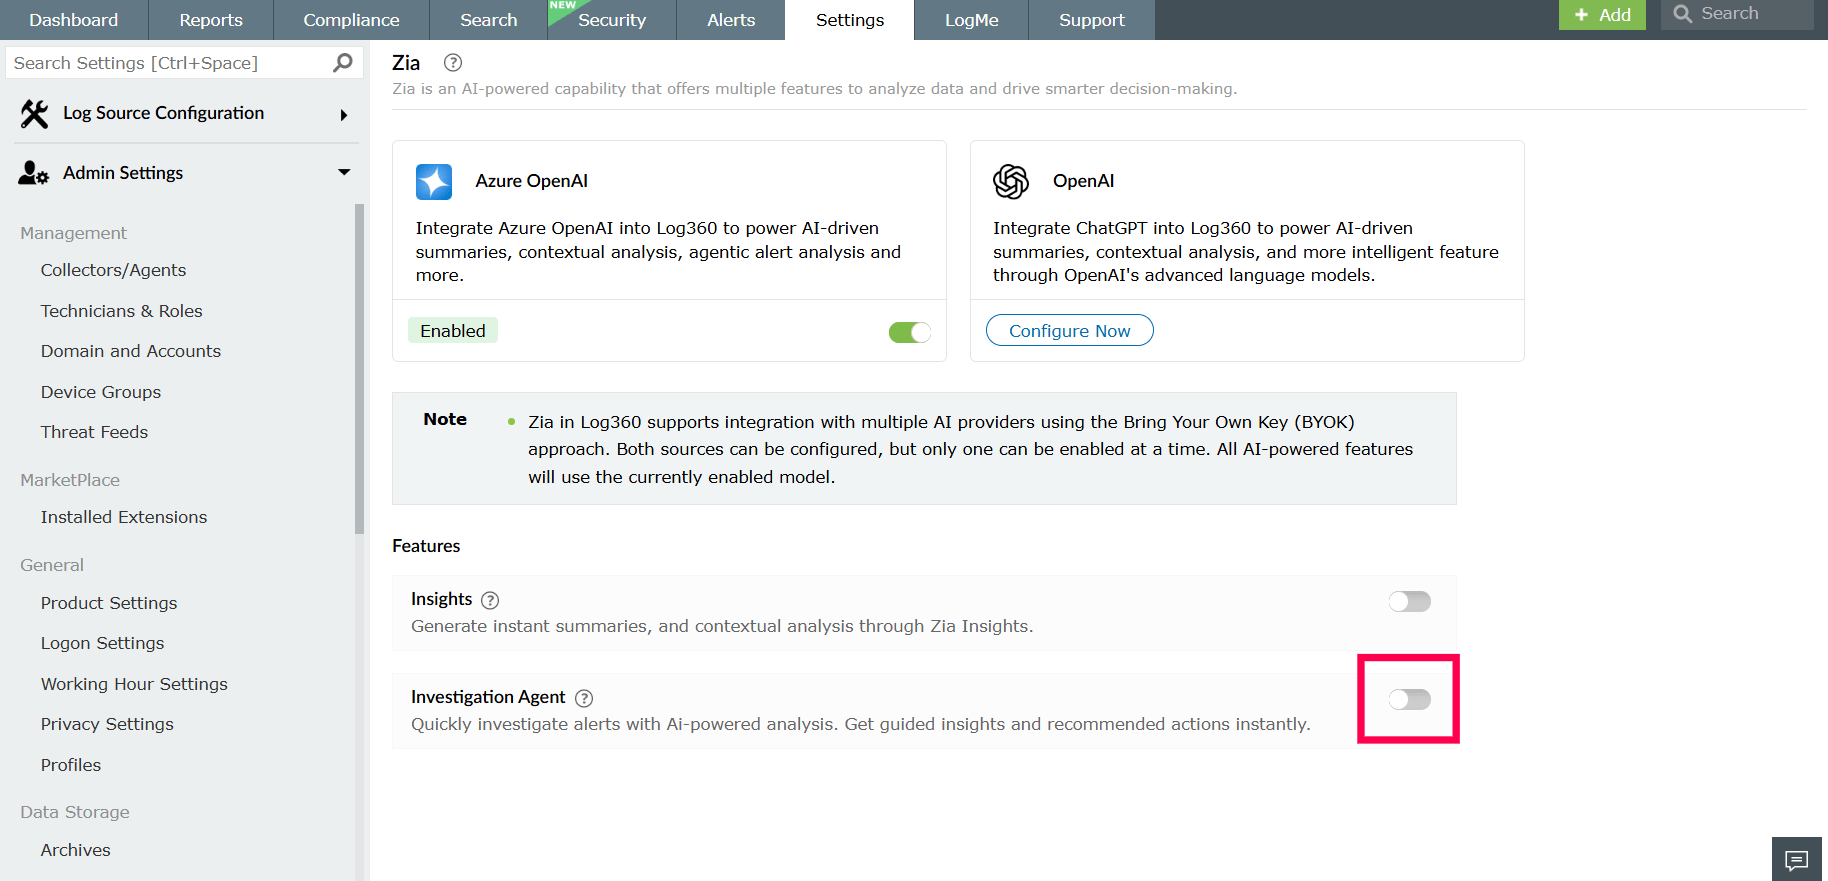
Figure 6: Enabling/ disabling investigation agent
- Use the Insights toggle to enable or disable the Investigation Agent.
- When you enable Investigation Agent, a pop-up window appears displaying the data privacy notice. Read the notice carefully, select the checkbox to acknowledge the terms, and then click Proceed to continue.
NOTE To generate AI-powered insights and investigation results, the processes contextual data associated with logs, alerts, and entities. This includes the following types of information:
- User-related information: usernames, account names, email, phone number, department, group names, mailgroups, mailbox names, company names, user information, and security ID (SID).
- Device and directory information: hostnames, computer names, domain, distinguished path of AD object, and AD object names.
- Network and location information: IP address, region, and country.
- Request and URL information: URL links, HTTP requests, and HTTP request parameters.
- Application and database information: database name.
This data is processed only to support contextual analysis, correlation, investigation workflows, and remediation guidance within the product.
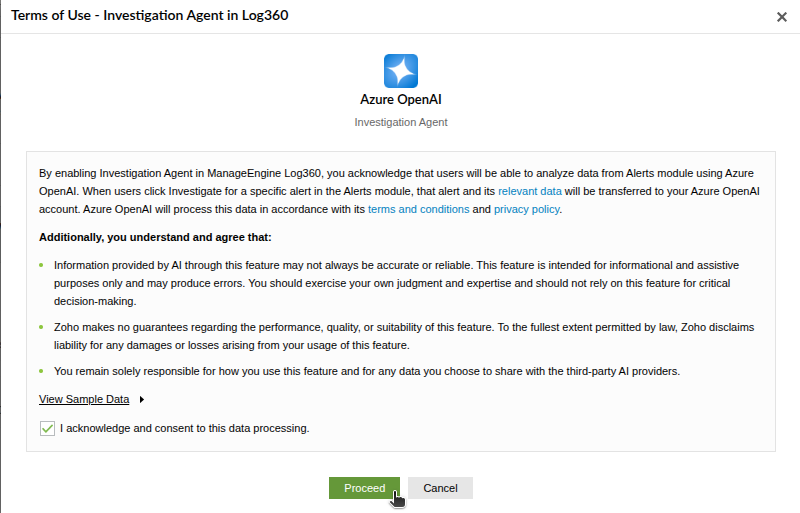
Figure 7: Data privacy note for Azure OpenAI 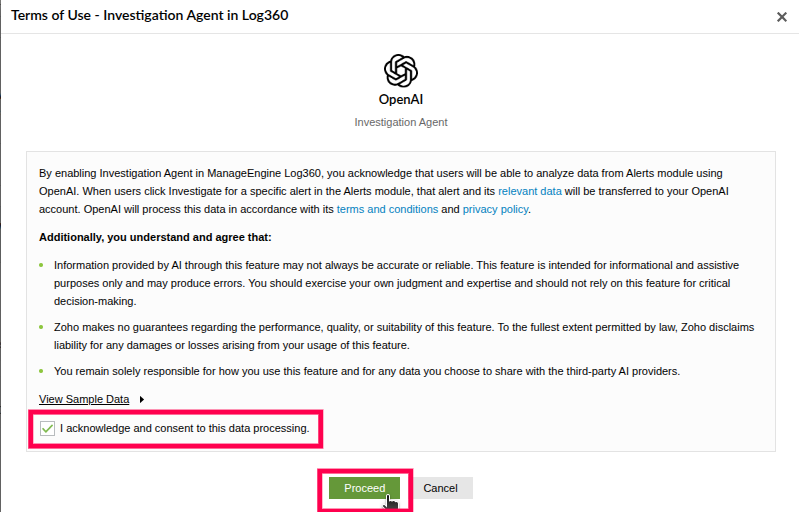
Figure 8: Data privacy note for OpenAI - To switch between Azure OpenAI and OpenAI, use the toggle to disable the currently active provider.
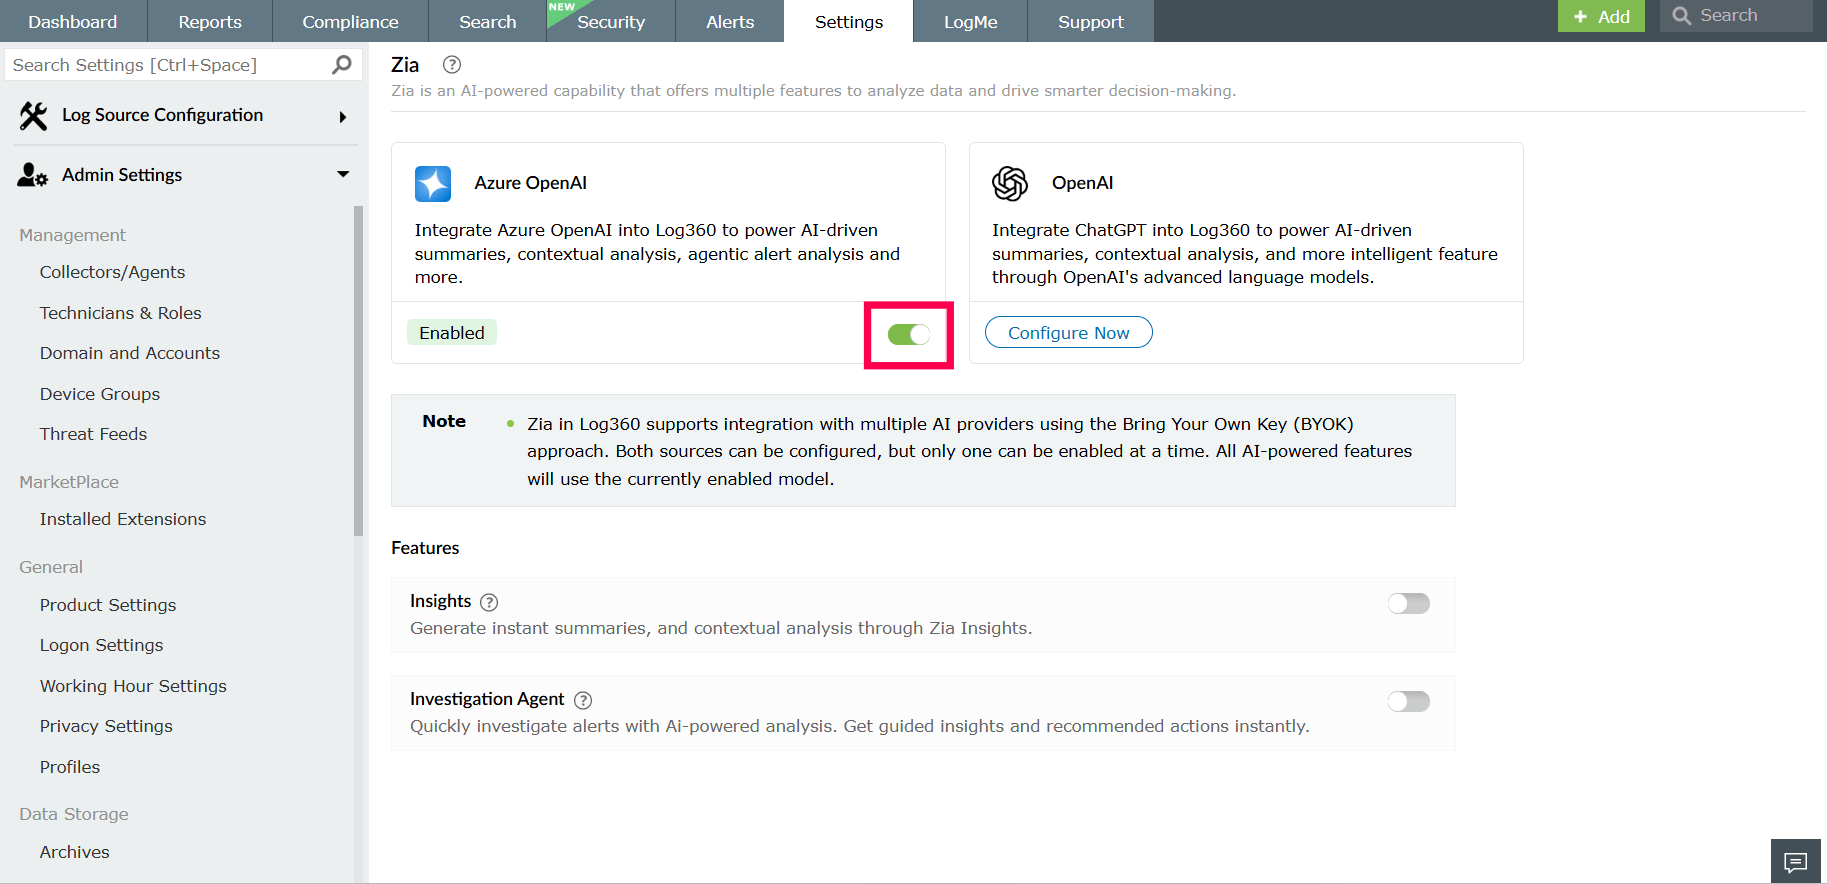
Figure 9: Switching between AI services - A confirmation pop-up will appear. Click Yes to disable, and then configure the other provider.
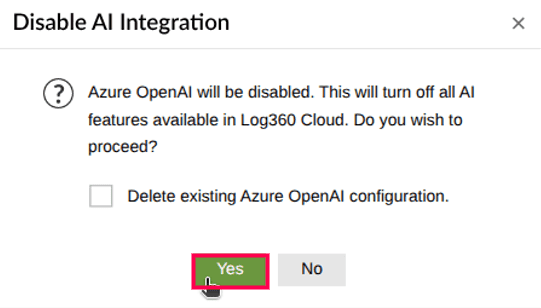
Figure 10: Switching between AI services - To delete a configuration, select Delete existing Azure/OpenAI configuration and click Yes to confirm your deletion.
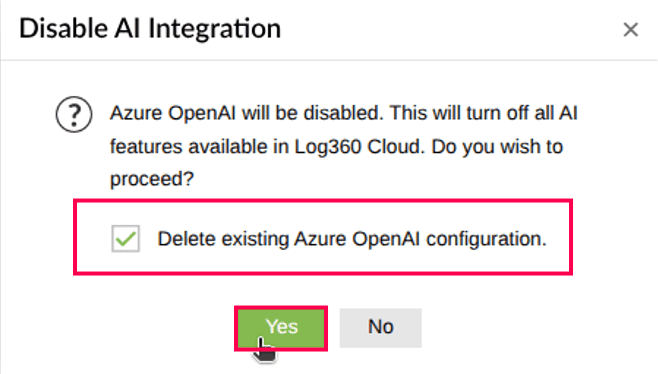
Figure 11: Deleting AI configuration NOTE If you attempt to configure another provider while one is already enabled, the existing provider will be disabled automatically.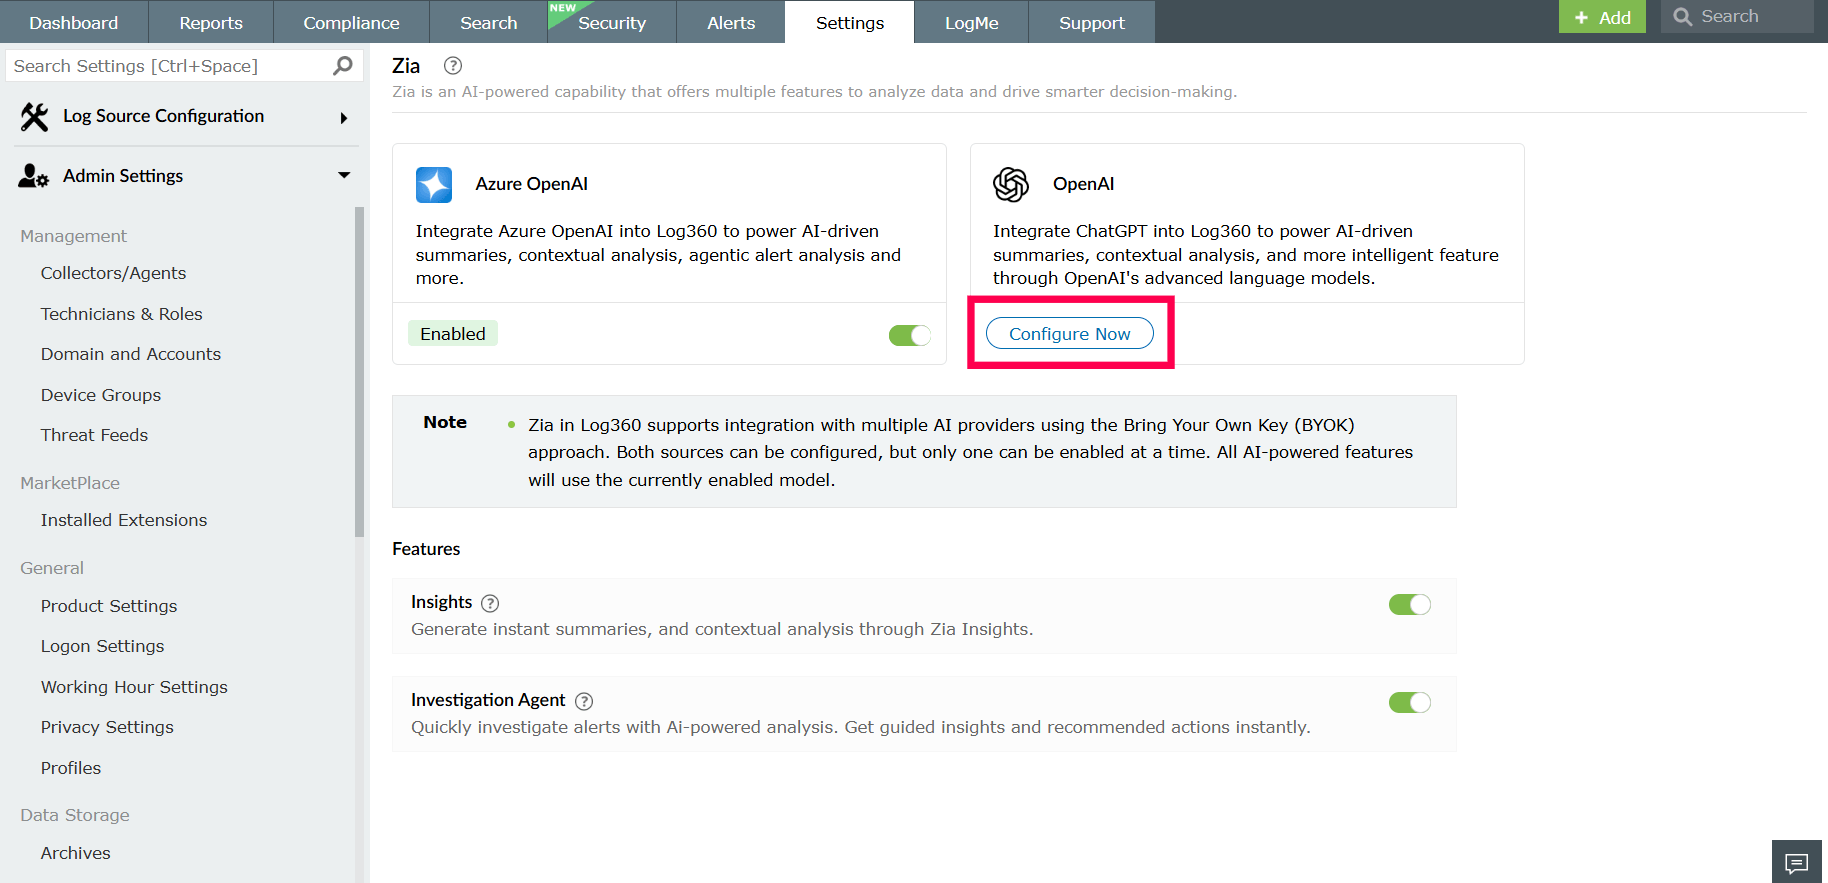
Figure 12: Configuring AI service In the confirmation pop-up that appears, click Proceed to continue with the new configuration.
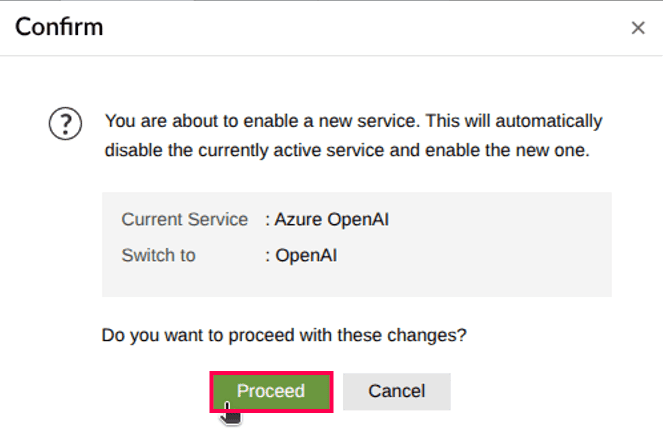
Figure 13: Configuring AI service
Read also:
This page explained how to configure and enable the Investigation Agent. To learn how to invoke investigations within the product, refer to: