Integrate On-Premises Active Directory(AD) with MDM Cloud
Integrating your Microsoft on-premises AD with the cloud version of Mobile Device Manager Plus involves configuring a directory server and setting up a tool to sync your AD data. This is feasible by using Zoho Directory which is our in-house solution. During the configuration of the Zoho Directory server, the Zoho Directory Sync tool is downloaded and set up in order to sync your AD. Follow the steps provided to successfully integrate your on-premises AD with MDM Cloud. Additionally, you can configure SAML to enable device enrollment using Active Directory credentials.
How does Zoho Directory Sync work?
The Zoho Directory Sync queries your LDAP server and your Zoho Account. The data belonging to both these lists are compared and all the observed changes are curated during this comparison. Now your Zoho Account is updated with all the necessary changes. The major benefit of Zoho Directory Sync is not even a single update is made to your LDAP server and your data remains completely safe and secure. The task of adding, modifying, and deleting accounts in each LDAP-enabled application separately is simplified thereby enhancing network security and reducing management costs.
Importance of Domain Verification
Domain verification is required for the following reasons:
- To check if the domain provided is valid.
- To check if the domain provided has not expired.
- To check if the domain was provided by a legitimate owner or by a user with access to the DNS page.
- To check if the domain is not a spoofed address to prevent any misuse or loss of service.
Note: However, there are other verification methods like TXT and HTML methods.
System Requirements
Before you download and install Zoho Directory Sync, make sure you meet the system requirements. The installer downloads and installs all the required components on your server. The system requirements are as follows.
- A minimum of 512 MB RAM is required. If your organization has more than 10,000 employees, a RAM of 1GB or higher is required for a faster sync
- Internet Explorer 9 and above
- Windows 7 and above
- Microsoft C++ Runtime redistributable 2010 or higher
- .NET framework 4.0 and above
- If the higher version is installed, please make sure you have .NET Framework 4.0 installed both in the Primary Domain Controller(PDC) and the local system
- Administrator privilege for the entire AD domain is required
For best results, a network connection to your Zoho domain without any proxies or firewalls is recommended.
Procedure
STEP #1: Configuring Zoho Directory Server
The first part of the integration process involves configuring Zoho Directory Server, where you initiate the integration process by following the below given steps:
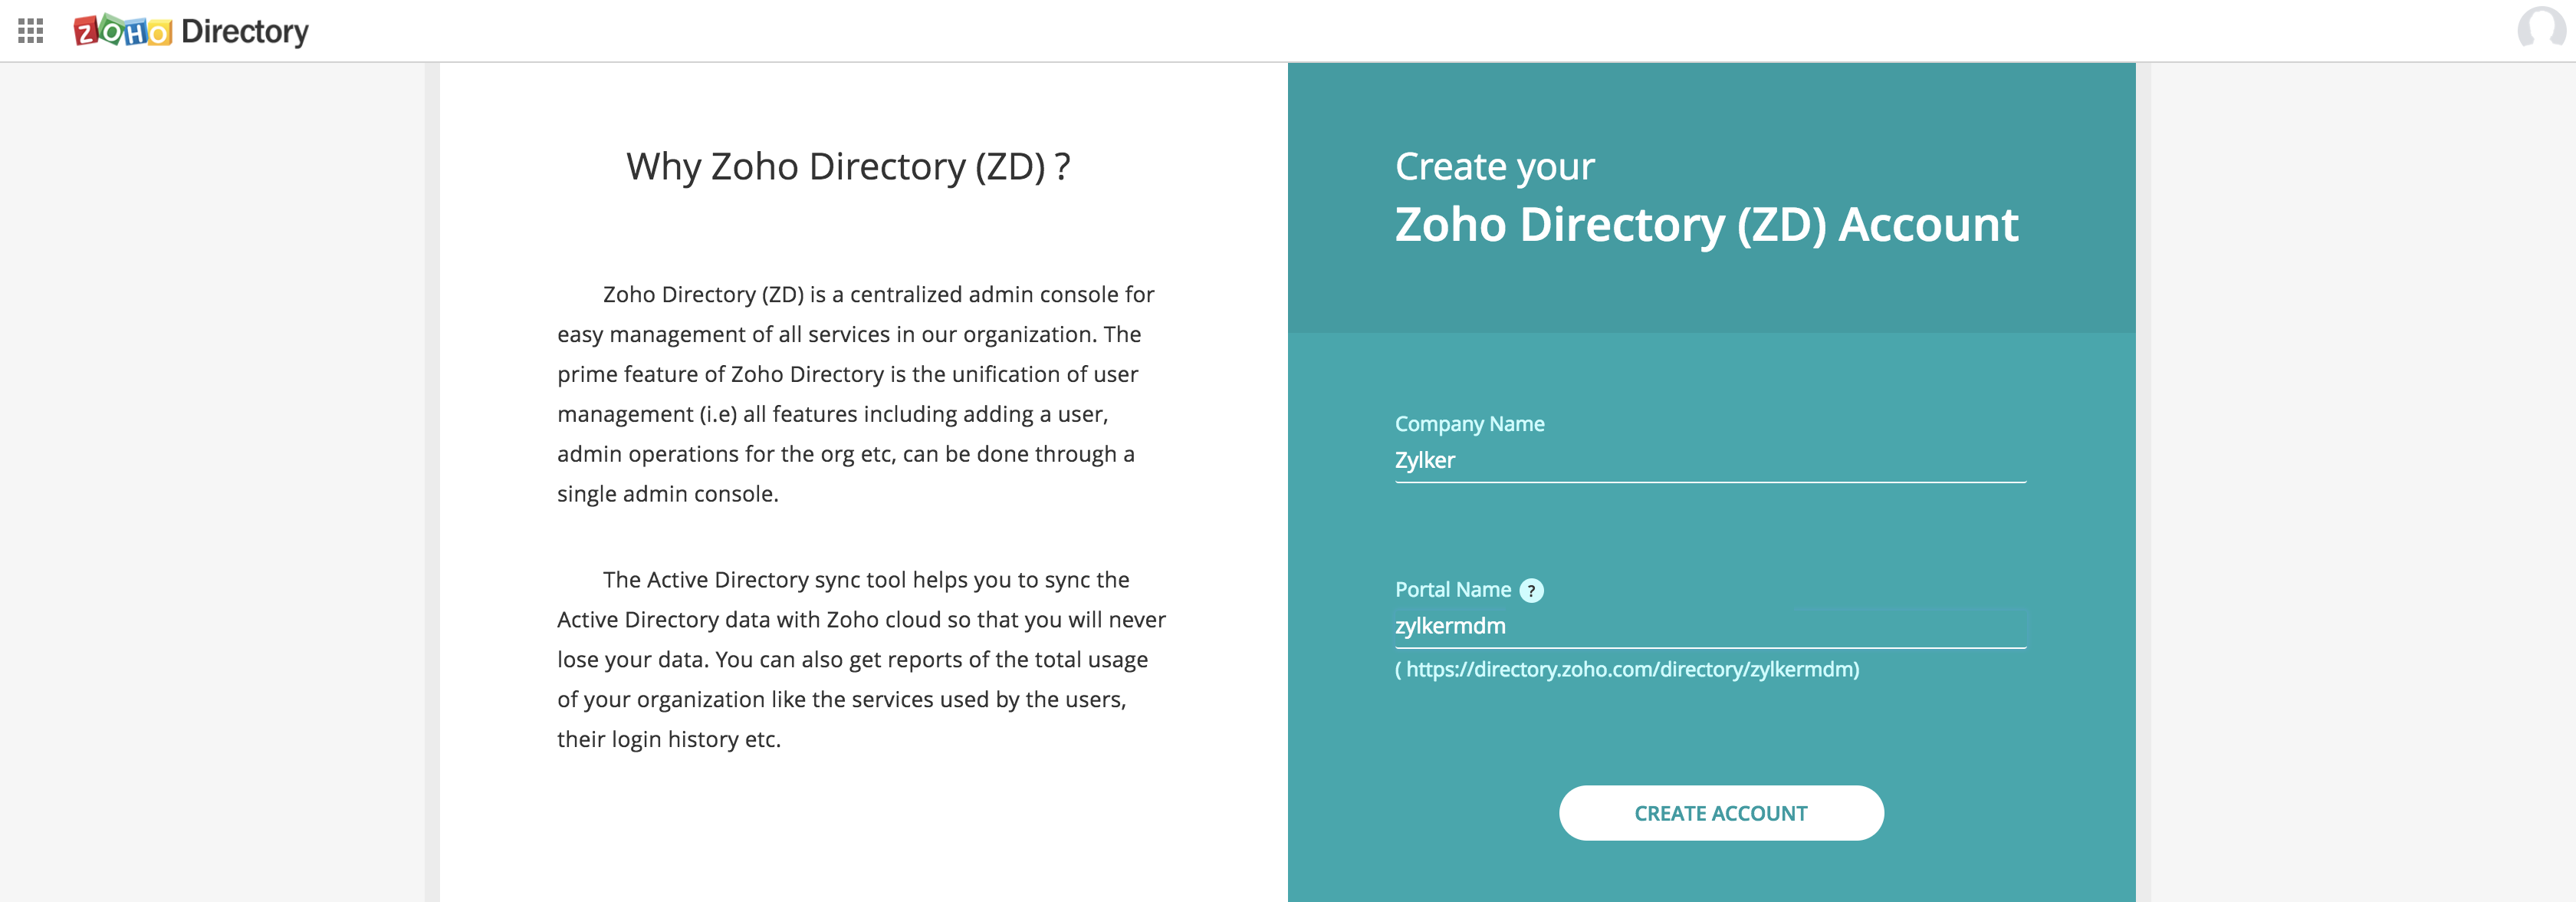
- Login to Zoho Directory, using the same Zoho account used for domain verification and signing up with MDM.
- Create a Zoho Directory instance, by providing your company name and portal name, which is added to the URL and used to identify your directory instance.
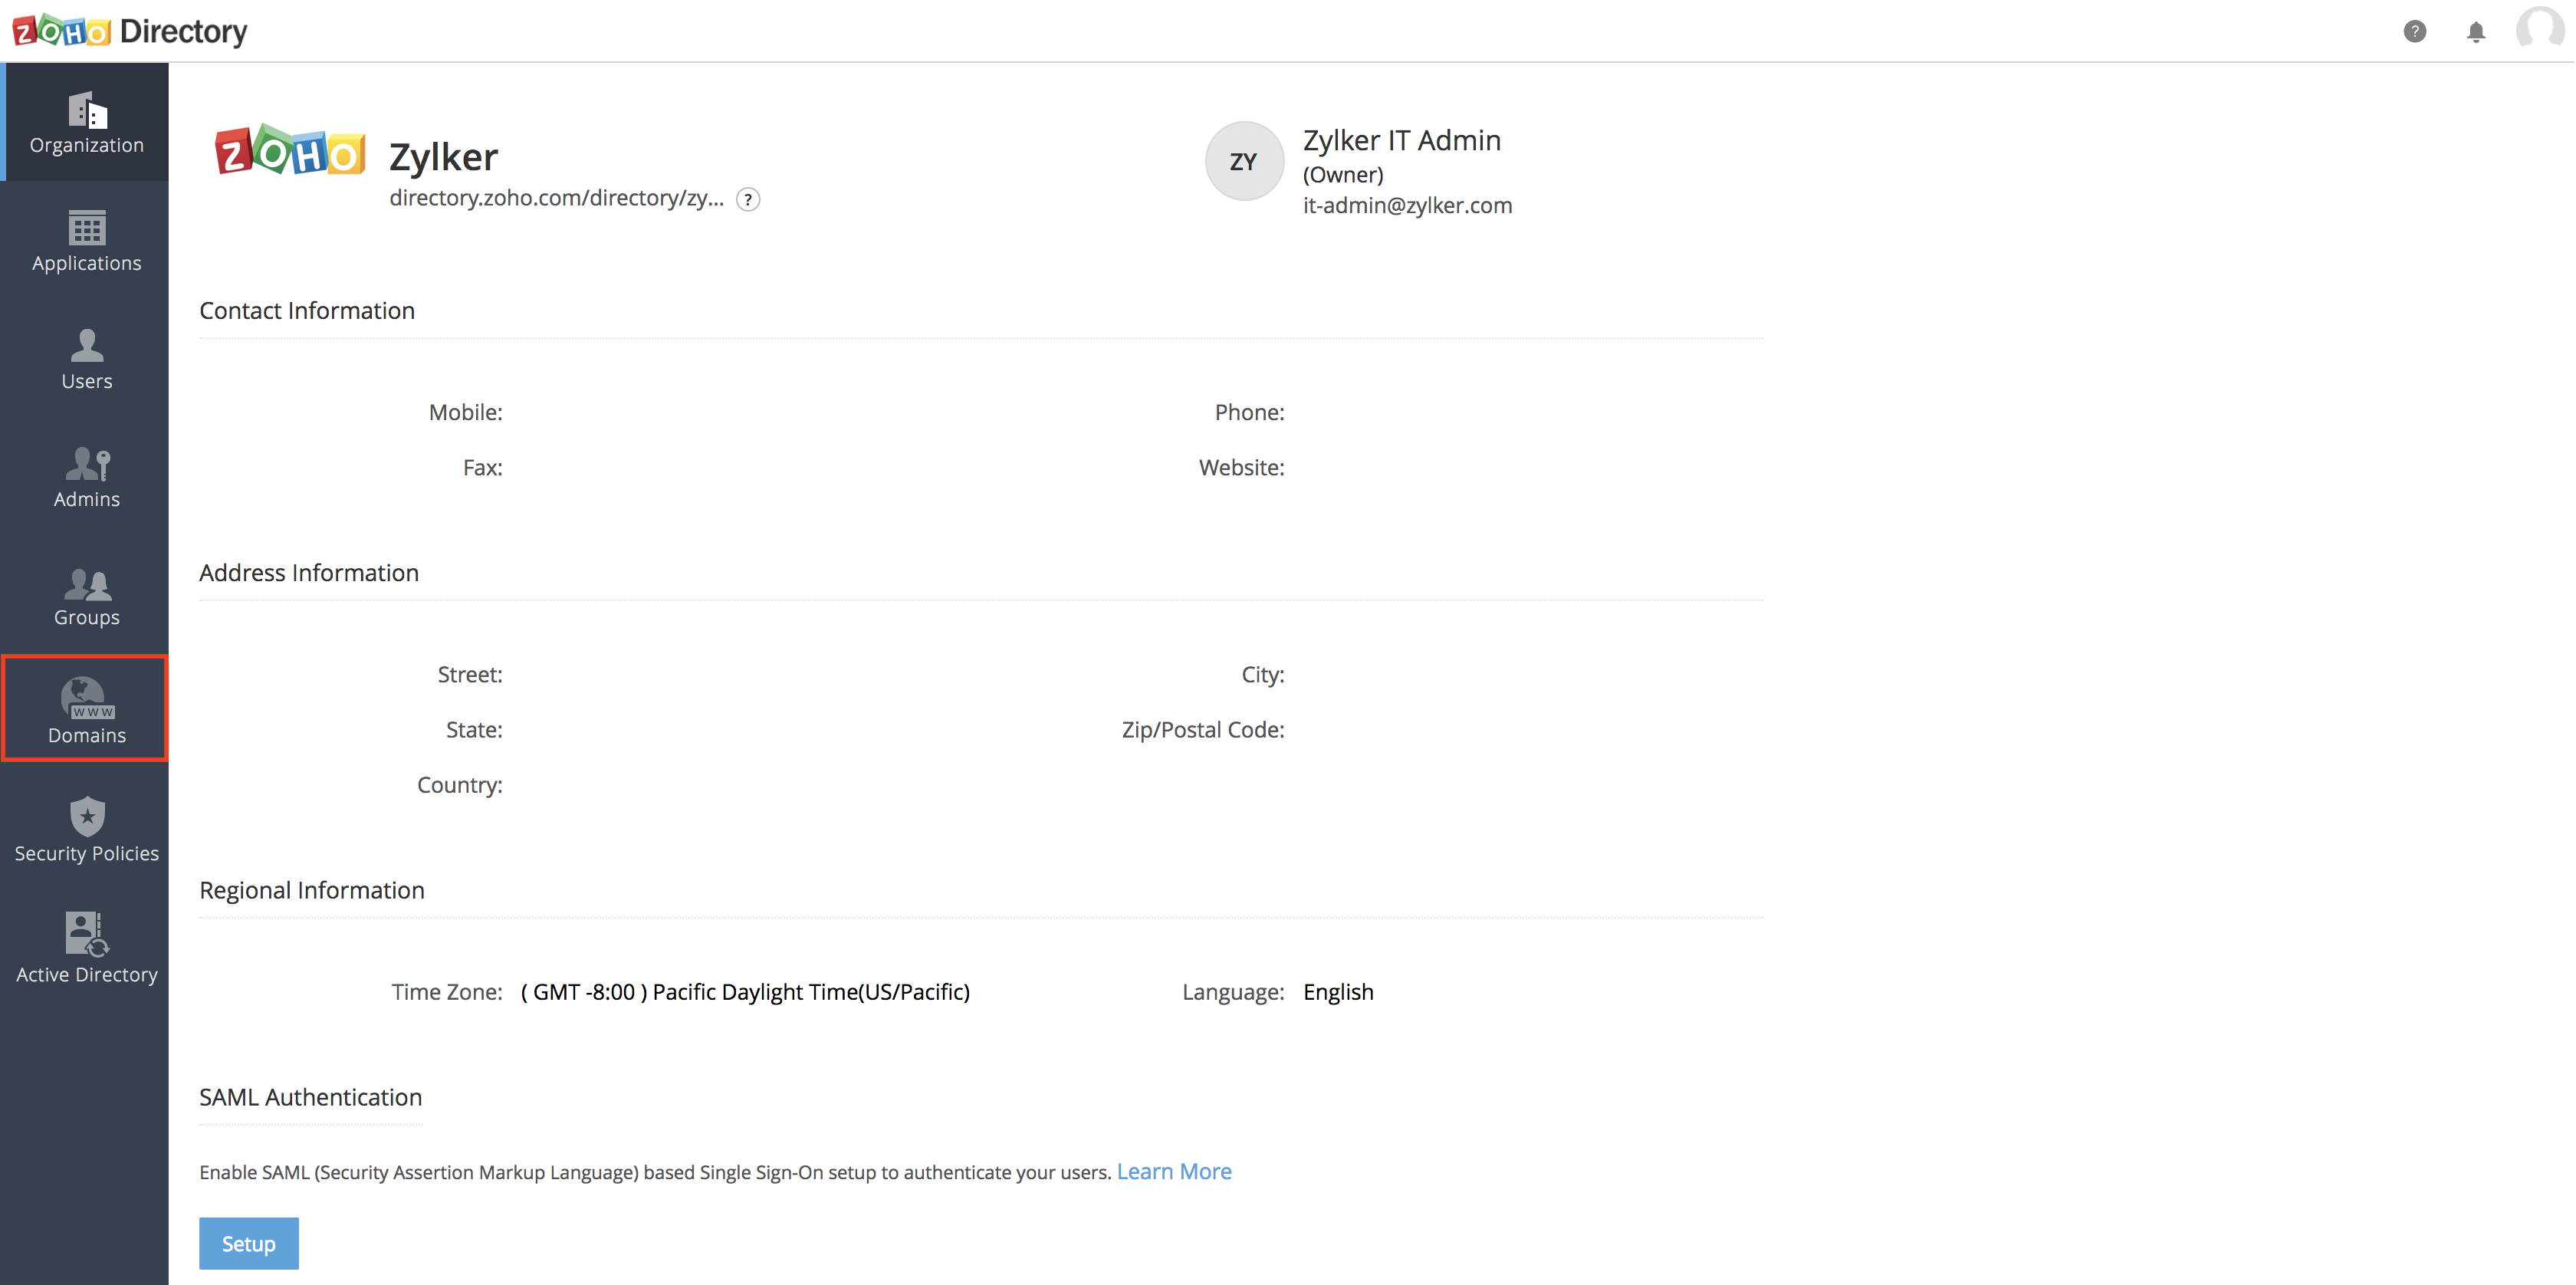
- You can optionally add the contact information, if need be and then click on Domains from the left pane.
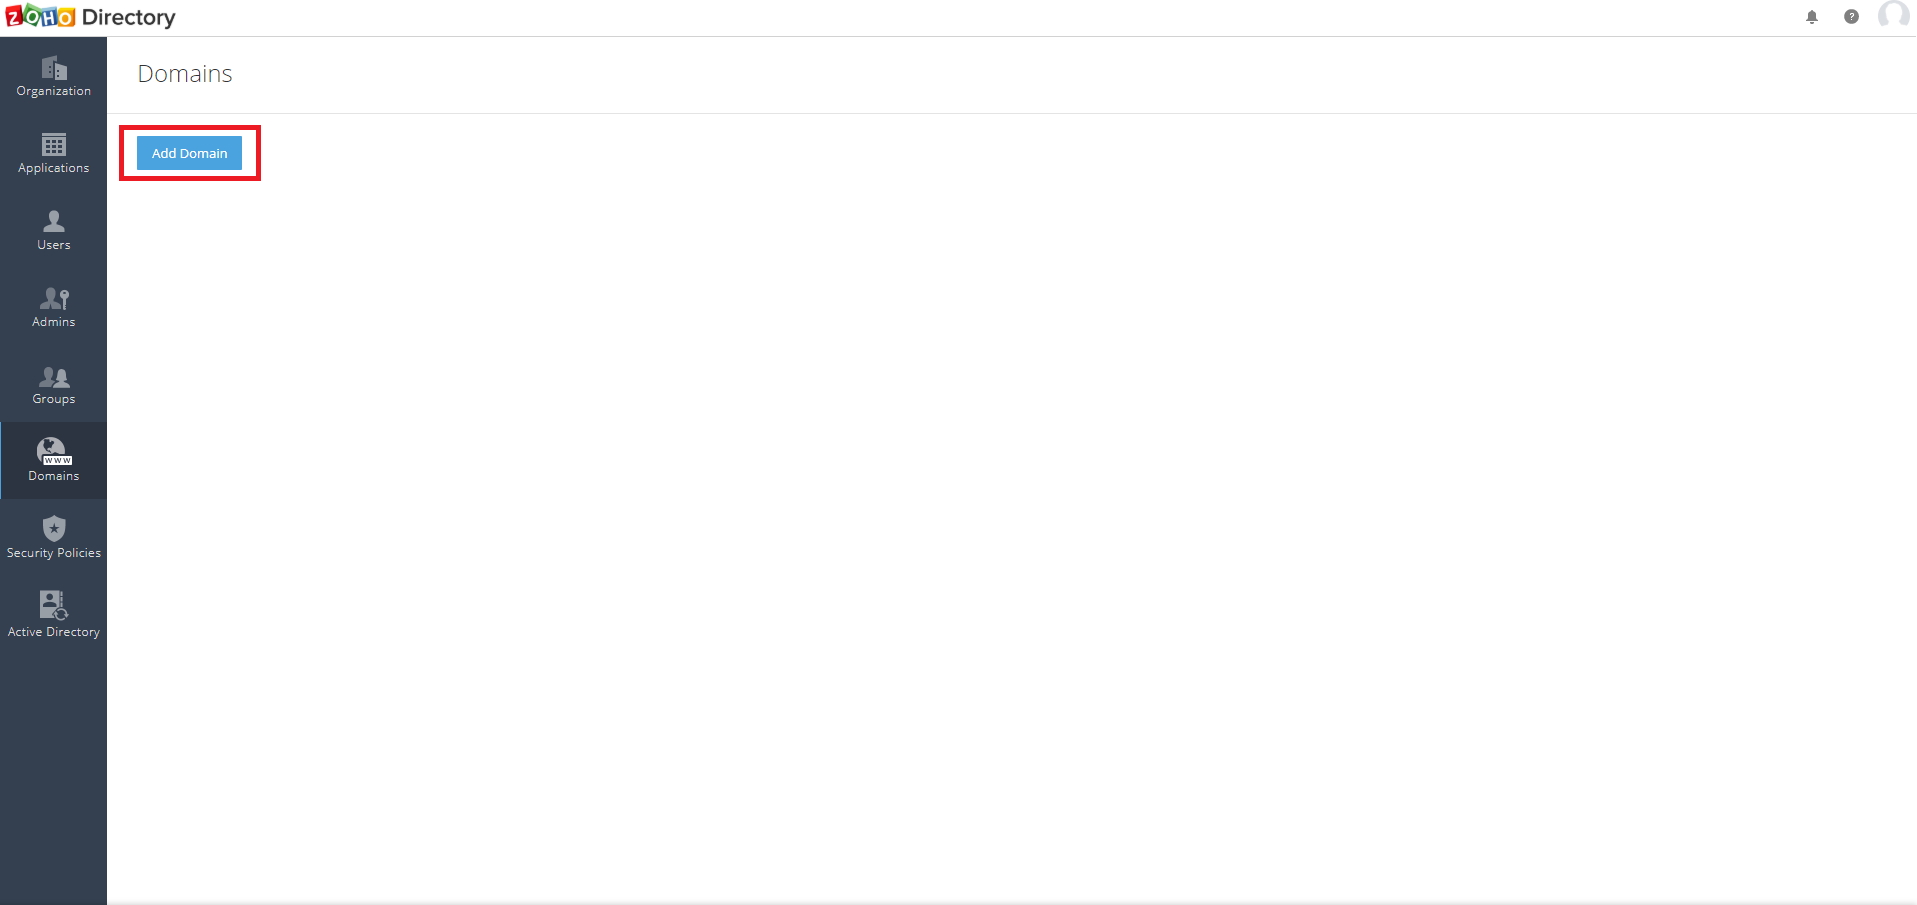
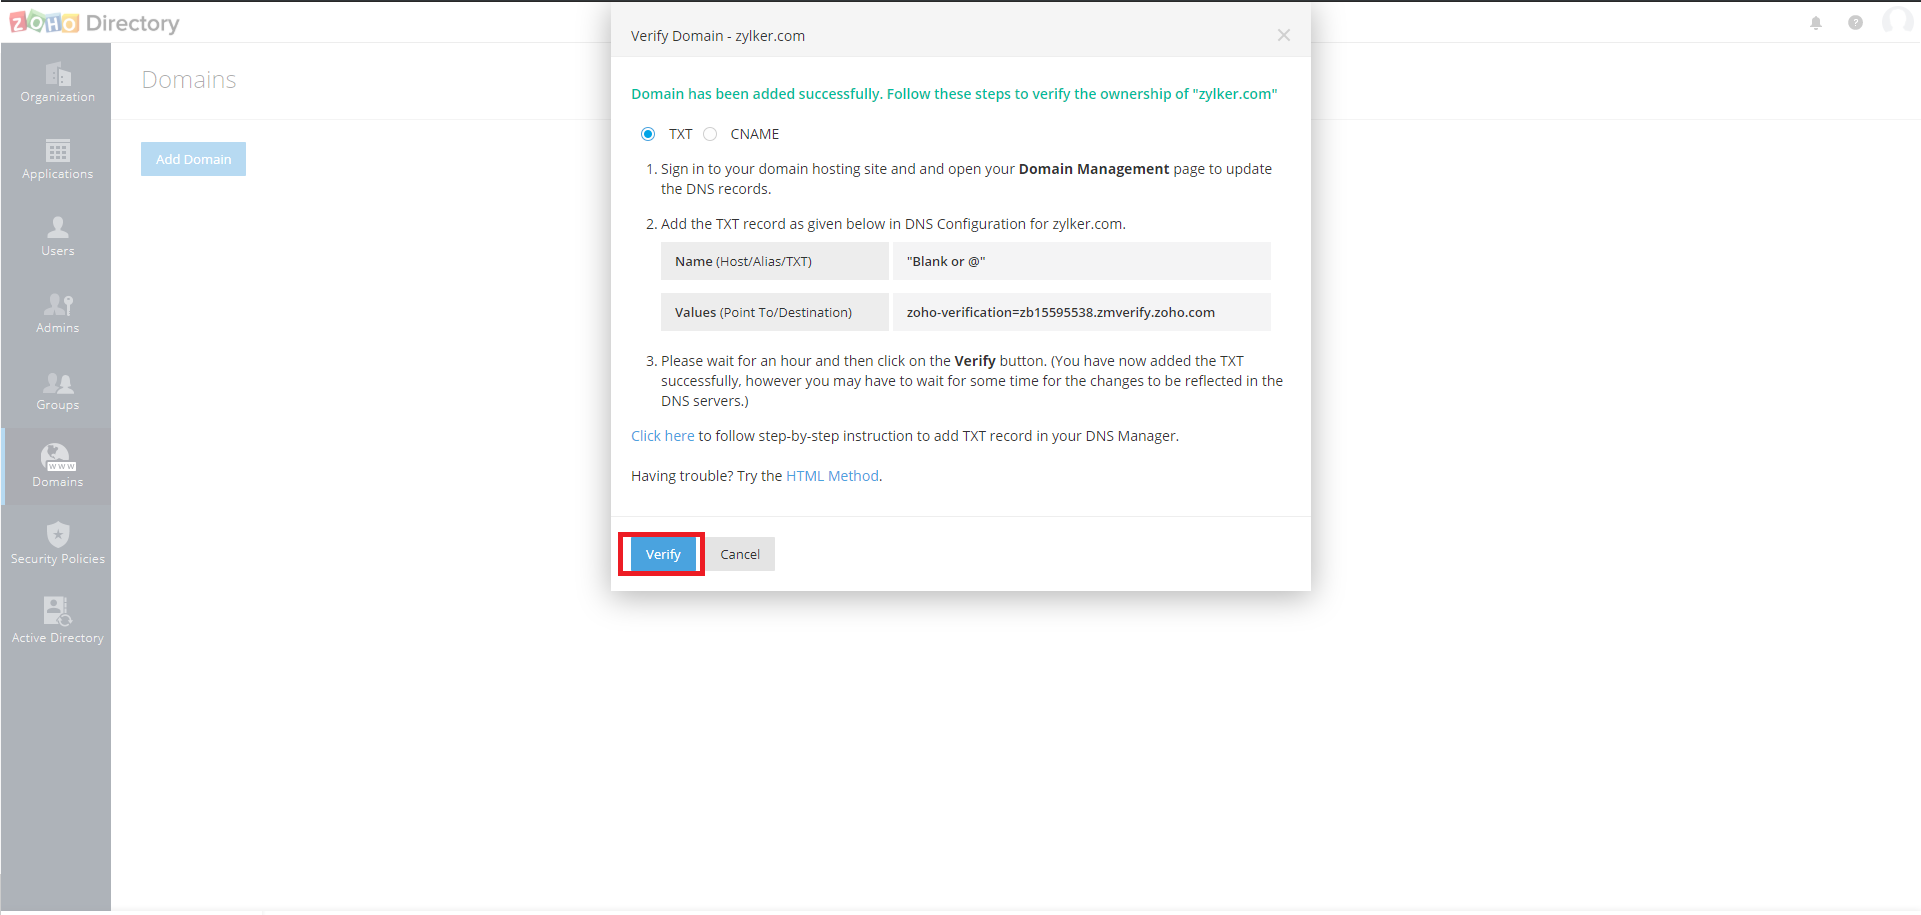
- It is required to add and verify your domain. In the Domains window, click on Add Domain.
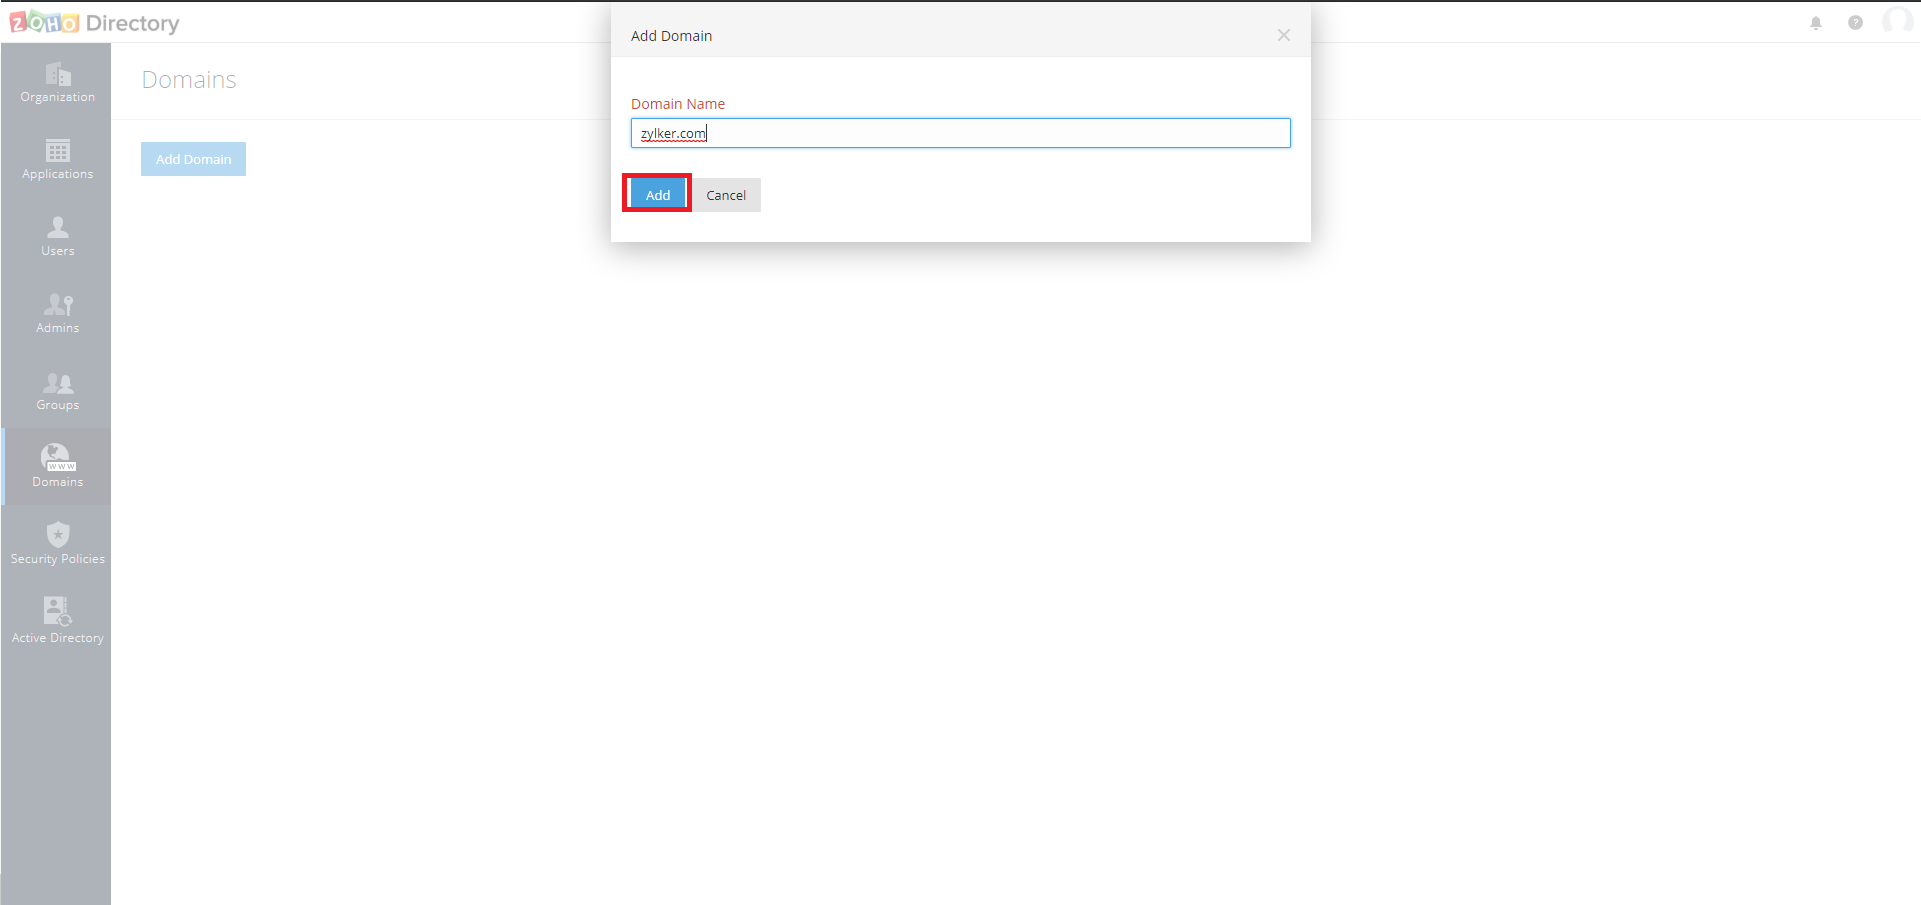
- Provide your AD domain name in the space provided, which in this case is zylker.com. Click on Add.
- Now, the added domain is to be verified. Follow the on-screen instructions to verify your domain. Once you are done, click on Verify.
- Check the status of your domain. Here, the green check mark implies the domain has been verified and added successfully.
- Now, click on Active Directory from the left menu and click on Download to download the tool on a Windows machine.


STEP #2: Setting up Zoho Directory Sync tool
The next part of the integration process involves setting up the Zoho Directory Sync tool, which is primarily responsible for syncing AD users and groups to MDM. Follow the steps given below to set it up:
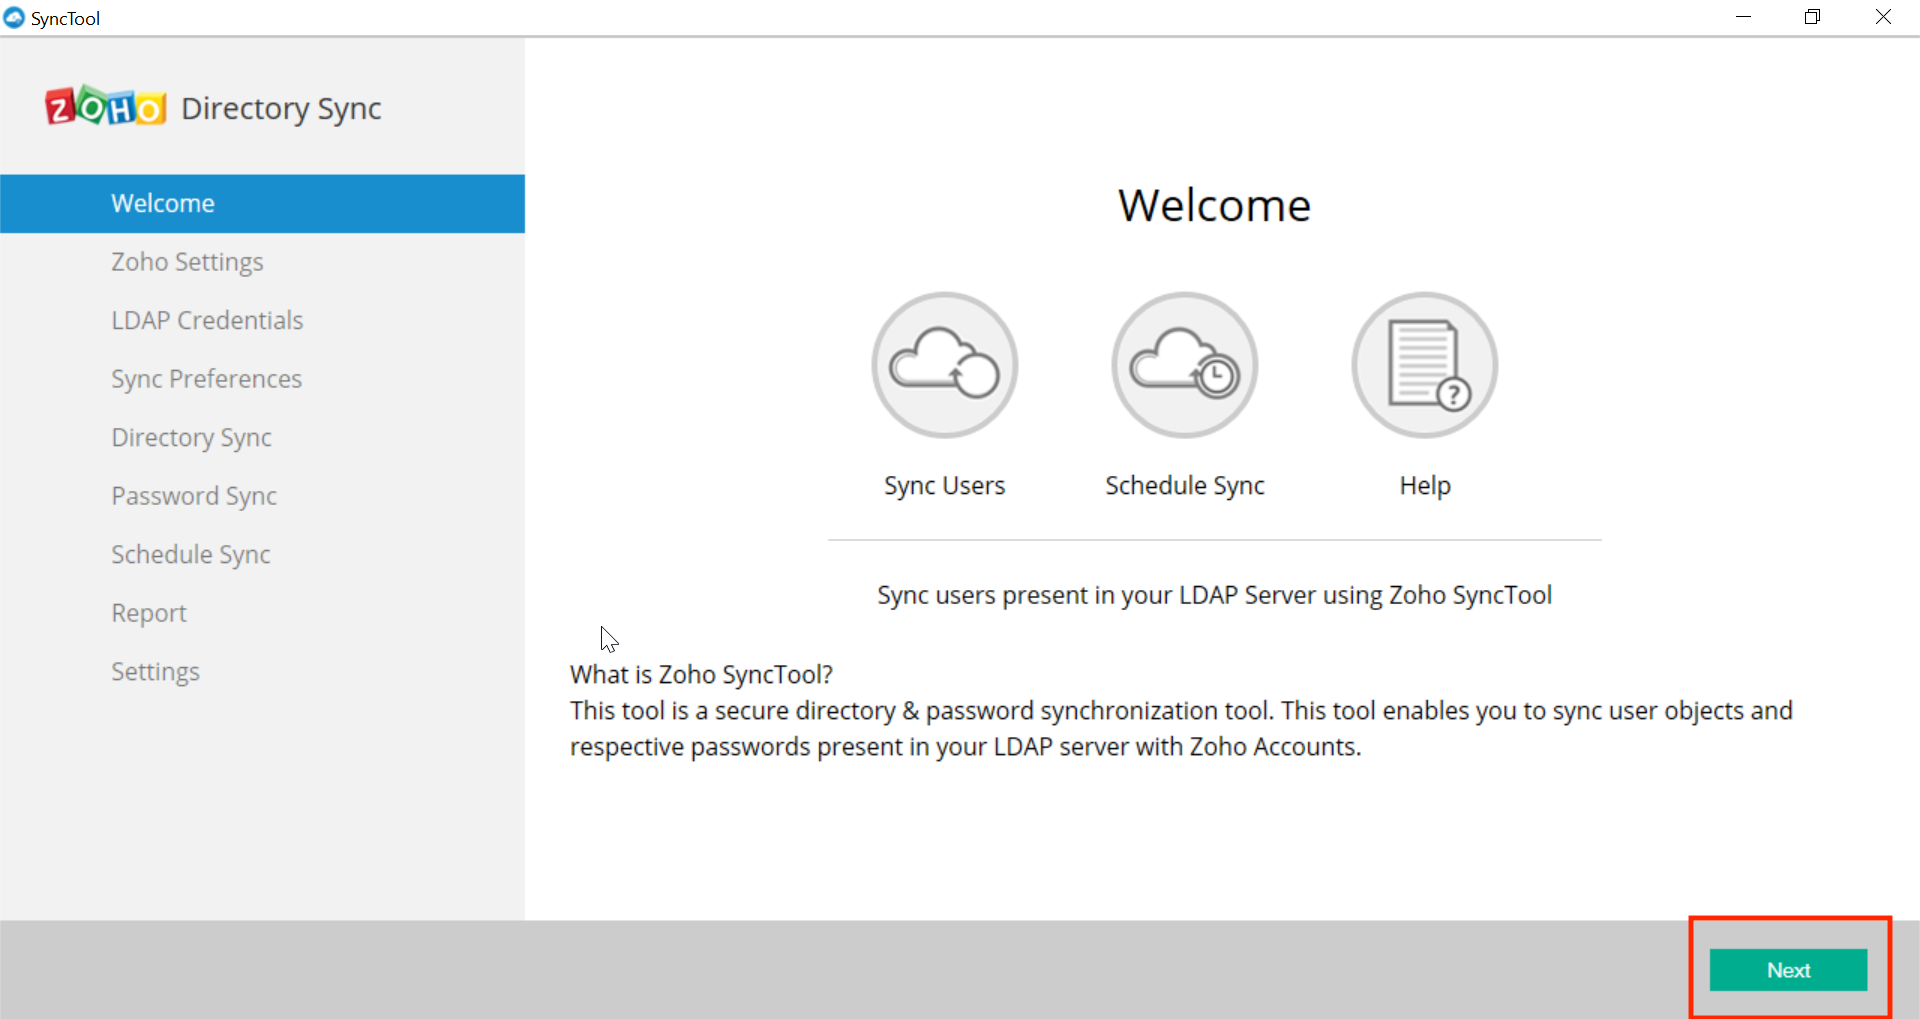
- Install the tool downloaded here. Open the tool and click on the Next button present in the introduction screen.
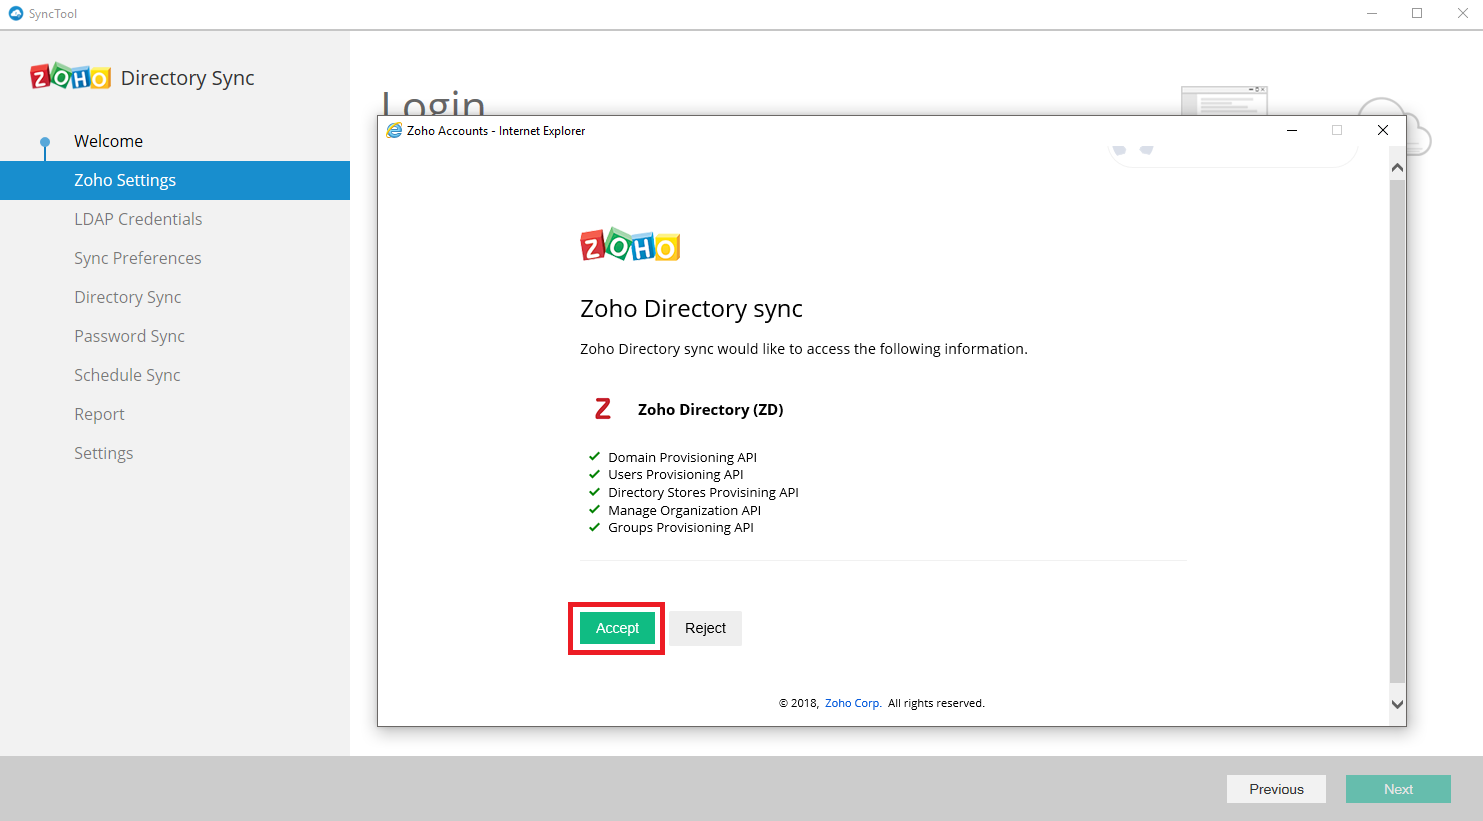
- In the Zoho Settings section, click on Authorize with Zoho and provide your Zoho account details in the new window, when prompted. This is to ensure the account provided in the Zoho Directory server and the tool are the same, since the tool is coupled with the Zoho account which is provided.
- After providing the account details, accept the permissions requested by clicking on the Accept button, when prompted.
- After your account details are listed, click on Next. If you modify your account details in future, you need to open this tool and click on Re-Authorize, in order to update the details in the tool
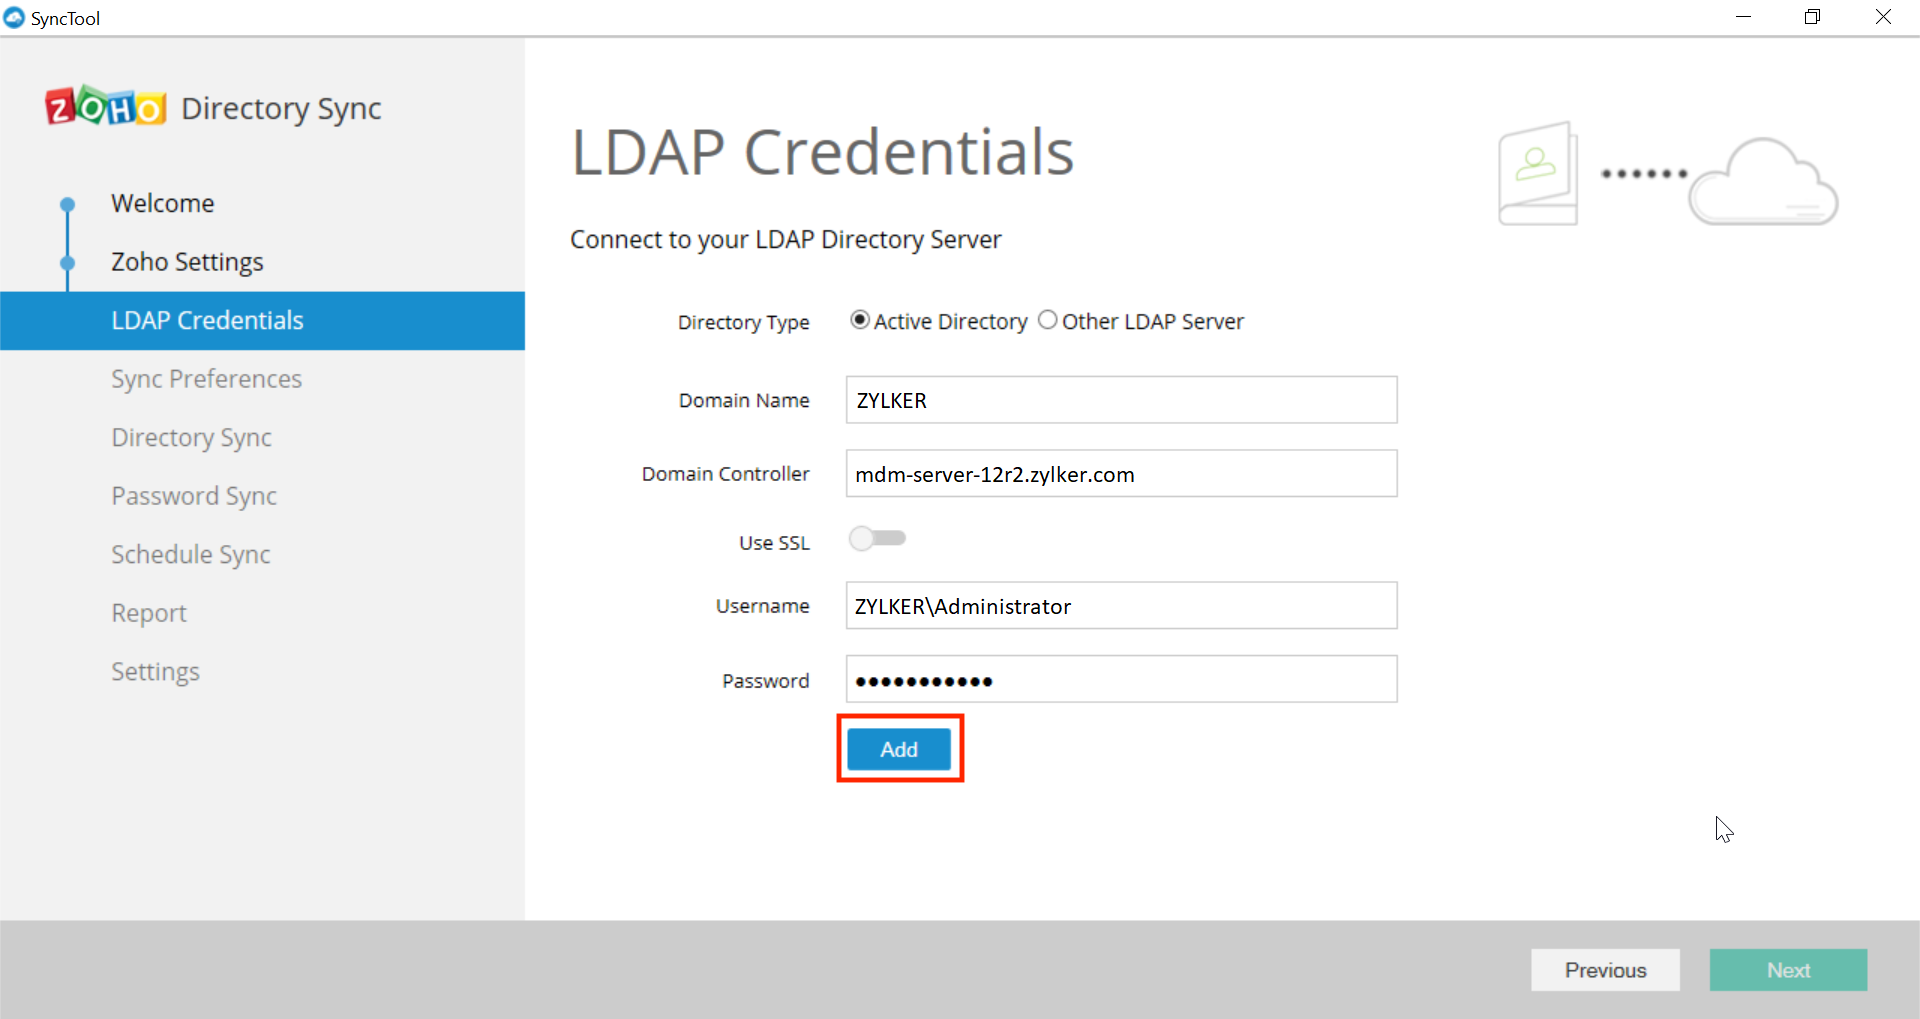
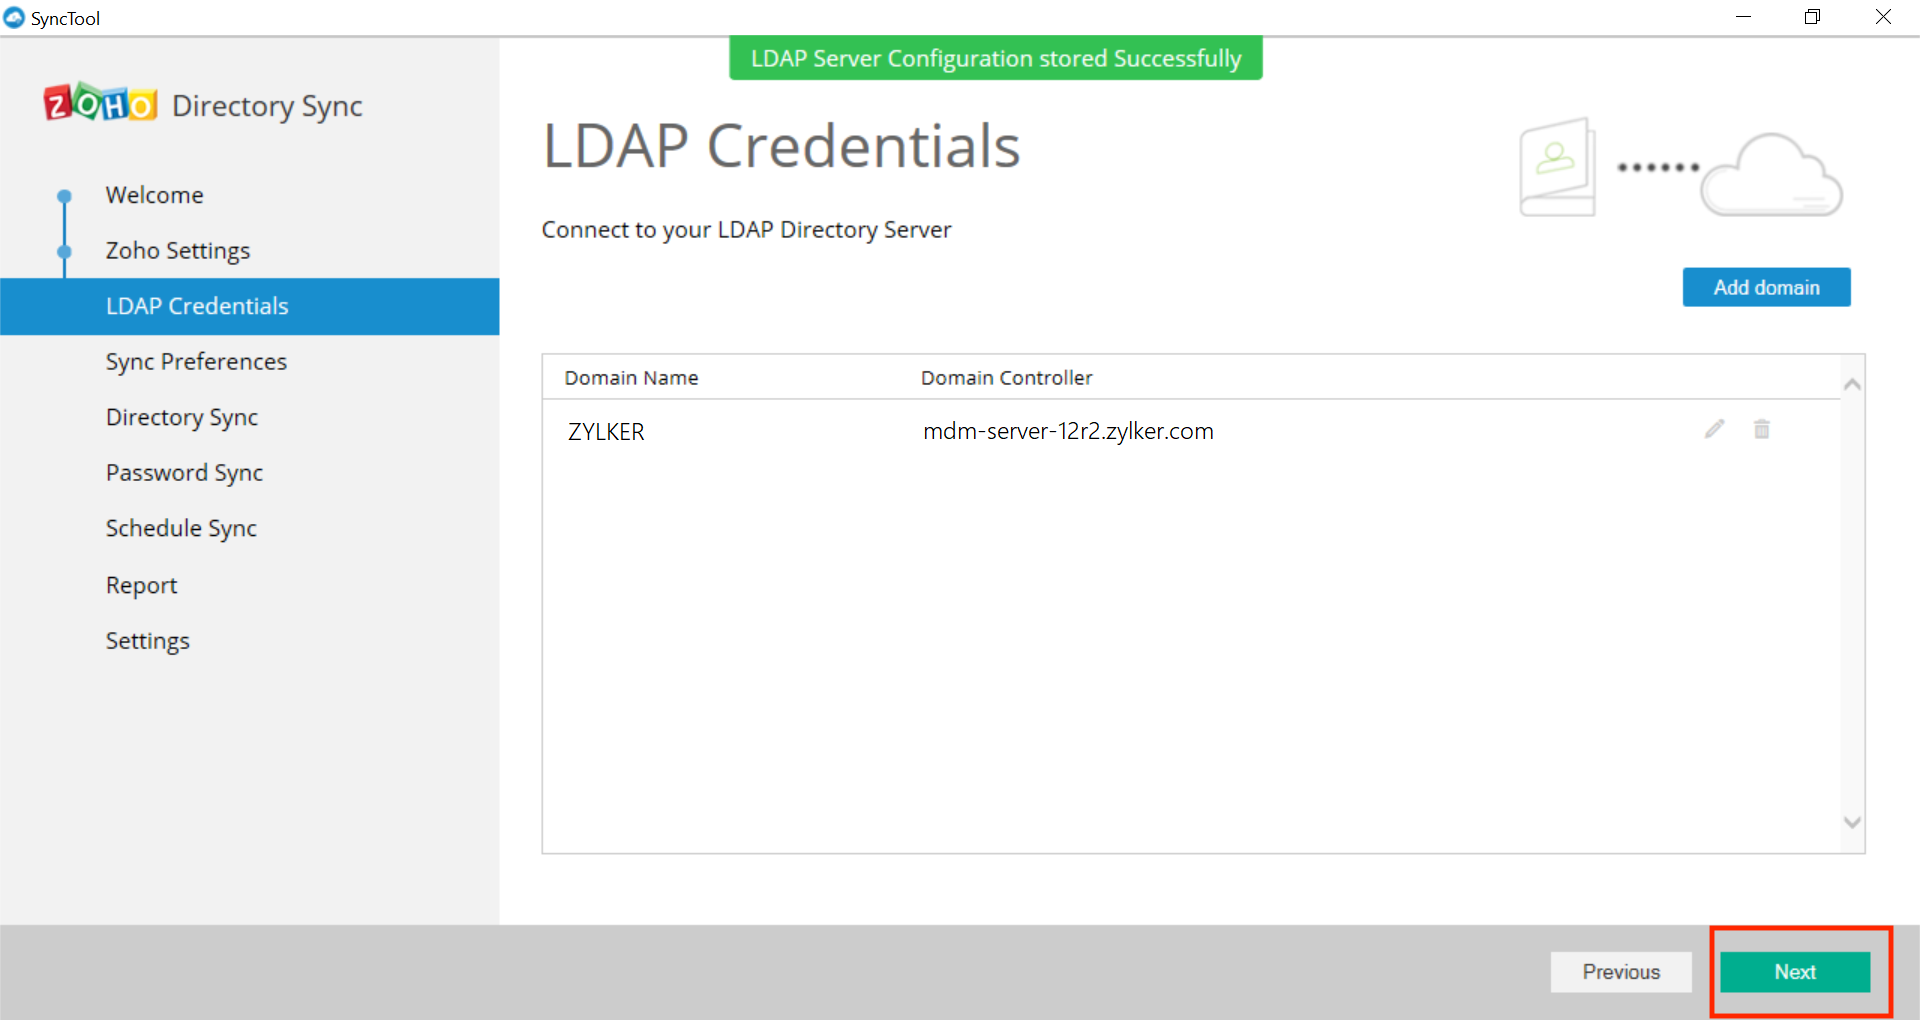
- Under the LDAP Credentials section, provide the details of your On-premises AD such as the domain name, domain controller etc. Refer the steps provided below to obtain these details.


- Domain Name
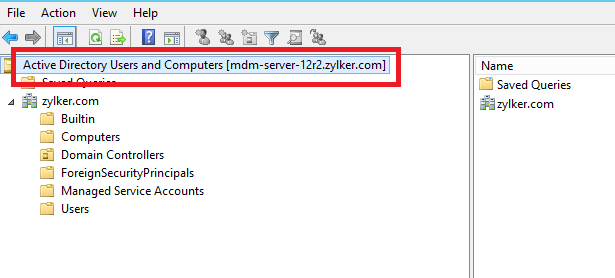
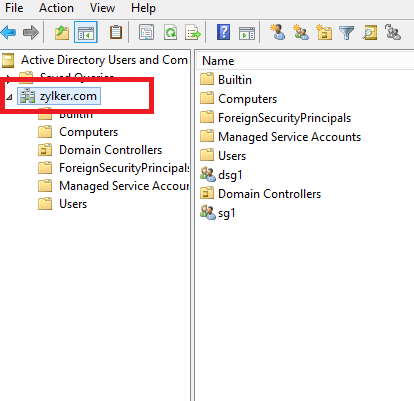
- Open the AD services and right click on the domain, which in this case is zylker.com
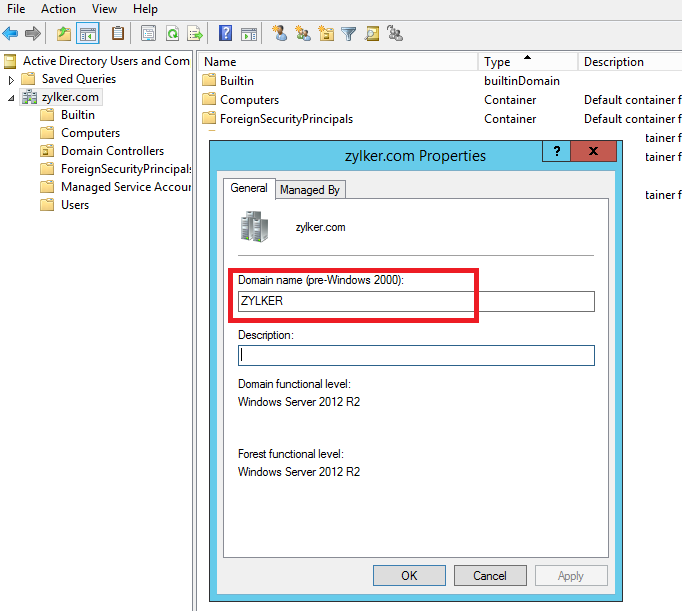
- Click on Properties to find the Domain Name
- Domain Controller
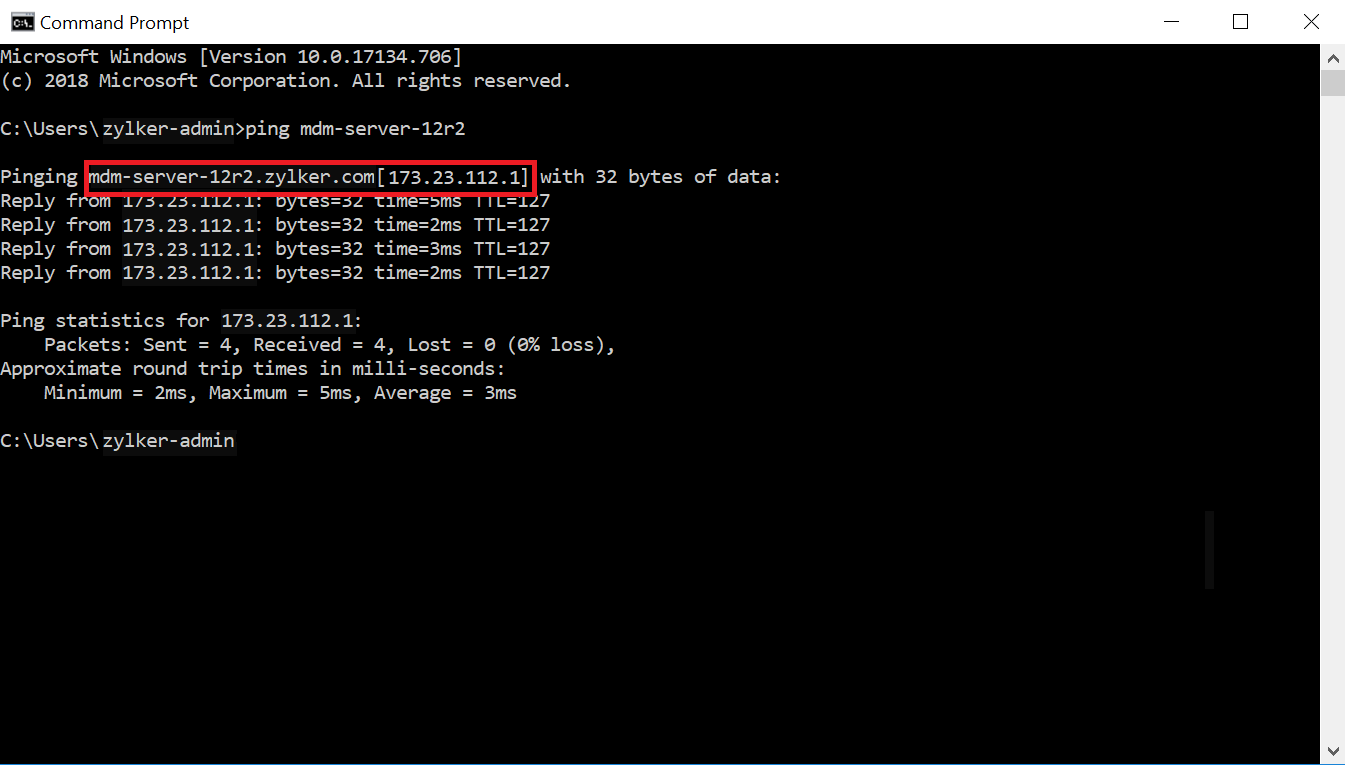
- Find the name of the server running your AD services, which in this case is mdm-server-12r2
- On Start menu, select Run, type cmd and click on OK. Enter the command, ping "server-name" to obtain the FQDN (Fully Qualified Domain Name) when connected within the same DNS network. Provide this FQDN as the Domain Controller, which in this case is mdm-server-12r2.csez.zohocorpin.com
- Username
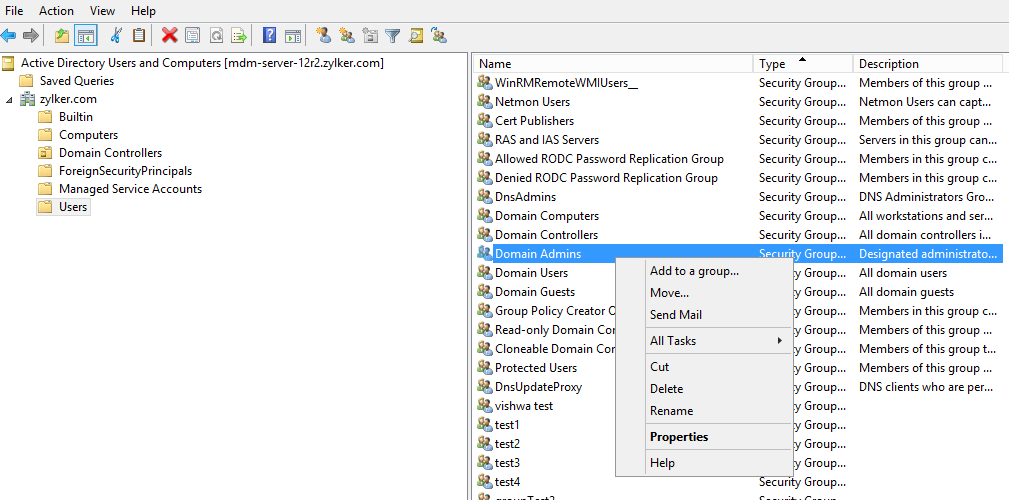
- Under the Users folder in your AD services, right click on Domain Admins, access properties.
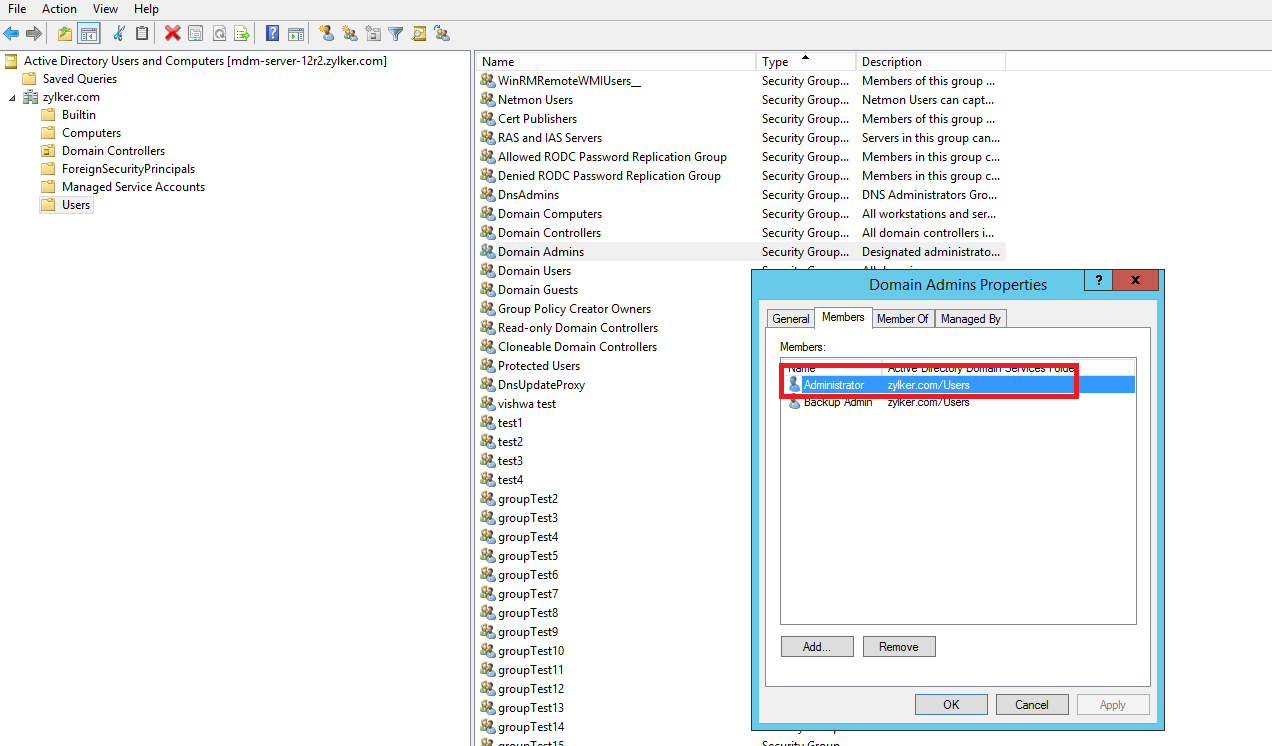
- Now, under the Members tab, double click on Administrator.
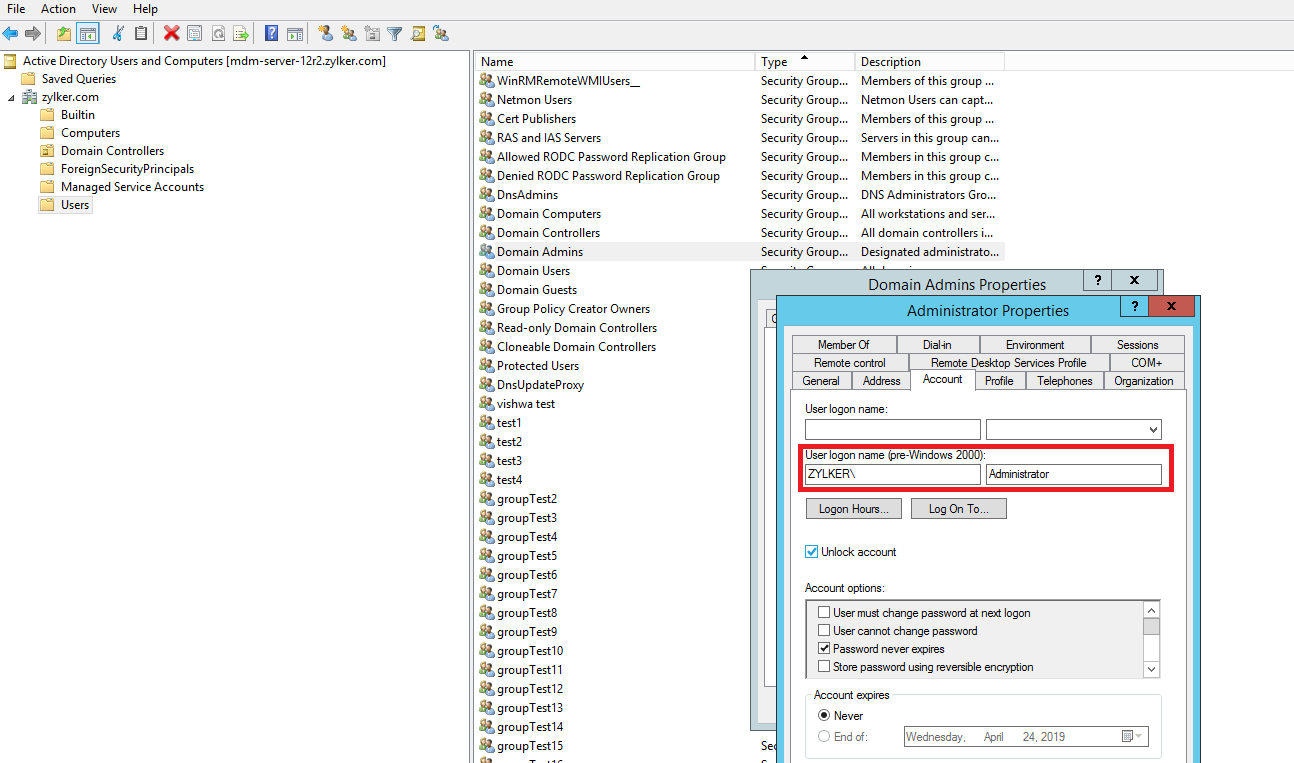
- Copy and paste the User logon name as the Username in the LDAP credentials application in the format Domain Name\Administrator Username, which in this case is ZYLKER\Administrator.
The Domain Name can be obtained from the AD server properties by following these steps:

Follow these steps to obtain the required username. The username must be entered in the format of Domain Name\Administrator Username
- Once you've provided all the requisite details, click on Add.
- After verifying the details specified, the domain gets added to the tool. Click on Next, to proceed further. You can choose to optionally add additional domains by clicking on the Add Domain button.
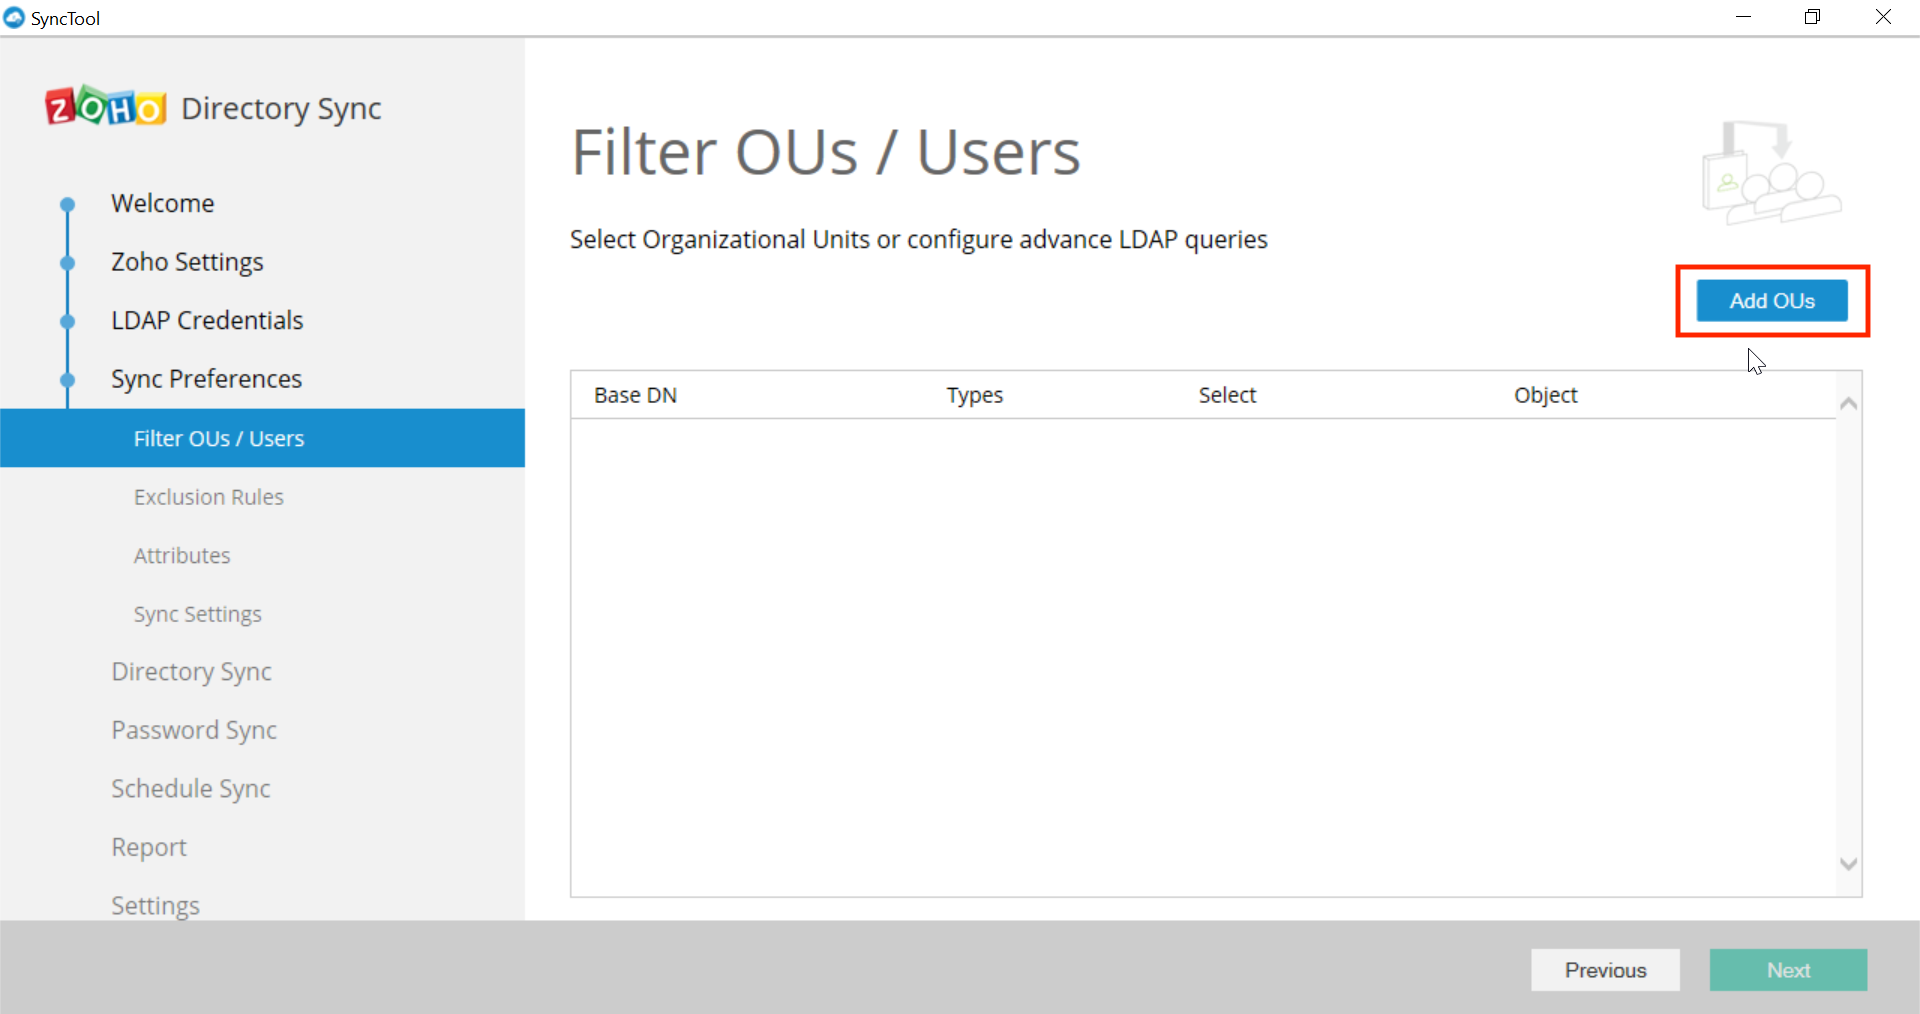
- Now, the next step is to add users and/or groups. You can do it by clicking on Add OUs. Once selected, the first step is to select the base DN by clicking on the space provided.
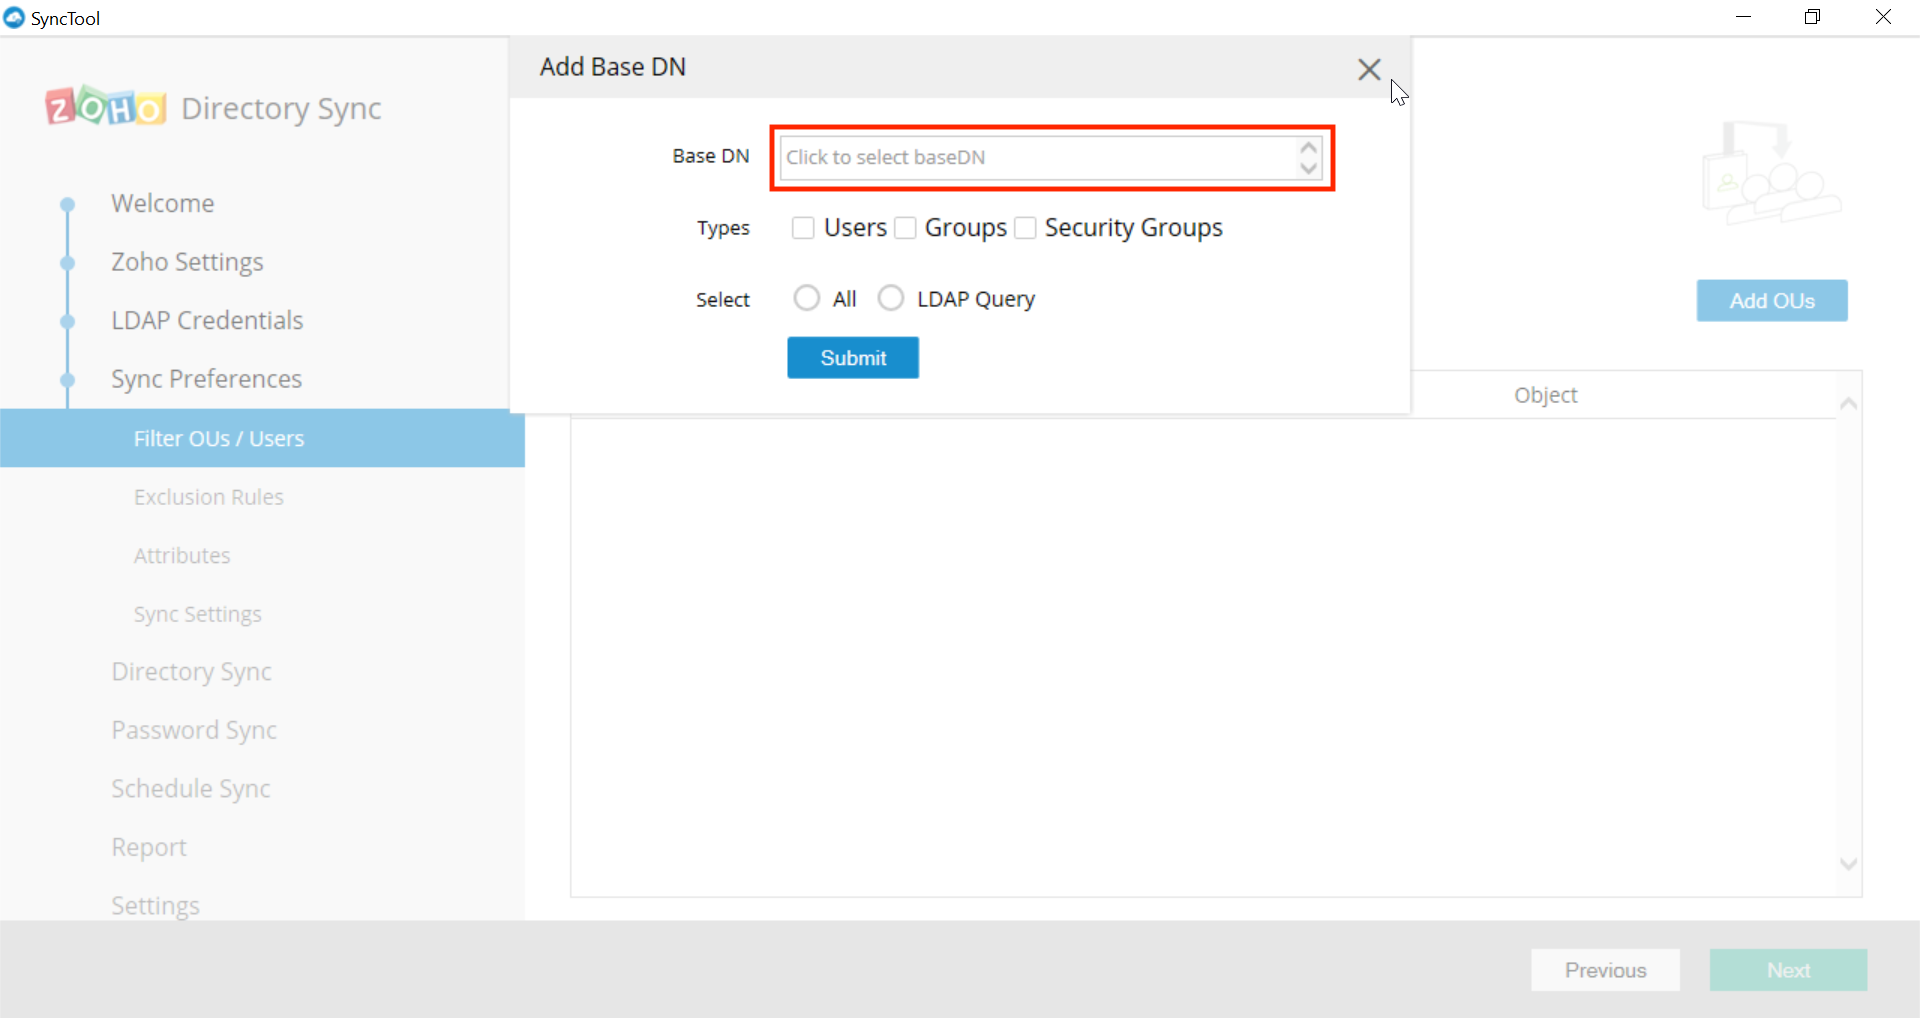
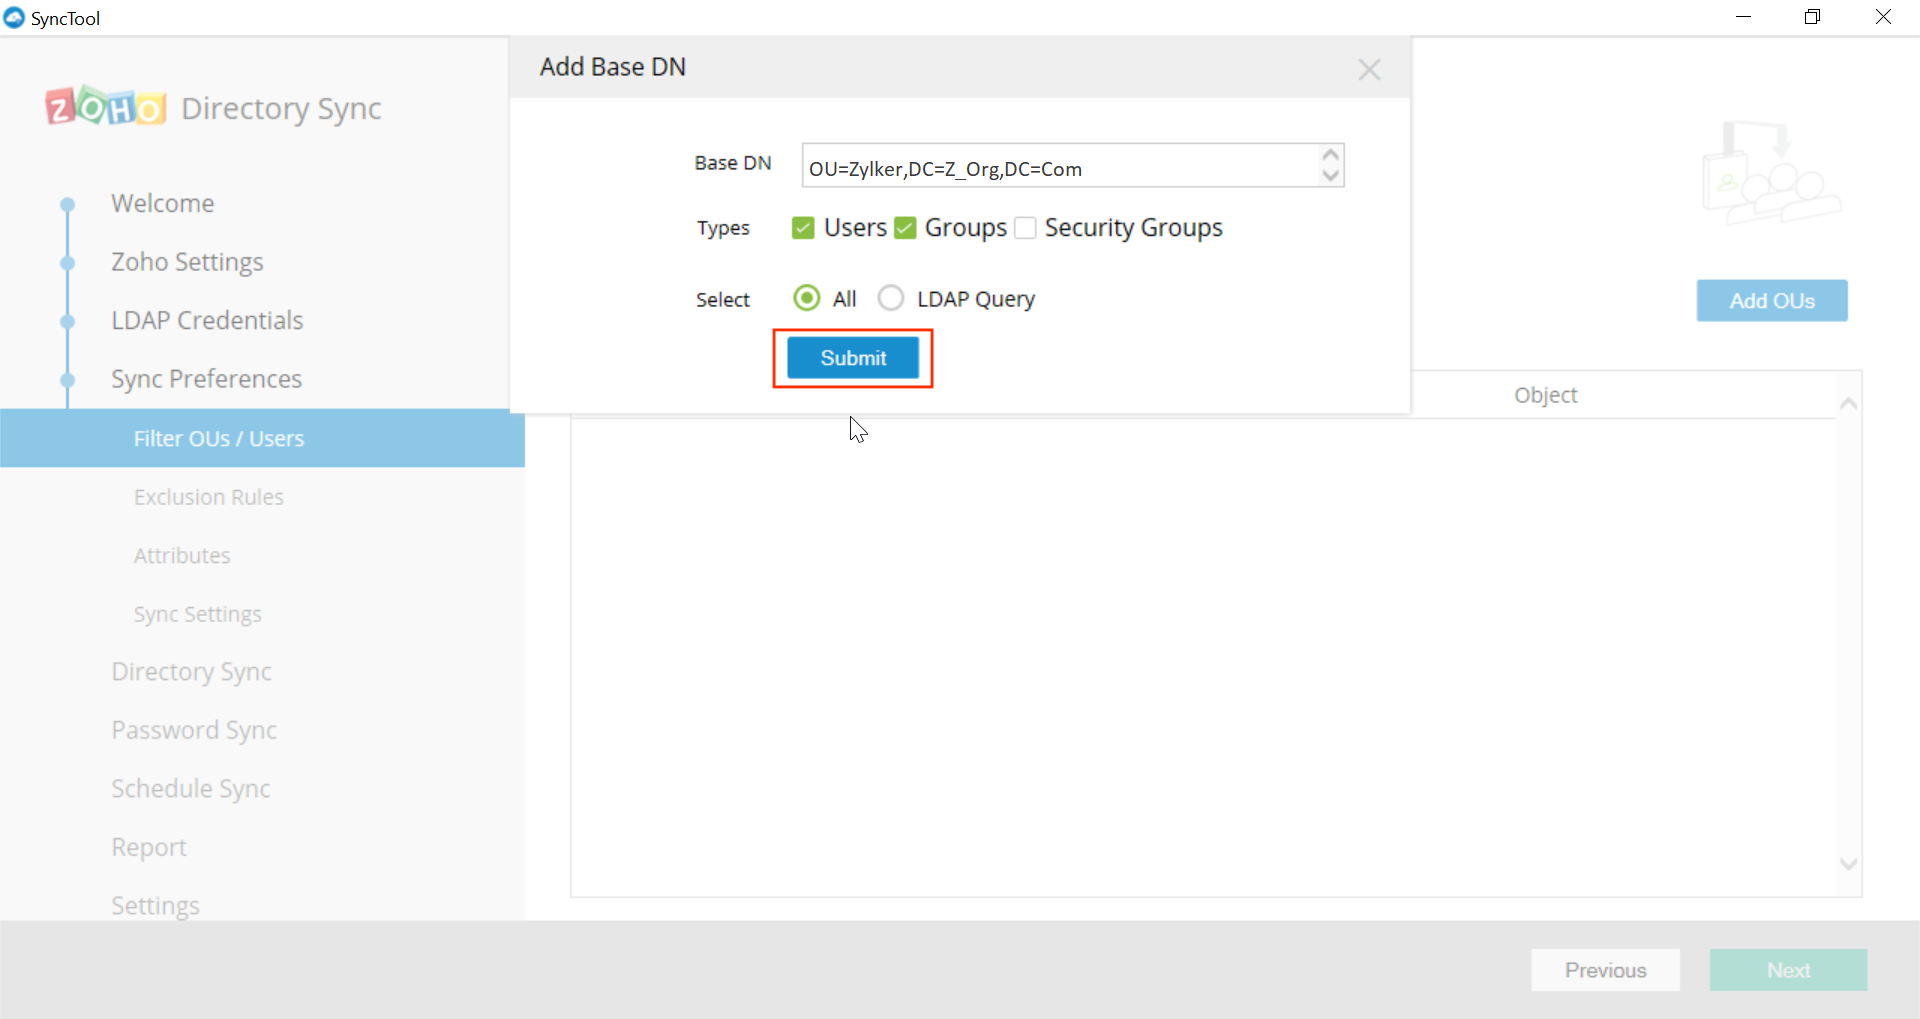
- You can either select all users/groups or specific ones based on your need. Once done, select the corresponding option(s) based on whether you have selected users, groups or both. You can add users/groups based on an LDAP query or you can add all of them. Once done, click on Submit.

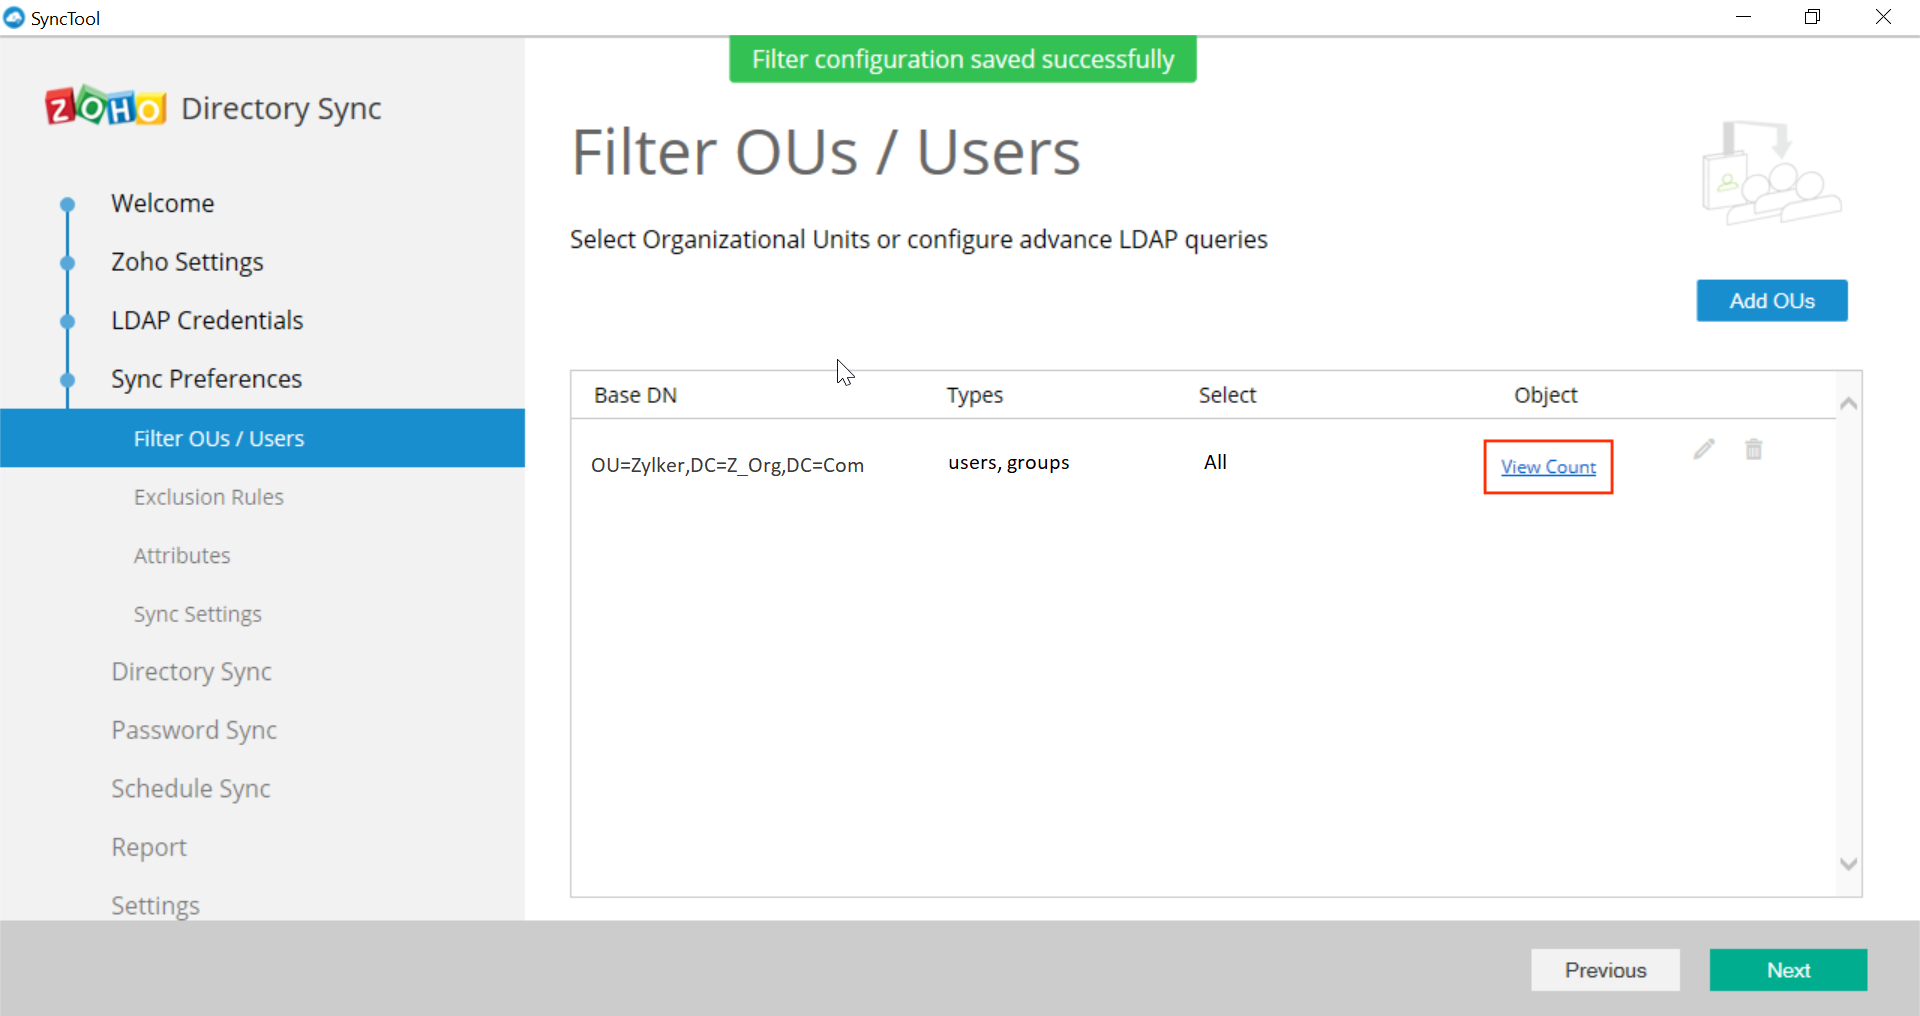
- You can obtain the number of users and groups added, by clicking on the option View Count.
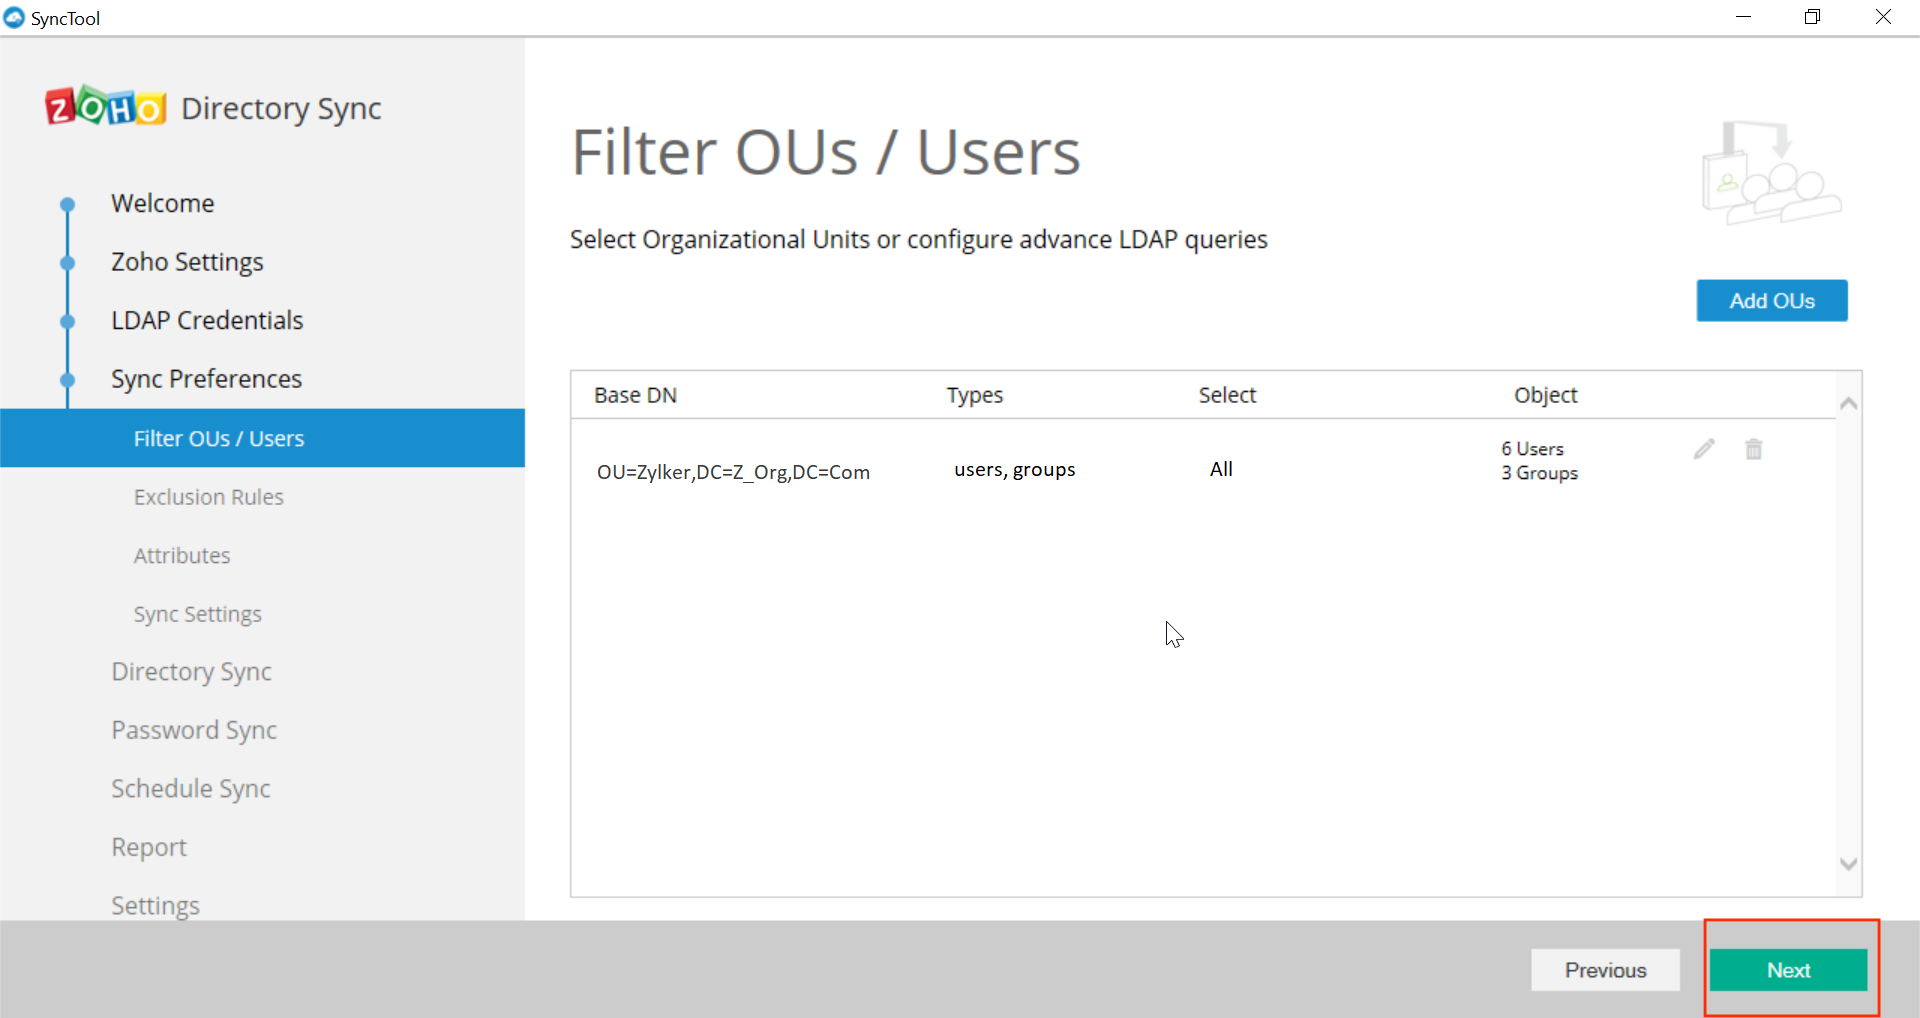
- You can optionally configure exclusion rule based on a specific parameter and ensure any entity matching this condition is removed.

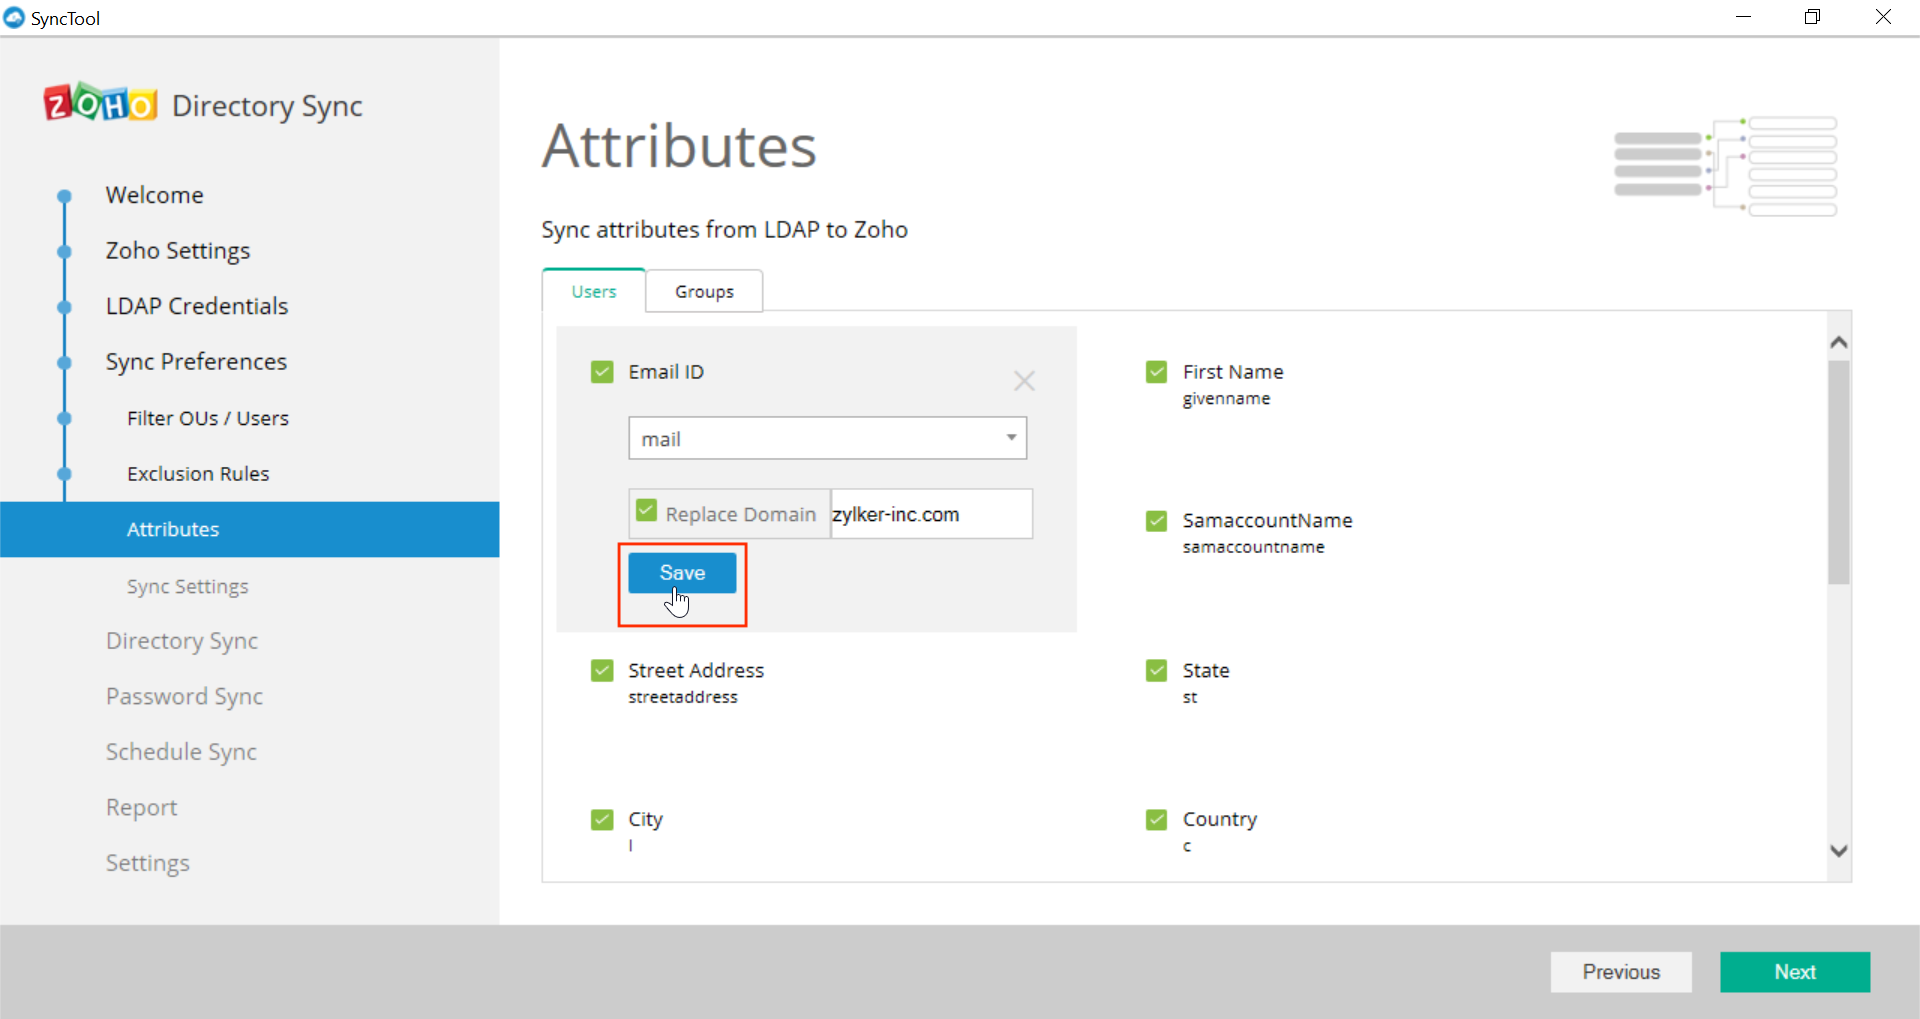
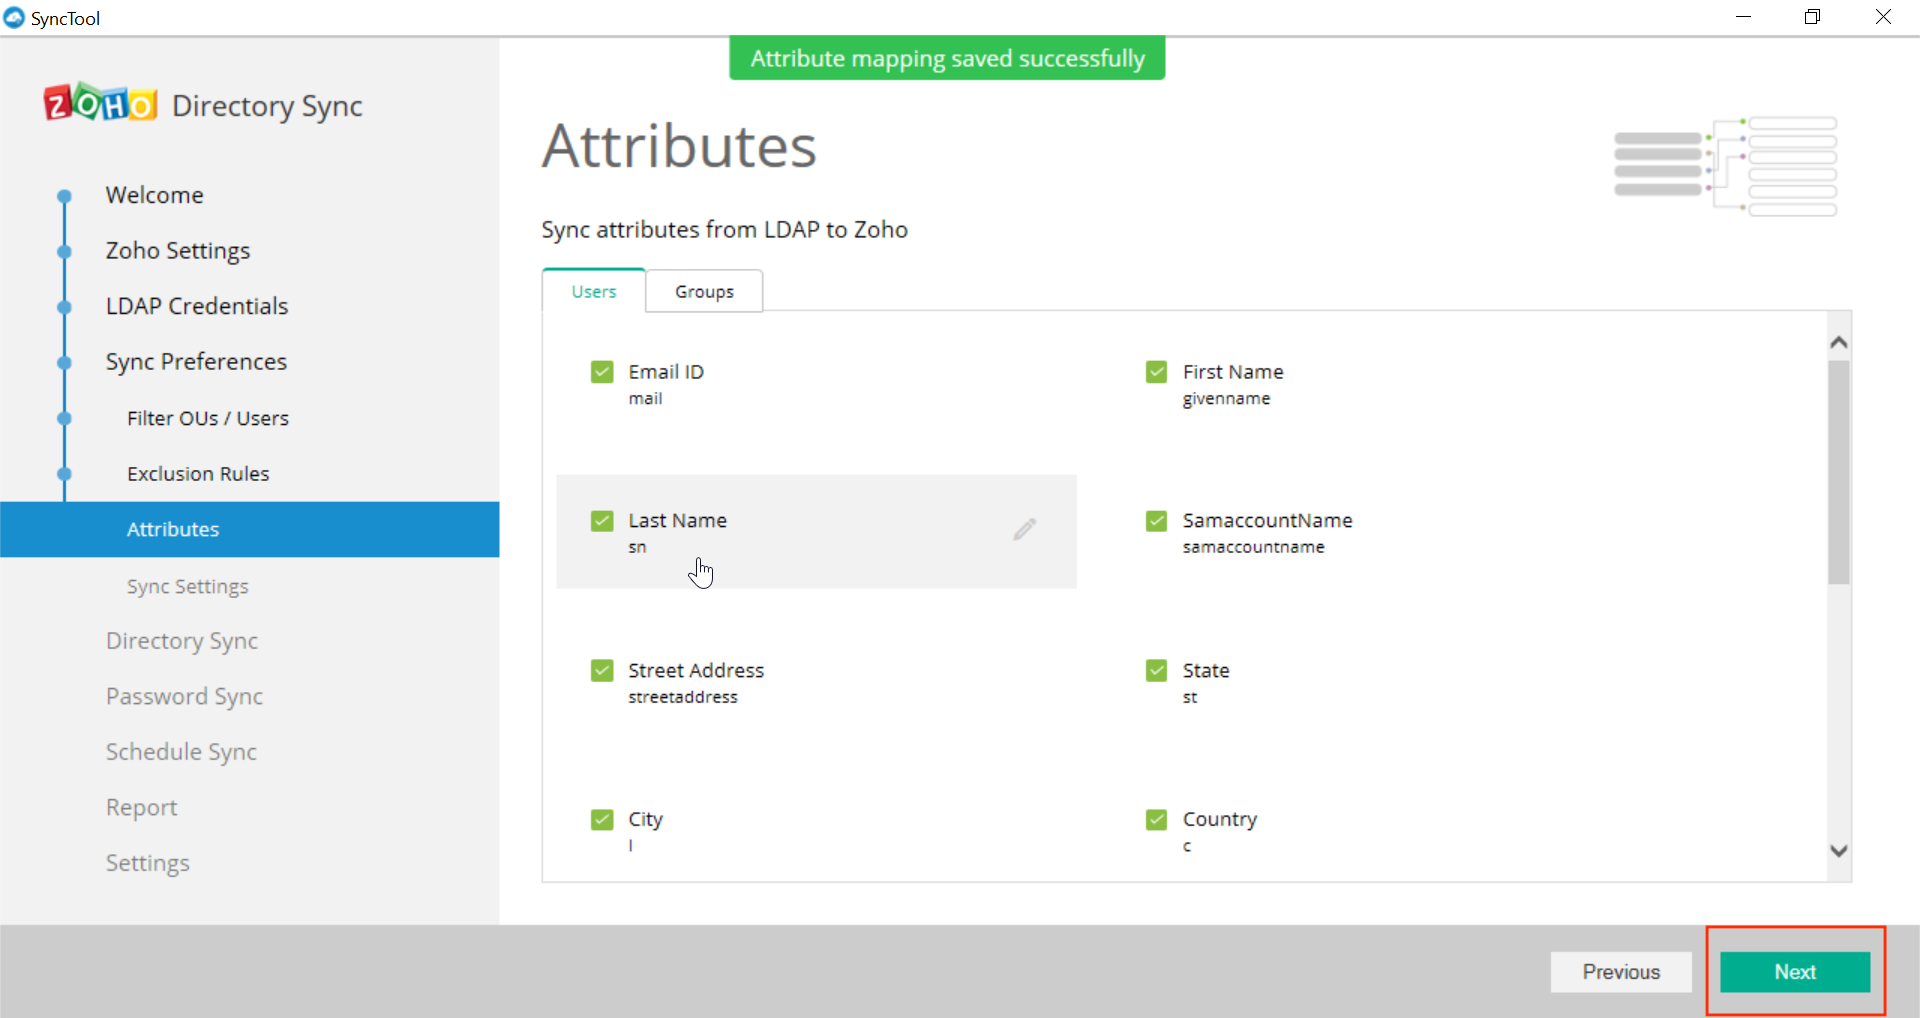
- In case you need to modify the uploaded AD user/group attributes specifically for MDM integration, you can choose to modify it here. For example, if your AD domain and e-mail are different, you can select E-mail ID and replace the AD domain with e-mail domain.
- Once done, click on Save to save the attribute mapping and click on Next.
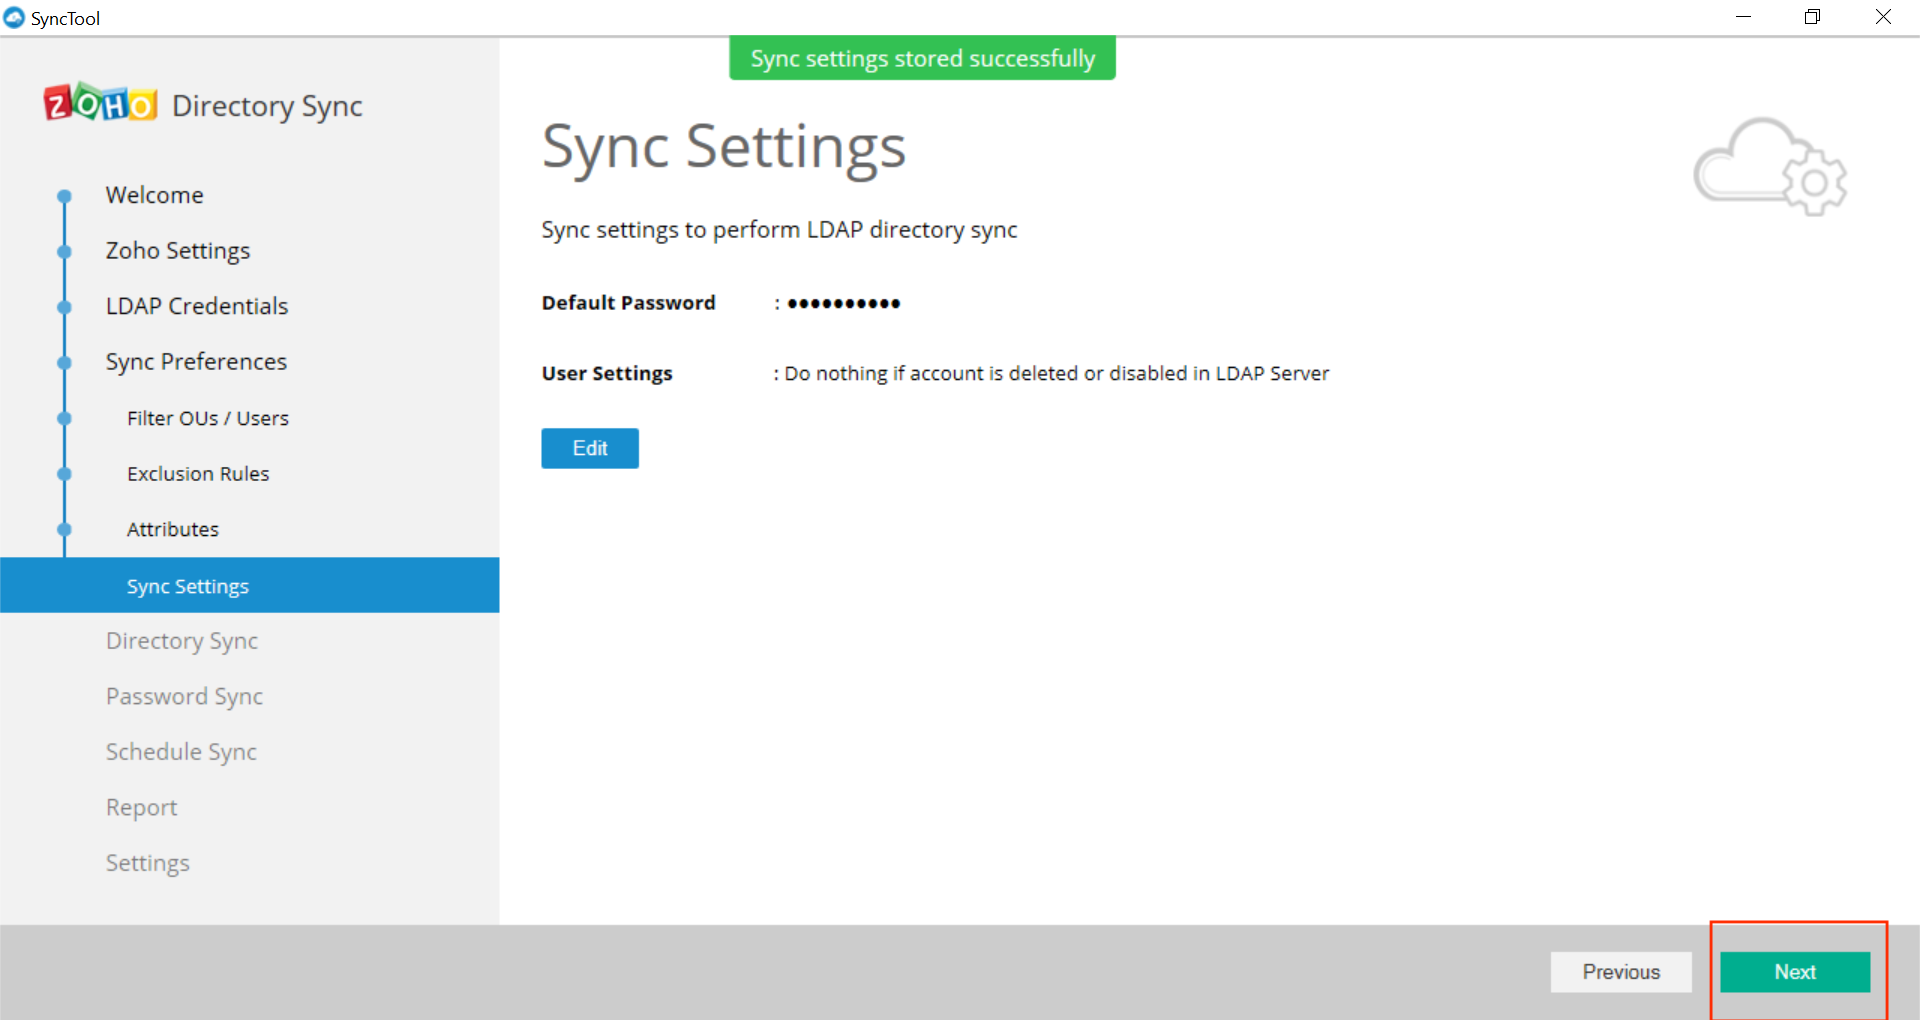
- The next step is to configure the syncing. For that, you need to configure Sync Settings. You need to provide a passcode as well as specify what the tool must do, if an AD account is deleted or removed from the server. Once done, click on Save.
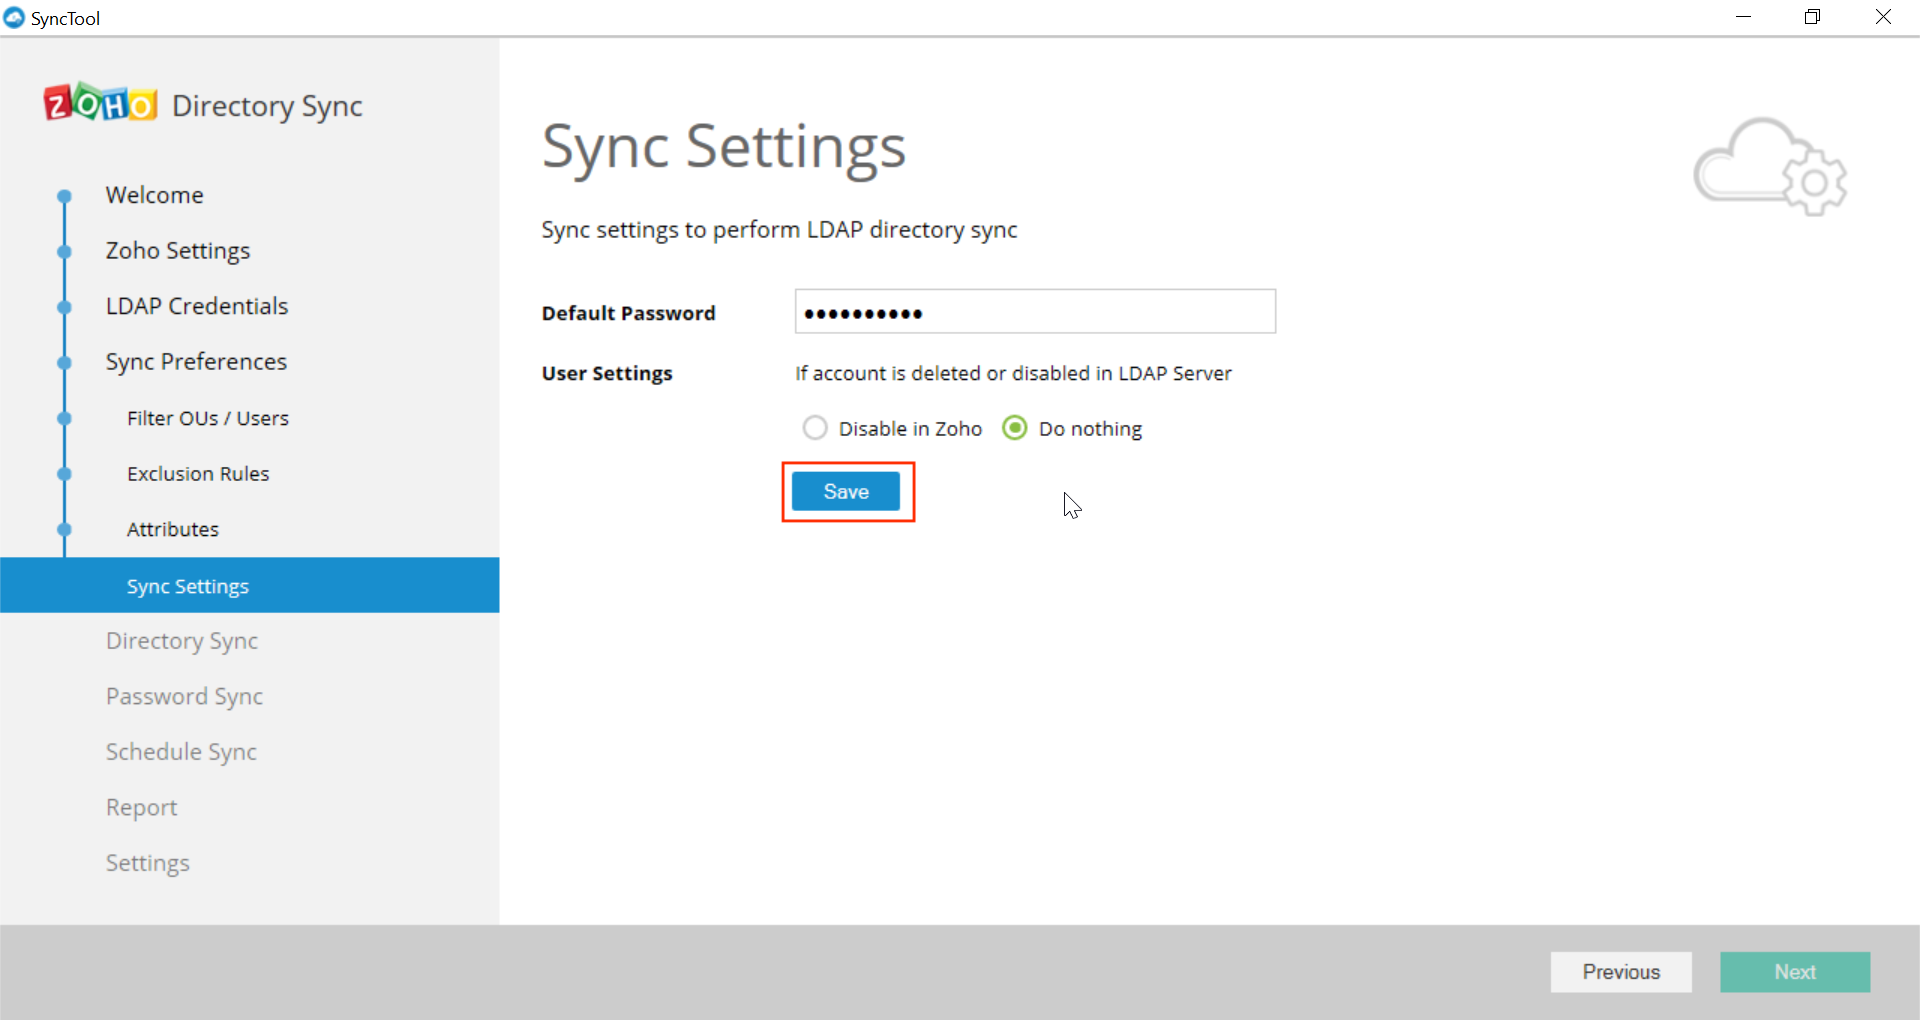
- After the settings have been saved, click on Next.
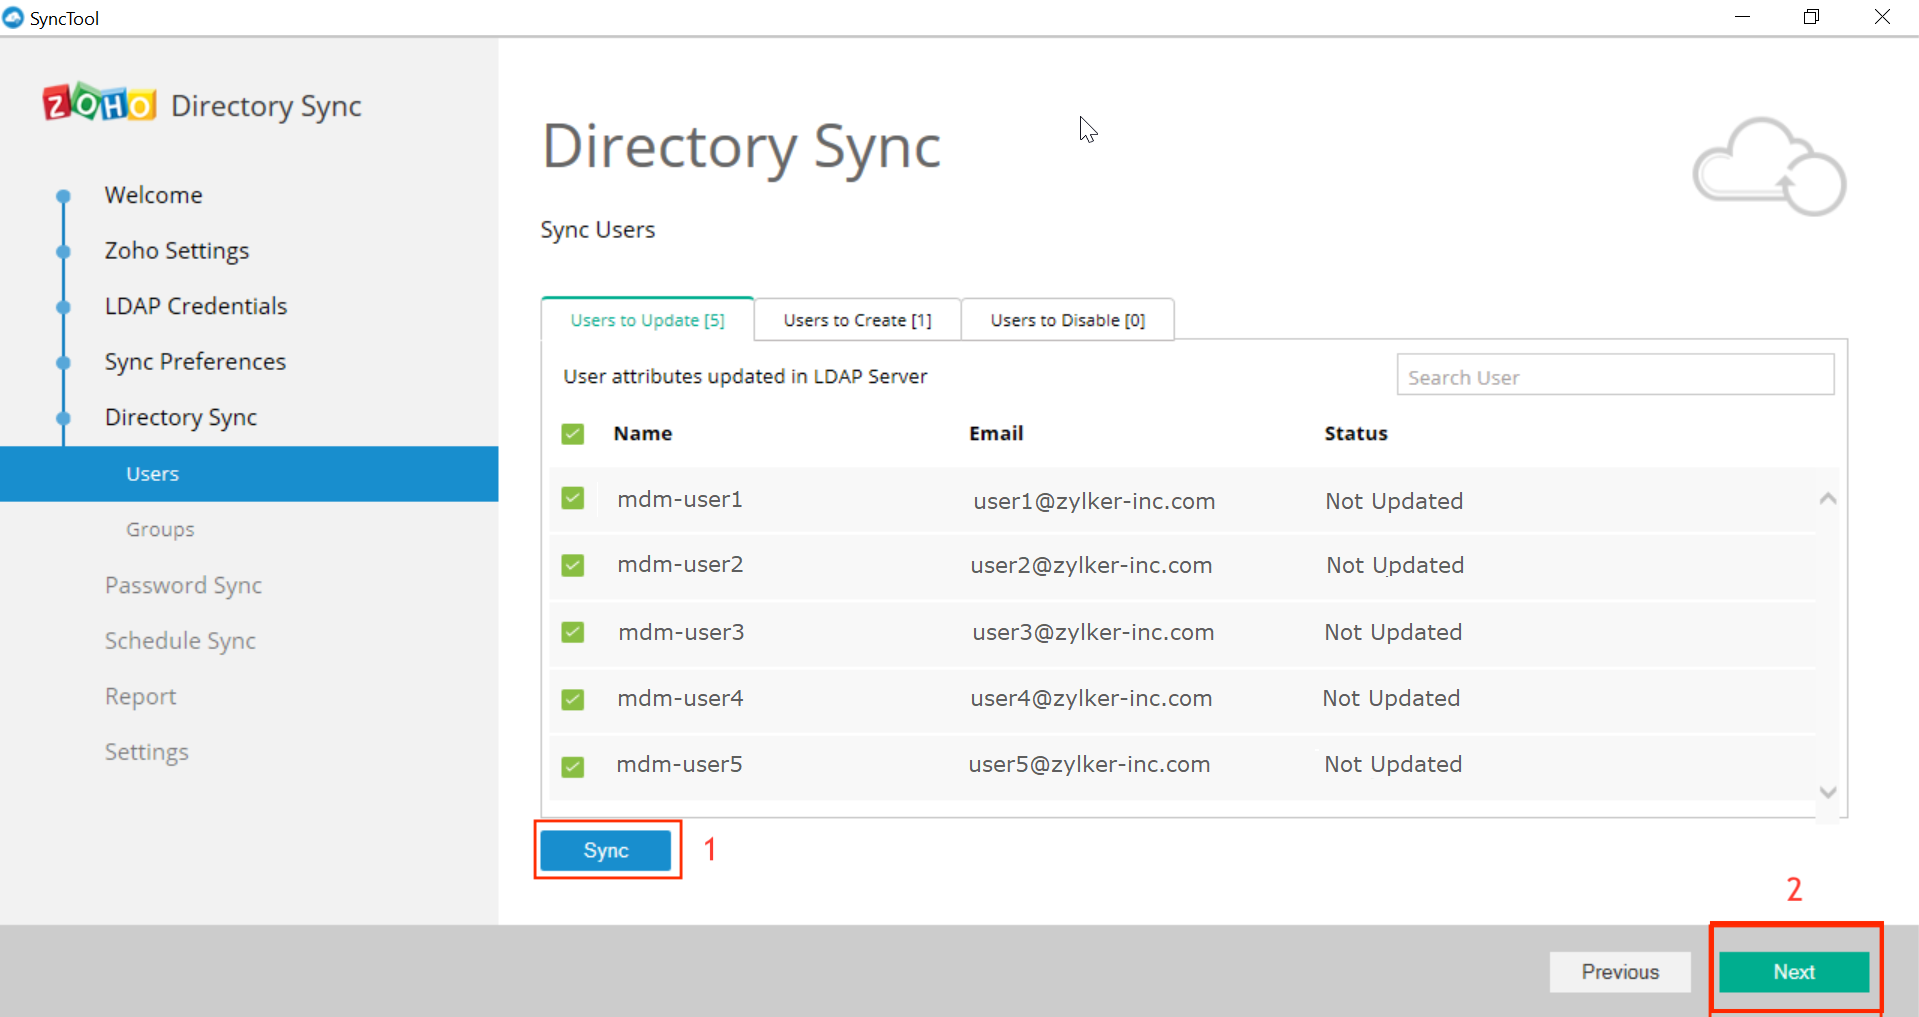
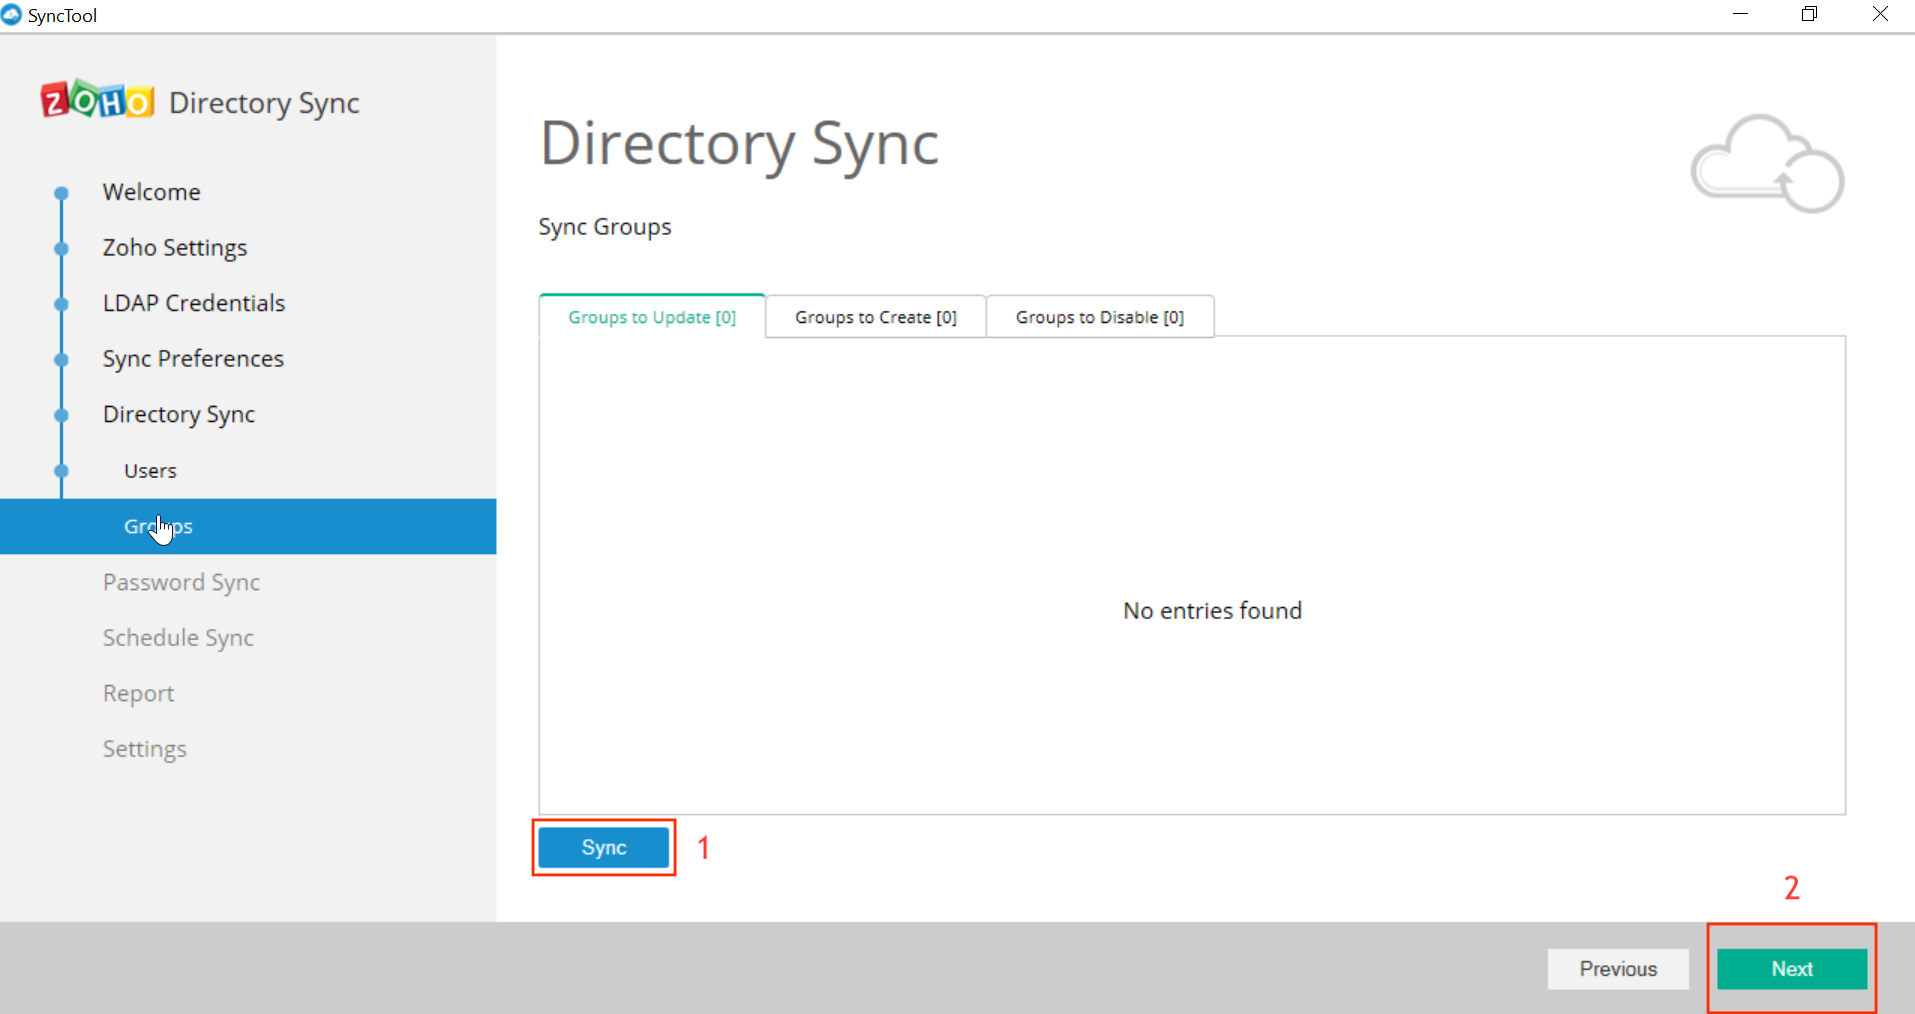
- Now you can view all the users/groups to be updated/created/disabled. Click on Sync, if need be and then click on Next.
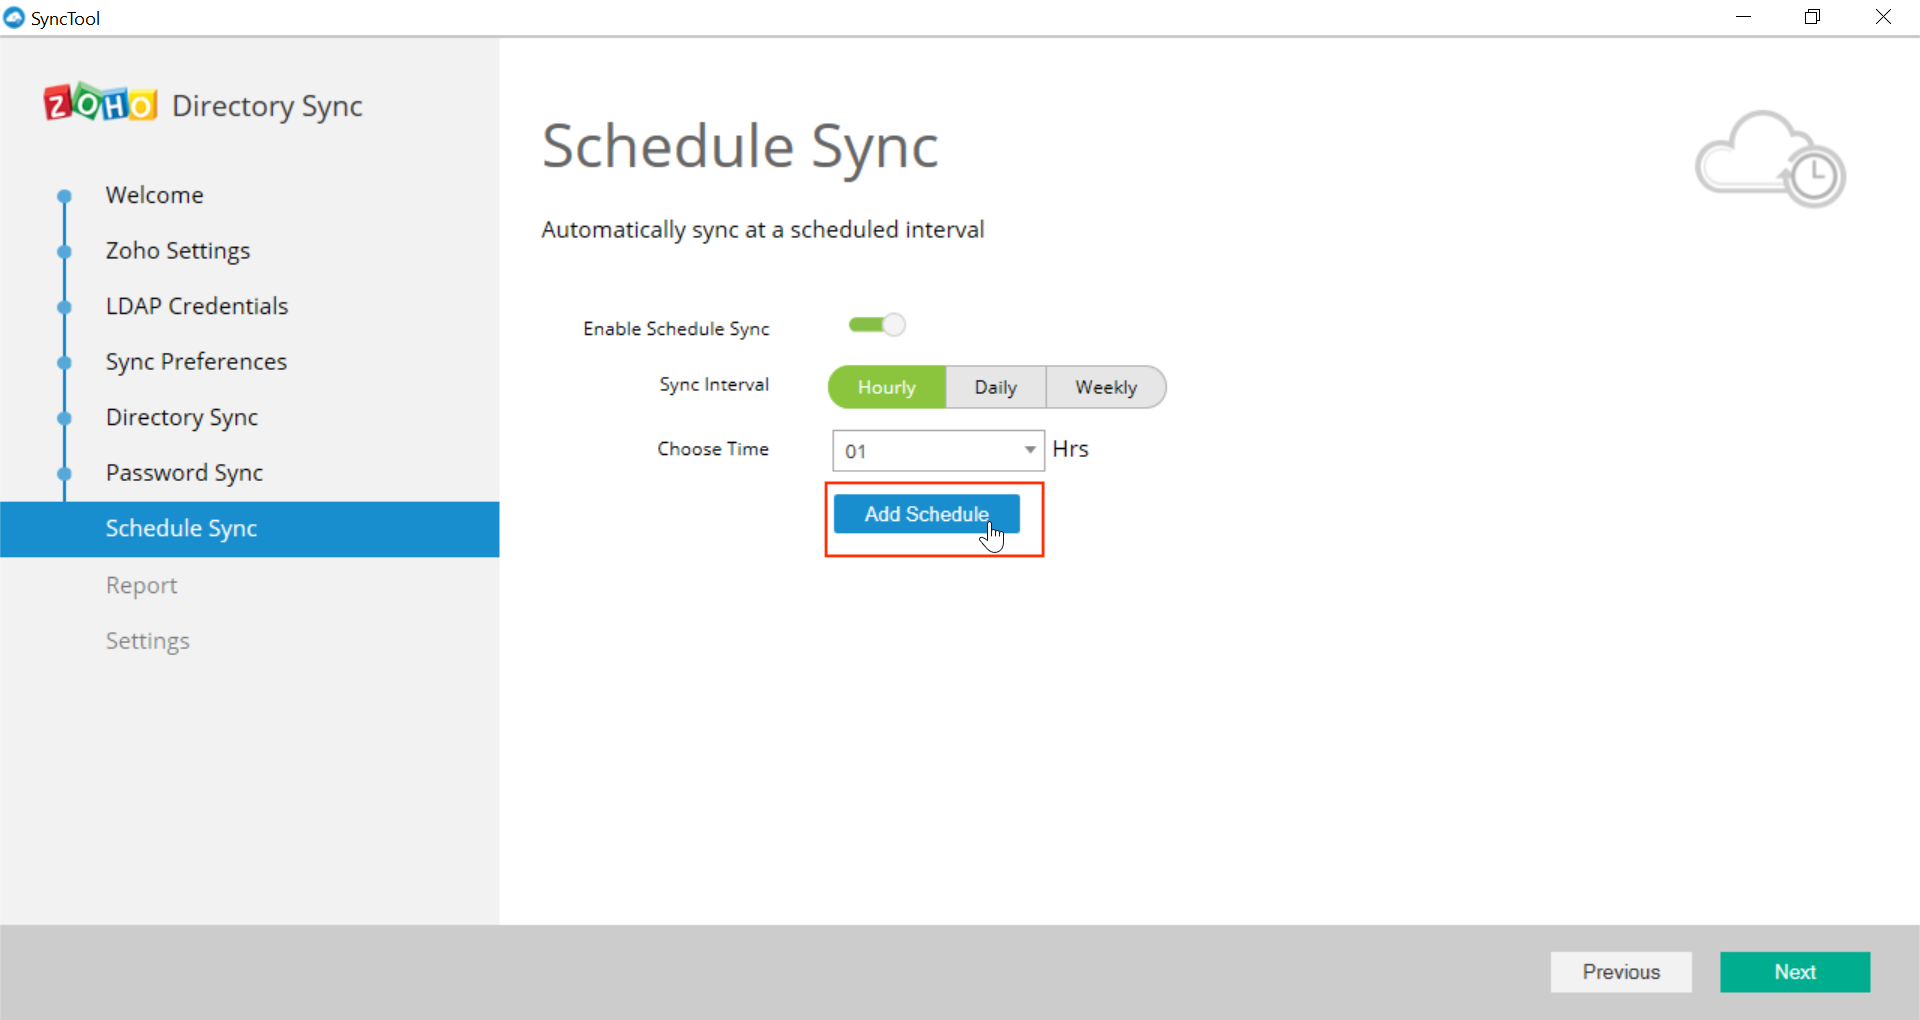
- Ignore the next section, Password Sync by clicking on Next. The penultimate step is to enable scheduled syncing. To schedule, configure the options present under the section Schedule Sync. Once configured, click on Add Schedule.
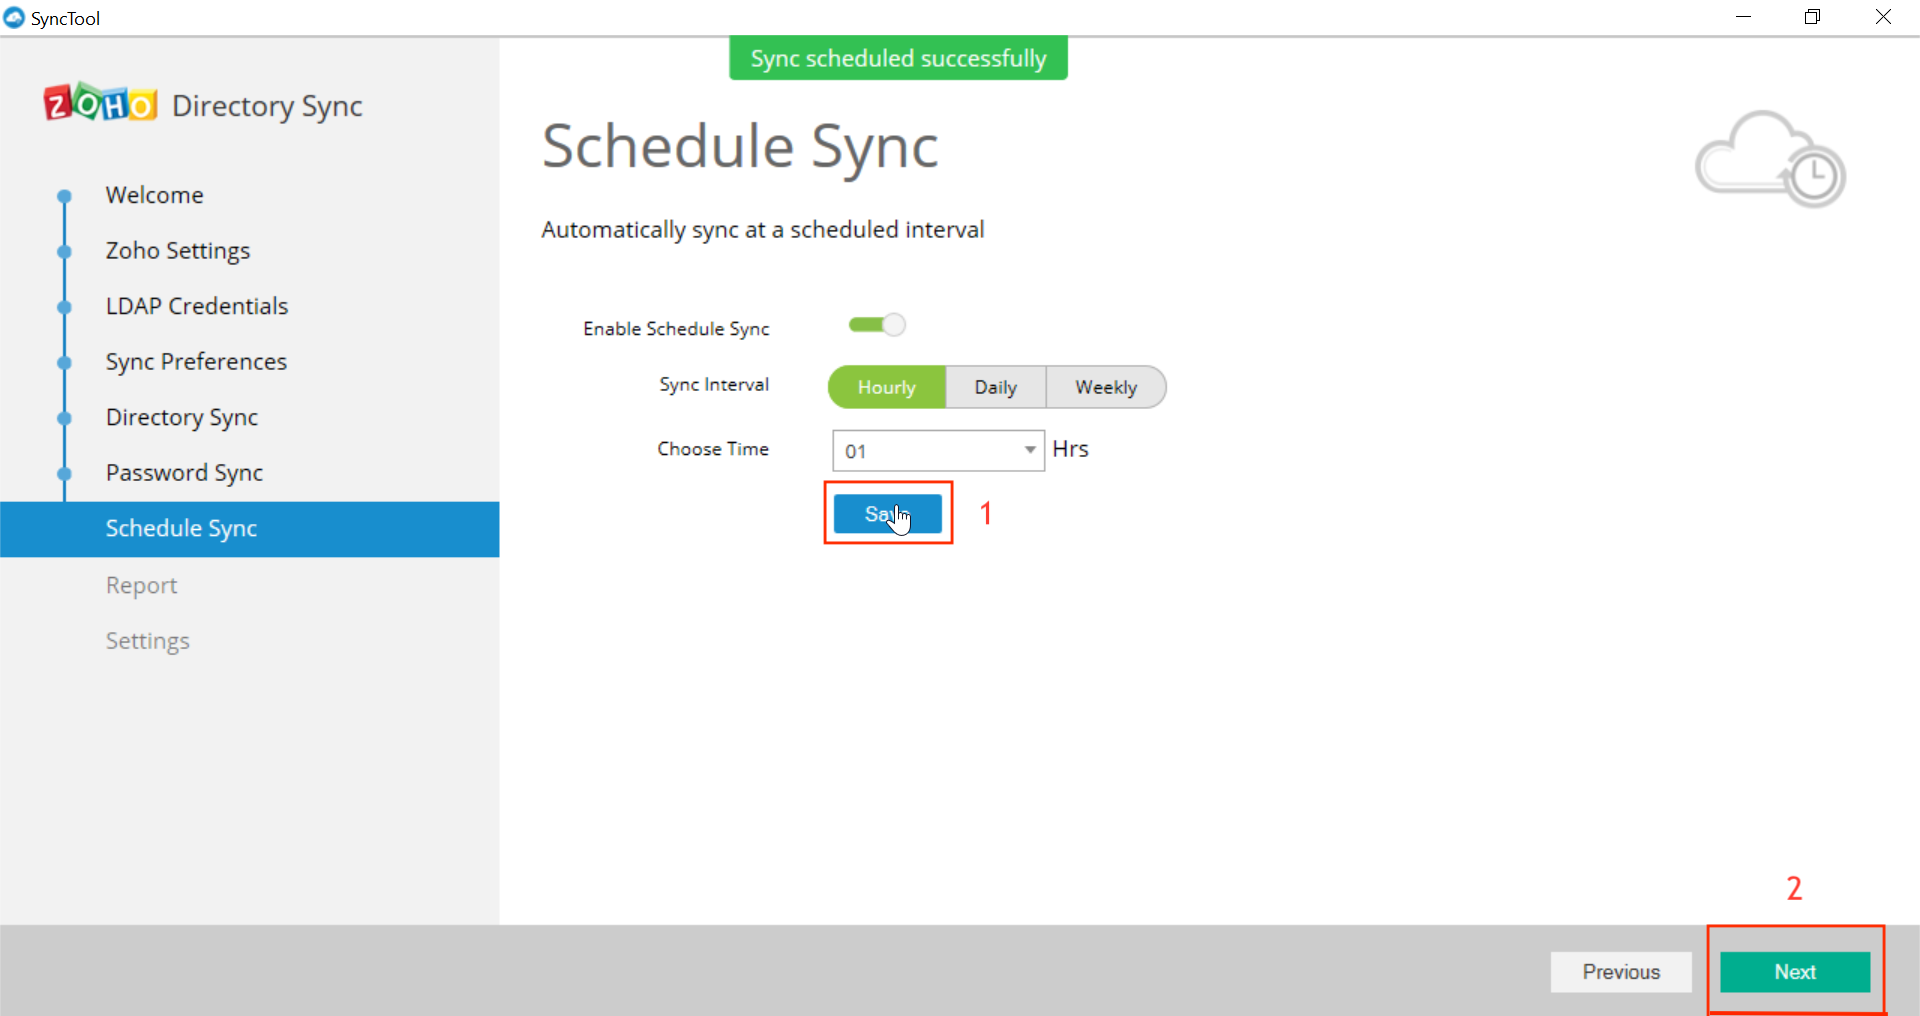
- Once the schedule is added, click on Save and select Next. Ignore the Report section by clicking Next again.
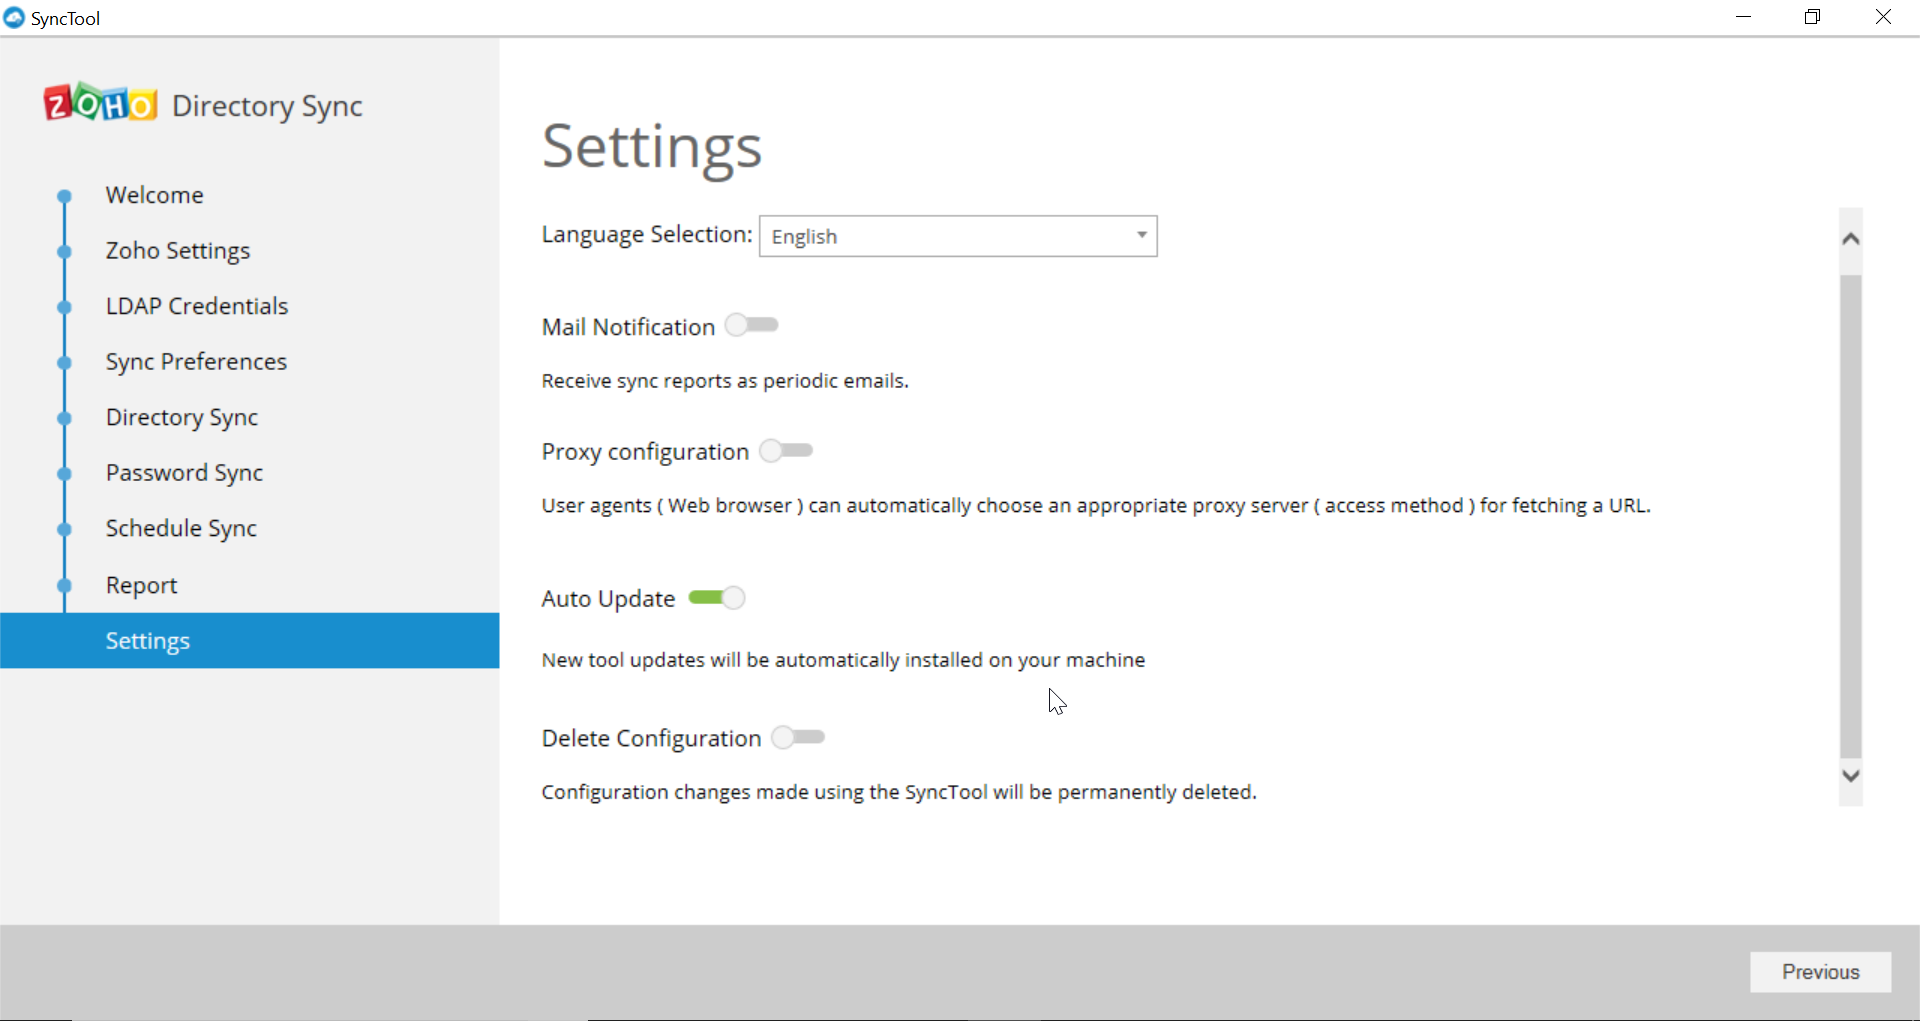
- The final step is to configure the basic Admin settings in the Settings section. Once done, close the tool.
You have successfully integrated Microsoft On-Premises Active Directory with MDM.
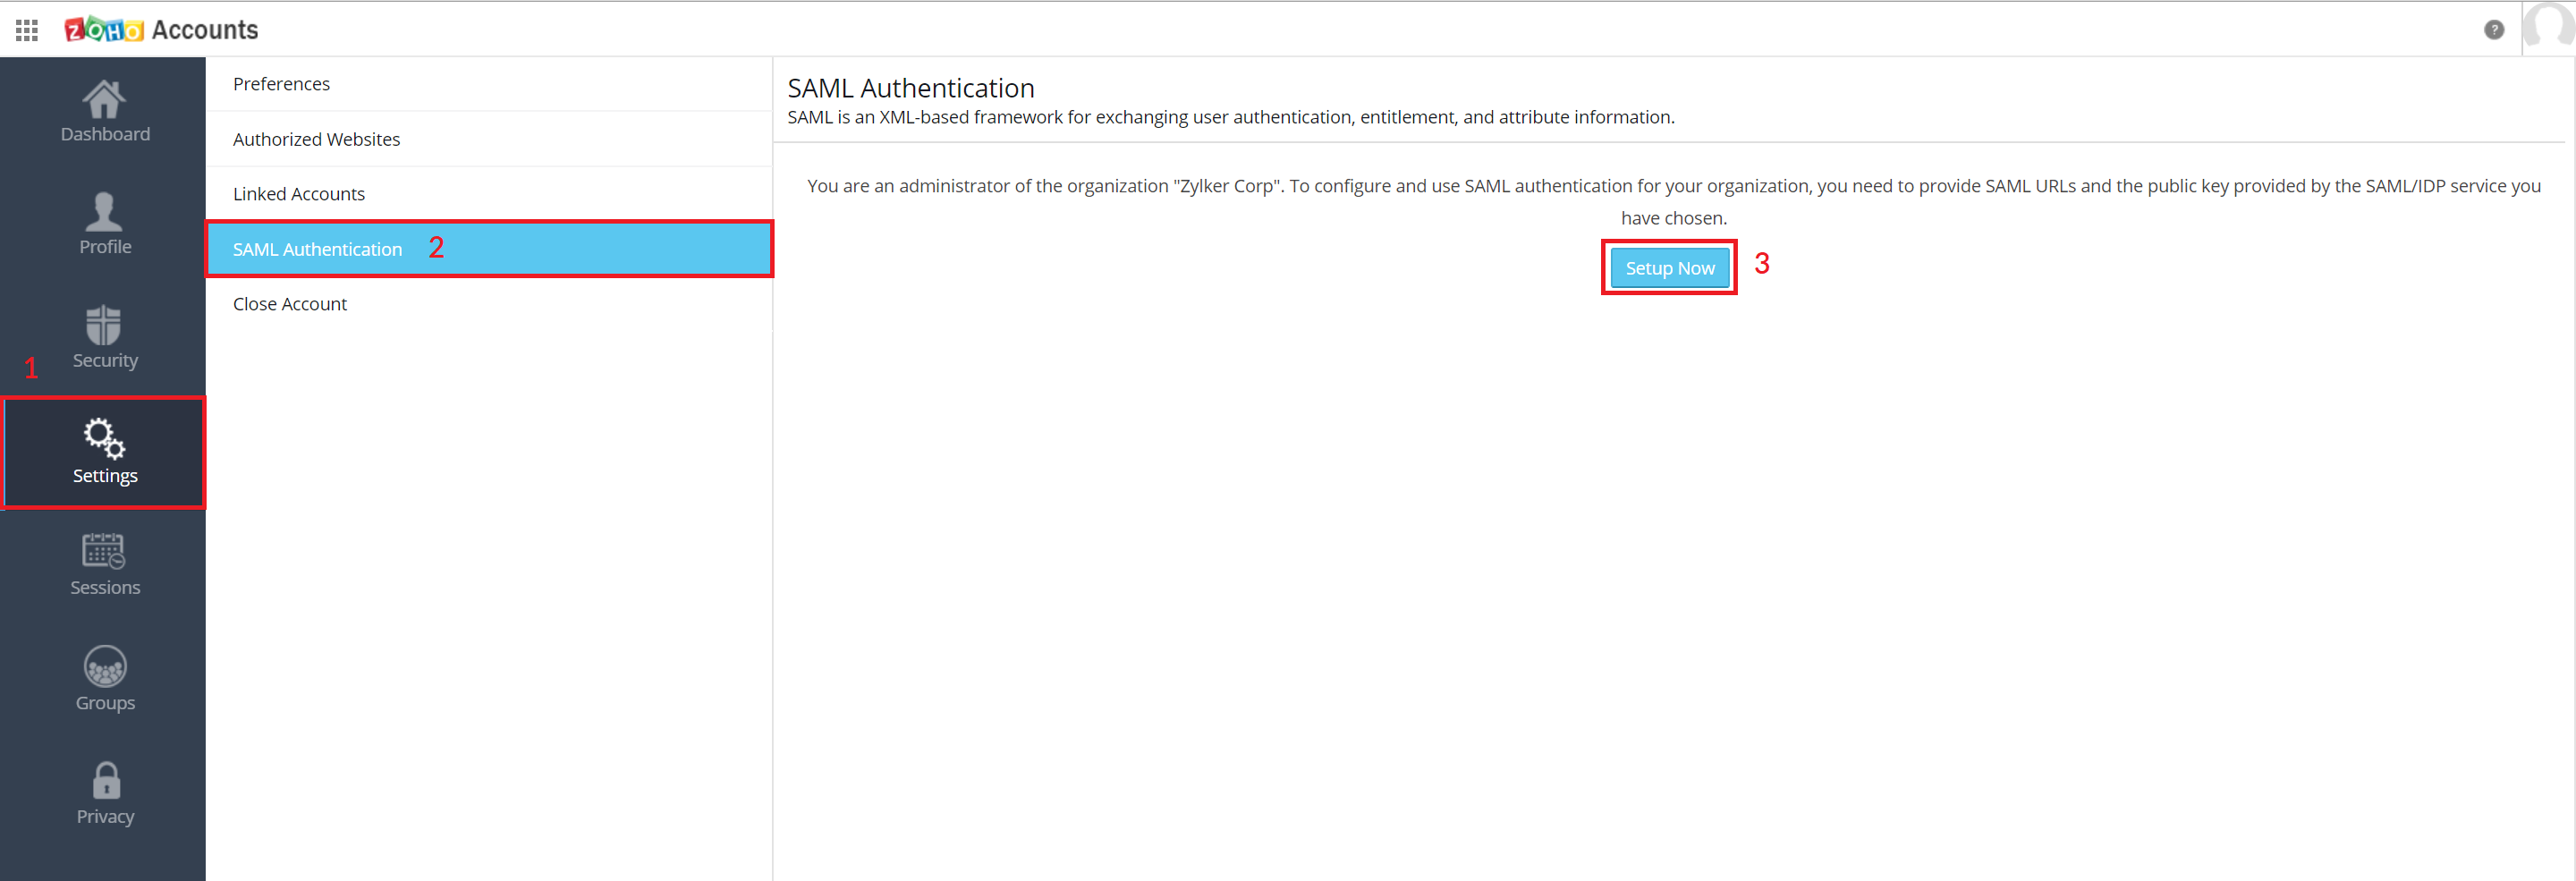
AD-based authentication
You can use AD-based credentials for authentication. To enable AD-based authentication, refer to the steps below:
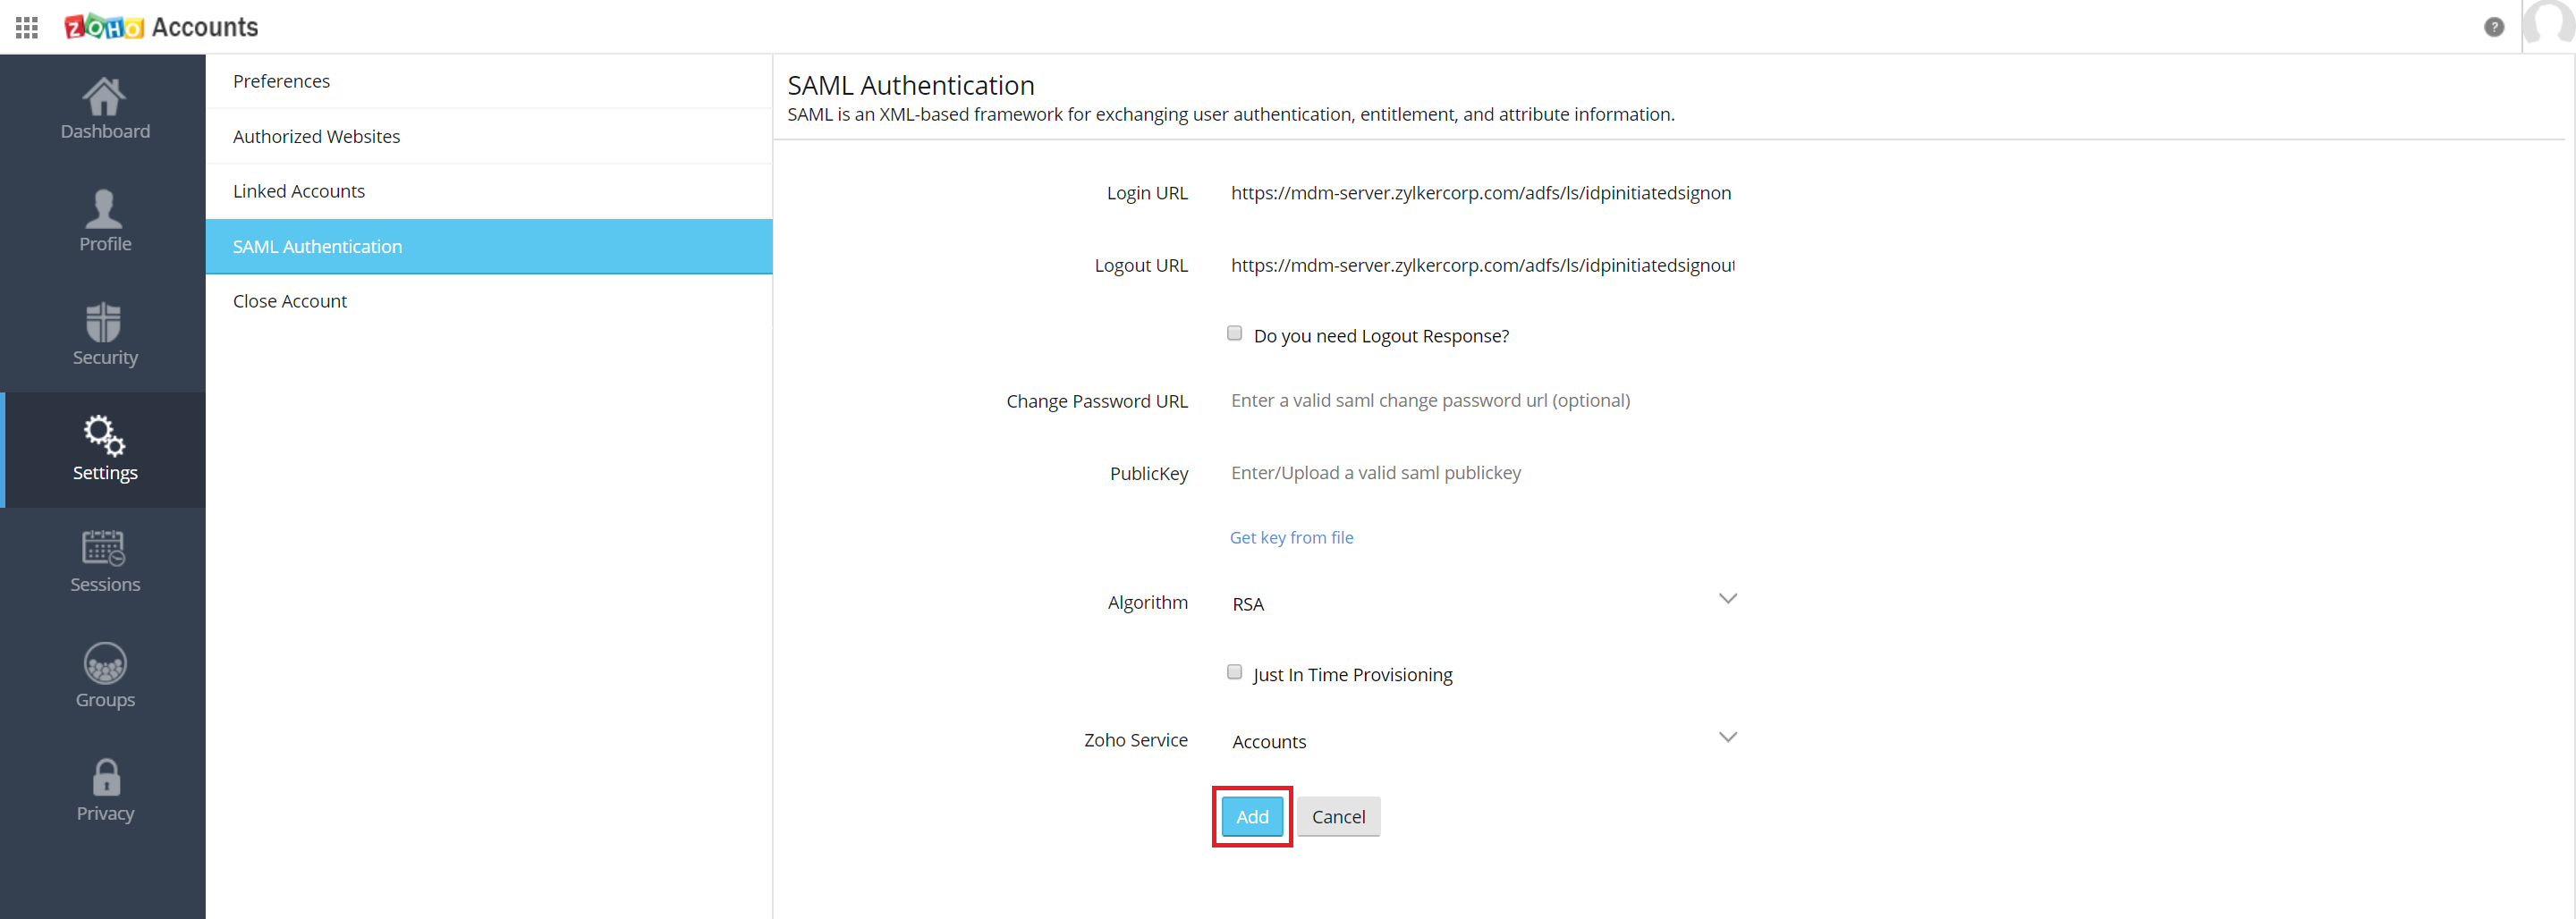
- Login here and sign in if need be or go to Zoho Accounts, click on Preferences and select SAML Authentication. Now click on Setup Now.
- Provide the details specified as shown below and click on Add to complete the process.
- Ensure Just In Time Provisioning is enabed if you want a user from your IdP to be added to Zoho Impromptu. The users will be added to Zoho after validating the SAML respone and their domain.
Steps to delete an organization:
NOTE : Deleting an organization affects all registered Zoho products. Make sure all the users are deleted before deleting an organization. The user and organization data across all the Zoho services will be permanently deleted.
- Log in to Zoho Accounts
- In the same browser window, open this link in a new tab.
- In the left pane, go to Dashboard -> Delete Organization and click on Delete as shown.

- Now, return to Zoho Accounts and sign out from the Zoho account.
- Close all tabs and do not refresh the page for the account to get permanently deleted (refreshing the page recreates the account).
Troubleshooting Tips
- How to transfer your Entra ID(formerly Azure AD) to your new Zoho account?
If you have multiple Zoho accounts and in case you want to transfer your Entra ID to another account, follow these steps.
- Login to Zoho Accounts with your old Zoho account credentials.
- Go to Preferences -> Linked Accounts and unlink your Entra ID.
- Now, login using the new account / account of choice and link the Entra ID.
- You are unable to successfully integrate Entra ID with MDM Cloud.
- Ensure you have used an Entra ID work account to integrate with MDM Cloud. You cannot sign in and complete the integration using a personal Entra ID account. (or),
- Verify whether you have accessed mdm.manageengine.com and clicked on Sign in with Google or other IDPs, before selecting Office 365 to sign in with your Entra ID work account.
- The users are getting synced successfully using the Zoho Directory Sync tool, but the user list is not reflecting on MDM Cloud.
The users might have synced from your AD to the Zoho Directory Sync tool, but not between the tool and MDM Cloud. To sync users from the Zoho Directory Sync tool to MDM Cloud, open the MDM Cloud console and go to the Enrollment tab. Click on Active Directory in the left pane. Here, all the added ADs are listed. Now, click on Sync all or Sync only modified for the users to reflect on MDM Cloud. Also, while fetching the data to MDM Cloud, sync issues may occur when invalid / special character entries are used in the user data fields (Example: Having text in the user's phone number field, etc). You can also use the Force Sync option on the Zoho Directory Sync tool to sync users from your AD to the tool.
- There is a domain which is already verified, but you are unable to add and verify multiple domains.
This may occur because the domain which is being added might already be verified in another organization. Hence, the domain must be removed from the old organization before adding and verifying your domain here. By logging in using your old organization's credentials, remove the domain(s). If required, refer the steps to delete an organization in order to remove your old organization.
- In the Zoho Directory Sync tool, you encounter the message "General Error", while authorizing Zoho account.
At times, the system might fail to establish a connection with the server, Zoho Accounts. Follow these steps to resolve this error.
- Check if the firewall and proxy configuration are in place. If yes, try to access Zoho Accounts from any web browser.
- Verify whether the system requirements are met. (Especially, update IE to 11 and install .NET 4.0 and 4.5)
- Now, retry the authorization process in the Zoho Directory Sync tool.
- In the Zoho Directory Sync tool, you encounter "ERROR_Invalid_Code" / "other_dc", while authorizing Zoho account.
This may occur for users setting up the Zoho Directory Sync tool with a European Domain Controller (.eu DC). The Sync tool is not completely compatible with EU DC. In your machine, go to Program Files -> ZOHOCORP -> conf and replace the file, app.properties with the one given here.
- In the Zoho Directory Sync tool, you encounter the message "Use Administrator Account" while trying to add your AD in MDM Cloud.
The approval of the administrator is always required for syncing the Zoho Directory Sync tool with your AD.
- Ensure the steps involved in setting up the Zoho Directory Sync tool are carried out properly.
- Verify if all the credentials provided by the administrator are correct.
- Now, close the Directory Sync tool and go to Program Files -> ZOHOCORP -> conf and open the app.properties file. Here, add a statement "admin=false". Restart the tool and add your AD to MDM Cloud again.
- How do you install the Zoho Directory Sync tool in another machine?
When you install the Zoho Directory Sync tool for the first time, the directory saves the configuration. You cannot install the sync tool on other machines without removing this existing configuration. To permanently delete the configuration, go to the Settings window in the Sync tool and turn on the Delete Configuration toggle button. Now, you can uninstall the Zoho Directory Sync tool from the old machine and refer to the procedure to install in another machine.