Network Configuration Manager Enterprise Edition
Contents |
Network Configuration Manager (NCM) Enterprise Installation
NCM Enterprise Edition can be deployed in the following cases:
Case 1: When geographically distributed network device configurations need to be backed up from one location.
Case 2: When the number of network devices for which the configurations have to be backed up is more than 1K devices.
ManageEngine recommends the installation of a Central server and a Probe to effectively achieve a distributed backing up of network configurations.

Central Server: The Central Server provides a summarized view of data collected from individual probes. When common objects such as Configlets, Device Templates etc,. are added to the Central Server, those objects will be distributed to all the individual probes as well.
Probe Server: When a device is added to a Probe Server or if any change is made to a device, that change will be automatically reflected in the Central Server. In case a common object is added to a Probe Server, it will be pushed to the Central Server and from there it is distributed to all the other Probe Servers.
If NCM is run with MSSQL as the backend database, then the MSSQL database must be configured before proceeding with the following installation.
Installing NCM enterprise edition on Windows
NCM Central Server
Step 1: Download the ManageEngine_NCM_Central_64bit.exe
Run the exe as 'administrator'
Step 2: Click 'Next' to proceed with installation.

Step 3: Click 'Yes' to the NCM License agreement

Step 4: Choose the destination folder for NCM installation and click 'Next' to proceed

Step 5: If you want to change the default web server port for NCM installation enter the new port number and click 'Next' to proceed.

Step 6: Register your NCM license with required details to get technical support and click 'Next' to proceed.

Step 7: If you select PGSQL, please proceed with Step 12. (or) If you select 'MSSQL' database (recommended for production). Click 'Next' to proceed

Step 8: If you select SQL Authentication, provide MSSQL details like Host Name, Port, Database Name. Use the SQL Server Authentication credentials (Username and Password) created earlier. Click 'Next' to proceed

(or)
If you select WINDOWS Authentication, provide MSSQL details like Host Name, Port, Domain Name, Database Name, Username and Password. Click 'Next' to proceed.

Step 9: Search for 'bcp.exe' and 'bcp.rll' in the MSSQL installation directory and copy these files under \NCM_Central\bin directory. Click 'Next' to proceed.
Note: The SQL server version compliant with the SQL Native Client must be installed in the same Server.
Step 10: Click on browse and select \NCM_Central\bin\bcp.exe. Click 'Next' to proceed

Step 11: Click 'Finish' to complete NCM Central Server installation.

NCM Probe Server
Step 1: Download the ManageEngine_NCM_Probe_64bit.exe
Run the exe as 'administrator'
Step 2: Click 'Next' to proceed with installation

Step 3: Click 'Yes' to the NCM License agreement

Step 4: Choose the destination folder for NCM Probe installation and click 'Next' to proceed

Step 5: If you want to change the default web server, netflow ports for NCM probe installation enter the new port numbers (NCM uses 80 as the default web server port and 9996 as the default Netflow port) and click 'Next' to proceed

Step 6: Enter the details of the proxy server (if the probe is installed behind a proxy server) and click 'Next' to proceed

Step 7: Register your NCM license with required details to get technical support and click 'Next' to proceed

Step 8: If you select PGSQL, please proceed with Step 13. (or) If you select 'MSSQL' database (recommended for production). Click 'Next' to proceed

Step 9: Provide MSSQL details like host name, port, database name. Use the credentials (username and password) that was created earlier while configuring SQL. Click 'Next' to proceed

Step 10: Search for bcp.exe and bcp.rll in the MSSQL installation directory. Copy these files under \NCM_Probe\bin directory. Click 'Next' to proceed
Step 11: Click on browse and select \NCM_Probe\bin\bcp.exe. Click 'Next' to proceed

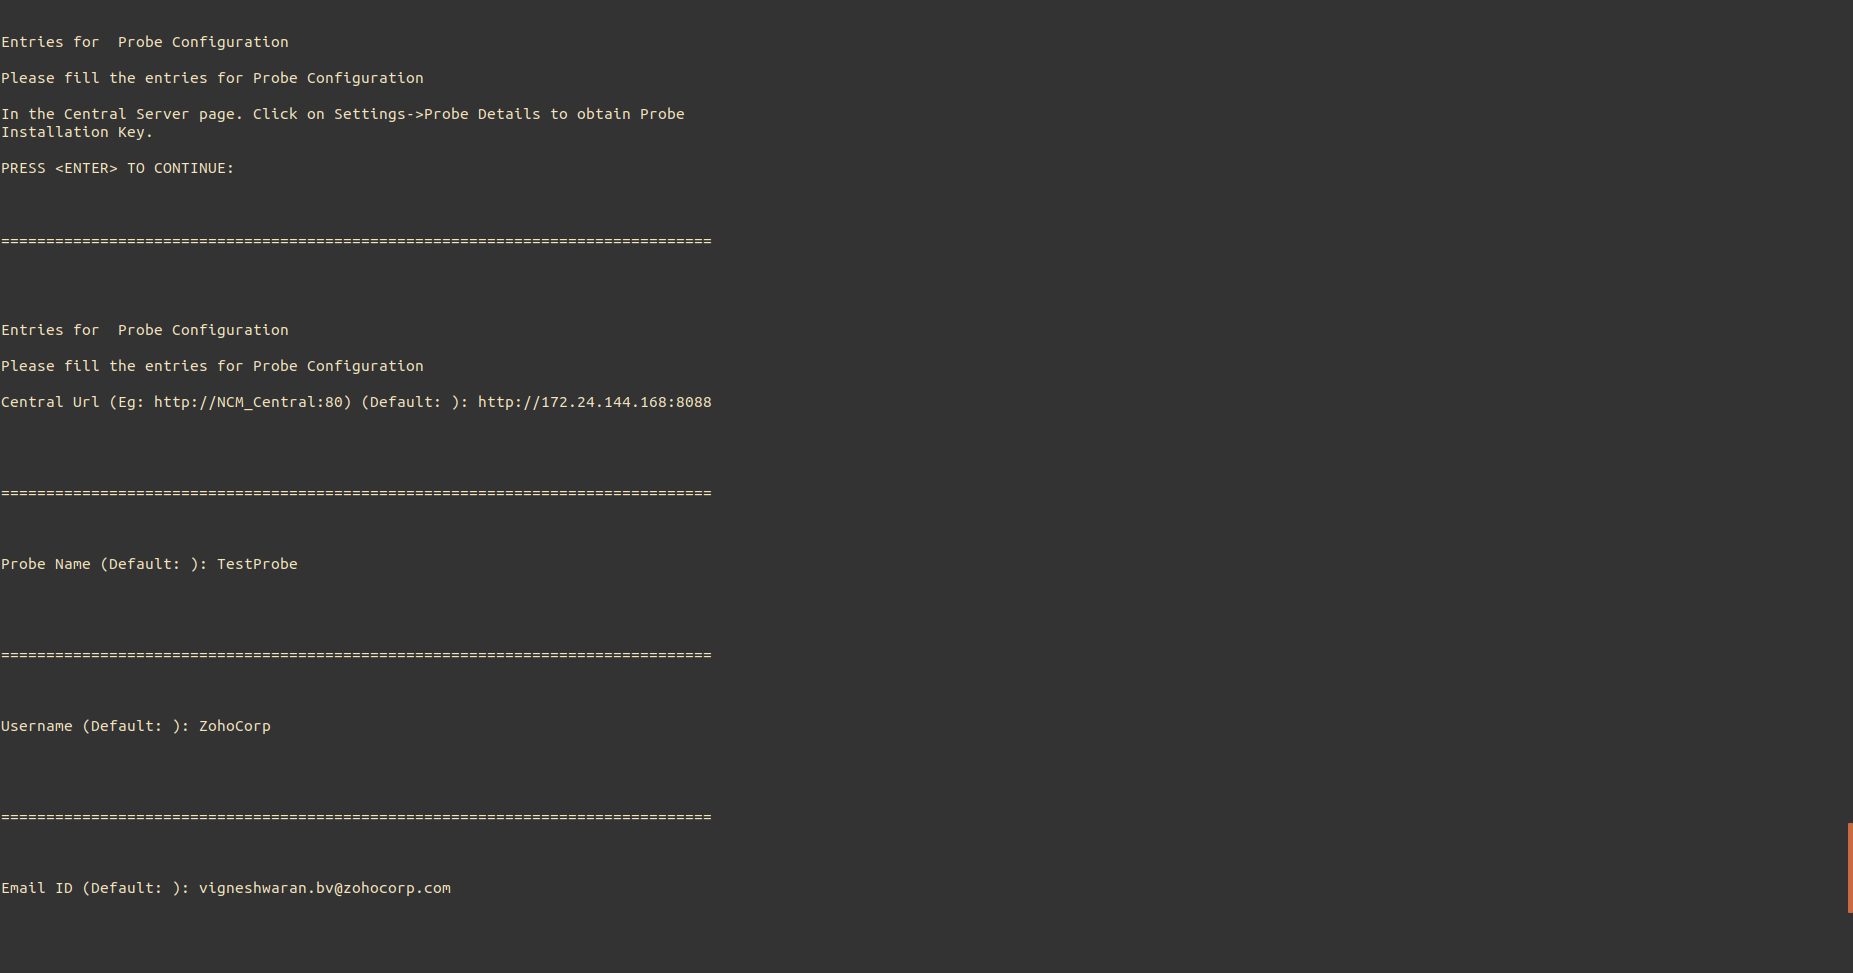
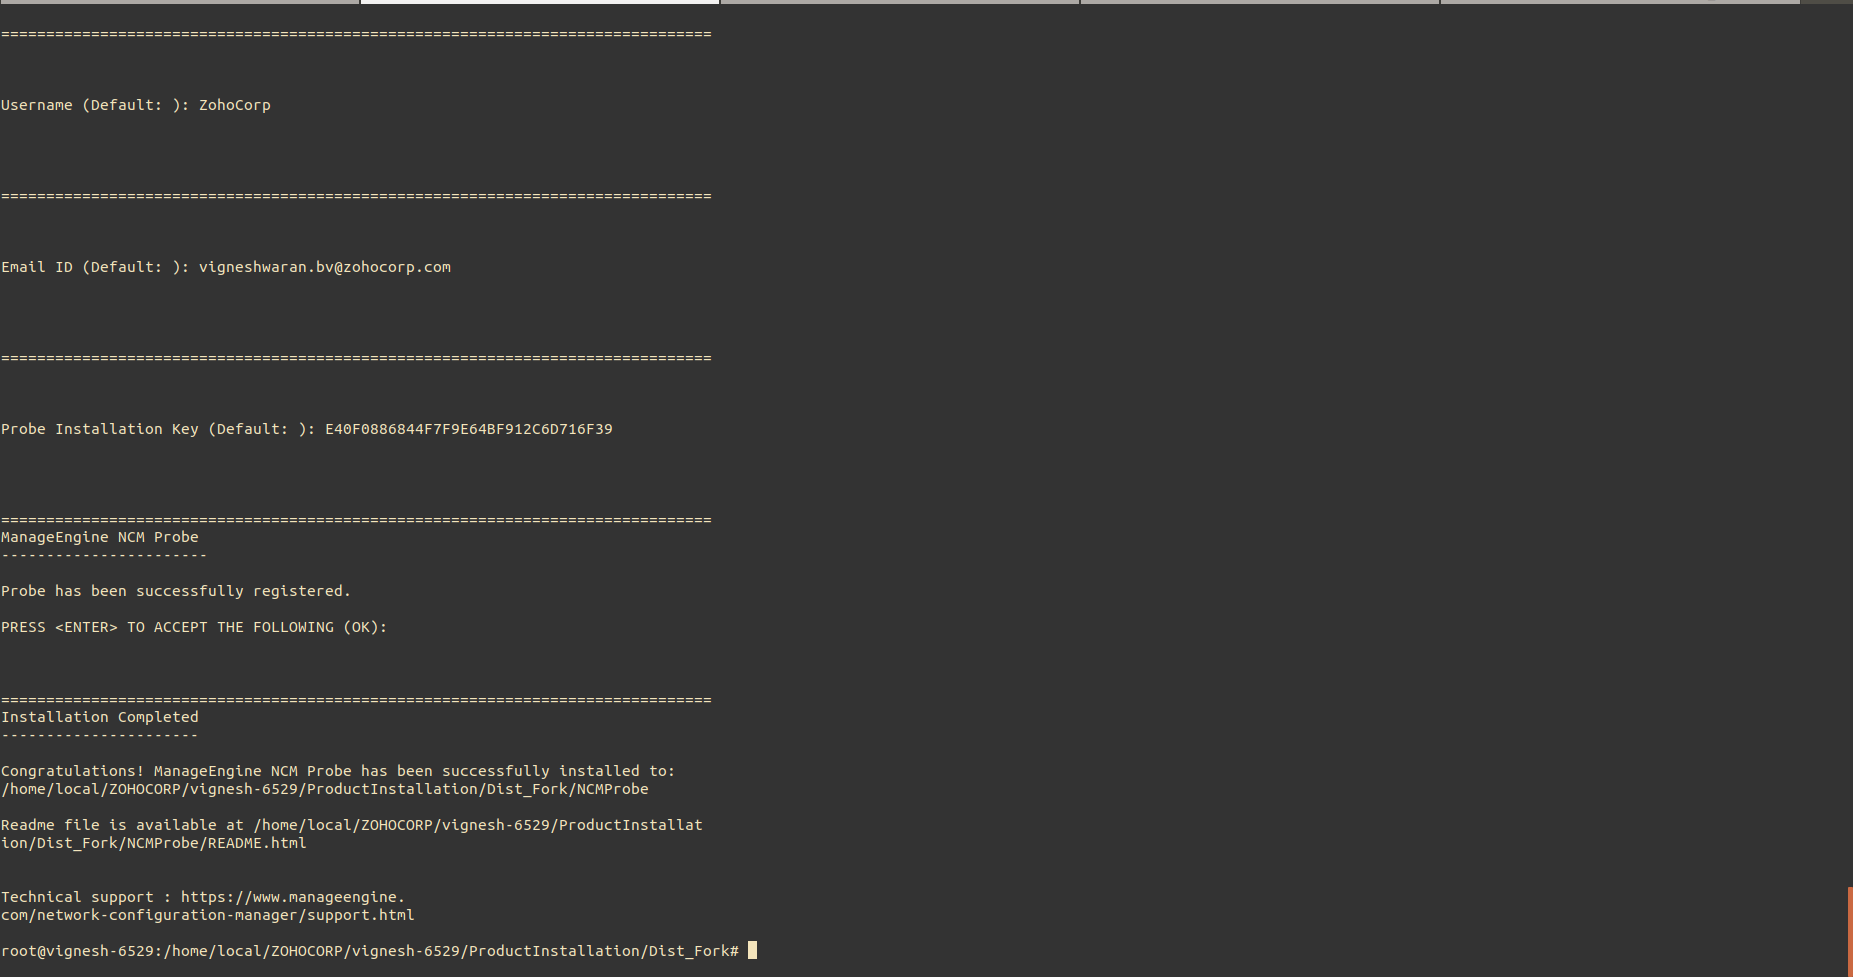
Step 12: Provide OpManager Central server details like central server URL, Probe Name, Contact Name and Contact Mail ID.
Enter the Probe installation key. You can find the Probe Installation key in the Central Server page under Settings->Probe Details.

Click 'Register' to proceed.


Note: If you are facing issues in above step such as write permission is denied, please follow the steps given in this page.
Step 13: Click 'Finish' to complete NCM Probe installation.

Installing NCM enterprise edition on Linux
NCM Central Server
- Download ManageEngine_NCM_Central_64bit.bin for Linux.
- Login as root user.
- Assign executable permission using command chmod a+x <file-name>
- Execute the following command with administrator privileges (sudo):
- ./<file_name>
- Follow the instructions as they appear on the screen.
- Network Configuration Manager is installed in your machine in the desired location. Henceforth, this installation directory path shall be referred as "NCMCentral".
Installing Network Configuration Manager Central on Linux using console mode/silent mode
Step 1: Execute ManageEngine_NetworkConfigurationManager_64bit.bin with administrator privileges (sudo) and -i console option.
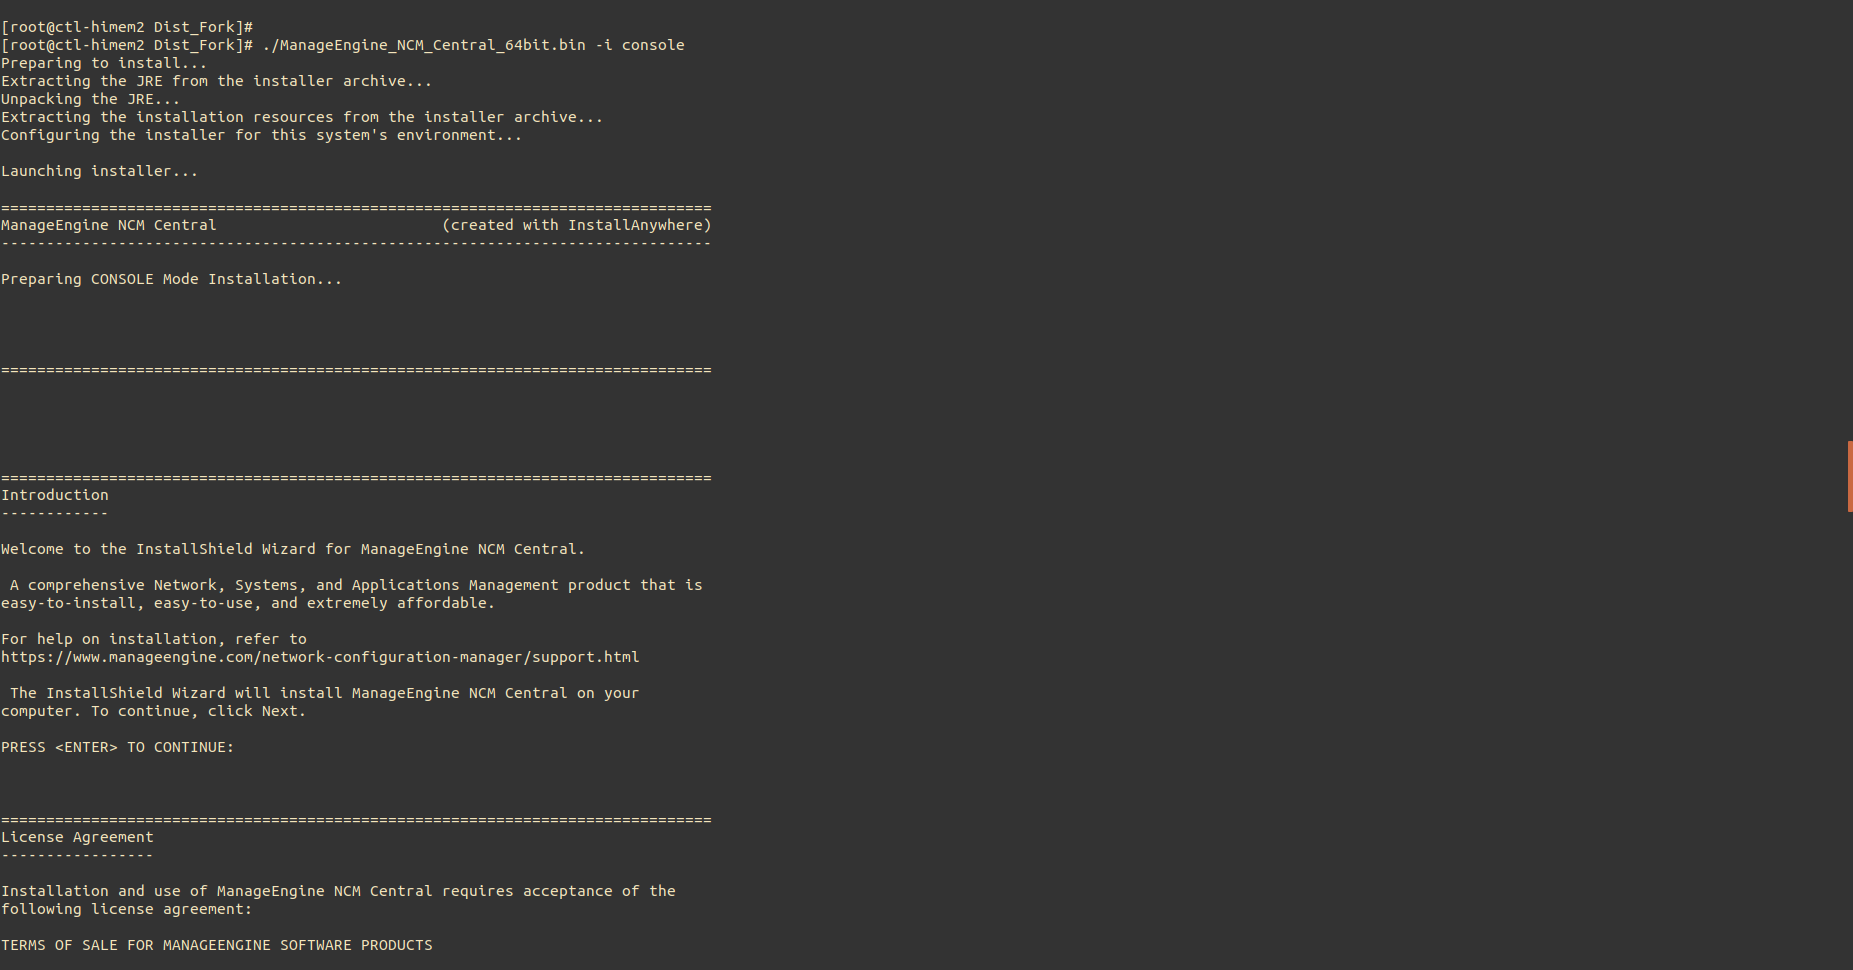
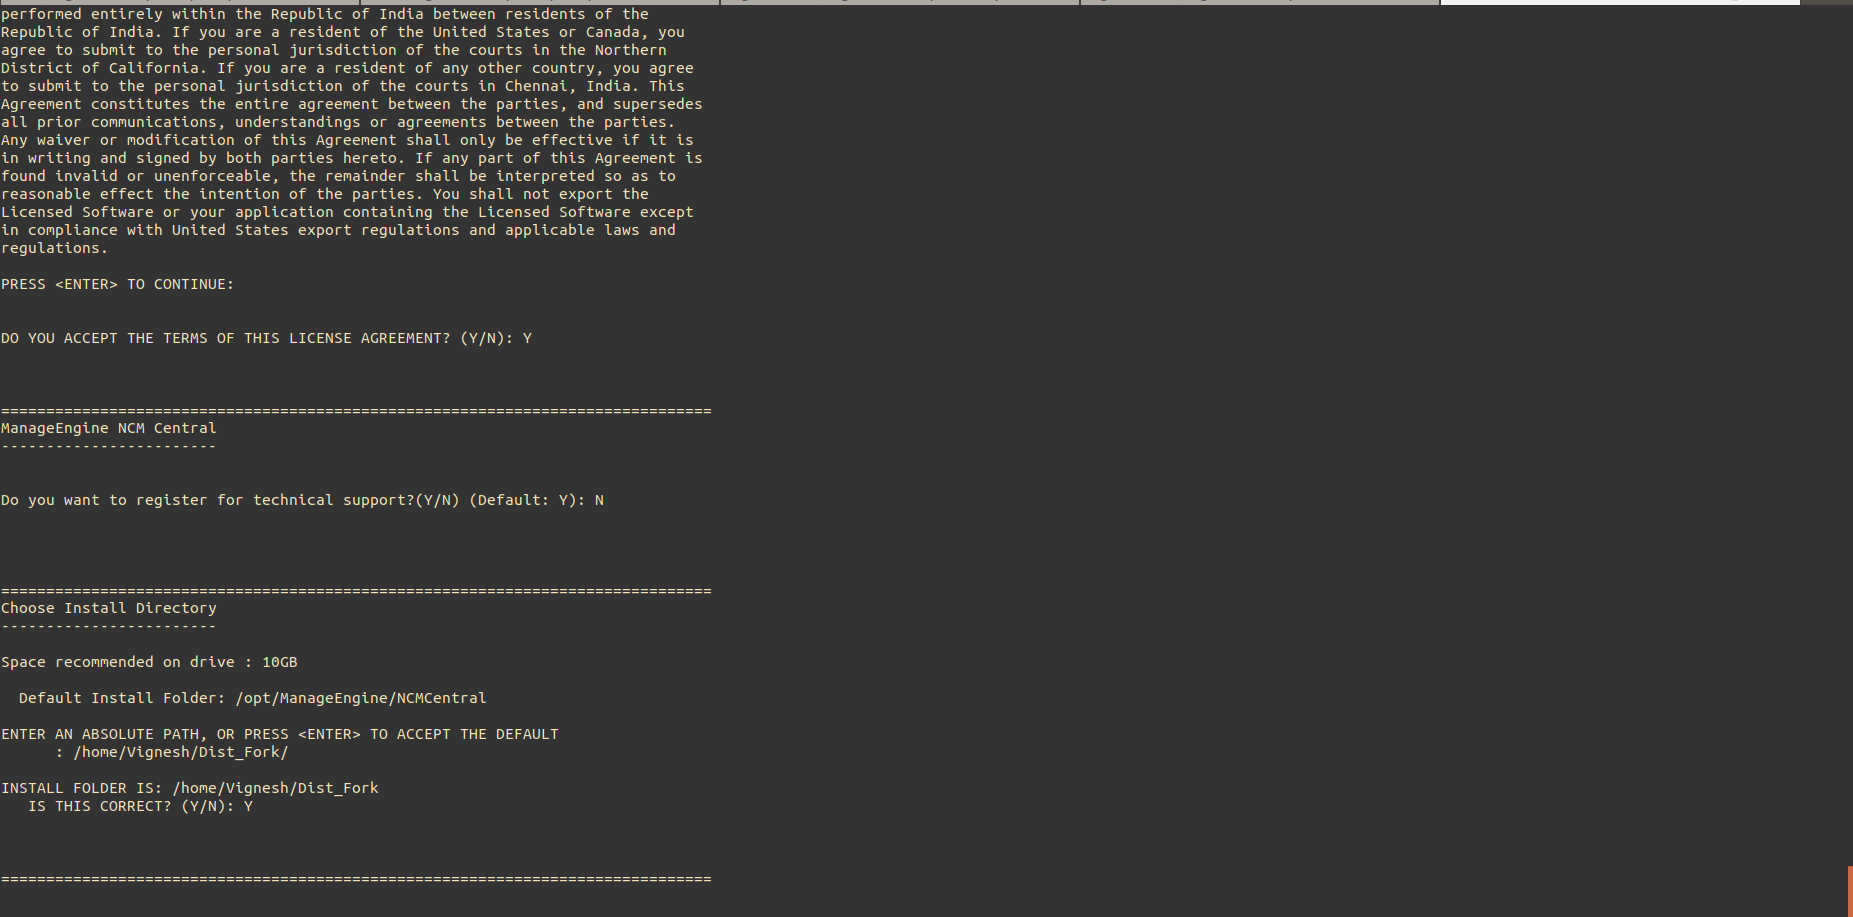
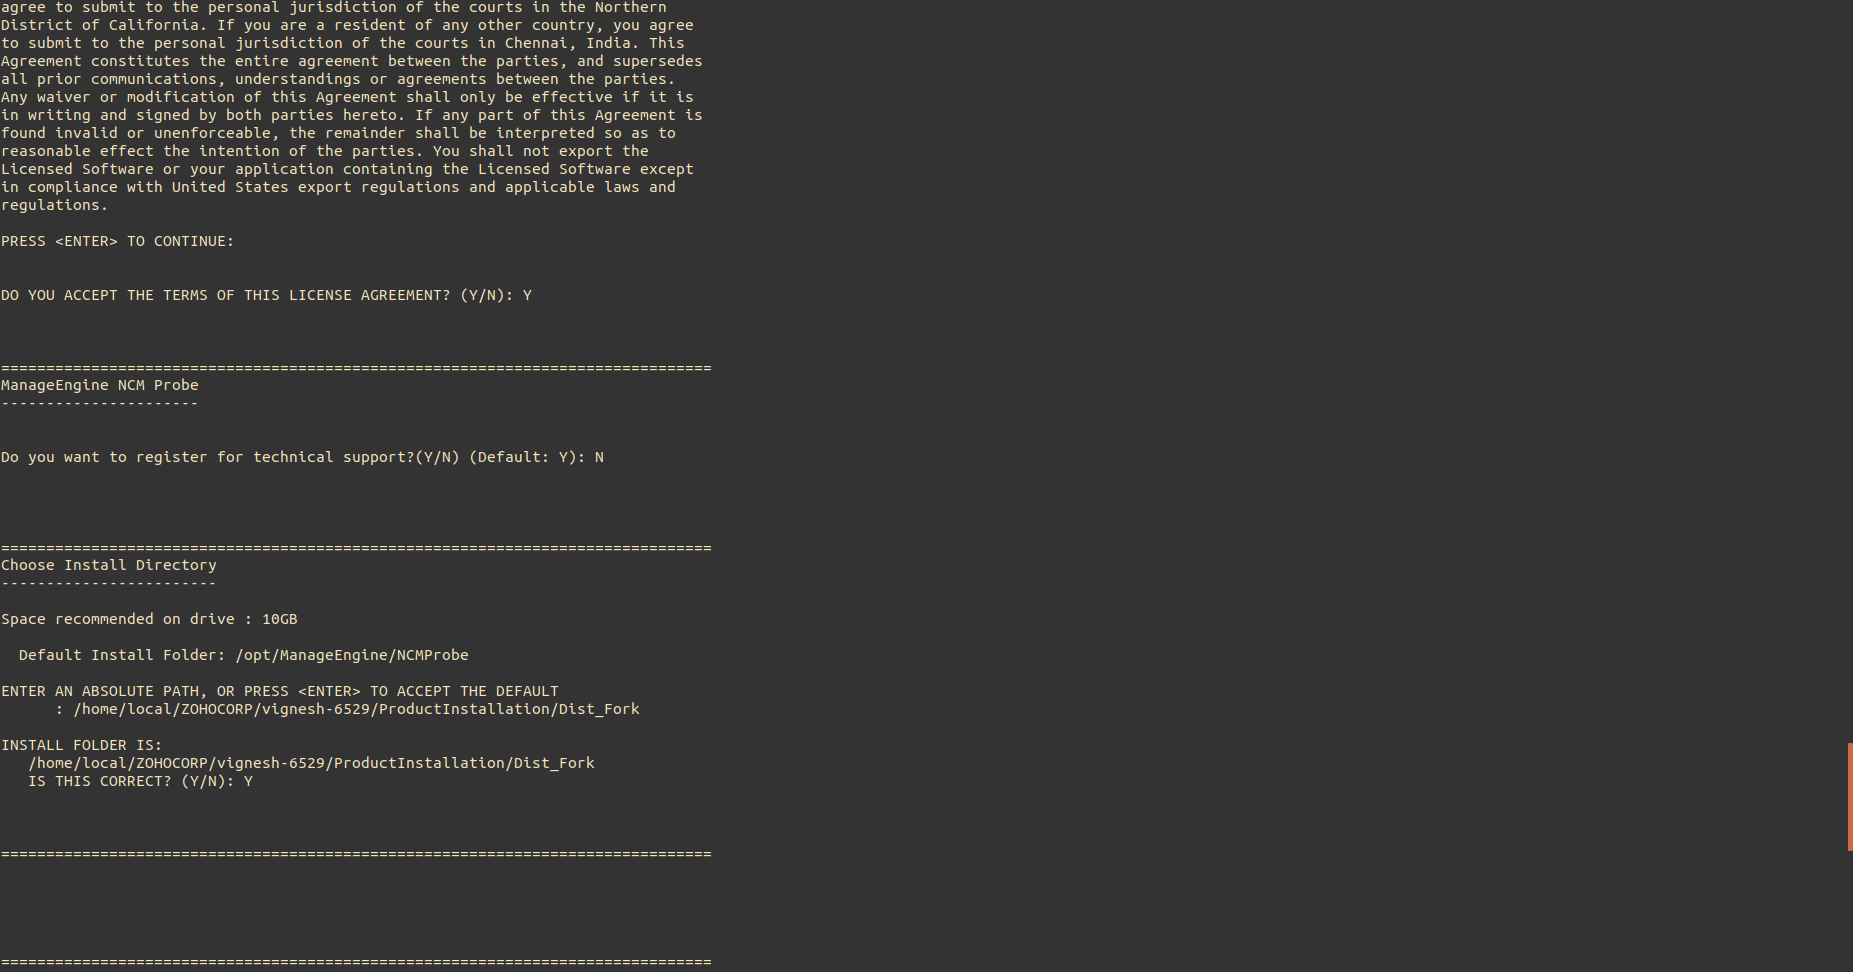
Step 2: Go through the license agreement and enter 'Y' to proceed.

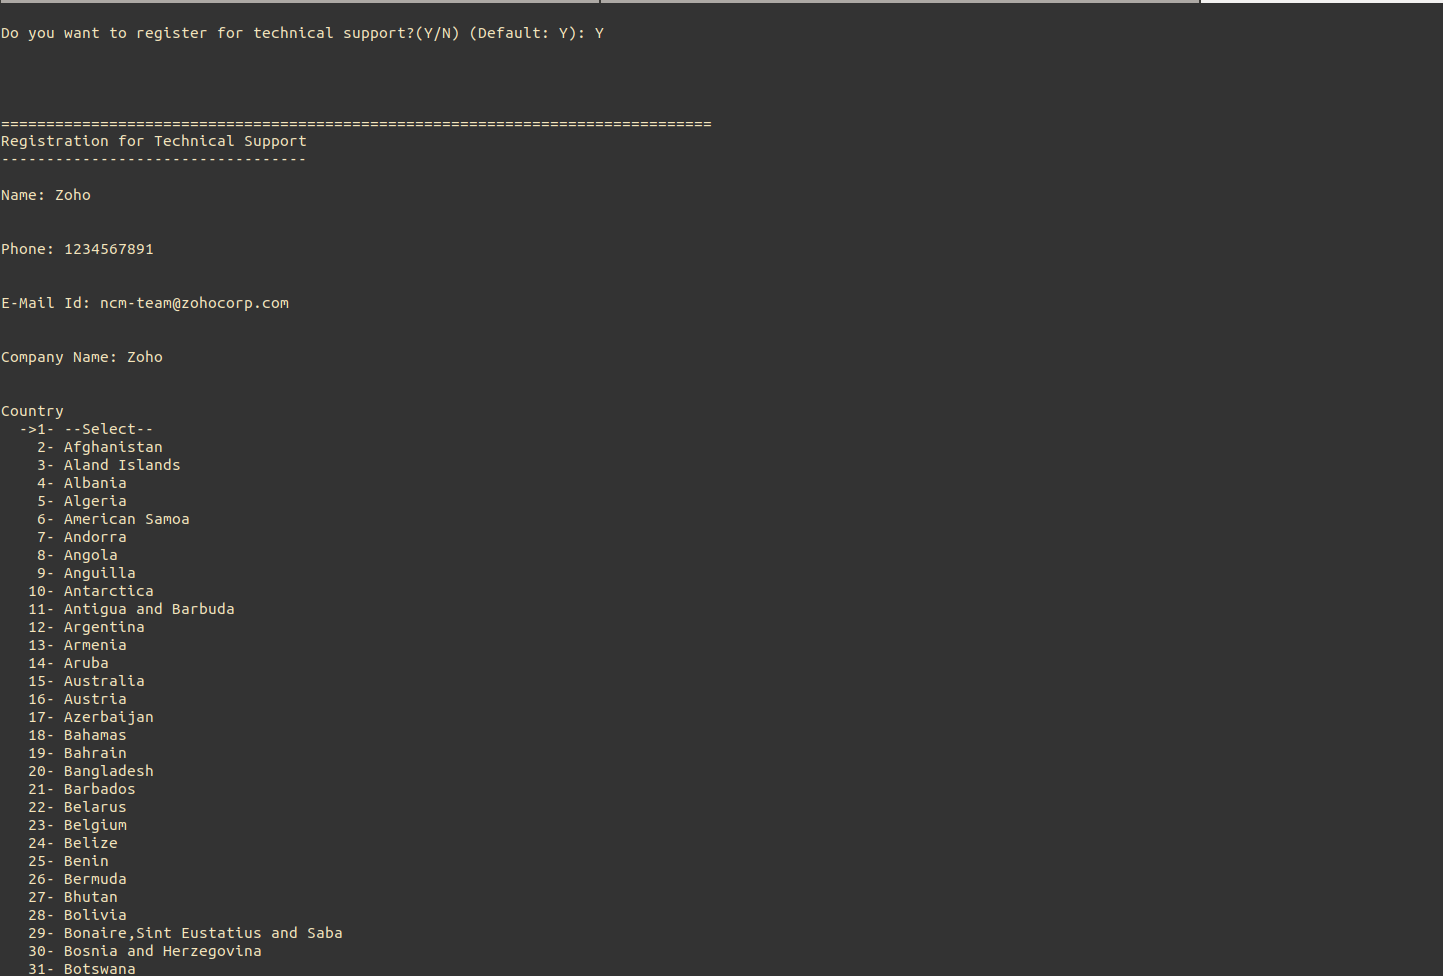
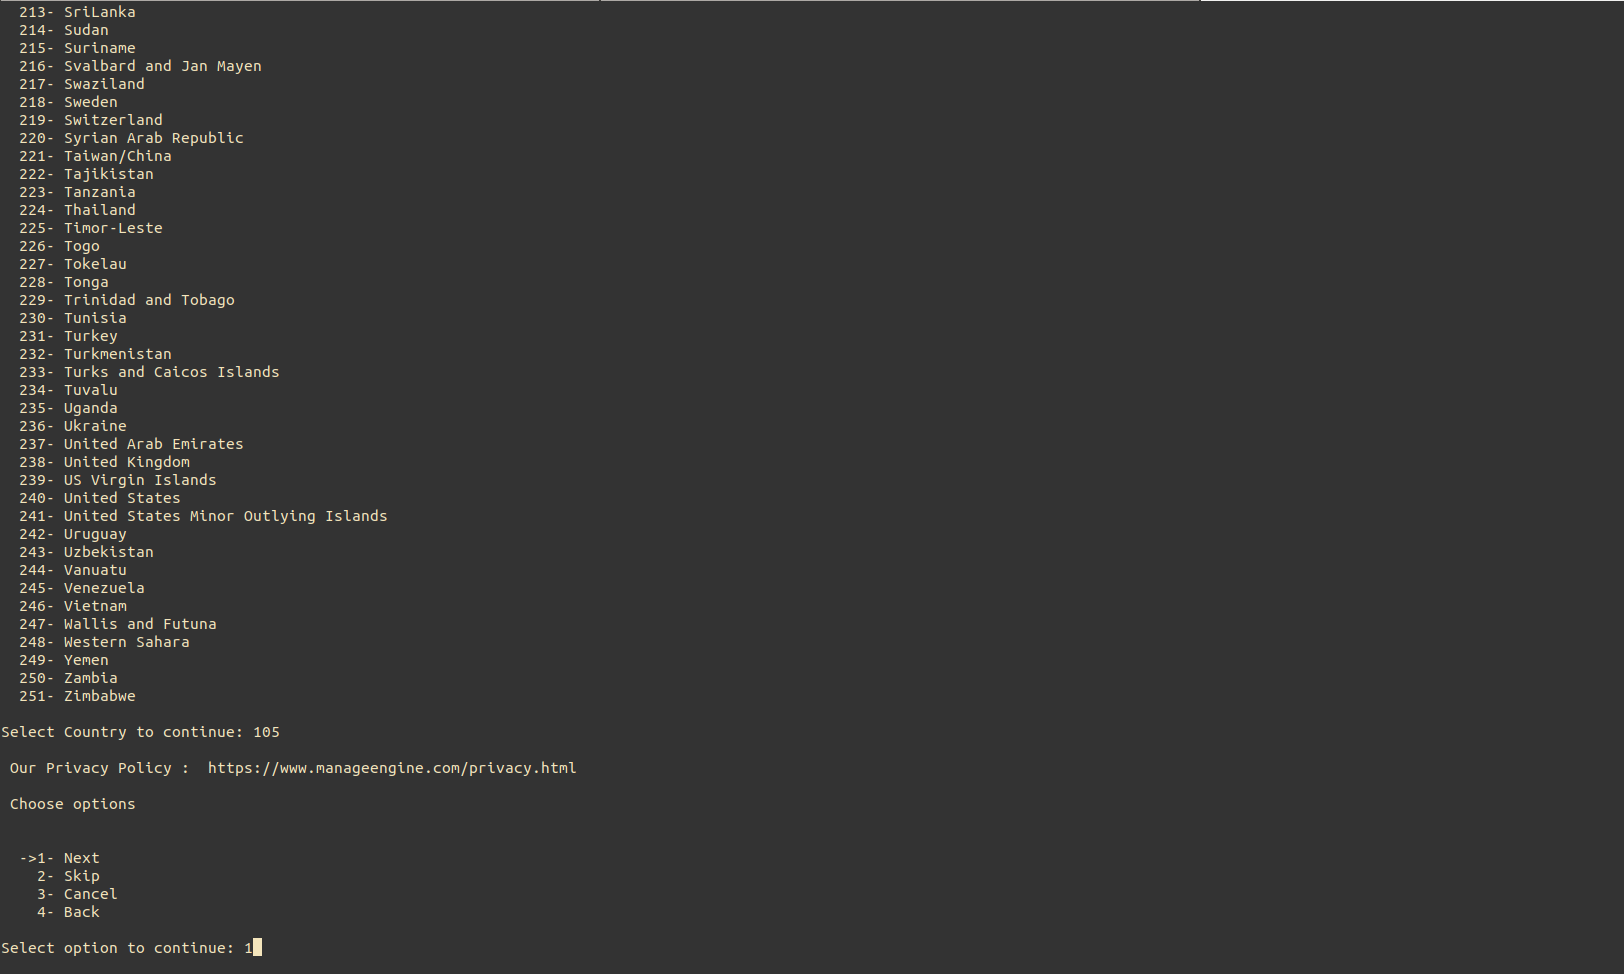
Step 3: You can register for technical support by providing the required details (Name, E-mail ID, Phone, Company Name).

Step 4: Select your location.

Step 5: Choose the installation directory.
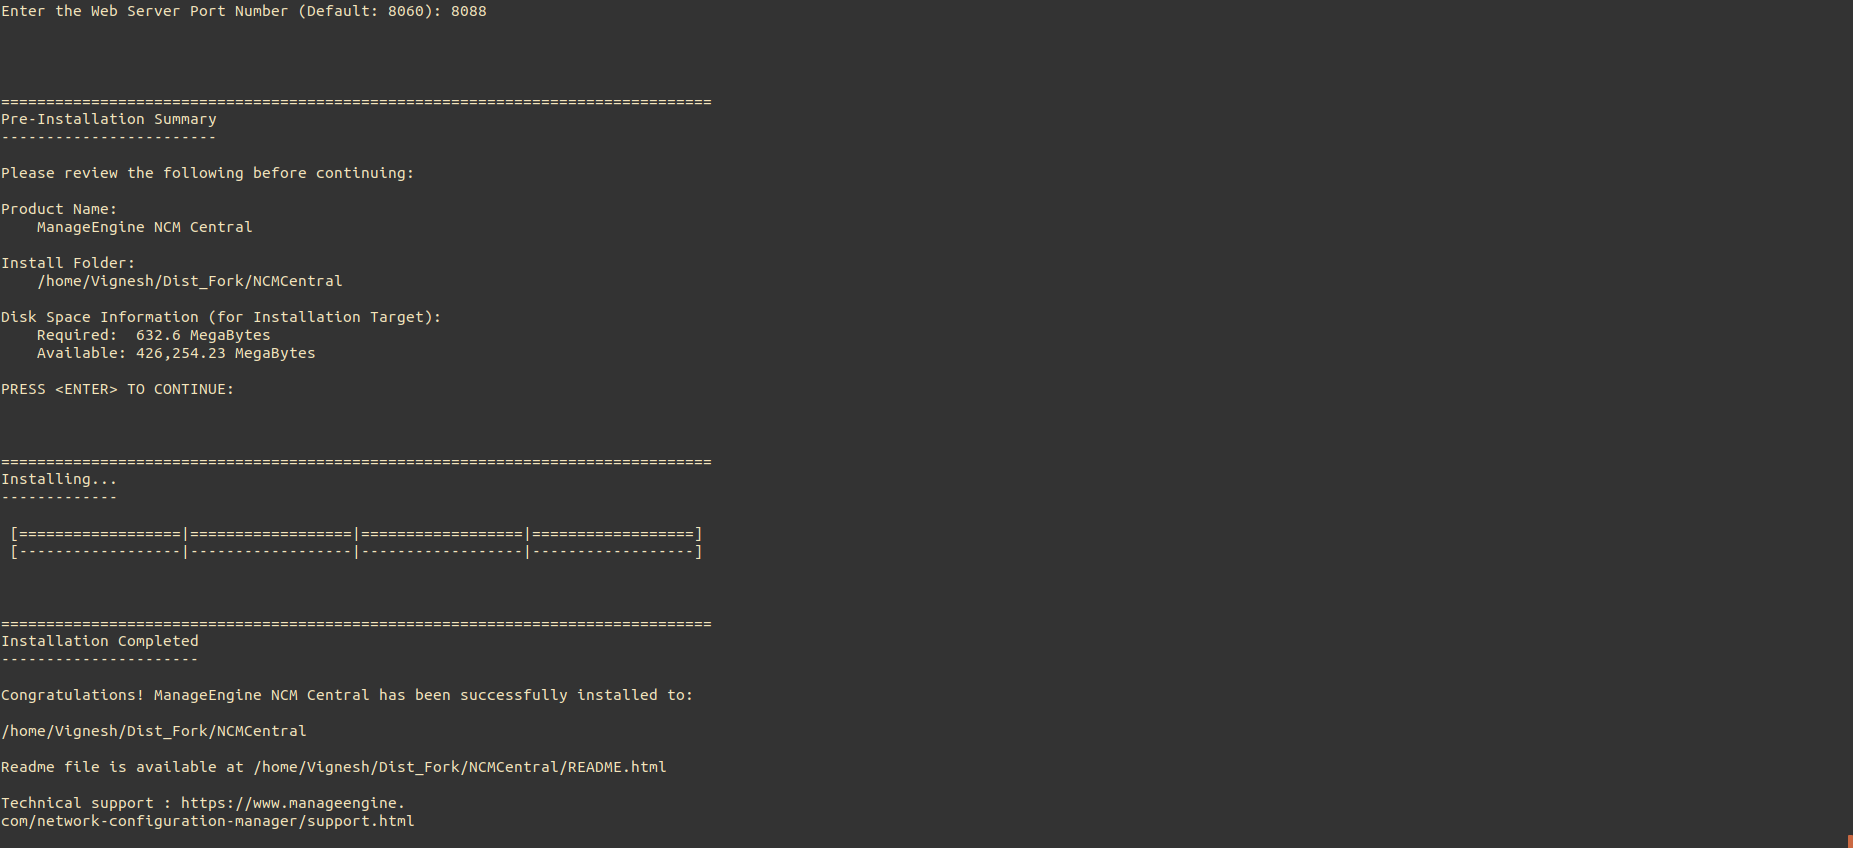
Step 6: Configure the web server port.

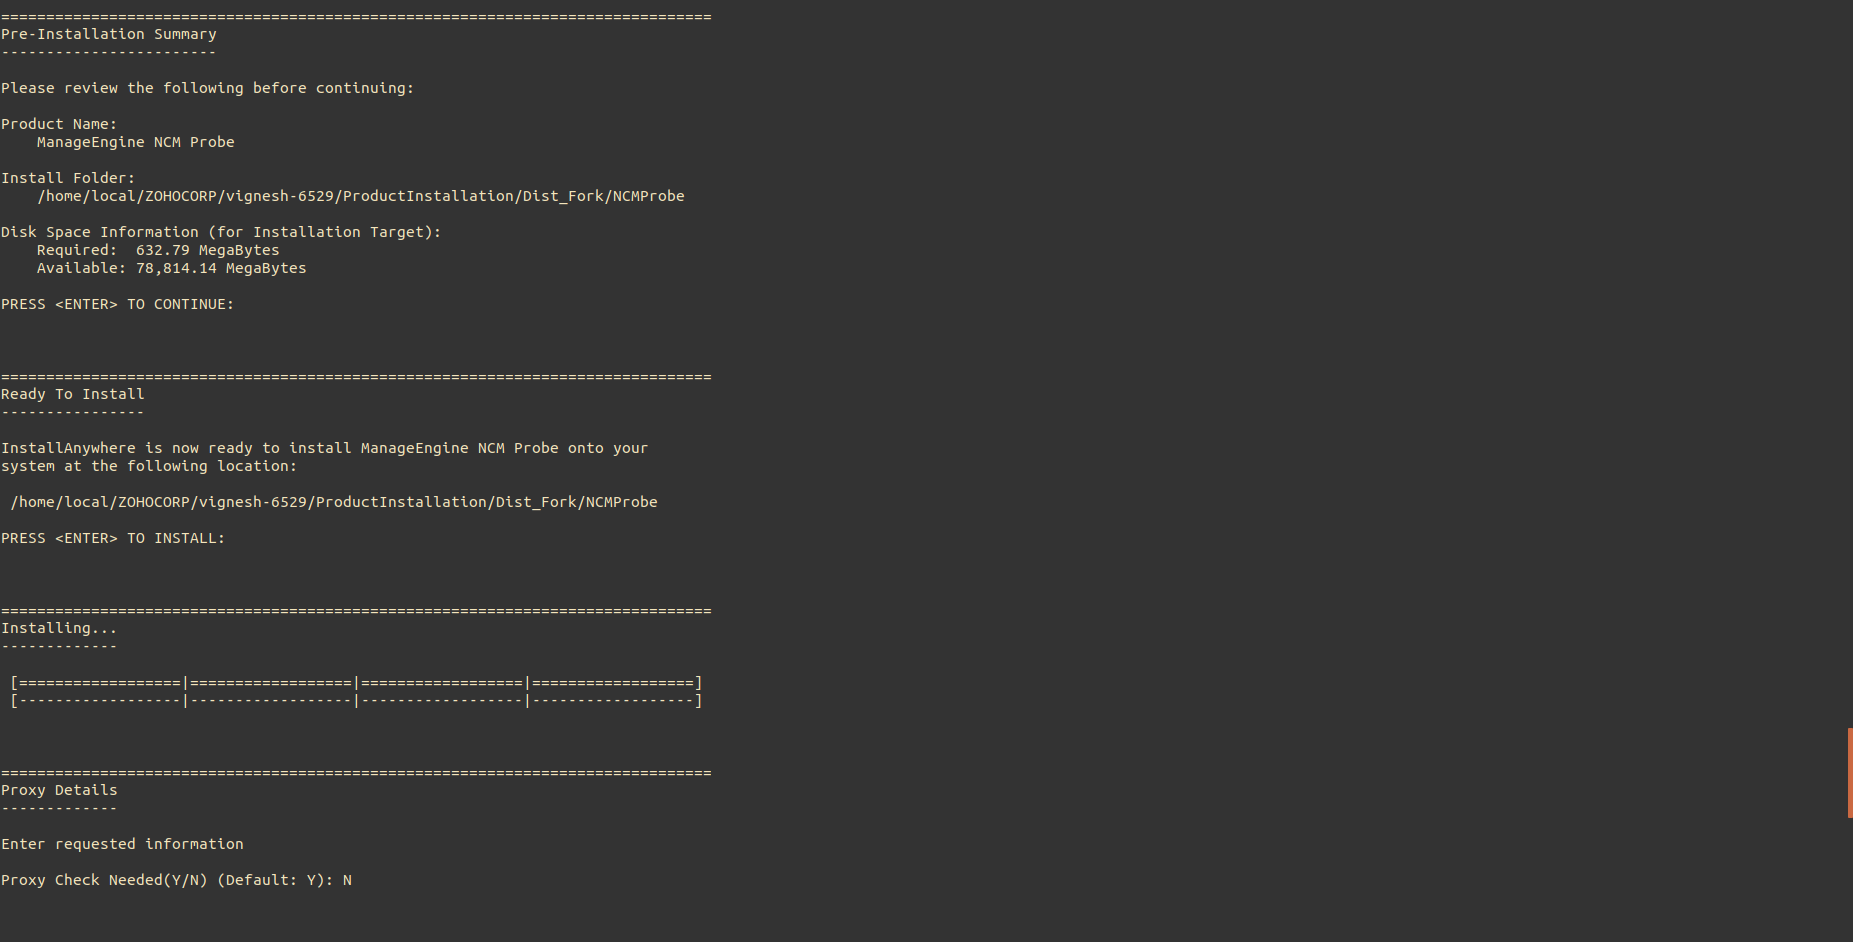
Step 7: Verify the installation details and press 'Enter' to complete the installation.
NCM Probe Server
- Download ManageEngine_NCM_Probe_64bit.bin for Linux.
- Login as root user.
- Assign executable permission using command chmod a+x <file-name>
- Execute the following command with administrator privileges (sudo):
- ./<file_name>
- Follow the instructions as they appear on the screen
- Network Configuration Manager is installed in your machine in the desired location. Henceforth, this installation directory path shall be referred as "NCMProbe".
Installing Network Configuration Manager Probe on Linux using console mode/silent mode
Step 1: Execute ManageEngine_NetworkConfigurationManager_64bit.bin with administrator privileges (sudo) and -i console option.
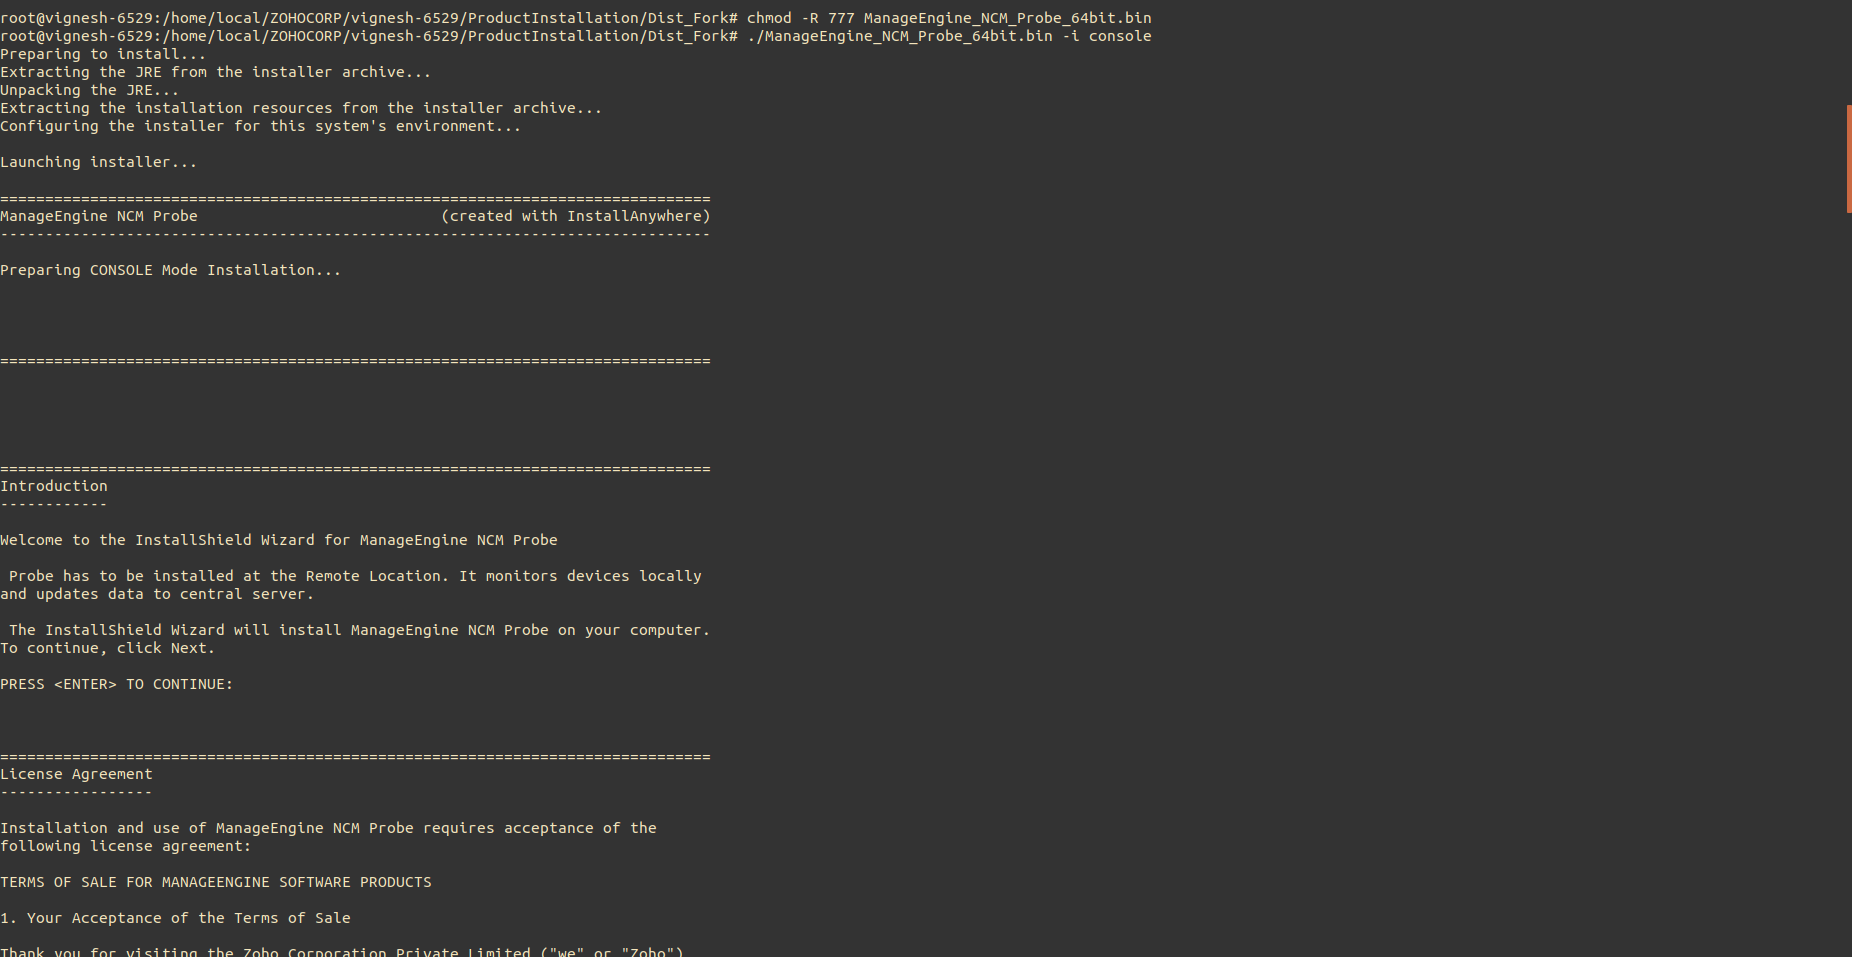
Step 2: Go through the license agreement and enter 'Y' to proceed.

Step 3: You can register for technical support by providing the required details (Name, E-mail ID, Phone, Company Name).
Step 4: Select your location.
Step 5: Choose the installation directory.
Step 6: Configure the web server port.

Step 7: Verify the installation details and press 'Enter' to complete the installation.
Step 8: Configure Probe(s) on the Central server page. Go to Settings -> Probe Details on the Central server page to get the Probe installation key.
Starting NCM Enterprise Edition
In Windows
Central Server
- Go to /NCM_Central/bin folder
- Execute: run.bat
Probe Server
- Go to /NCM_Probe/bin folder
- Execute: run.bat
In Linux
Central Server
- Go to /NCM_Central/bin folder
- Execute: sh run.sh
- Alternatively, to run NCM Central server in the background, execute: nohup sh run.sh
Probe Server
- Go to /NCM_Probe/bin folder
- Execute: sh run.sh
- Alternatively, to run NCM Probe server in the background, execute: nohup sh run.sh