Installing the Password Manager Pro Agent
(Feature available only in Premium and Enterprise editions)
- Overview
- Communication between the PMP server and the PMP agent
- Installing the PMP agent
3.1 Prerequisite
3.2 Steps to download PMP agent
- Discovering local accounts using the PMP agent
- Finding tasks awaiting execution by the PMP agent
1. Overview
By deploying the Password Manager Pro (PMP) agent, you can establish connection with remote resources that are not connected to the PMP server and manage them from PMP. PMP agent is available for Windows, Windows domain, and Linux servers. The agent package is available for download in the PMP web interface and it contains the necessary executable/configuration files, and an SSL certificate to use for the HTTPS communication between the agent and the PMP web server. During installation, you must supply a unique Agent Key (copied from the PMP UI) for each agent in the target machine. You can also keep an Agent Key active for a specified number of hours and use it for multiple installations.
The PMP agent is useful in the following cases:- When PMP server runs in a Linux system and password reset has to be carried out for a Windows machine.
- If the target systems are in a Demilitarized Zone(DMZ) or a different network to which PMP server does not have direct connectivity.
- If the required administrative credentials are not stored locally in the PMP server to execute remote password resets.
- To change the password of domain accounts without the domain controller's admin credentials.
2. Communication Between the PMP Server and the PMP Agent
All password-related communication between the PMP server and the agent is carried out securely over HTTPS. Since the agent always initiates the connection, the communication is one-way. The agent residing in the target machines only needs access to the PMP web interface, thereby only the PMP web server needs to be available for the agent. Since the agent uses the outbound traffic to reach the login page of PMP, there is no need to punch firewall holes or create VPN paths to allow inbound traffic for the server to reach all the deployed agents.
The agent will periodically ping the PMP web server through HTTPS to check if any operation is pending for execution. By default, the agent pings the server once every 60 seconds but the interval can be changed according to requirements. Once the agent contacts the PMP web server, the server will trigger the list of tasks to be carried out by the agent in the remote resource. Once the tasks have been executed, the agent will notify the results to the PMP web server.
Note: Since the tasks are triggered by the web server only upon contact from the agent, the time taken for successful task execution will depend on how quickly the agent can connect with the PMP web server.
3. Installing the PMP Agent
3.1 Prerequisite
Before installing the agent, ensure that the account that you use to install the agent in the remote host has sufficient privileges to carry out password modifications.
3.2 Steps to Download PMP Agent
- Navigate to Admin >> PMP Agents.
- Agent packages are available for both 32-bit and 64-bit versions of the following operating systems:
- Windows
- Windows Domain
- Linux
- Click the required agent package.
- In the pop-up that appears, copy the Agent Key using the copy icon beside it. This Agent Key is necessary to install the PMP agent in the target system and it can be used one time only. Once the Agent Key is supplied for an installation, it will become invalid. (Supplying the Agent Key is applicable from build 10302 and above only)
- To keep a single key active for a specified amount of time, select the option Allow the key to be active for: X hours and specify a number of hours. Now, the same Agent Key can be used for any number of agent installations within the specified time.
- Click Download Agent. Once the agent package zip file is downloaded, unzip the contents.
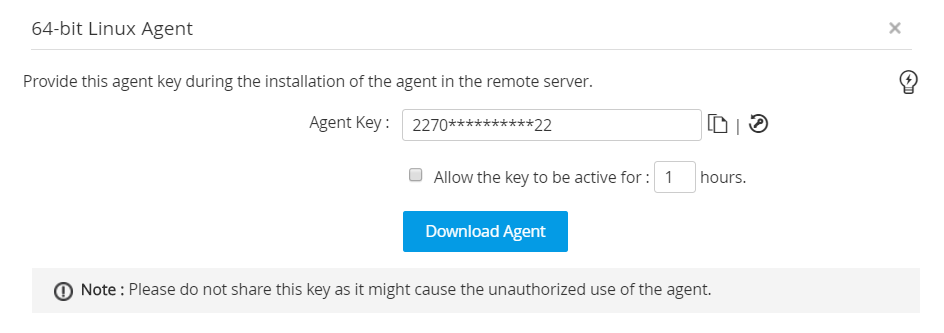
Note: Please do not share this key as it might cause the unauthorized use of the agent.
3.3 PMP Agent for Windows/Windows Domain
The following are the commands to be executed in the target system for Windows and Windows Domain agent.
- Install
- Start
- Update
- Stop
Note: You need administrative privileges in the target system to execute the above commands.
i. To Install the Agent as a Windows Service
- Open a command prompt and navigate to the PMP agent installation directory.
- Execute the command AgentInstaller.exe install <Agent Key copied from the PMP UI>.
- The Windows agent will be installed and the PMP agent service will start automatically.
ii. To Start the Agent as a Windows Service
- Open a command prompt and navigate to the PMP agent installation directory.
- Execute the command AgentInstaller.exe start.
- Previously installed PMP agent service will start now.
iii. To Update the Windows Agent
In case the PMP agent was previously installed by a different admin user, use this command to update the user account under which the agent server will be added as a resource. The agent server will be added as a resource under the new admin user without the need to uninstall and reinstall the agent. However, the new admin will not have access to the accounts that were previously under the agent server. To gain access to the accounts, the previous admin has to transfer the ownership of the resource to the new admin.
- Open a command prompt and navigate to the PMP agent installation directory.
- Execute the command AgentInstaller.exe update <Agent Key copied from the PMP UI>.
- The agent will be added as a resource in the new user account.
iv. To Stop the Agent the Windows Service
- Open a command prompt and navigate to the PMP agent installation directory.
- Execute the command AgentInstaller.exe stop.
- Now the PMP agent service will stop and it will be uninstalled.
3.4 PMP Agent for Linux
The following are the commands to be executed in the target system for the Linux agent.
- Install
- Start
- Update
- Stop
- Remove
Note: You need administrative privileges in the target system to execute the above commands.
i. To Install the Agent as a Linux Service
- Open a command prompt and navigate to the PMP agent installation directory.
- Execute the command sh installAgent-service.sh install <Agent Key copied from the PMP UI>.
- The Linux agent will be installed and the PMP agent service will start automatically.
ii. To Start the Agent as a Linux Service
- Open a command prompt and navigate to the PMP agent installation directory.
- Execute the command sh installAgent-service.sh start.
- Previously installed PMP agent service will start now.
iii. To Update the Linux Agent
In case the PMP agent was previously installed by a different admin user, use this command to update the user account under which the agent server will be added as a resource. The agent server will be added under the new admin user without the need to uninstall and reinstall the agent. However, the new admin will not have access to the accounts that were previously under the agent server. To gain access to the accounts, the previous admin has to tranfer the ownership of the resource to the new admin.
- Open a command prompt and navigate to the PMP agent installation directory.
- Execute the command sh installAgent-service.sh update <Agent Key copied from the PMP UI>.
iv. To Stop the Agent Running as a Linux Service
- Open a command prompt and navigate to PMP agent installation directory.
- Execute the command sh installAgent-service.sh stop.
- The Linux agent service will be stopped.
v. To Uninstall the Agent as a Linux Service
- Open a command prompt and navigate to the PMP agent installation directory.
- Execute the command sh installAgent-service.sh remove.
- The Linux agent will be uninstalled and removed.
3.5 Configuring Agent Settings
Open the agent.conf file available in the downloaded agent package. The following are the parameters listed in the conf file, some of which can be modified to suit your needs:
- agentType: agentType denotes the type of agent i.e., agent with PMP features.
- ServerName: This is the server/IP Address which the PMP agent will try to reach to contact the PMP server.
- ServerPort: This indicates the port in which the PMP server is running. If you have changed the default port of PMP to any other port such as 443, the same port number must be updated here.
- ScheduleInterval: By default, the agent pings the server once in every 60 seconds. To configure the time interval at which the agent should ping the PMP web server, modify the time interval value in seconds.
- UserName: This is the admin user account under which the agent server will be added as a resource.
- OSType: Denotes the OS which the agent belongs to - Windows/Windows Domain/Linux.
Once any of the above parameters are modified, restart the agent service.
4. Discovering Local Accounts using the PMP Agent
When the agent is started for the first time on the target machine, it will automatically add the machine as a resource in PMP and discover the local accounts. After discovery, you can reset the passwords of the local accounts. To learn more about resetting passwords using the PMP agent, click here.
5. Finding Tasks Awaiting Execution by the PMP Agent
Follow the below steps to find the tasks have been triggered by the user but awaiting execution by the PMP agent.
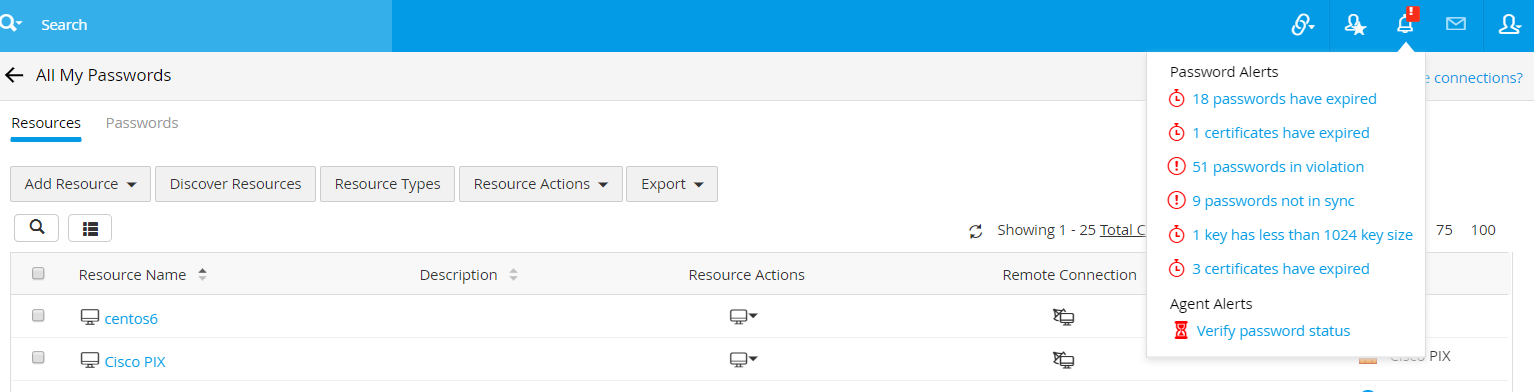
- Click the bell icon in the top panel of the interface for viewing Notifications.
- Under Agent Alerts, you will find the agent related statuses:
- The number of password reset and password verify actions triggered.
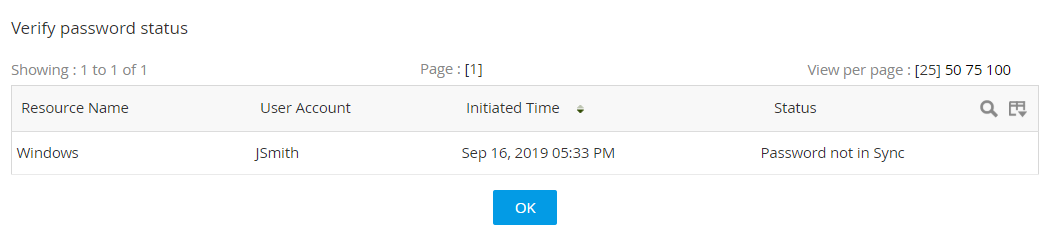
- Status of password reset actions triggered earlier.
- Status of password verify actions triggered earlier.
- The notifications are user-specific i.e., users will be notified of only those tasks that they have triggered.