PAM360 Mobile Application - Android
PAM360 offers the flexibility to access its features through the PAM360 mobile application. The PAM360 mobile application in Android supports the powerful and efficient functionalities of the PAM360 solution to your fingertips, enabling you to manage and control your organization's privileged accounts and passwords with ease and security from your mobile device.
The mobile application offers several advantages, such as enhanced flexibility , monitoring capabilities, and overall security management of the privileged resources in your environment. You can access and manage your privileged resources and accounts just as securely as on PAM360's desktop installation. The app encrypts and stores all your data with AES-256 encryption, ensuring the highest level of data protection. Additionally, all the communication between the PAM360 server and the Android application is secured over an encrypted channel using the HTTPS protocol over SSL.
With the mobile application, you can actively view resources, accounts, SSL certificates, CSRs, and SSH keys while managing sensitive personal information. With the suite of features it offers, the PAM360 Android application ensures that you maintain control over your organization's critical resources on the go. This guide aims to familiarize you with its key features, setup process, and operational functionalities, allowing you to leverage the PAM360's mobile capabilities.
Caution
- The PAM360 mobile application requires a valid working instance of the ManageEngine PAM360 web application.
- The mobile device must be connected to the same network as the PAM360 web server. You also can use the passwords cached in offline mode, if you are unable to connect to the same network as the server. Users can cache passwords for offline access only when the secure offline mode is enabled.
This document will guide you through the following topics:
- PAM360 Capabilities in Android Application
- Mobile Application Access to Users
- Getting started with the PAM360 Mobile Application
- Choosing the Organization
- Navigation Menu
- Secure Offline Mode
- PAM360 Widgets
1. PAM360 Capabilities in Android Application
The PAM360 mobile application offers a comprehensive suite of features to help you manage privileged accounts and resources within your environment effectively, even when you are away from your desktop. The following table highlights each feature and its purpose, helping you make the most of PAM360 on the go.
| Capabilities | Description |
|---|---|
View Passwords | Access passwords you own or manage for quick reference. |
Request Password Access | Send password access requests for resources shared with you with configured access control workflow. |
Manage Access Requests | Approve or reject access requests directly from your mobile device. |
Check In/Out Passwords | Check in or check out passwords as needed. |
View Resource Groups | See all resource groups that you own, manage, or those shared with you. |
Launch Remote Sessions | Initiate RDP sessions to Windows resources directly from your mobile device. |
View SSH Keys | Access stored SSH keys for your managed resources. |
Manage SSL Certificates | View, create SSL certificates, and generate CSRs as needed. |
Personal Password Management | Securely view and manage personal passwords stored within the personal tab. |
Advanced Search | Locate specific resources or accounts |
Offline Access | Cache essential passwords for uninterrupted offline access. |
2. Mobile Application Access to Users
The PAM360 mobile application supports Two-Factor Authentication (TFA) for enhanced security. Once enabled, users must authenticate through two successive stages to access the PAM360's mobile interface. The first level of authentication can be achieved in one of the three following ways: PAM360's native authentication, Active Directory/LDAP/Microsoft Entra ID credentials, SAML SSO. The second level of authentication can be performed using any of the TFA provisions supported by PAM360. Refer to this document to see the different TFA provisions supported by PAM360. Administrators can selectively allow or restrict mobile application access for users. To restrict mobile access:
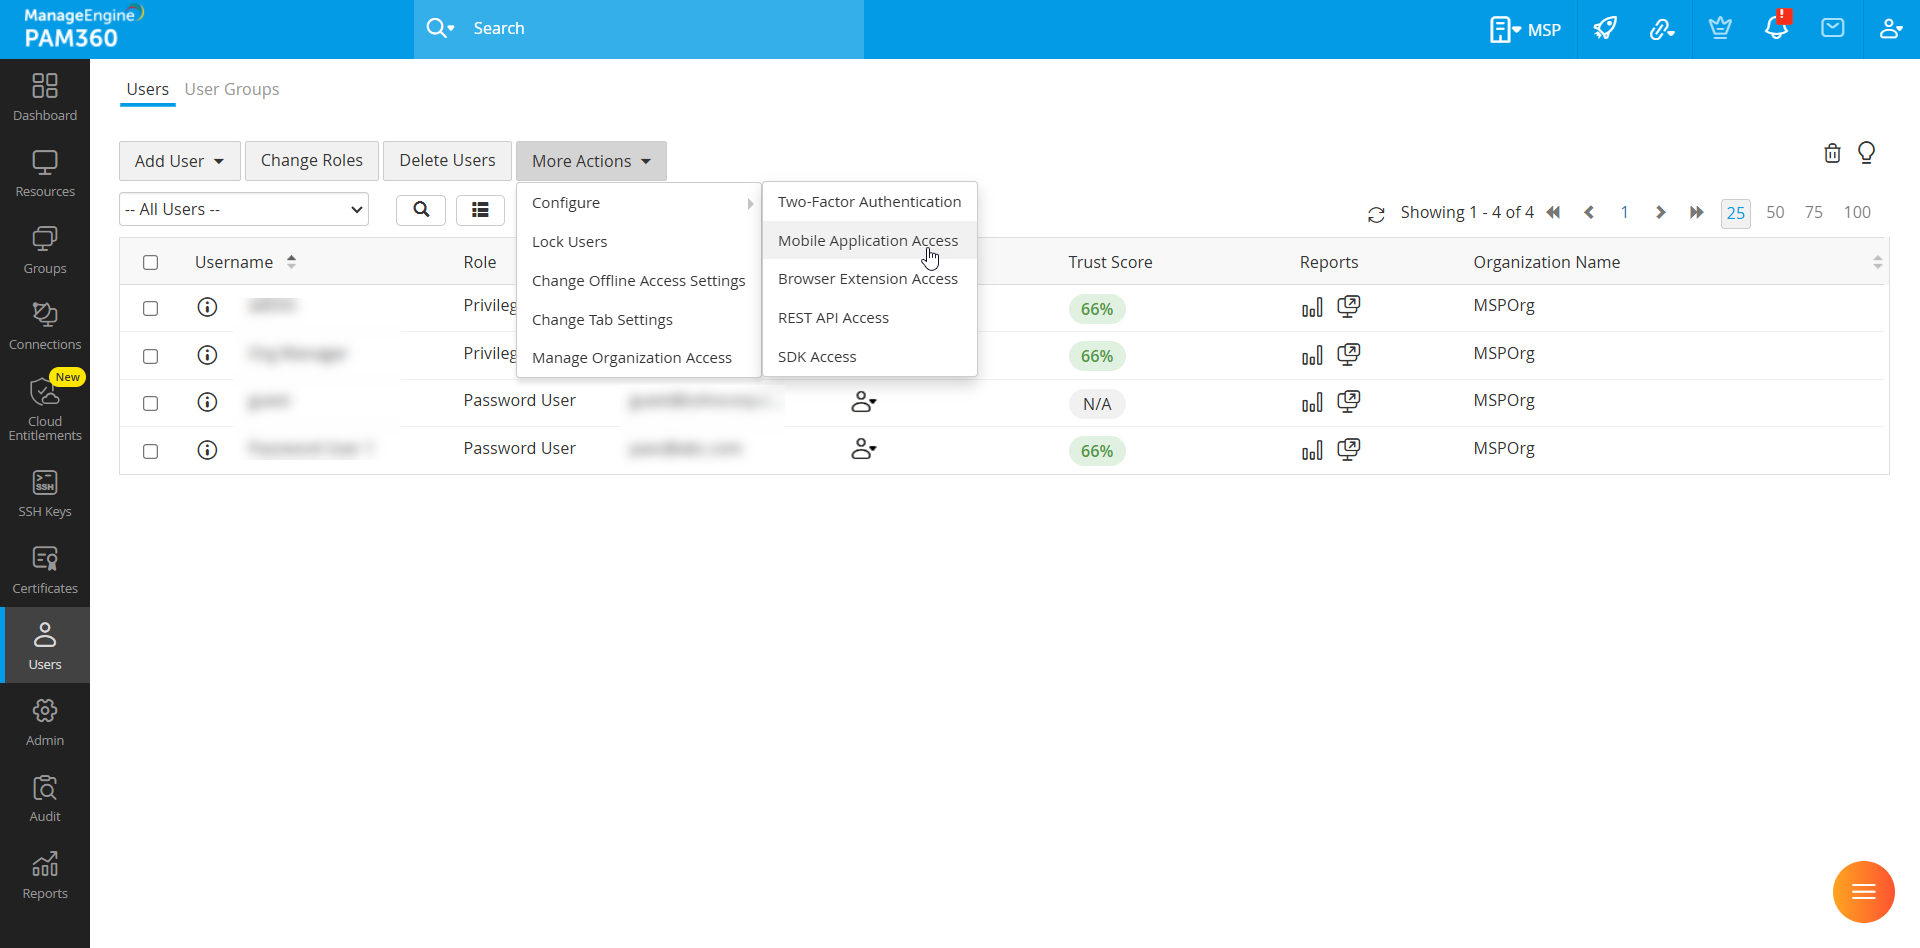
- Navigate to Users >> More Actions >> Configure >> Mobile Application Access.
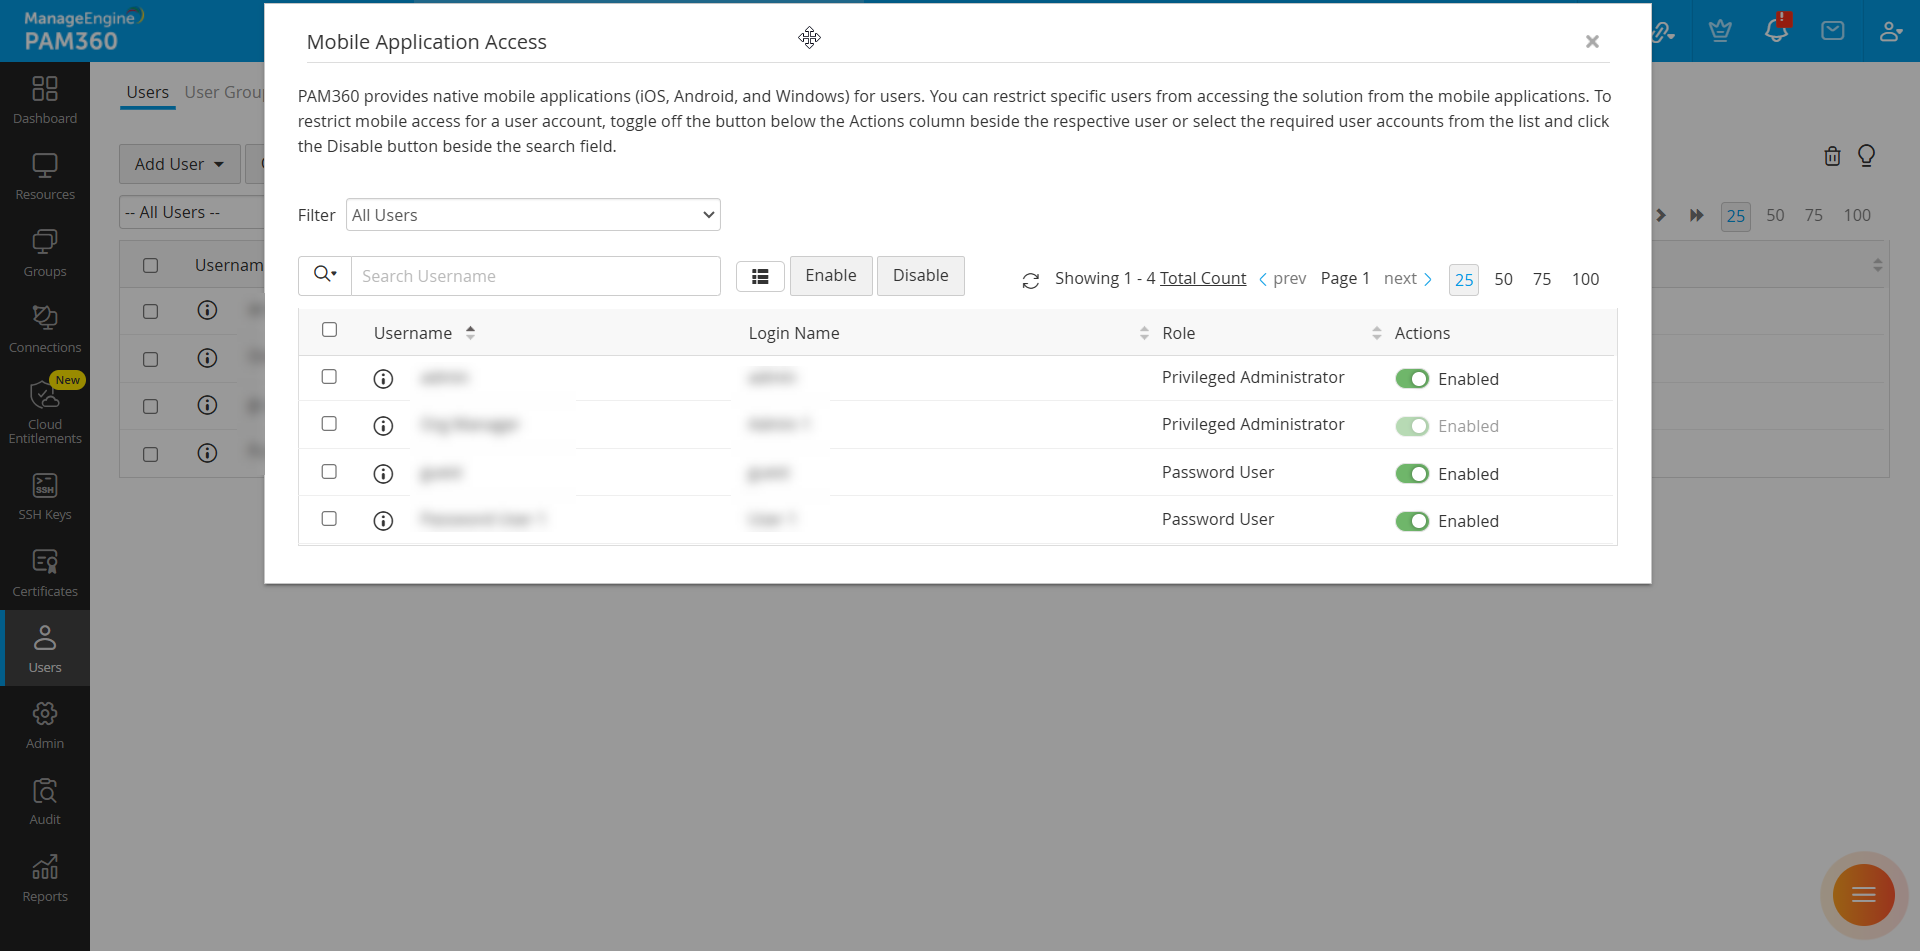
- On the Mobile Application Access window, use the toggle switch under the Actions column beside the desired user to configure mobile access for that user.
To allow password caching for users, follow these steps:
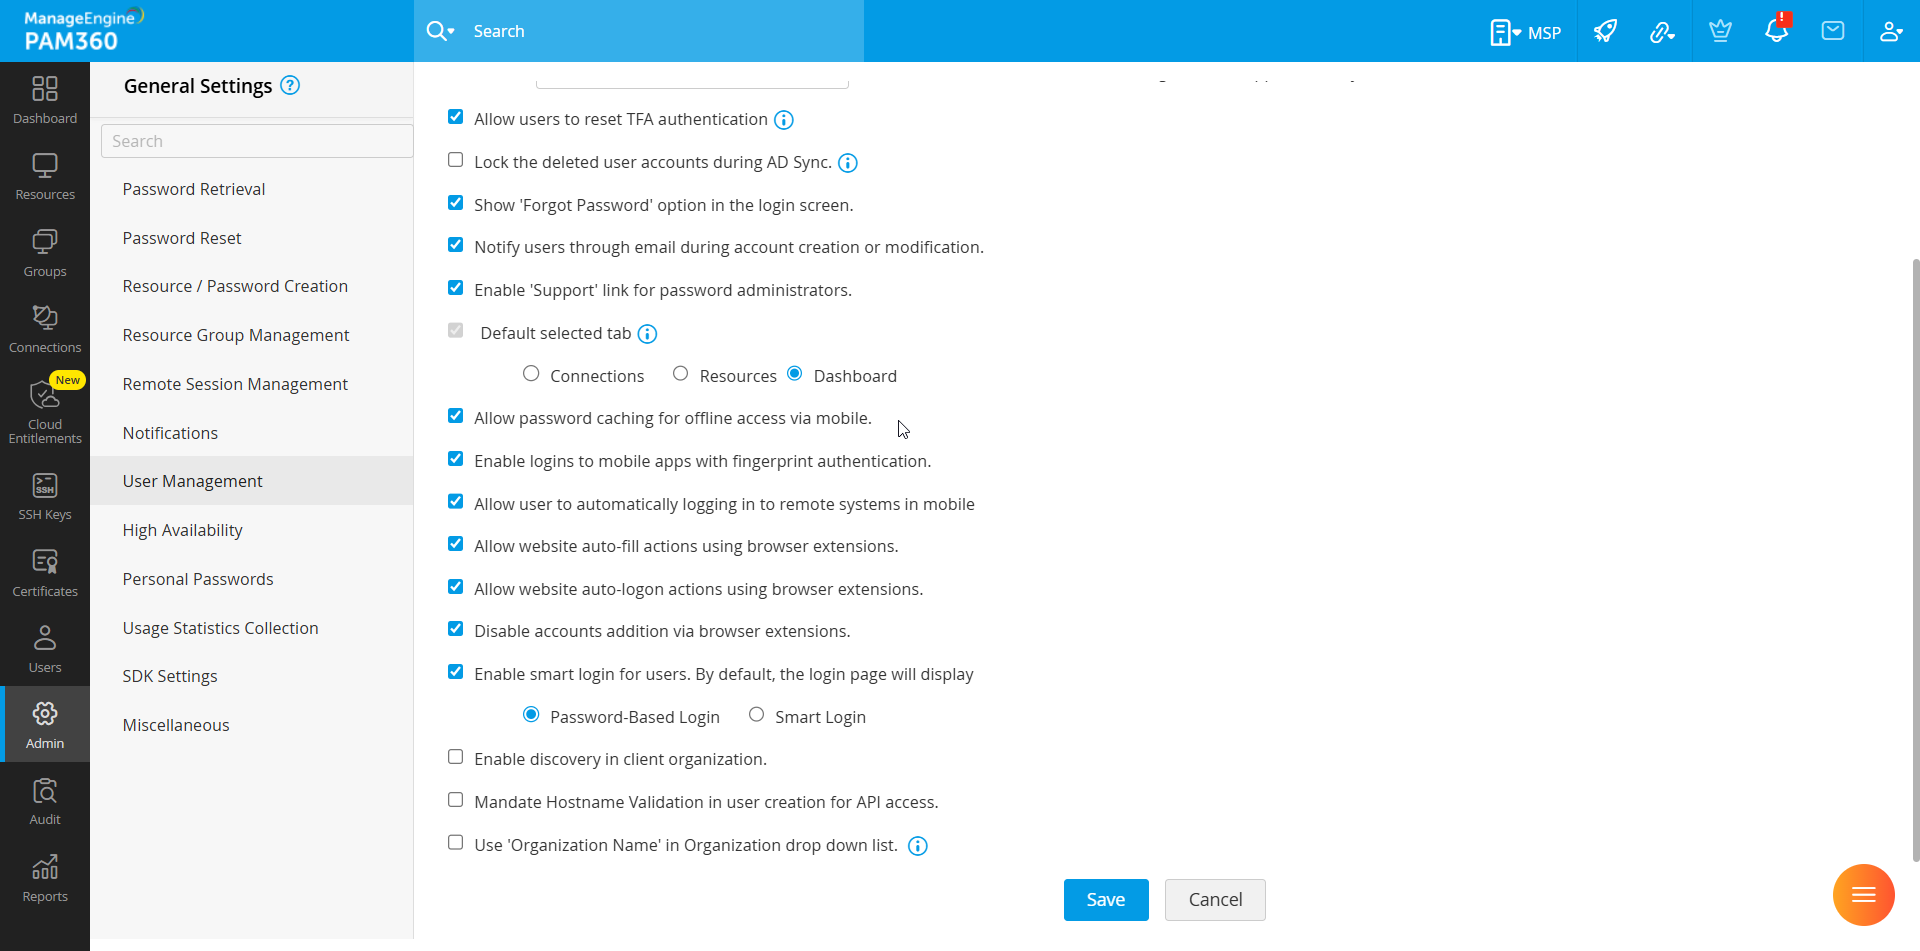
- Go to Admin >> Customization >> General Settings >> User Management.
- Enable the Allow password caching for offline access via mobile option to allow users to cache passwords for offline access.
- Leave this option unchecked to prevent users from accessing the passwords offline.
3. Getting Started with the PAM360 Application
- Supported Devices: All Android devices
- Compatibility: Requires Android version 5.0 and above
- Size: 5.3 MB Approximately
- Languages Supported: English, French, German, Hebrew, Japanese, Polish, Simplified Chinese, Spanish, Traditional Chinese, Turkish, Brazilian Portuguese, Italian, Russian, and Dutch. The device's language settings will be applied to the PAM360 mobile application.
To securely access and manage your privileged accounts on the go, you must first set up the PAM360 Android application. Installing the PAM360 mobile app is as simple as installing any other mobile application. Follow these steps to install the application:
- Open the Google Play Store on your mobile device.
- Search for ManageEngine PAM360 and select the official application.
- Tap Install to download and install the application.
- Alternatively, you can use this direct link to download the PAM360 mobile application.
Once the installation is complete, launch the ManageEngine PAM360 app and enter the following required details to get started:
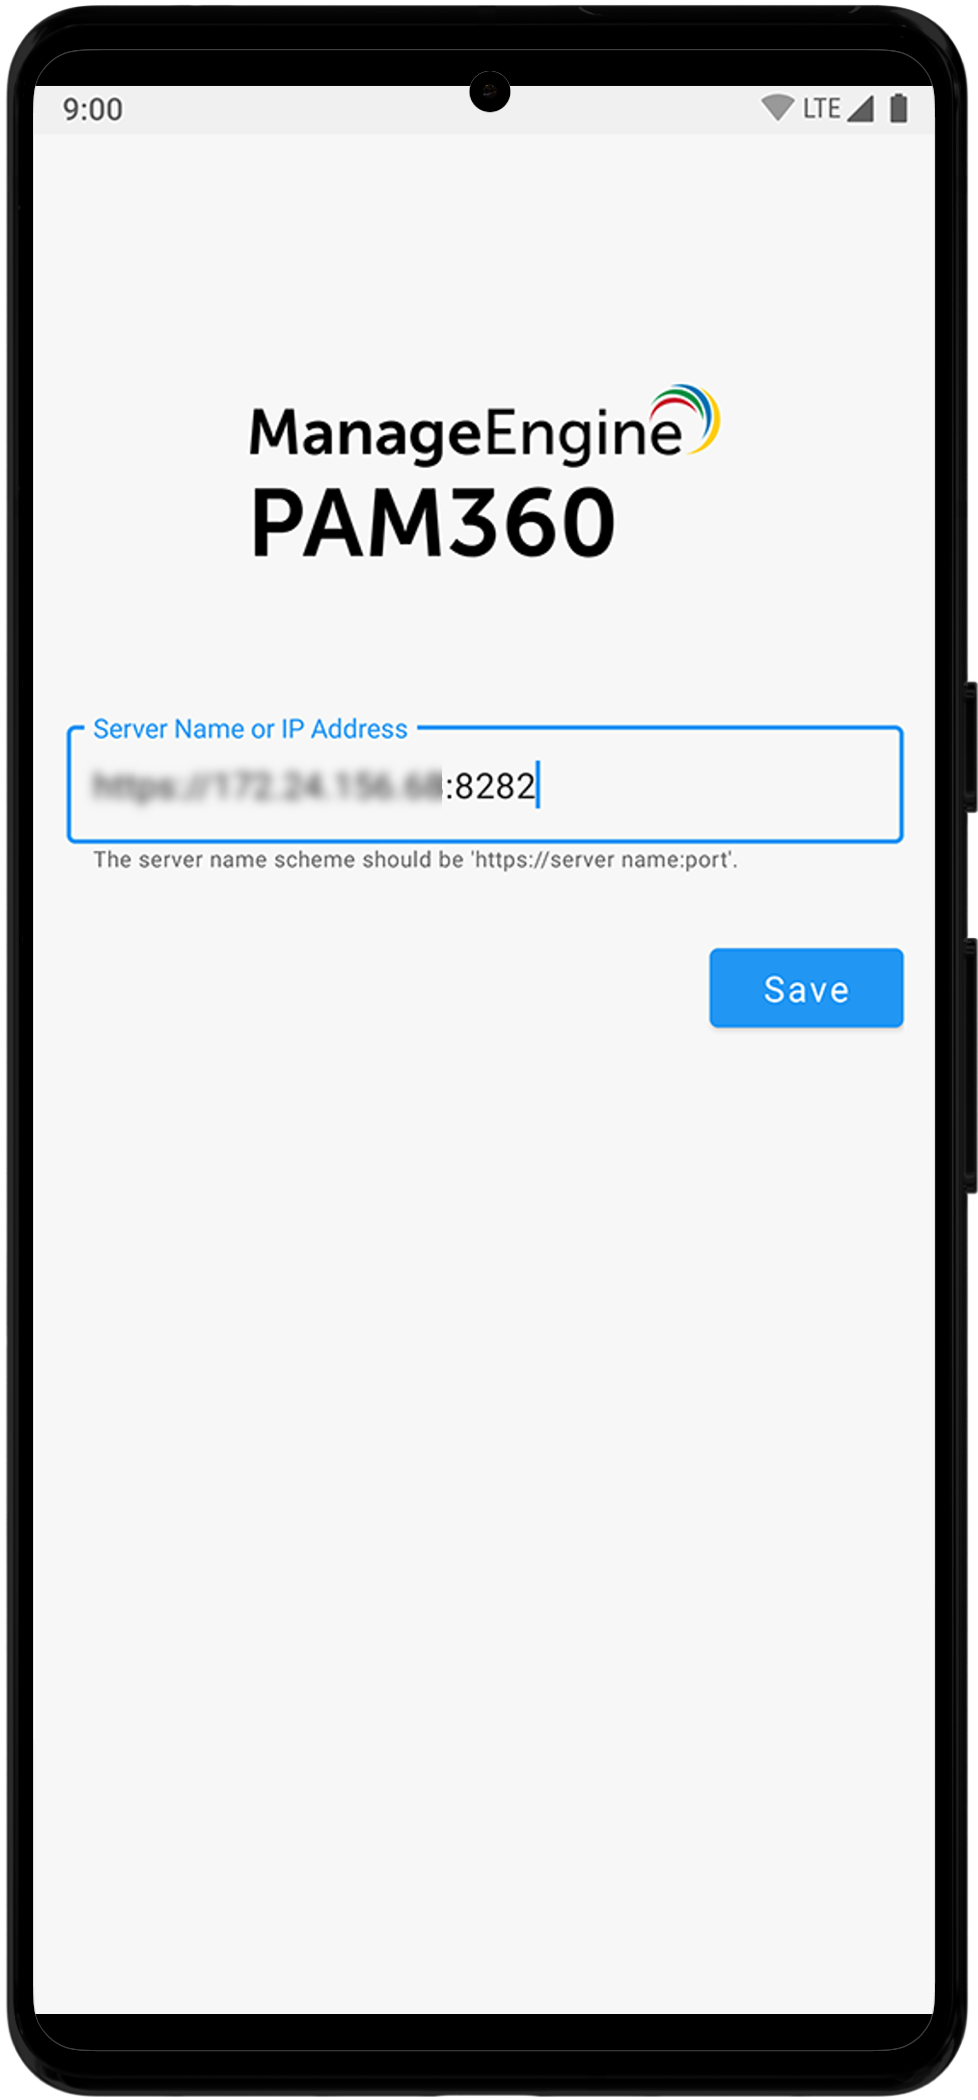
- Enter the Server Name or IP address of the machine where the PAM360 server is running along with the Port number in the format https://Hostname:port or https://IPaddress:port and click Save.
- If your PAM360 server is on a local network, ensure that the PAM360 server and mobile device are connected to the same network.
- If your PAM360 server is hosted on the cloud, you can access the PAM360 interface via the mobile application from a different network as well.
Additional Detail
If you are a PAM360 MSP user, you will be prompted to enter your organization name after entering the server name/IP address. Users created under specific organizations must enter their respective organization names in the Organization field to access their PAM360 accounts. Entering an incorrect or invalid organization name will prevent access to the PAM360 account.
- On the PAM360 login page, enter your account credentials, select the appropriate authentication method from the provided drop-down menu, and click Login to log into your PAM360 account. The PAM360 Android application supports all the authentication methods similar to the PAM360 web-interface login.
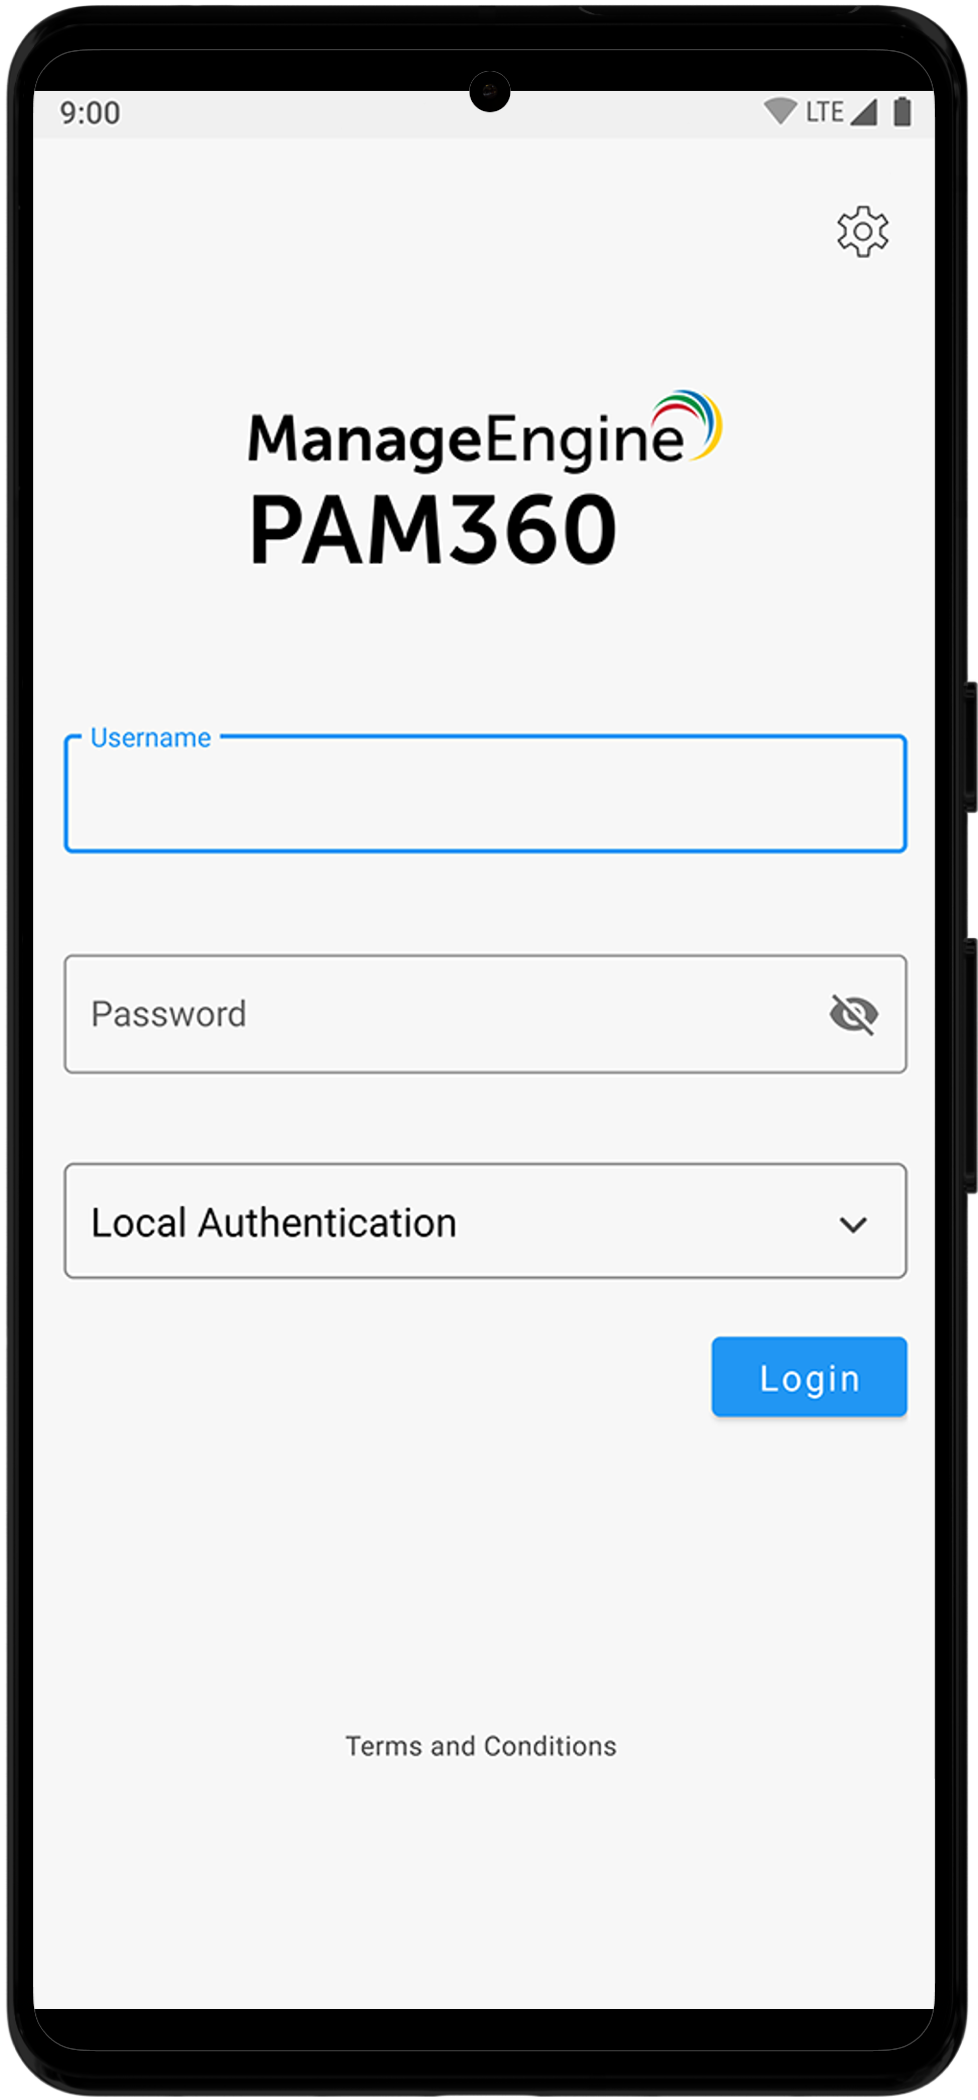
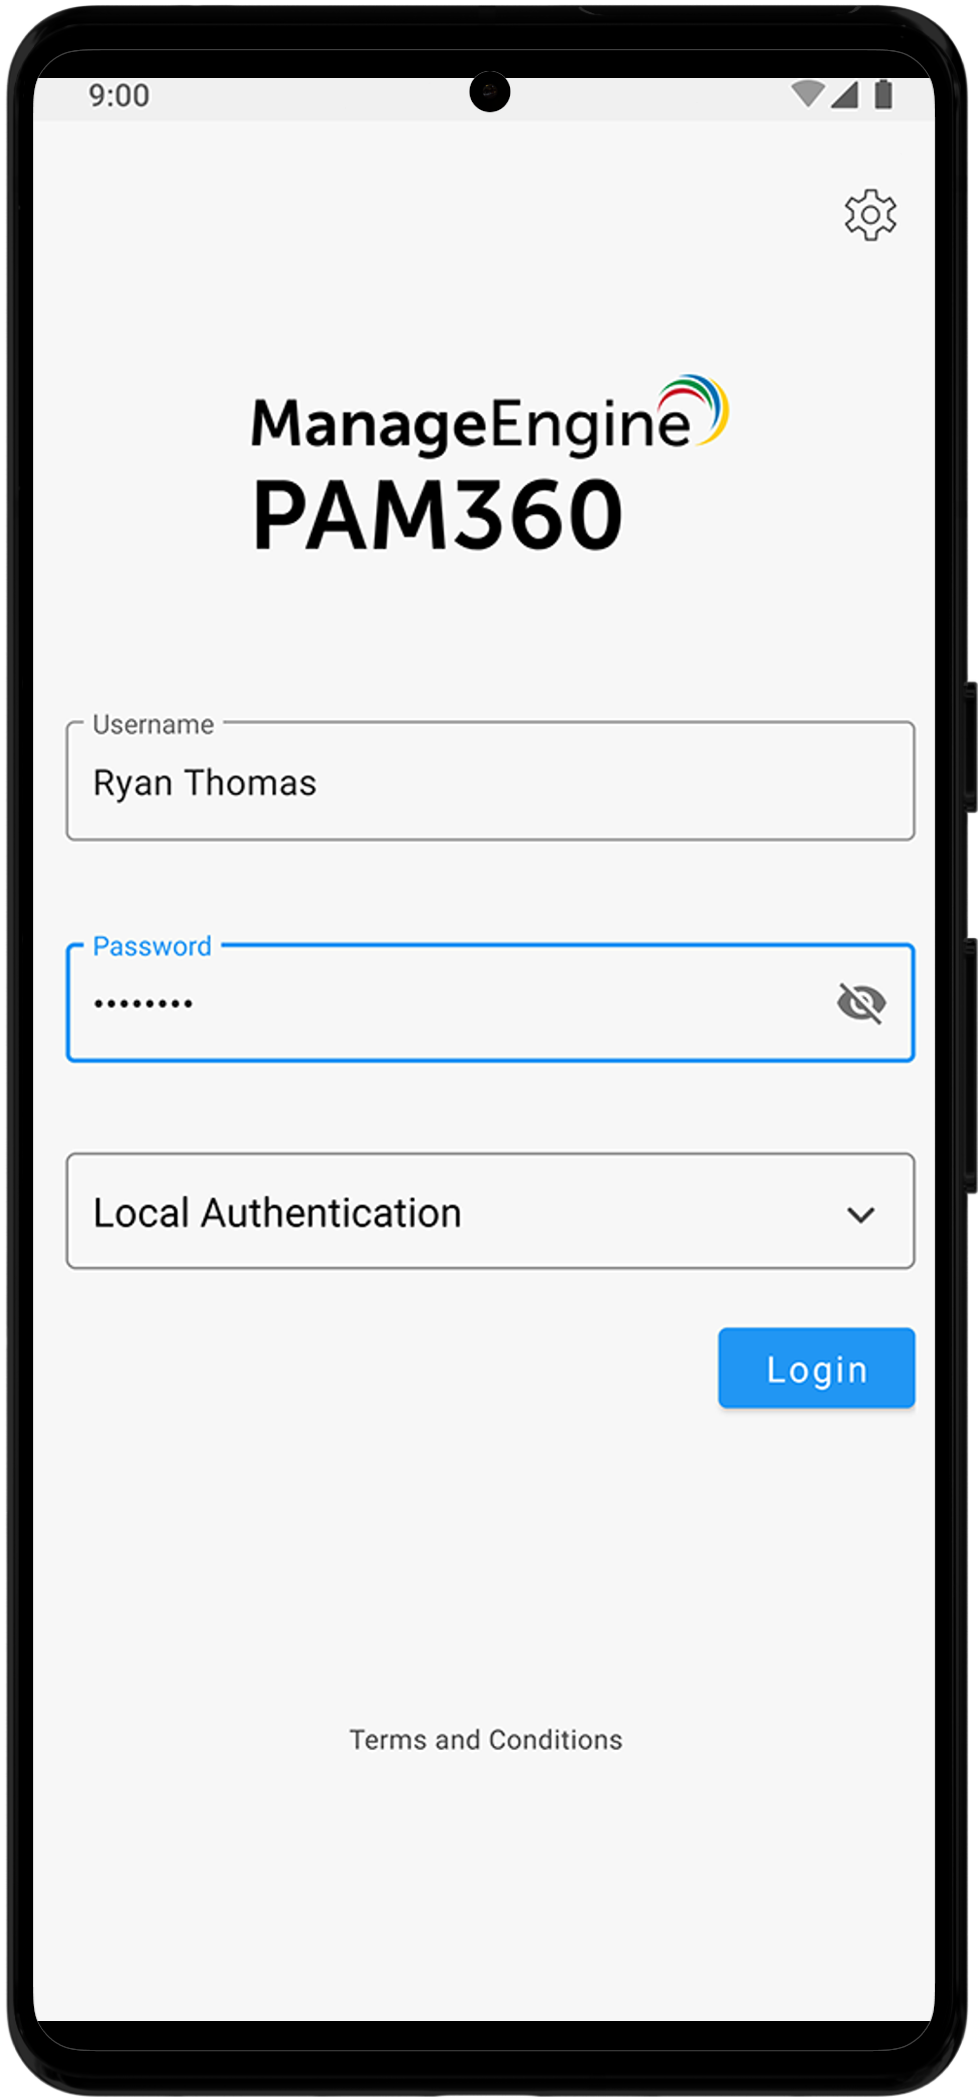
- Upon logging into your account, you must set up a Passphrase for enhanced security. Enter a passphrase of your choice in the designated fields. This passphrase must contain a minimum of eight characters and will be used for mobile authentication. The PAM360 Android application employs the advanced AES-256 encryption algorithm to ensure the security of all offline data.
- Next, you will be prompted to set up the Swift Login option for your account, eliminating the need to enter your login credentials and passphrase every time you log into your mobile application. You can choose from the following options: Biometric, PIN, or Device's Screen Lock. Select None if you prefer not to set up Swift Login for your account.
Caution
- You must enter your passphrase whenever you log in to the mobile application. You have five attempts to enter the correct passphrase. If you fail, you will be logged out of the PAM360 Android application, and all the passwords cached for offline access, along with configured application preferences, will be deleted automatically.
- In online mode, failing to provide the correct passphrase within the allowed attempts will log you out. You should log in again and set up a new passphrase to access the mobile application.
- In offline mode, you will be unable to access the application if you exceed the allowed 5 incorrect passphrase attempts. To regain access, you must log in through online mode and reset the passphrase.
- Setting up a new passphrase will delete all saved offline password caches and customized settings from your device.
- If you do not remember your passphrase, you can use the Forgot Passphrase option to regain access to your account.
- You must set up a passphrase every time you log into your PAM360 mobile application.
4. Choosing Client Organization as an MSP User
Upon logging into your PAM360 account through the Android application, you will see the Menu icon in the bottom-left corner of the home screen. Click the menu icon to reveal the Navigation Menu, which will slide up from the bottom. You can switch between MSP and client organizations through the navigation menu if you are a PAM360 MSP user. This section provides instructions for managing client organizations in the PAM360 mobile application.
PAM360's Android application empowers MSP administrators to manage administrative passwords for different client organizations separately from a single management console. The application categorizes client organizations into distinct sections, allowing you to tap and view all the associated passwords within a specific organization.
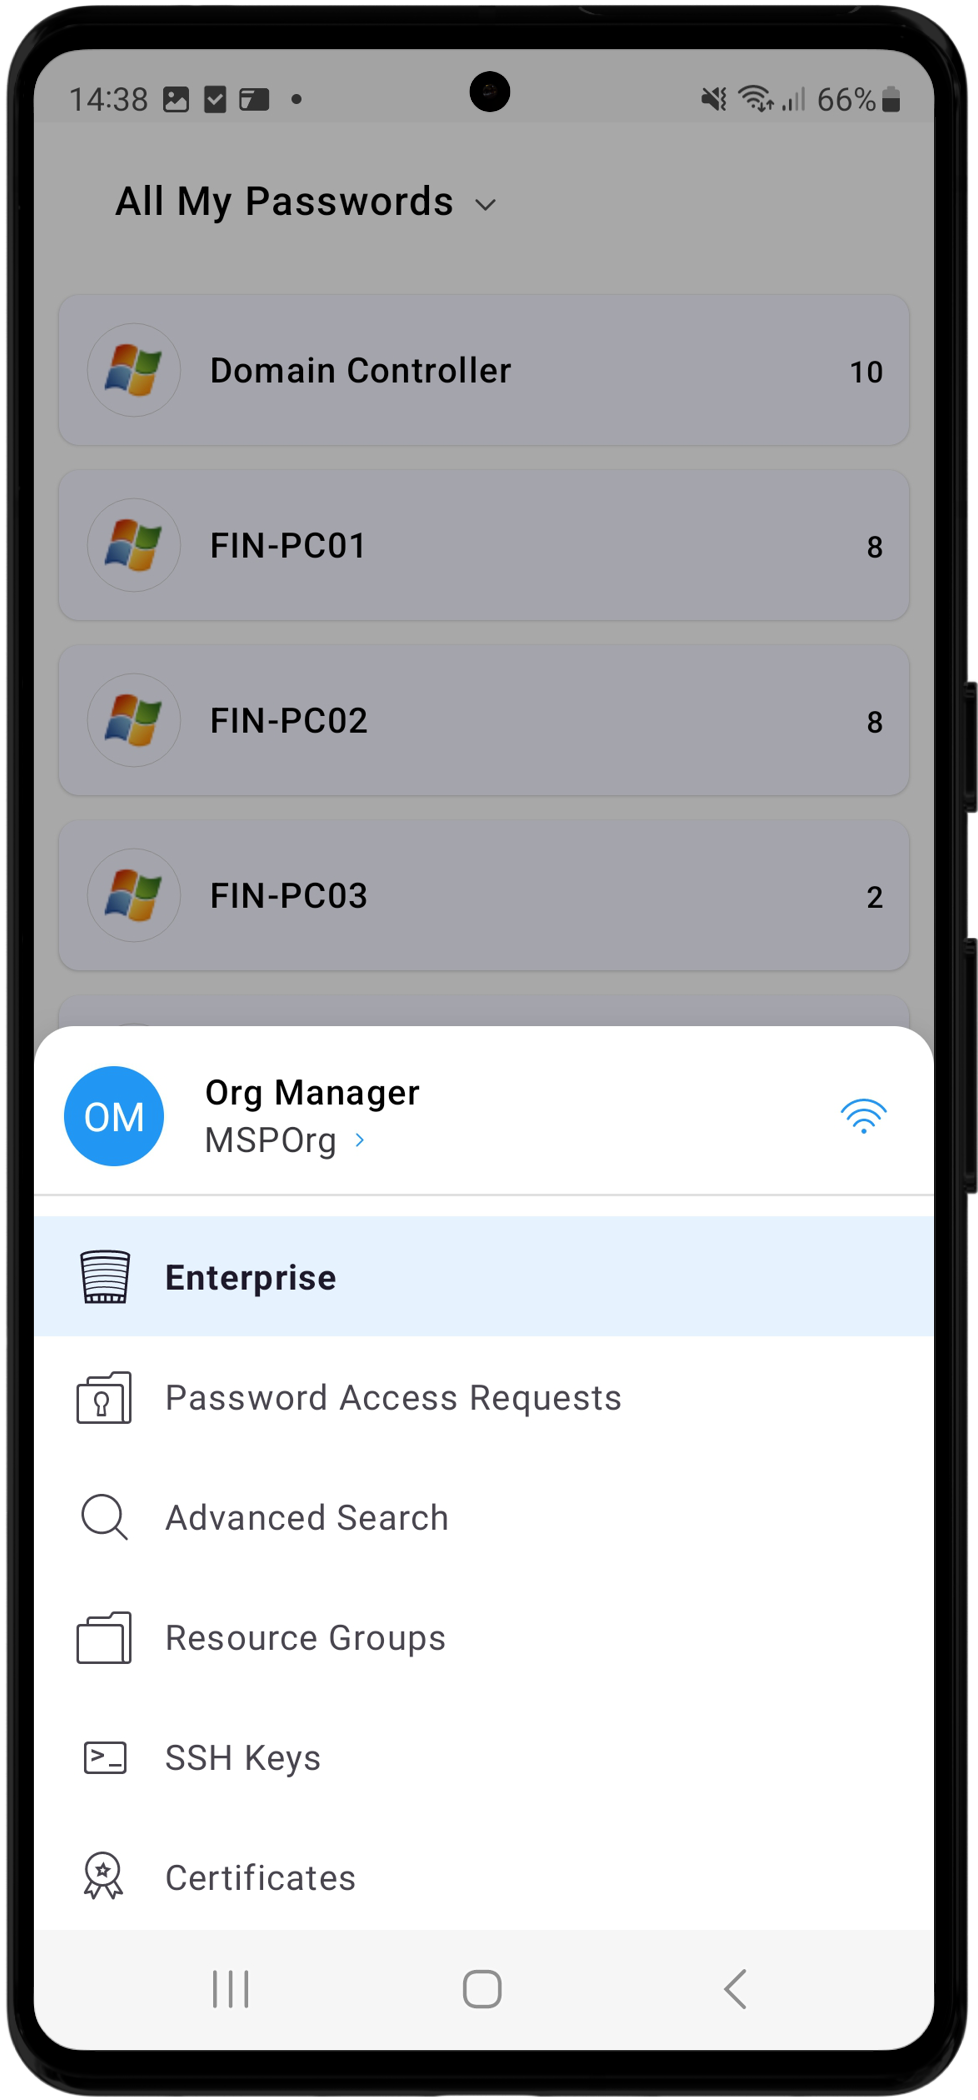
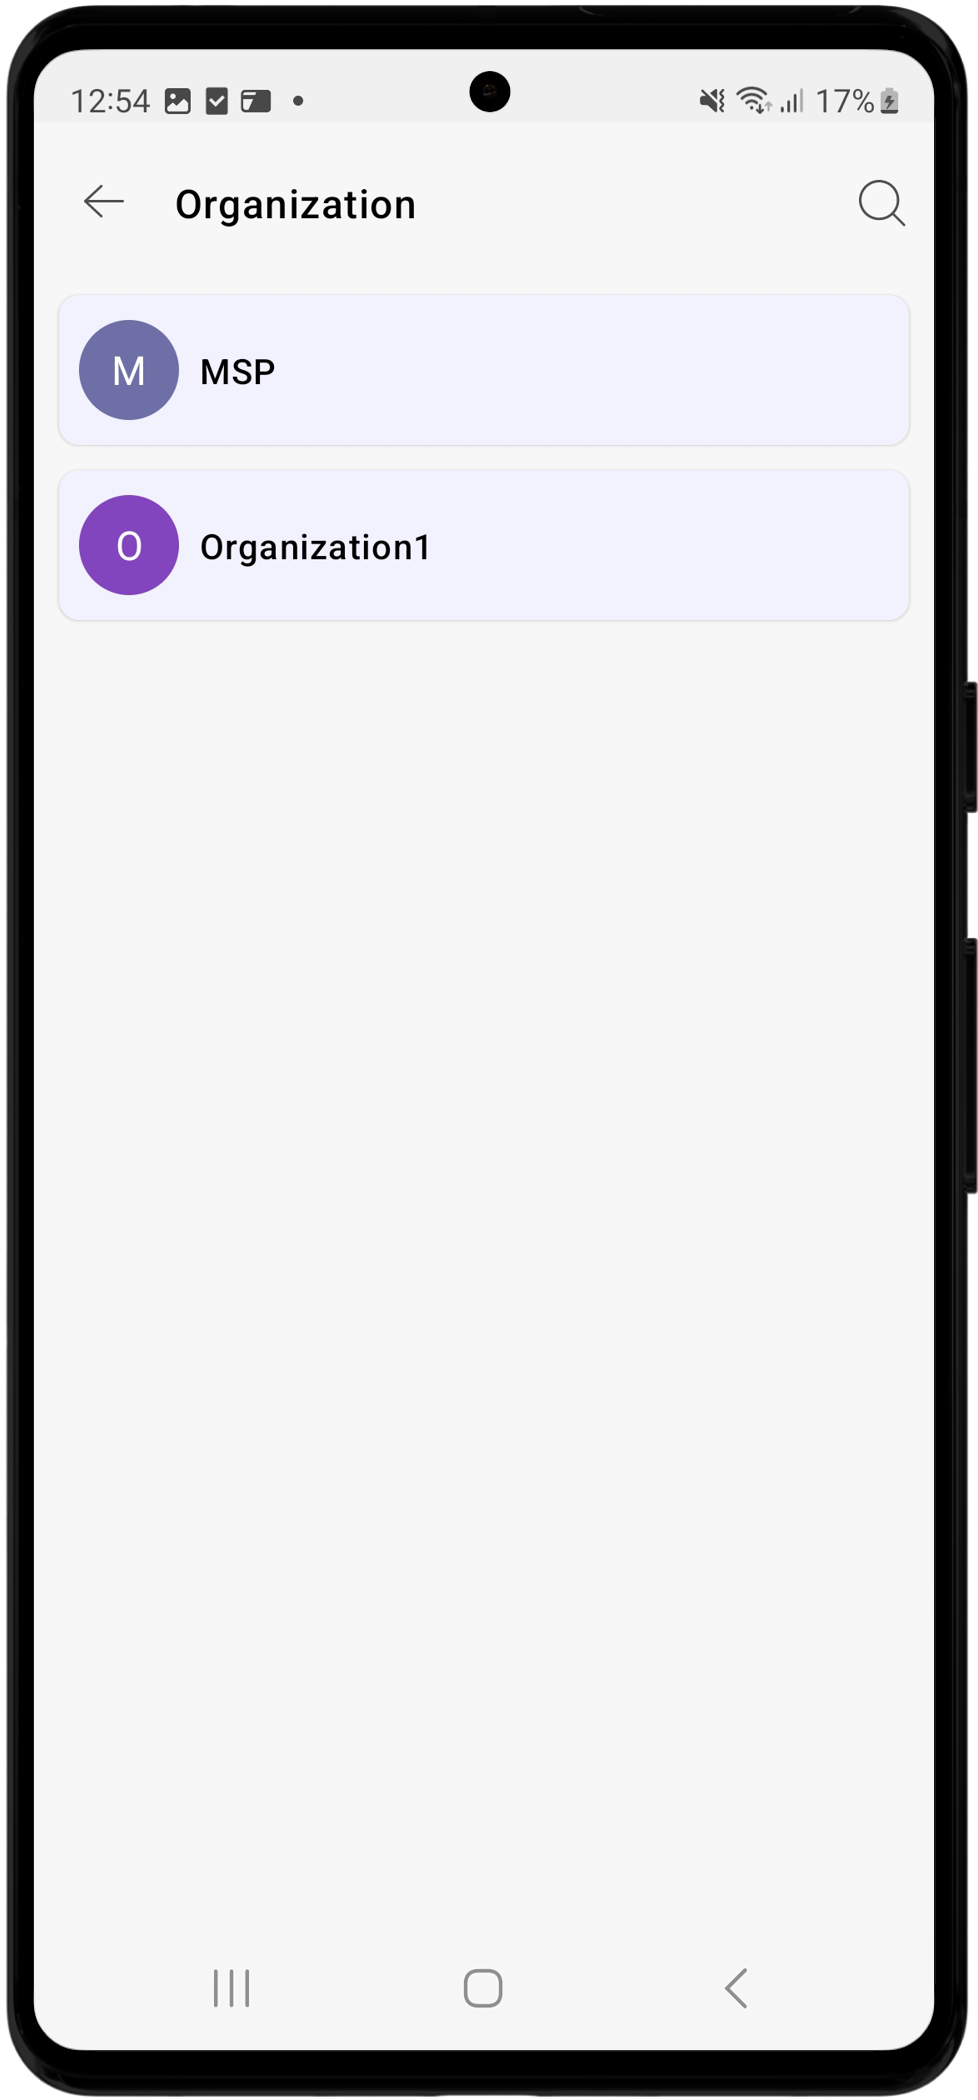
As an MSP admin, you can view and manage all the organizations under your management. Click the Menu icon on the bottom-left corner of the screen, then select the organization name under your account name. On the Organization page, you will see a list of all the organizations that you manage. Select the desired organization to view and manage all the associated resources within that organization. However, you can only view the resources within these organizations if you have added them or if they are shared with you. Users from client organizations can only access the resources belonging to their respective organizations.
5. Navigation Menu
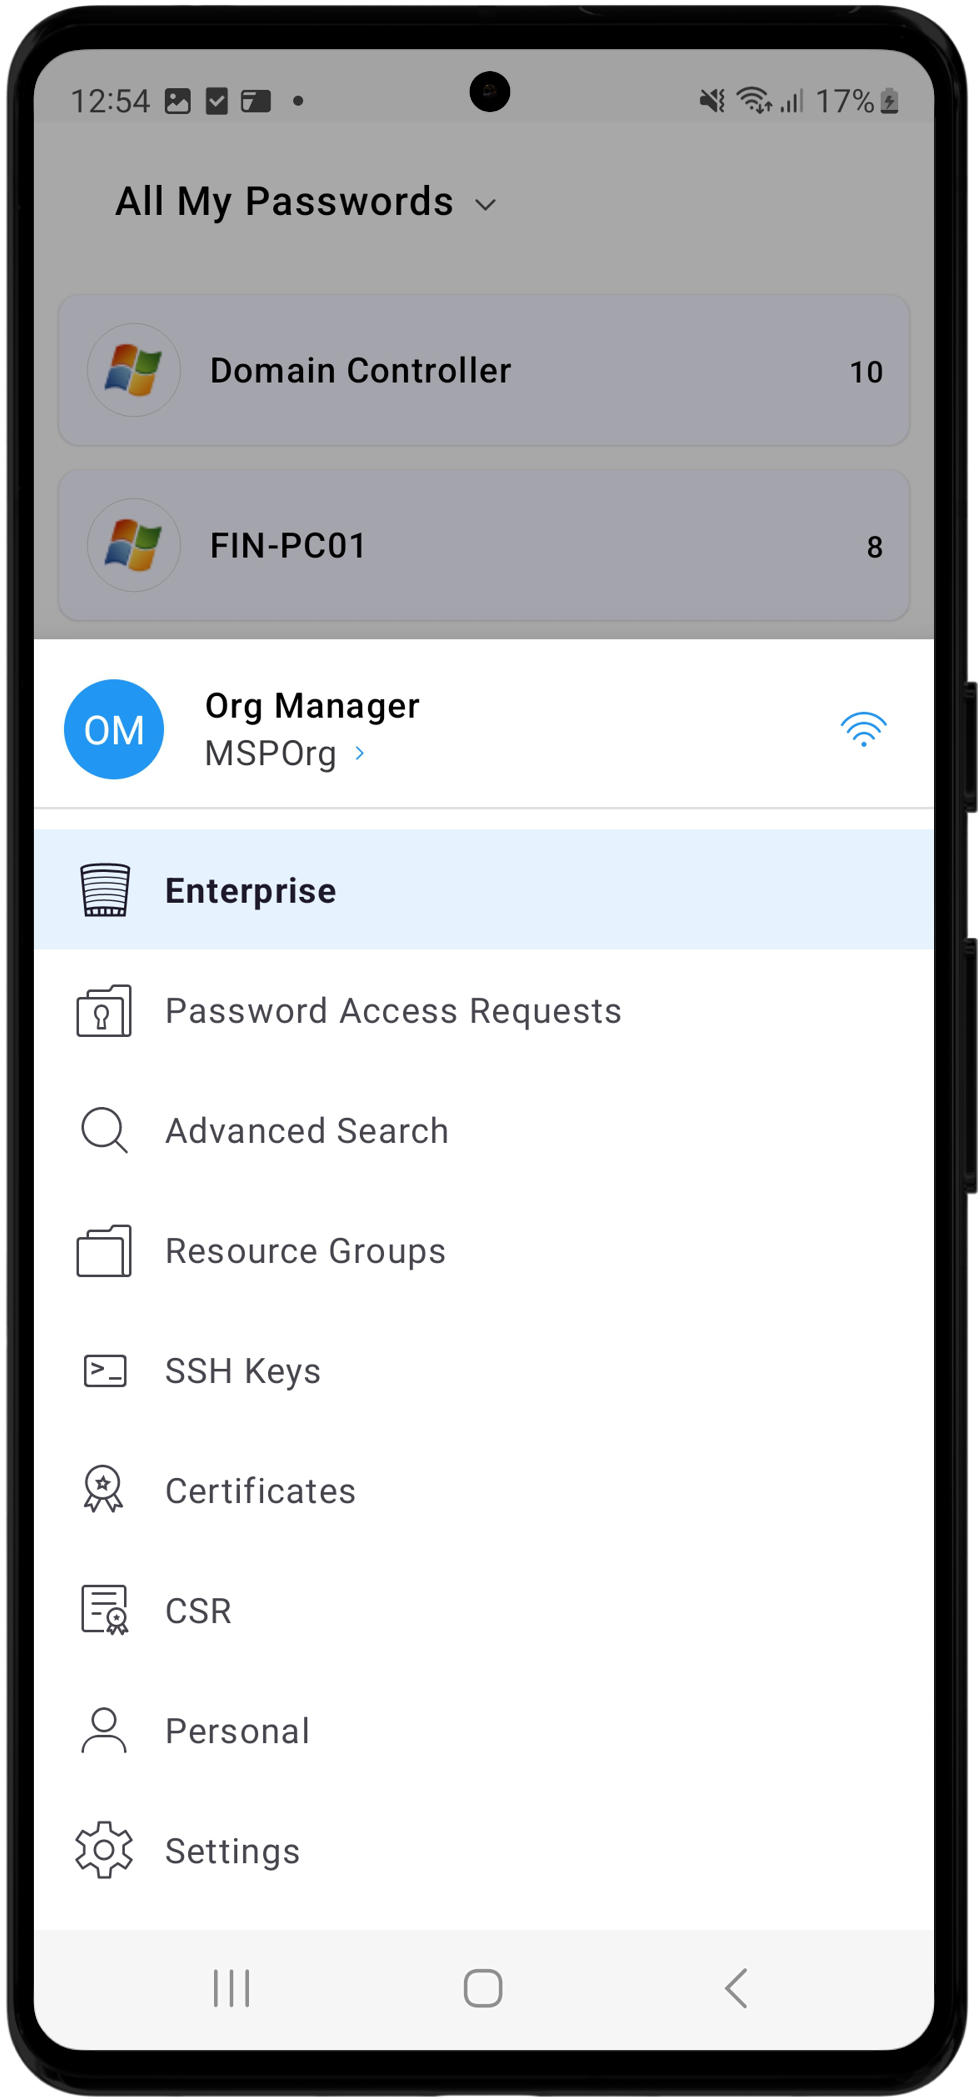
The Navigation Menu is designed to provide quick and easy access to various functionalities available in the mobile application. It is divided into the following sub-sections, each serving a specific purpose to streamline the management of your privileged accounts and resources.
- Enterprise
- Password Access Requests
- Advanced Search
- Resource Groups
- SSH Keys
- Certificates
- CSRs
- Personal
- Settings
5.1 Enterprise
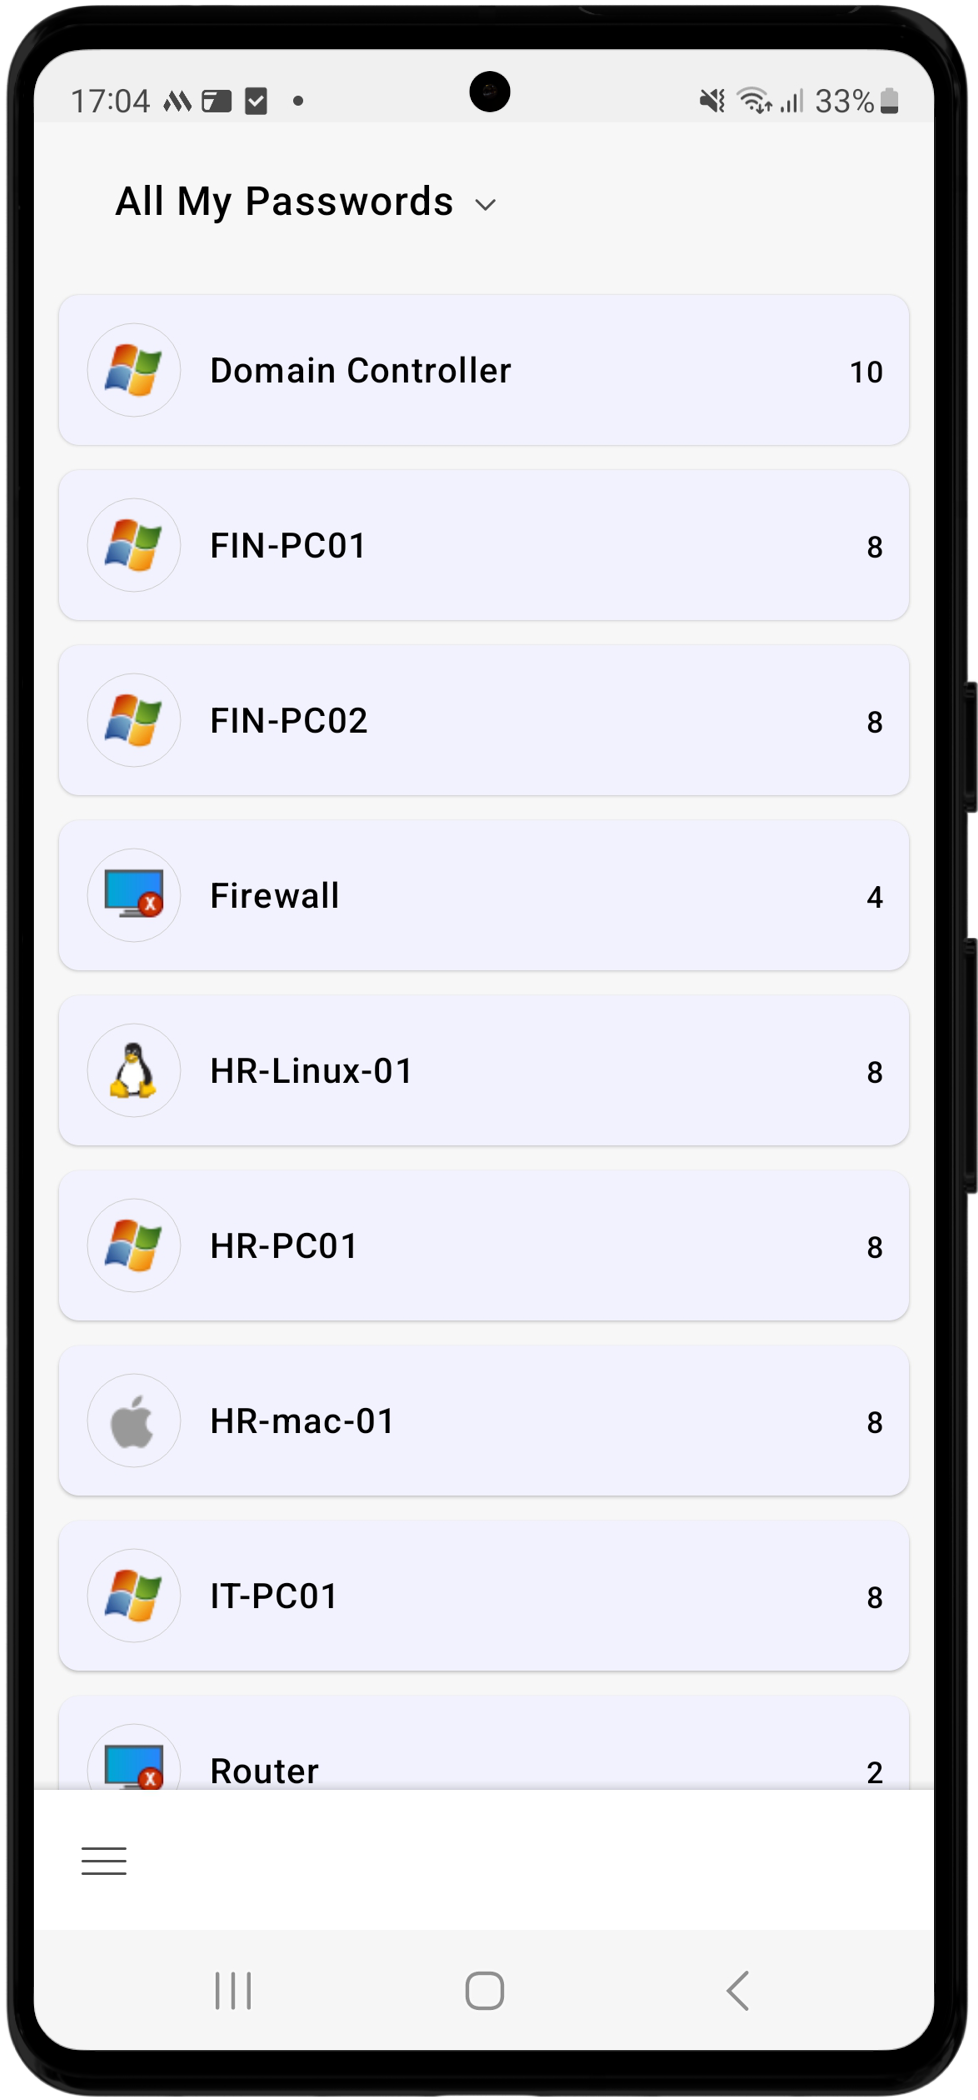
You will see the Enterprise view upon logging into the PAM360 application. Here, you can view a list of all the resources you own, manage, or those shared with you. To view the resource and account details:

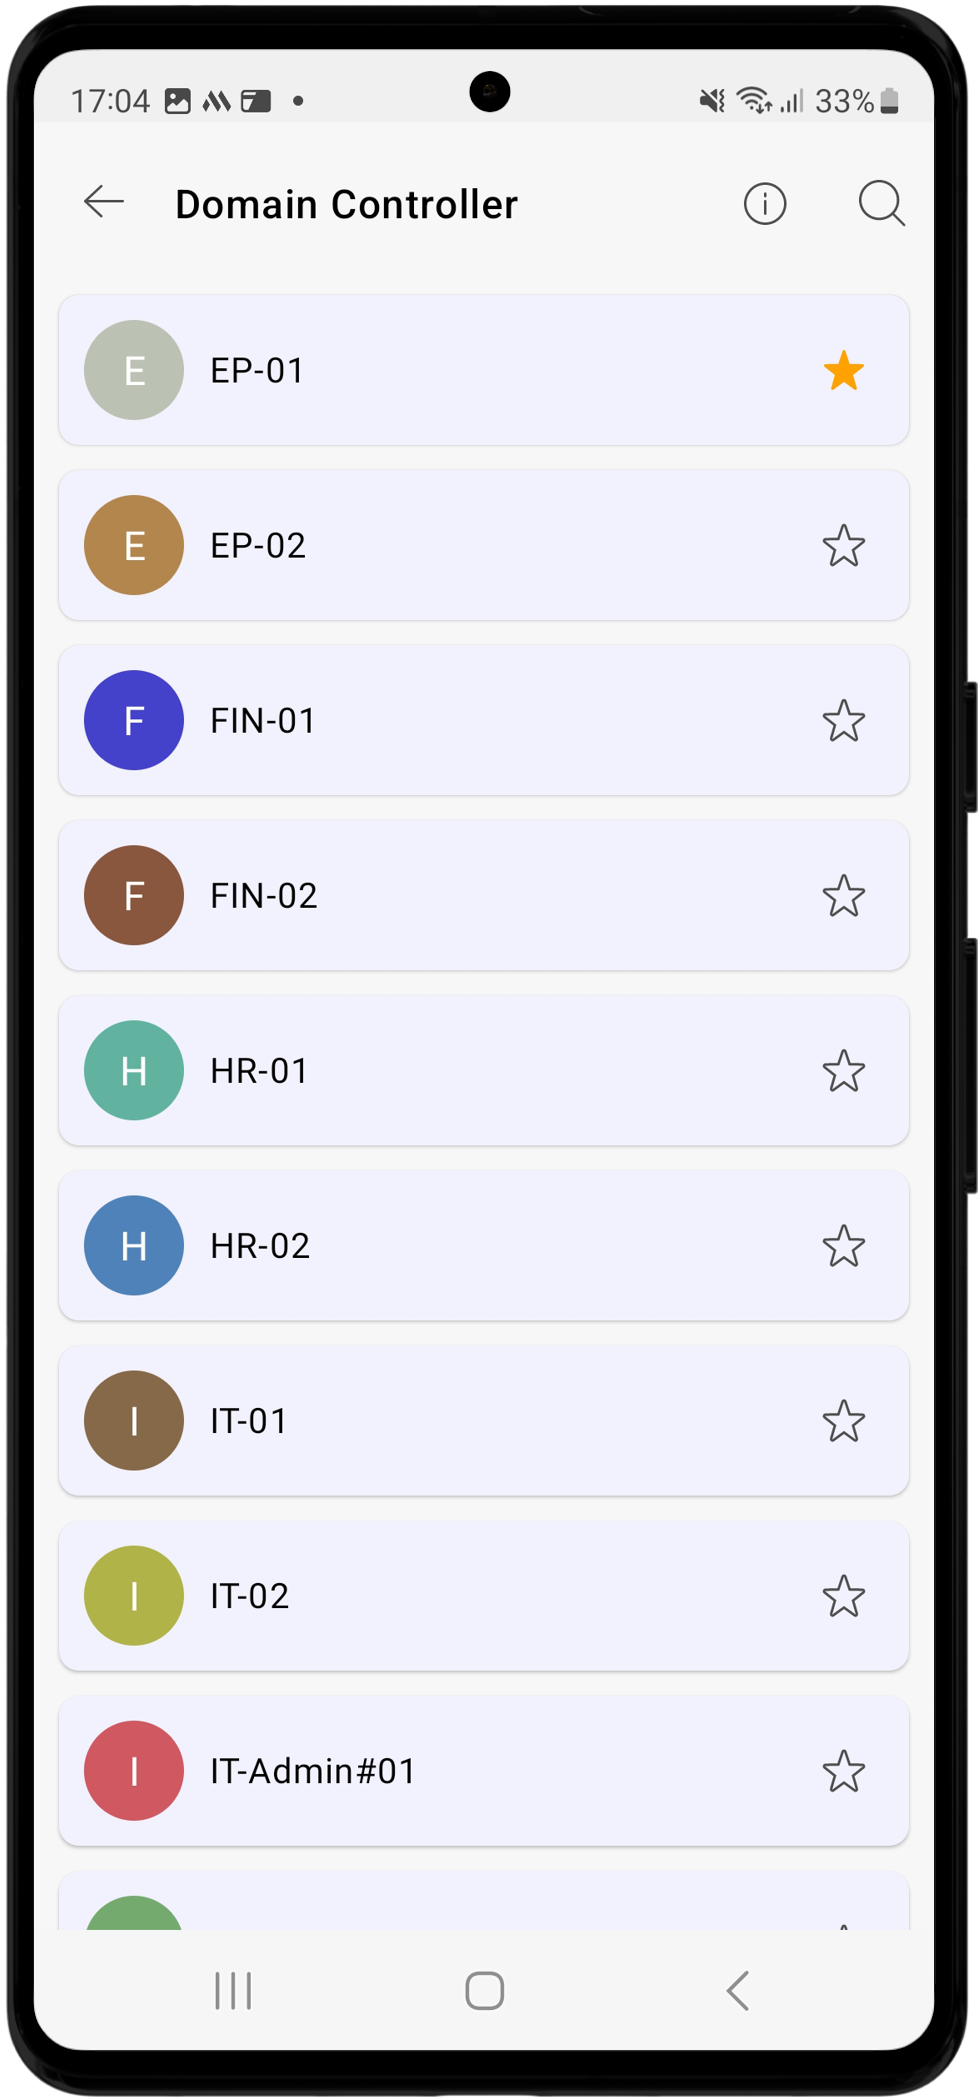
- Tap on any resource to view the list of accounts and the corresponding passwords associated with that resource. The resource view features an info and search icon.
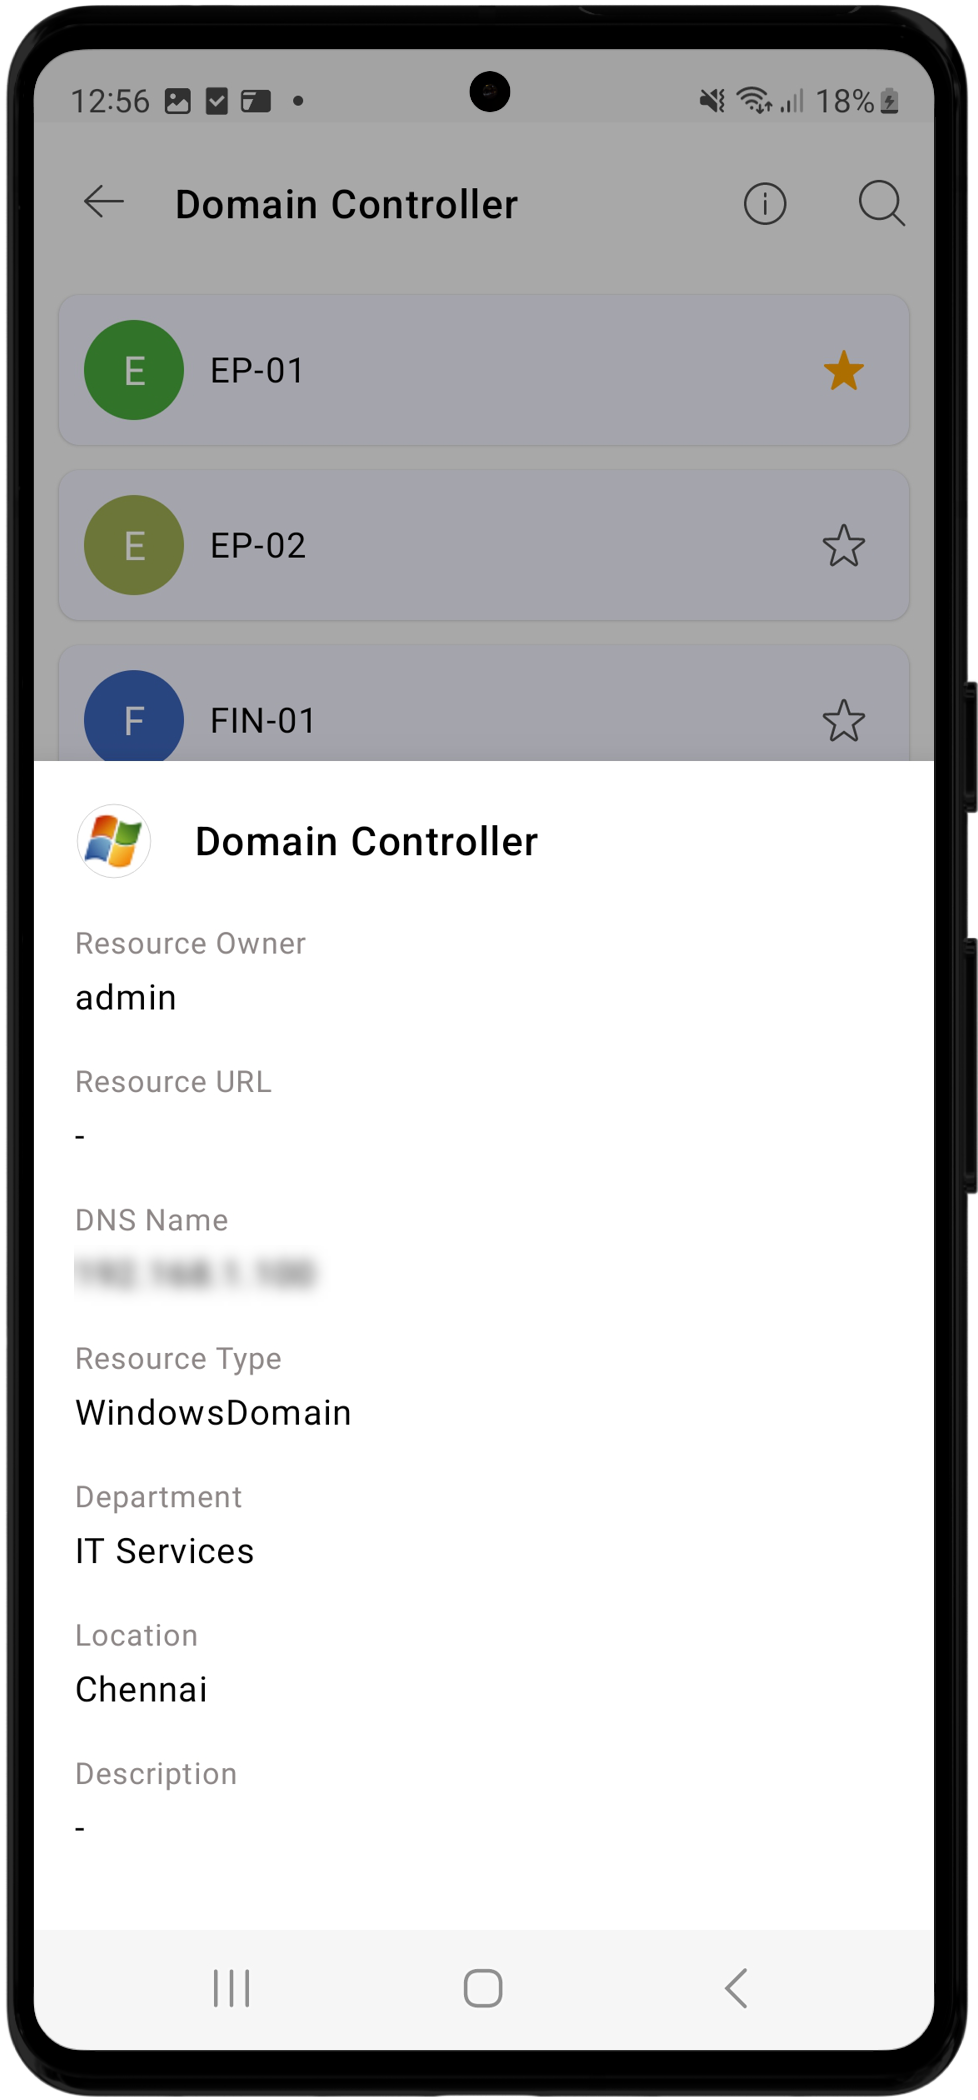
- Tap the info icon to view all the details related to that specific resource, such as resource owner, URL, DNS name, resource type, and additional information such as department, location, and description. Use the search option to find the desired account.
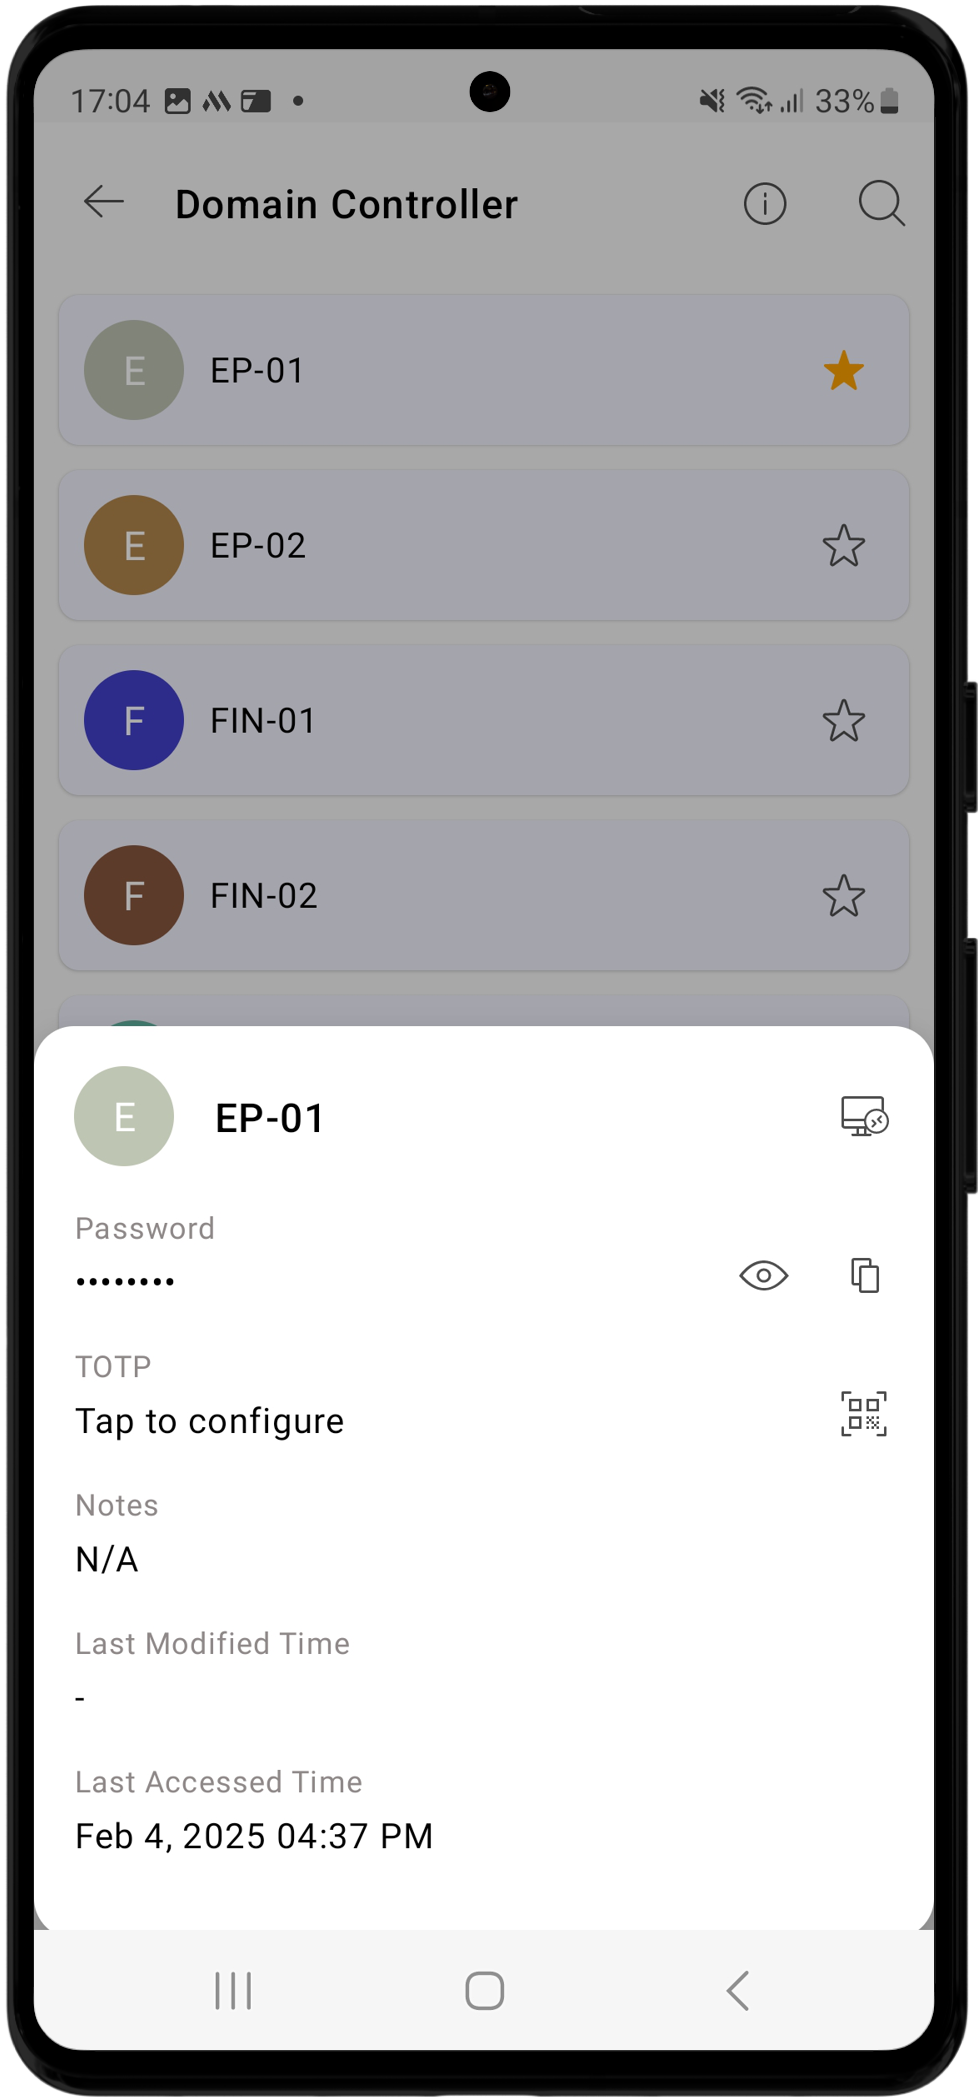
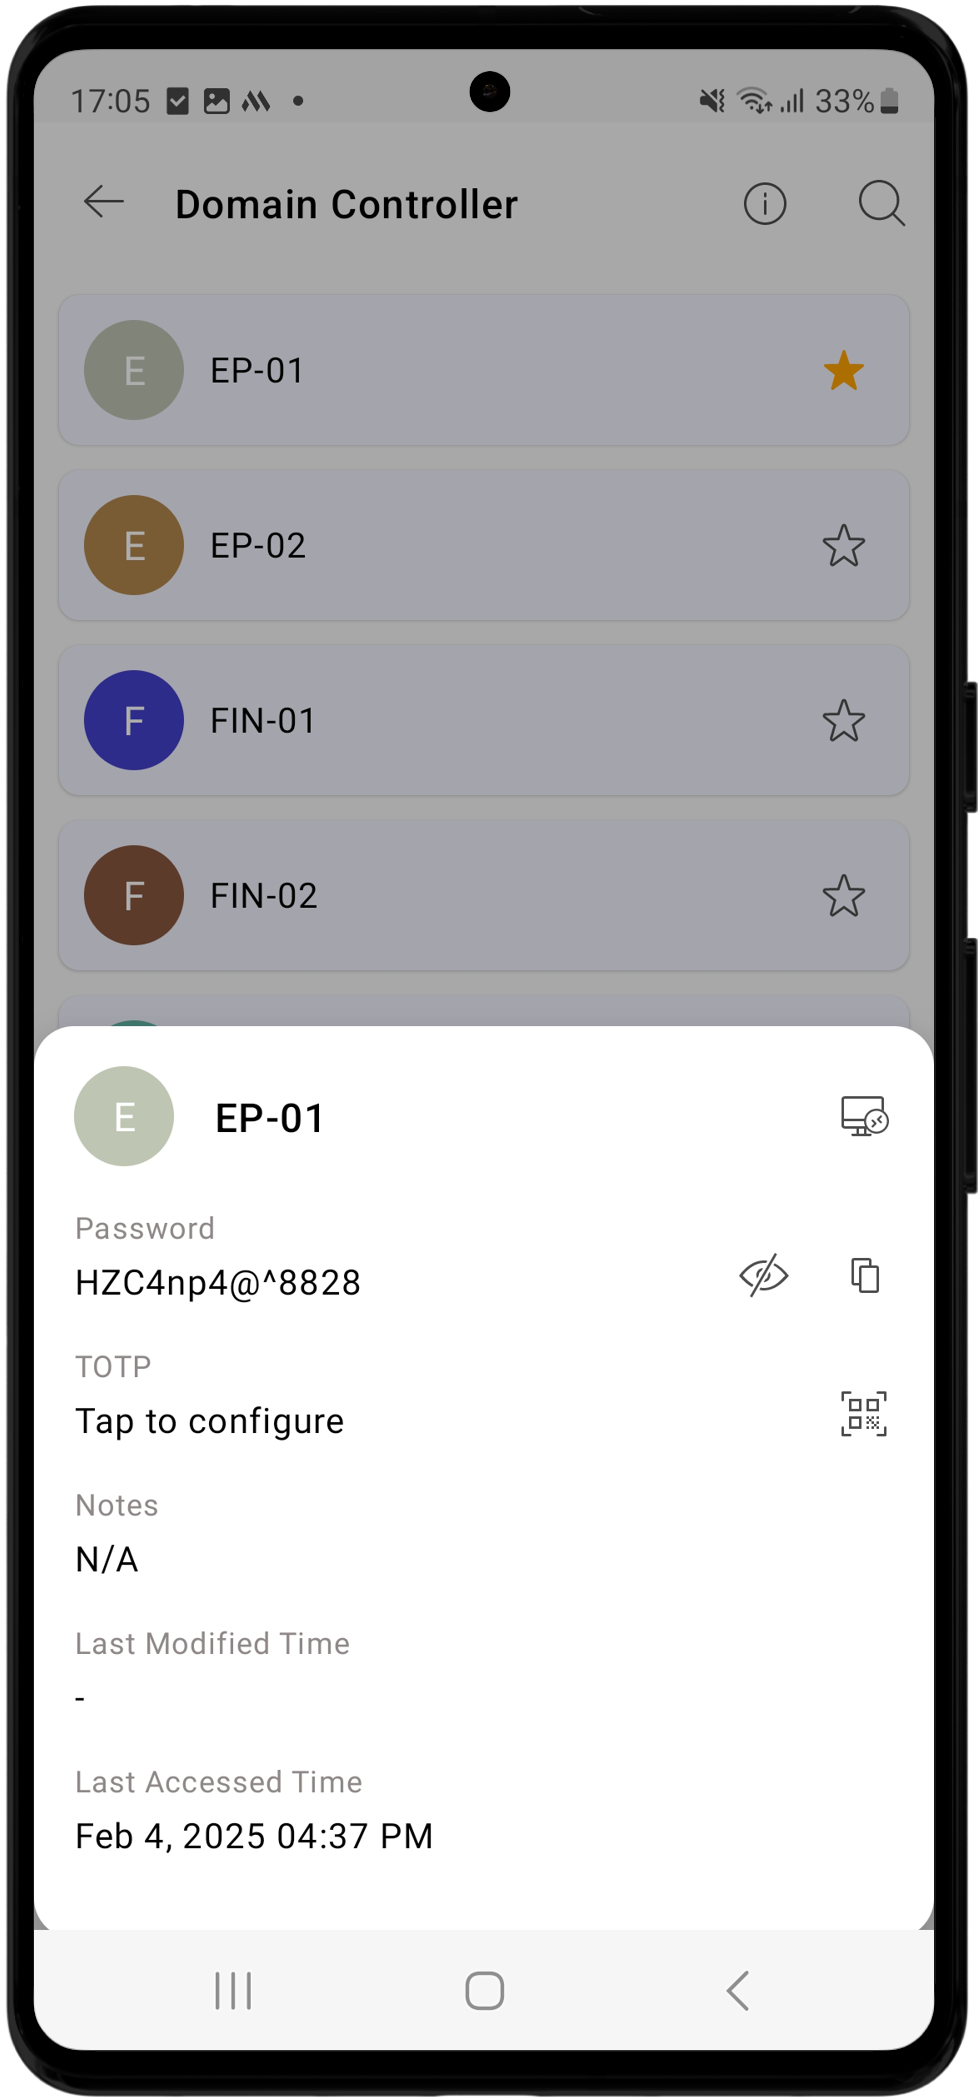
- Click on the desired account from the list to view or copy its password, configure TOTP, and access additional account information such as notes, last modified time, and last accessed time.
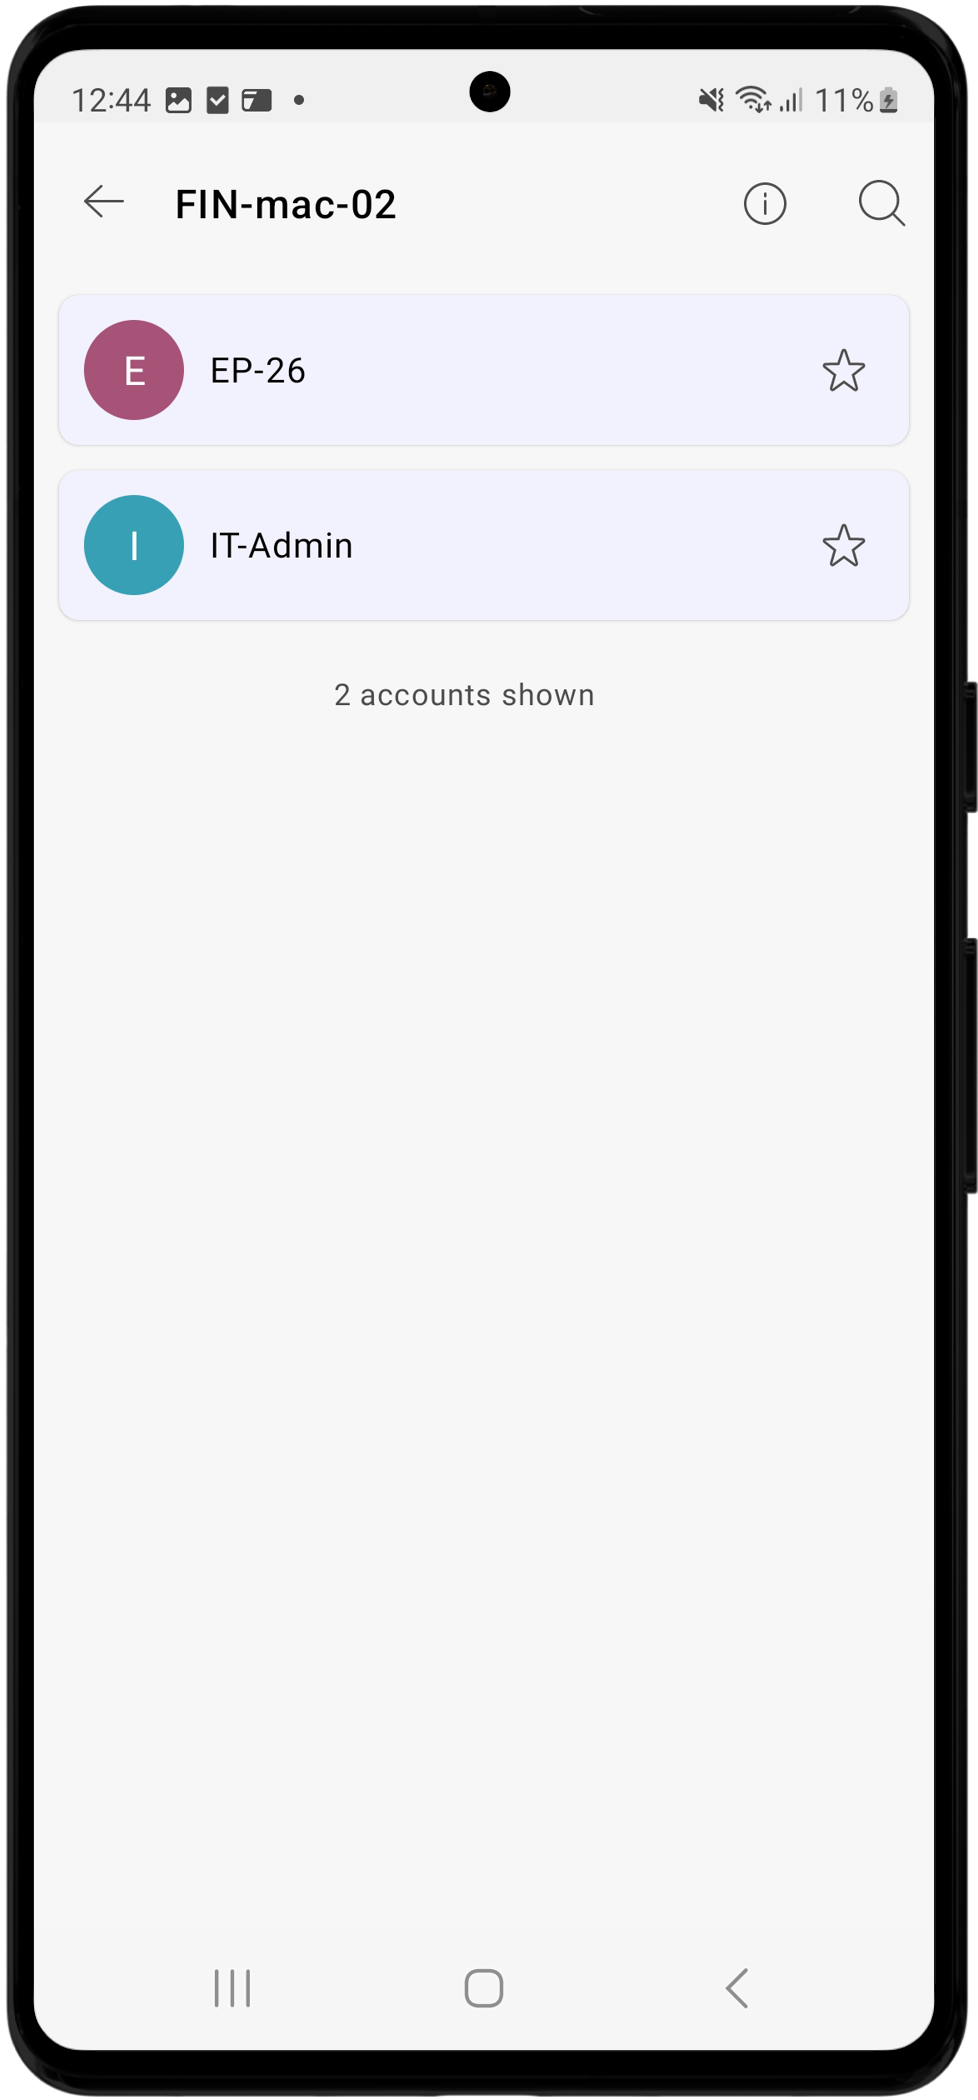
- Also, you can mark any frequently accessed accounts as favorites for easy access by tapping on the star icon beside the desired account. Marking passwords as favorites helps you locate a particular account and its password effortlessly without the need to scroll through the entire list every time, as passwords marked as favorites will be displayed at the top of the list.
- On the top-left corner of the screen, tap the All My Passwords option to access various enterprise filters, which will allow you to categorize the resources you own or manage based on various factors.
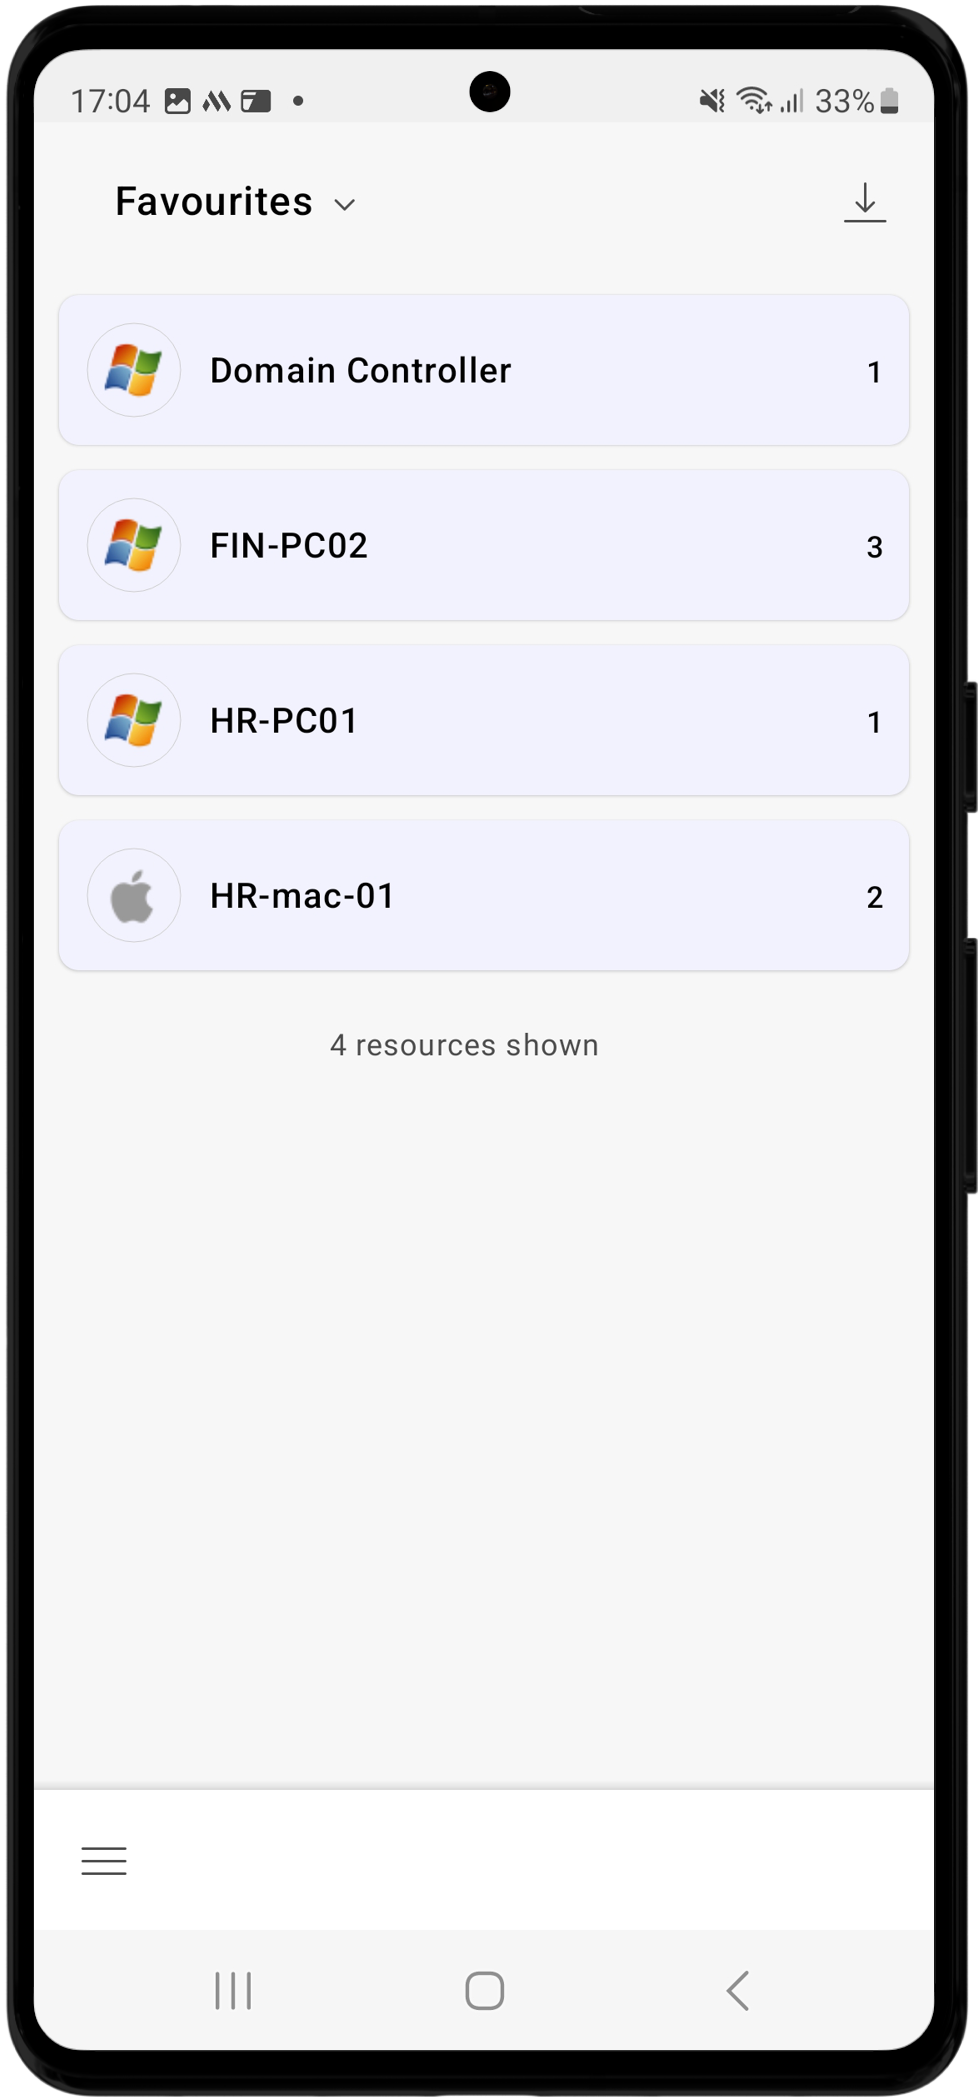
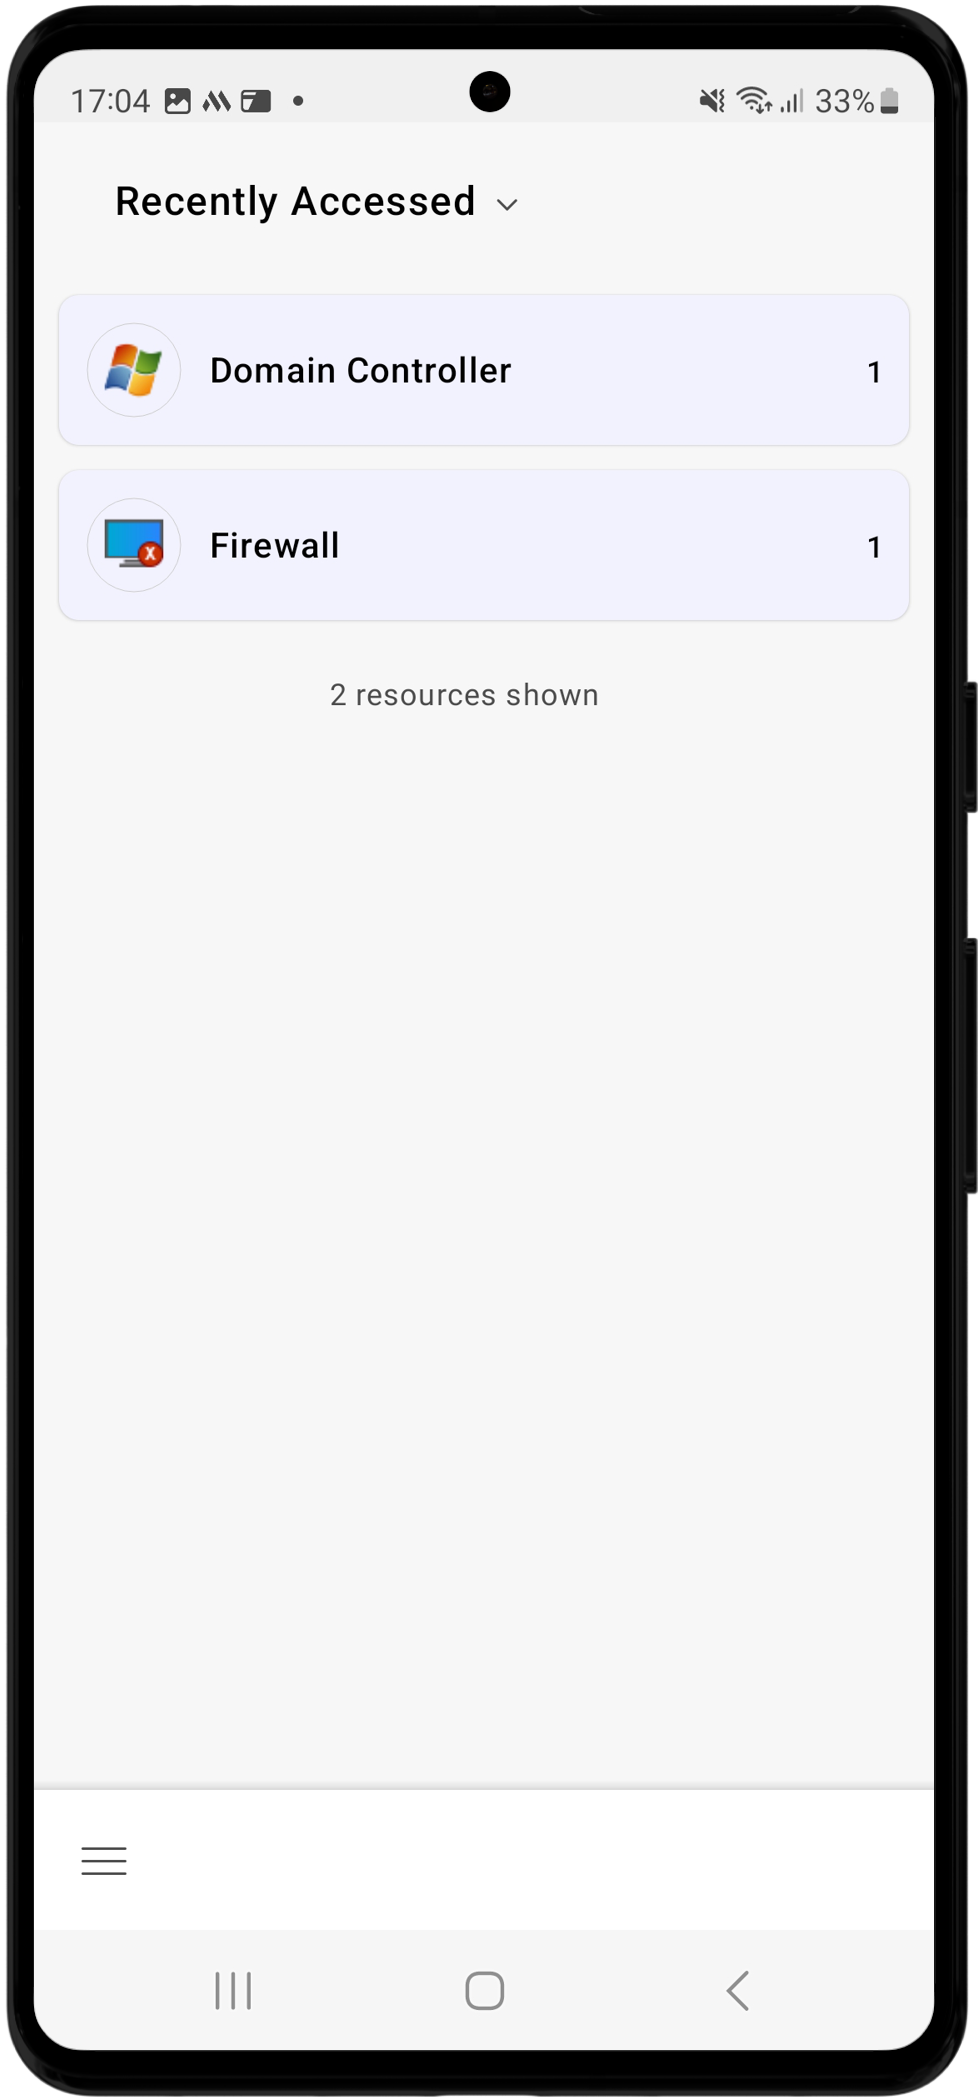
The enterprise filters include the following:
- All My Passwords - The default home screen you see upon logging into your mobile application. Select this filter to view a list of all the resources you own, manage, and those shared with you.
- Favorites - The Favorites view displays a list of all the resources and their respective accounts marked as favorites from the resource view.
- Recently Accessed - This view displays a list of all the resources and their respective accounts you accessed recently.
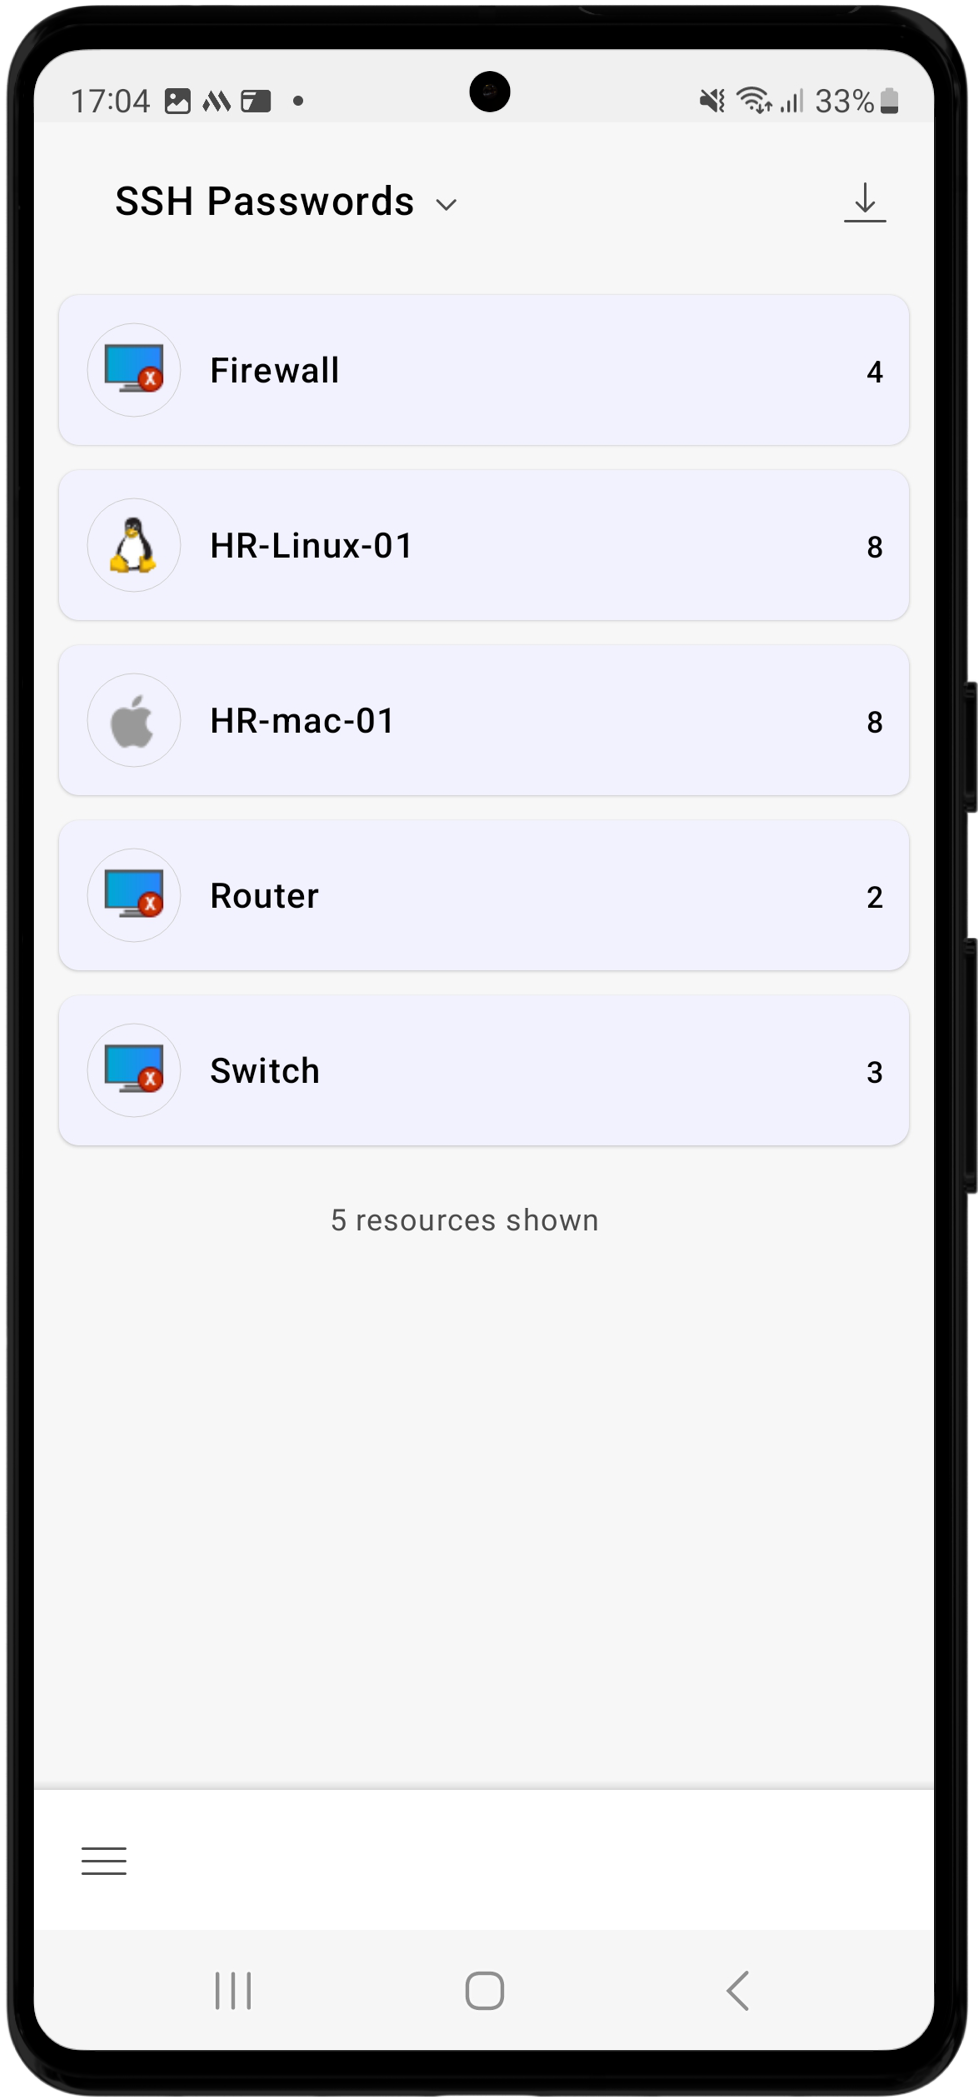
- SSH Passwords - The SSH Passwords view displays a list of all the resources and their respective SSH accounts you own, manage, and those shared with you.
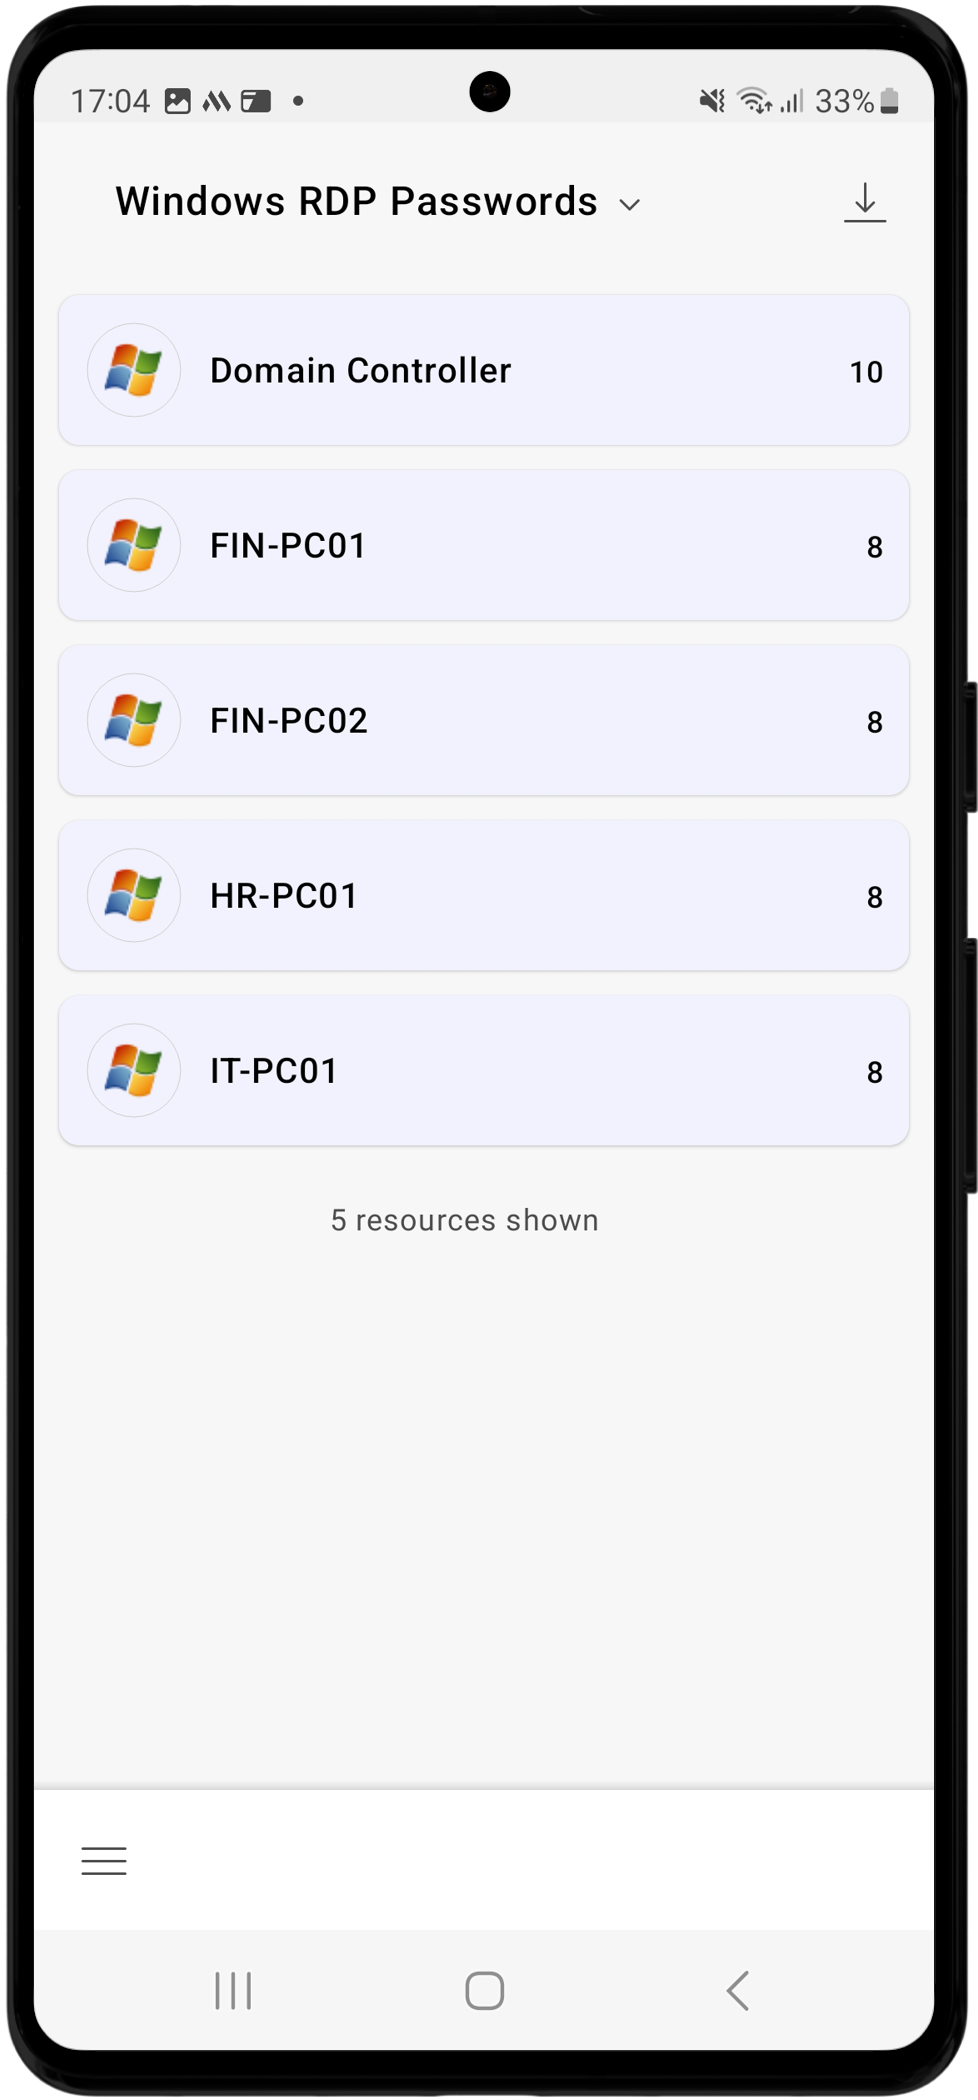
- Windows RDP Passwords - This view displays a list of all the resources and their respective Windows RDP accounts you own, manage, and those shared with you.
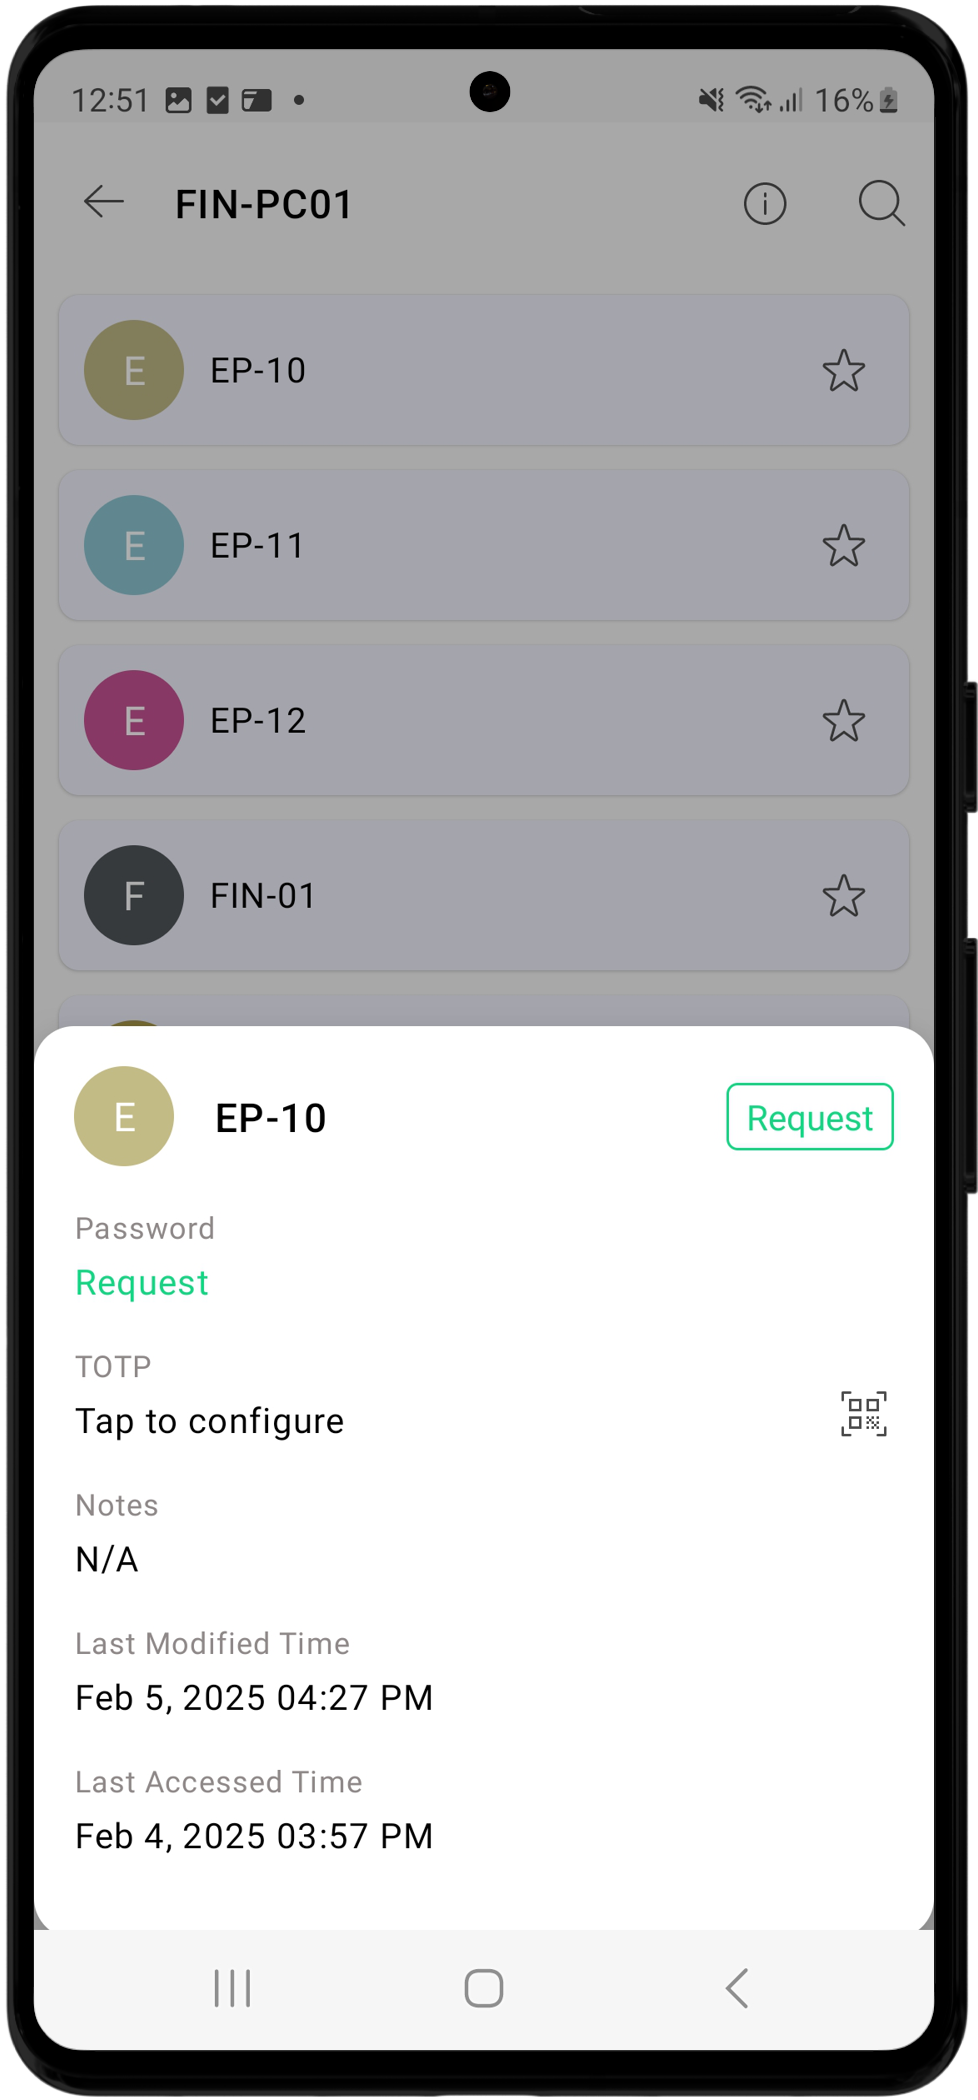
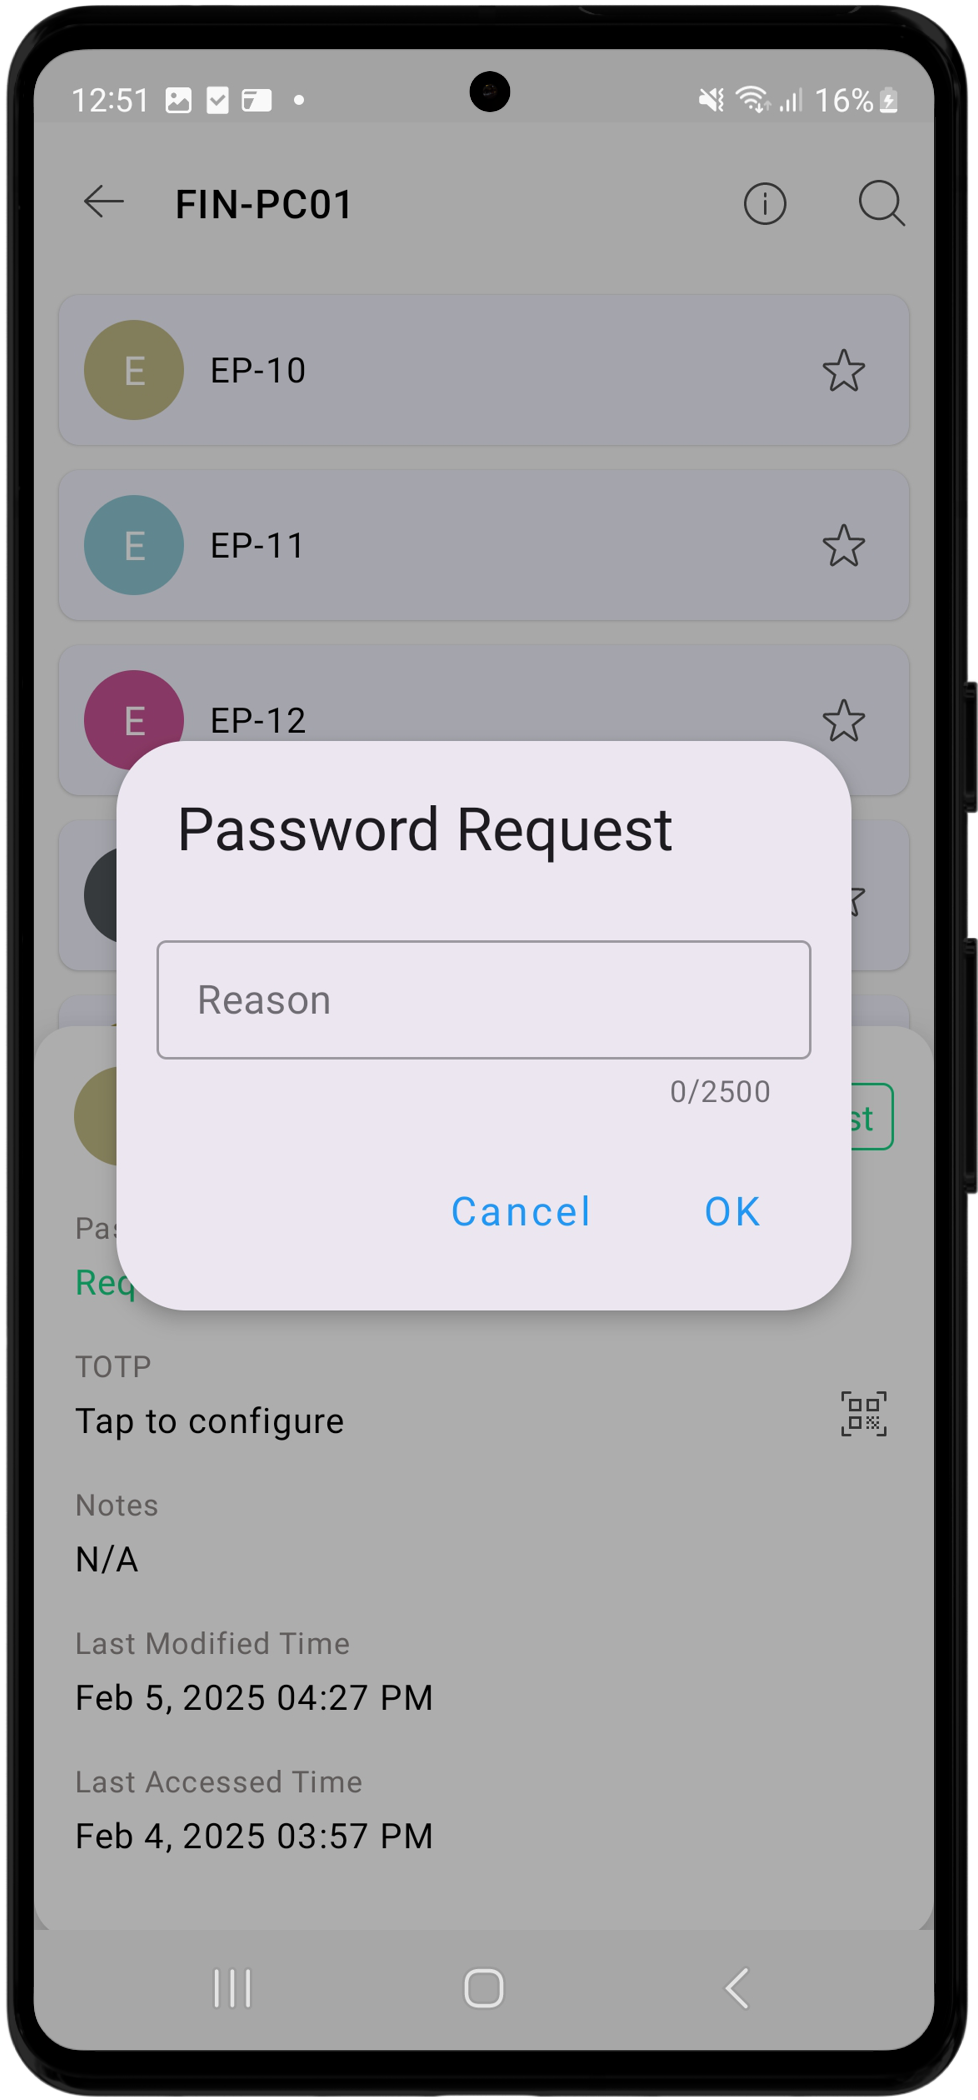
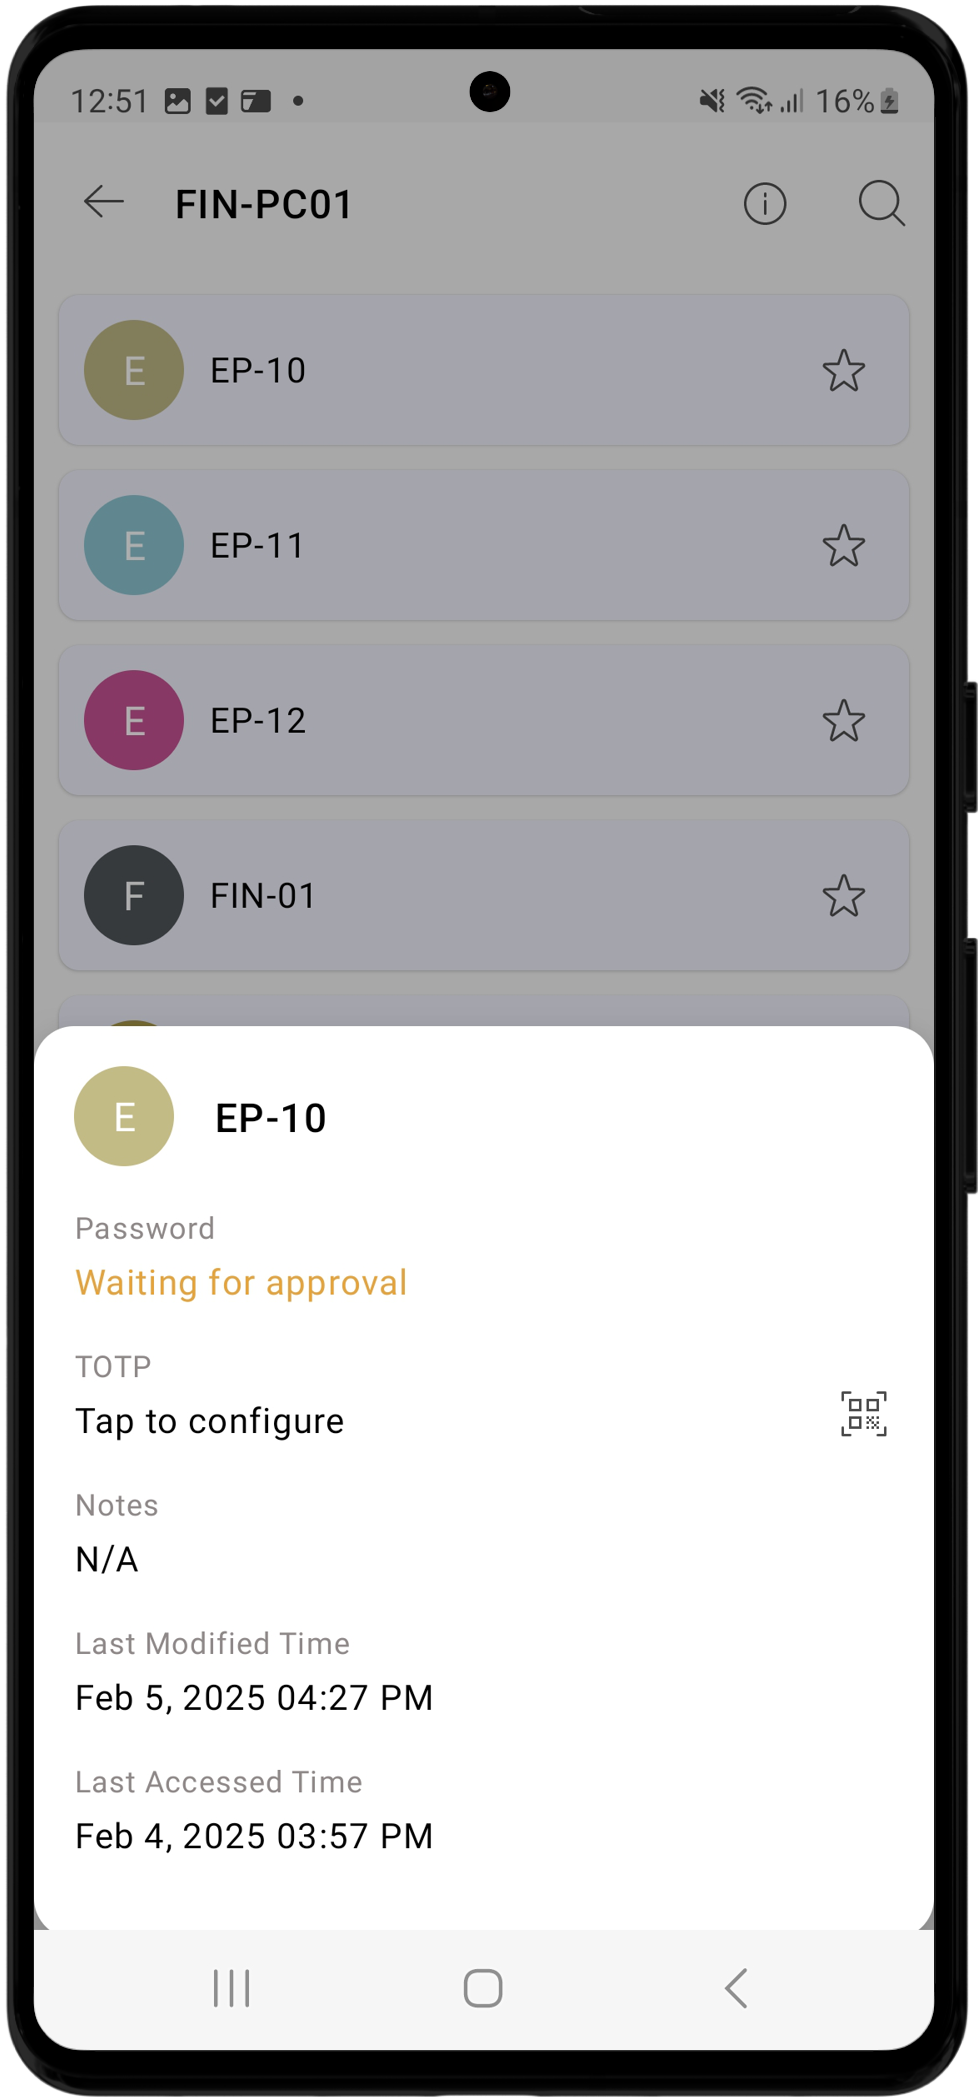
Users can request access to a password associated with a resource configured with access control workflow. To request a password for an account/resource shared with you, tap the desired account and select the Request option beside the account name. In the Password Request window, enter the reason for requesting access to the selected account and click OK. Once you request a password, the status will change to Waiting for Approval. After an authorized administrator approves your request, the password will be available for Check-Out.
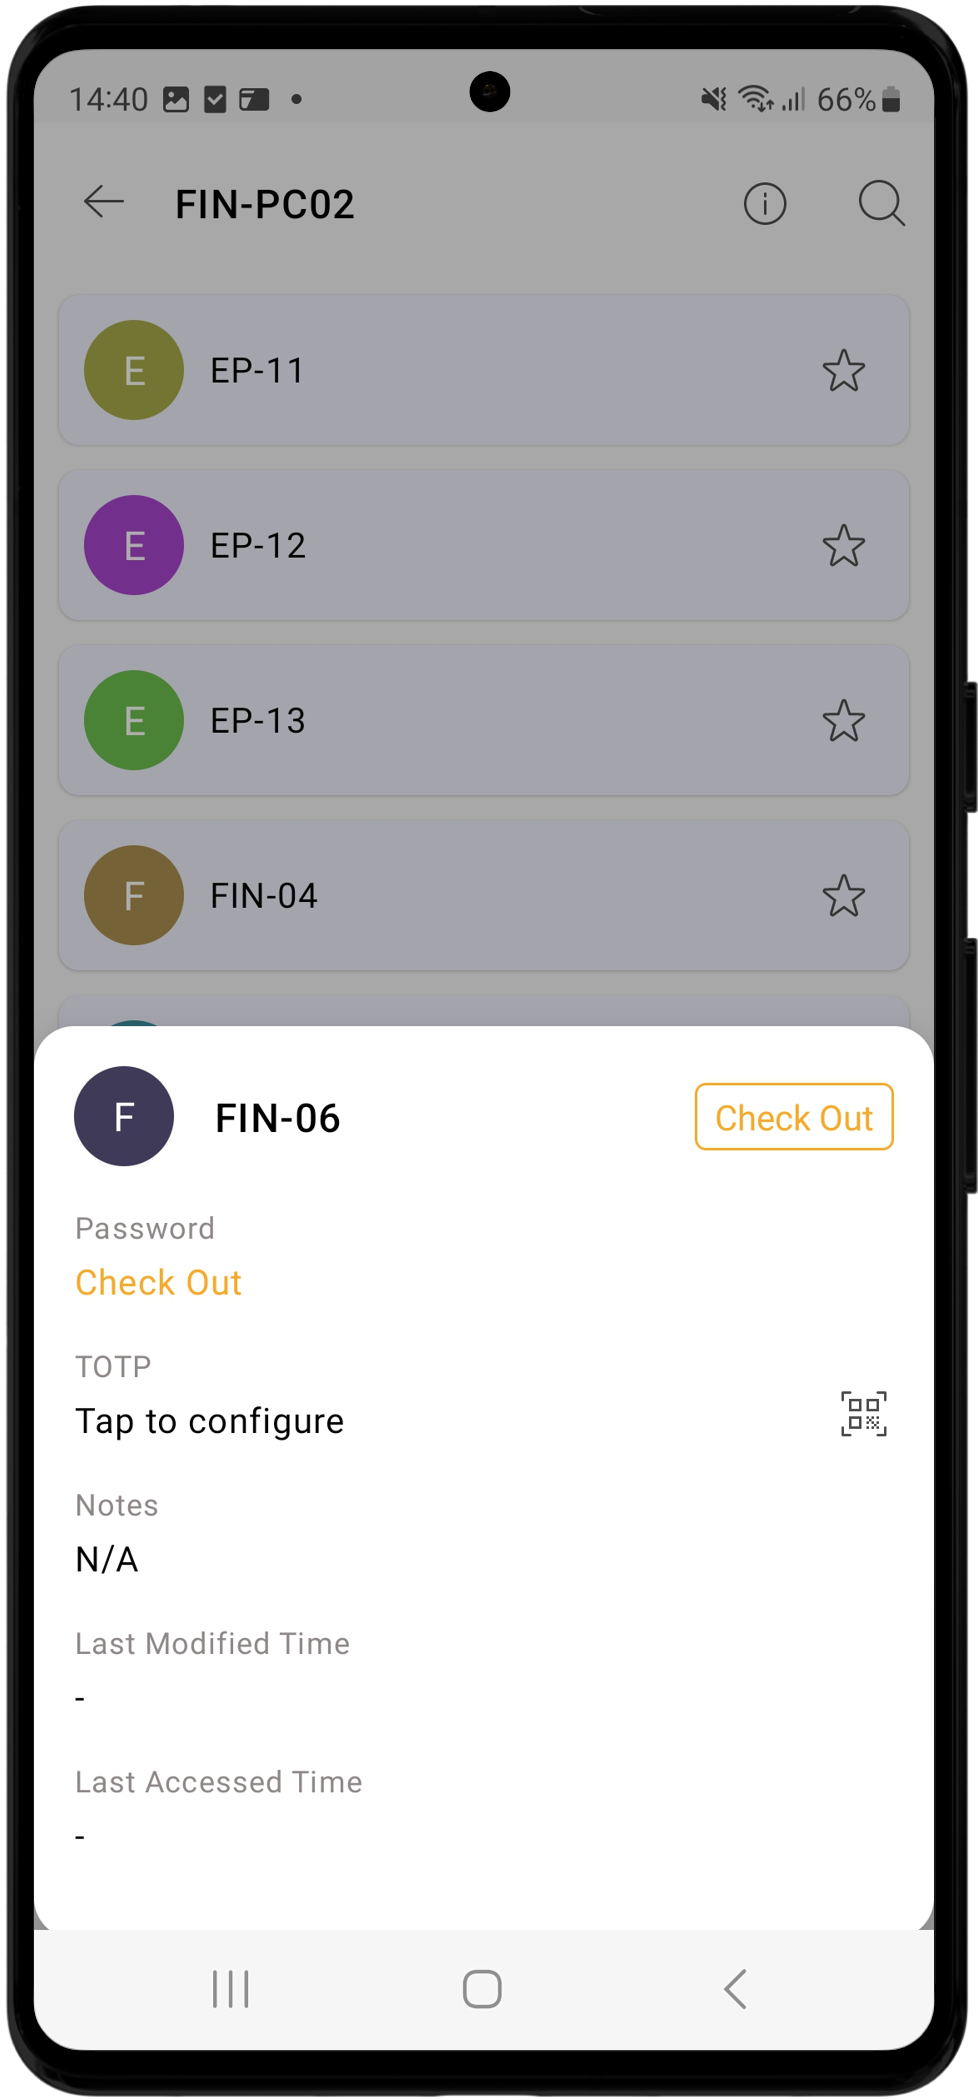
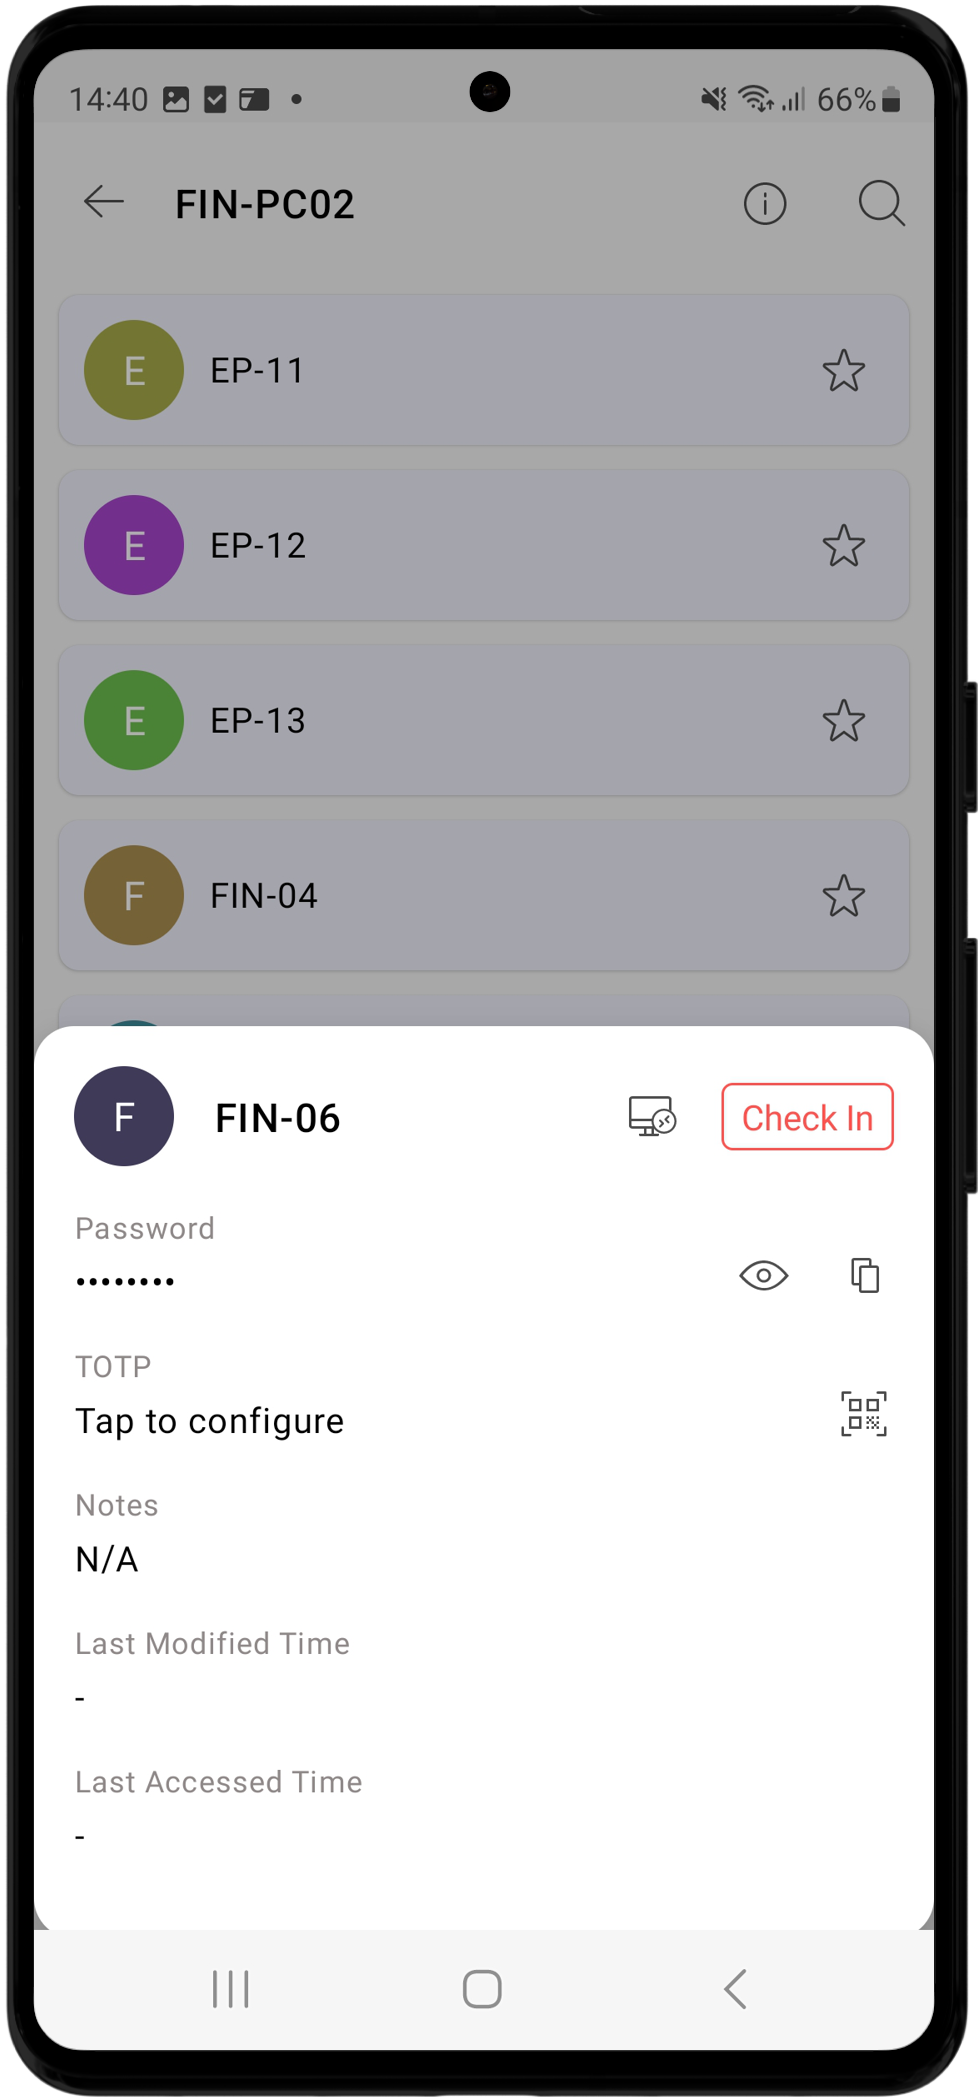
Upon checking out the password, the status will change to In Use, which will be visible to other users in both the Check-In tab and the Account Details section of the account. To relinquish access, click the Check-In option to return the password to the PAM360 vault. If you need access to the password again, you should repeat the request-release workflow. If your PAM360 server is integrated with a ticketing system, you must provide a valid ticket ID along with the reason for the request in the Password Request window while requesting password access or launching RDP sessions. PAM360 will validate the ticket ID with the ticketing system before granting access to the password or initiating the RDP session.
Additional Detail
Starting from PAM360 build 5530, you can launch RDP connections to remote resources directly from the PAM360 Android application.
5.2 Password Access Requests
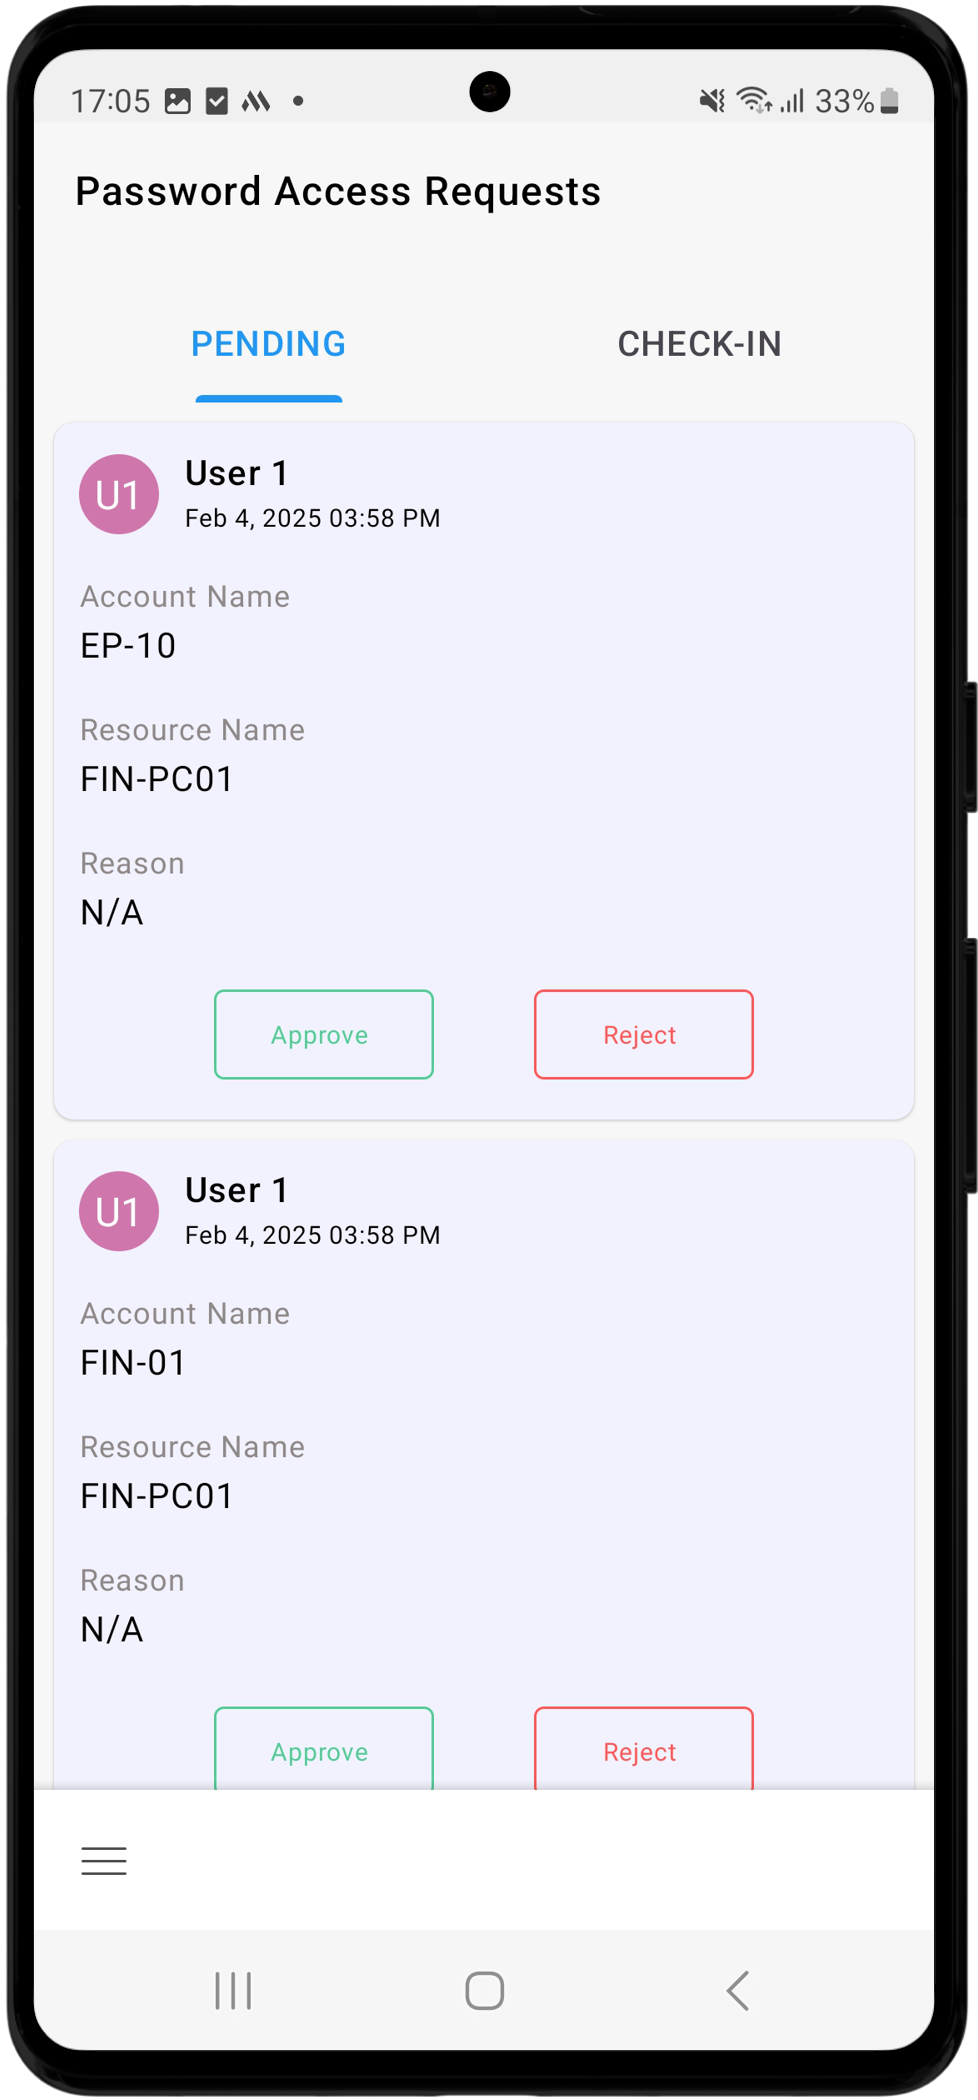
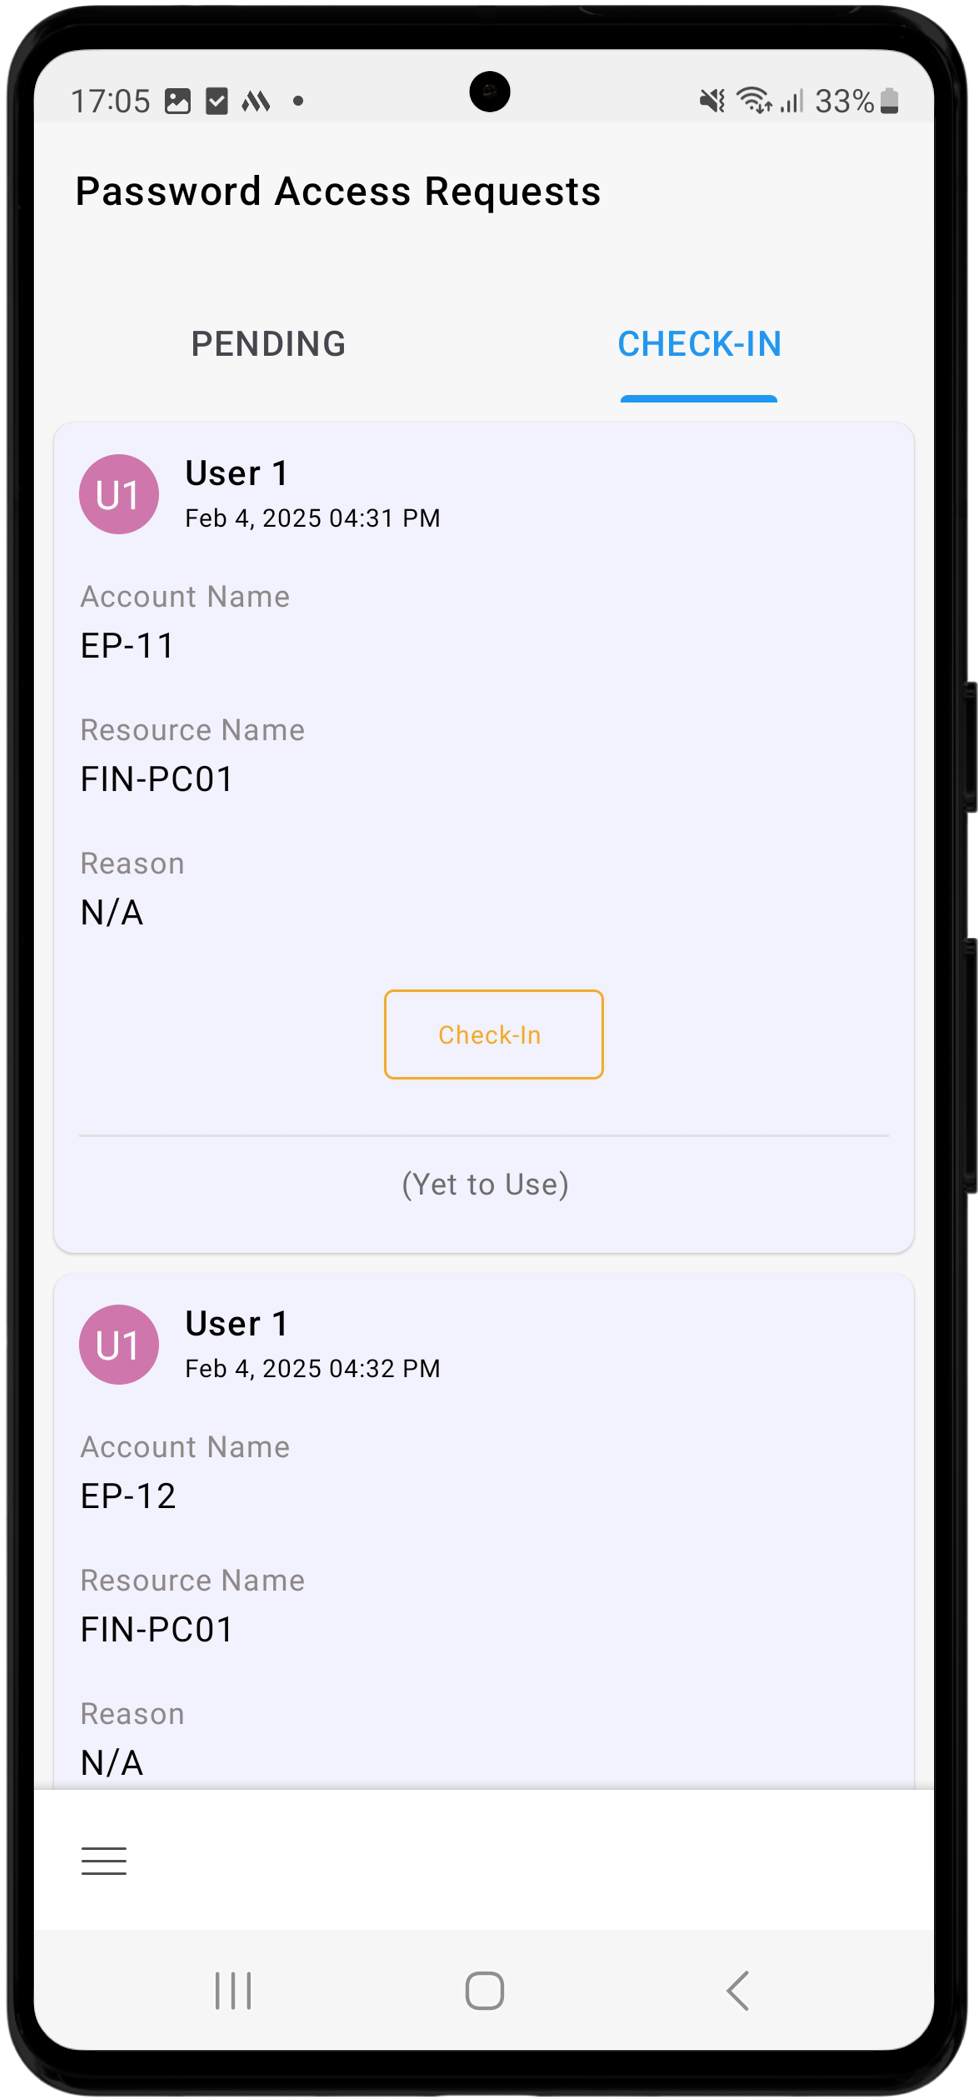
PAM360 enables administrators to manage password access requests via the PAM360 mobile application. Administrators can view and act upon pending and approved password access requests on the Password Access Requests screen. This section is divided into two tabs: Pending and Check-In.
- Pending: The pending tab displays a list of all the password access requests awaiting approval from administrators. Before making a decision, administrators can review the relevant resource and account details along with the reason provided by the user for accessing the password.
- Check-In: The check-in tab features all the approved requests. Administrators can revoke password access to users by checking in the passwords that are currently in use. They can also verify the status of an approved request, identifying whether the password is currently checked out or yet to be used.
5.3 Advanced Search
The Advanced Search feature in PAM360's Android application enables you to locate specific resources or accounts. To use this feature, select Advanced Search from the navigation menu. This section contains two tabs: Enterprise and Personal. You can either enter a keyword in the provided search field and apply one of the available search filters to refine your search. The filters available on the Enterprise tab include, Resource Name, DNS Name, User Account, Resource Type, Resource Description, Department, Location, Domain Name, and Resource URL.
Similarly, the filters available on the personal tab include, Web Accounts, Banking, Credit Cards and Contacts.
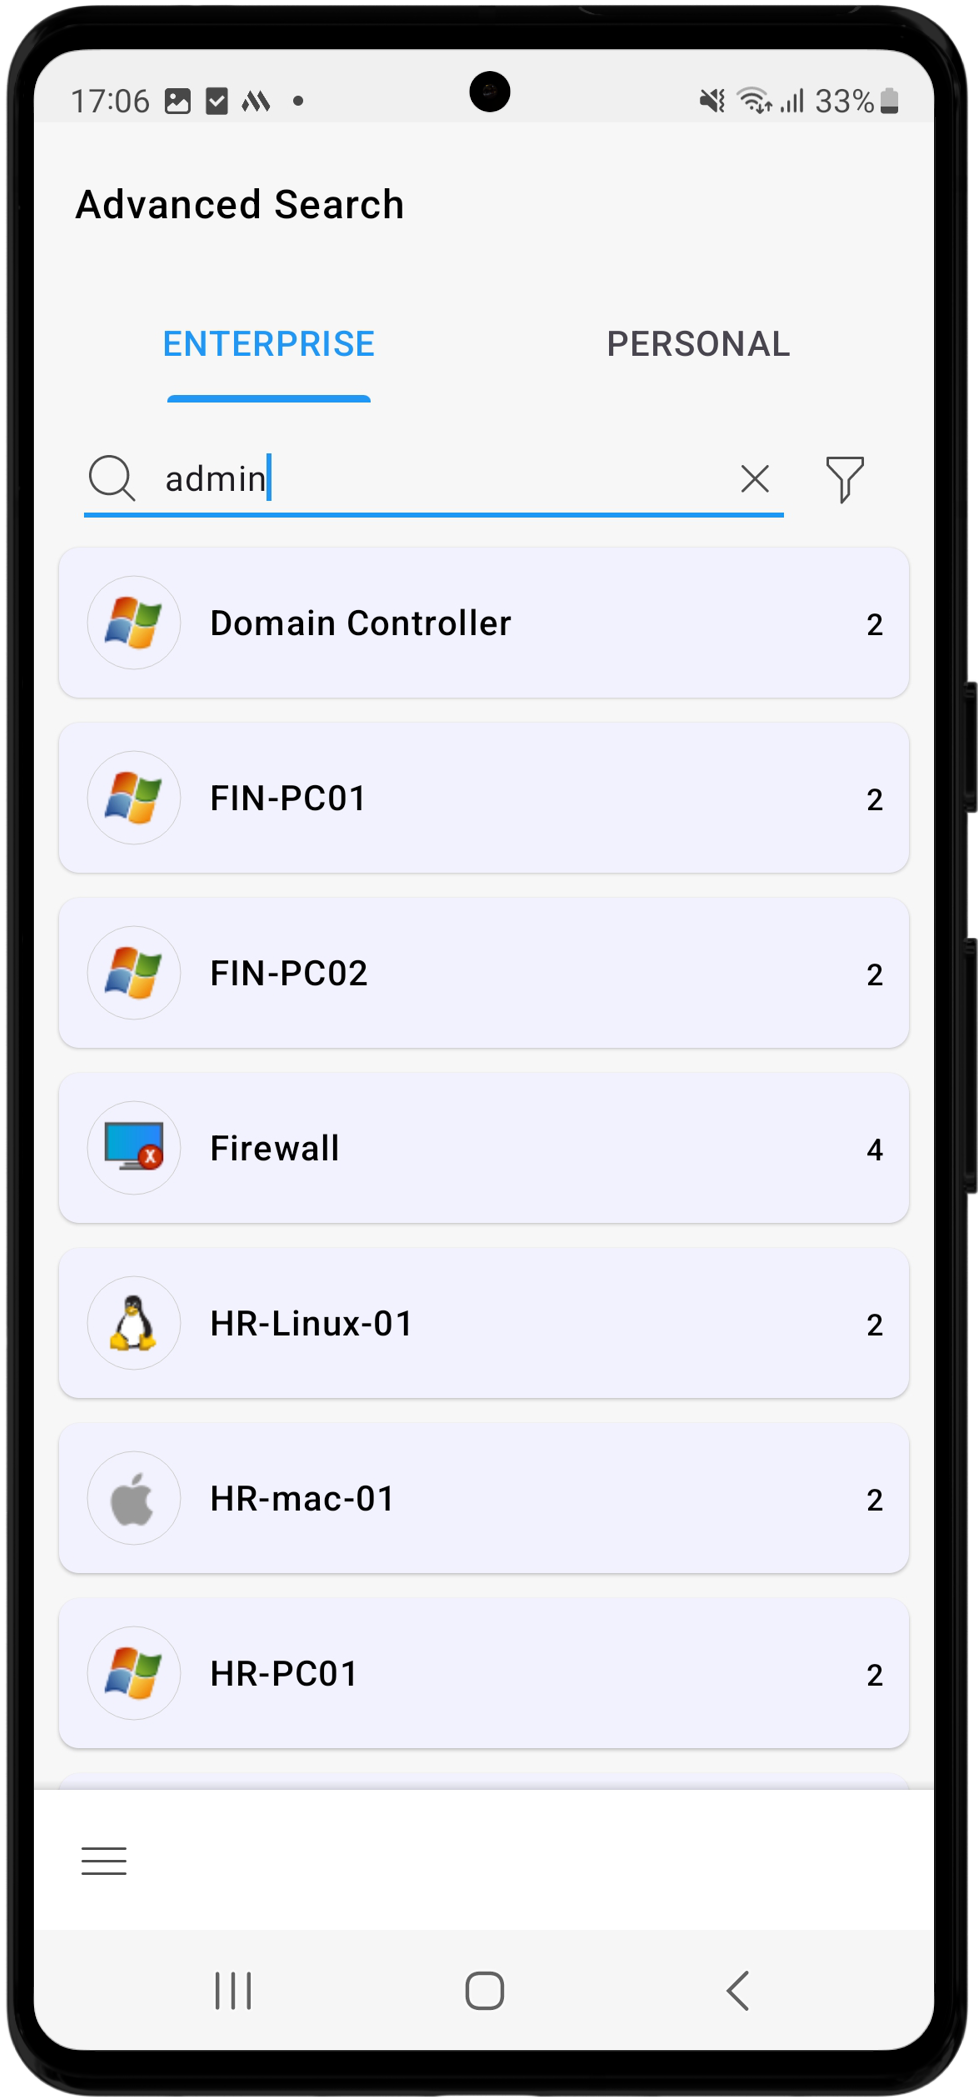
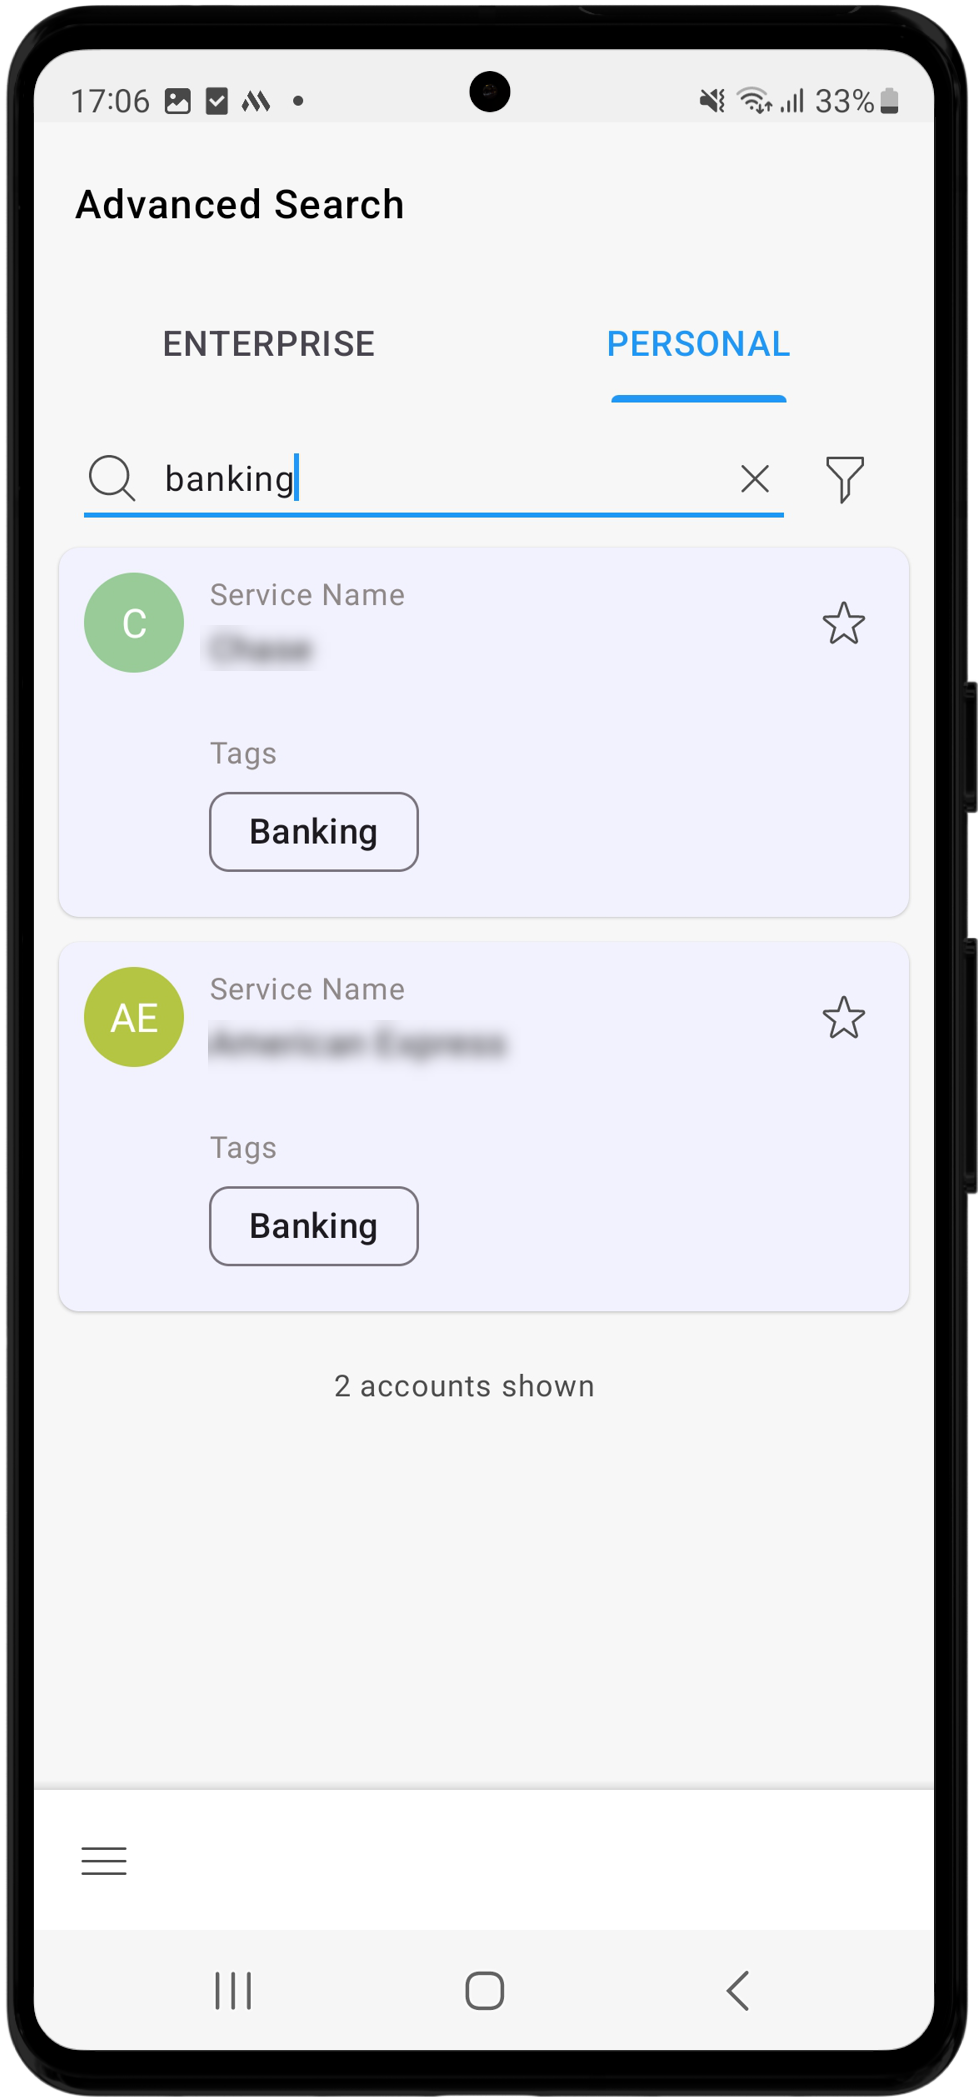
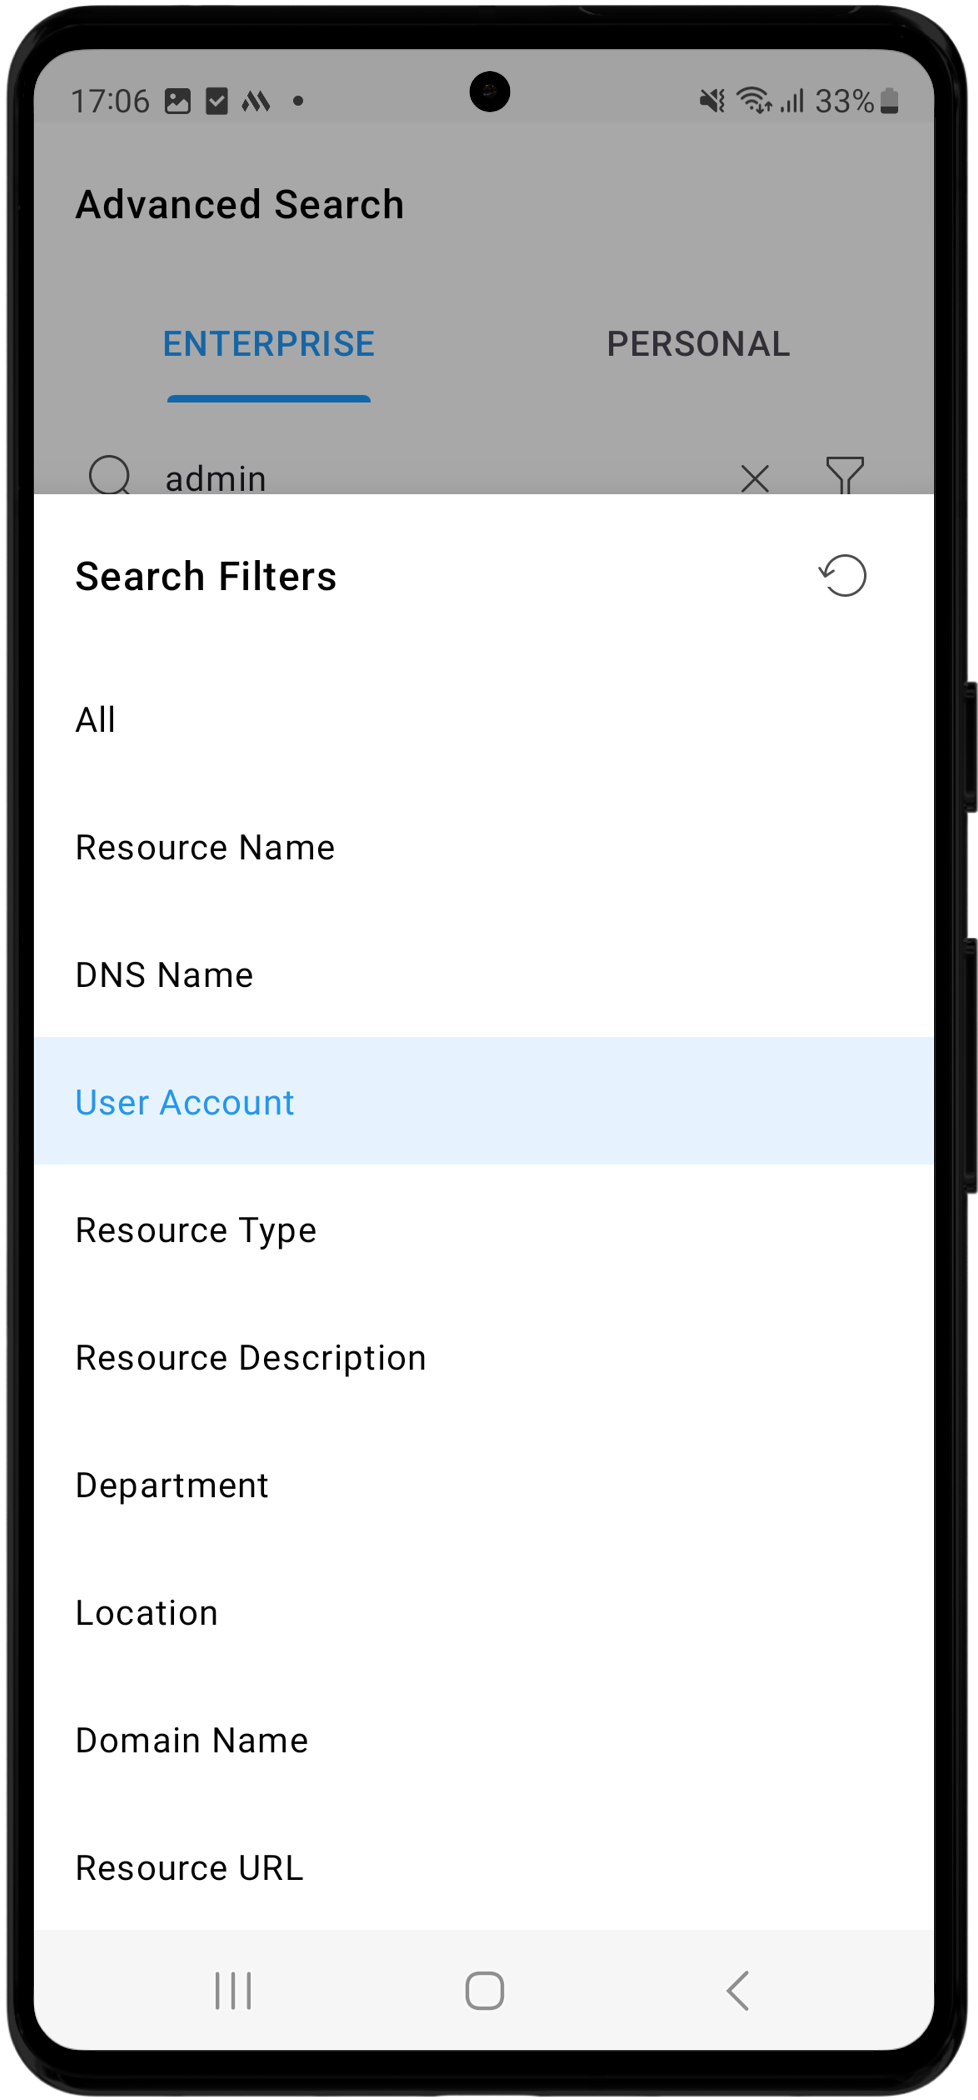
Additionally, any custom fields added in the enterprise section and the custom categories created within the personal tab in PAM360's web interface will be available as filters in the Advanced Search section, allowing you to tailor the search function to meet your custom needs.
Caution
- To utilize the personal tab on the PAM360 mobile application for managing personal information, the Allow users to manage their personal passwords option should be enabled in the PAM360 web interface.
- PAM360 supports the Advanced Search functionality in the Offline Mode from application version 2.10.0 onwards.
5.4 Resource Groups
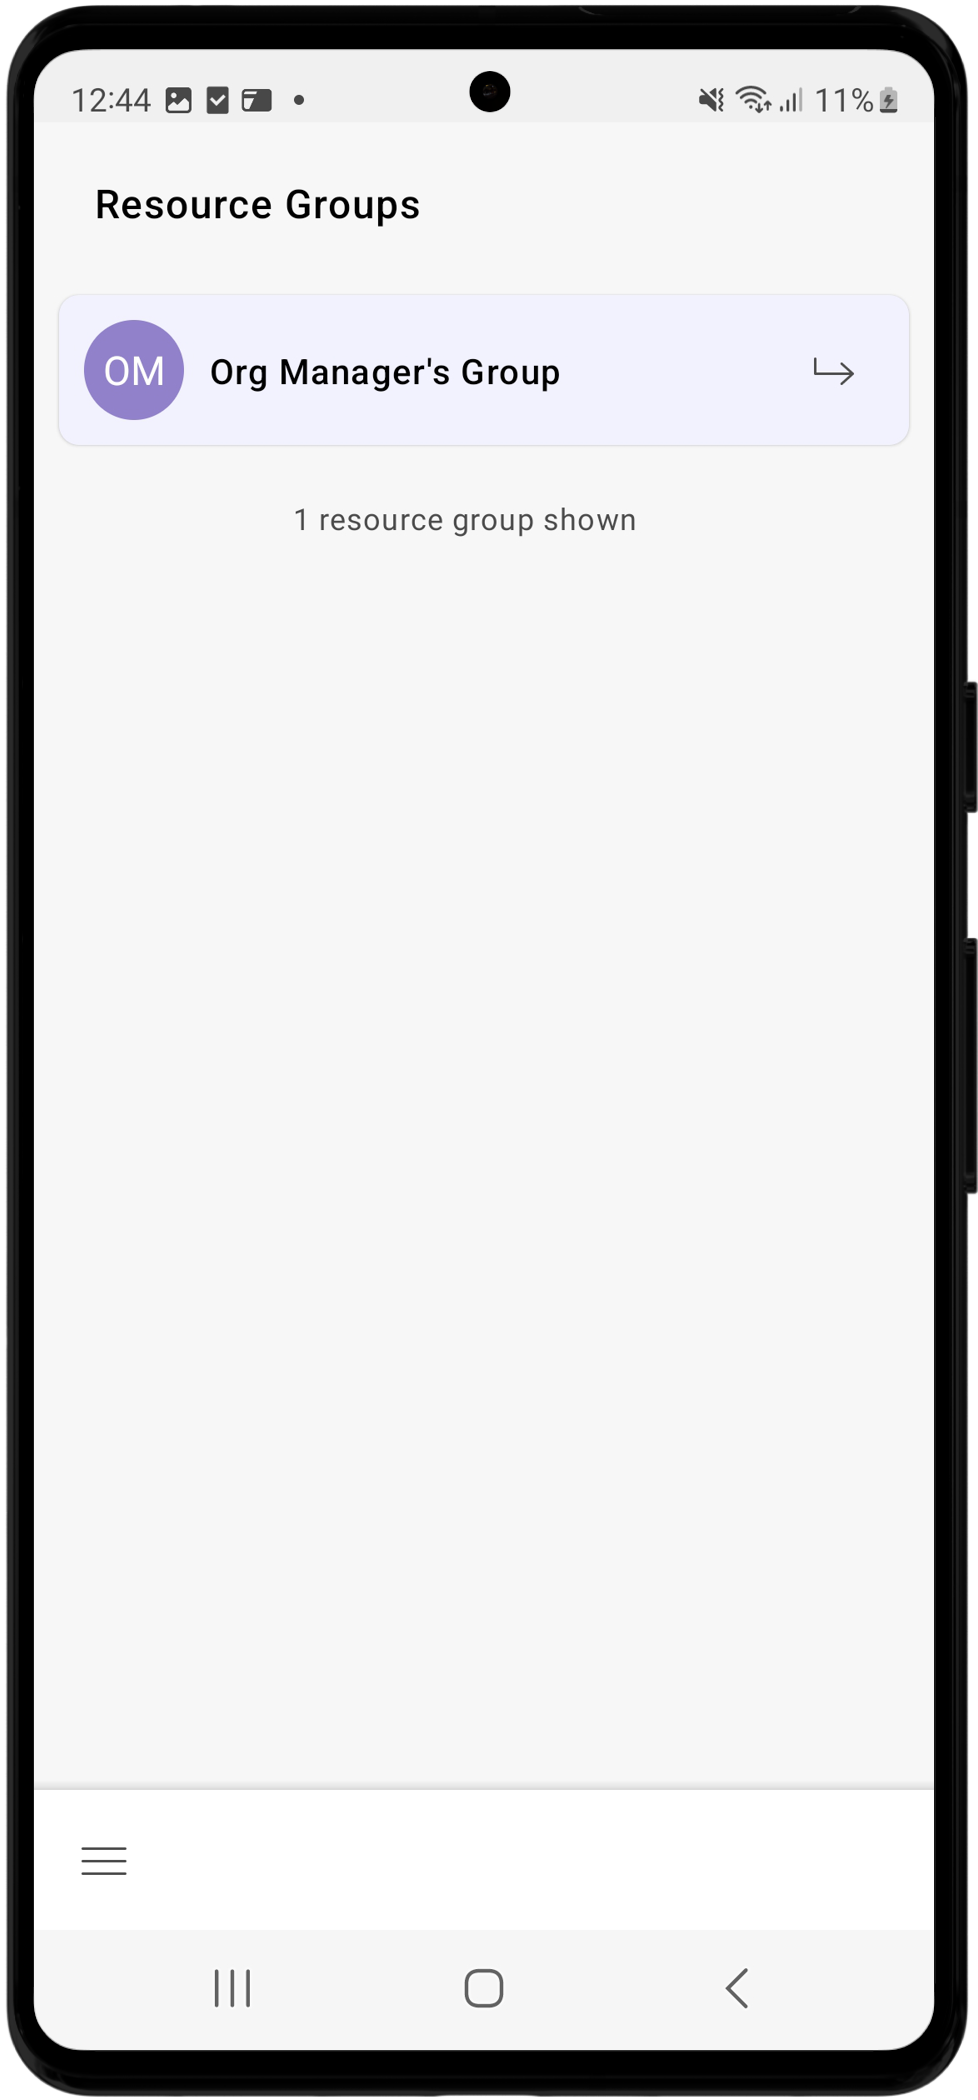
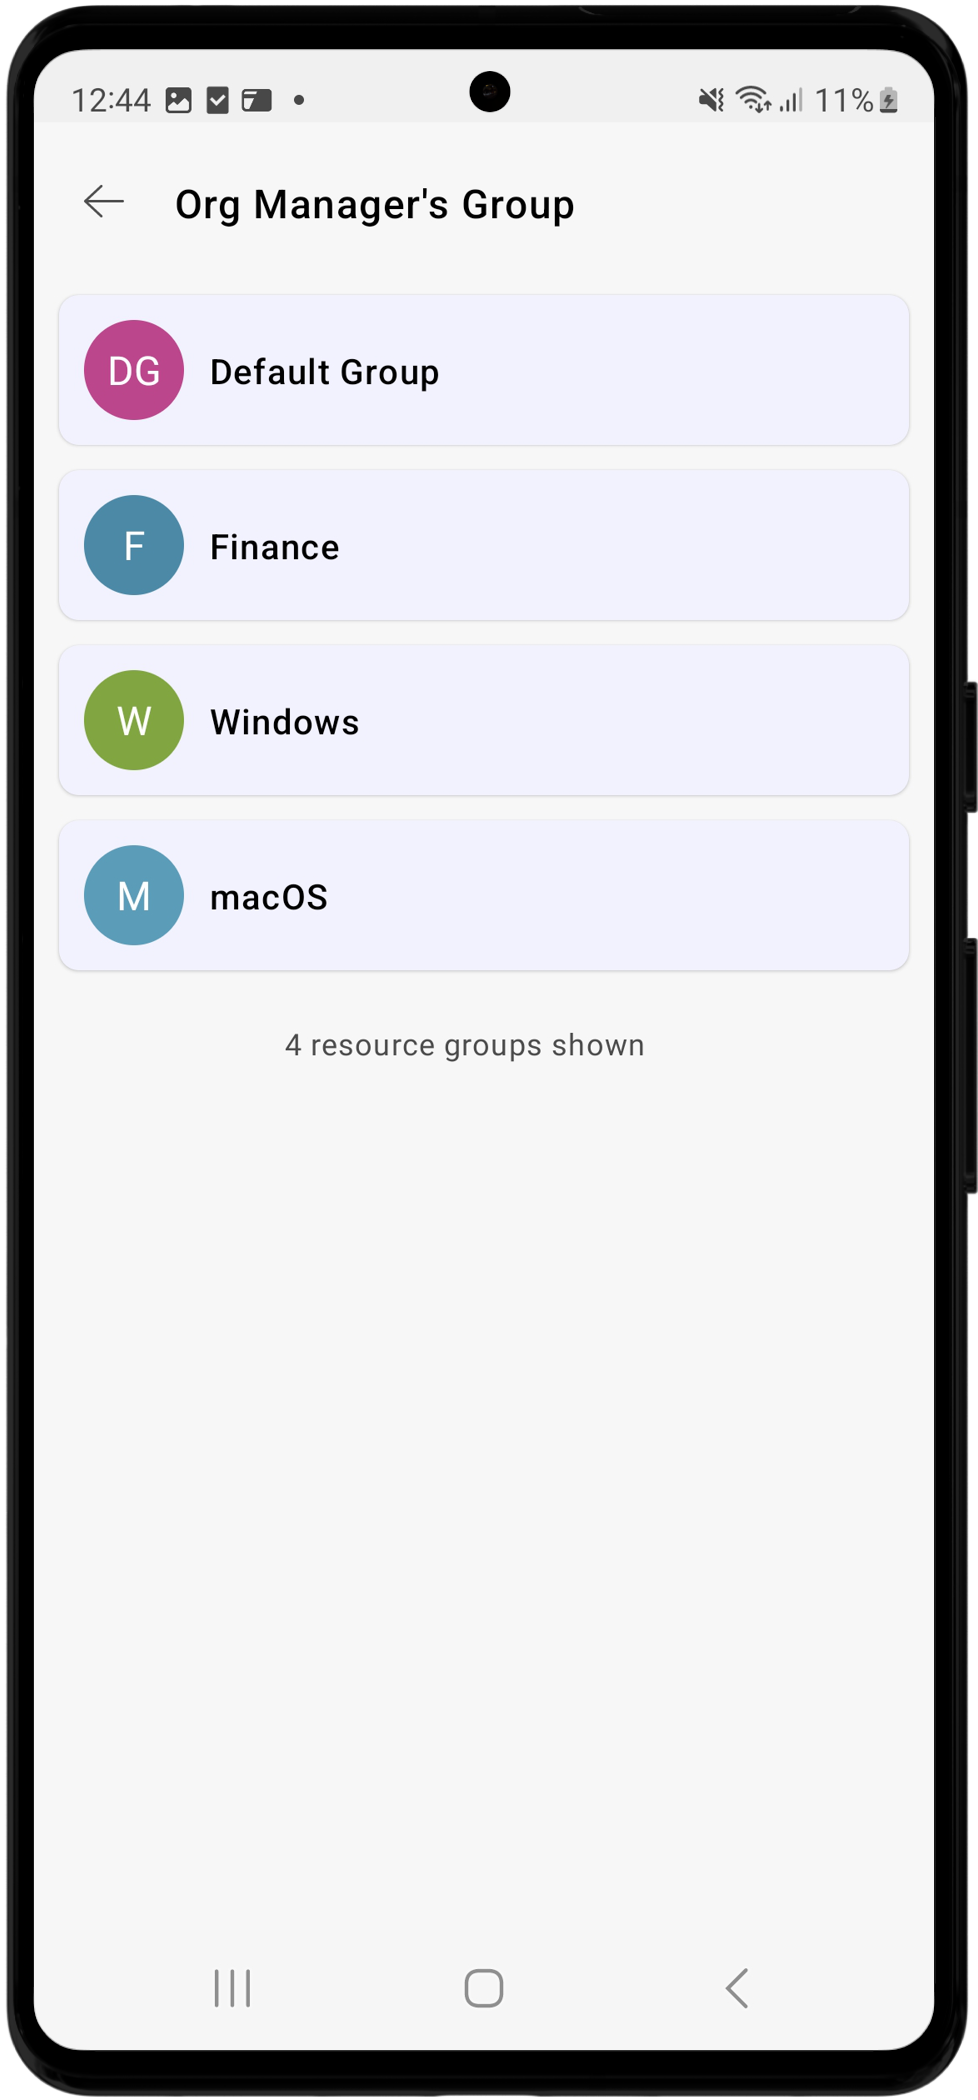
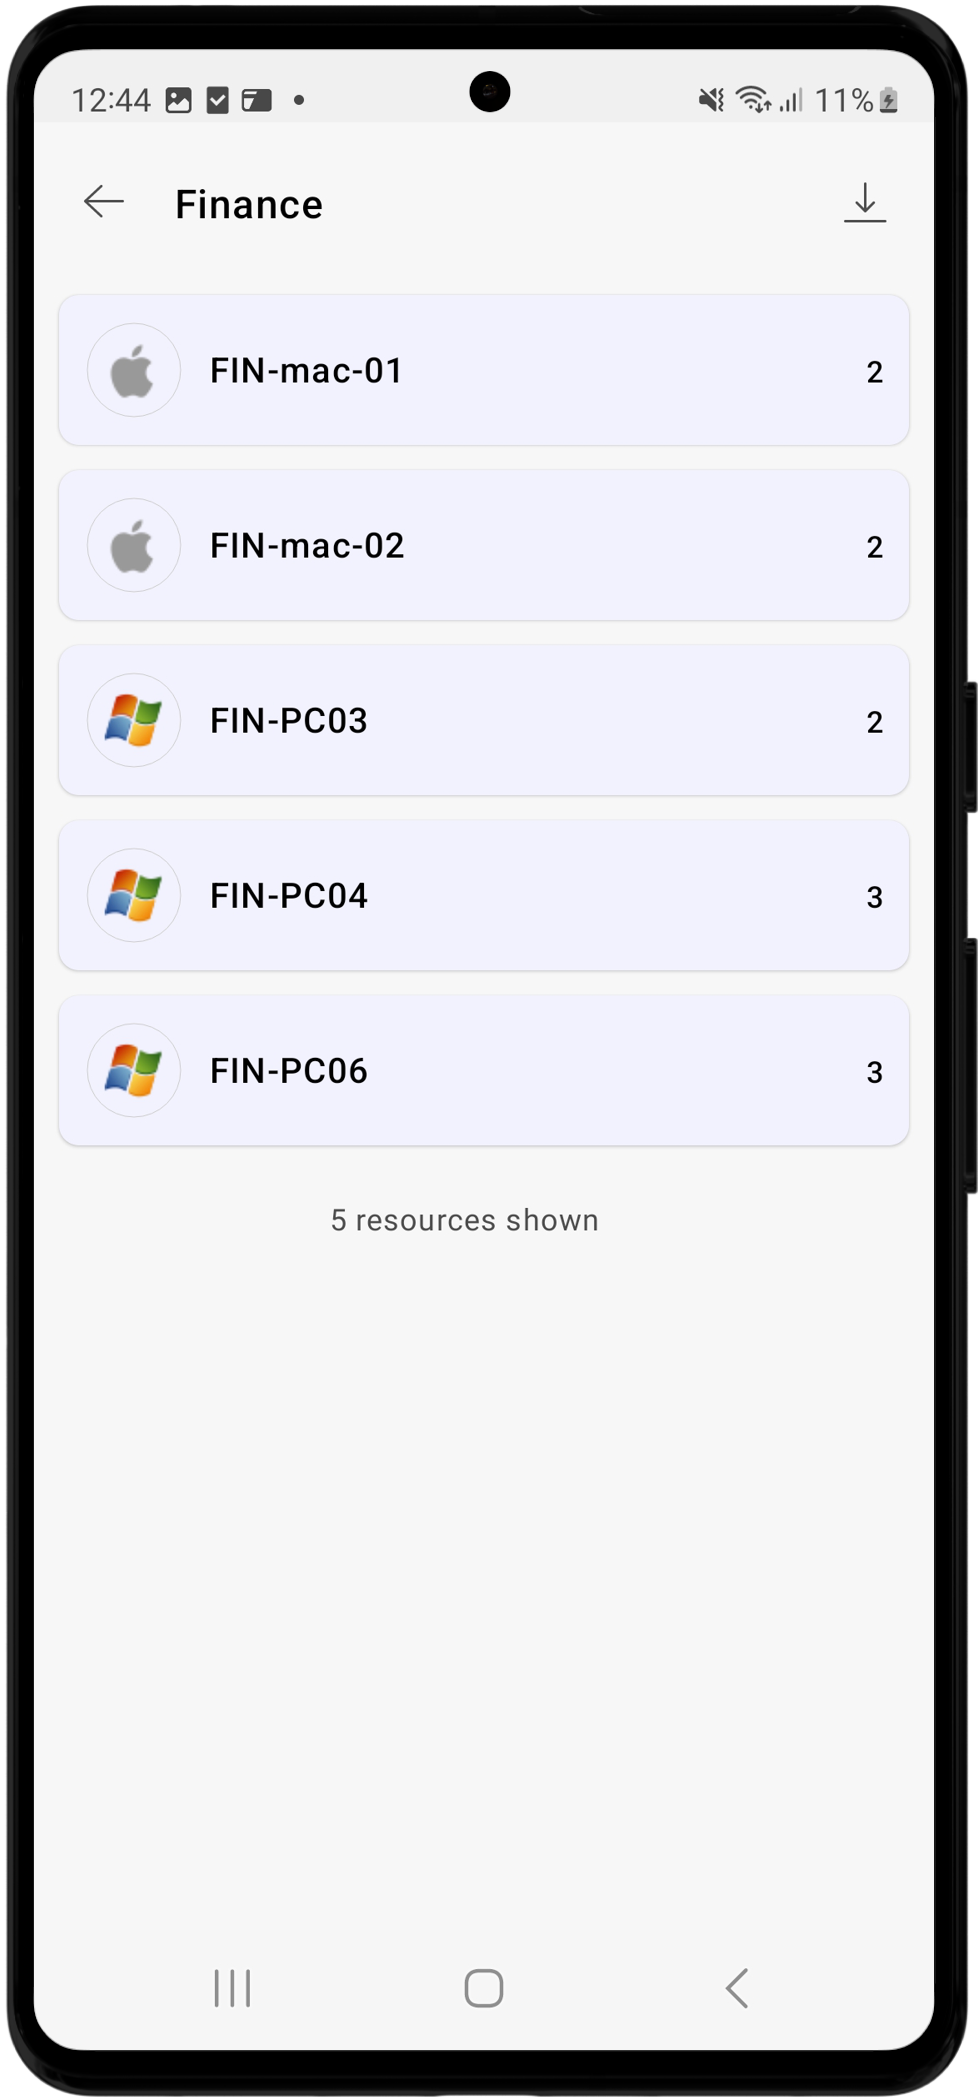
You can view all the resource groups you own or those shared with you via the PAM360 mobile application. Select the Resource Groups option from the Navigation Menu to access the resource groups you own or manage. If a resource group has subgroup(s), a right arrow icon will be displayed beside the group name. Click the arrow icon to view the available subgroups. Tap the respective resource group/subgroup to view the list of resources available under that specific group. Select the desired resource to view the list of accounts available within that resource, and tap the desired account to view its details.
5.5 SSH Keys
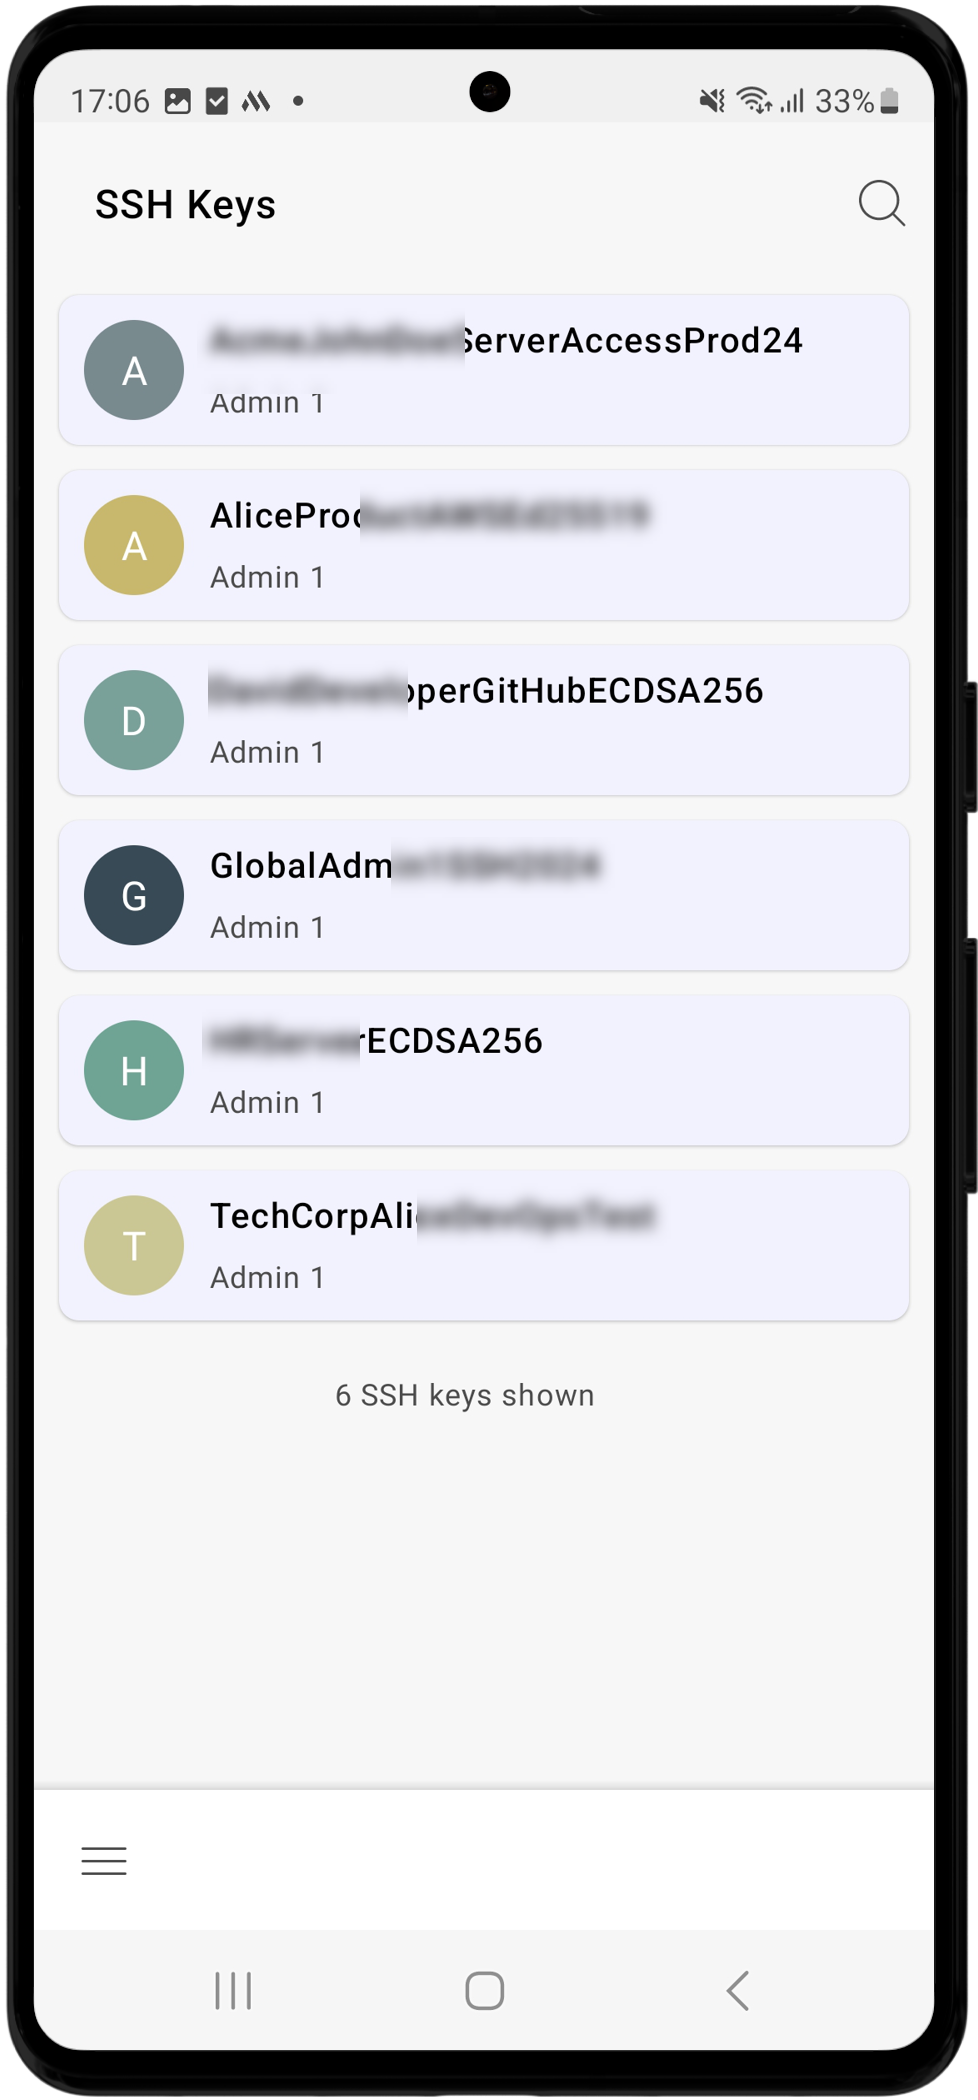
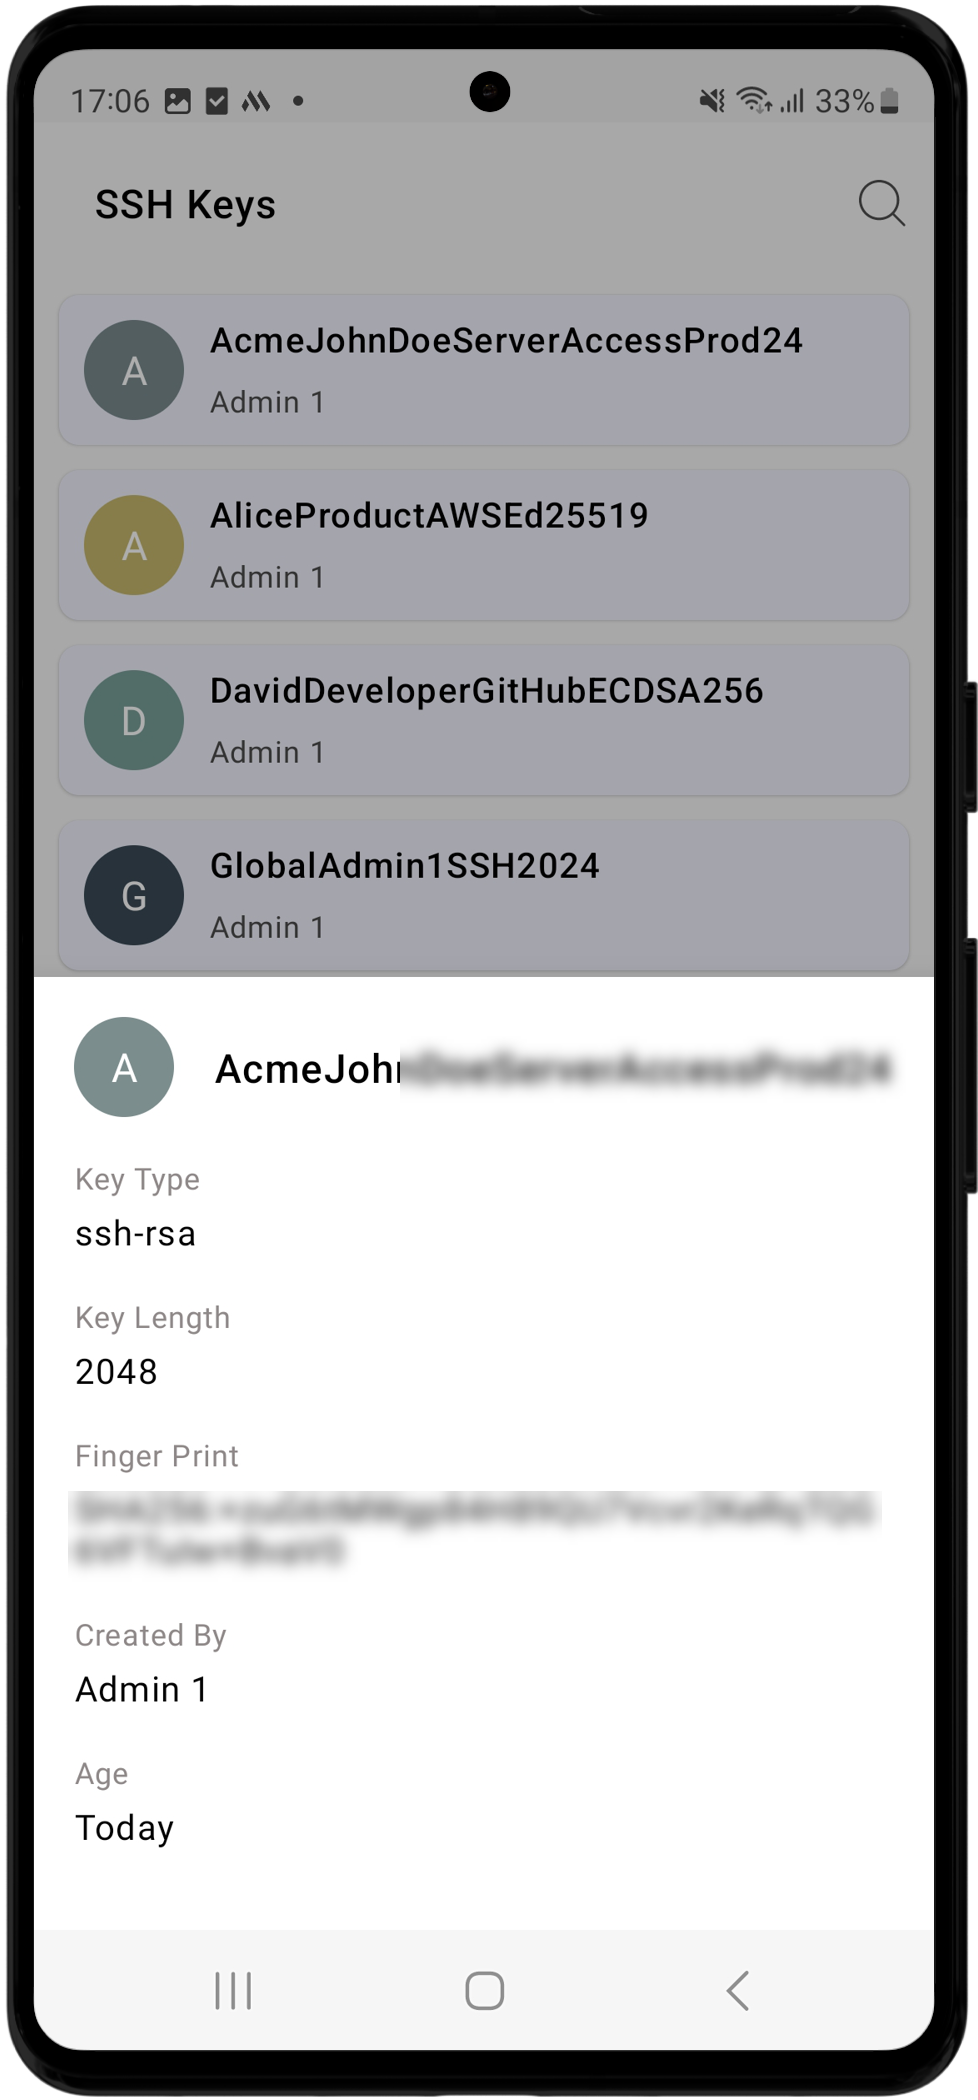
To view the SSH keys you own or manage, select SSH Keys from the navigation menu. On the SSH Keys screen, you will see a list of all the SSH keys you own or those shared with you. Tap the desired SSH key to view its details, including Key Type, Length, Fingerprint, Age, and Owner.
5.6 Certificates
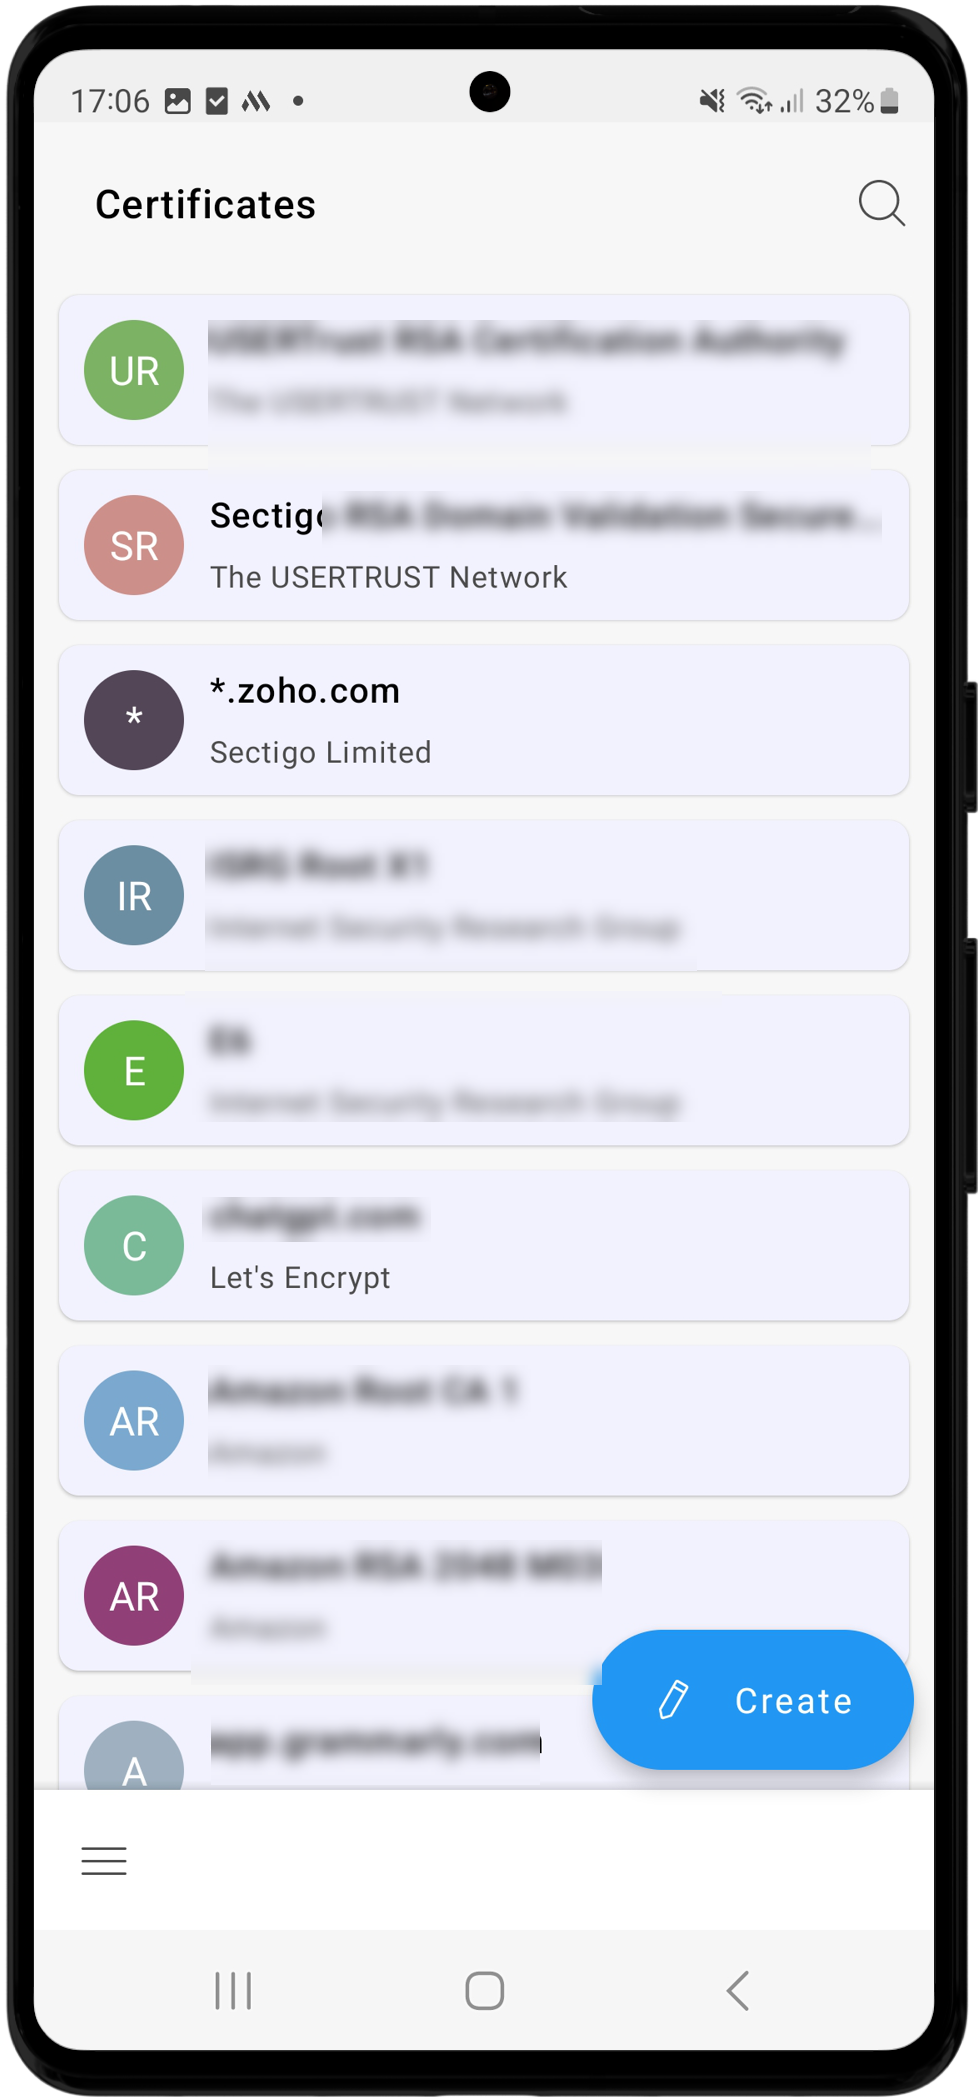
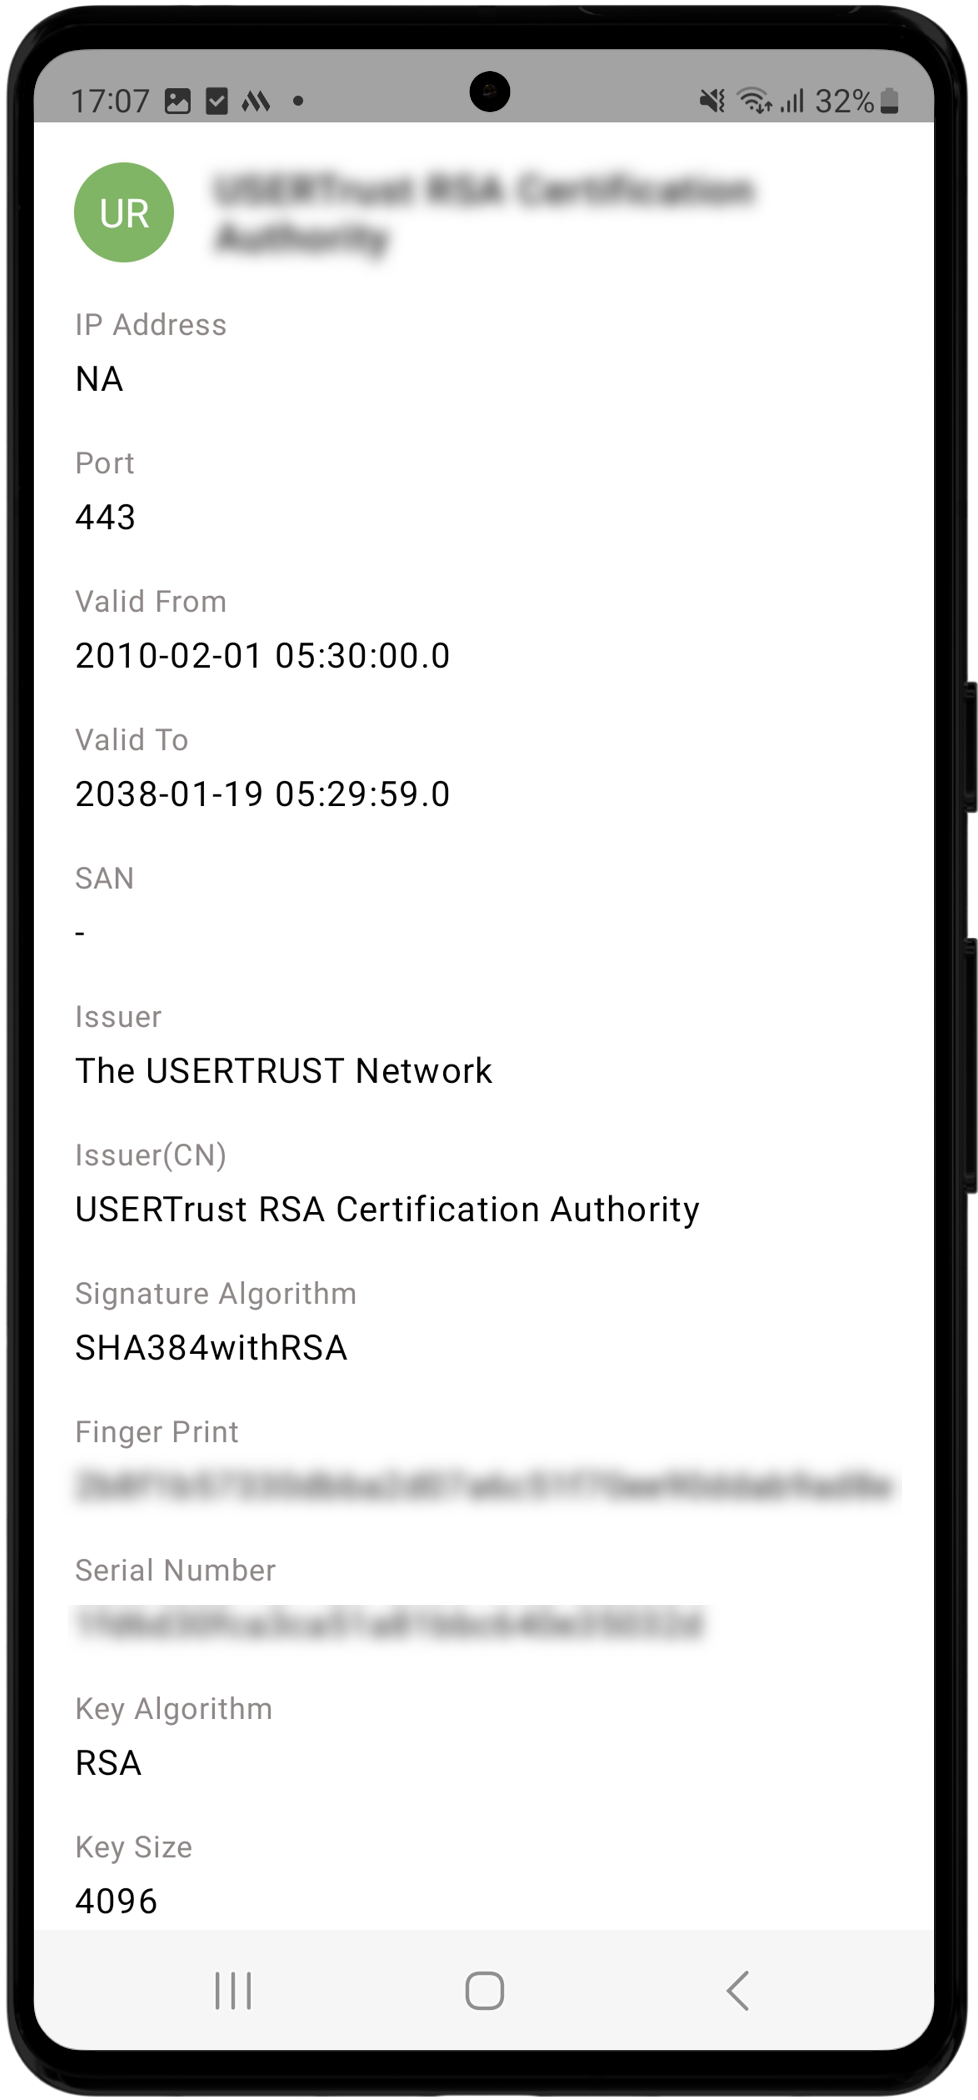
To view the SSL certificates, select Certificates from the navigation menu. On the Certificates screen, you will see a list of all the SSL certificates you own and manage. Tap any SSL certificate from the list to view its details, including Common Name/IP Address, Port, Validity Period, SAN, Issuer, Signature Algorithm, Fingerprint, Serial Number, Key Algorithm, and Key Size.
Additionally, you can create an SSL certificate from the PAM360 Android application. To create an SSL certificate, follow these steps:
- Select Certificates from the Navigation Menu and tap the Create option.
- Specify the required details such as Common Name, SAN, Organization Unit, Organization, Location, State, and Country.
- Select the Key Algorithm, Key Size, Signature Algorithm, and KeyStore type from the respective dropdowns.
- Choose a Validity Type (Days, Hours, or Minutes) and mention the validity period in the given field.
- Enter the Store Password or tap the Generate Password icon to generate a key store password. Tap the eye icon to view the generated store password.
- Enter the expiry notification email address and tap the Tick button to create an SSL certificate based on the provided details.
Your SSL certificate will be created and added to the list. You can view it anytime from the Certificates screen.
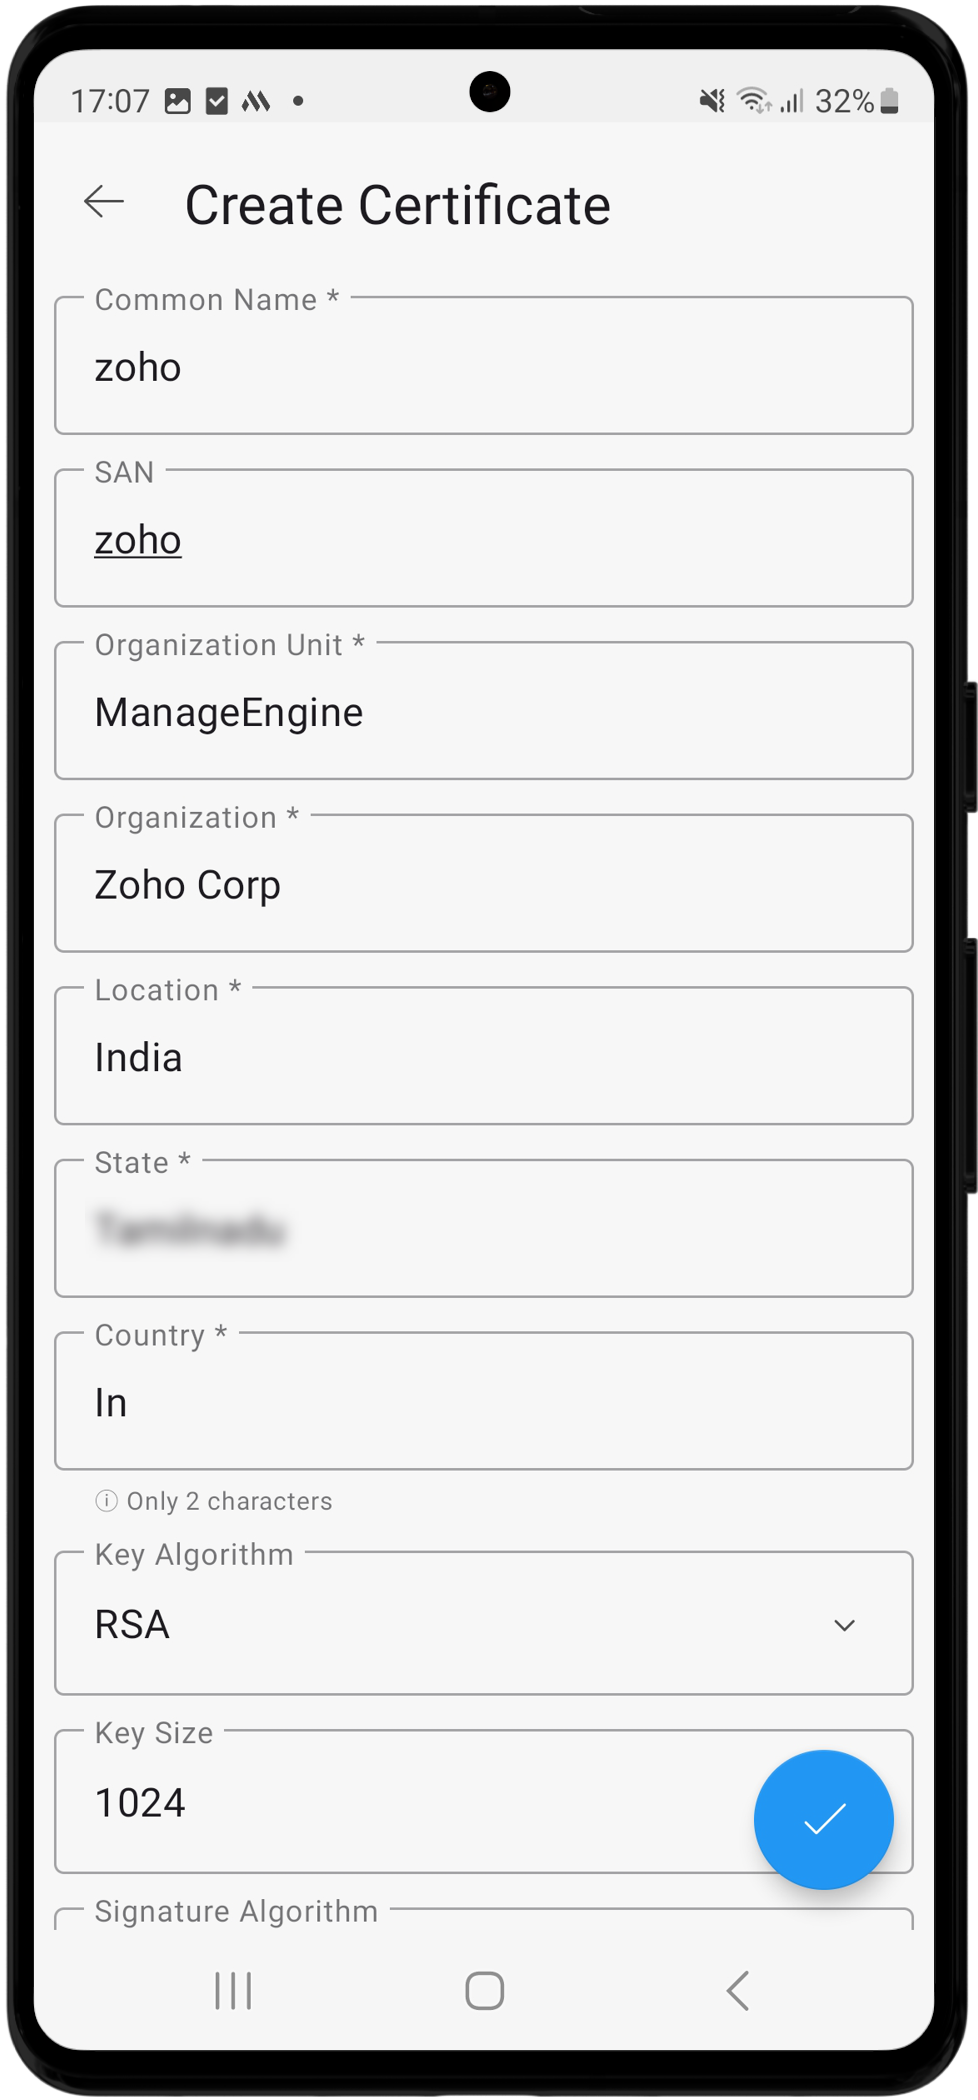
Caution
The Create Certificate functionality is supported in the Android application from PAM360 builds 6200 onwards.
5.7 CSR
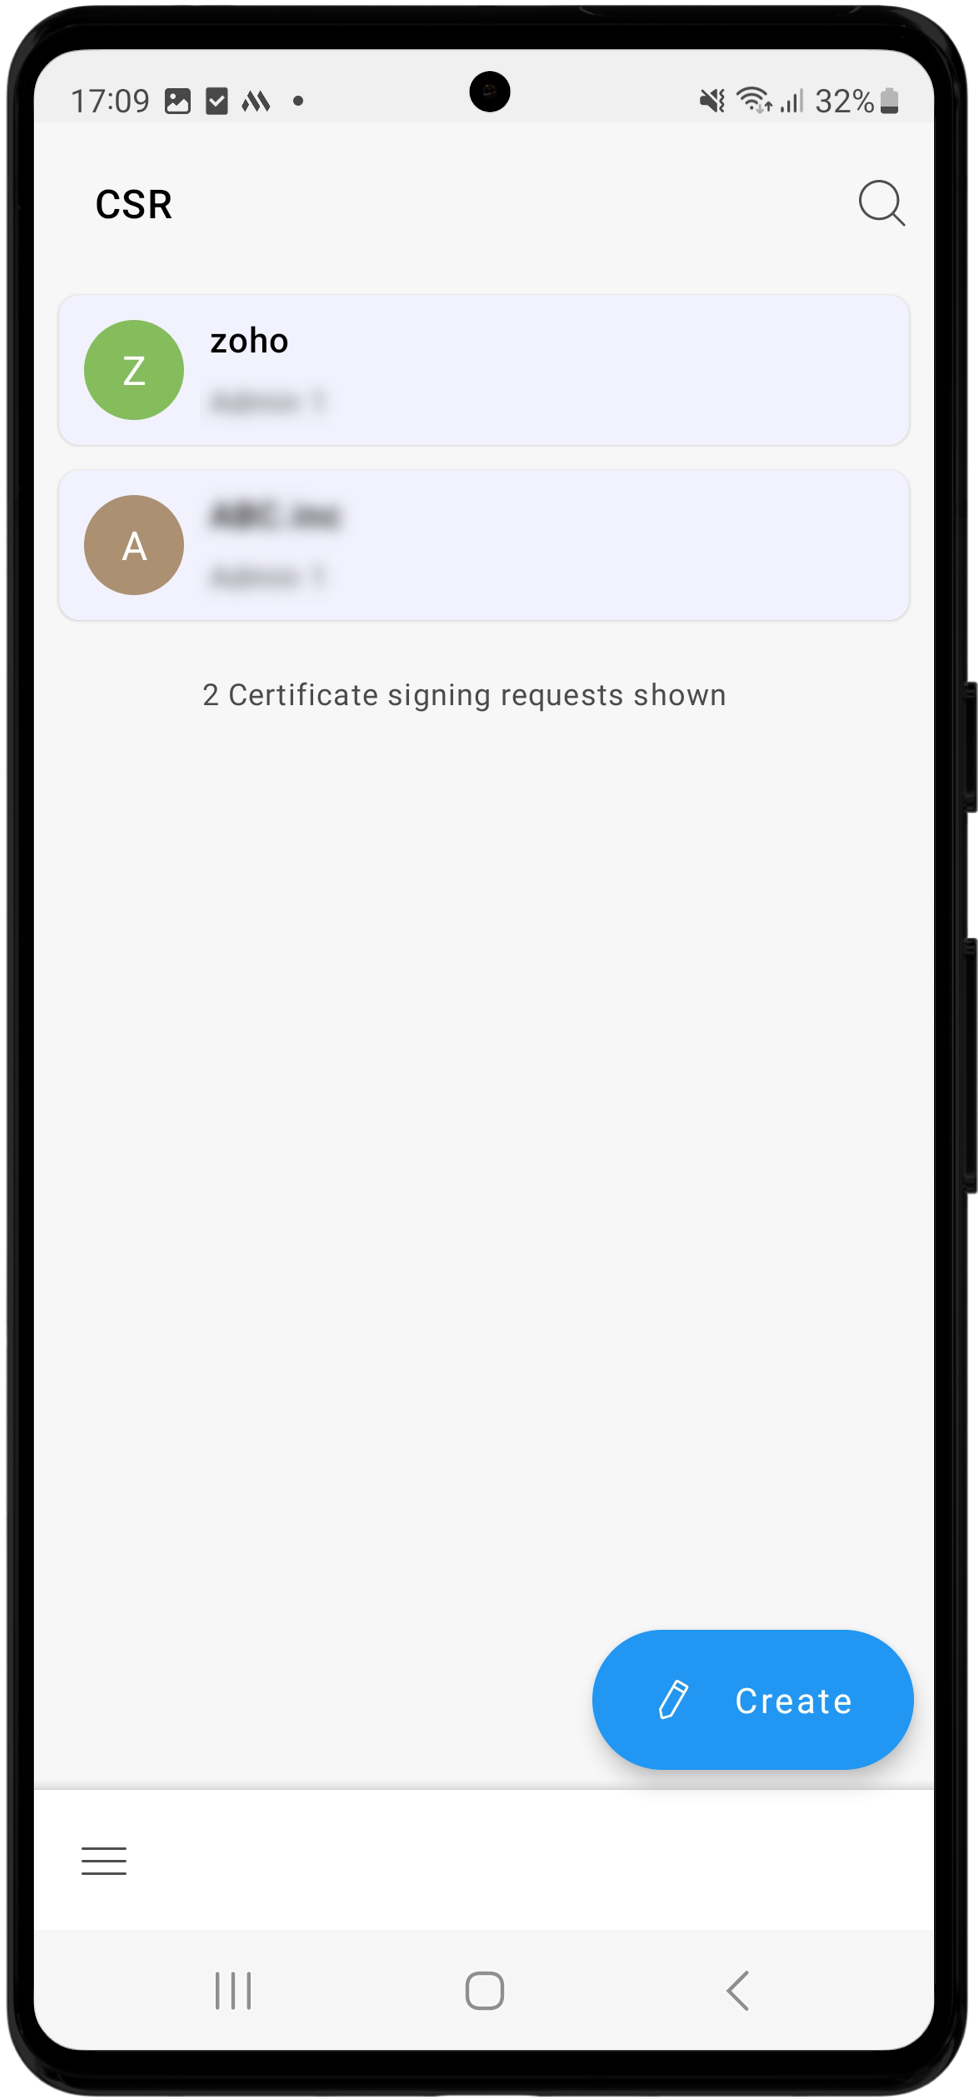
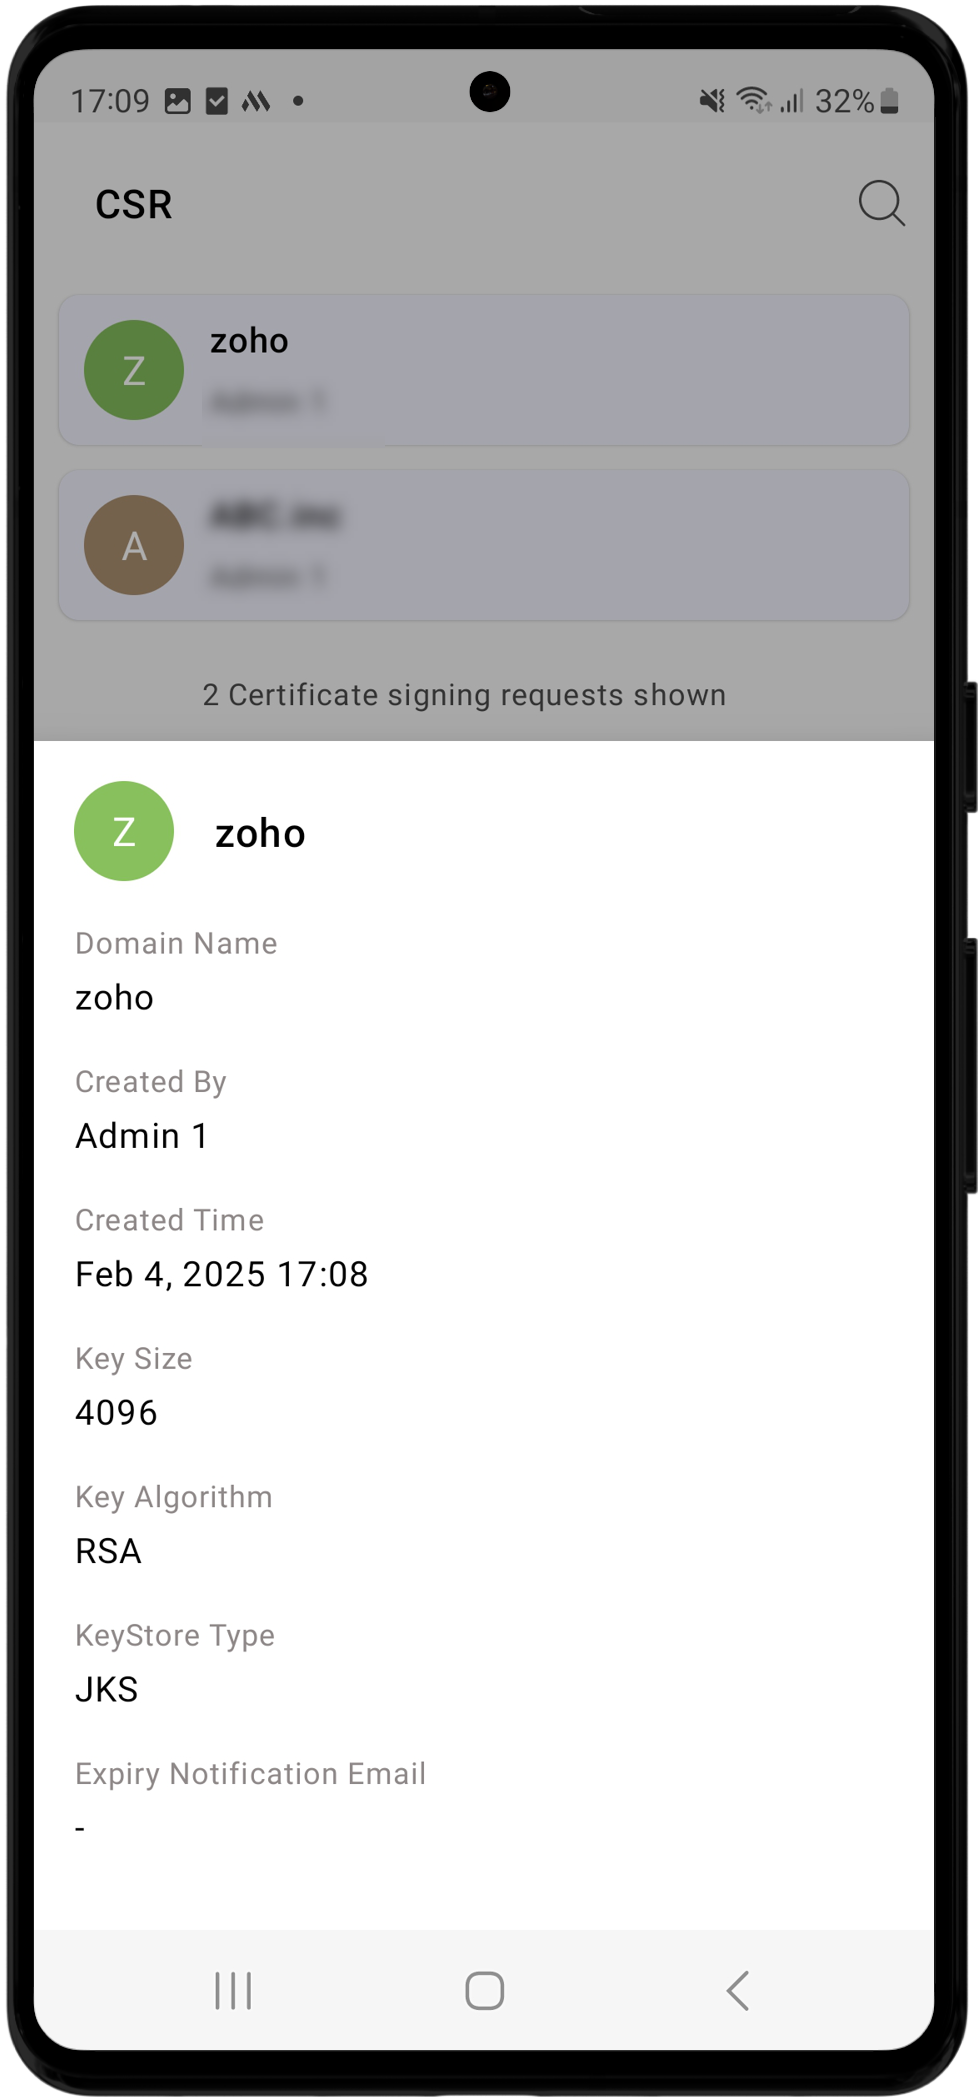
The PAM360 mobile application lets you view the Certificate Signing Requests (CSR) created on the web interface. Tap the CSR button from the navigation menu to view the CSR list. Additionally, you can create CSR in the mobile application by following the steps detailed below.
- Select CSR from the navigation menu and tap the Create option.
- Specify the required details such as Common Name, SAN, Organization Unit, Organization, Location, State, and Country.
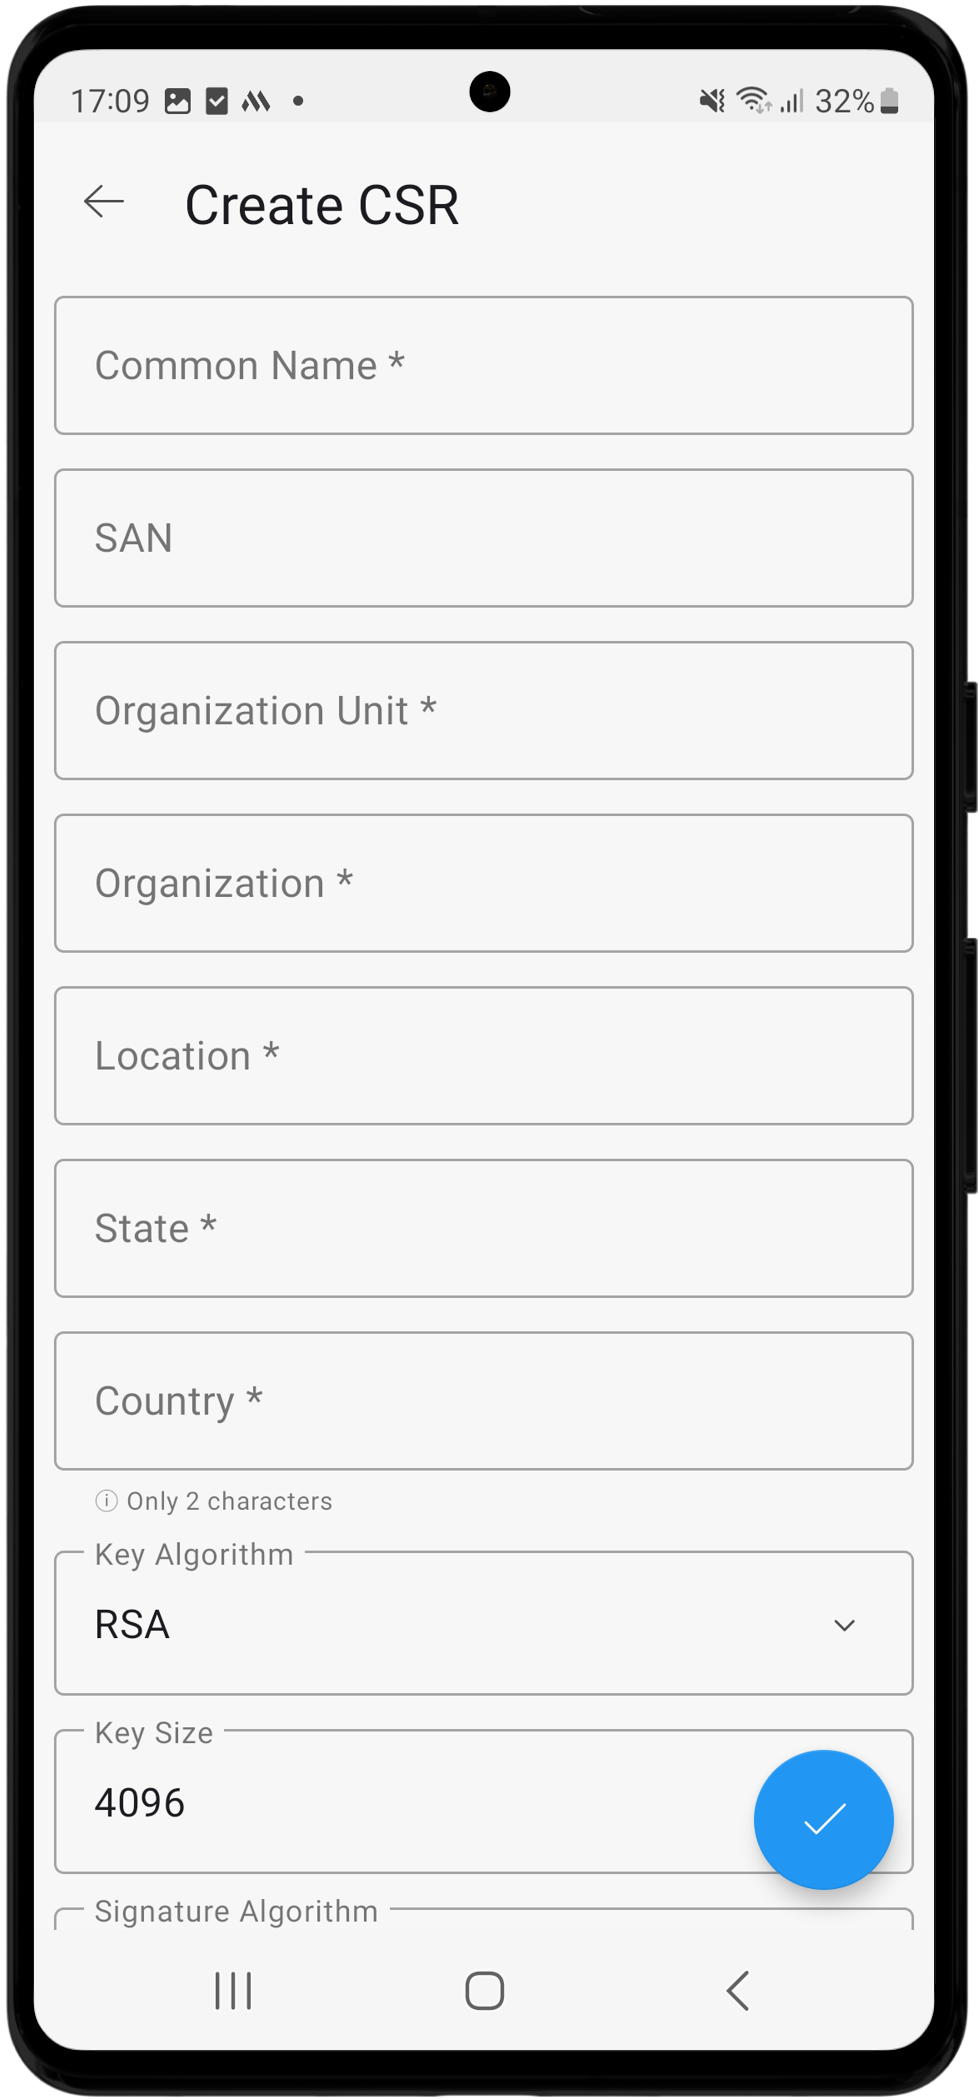
- Select the Key Algorithm, Key Size, Signature Algorithm, and KeyStore type.
- Choose a Validity Type (Days, Hours, or Minutes) and mention the validity duration in the given field.
- Enter the store password or tap the Generate Password icon to generate a key store password. Tap the eye icon to view the generated store password.
- Enter the expiry notification email address and tap the Tick button to create a certificate signing request based on the provided details.
Your CSR will be added to the list. You can view it anytime from the CSR screen.
Caution
- The CSR tab is available in the Android application from PAM360 builds 5000 onwards.
- The Create CSR functionality is supported in the Android application from PAM360 builds 6200 onwards.
5.8 Personal
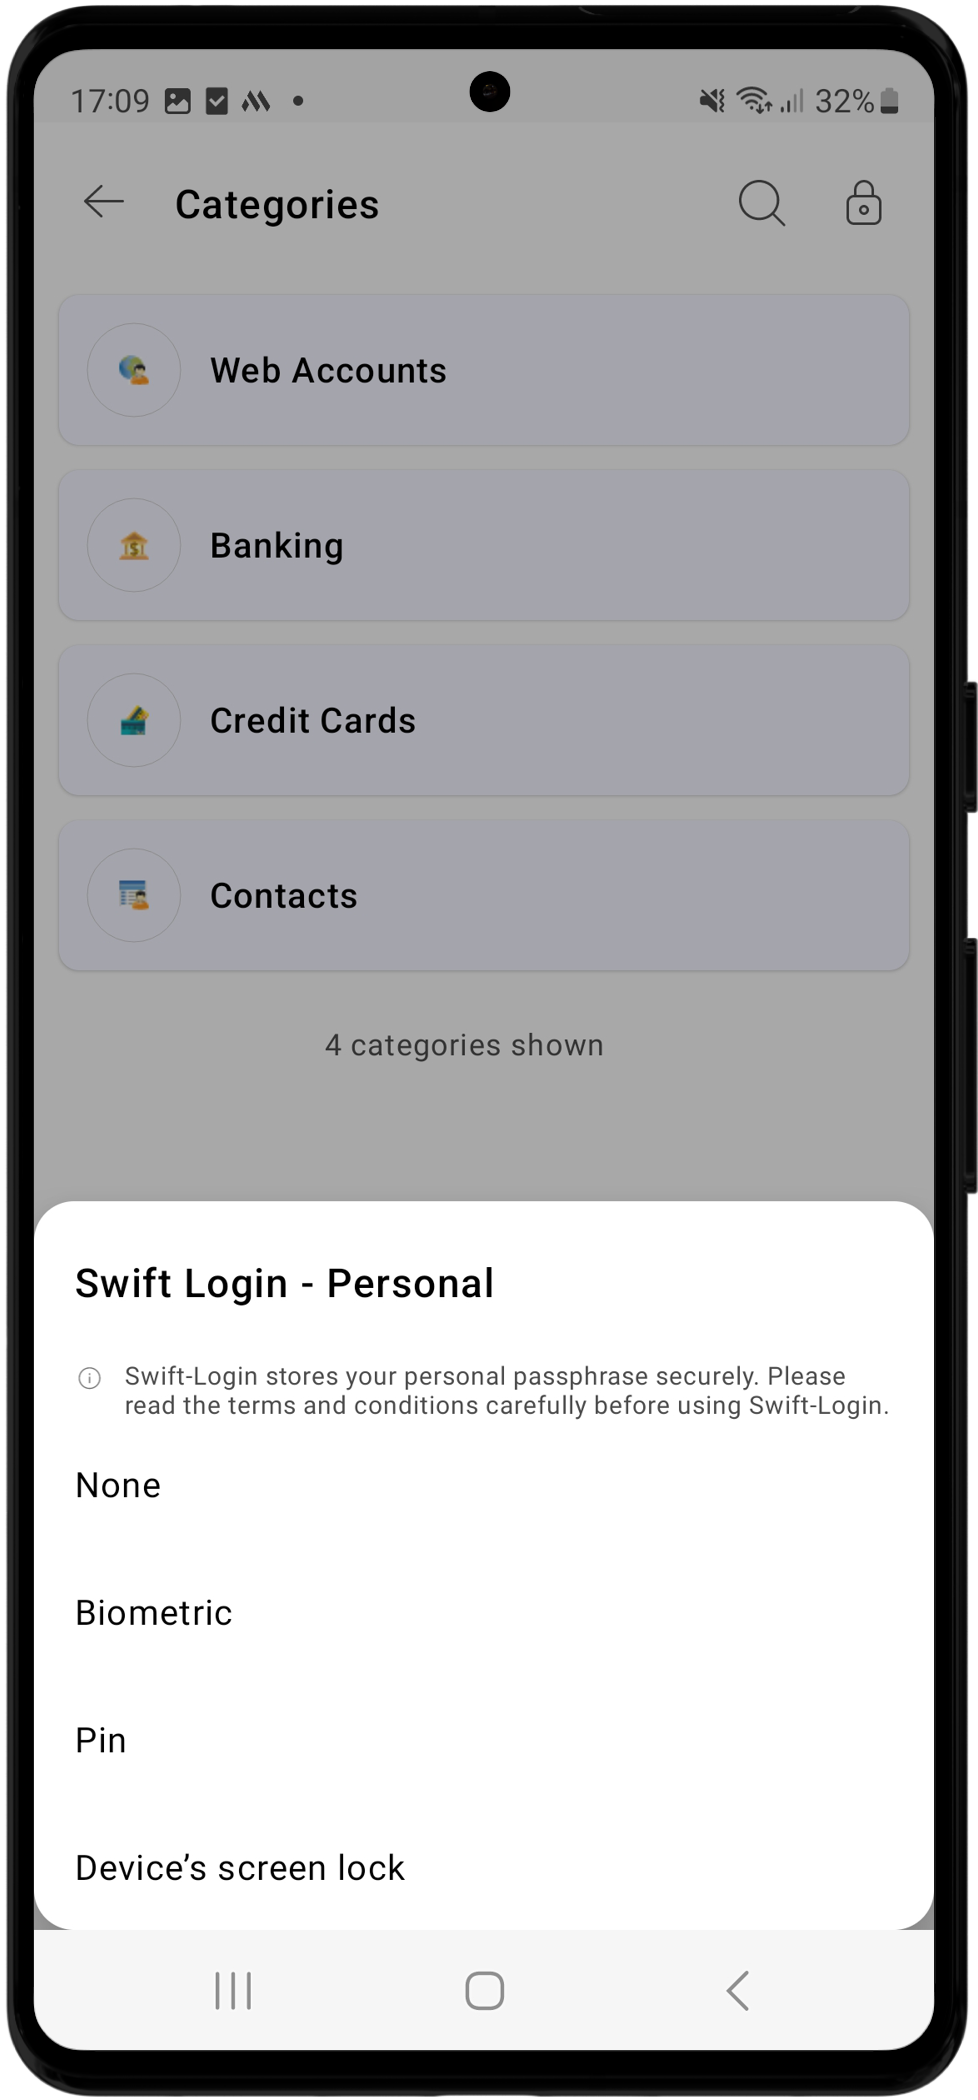
You can access the personal data stored within the personal tab from the PAM360 mobile application. Before you can access the personal tab on the mobile application, you must first set a passphrase for the personal tab via the PAM360 web interface. Once you set up a passphrase, you can add your personal details, such as Web Accounts, Banking, Credit Cards, and Contacts, and access them via the mobile application. When you access the Personal tab via the mobile application for the first time, you will be prompted to set up a swift login option, eliminating the need to enter your personal passphrase every time. You can choose from the following options: Biometric, PIN, or Device's Screen Lock. Select None if you prefer not to set up Swift Login for your account.
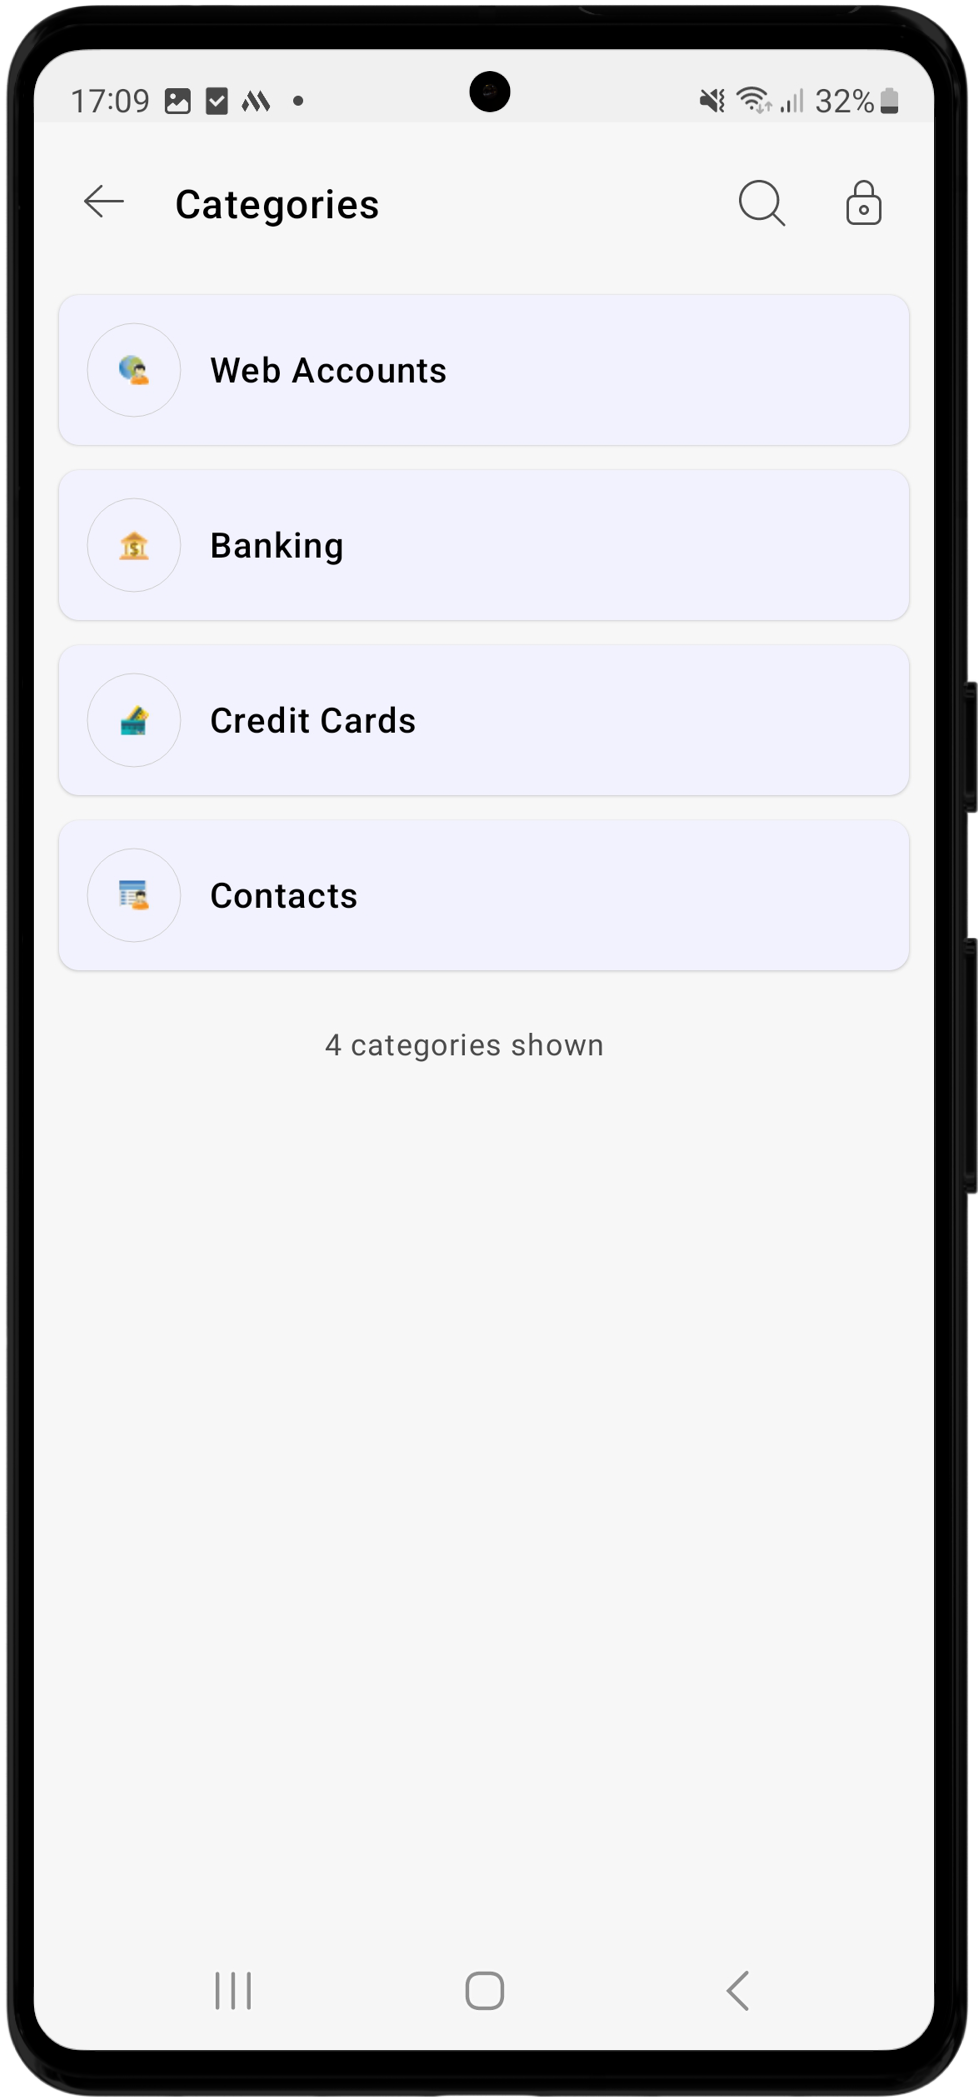
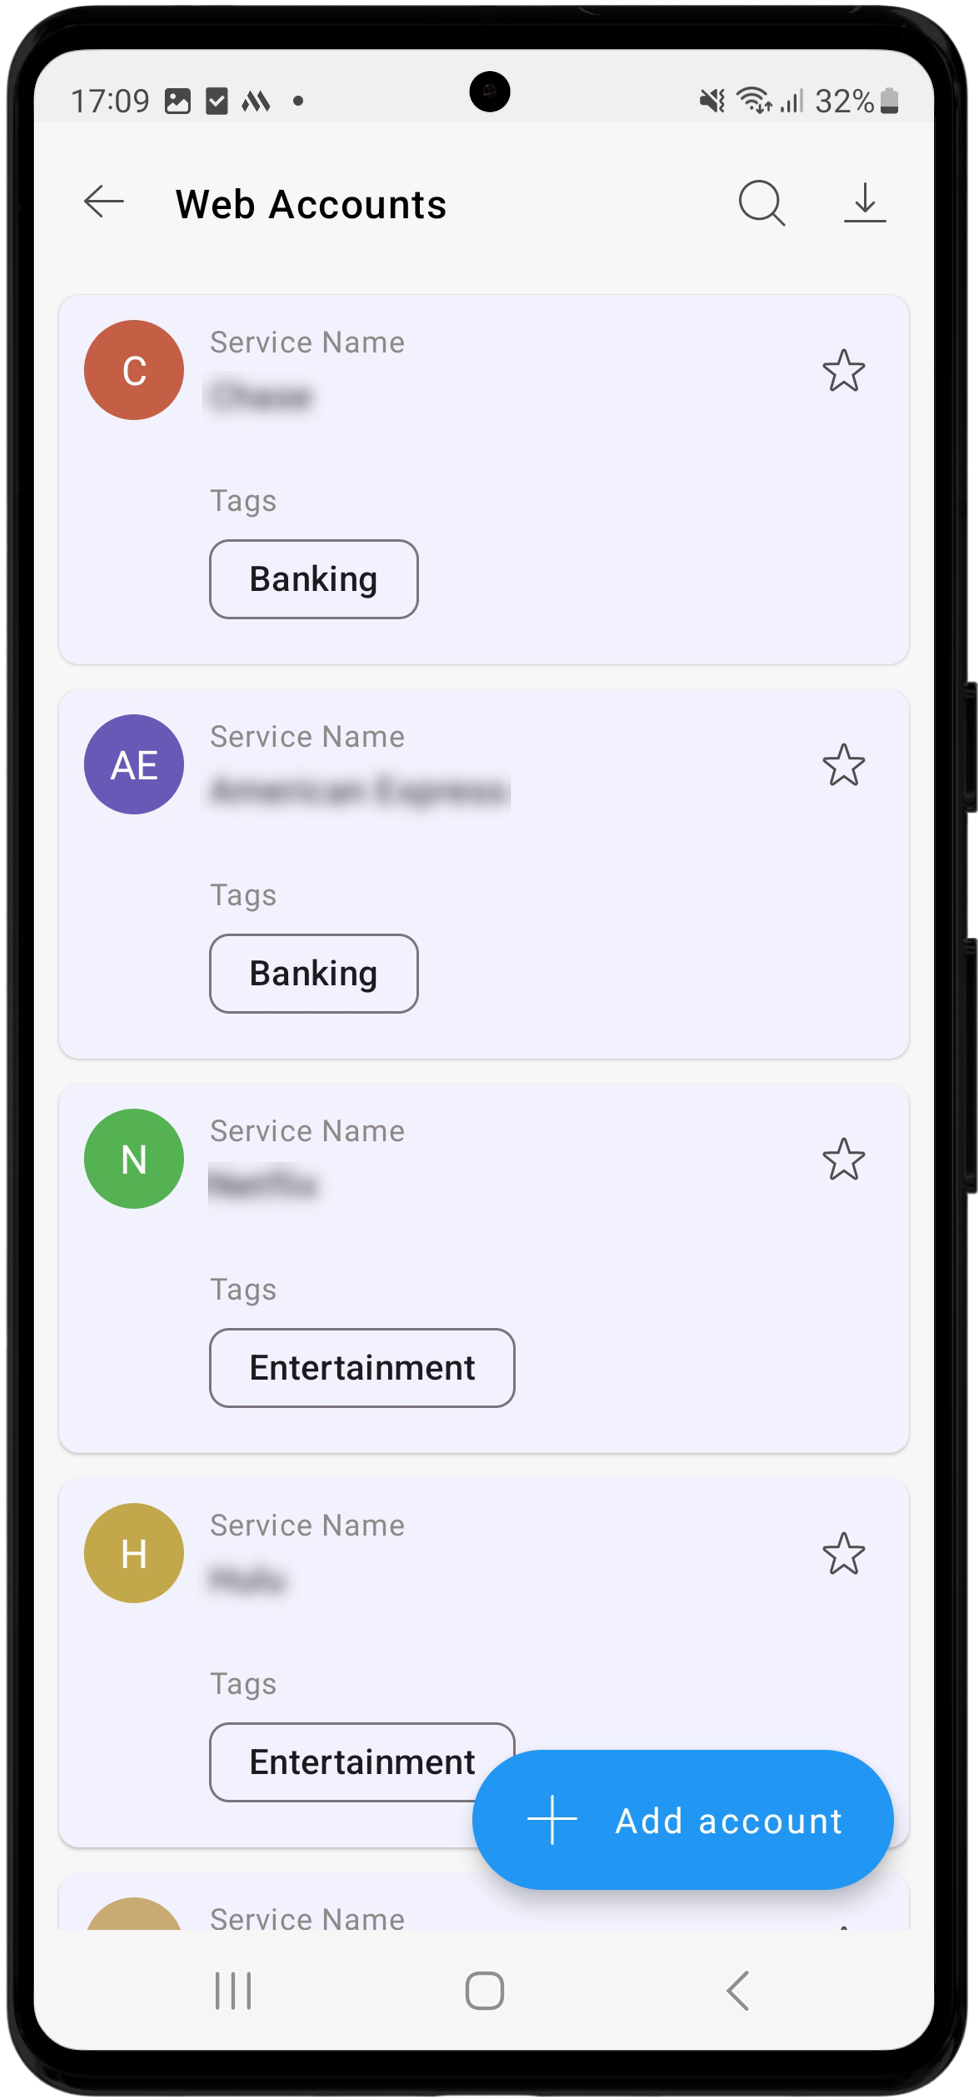
Upon entering the Personal tab, you will see the list of available categories. The custom fields and categories added to the personal tab via the PAM360 web interface will be available on the PAM360 mobile application while adding an account to the personal tab. Select the desired category to view the list of accounts available under that particular category.
Additional Detail
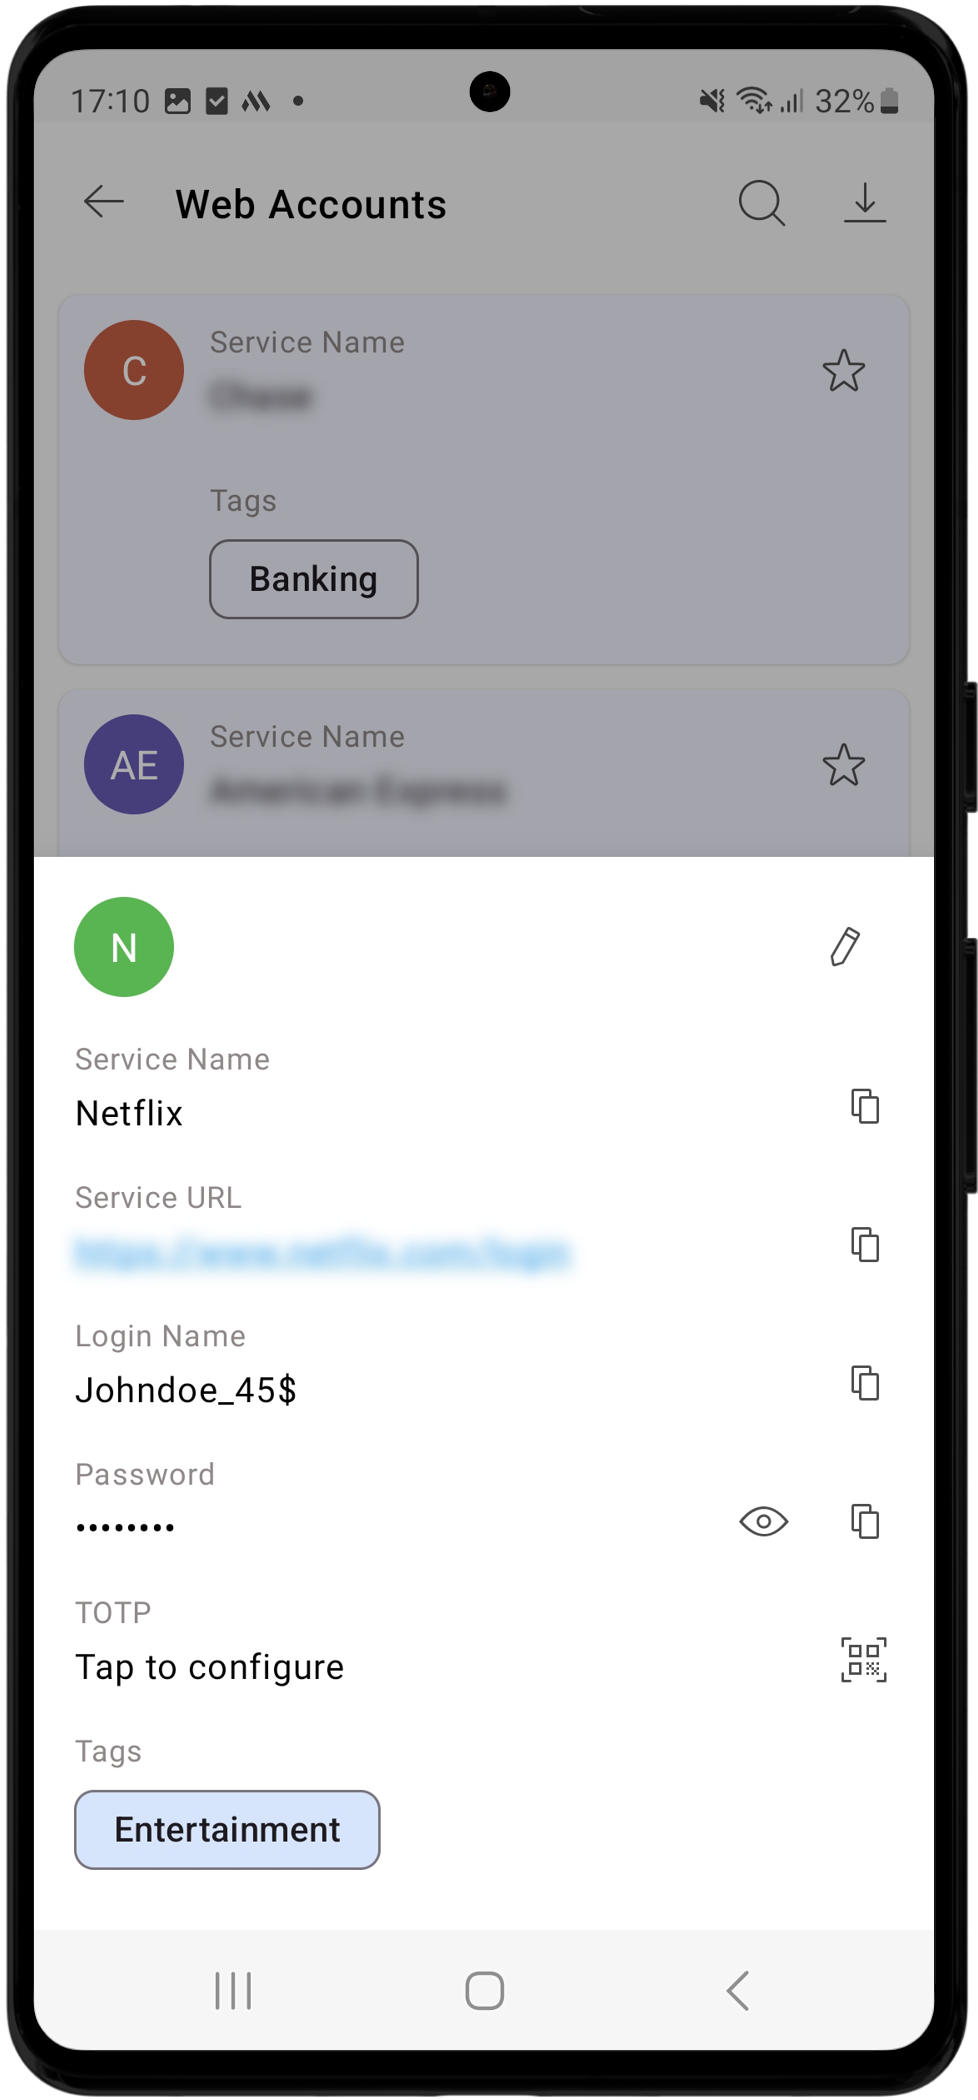
PAM360 android application provides TOTP support for personal accounts from version 2.8.0 onwards.
On the respective Category page, you can:
- View Account Details: Tap the desired account to view its details.
- Edit Accounts: Tap the edit icon on the account details section that appears after tapping on a specific account to modify the selected account.
- Add Accounts: Tap the Add Account option on the respective category screen to add new accounts to that category.
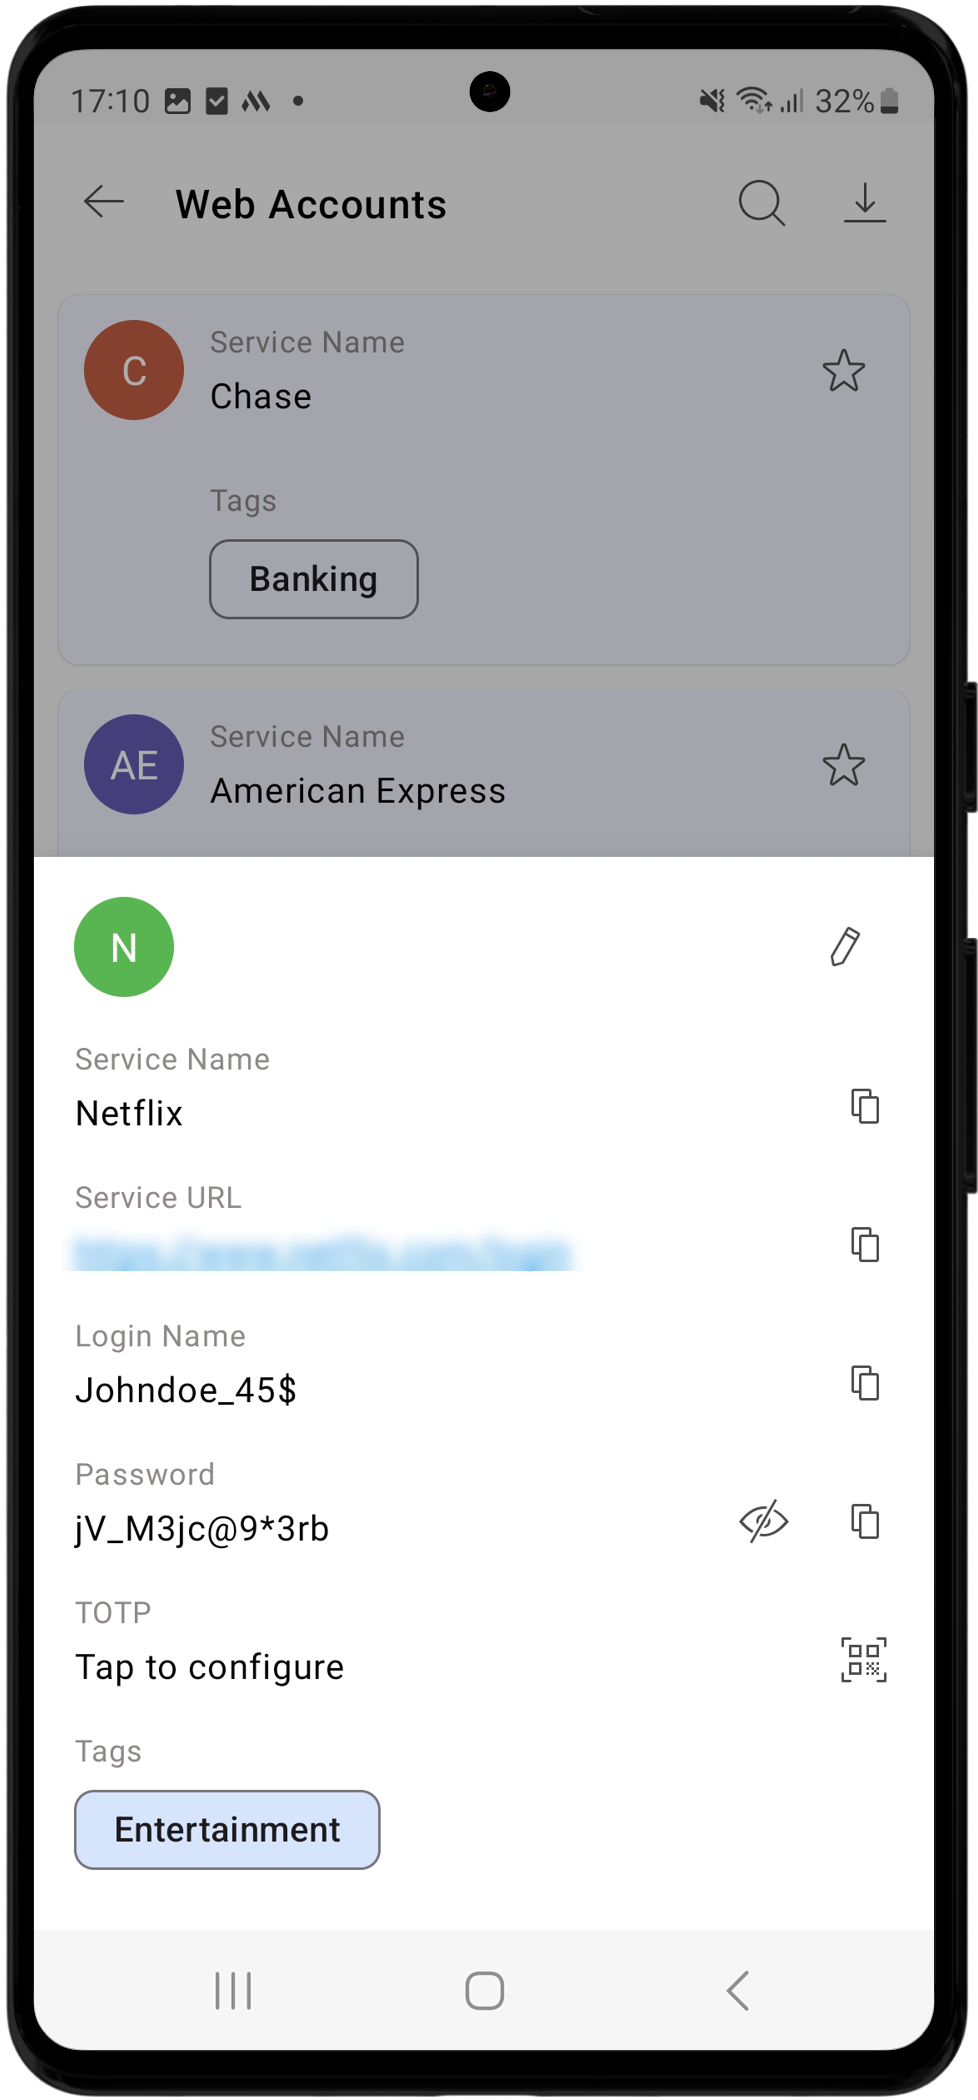
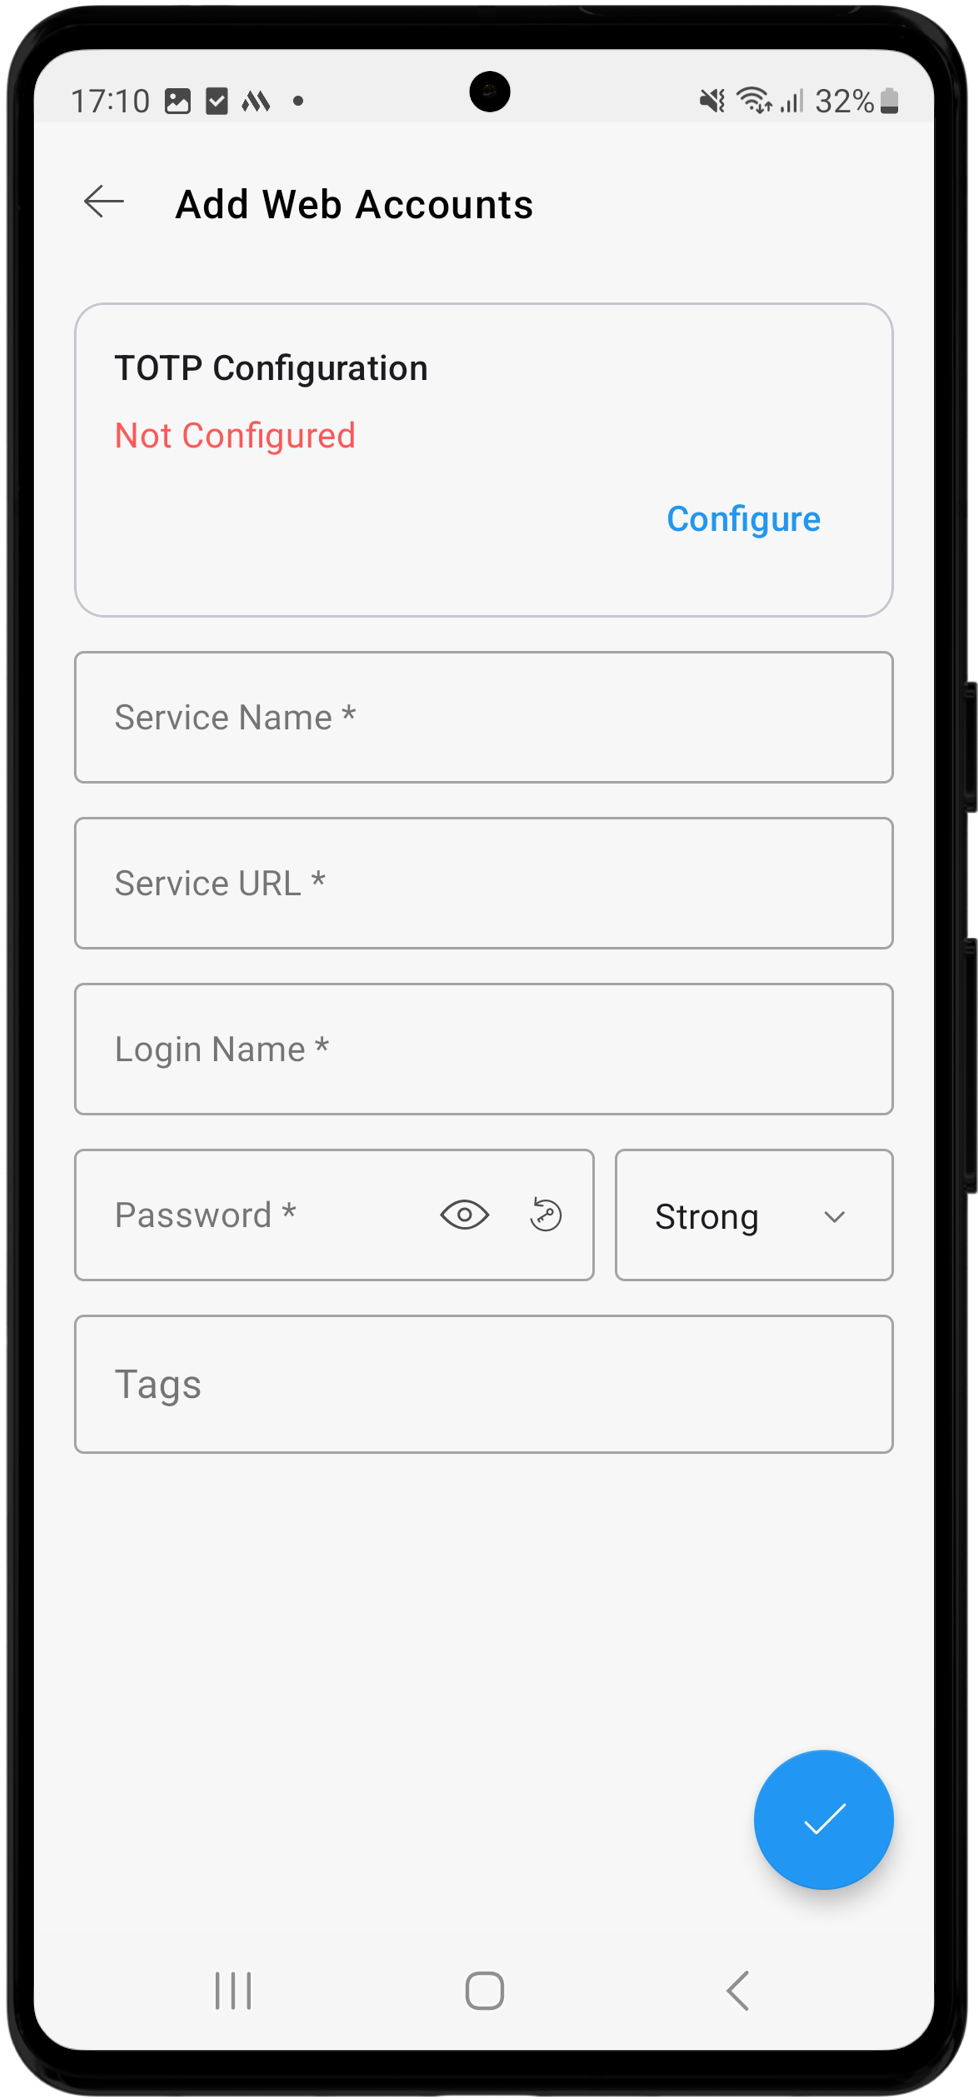
To exit the personal tab, tap the Lock icon at the top right corner. You will return to the home screen, and the personal tab will be locked. To access the data stored in the personal tab again, you must reenter the passphrase or authenticate using the configured Swift Login method.
5.9 Settings
The Settings menu on the PAM360 Android application offers a comprehensive collection of options organized into different categories, enabling you to customize and secure your mobile application experience based on your preference. Tap the Navigation Menu icon on the home page and select the Settings option to access the PAM360 mobile settings. On the Settings page, you can view and manage login options, customize various security and privacy settings, review the privacy policy, and modify general application settings.
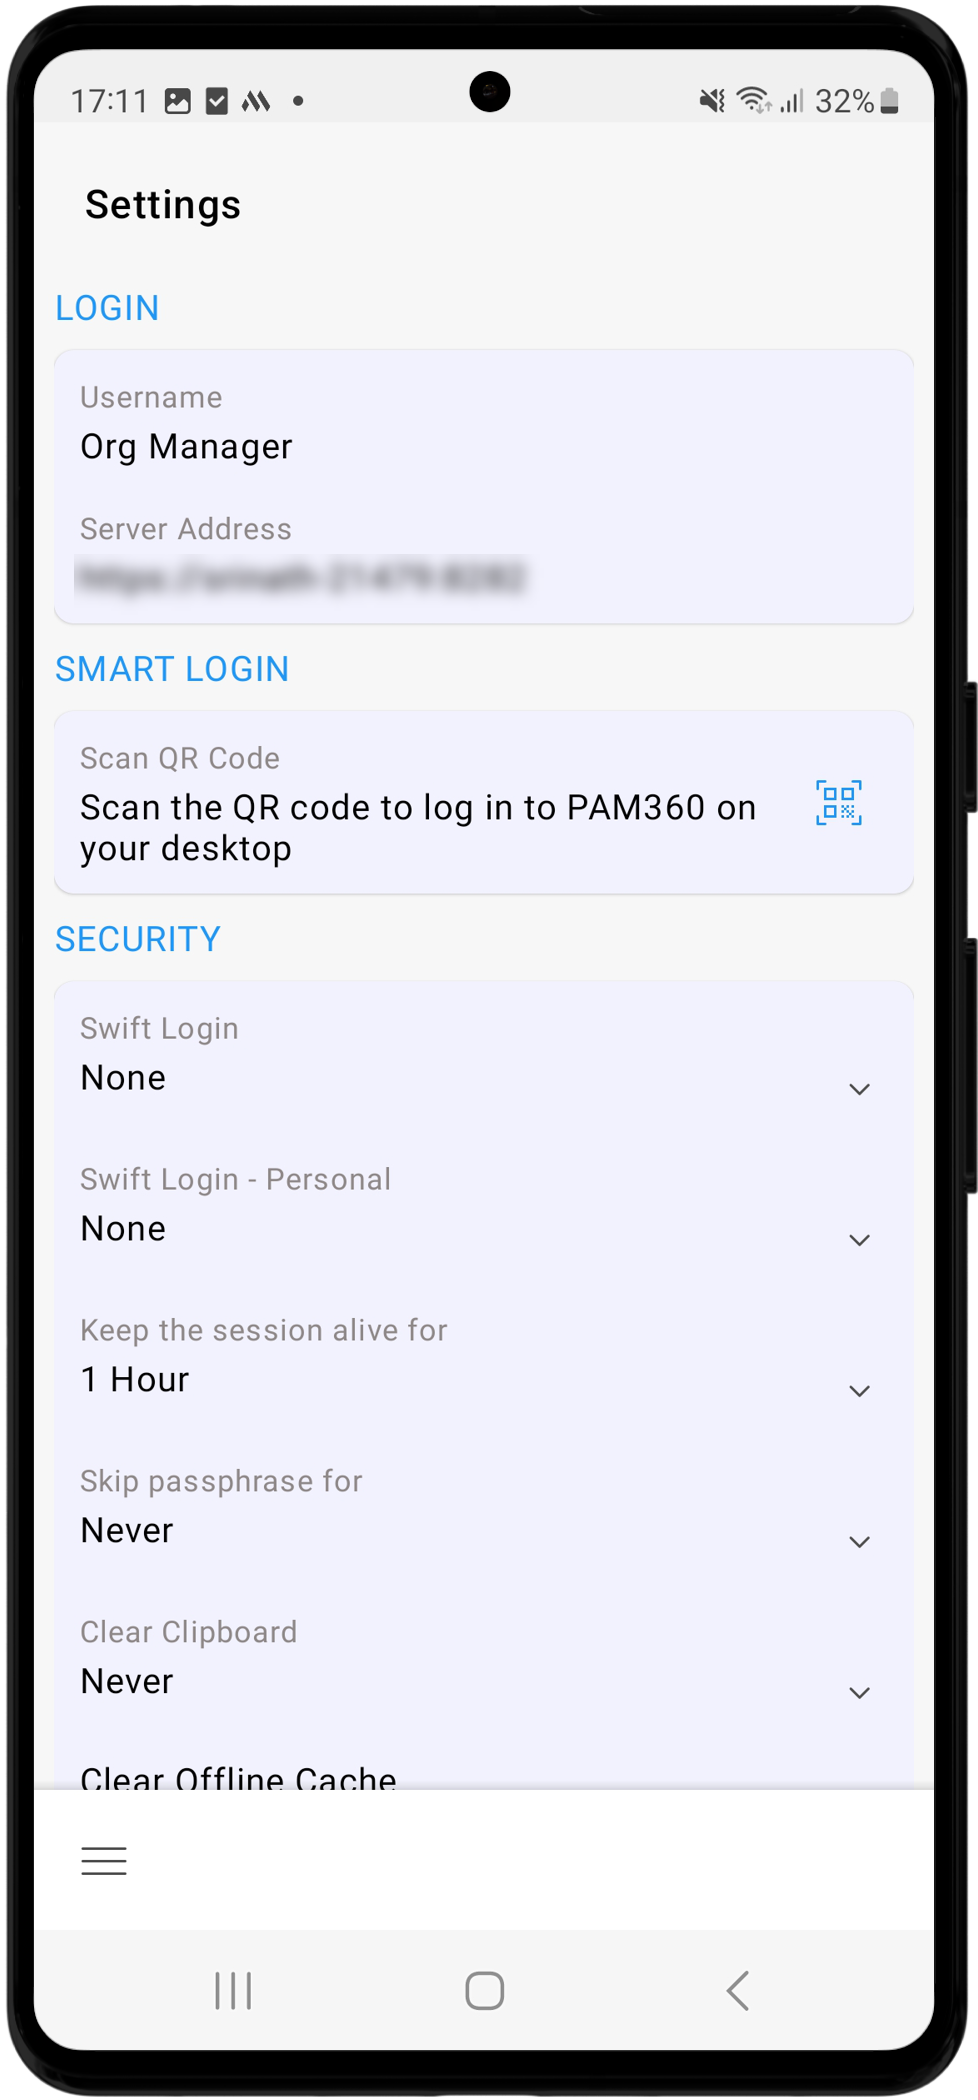
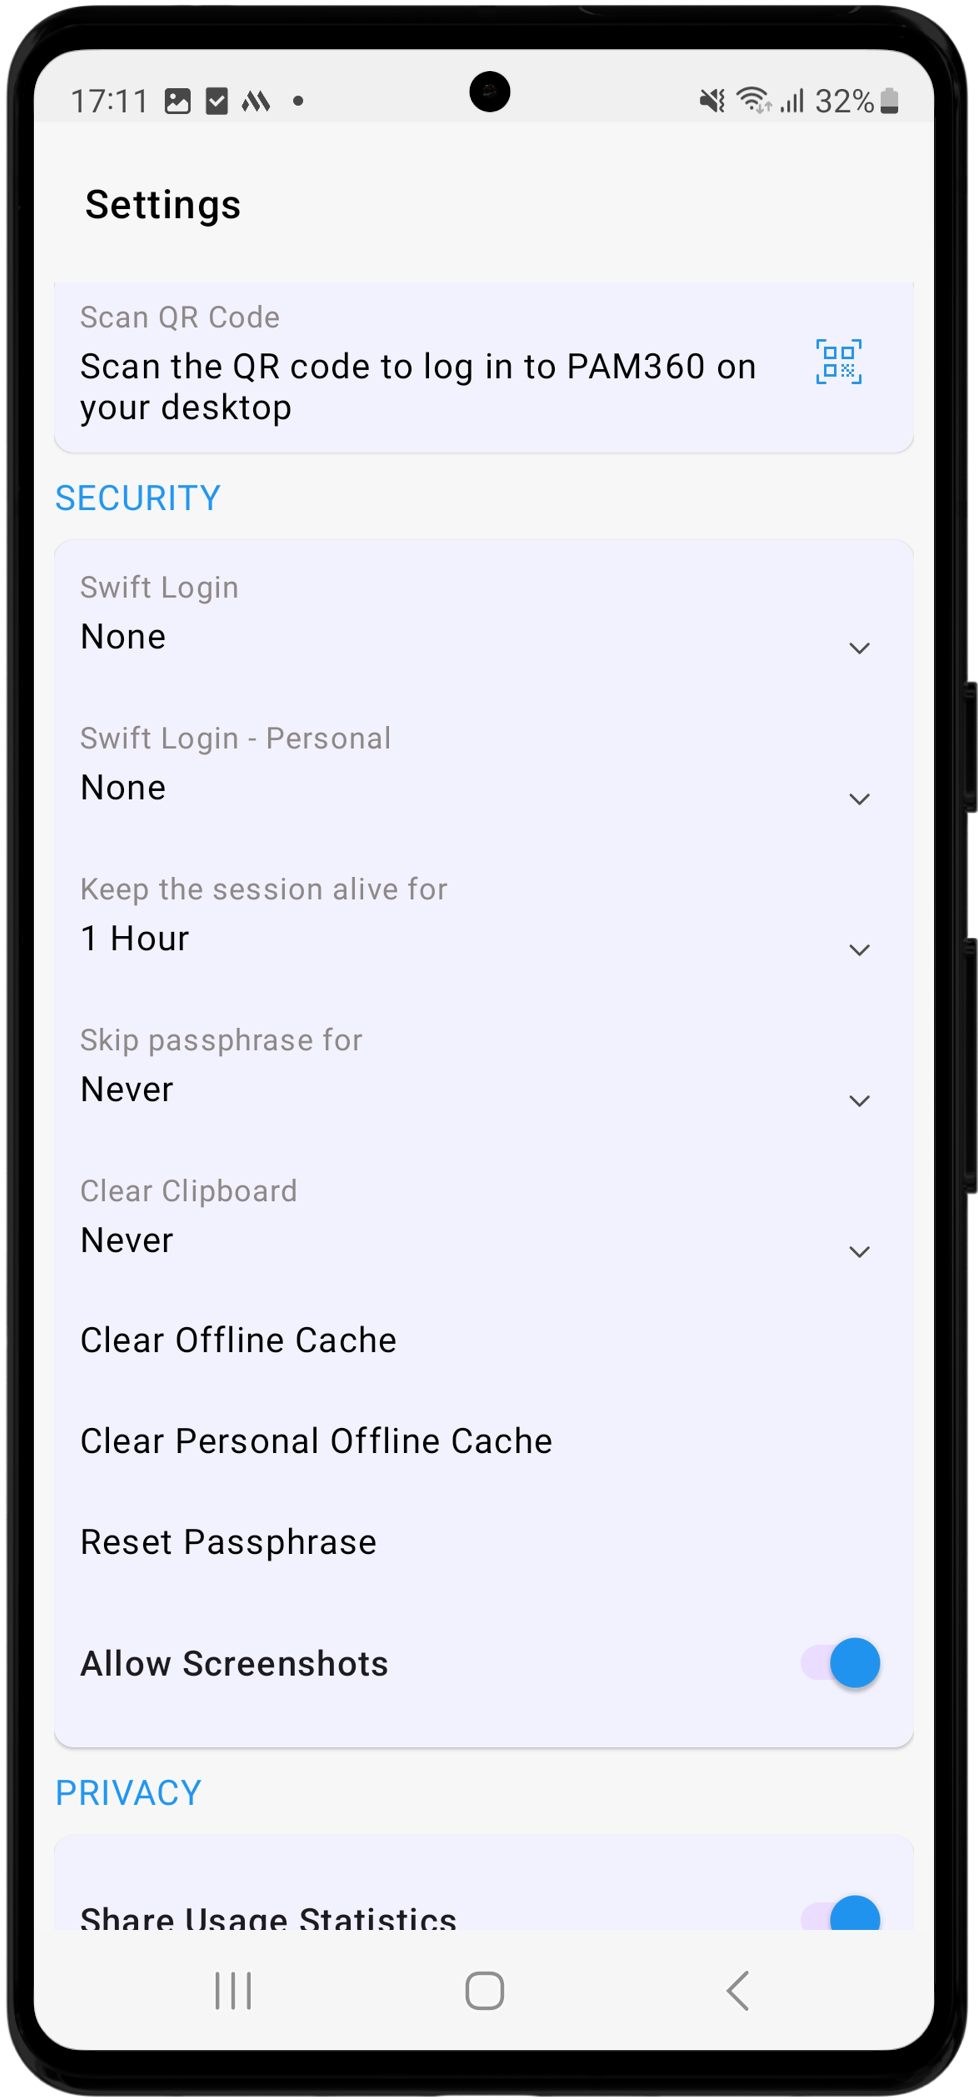
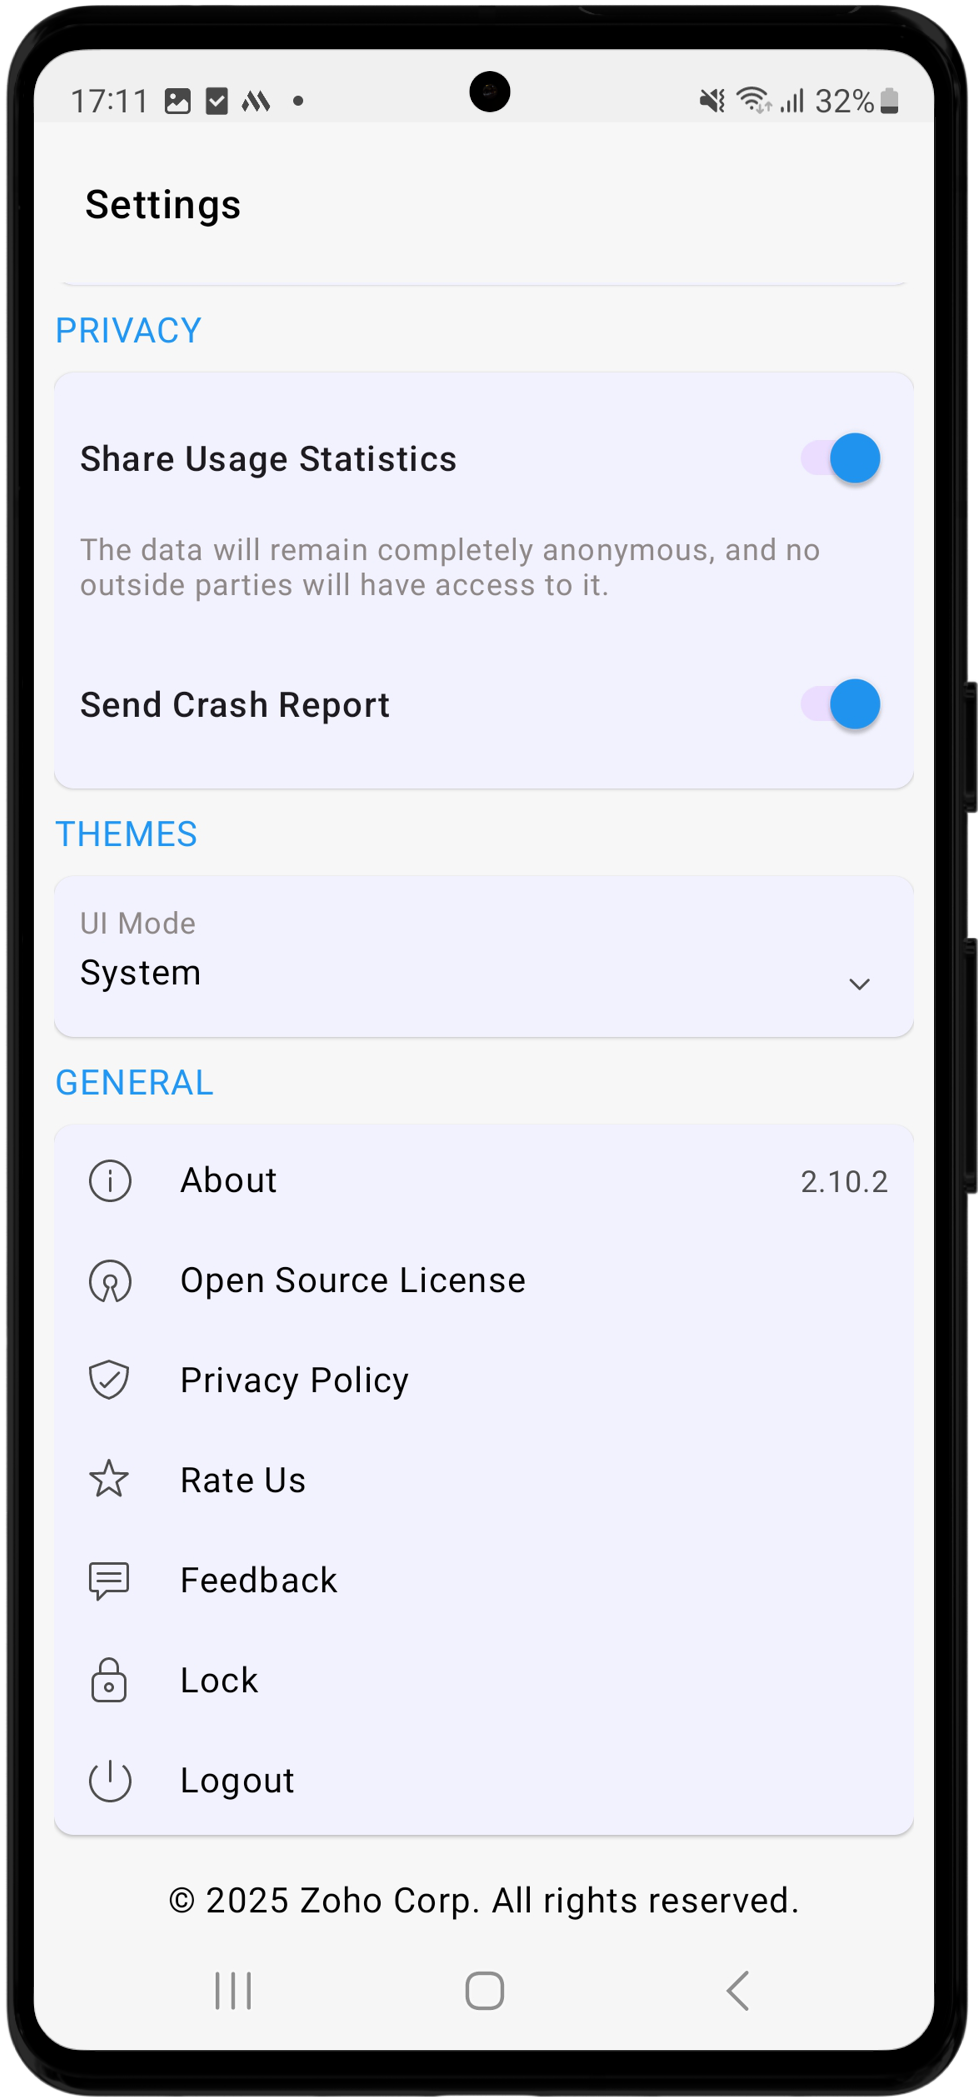
These settings are organized into various categories as shown below:
1. Login
- Username - The username of the PAM360 account you are currently logged into.
- Server Address - The address of the PAM360 server to which the PAM360 mobile application is connected.
Additional Detail
If the High Availability feature is enabled in your environment, the secondary server address is also displayed under the Login section.
2. Smart Login
The Smart Login feature in PAM360 offers a seamless way to access the PAM360 web interface by scanning a QR code displayed on the web login page using the PAM360 mobile application. This direct login method simplifies the process, providing password-less authentication and significantly reducing the effort required for web login while maintaining robust security. To log into the web application using the Smart Login option, follow these steps:
- Access the PAM360 web interface and click the Smart Login option on the login page.
- Tap the Scan the QR Code option on the Settings page in the PAM360 mobile application to open the QR scanner.
- Scan the QR code displayed on the web interface using the QR scanner on the mobile application.
- After authentication, you will be logged into your PAM360 account on the web interface.
Additional Detail
To access the PAM360 web interface using the Smart Login method, enable the Smart Login option on the Admin >> Customization >> General Settings >> User Management page.
3. Security
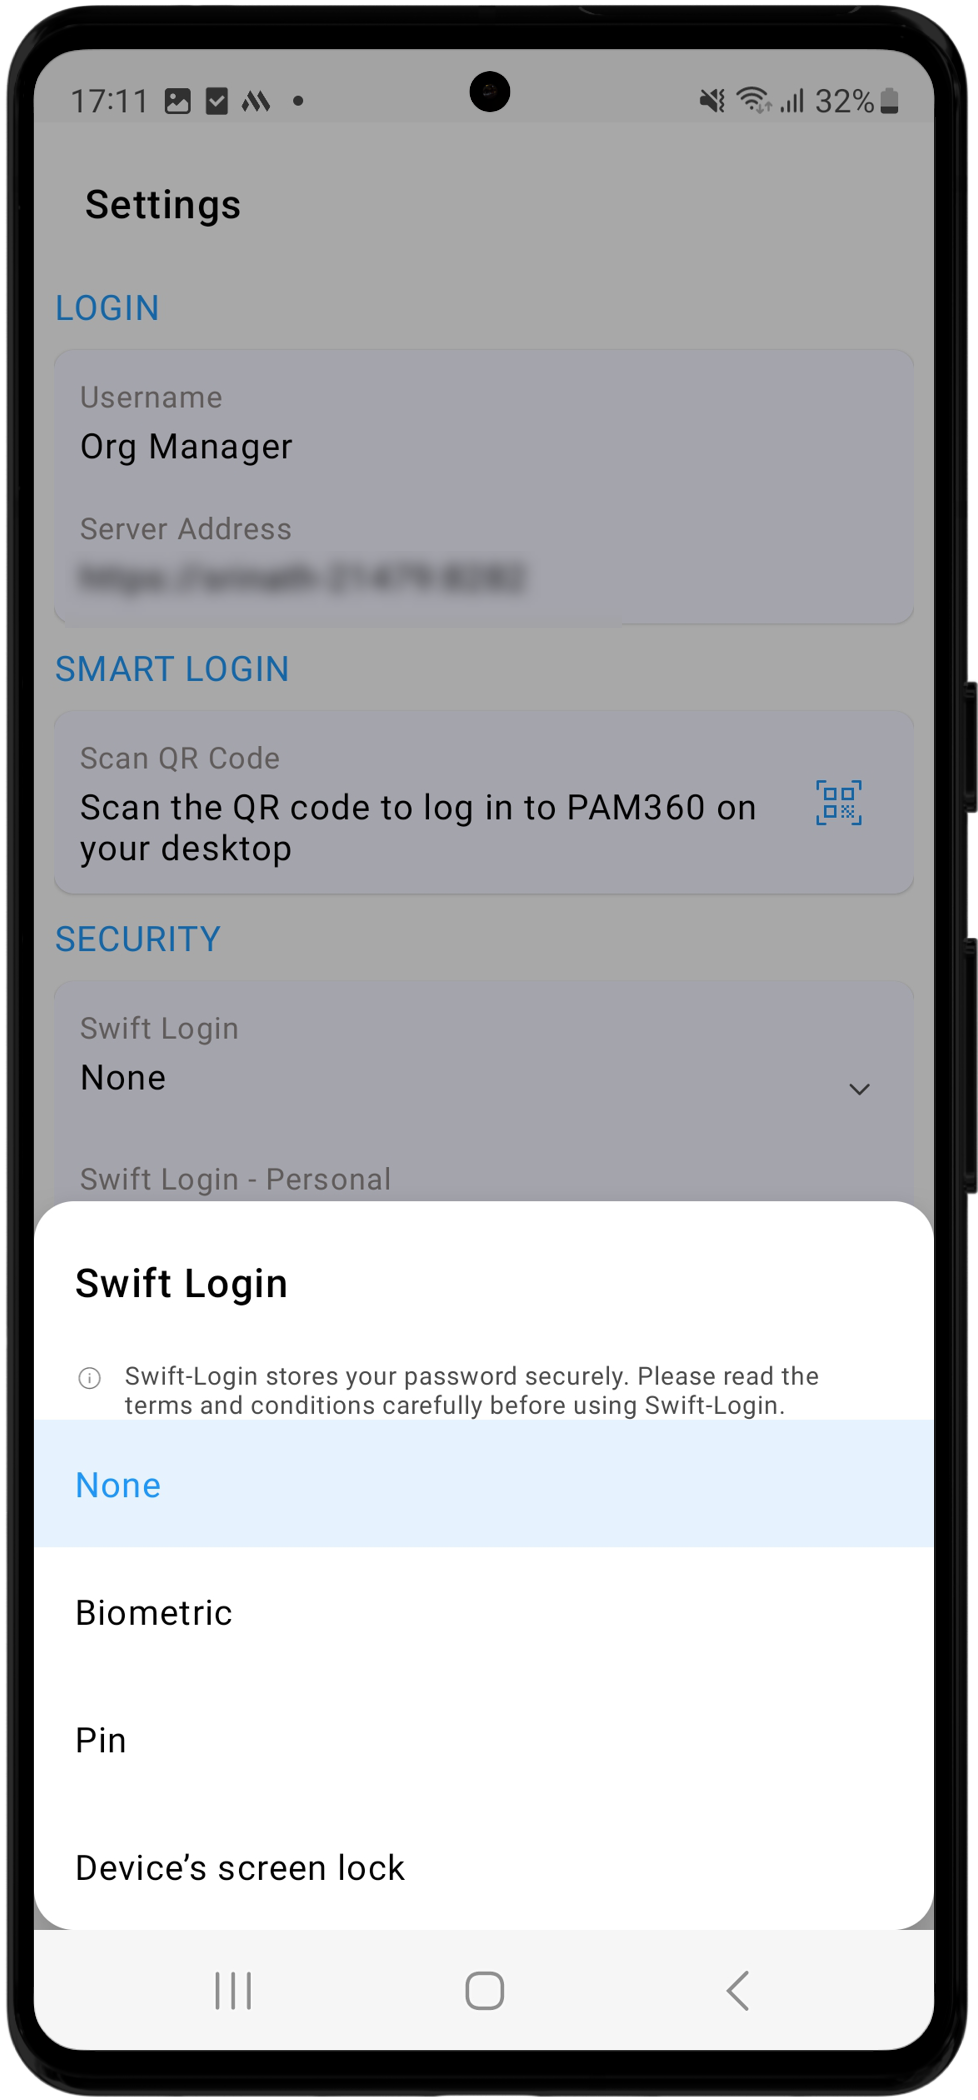
- Swift Login - Set up one of the three available authentication methods for Swift Login: Fingerprint, PIN, or Credentials. This option allows you to set up the desired authentication method to log into your mobile application.
- Swift Login (Personal) - Tap this option to set up/modify the Swift Login method to access the passwords stored in the Personal section.
Additional Detail
To enable fingerprint login in the mobile application, navigate to Admin >> Customization >> General Settings >> User Management and enable the Enable logins to mobile apps with fingerprint authentication option.
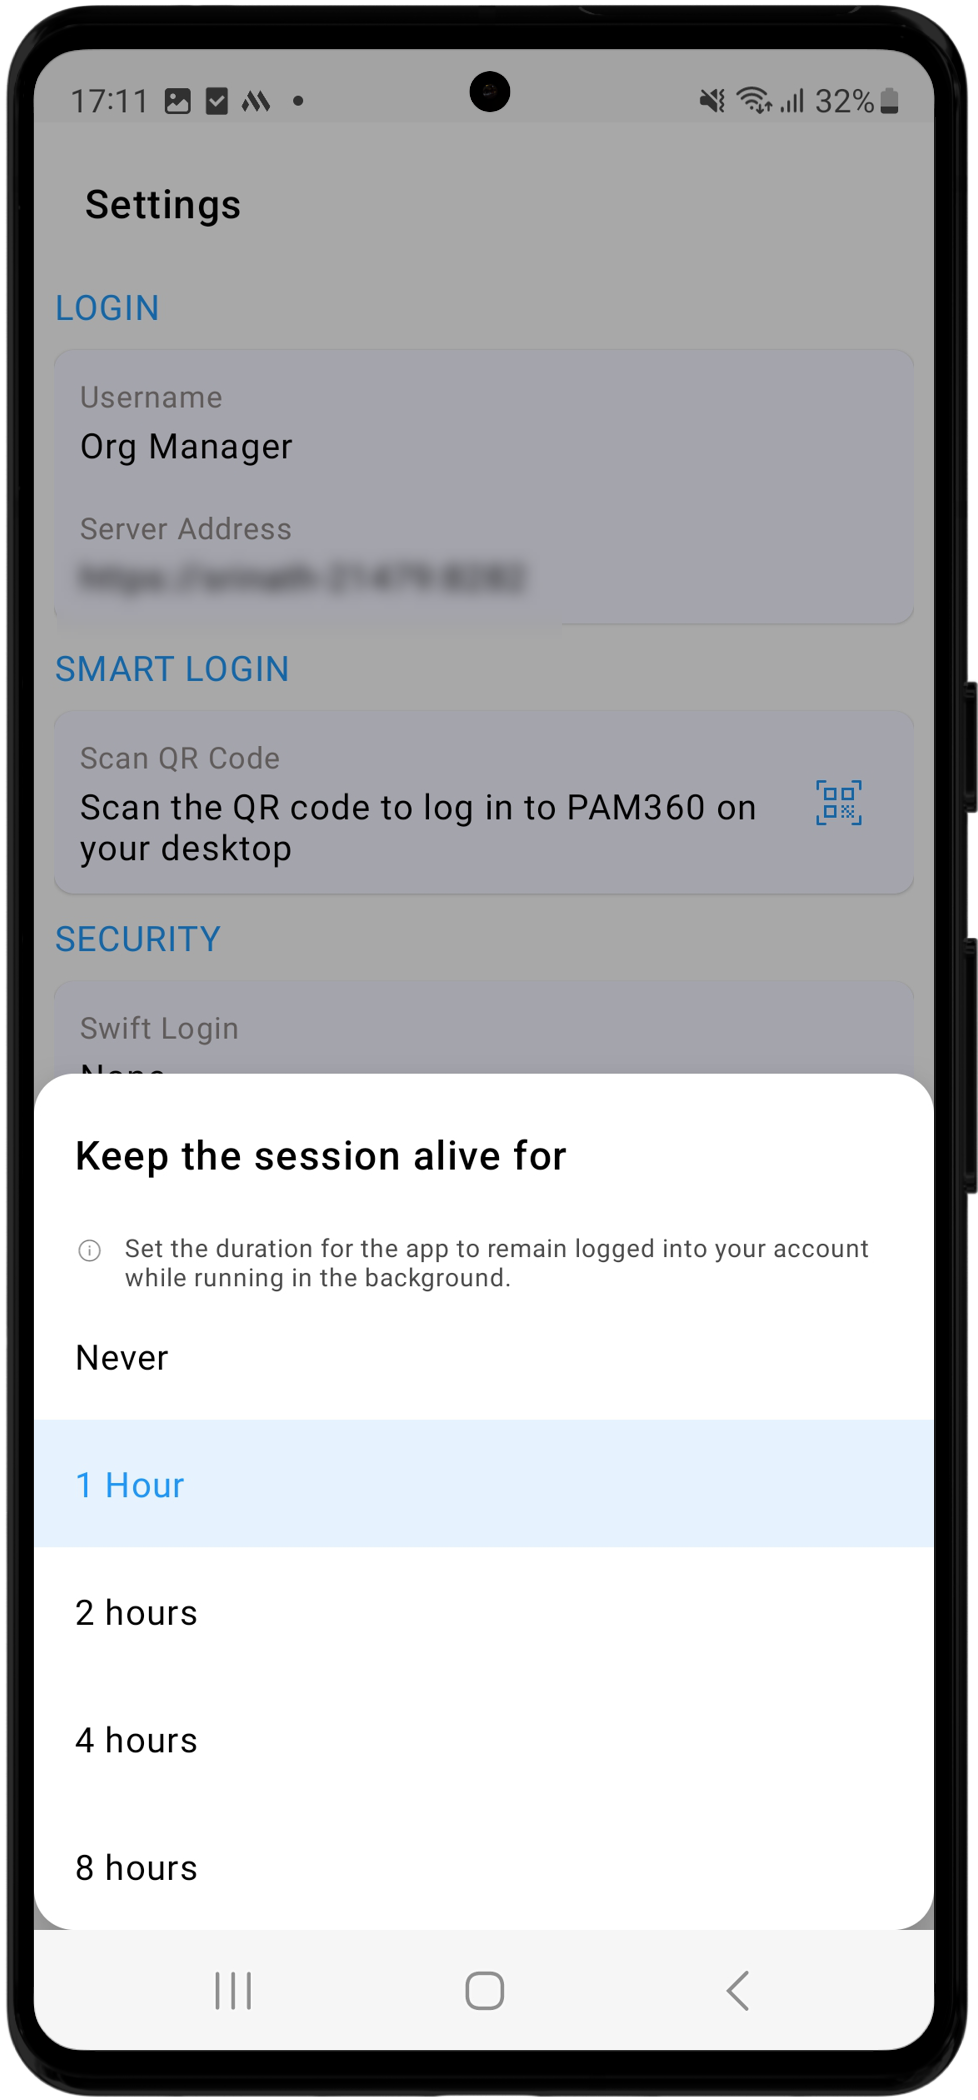
- Keep the session alive for - Set the duration for which the application should remain logged in the background. You can choose a time frame ranging from 1 to 8 hours, allowing seamless switching between PAM360 and other applications. Alternatively, select Never to ensure the application logs out immediately when it goes into the background.
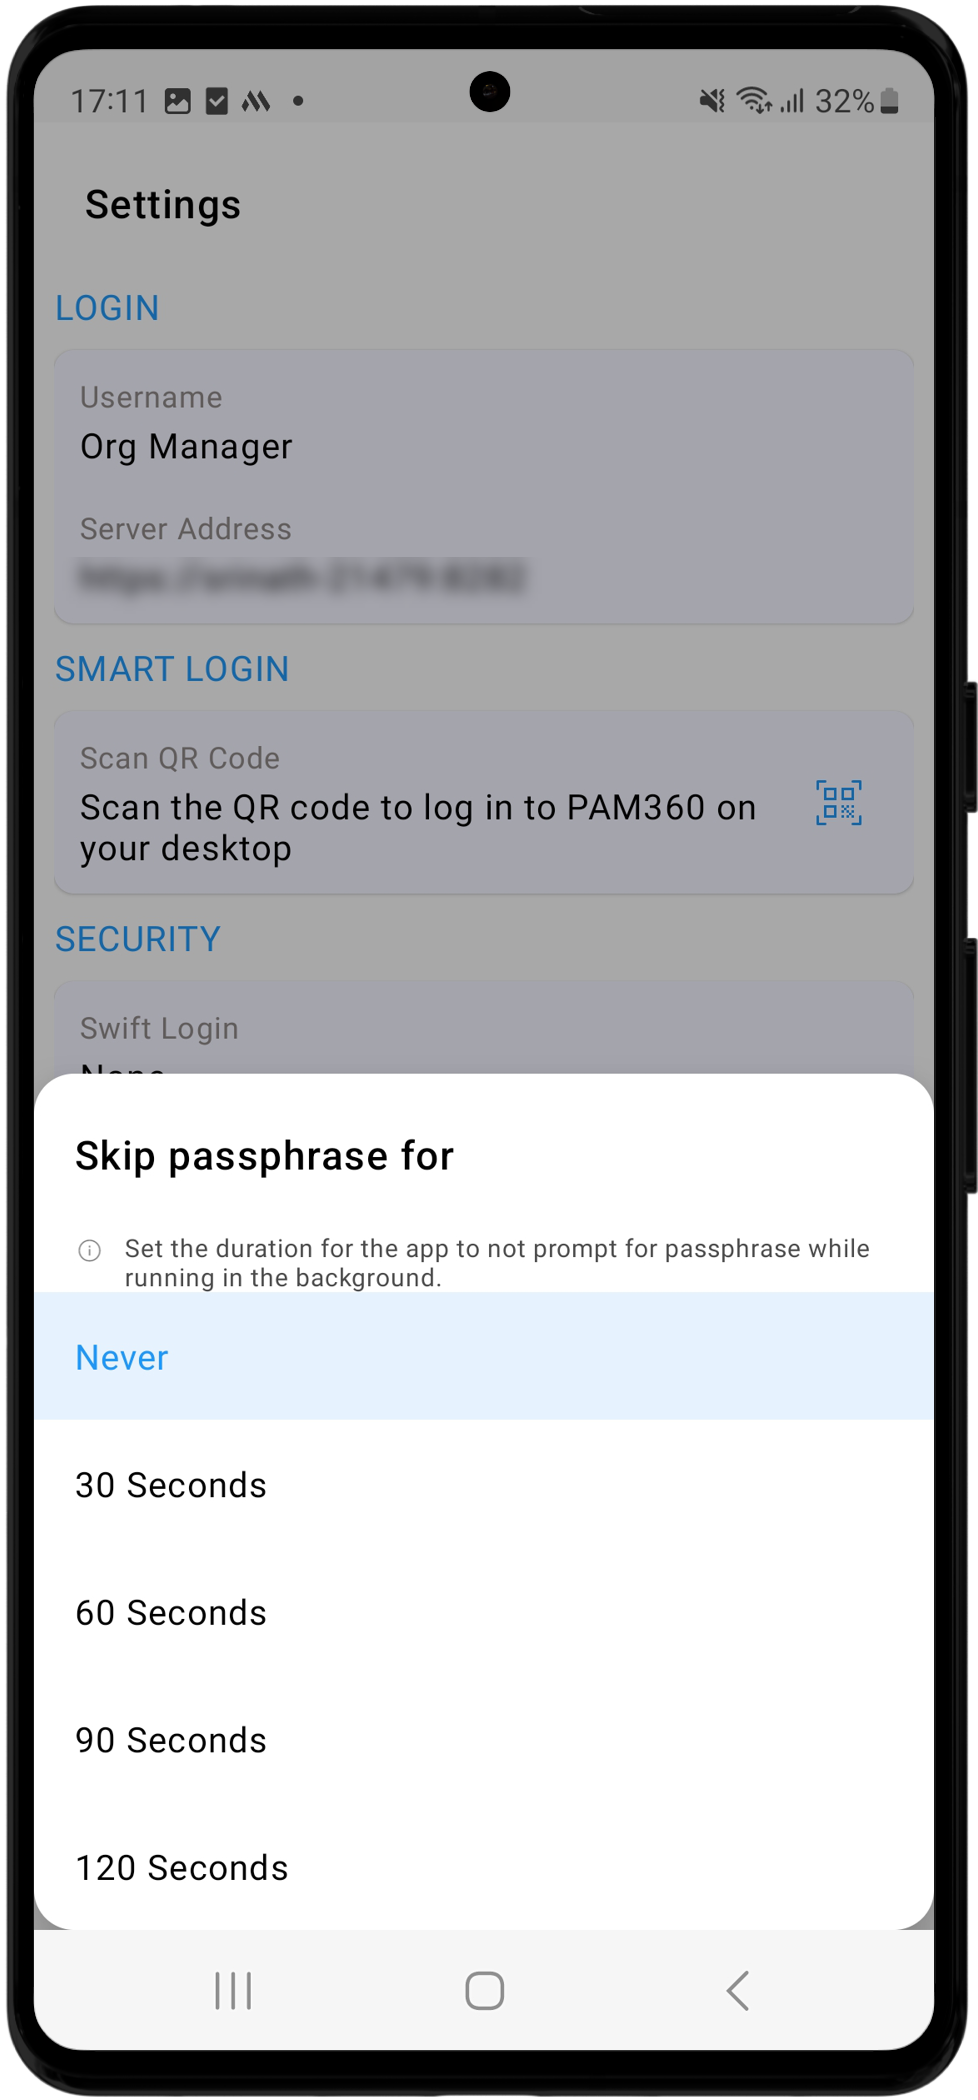
- Skip passphrase for - Set the duration for which the application should not prompt for your passphrase if you momentarily exit the app without logging out. You can select a period ranging from 30 to 120 seconds. Alternatively, select Never to always require a passphrase upon accessing the application.
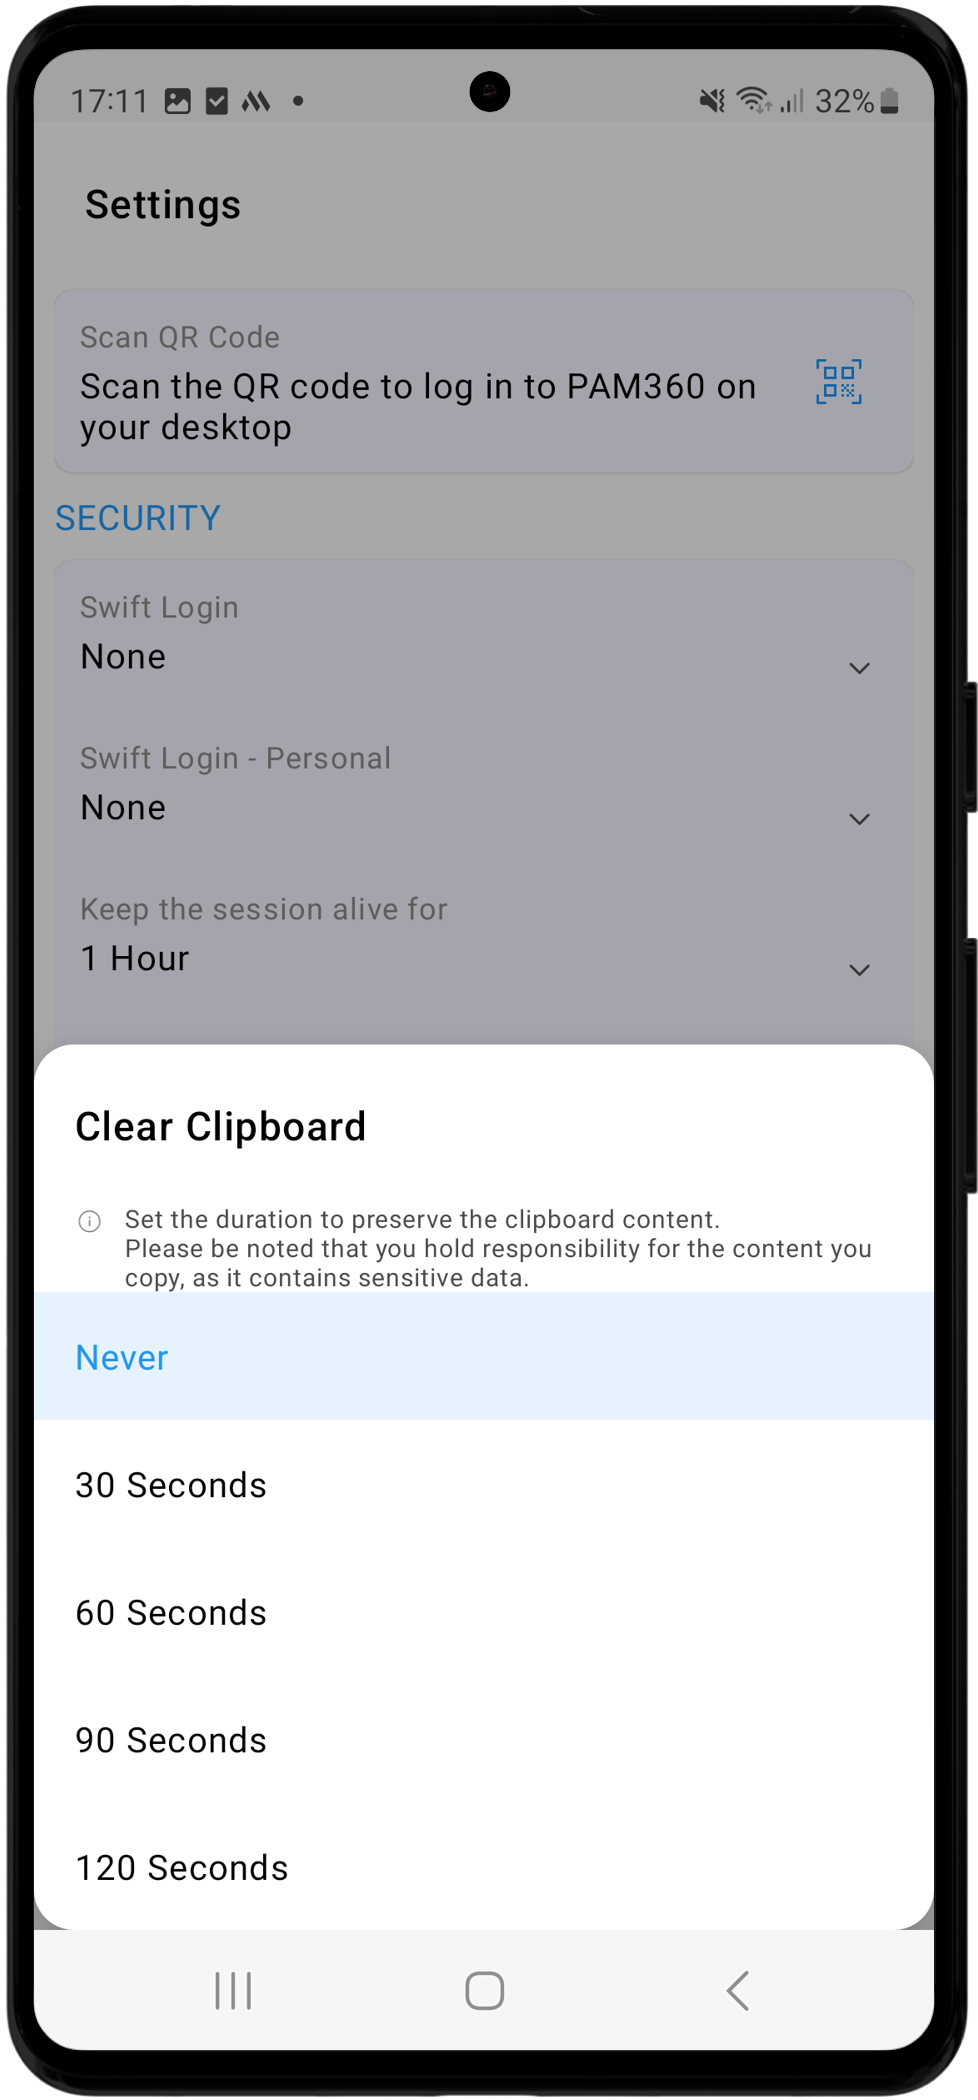
- Clear Clipboard - PAM360's Android application can temporarily store the data you copy within the app in the clipboard. To copy a password, tap the copy icon next to it. Use the Clear Clipboard option to set the duration for which copied content should remain in the clipboard, with options ranging from 30 to 120 seconds. Alternatively, select Never to avoid saving any copied content in the clipboard.
- Clear Offline Cache - Tap this option to clear all offline cache, deleting all your enterprise passwords saved for offline access.
- Clear Personal Offline Cache - Tap this option to clear all personal offline cache, deleting all your personal passwords saved for offline access.
- Reset Passphrase - Tap this option to reset your passphrase for mobile authentication. Note that resetting the passphrase will erase all cached data from this device, including enterprise and personal offline data.
- Allow Screenshots - Toggle this option to allow or deny permissions to capture screenshots within the application.
4. Privacy
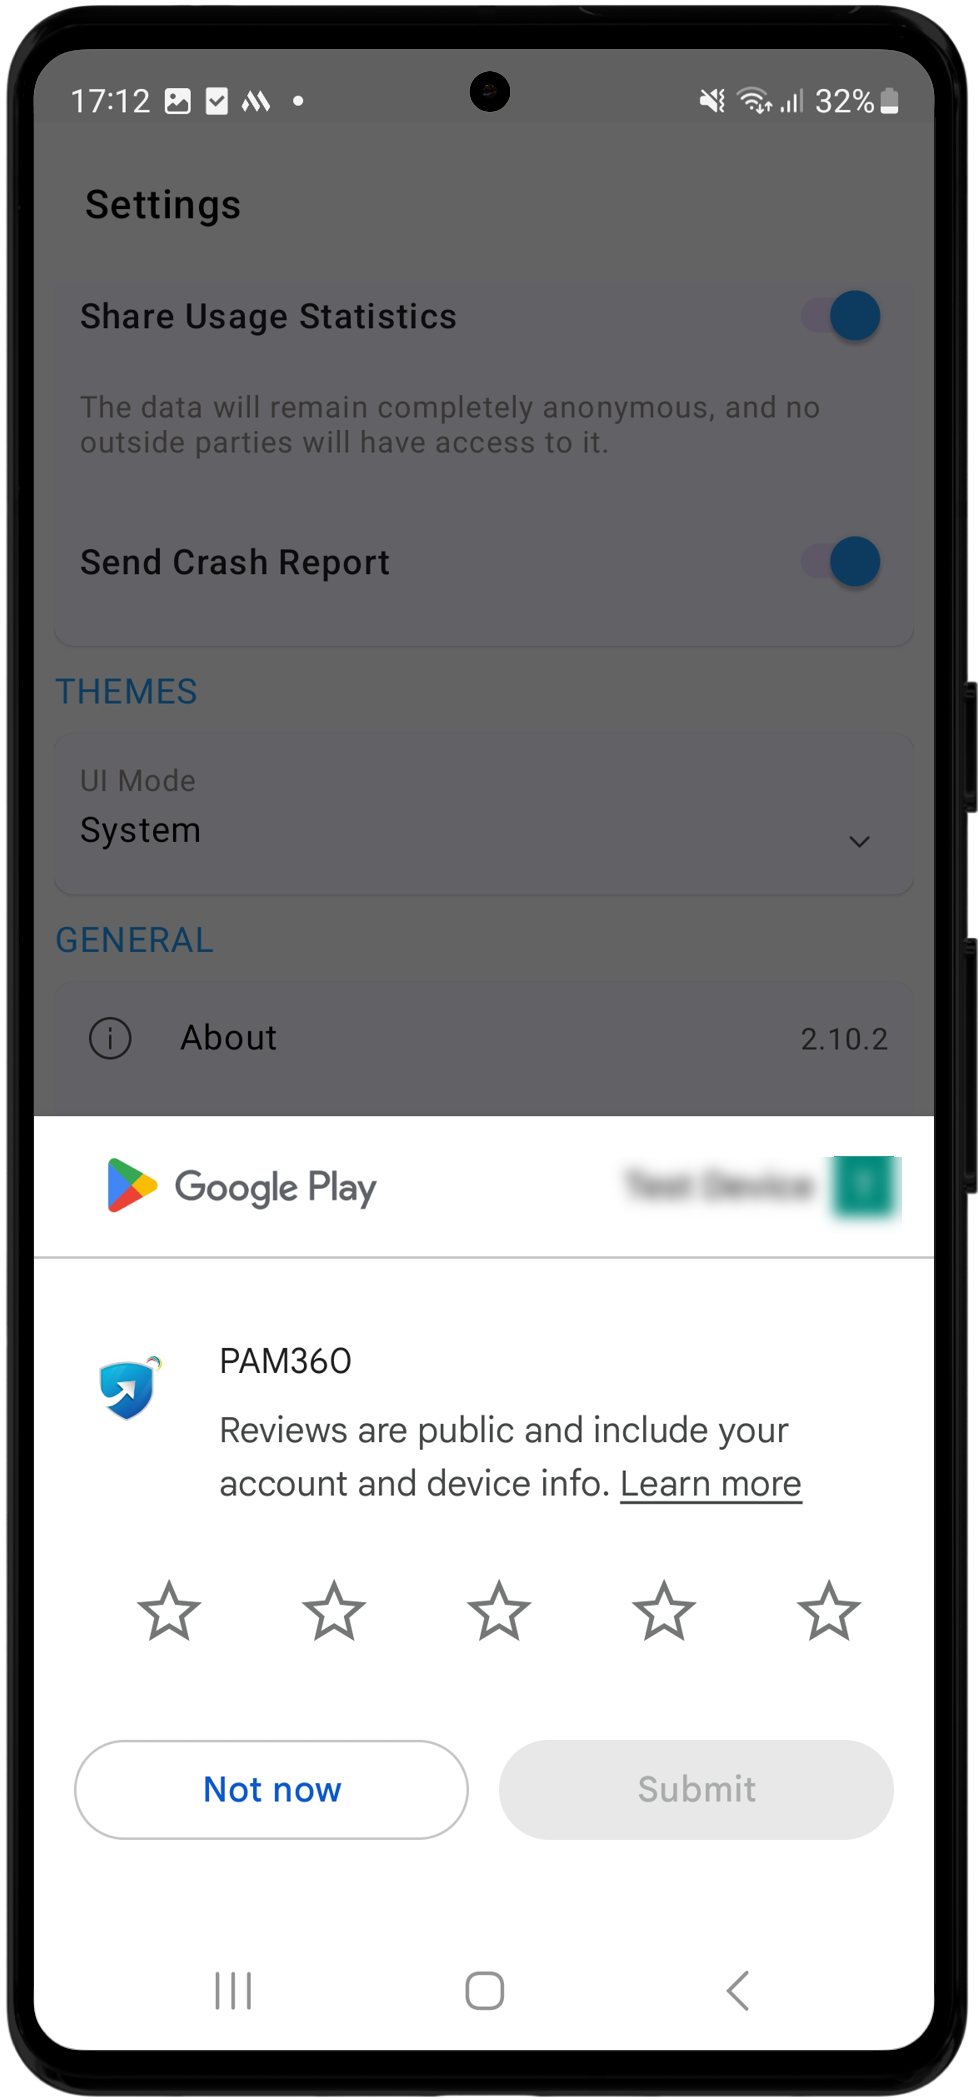
- Share Usage Statistics - Toggle this option to enable or disable the sharing of usage data with ManageEngine. This data provides insights into how frequently and extensively different features of the application are used. Such information is valuable for understanding user behavior, identifying potential pain points, and improving the application's performance and user experience based on the collected data.
- Send Crash Report - Toggle this option to enable or disable the sharing of crash reports with ManageEngine. These reports contain detailed system logs that capture the application's state at the time of a crash. By collecting and analyzing this data, we can identify the causes of crashes and address them in future updates, enhancing the application's stability and performance.
5. Themes (UI Mode) - Tap on this option to change the theme of the PAM360 Android application. You can choose between Light, Dark, or Battery Saver mode.
6. General
- About - Tap this option to view information about the mobile application, including the application version and build number.
- Privacy Policy - Review the privacy policy to understand how your data is collected, used, and protected.
- Rate Us - Tap this option to rate us on the Play Store.
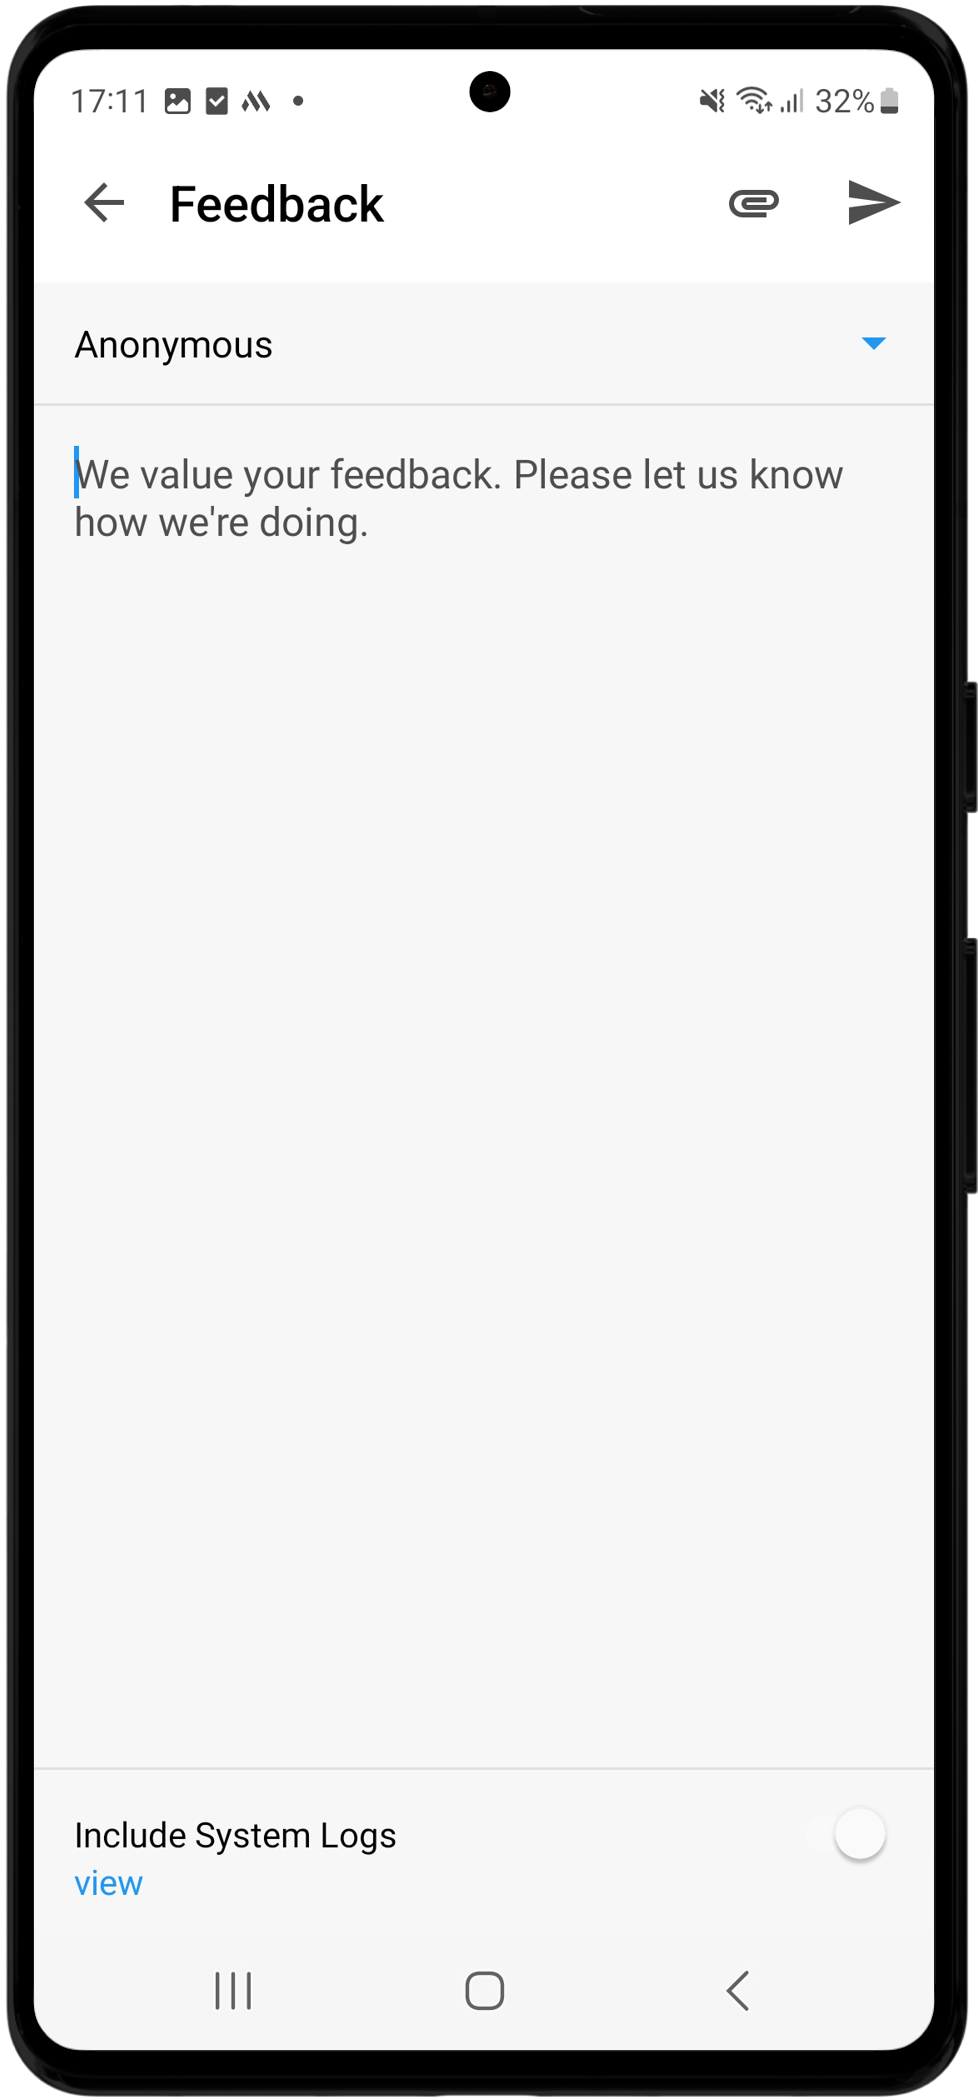
- Feedback - Share your thoughts and suggestions to help us improve the PAM360 mobile application. You can send your feedback anonymously or provide an email address to receive a response from us.
- Lock - Secure your session by locking the application, requiring authentication to unlock it.
- Logout - Tap this option to exit the current session and return to the login screen.
6. Secure Offline Mode
PAM360's Android application provides a secure offline mode that enables you to access the privileged passwords in your environment when you do not have access to the internet.
6.1 Setting Up Secure Offline Mode
To access passwords in offline mode, you must download the required passwords first. To download passwords for offline access, access the Enterprise Filters, and click the downward arrow beside the required list of passwords. The application allows you to download a group of passwords from the Enterprise section using the enterprise filters. Tap the download icon on the top-right corner of the screen on the desired filter view to download all the associated resources along with their corresponding accounts and passwords. For example, tapping the download icon on the Favorites view will download all resources and their respective accounts marked as favorites for offline access. Additionally, you can download resource groups and personal passwords for offline access.
Additional Detail
The Secure Offline Mode is enabled only when the Allow password caching for offline access via mobile option is enabled in the Admin >> Customization >>General Settings >> User Management page.
6.2 Switching Between Offline and Online Mode
Click the Wi-Fi icon on the top-right corner of the Navigation Menu to switch between offline and online modes. In offline mode, you can access previously cached passwords and other data. Offline mode is useful when you are not connected to the internet or while working with sensitive information without an active connection. In online mode, the application syncs with the PAM360 server, allowing you to access real-time data, request passwords, and manage resources as usual. Ensure you switch to online mode to update or retrieve the latest information from the PAM360 server.
7. Widgets
The PAM360 Android application provides two widget options: Smart Login and Password Access Requests. These widgets enable quick access to PAM360 functionalities, allowing users to log in seamlessly and manage access requests efficiently.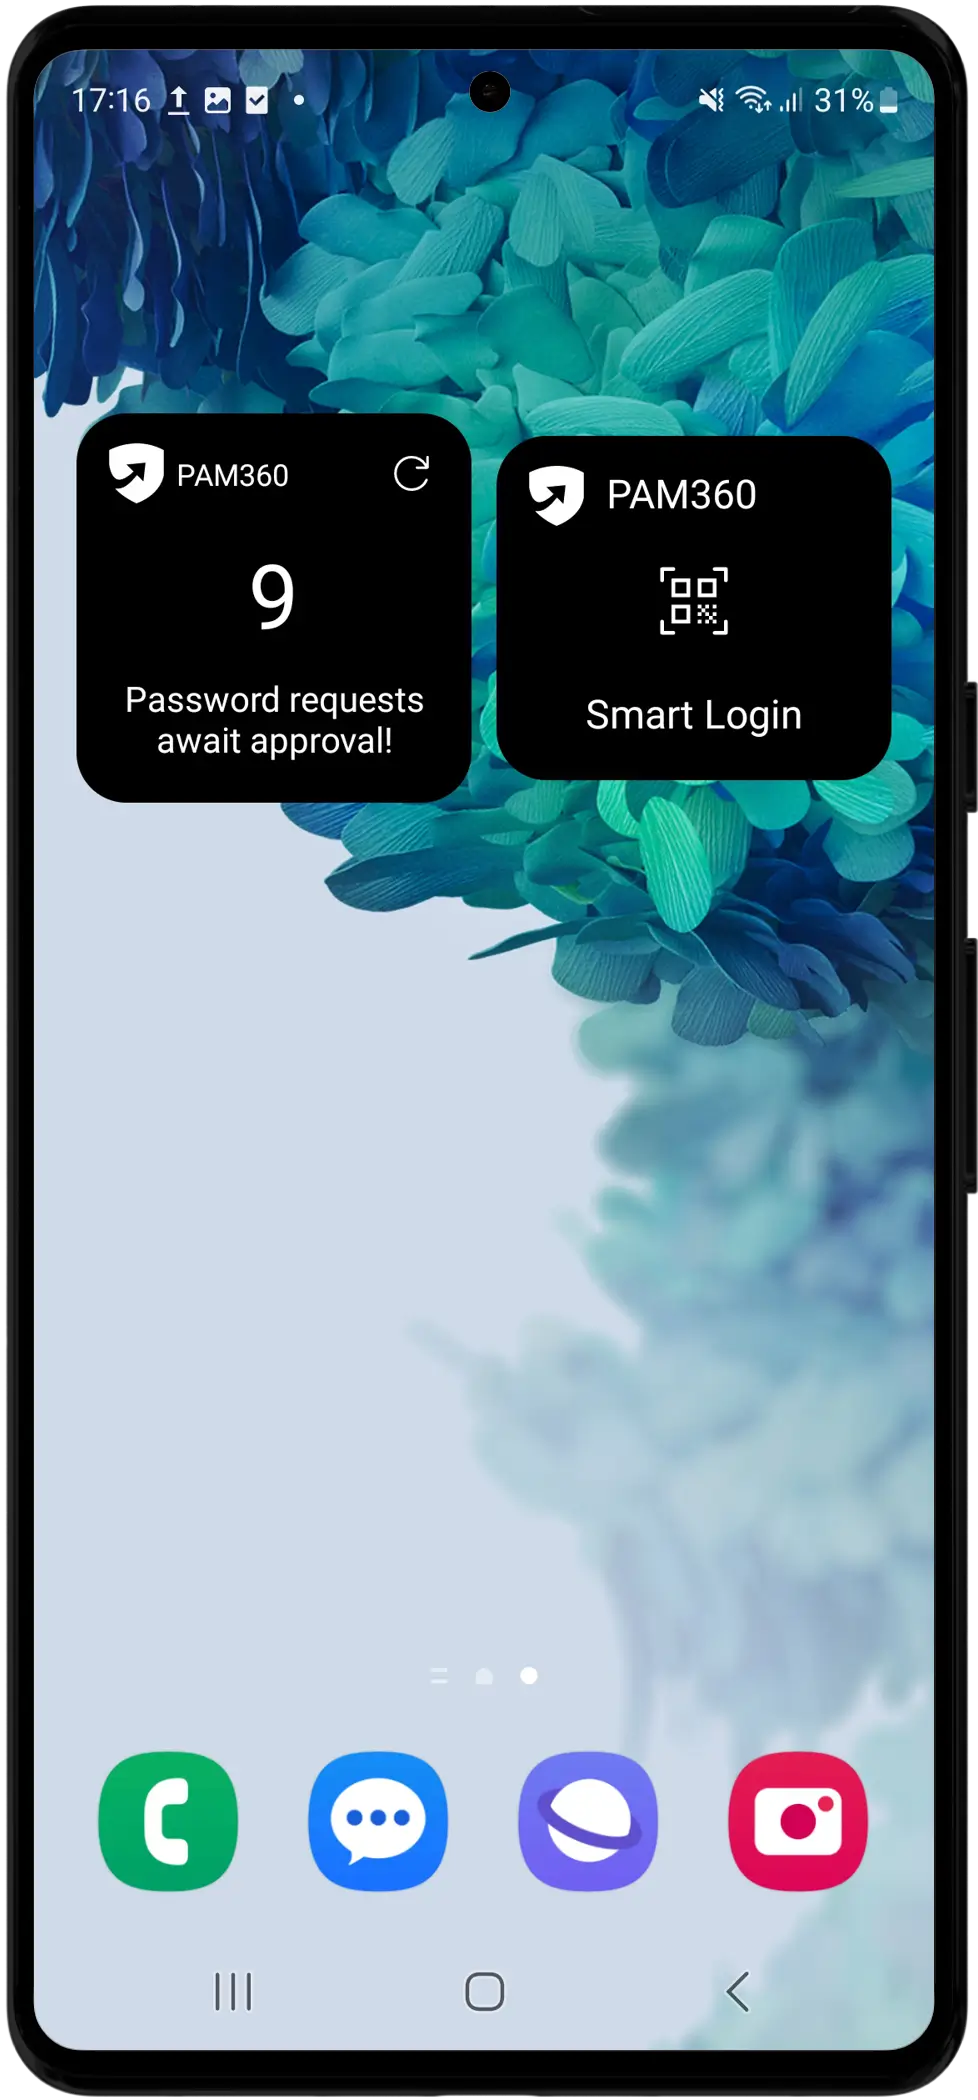
7.1 Password Access Request Widget
This widget displays the number of password access requests awaiting administrator approval. Tapping the widget opens the Password Access Requests section in the mobile application, where administrators can approve or reject pending requests.
- Quick Access - Instantly navigate to the approval section.
- Real-time Updates - Use the Refresh button to update the request count and stay informed.
7.2 Smart Login Widget
The Smart Login widget allows users to securely log into PAM360 via a web browser using the smart login feature.
- Tap the Smart Login widget.
- Enter your passphrase when prompted.
- Scan the QR code displayed on the PAM360 login page in your browser.
Once authenticated, you will be logged into PAM360 without manually entering credentials.
Additional Details
If you face any issues with the mobile application, get in touch with our technical support team.
- Toll Free Number: +1-888-720-9500
- Email ID: pam360-support@manageengine.com