Duo-Security Authentication
Duo-Security is a cloud based Two-Factor Authentication service that can be integrated with Access Manager Plus for Two-Factor Authentication.
Summary of Steps
- Configuring Access Manager Plus-Duo Security Integration
- Configuring Two-Factor Authentication in Access Manager Plus
- Enforcing Two-Factor Authentication for Required Users
- Connecting to Access Manager Plus Web Interface when TFA through Duo-Security is Enabled
- Enrolling while Logging in
1. Configuring Access Manager Plus - Duo Security Integration
If you have Duo Application in your environment, you can integrate it with Access Manager Plus and leverage the Duo security authentication as the second level of authentication. This section explains the configurations involved.
- Sign up for a Duo account.
- Log in to the Duo Admin Panel and add a new application.
- Click Protect an Application. The Protect an Application page lists the applications you can protect with Duo.
- Search for Web SDK and click Protect This Application.
- Fill the required fields and Save.
- While saving, take a note of integration key, secret key and API hostname which must be provided in Access Manager Plus GUI (in step 2 below).
- Enroll your users with Duo and start authenticating.
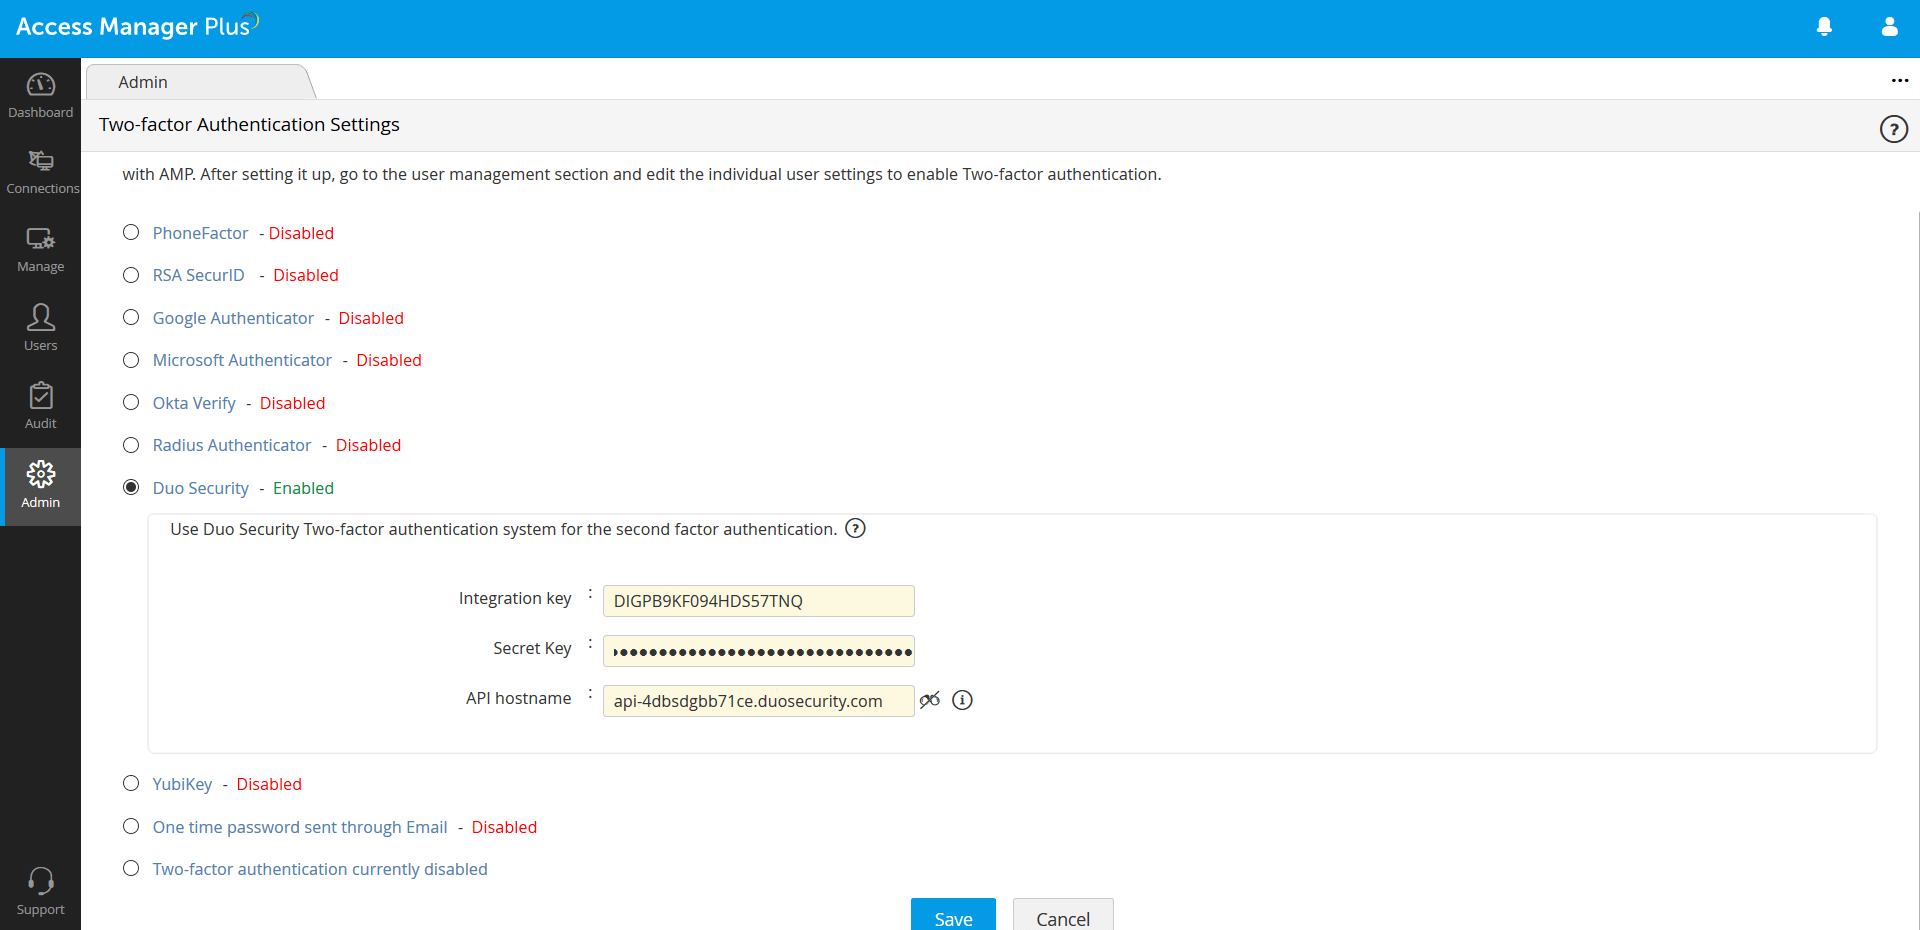
2. Configuring Two-Factor Authentication in Access Manager Plus
- Navigate to Admin >> Authentication >> Two-factor Authentication.
- In the UI that opens up, choose the option Duo Security.
- Provide the following details that you noted down in step 1:
- Integration key
- Secret key
- API hostname
- Click Save.
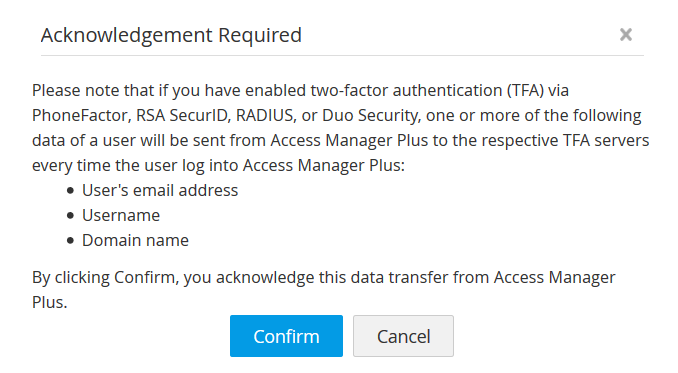
- Click on Confirm to enforce Duo Security as the second factor of authentication.
3. Enforcing Two-Factor Authentication for Required Users
- Once you confirm Duo Security as the second factor of authentication in the previous step, a new window will prompt you to select the users for whom Two-Factor Authentication should be enforced.
- You can enable or disable Two-Factor Authentication for a single user or multiple users in bulk from here. To enable Two-Factor Authentication for a single user, click on the Enable button beside their respective username. For multiple users, select the required usernames and click on Enable at the top of the user list. Similarly, you can also Disable Two-Factor Authentication from here.
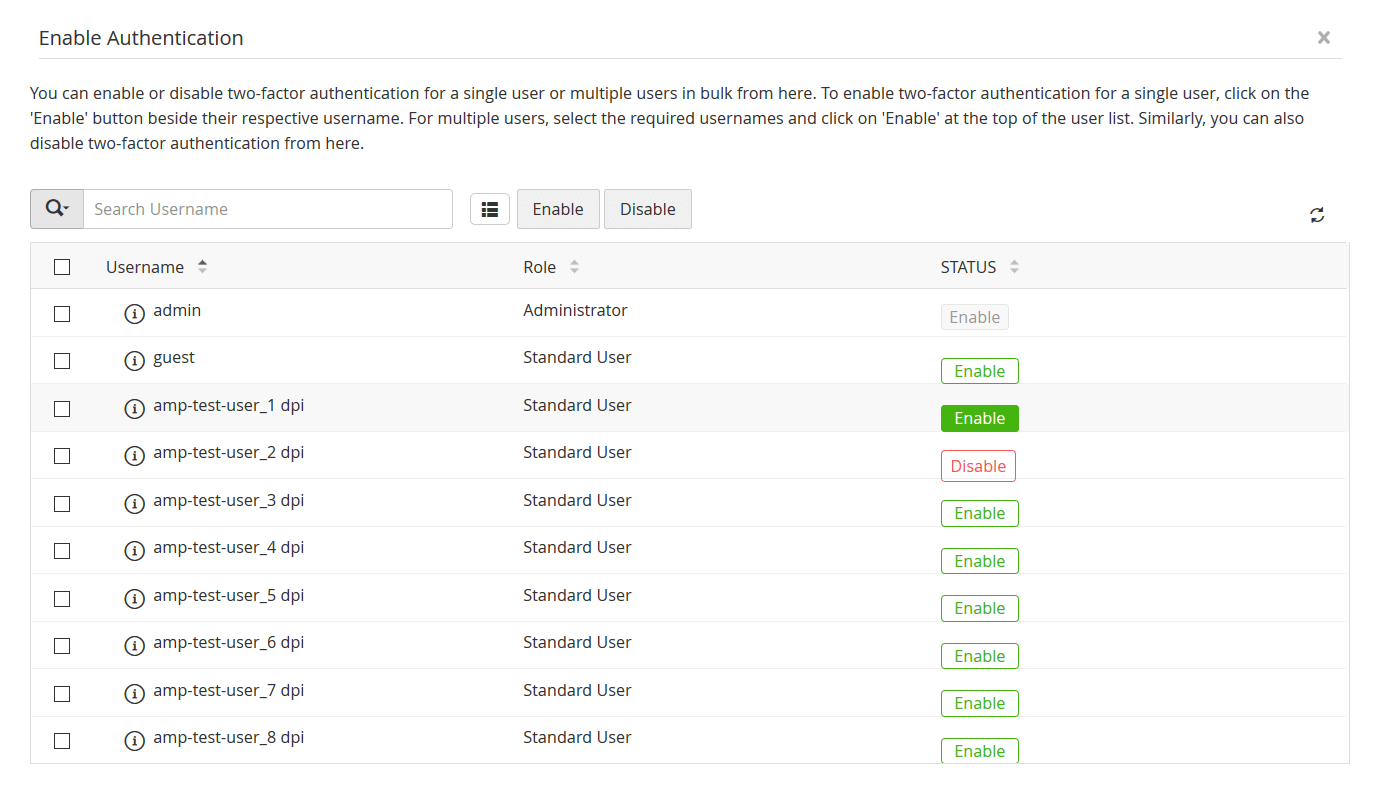
- You can also select the users later by navigating to Users >> More Actions >> Two-Factor Authenitcation.
4. Connecting to Access Manager Plus Web Interface when TFA through Duo-Security is Enabled
The users for whom Two-Factor Authentication is enabled will have to authenticate twice successively. As explained above, the first level of authentication will be through the usual authentication. That is, the users have to authenticate through Access Manager Plus's local authentication or AD/LDAP authentication. Depending on the type of TFA chosen by the administrator, the second level of authentication will differ as explained below:
- Upon launching the Access Manager Plus web-interface, the user has to enter the Username and Local Authentication or AD/LDAP Password to log in to Access Manager Plus and click Login.
- Once the first level of authentication succeeds, Access Manager Plus will prompt you to choose an authentication method out of the three options offered by Duo.
- You can choose Duo Push as an authentication method.
- Tap Approve on the Duo Push request sent to your phone.
- You can click the Call me option, upon which you will get a call on your phone. Answer and press a key to authenticate.
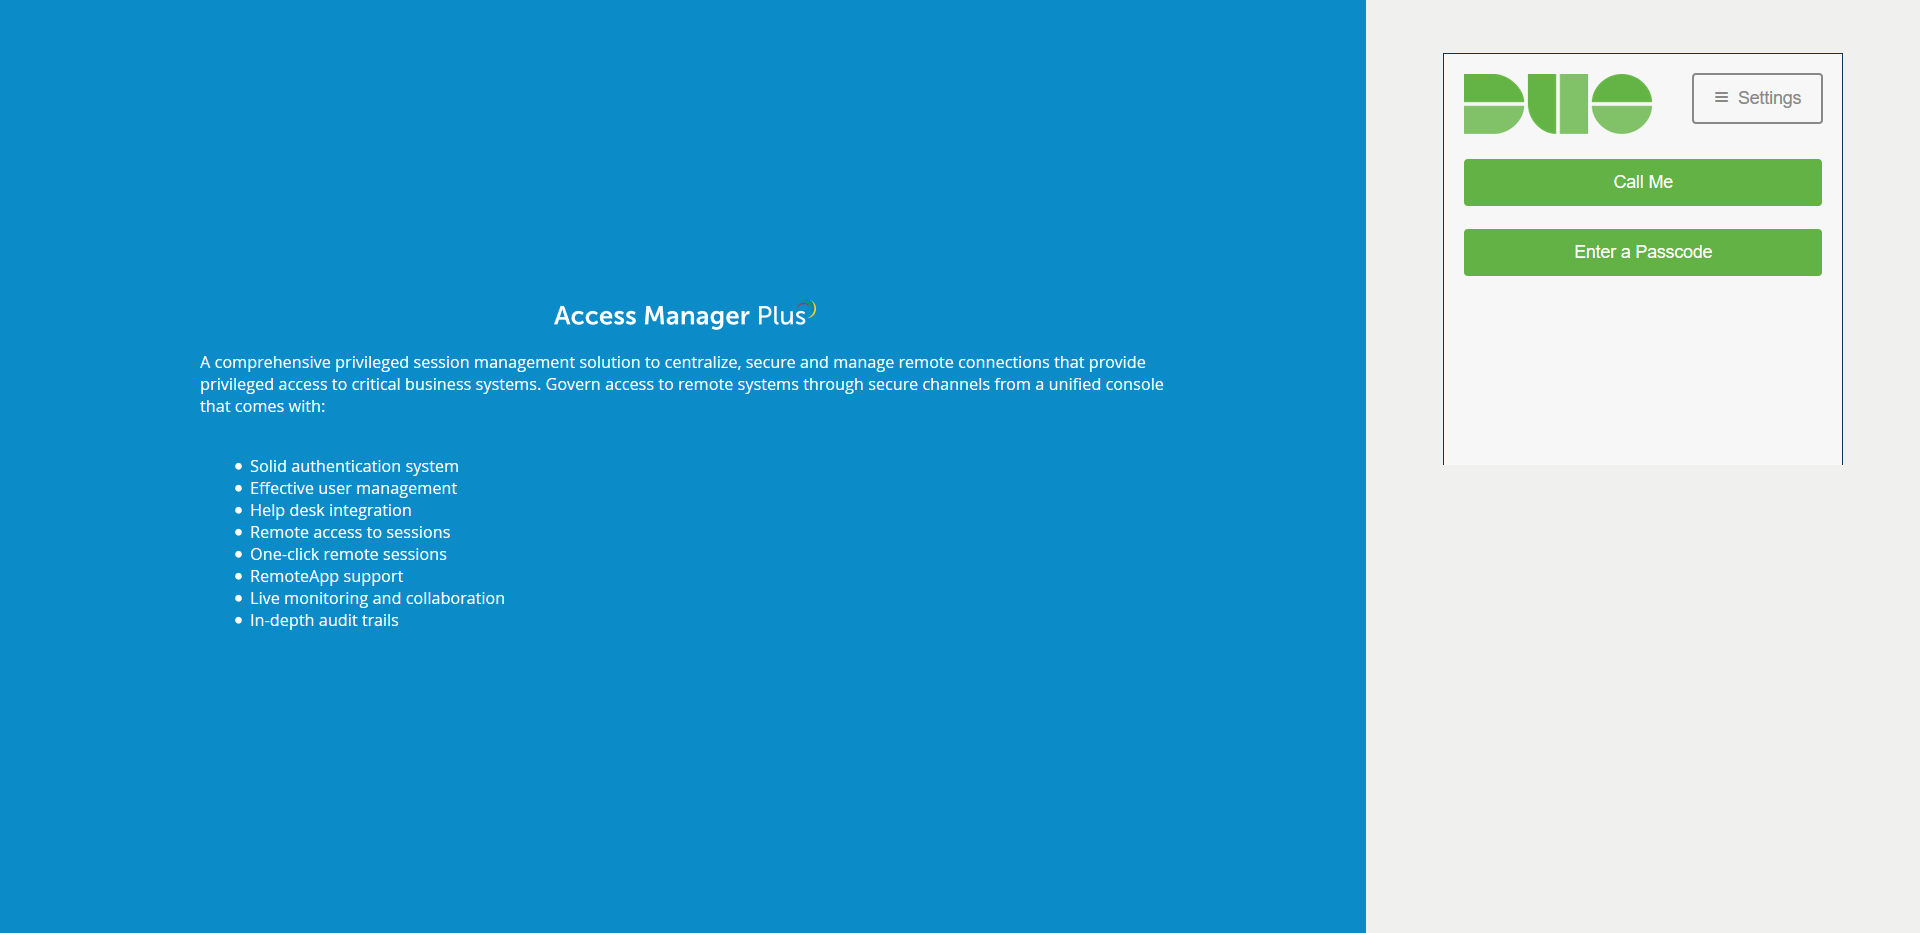
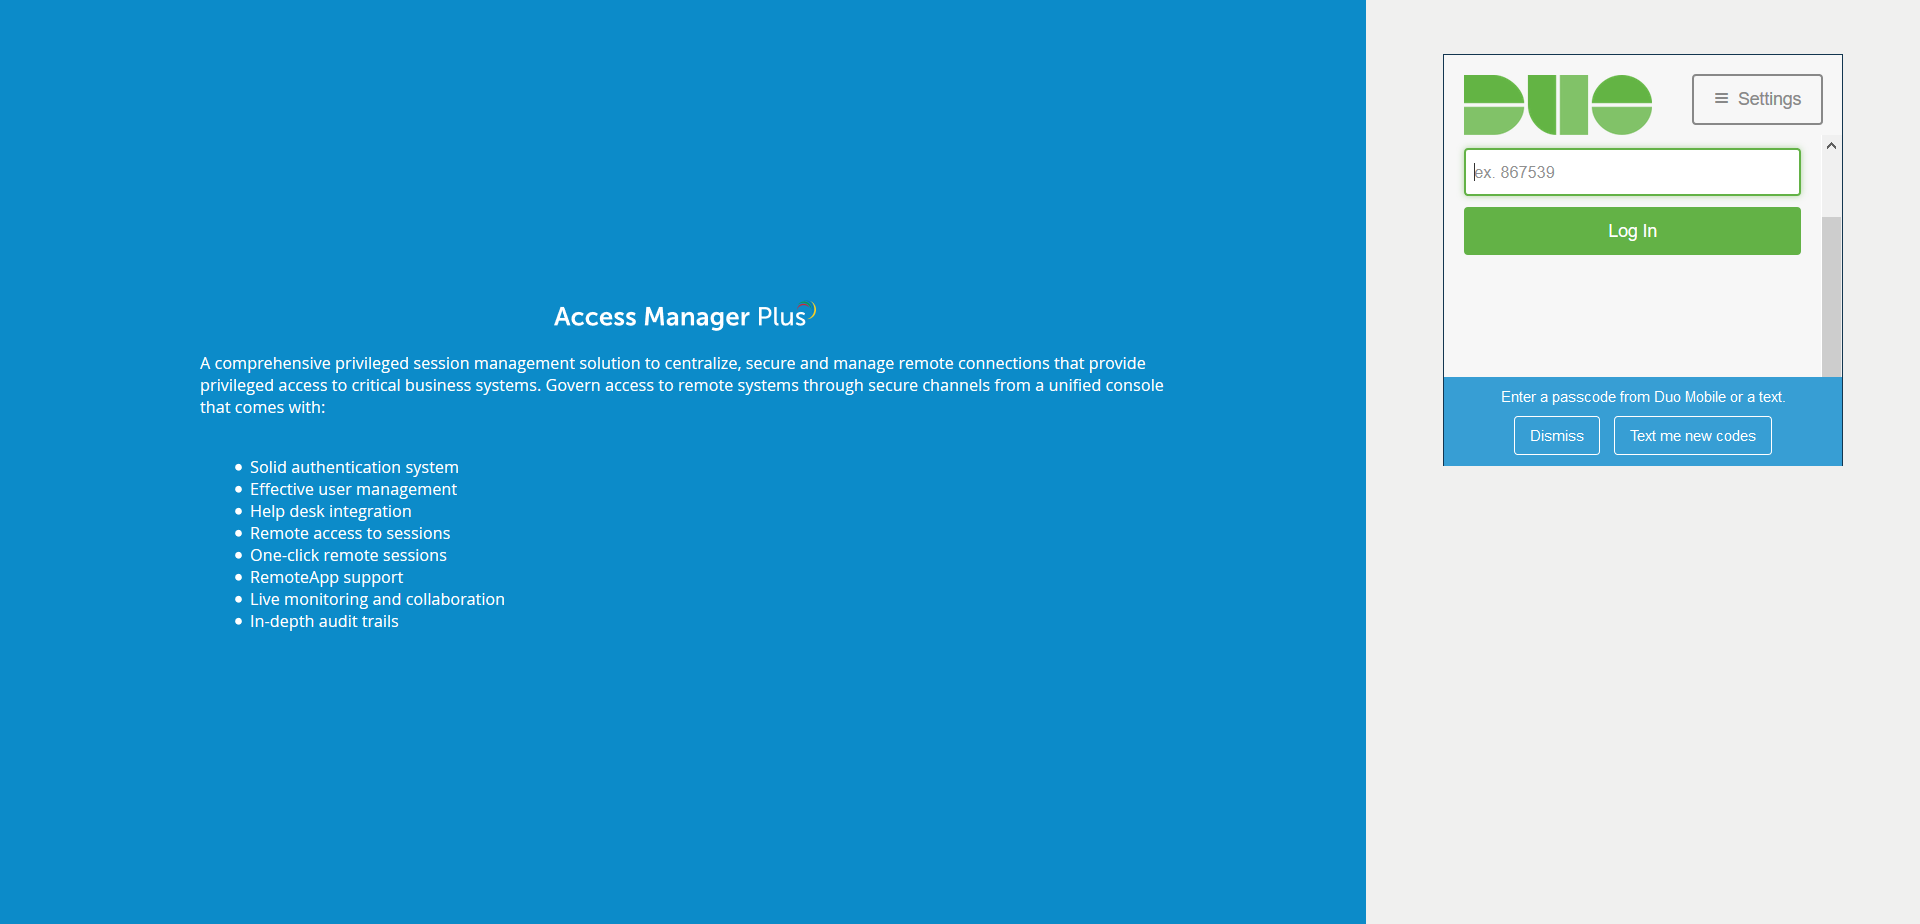
- You can also request a One Time Passcode via SMS on your phone, allowing users to avail Two-Factor Authentication even when there is no internet connectivity.
5. Enrolling while Logging in
- Click Start Setup in the login page.
- Select the type of device you are adding and enter your phone number.
- Verify your phone number by scanning the QR code sent to your phone.
- After successful verification, click Continue to Login.