Google Authenticator
Google developed a software-based authenticator called the Google Authenticator. It provides you with a random code that will be used to confirm your identity. While logging onto a site supporting the authenticator, the authenticator generates a six-eight digit unique code which should be entered along with other credentials to login successfully. Google Authenticator app needs to be installed on your smart phone or tablet devices to receive the code. This can be configured with Access Manager Plus to provide that extra layer of security. To know more about the other security features available in Access Manager Plus click here.
Sequence of Events
- A user tries to access Access Manager Plus web-interface.
- Access Manager Plus authenticates the user through Active Directory or LDAP or locally (first factor).
- Access Manager Plus prompts for the second factor credential through Google Authenticator.
- Enter the six-digit token that you see on the Google Authenticator app GUI.
- Access Manager Plus grants the user access to the web-interface.
Summary of Steps
- Configuring Two-Factor Authentication in Access Manager Plus
- Enforcing Two-Factor Authentication for Required Users
- Connecting to Access Manager Plus Web Interface when TFA via Google Authenticator is Enabled
1. Configuring Two-Factor Authentication in Access Manager Plus
- Navigate to Admin >> Authentication >> Two-Factor Authentication.
- Select Google Authenticator and click Save.
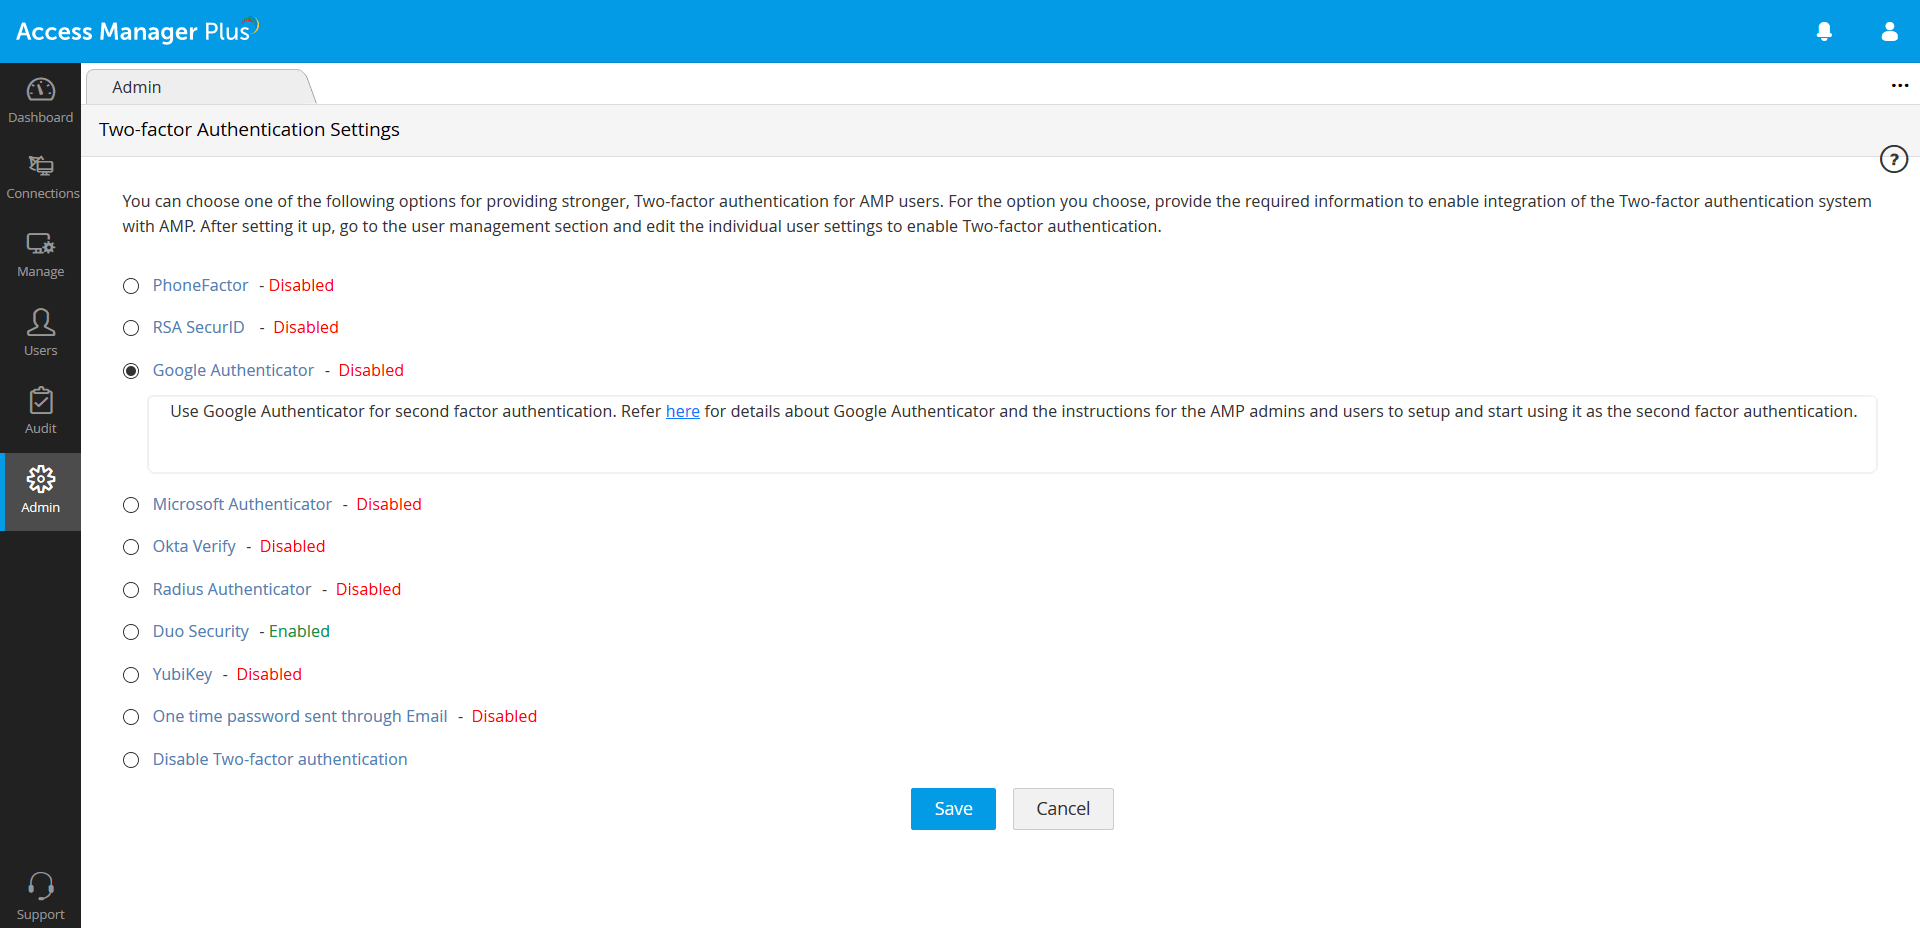
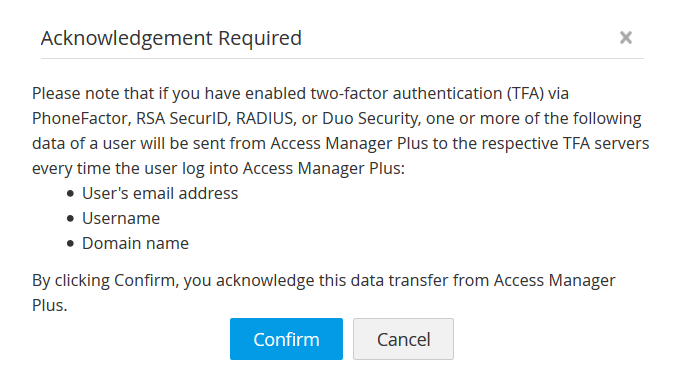
- Click Confirm to enforce Google Authenticaor as the second factor of authentication.
2. Enforcing Two-Factor Authentication for Required Users
- Once you confirm Google Authenticator as the second factor of authentication in the previous step, a new window will prompt you to select the users for whom Two-Factor Authentication should be enforced.
- You can enable or disable Two-Factor Authentication for a single user or multiple users in bulk from here. To enable Two-Factor Authentication for a single user, click on the Enable button beside their respective username. For multiple users, select the required usernames and click on Enable at the top of the user list. Similarly, you can also Disable Two-Factor Authentication from here.

- You can also select the users later by navigating to Users >> More Actions >> Two-Factor Authentication.
3. Connecting to Access Manager Plus Web Interface when TFA via Google Authenticator is Enabled
3.1 Prerequisite
To use Google authenticator as the second factor of authentication, you should first install Google Authenticator app in your smart phone or tablet. Google officially supports Android, iPhone, iPad, iPod Touch and BlackBerry devices. Detailed instructions to install the Google Authenticator app is available in Google's website.
3.2 Connecting to Access Manager Plus Web Interface
The users for whom Two-Factor Authentication is enabled, will have to authenticate twice successively. As explained above, the first level of authentication will be through the usual authentication. That is, the users have to authenticate through Access Manager Plus's local authentication or AD/Azure AD/LDAP authentication. If the administrator has chosen the TFA option Google Authenticator, the Two-Factor Authentication will happen as detailed below:
- Upon launching the Access Manager Plus web-interface, the user has to enter the username and local authentication or Azure AD/AD/LDAP password to log in to Access Manager Plus and click Login.
- Associating Google Authenticator with your account in Access Manager Plus: When you are logging in for the first time after enabling TFA through Google Authenticator, you will be prompted to associate it with your account in Access Manager Plus. You need to first launch the Google Authenticator app in your mobile device/tablet and choose the + button. Then, select Scan Barcode and point your device to the barcode shown in the GUI such as the image displayed below. This will automatically configure Google Authenticator to start generating authentication codes for Access Manager Plus.
- After completing this, you can enter the current token for authentication in the text box.
- Choose Time Based for your token (this is the default selection in the app).
- Supply an identifier for your Access Manager Plus account in this format - AMP: (for ex. AMP:john@abc.com).
- Supply the alphanumeric string as the key and select Done.
- Google Authenticator is now setup and it will start generating codes periodically for <AMP:user@mailid>. Enter the current code to continue logging into Access Manager Plus.
Troubleshooting Tip
As mentioned earlier, the Google Authenticator is associated with your Access Manager Plus account. If you ever lose your mobile device/tablet OR if you accidentally delete the Google Authenticator app on your device, you will still be able to get tokens to log in to Access Manager Plus. In such scenarios, just click the link Have trouble using Google Authenticator? in the Access Manager Plus login screen. You will be prompted to enter your Access Manager Plus username and the email address associated with Access Manager Plus. You will receive instructions to get Google Authenticator again.
Note: Two-Factor Authentication will take effect only if both the above steps are performed. Also, Two-Factor Authentication will be applicable only for those users for whom it is enforced by their administrators. All the other users will be allowed to login to Access Manager Plus through the usual way.