Managing Connections
Access Manager Plus provides a variety of options that lets you seamlessly manage the remote systems added to the product. Individual and bulk edit operations can be performed from the Manage section of Access Manager Plus for quicker and more efficient management of connections. The search filter helps you organize the display area for connections. The search filter drop-down comes with an All Connections option that will display all available connections. To tailor the view further, choose either the Owned Connections or Shared Connections option.
Below listed are various ways in which you can manage and customize the connections added into Access Manager Plus:
- Navigate to Manage tab and click Actions drop-down beside a connection name.
- Choose one of the following options from the drop-down.
i. Edit Connection
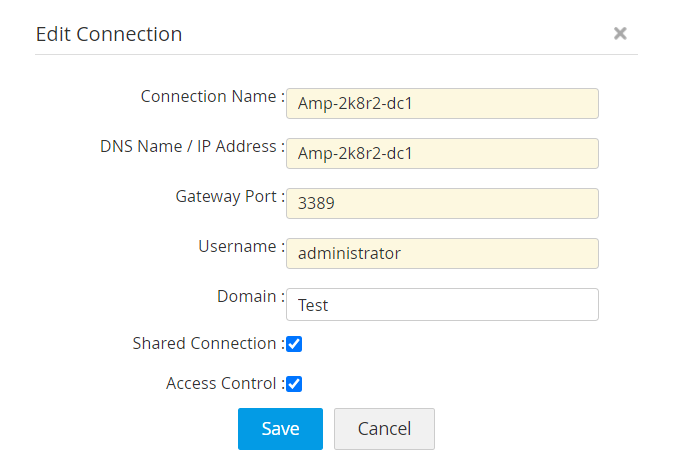
- In the Edit Connection dialog box, edit basic details about each type of connection added in Access Manager Plus:
- RDP Connections: Edit the following details for RDP connections - Connection Name, DNS name/IP Address, Port, Username, Domain.
- SSH Connections: Edit the following details for SSH connections - Connection Name, DNS name/IP Address, Port, Username, Domain.
- VNC Connections: Edit the following details for VNC connections - Connection Name, DNS name/IP Address, Port.
- SQL Connections: Edit the following details for VNC connections - Connection Name, DNS name/IP Address, SQL Type, Port, Connection Mode, Instance Name, Authentication, Username, Default Database.
- By default, all connections are private at the time of adding. Select the Shared Connections checkbox to make the connection public and accessible to other users.
- For all of the above connection types, you can enable or disable Access Control using the Access Control checkbox. Select the option to enforce other users to send a request for access to the connection rather than initiating the connection directly. The access requests will be visible to you in Admin >> Connection Access Requests from where you can either approve or reject the request. For ease of access, the connection requests will also be visible in the Notifications panel present at the top right corner of Access Manager Plus's web interface. Approve or reject requests directly from the Notifications panel. Click here to read more about Connection Access Control. Click Save to save changes.
- Alternatively, to edit attributes for a number of connections in bulk, select connections using the checkboxes beside them and click More Actions drop-down from the top bar and choose Edit.
- Using the bulk edit option, you can change the following attributes even for shared connections: DNS Name/ IP Address, Gateway Port, Domain. However, only the owner of a connection can enable or disable the Shared Connection and Access Control options. To leave previously configured settings untouched, Choose None in the respective drop-downs for SharedConnection or AccessControl. Doing so will preserve existing settings for these two options while allowing you to modify other attributes of the selected connections. In case you enable or disable SharedConnection or AccessControl options, the changes will be applied to only the connections that are owned by you. The configuration for other connections will remain unchanged. Click Save to save changes.
ii. Change Password
In the Change Password window, set a new password by typing it in the New Password field and enter it again for confirmation. Username and Connection Name cannot be edited from this window.
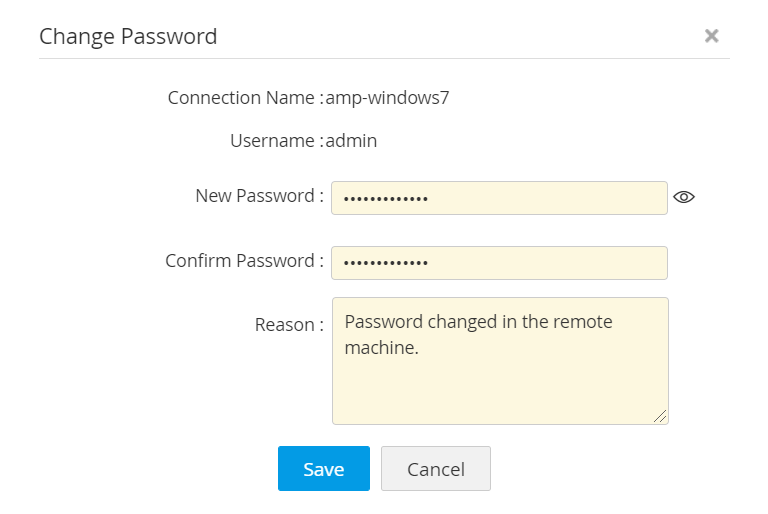
For audit purposes, enter a reason for changing the password. However, providing the reason is not mandatory.
iii. Map Remote App
Prerequisite for Mapping Remote Apps
A list of remote apps can be mapped to the RDP connections in Access Manager Plus. You can either launch a direct connection to the remote Windows system directly or launch a particular app separately. For that to work, you must add a list of remote apps in Access Manager Plus and map them to the respective connections. Click here for steps on how to add Remote Apps to Access Manager Plus. Once Remote Apps are added, follow the below steps to add a list of apps to be connected via a remote session.
Steps to Map Remote App
- The Map Remote App option applies only for RDP connection type. Click Map Remote App option from the Actions drop-down to list all the remote apps that were added prior, as Available Applications.
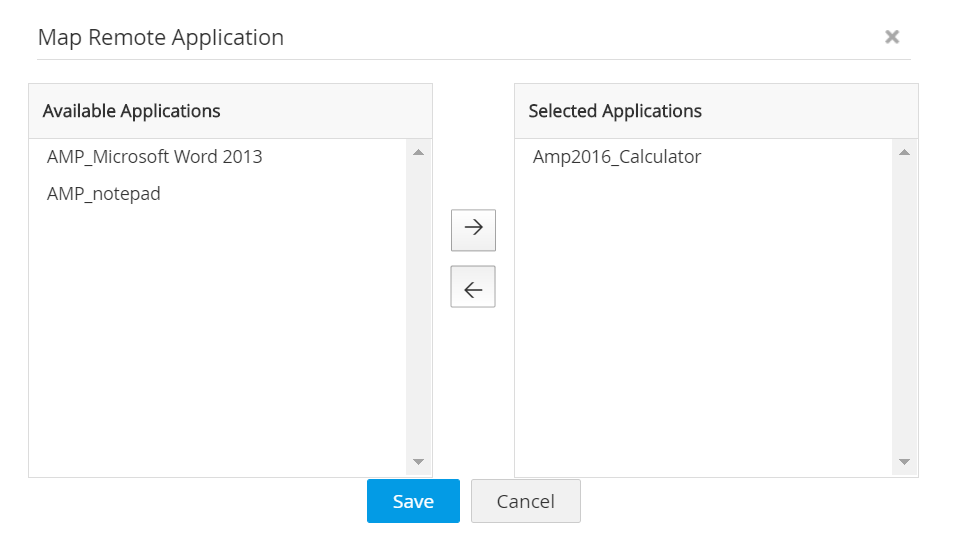
- Click an application name from the Available Applications list and move it to Selected Applications using the dedicated arrows.
- Click Save to save the changes.
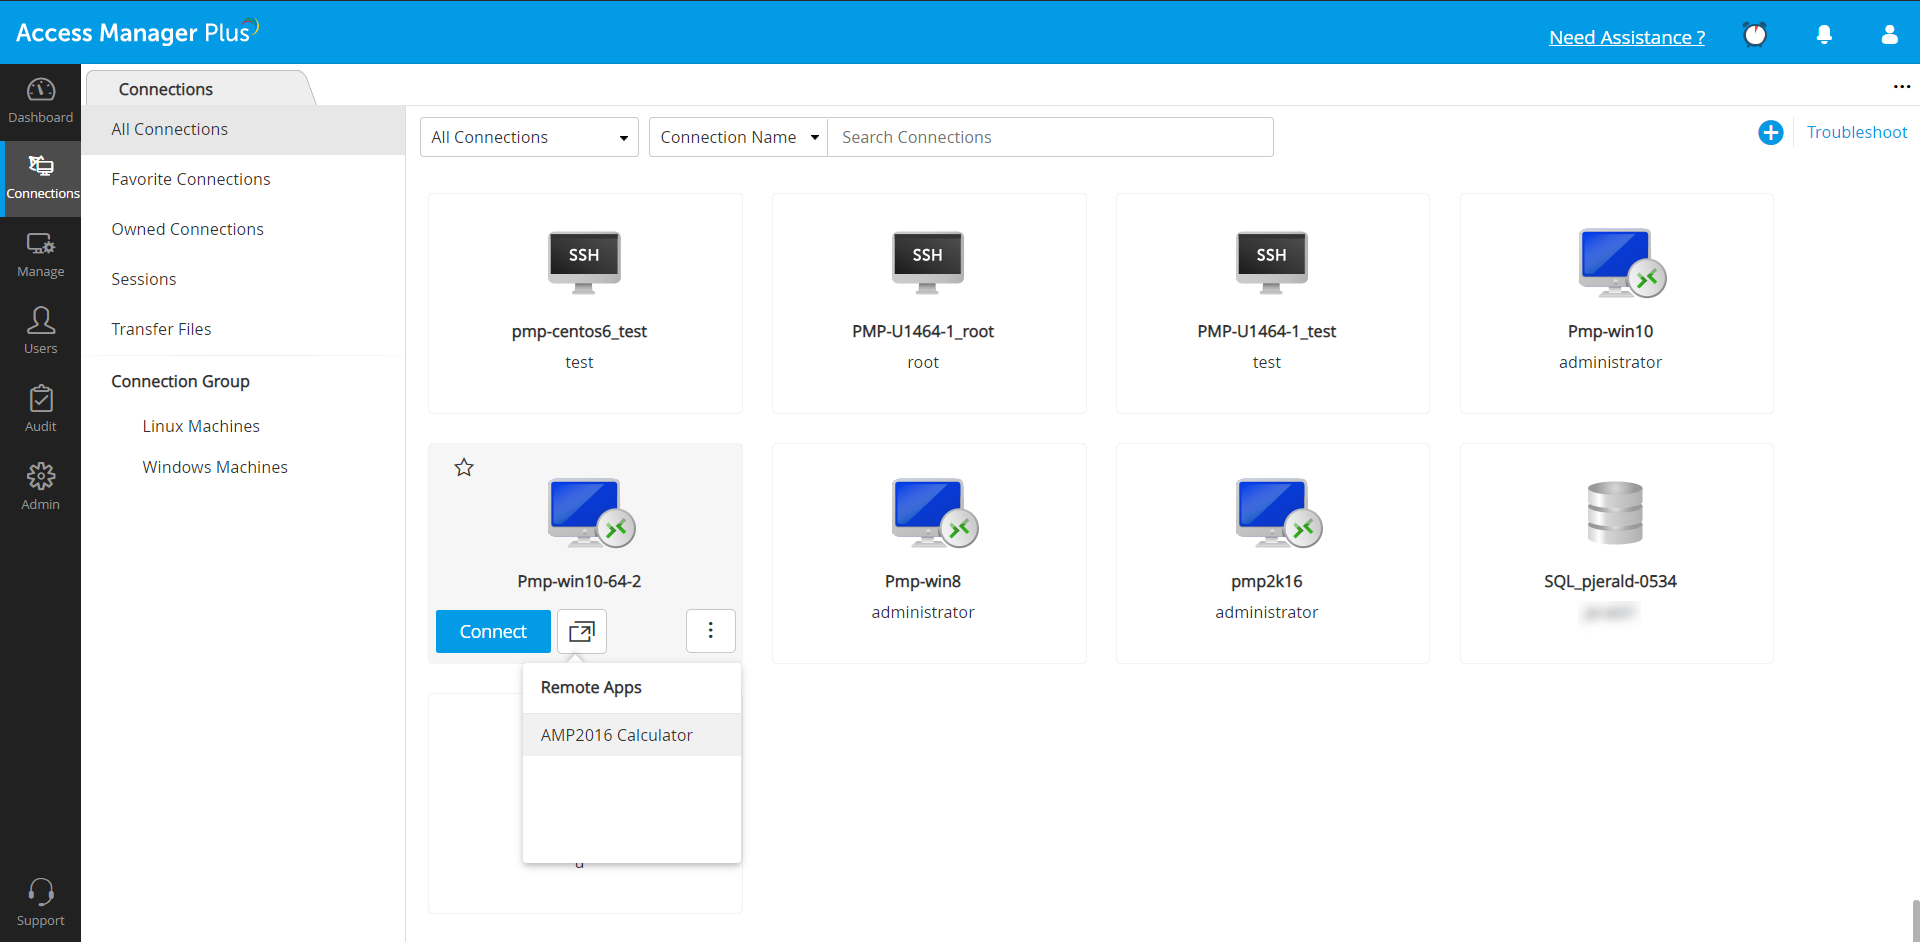
- Now, the mapped application will appear in a drop-down on the RDP connection's thumbnail in the Connection tab. By clicking the remote app name from the drop-down, you can connect to the application directly.
iv. Advanced Settings
Click here to learn in detail about configuring advanced settings for different types of connections.
v. Delete Connection
There are two ways in which you can delete connections:
- To delete connections in bulk, select connections using the checkboxes and click More Actions >>Delete from the top-bar. [OR] To delete individual connections, click the Actions drop-down beside a connection name and choose Delete from the list.
- In the confirmation dialog box, click Delete. The selected connections will be removed immediately.