Support
 
Phone Live Chat
 
Support
 
US: +1 888 720 9500
US: +1 800 443 6694
Intl: +1 925 924 9500
Aus: +1 800 631 268
UK: 0800 028 6590
CN: +86 400 660 8680

Direct Inward Dialing: +1 408 916 9393


Knowledge Base

How to set up DFS Share

Distributed File System (DFS) Share is a network file share provided by Microsoft DFS technology. DFS enables organizations to organize distributed file shares into a logical namespace, making it easier for users to access files across multiple servers and locations.

With DFS, administrators can create a hierarchical file system structure that appears as a single directory tree to users. This structure can span multiple servers and locations, providing fault tolerance and load balancing by distributing file access.

How to configure a DFS Share on the network

Enabling the server

  1. Launch the Server Manager, then navigate to Manage > Add Roles and Features. This will open the Add Roles and Features Wizard.
  2. Click Next to begin the setup.
  3. Choose Role-based or feature-based installation and click Next.

    How to set up DFS Share

  4. Choose Select a server from the server pool.
  5. In the next section, under File and Storage Services:
    • Ensure that DFS Namespaces and DFS Replication are both checked on the primary server.
    • When checking DFS Namespaces, a pop-up will appear asking if you want to add features.
    • Click Add Features.

    How to set up DFS Share

  6. Click Next twice and click Install.

To configure site two, follow all the steps for site one, except for step five under Server Roles. In step five, only select DFS Replication and click Add Features. There is no need to choose DFS Namespaces.

Configuring DFS Namespaces

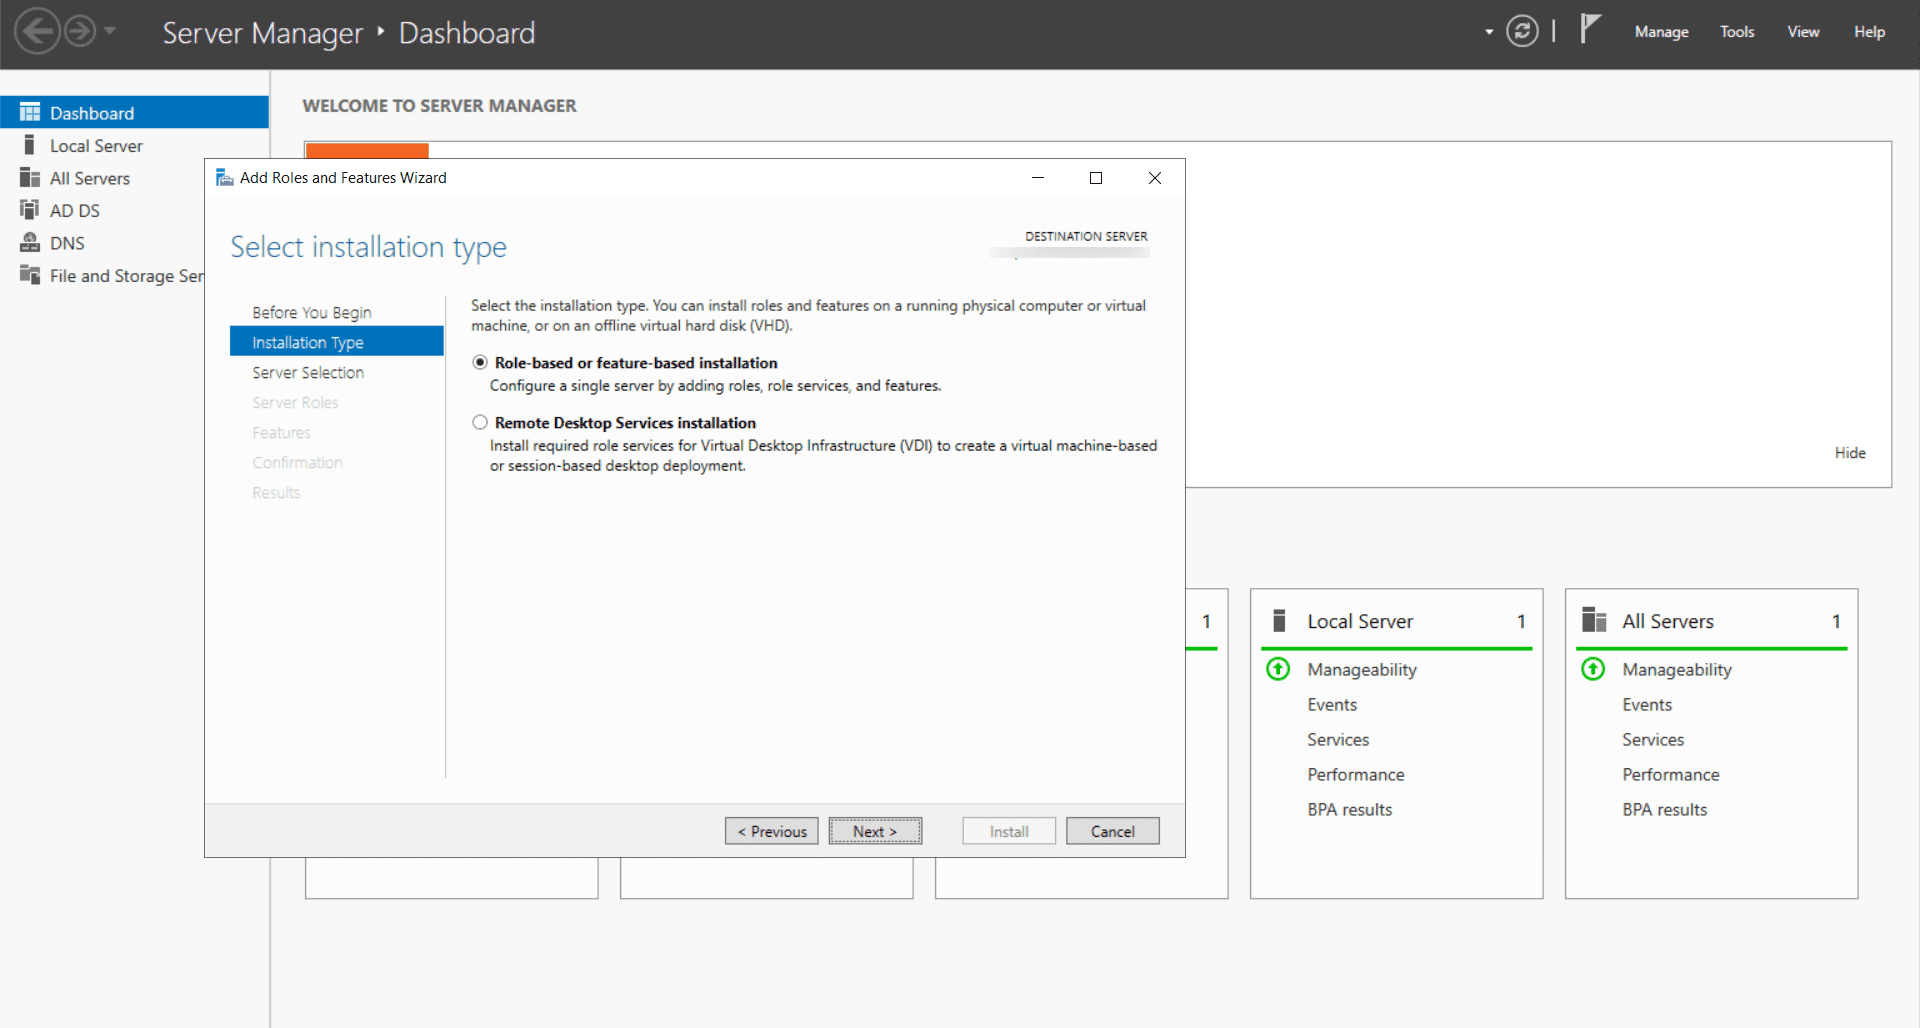
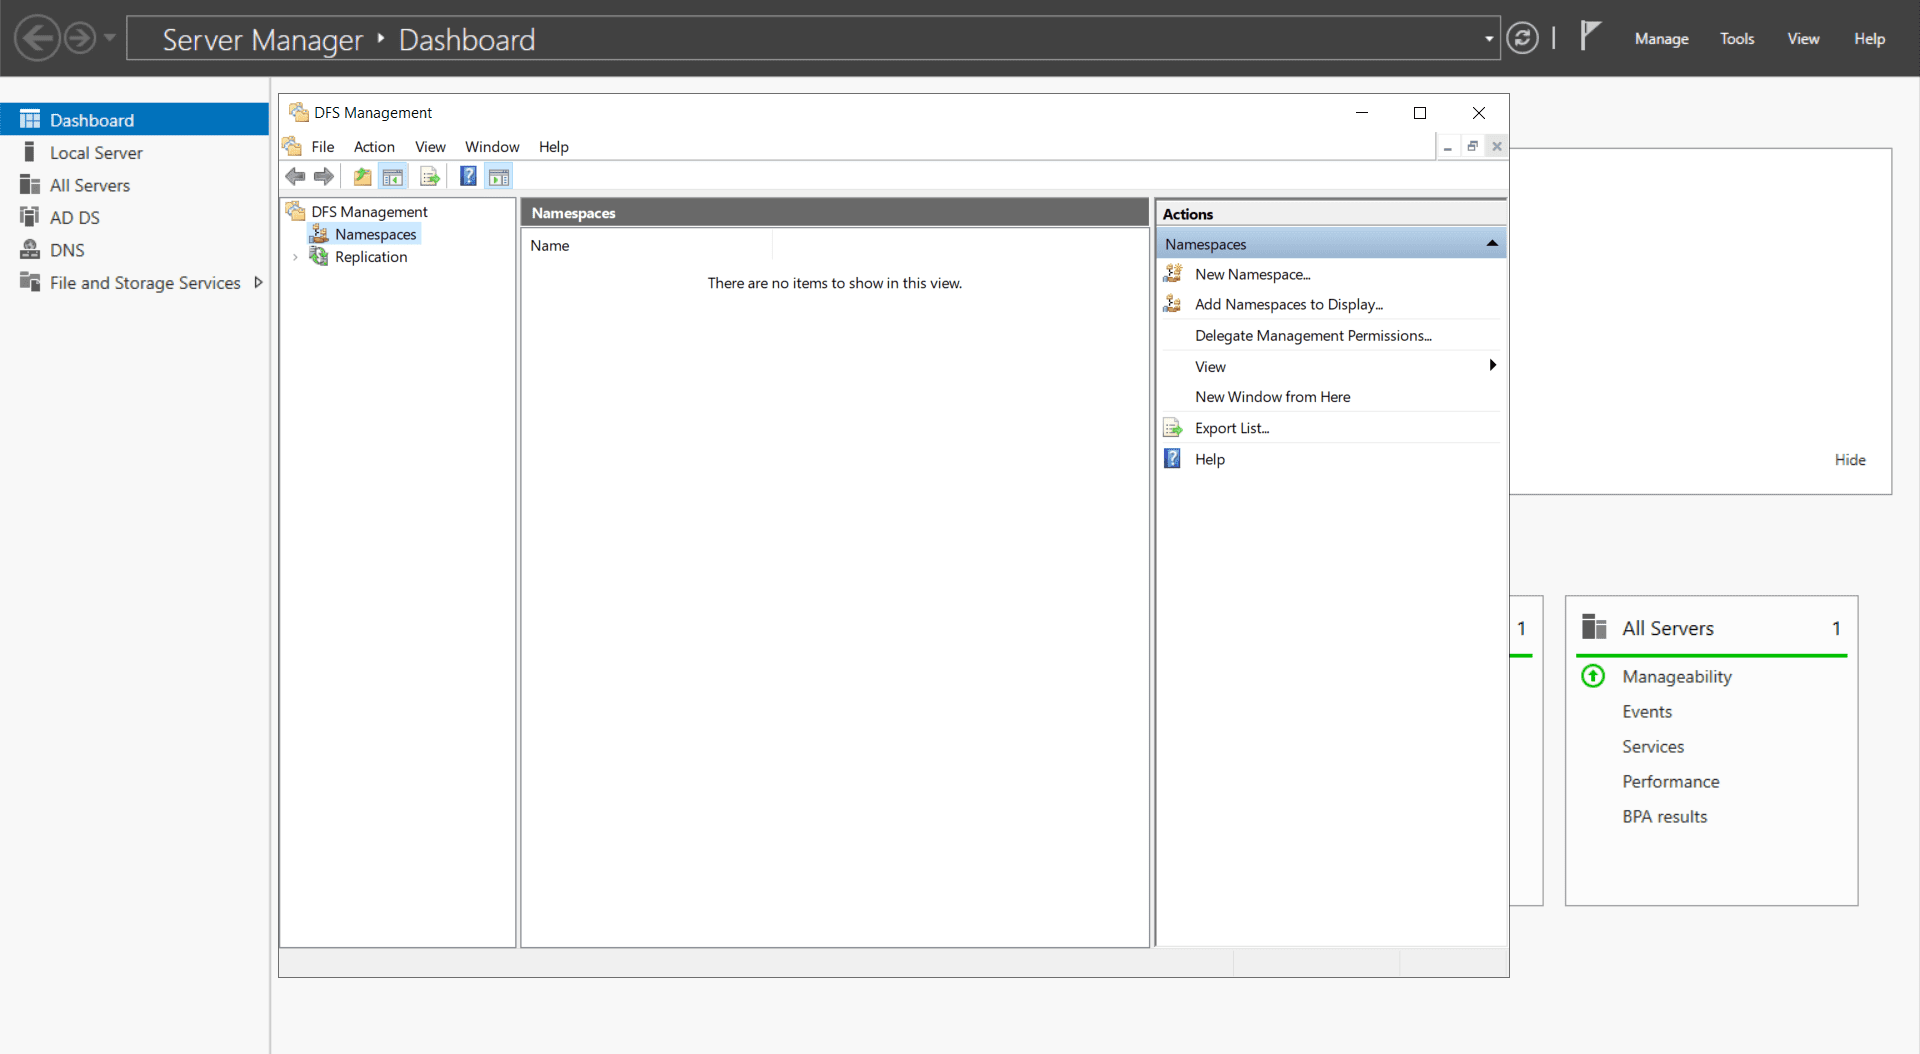
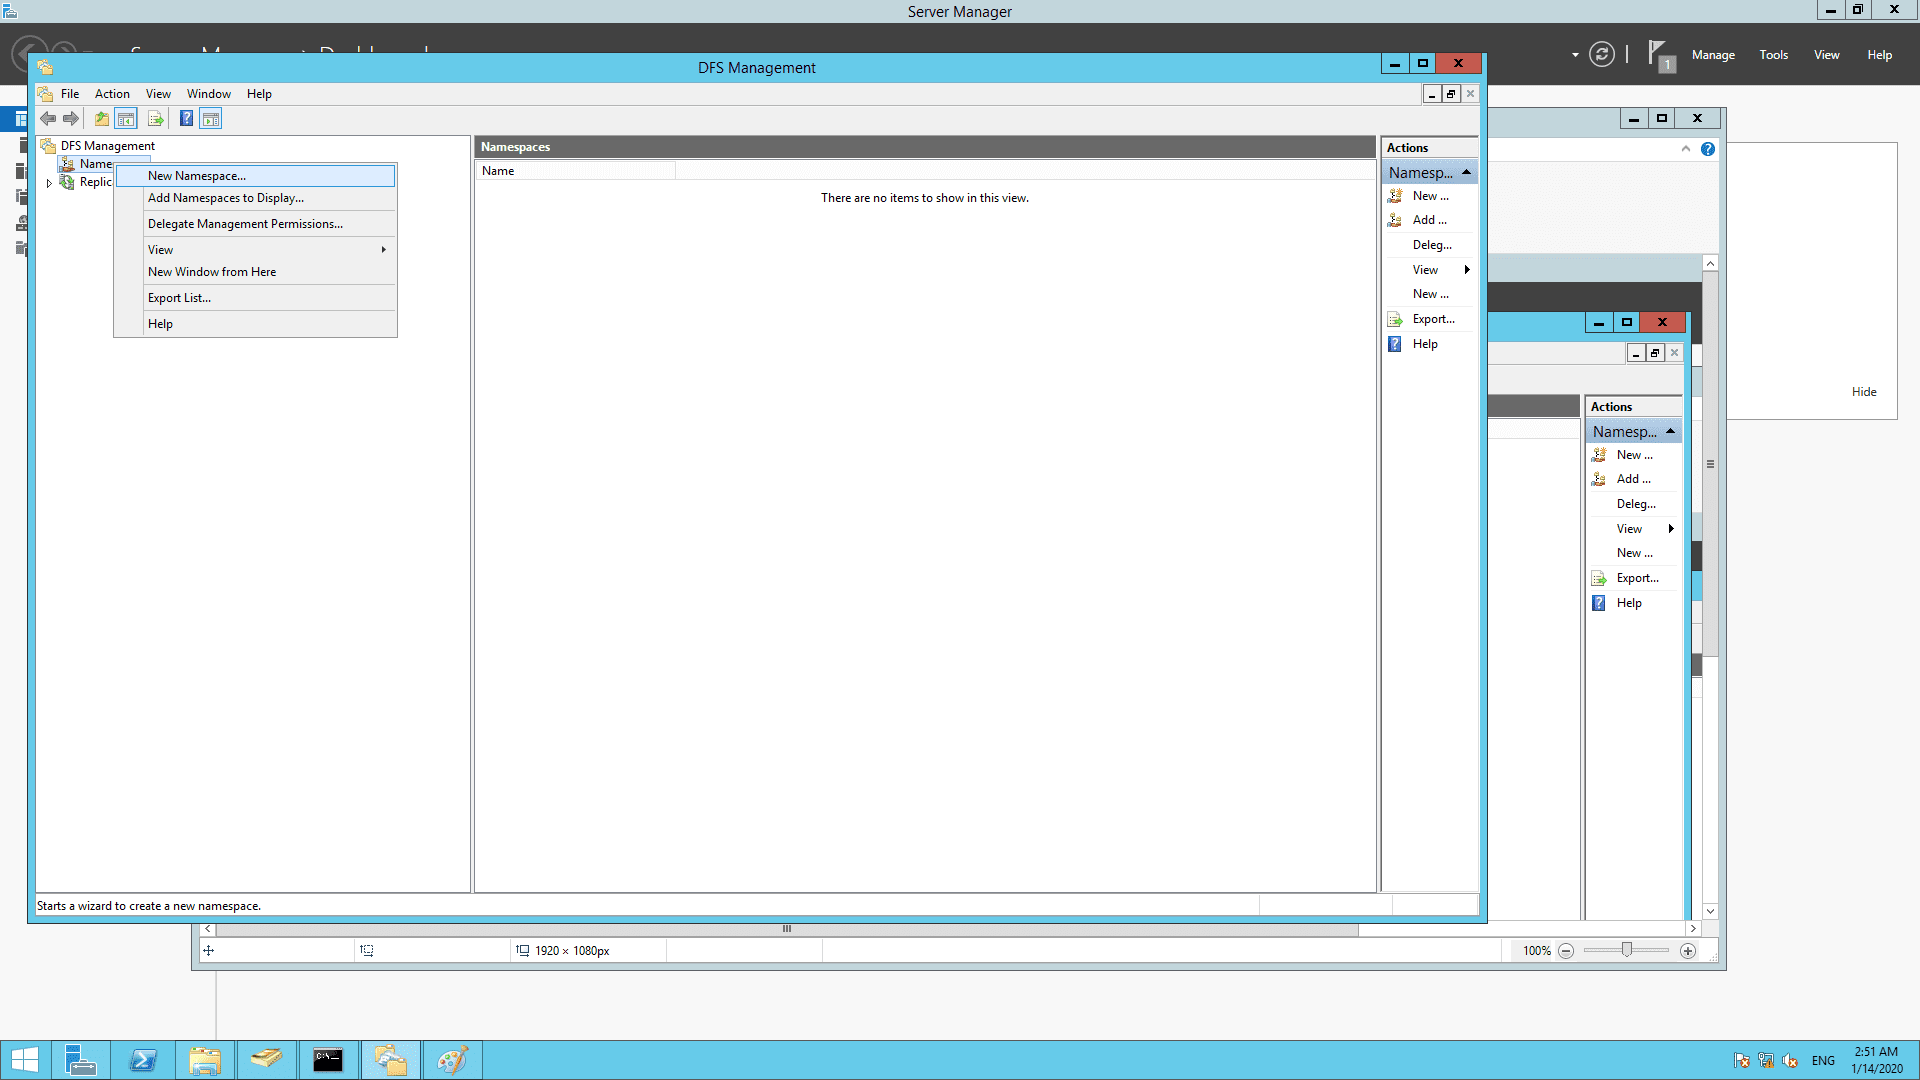
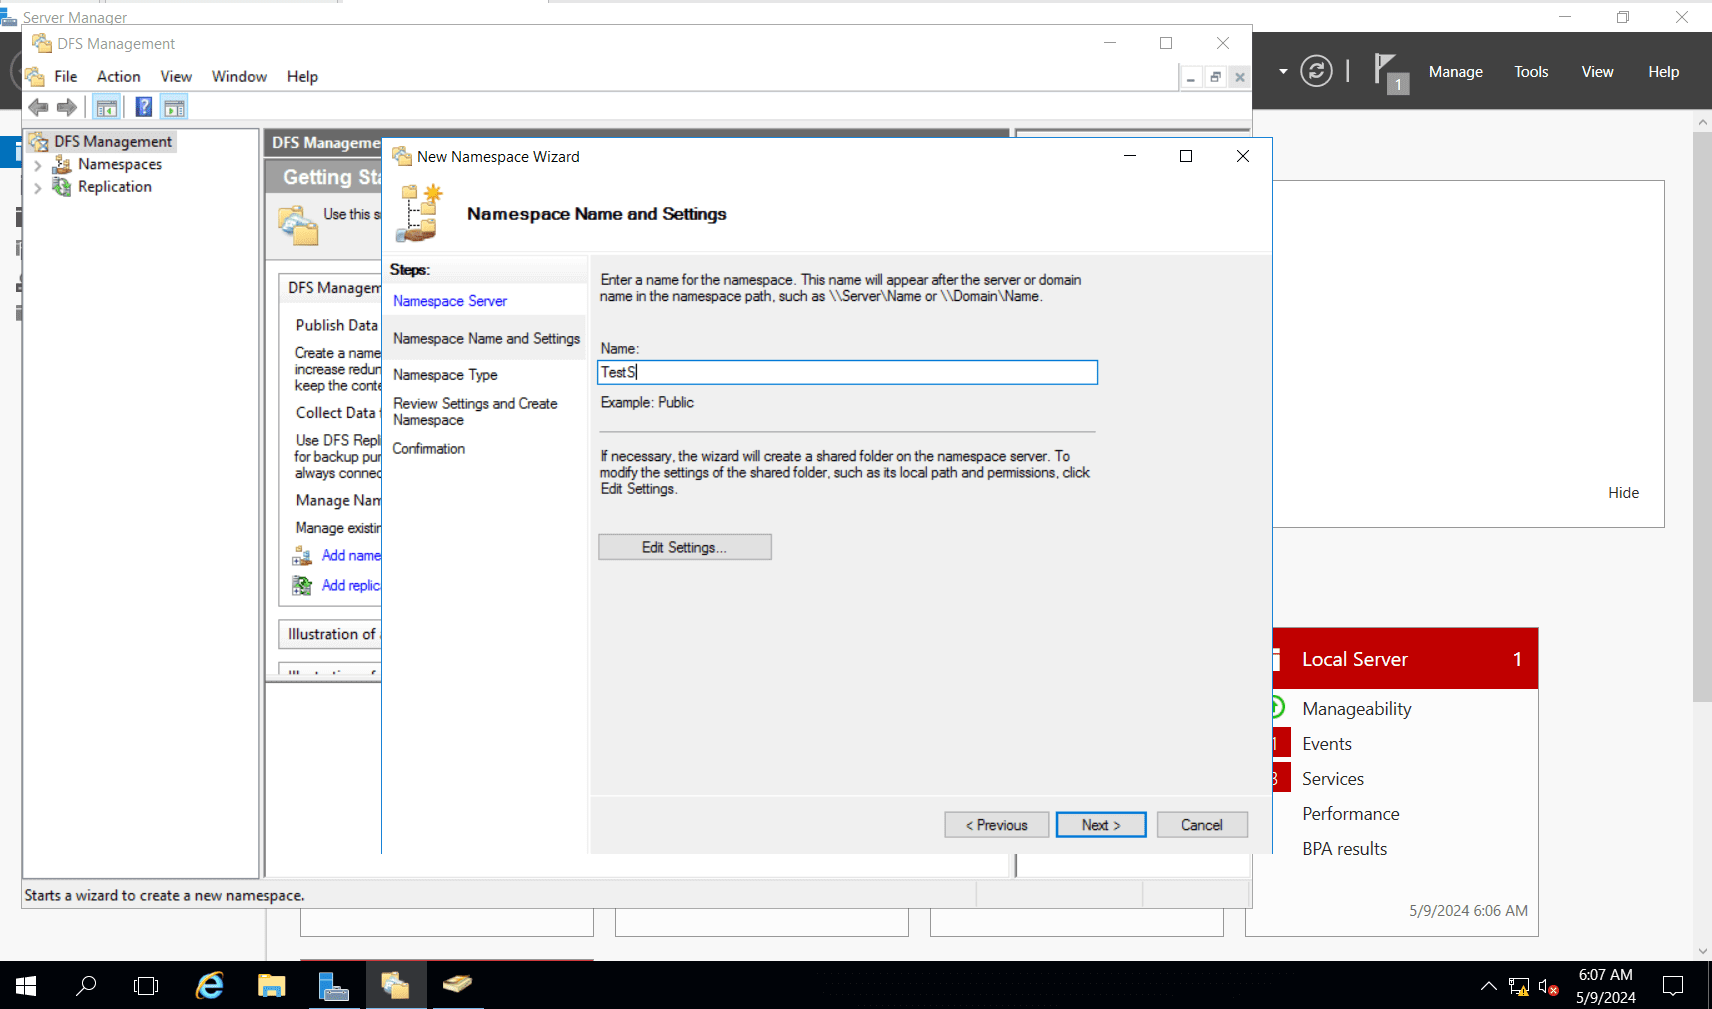
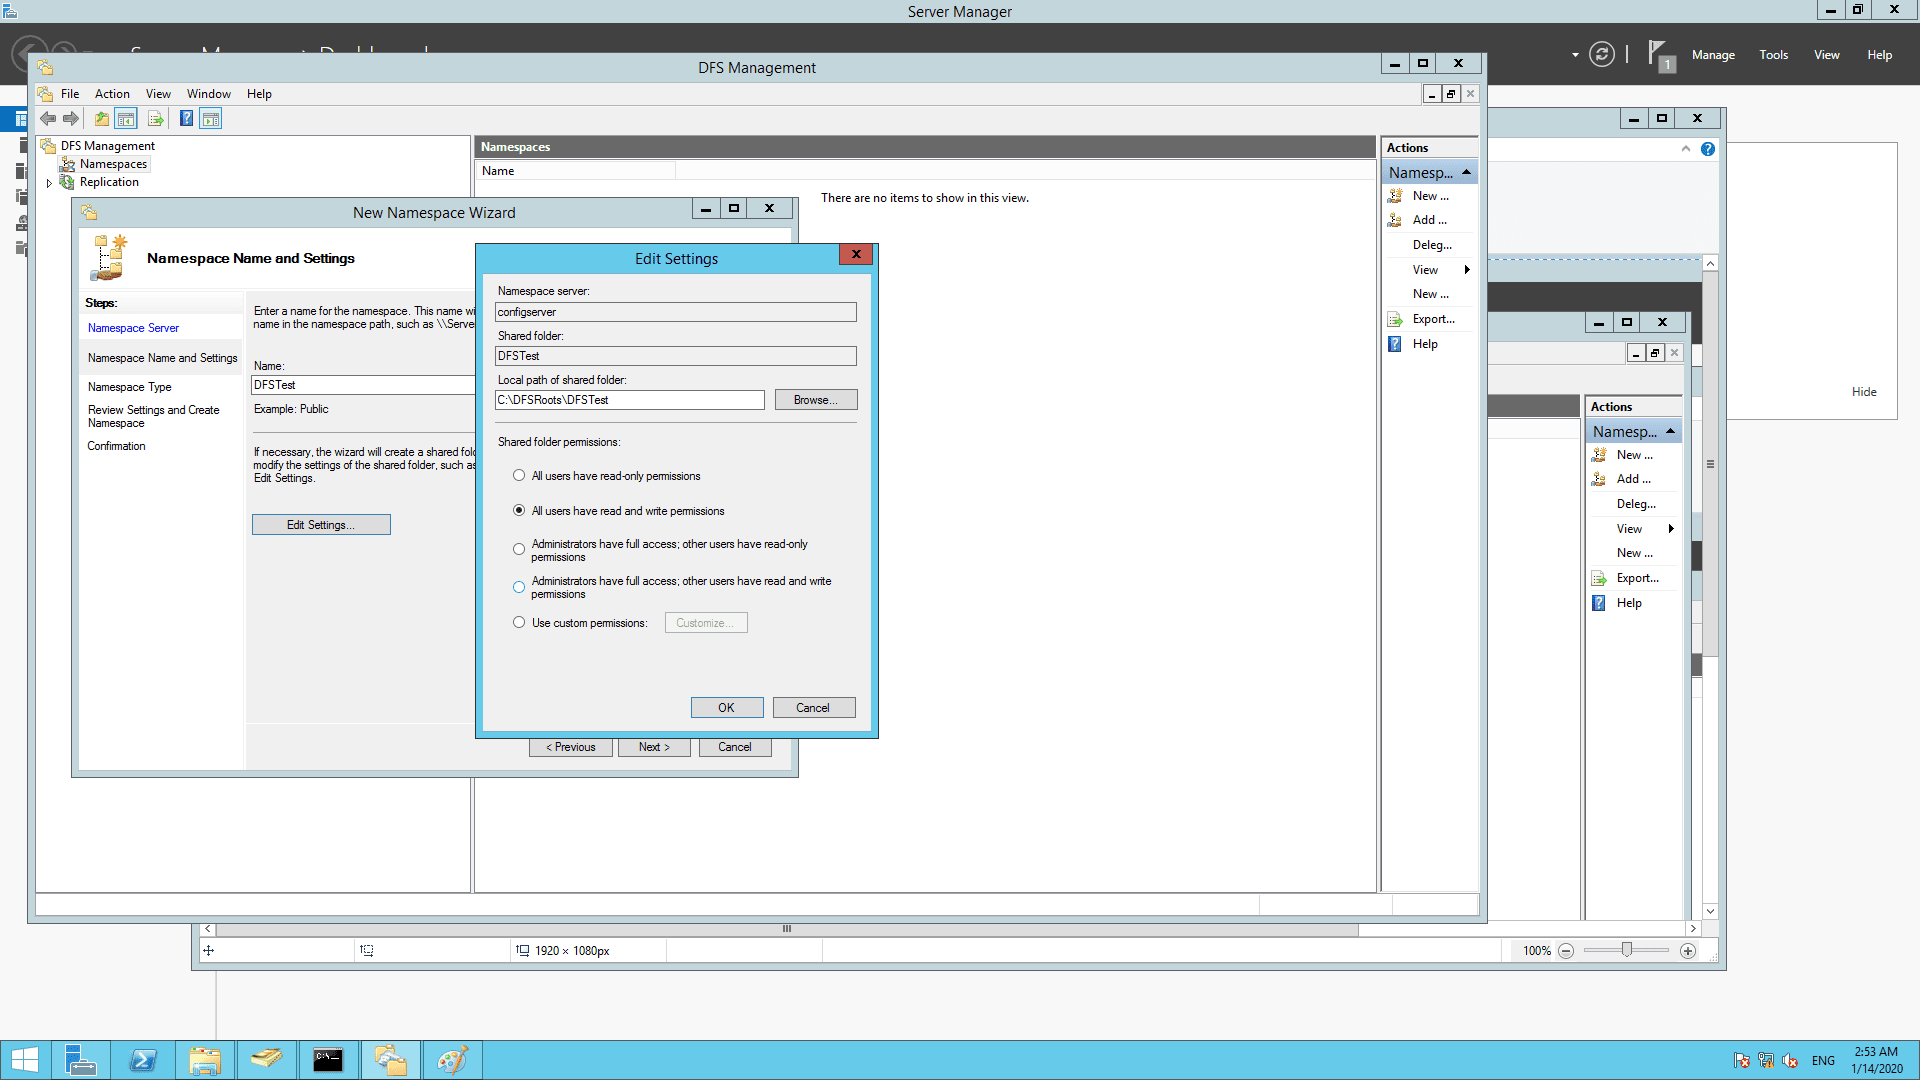
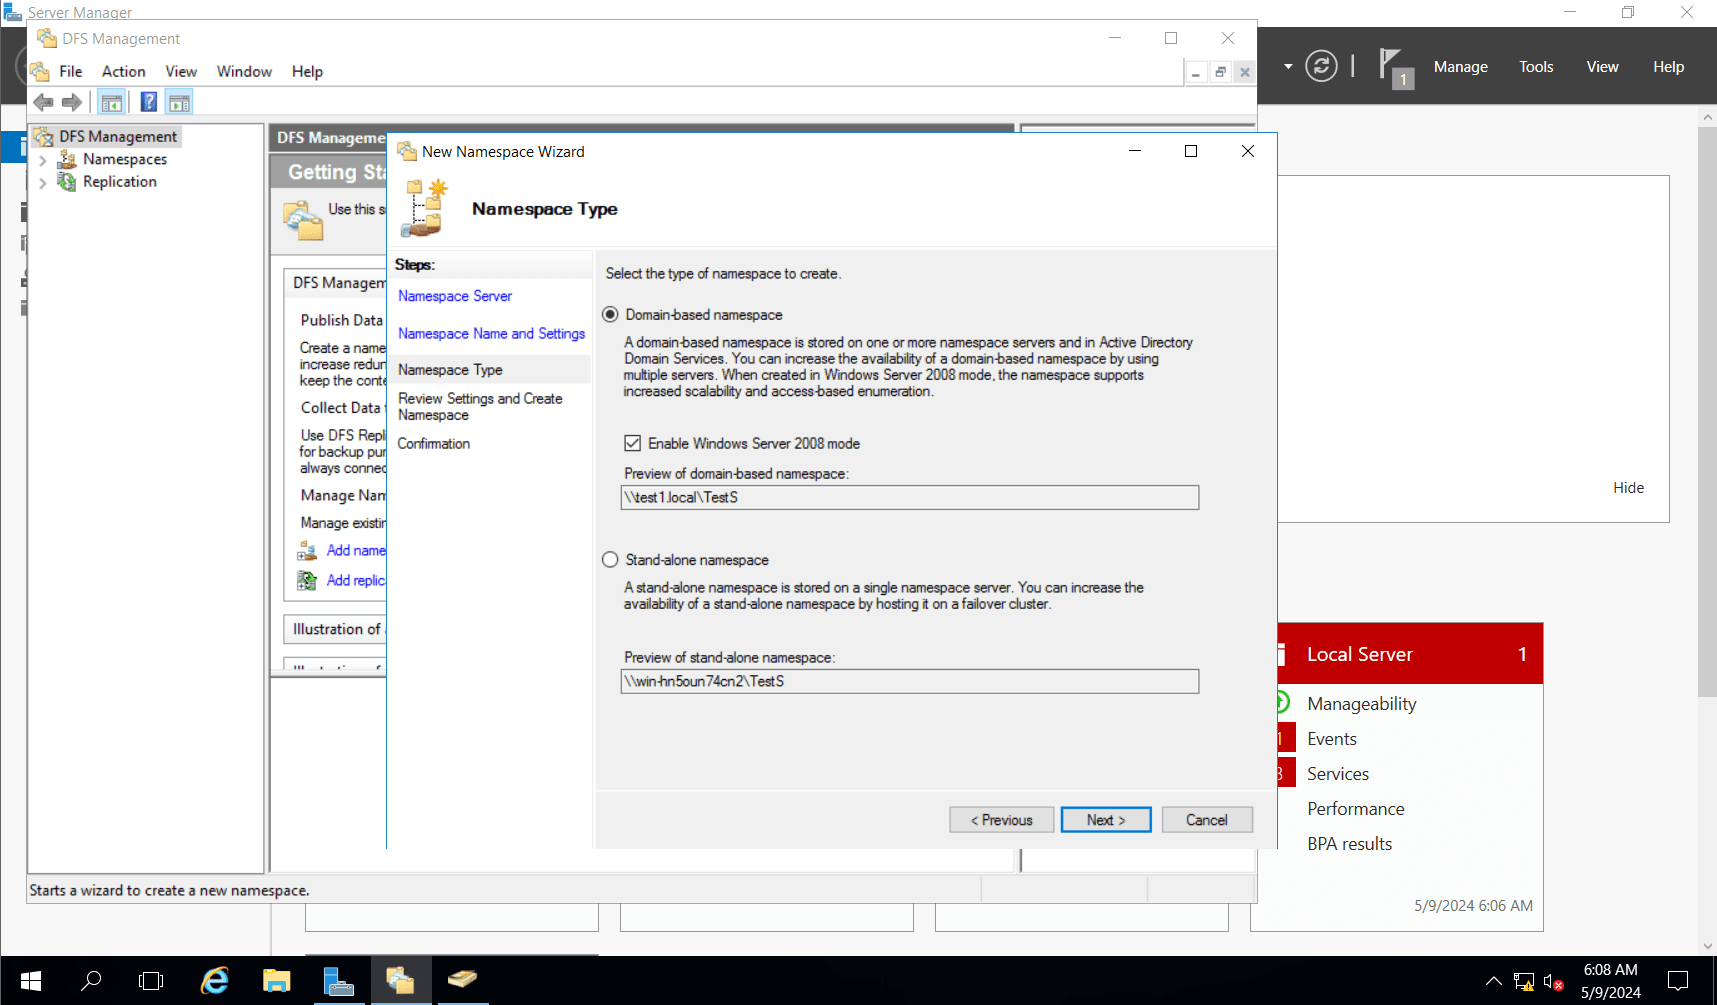
The next step in setting up DFS on Windows Server is to create your namespaces. Namespaces are the names we give to the shared folders that we are replicating. Here is how to set them up:

  1. Navigate to Tools > DFS Management.

    How to set up DFS Share

  2. In the left panel, right-click Namespaces and click New Namespace.

    How to set up DFS Share

  3. Enter the server name and click Next.

    How to set up DFS Share

  4. Enter the name of the server that will host the namespace.
  5. You can choose to edit the local path of the shared folder.

    How to set up DFS Share

  6. Select either Domain-based namespace or Stand-alone namespace, and click Next.

    How to set up DFS Share

  7. Finally, a summary will appear. Click Create to complete the configuration of your new namespace.

Steps to configure DFS Namespaces in ADManager Plus

In ADManager Plus, you can effortlessly configure and manage DFS Namespaces from a single console.

  1. Log in to ADManager Plus and navigate to the Management tab.
  2. In the left pane, click File Server Management.
  3. Under Configuration, click Manage DFS Namespaces.
  4. On the page that opens, click Add DFS Namespaces. A pop-up will then display the namespaces in your domain.
  5. Select the namespaces that you would like to manage using ADManager Plus and click OK.

In addition to efficiently managing DFS file server permissions, ADManager Plus also facilitates the management of NTFS and Share permissions. It also offers predefined reports for viewing, analyzing, and modifying file and folder permissions as needed.


Select a language to translate the contents of this web page:

Need further assistance?

Fill this form, and we'll contact you rightaway.

Request Support

  •  
  • *
     
  • *
     
  • *
     
  • By submitting you agree to processing of personal data according to the Privacy Policy.

"Thank you for submitting your request.

Our technical support team will get in touch with you at the earliest."

ADManager Plus Trusted By

The one-stop solution to Active Directory Management and Reporting
Email Download Link email-download-top