Setting an expiration date on an Active Directory (AD) account is one of the simplest ways to keep temporary staff, contractors, interns, and seasonal employees from staying in your directory after their access has ended. Once the date passes, AD automatically blocks the account from authenticating, so you don't have to switch it off manually.
PowerShell handles this with the Set-ADAccountExpiration cmdlet, which writes the date you specify to the account's accountExpires attribute. The cmdlet is quick for a single account, but it depends on the AD module being installed, expects exact user identifiers, and requires scripting expertise. This guide walks through three ways to set an account expiration date in AD: Using PowerShell, using the Active Directory Users and Computers (ADUC) console, and using ADManager Plus, including verification and common error fixes for each.
Every AD user object has an accountExpires attribute that stores the exact moment the account stops being usable. In LDAP it is held as a 64-bit integer—the number of 100-nanosecond intervals since 12:00am on January 1, 1601 (UTC). When you set an expiration date, the cmdlet converts your input to the correct integer, and when you read it back through AccountExpirationDate, it gives you a normal, human-readable date.
One detail that can cause confusion is how AD interprets the end of a day. An expiration date marks the first instant the account is no longer valid, stored in UTC. If you specify a date such as 2026-12-31, AD reads it as midnight at the start of December 31, meaning the user can no longer log in on the 31st itself. To keep an account usable through the whole of December 31, you set the expiration to 2027-01-01. This end of day midnight offset is the single most common reason an account appears to expire a day earlier than expected in PowerShell.
The Set-ADAccountExpiration cmdlet ships with the Active Directory PowerShell module, part of the Remote Server Administration Tools (RSAT). Before you run any command, confirm the module is present. On a Windows 10 or 11 workstation, enable it with the following PowerShell command:
Add-WindowsCapability -Online -Name "Rsat.ActiveDirectory.DS-LDS.Tools~~~~0.0.1.0"
On Windows Server, add the feature instead:
Install-WindowsFeature -Name RSAT-AD-PowerShell
Then import the module into your session and confirm it loaded:
									Import-Module ActiveDirectory

									Get-Module -Name ActiveDirectory
If Import-Module ActiveDirectory returns a module was not found error, RSAT isn't installed. Run the appropriate install command above and try again. You only need to install RSAT once; on domain controllers (DCs) the module is present by default.
Every expiration command needs to know which account to modify. The -Identity parameter accepts a SamAccountName, a distinguished name, GUID, or a SID. sAMAccountName is the one you'll require the most.
Before changing anything, it's worth reading the account's current expiration so you have a baseline:
Get-ADUser -Identity jsmith -Properties AccountExpirationDate | Select-Object Name, AccountExpirationDate
The base command takes the user identity and a -DateTime value. Use the unambiguous yyyy-MM-dd format to avoid regional date-parsing surprises. This example expires the account jsmith at the end of December 31, 2026:
Set-ADAccountExpiration -Identity "jsmith" -DateTime "2027-01-01 00:00:00"
Remember the offset covered earlier: to keep the account active through December 31, the value you pass is January 1. If you instead want the account to become unusable at the start of December 31, pass "2026-12-31". Set-ADAccountExpiration reads the value in your local time zone and converts it to UTC as it writes the accountExpires attribute.
Set-ADUser exposes the same functionality through its -AccountExpirationDate parameter, which is handy when you're already setting other attributes in one call:
Set-ADUser -Identity "jsmith" -AccountExpirationDate "2027-01-01"
To lift an expiration date and set an account to never expire, clear it:
Clear-ADAccountExpiration -Identity "jsmith"
For several accounts at once, pipe a list of identities through ForEach-Object. This applies the same date to three named users:
									$expiry = "2027-01-01"

									"jsmith","mday","apatel" | ForEach-Object {

									Set-ADAccountExpiration -Identity $_ -DateTime $expiry

									}
To drive the same operation from a spreadsheet, import a CSV whose columns hold each user's sAMAccountName and ExpiryDate:
									Import-Csv "C:\temp\users.csv" | ForEach-Object {

									Set-ADAccountExpiration -Identity $_.sAMAccountName -DateTime $_.ExpiryDate

									}
When you're expiring a whole organizational unit (OU), filter for only enabled accounts so you don't waste cycles rewriting already disabled ones:
									Get-ADUser -Filter 'Enabled -eq $true' -SearchBase "OU=Contractors,DC=corp,DC=com" | ForEach-Object {

									Set-ADAccountExpiration -Identity $_.sAmAccountName -DateTime "2027-01-01"

									}
The parameters below can be used for account expiration tasks in PowerShell.
| Parameter/cmdlet | Description |
|---|---|
| -Identity | The account to modify, given as SamAccountName, UPN, distinguished name, or SID. |
| -DateTime | The expiration date and time. Interpreted in local time and stored as UTC in accountExpires. |
| -Filter | Query used with Get-ADUser to select accounts by condition (for example, enabled status). |
| -SearchBase | Limits the operation to a specific OU or container. |
| Clear-ADAccountExpiration | Removes the expiration date, setting the account to never expire. |
If you prefer a graphical approach for a single account, the ADUC console sets the same accountExpires attribute through a simple field:
The End of wording in ADUC reflects the same midnight behavior described above: End of December 31, which keeps the account usable through the 31st and disables it at the start of January 1. ADUC only lets you edit one account at a time, so for bulk changes, consider PowerShell or ADManager Plus.
ManageEngine ADManager Plus is a unified AD, Exchange, and Microsoft 365 management tool that sets expiration dates through a point-and-click console—for one account or thousands—with no scripting. It offers several ways to do this, depending on whether you're creating accounts, updating existing ones, or automating the entire lifecycle.
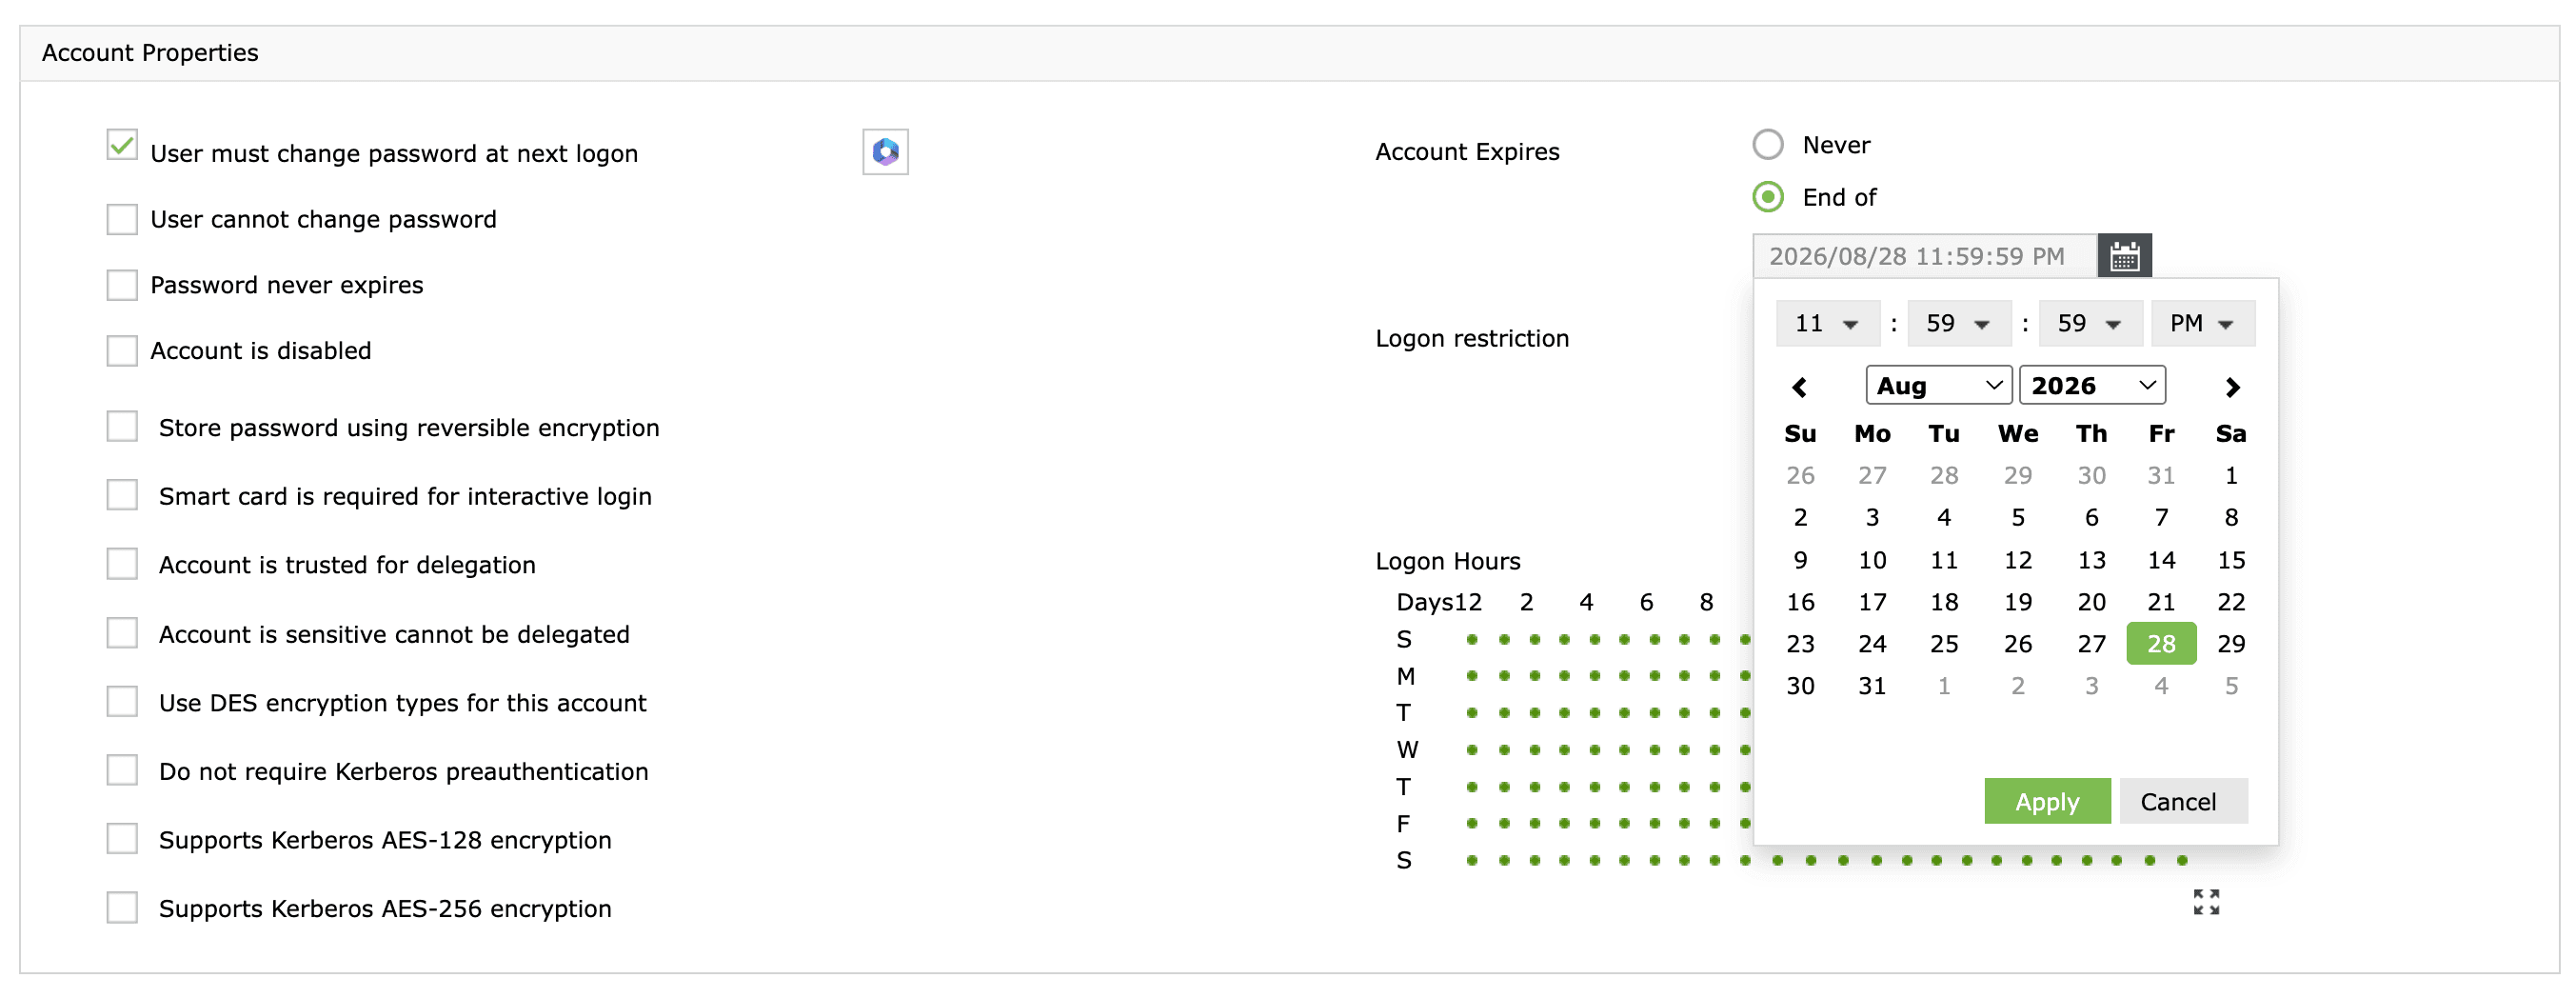
You can also stamp an expiration date at creation time. Under Management > User Management > User Creation, open the Account tab and set End of in the Account Expires section.
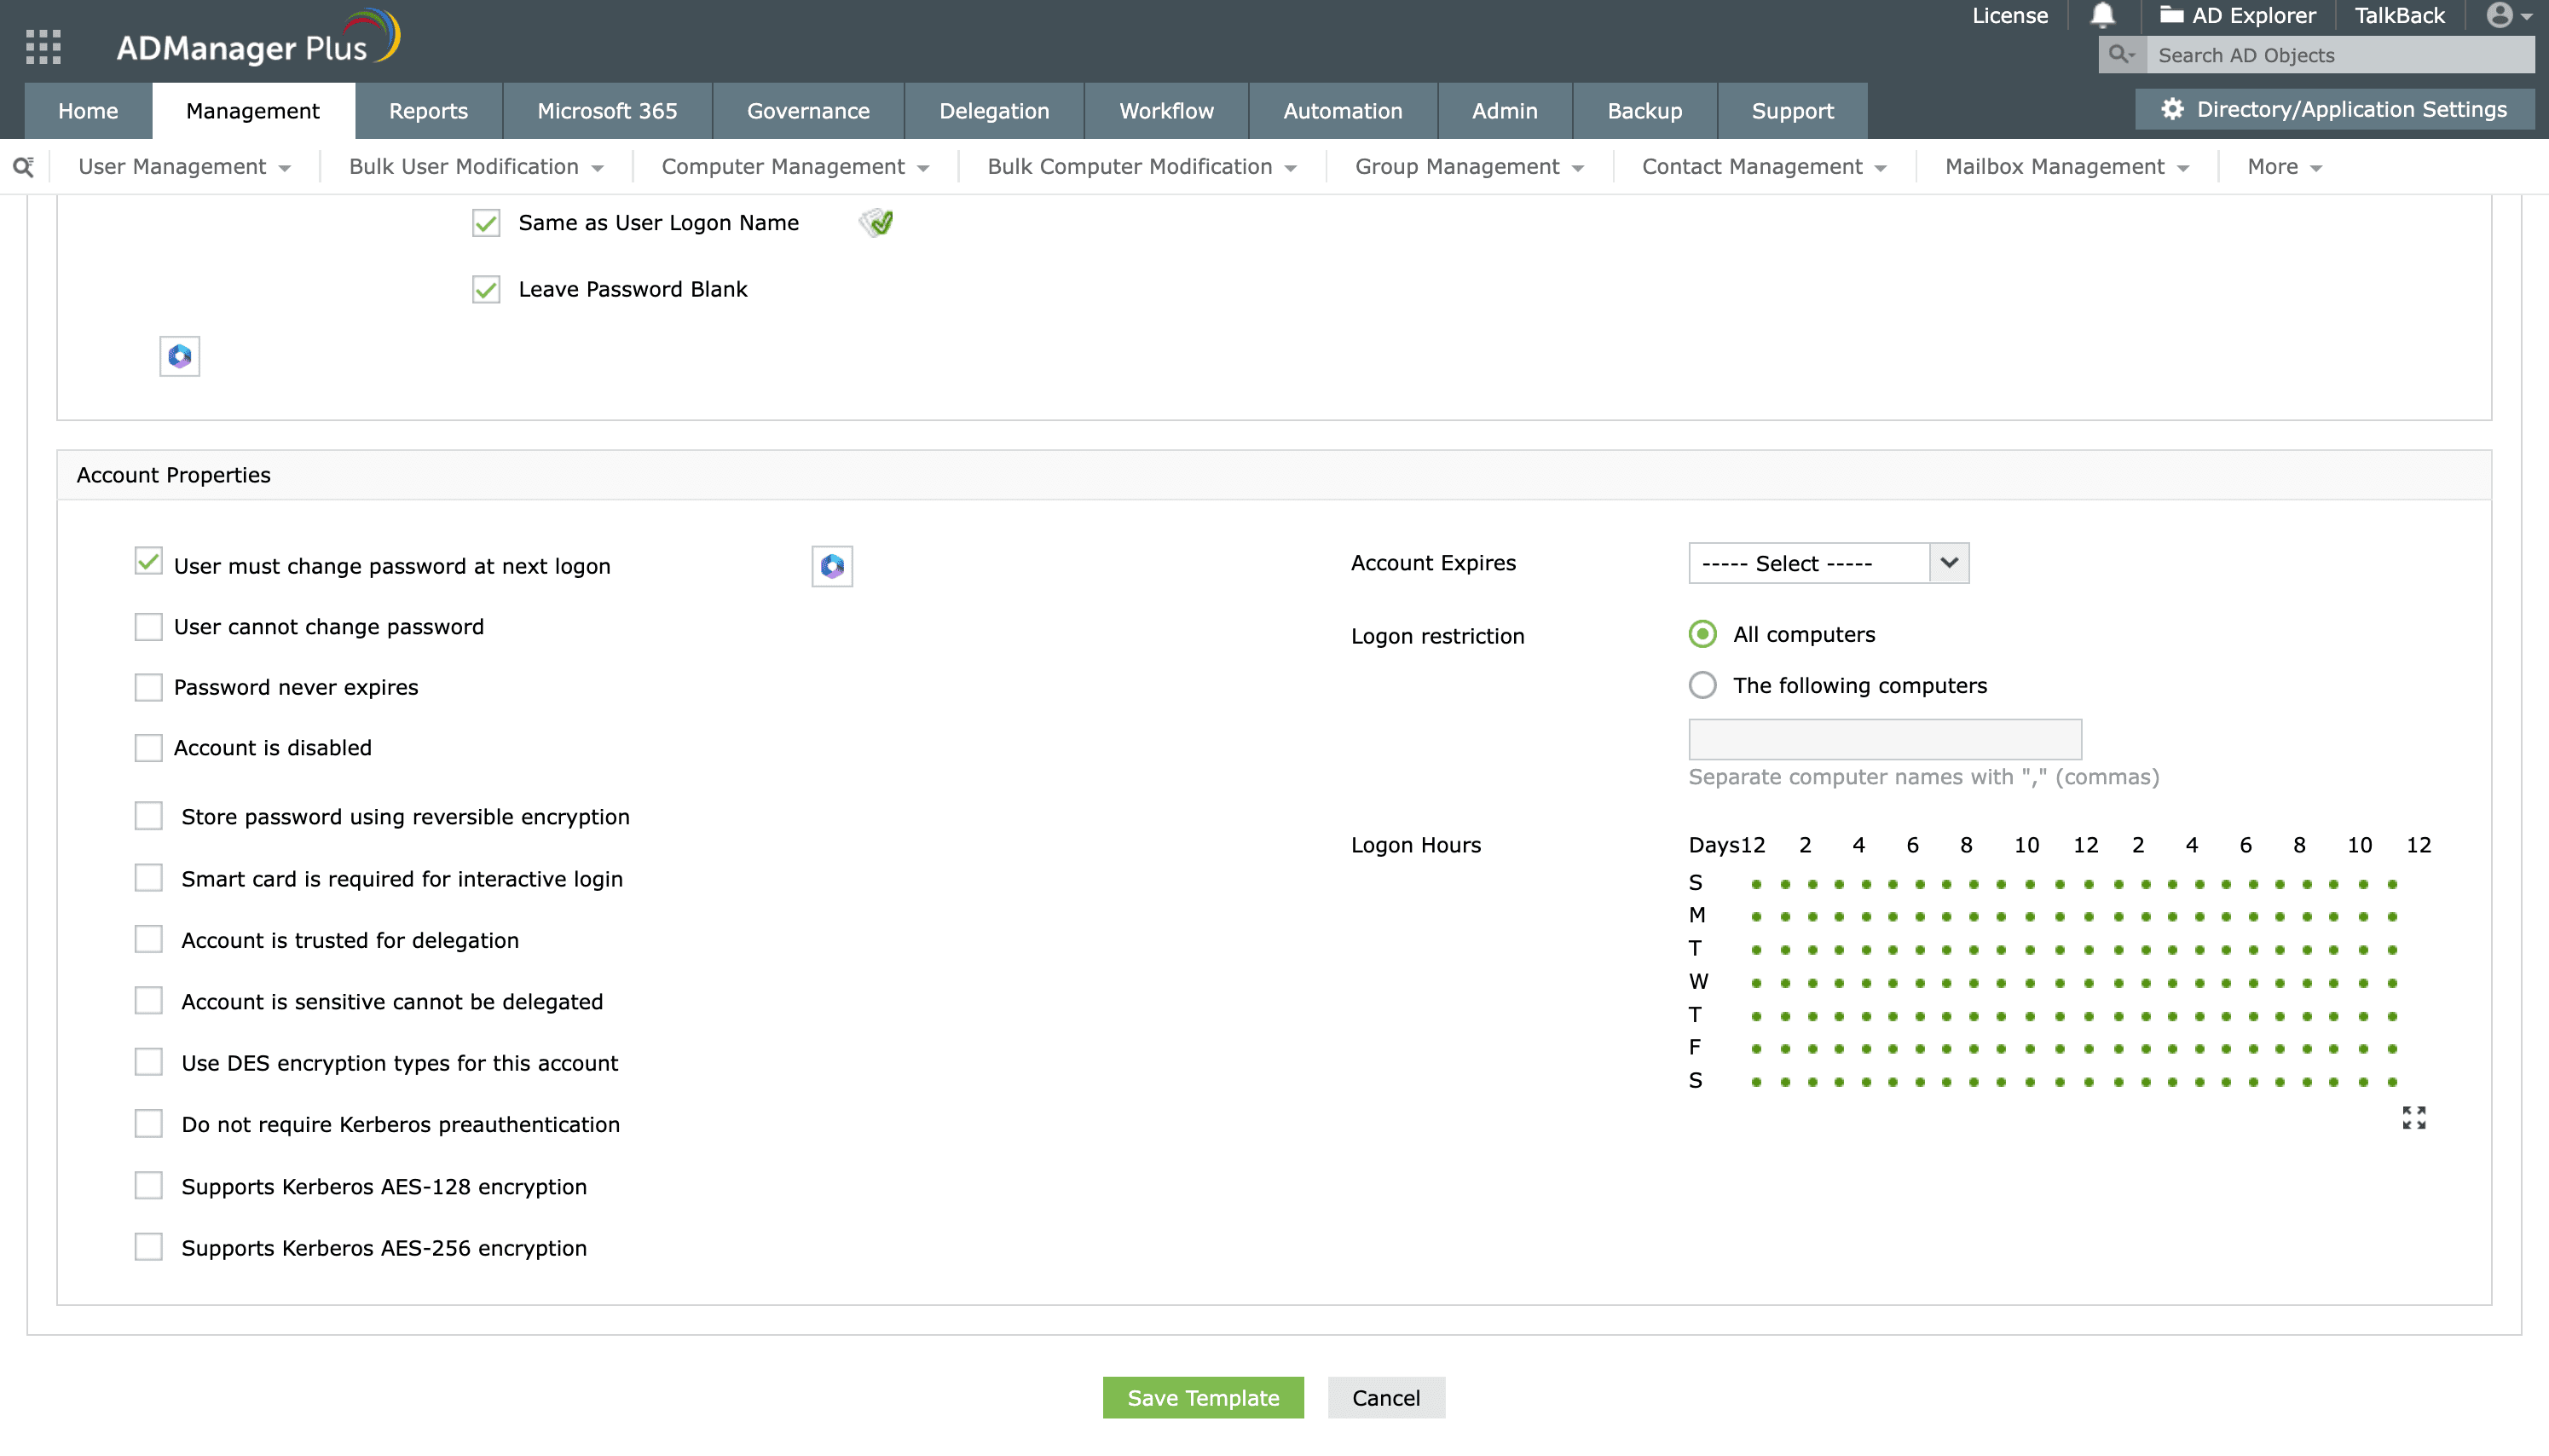
Alternatively, set a default account expiration date using user creation templates under Management > User Management so every contractor or intern account you provision using a template inherits the same expiry automatically.
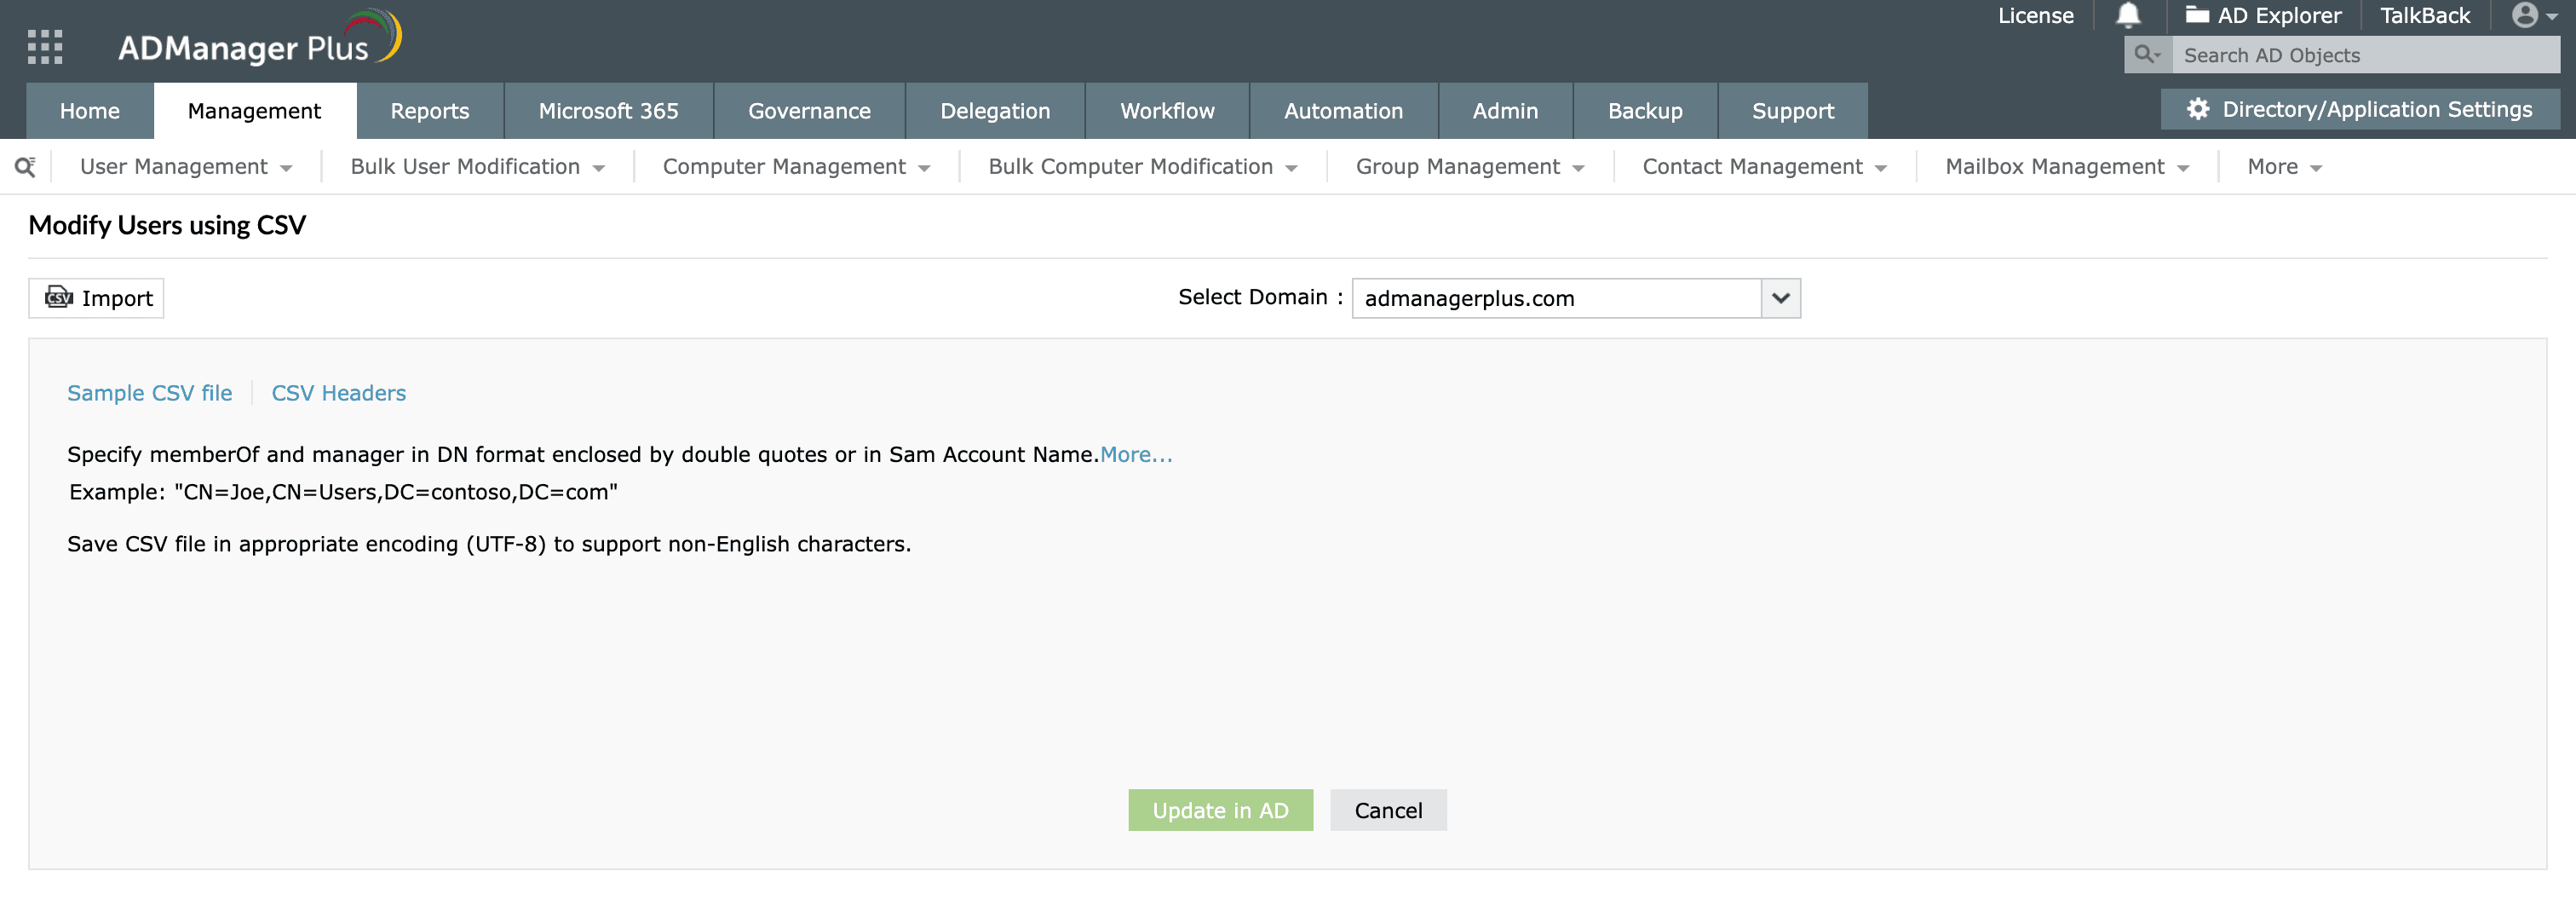
ADManager Plus lets you create a scheduled automation, helping you automatically set expiration dates or even disable users when they meet your specified conditions. For example, this task extends the expiration date by 30 days for the members of a specified group, on a weekly schedule.
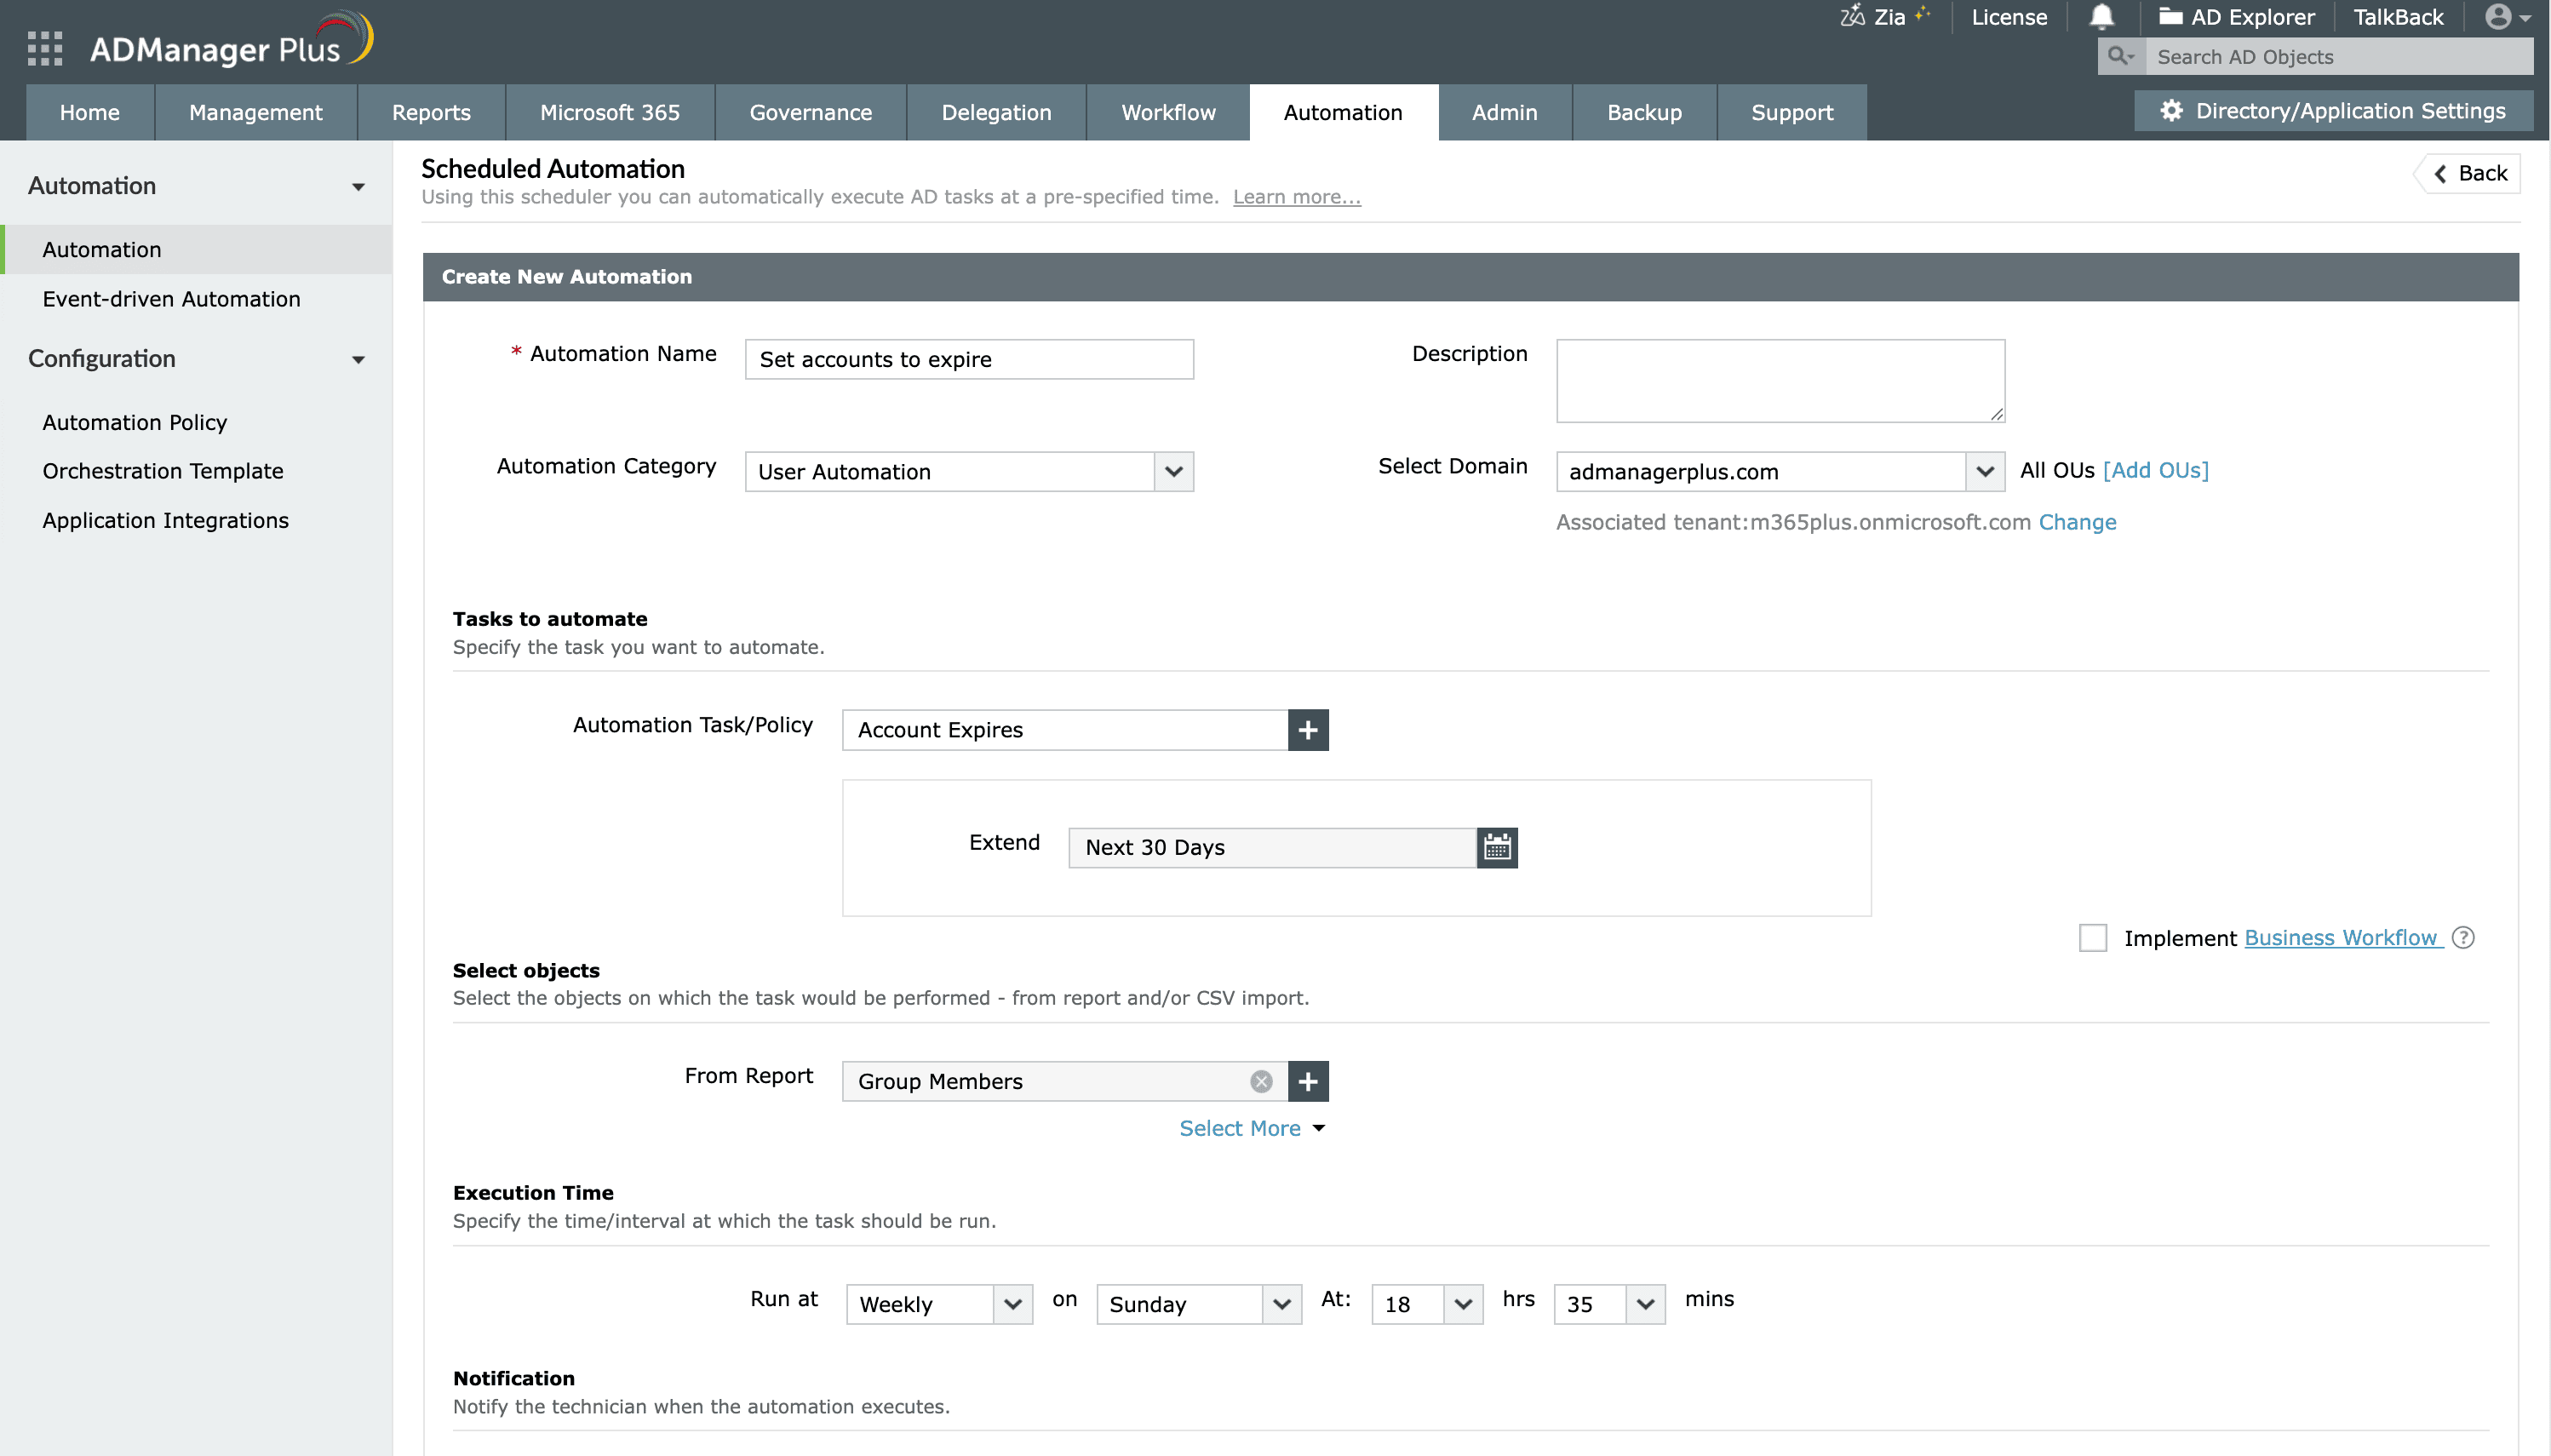
For teams handling onboarding and offboarding at volume, ADManager Plus' orchestration engine removes manual work entirely. You can build an automation workflow that sets or clears expiration dates as part of a larger life cycle sequence. For example, disabling an account the moment it expires and moving it to a deprovisioning OU.
Create a help desk role that includes the account expiration action, then assign it to a non-admin user.
This usually comes down to how ADUC and PowerShell handle expiration dates. ADUC treats the selected expiration date as inclusive, while a raw or PowerShell value set to midnight expires the account at the start of that date. To keep an account active through a specific date, set the PowerShell expiration date to the following day.
An expired account fails logon with an account-expired message while its disabled flag stays off. Check accountExpires or the AccountExpirationDate property; if the date has passed, extend or clear it.
Both 0 and 9223372036854775807 mean the account never expires. New accounts start at the large value; accounts reset from a real date to never become 0.
By default, Microsoft Entra Connect does not translate accountExpires into a disabled cloud account. An expired on-premises user can retain cloud access unless you add handling for it. Validate your sync configuration if cloud access must end with the on-premises expiration.
For a valid expiration value, use [datetime]::FromFileTime($value) in PowerShell. Treat 0 and 9223372036854775807 as never expires rather than converting them.
After setting a date, confirm it landed as intended. Read the friendly, converted value with the following PowerShell command:
Get-ADUser -Identity jsmith -Properties AccountExpirationDate | Select-Object Name, AccountExpirationDate
If you want to see the raw stored integer, useful when diagnosing a suspected offset, query the accountExpires property directly:
Get-ADUser -Identity jsmith -Properties accountExpires | Select-Object Name, accountExpires
A value of 0 or 9223372036854775807 both mean "never expires." Any other number is the UTC timestamp in AD's 1601-based format. If AccountExpirationDate shows the day before you intended, you've hit the midnight offset. Re-run the command with the date advanced by one day. You can also cross-check visually in ADUC by reopening the account's Account tab.
ADManager Plus replaces scripts and one-off GUI edits with a single console for AD and Microsoft Entra ID management:
Account expires is the calendar date after which an Active Directory (AD) user account can no longer be used to log in. It is stored in the accountExpires attribute as a UTC timestamp. When the date passes, AD automatically prevents the user from authenticating. This means the account isn't deleted, just rendered unusable until an administrator sets a new expiration date or clears it. It's commonly used for contractors, interns, and temporary staff whose access should end on a known day.
Account expiration disables the whole account on a fixed calendar date and is stored in accountExpires. Password expiration only requires the user to set a new password after a certain number of days, controlled by a domain policy or fine-grained password policy, and it leaves the account otherwise active. If you meant to force a password change rather than end access, you'd adjust the password policy and not the account expiration date. The two settings are independent.
Password expiration is governed by Group Policy, not the accountExpires attribute. Open the Default Domain Policy or a fine-grained password policy and set the Maximum password age under Computer Configuration > Policies > Windows Settings > Security Settings > Account Policies > Password Policy. This is separate from setting an account's expiration date.
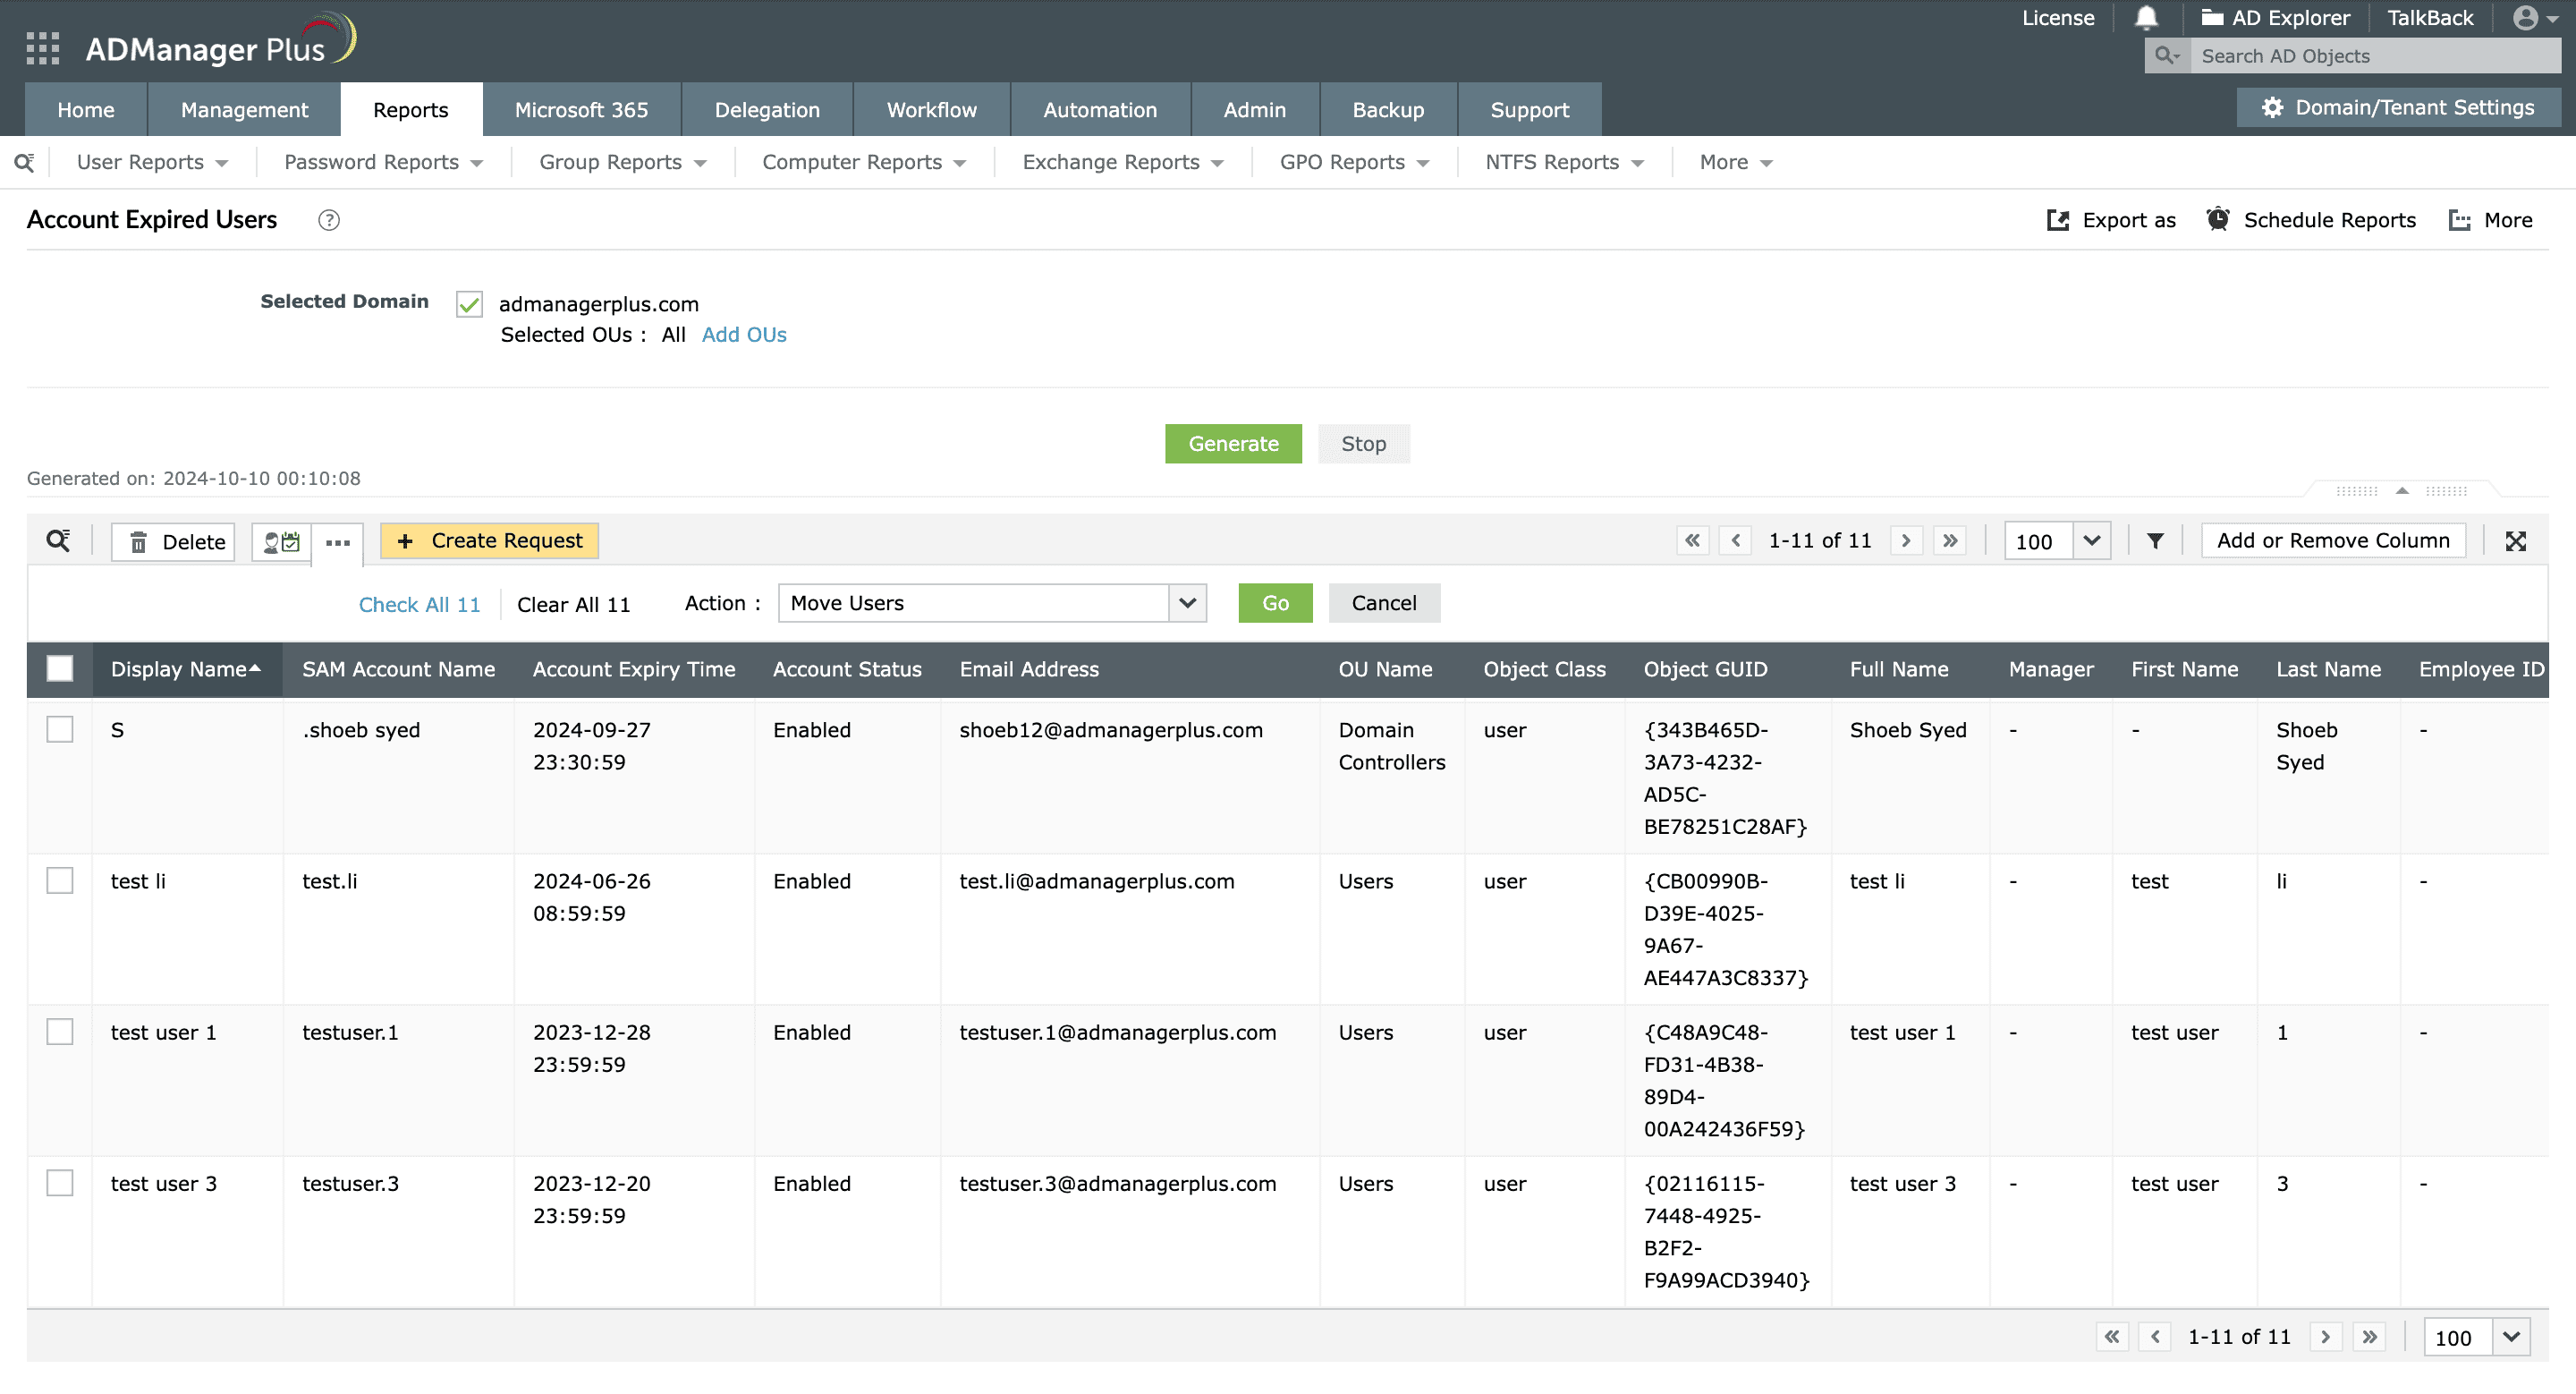
Native AD doesn't send advance warnings before an account or password expires. To notify users ahead of time, you'd script periodic Get-ADUser queries against AccountExpirationDate and send email reminders, or use a management tool that has notification workflows built in. ADManager Plus, with its prebuilt reports, can surface soon-to-expire accounts and alert stakeholders automatically, which is more reliable than a scheduled script.
In PowerShell, calculate the date inline using 31 so the account stays usable through day 30 and expires at the start of day 31. Here's an example PowerShell command for doing this:
Set-ADAccountExpiration -Identity "jsmith" -DateTime (Get-Date).AddDays(31)
For a script-free approach, in ADManager Plus, go to Management > User Management > Modify Single User, open the Account tab, choose End of in the Account Expires section, set the date 30 days out, and click Update User.
This is the "end of day" midnight offset. A bare date such as 2026-12-31 is read as midnight at the start of that day, so the account is already unusable on the 31st. To keep the account active through a given day, set the expiration to the following day: 2027-01-01 to remain usable through December 31. Verify with Get-ADUser -Properties AccountExpirationDate.

