User Management Lifecycle
Overview
Effective user management is essential for maintaining system security and ensuring appropriate access control. This document outlines the complete lifecycle of user accounts, detailing their creation, management, and role-based access within the system.
User accounts, which can be either local accounts or Active Directory accounts, are created within the Central Server to grant access to endpoints, custom groups, and remote offices. Roles define a set of permissions that determine what actions a user can perform within the system and outline the scope of which computers or devices the user will be allowed to manage. Each user is assigned a role, which dictates their level of access.
Table of Contents
Prerequisites for User Creation
A configured mail server is essential for user account creation and user account-related notifications, such as password resets, account activation, and security alerts. Proper SMTP settings must be in place to ensure seamless email communication. Refer to the Mail Server Configuration document for detailed setup instructions.
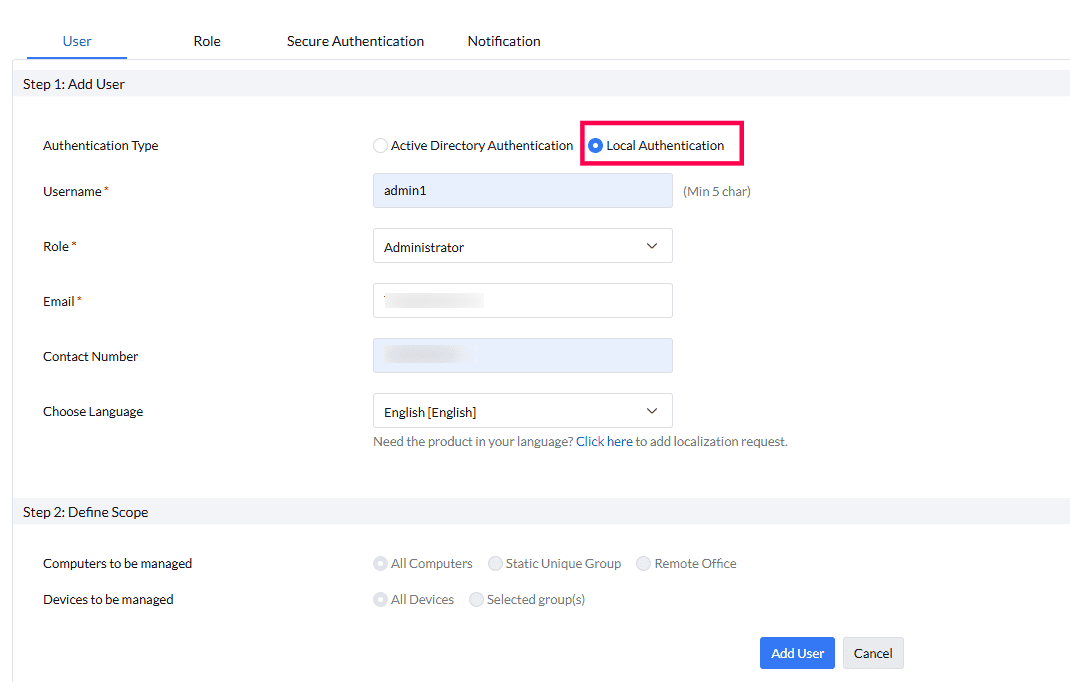
Local User Creation
- Navigate to the Admin tab and select User under User Administrator.
- Choose Local Authentication as the authentication type.
- Enter a User Name and manually enter the user’s email address.
- Select the Role from the drop-down list, which includes both predefined and user-defined roles.
- Enter the user's Contact number if necessary.
- Choose a language from the drop-down list for multi-language support; refer to the supported languages document.
- Define the user's scope by specifying which computers they need to manage; refer to the Scope of the User section for detailed instructions.
- Click on Add User.

Active Directory (AD) User Creation
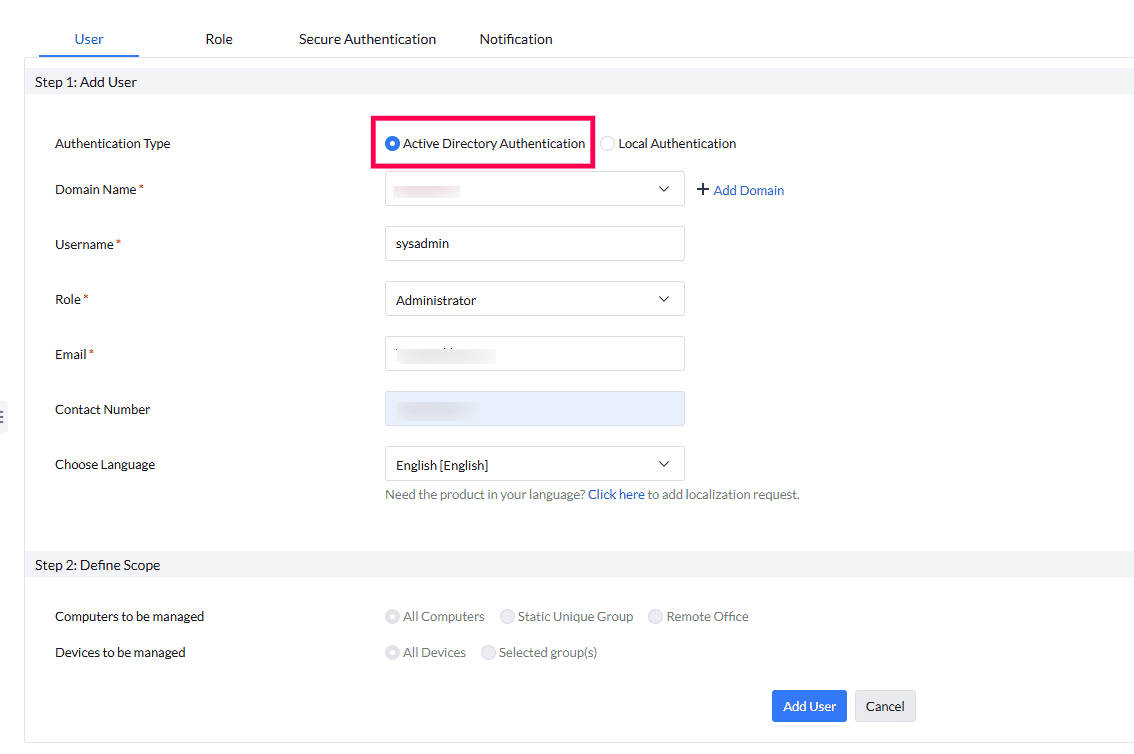
- Navigate to the Admin tab and select User under User Administrator.
- Choose Active Directory Authentication as the authentication type.
- Select a Domain in the Domain Name field; refer to the document on how to add a domain.
- Choose a username fetched from Active Directory (AD).
- The user’s email address will be automatically fetched from Active Directory if available. If not, manually enter the email address.
- Select the Role from the drop-down list, which includes both predefined and user-defined roles.
- Enter the user's Contact number if necessary.
- Choose a language from the drop-down list.
- Define the user's scope by specifying which computers they need to manage.
- Click on Add User.

Note: If you want to enable login using SAML authentication, you must create either a Local User or an AD User. For detailed steps, refer to the SAML Authentication documentation.
Scope of the User
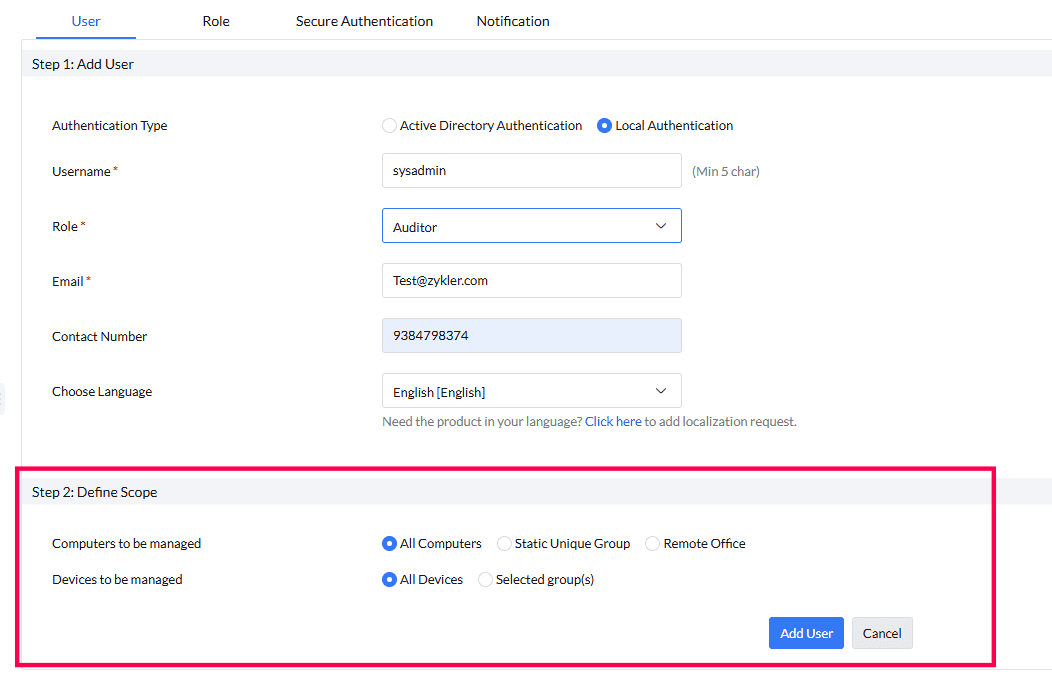
The user is responsible for managing computers within their assigned scope on a Central Server. The scope can be customized, and there are two types of scope:
- Computers to be Managed
- Devices to be Managed
Computers to be Managed
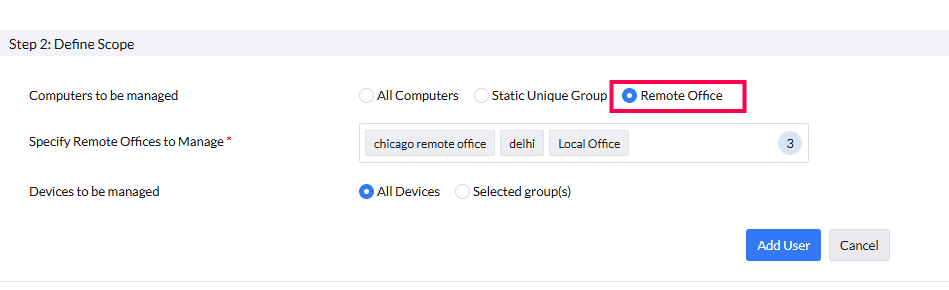
The user can be assigned one of the following types of computer scope:
- All Computers: The user has access to all computers managed by the Central Server.
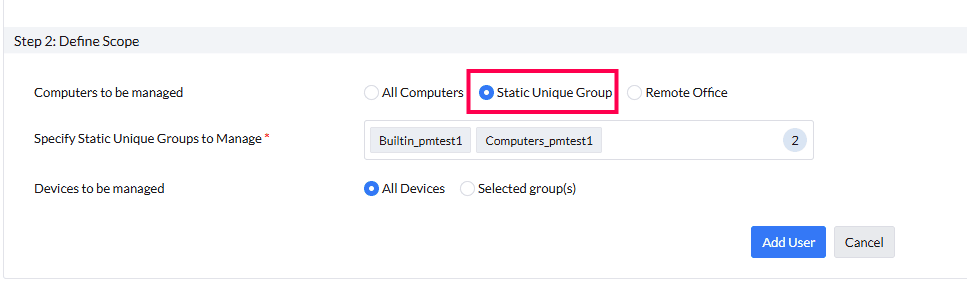
- Static Unique Groups: The user has access to specific groups of computers created as custom groups. Refer to the custom groups document.
- Remote Office: The user has full access to computers belonging to a designated remote office. Refer to the Remote Office document.



Devices to be Managed
The user can be assigned:
- All Devices: The user has access to manage all devices.
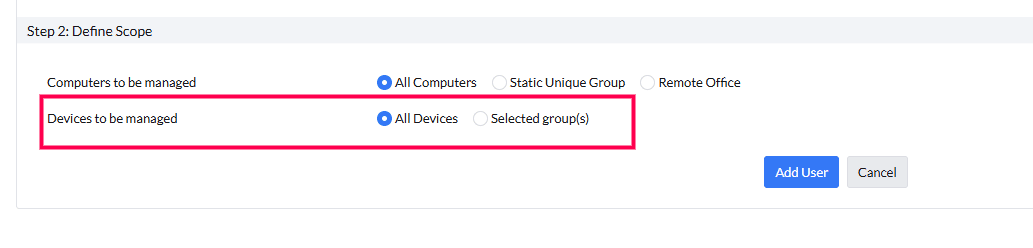
- Device Groups: The user has access to specific groups of devices. Refer to the device groups document.

Note: Only Administrator Role users have full access to the User Management console.
User Management Actions
Administrator users can modify, delete, reset passwords, disable accounts, and regenerate QR codes for users using the Action button.
1. Modify User
Administrator users can modify, add, and remove user details, as well as define scope.
How to Modify User?
- Navigate to the Admin tab.
- Select User under User Administrator.
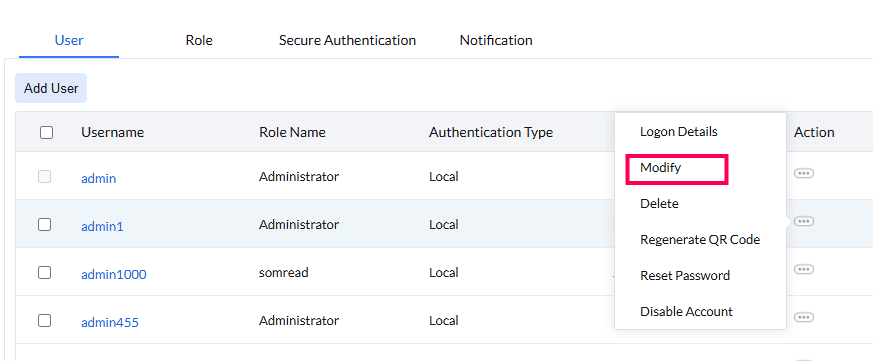
- On the user page, click the three-dotted action button in the action column.
- Select Modify. The user details page will open where you can modify, add, and remove details.

Modifying AD User
- If it is an AD user, you can modify the domain name.
- Note: The username cannot be modified.
- Modify the role, email, contact number, and language.
- Define the user's scope by specifying which computers and devices they need to manage.
Modifying Local User
- Modify the role, email, contact number, and language.
- Note: The username cannot be modified.
- Define the user's scope by specifying which computers and devices they need to manage.
Convert User Authentication Type
- You can change an AD user to a local user by modifying the authentication type.
- The user will then receive a password creation link via email, allowing them to log in as a local user.
- You can also change a local user to an AD user by modifying the authentication type.
- Note: The same username must be present in Active Directory.
2. Logon Details
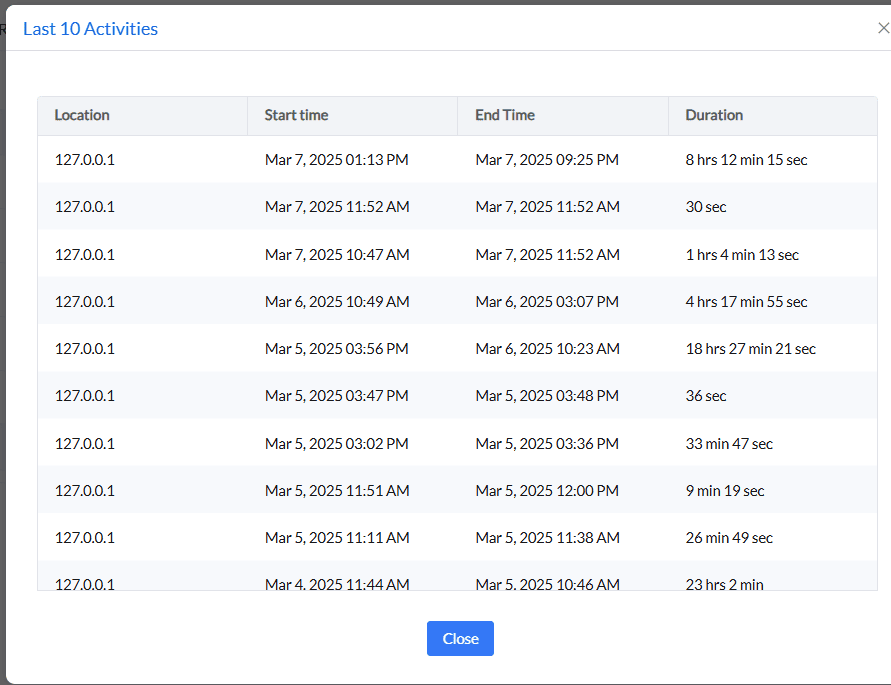
Administrator users can view the logon details of users to monitor their logon activities.
How to view Logon Details?
- Navigate to the Admin tab.
- Select User under User Administrator.
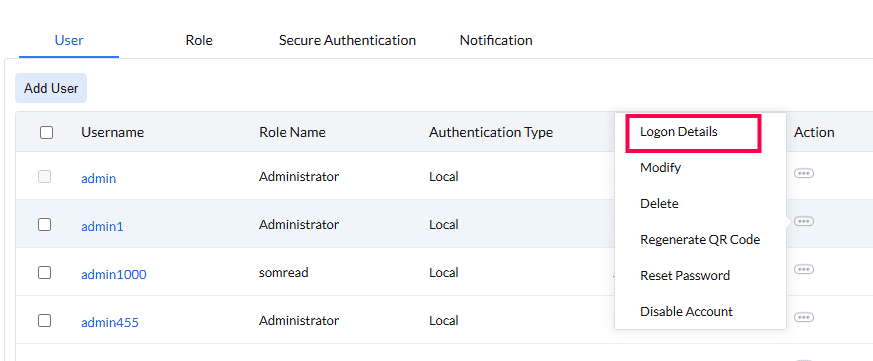
- On the user page, click the three-dotted action button in the action column.
- Select Logon Details.
- A popup will display the logon details of the last 10 activities.


3. Delete User
Removing a user from the Central Server will revoke their access. Deletion permanently removes personal information such as email and contact number from notifications. If API keys have been generated, those integrations will be disabled unless new keys are generated prior to deletion.
How to Delete User?
- Navigate to the Admin tab.
- Select User under User Administrator.
- Click the three-dotted action button in the action column.
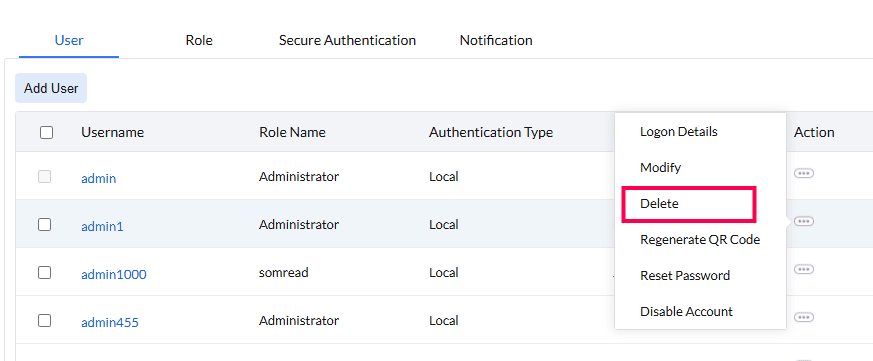
- Select Delete User.
- In the Confirmation User Deletion Popup, optionally check the box to provide alternative contact details for replacement.
- Remove any secondary contact details used for notifications.
- Click Delete User to confirm deletion.

4. Reset Password
The following steps describe the password reset process for a technician or Administrator using the Central Server web console.refer to the User Password Reset Guide.
How to Reset Password?
- Navigate to the Admin tab.
- Select User under User Administrator.
- Click the three-dotted action button in the action column.
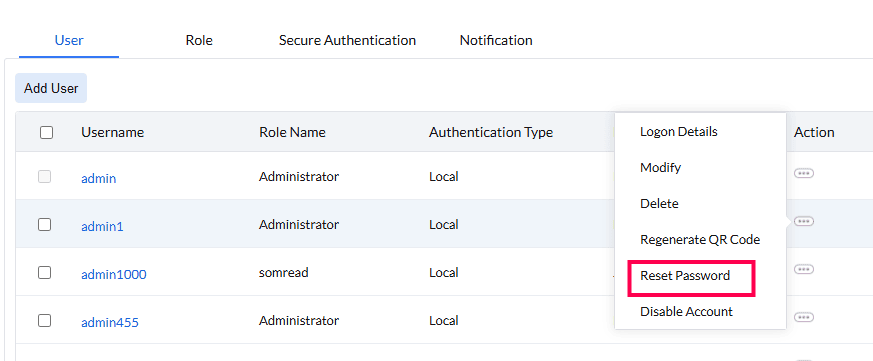
- Select Reset Password.
- A mail will be sent to the user with instructions and a link to reset the password.
- The password reset link will expire in 30 minutes.
- If the email is not delivered due to mail server issues, a “Send link manually” option will appear in the Remarks column for that user.
- The Administrator can copy and manually send the password reset link.

5. Disable User
Disabling a user account prevents login until reactivation and disrupts any enabled integrations. This action helps manage inactive accounts. For inactivity-based disabling, refer to the User Account Policy.
How to Disable User Account?
- Navigate to the Admin tab.
- Select User under User Administrator.
- Click the three-dotted action button in the action column.
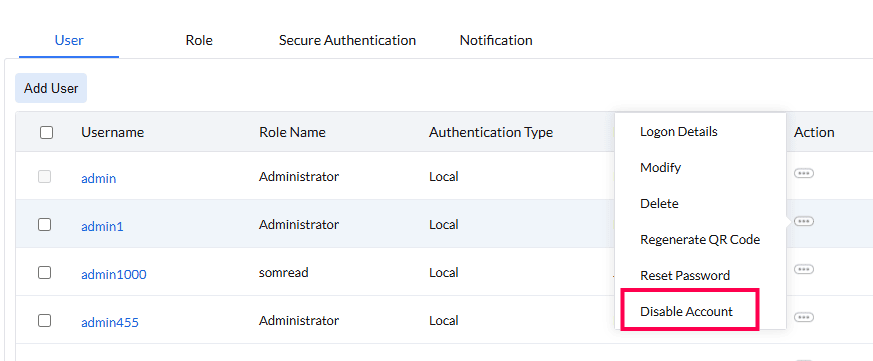
- Select Disable Account.
- In the confirmation popup, select "Yes, disable."

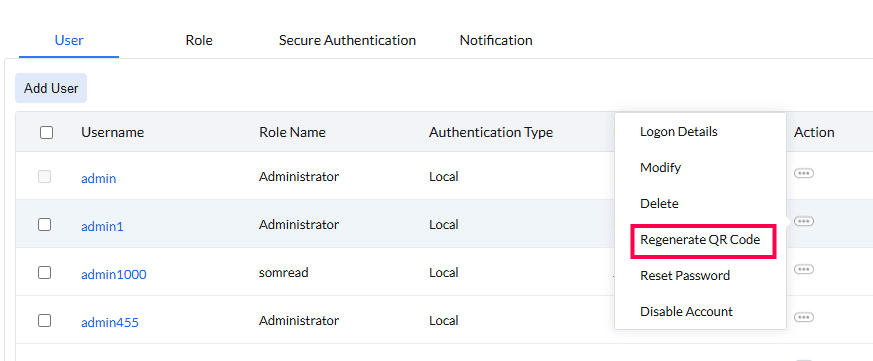
6. Regenerate QR Code
If secure authentication is enabled via an Authenticator app, the Administrator can regenerate a QR code to set up OTP on a new device if the current one is lost or the app is accidentally removed.
How to Regenerate QR Code?
- Navigate to the Admin tab.
- Select User under User Administrator.
- Click the three-dotted action button in the action column.
- Select Regenerate QR code.
- In the confirmation popup, select "Regenerate QR code."

Personalization
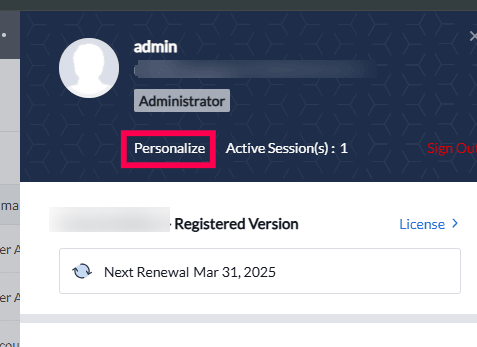
The Personalize menu allows users to customize their account settings for a tailored experience. It enables session management, time zone and format settings, language preferences, and password updates for better security and usability.
How to Access Personalization?
- Log in to the Central Server web console.
- Click the user profile icon located at the top-right corner, then select Personalize.

Change Session Expiration
- Under the General Settings tab, locate the Session Expiration dropdown and select a duration.
- Go to the Choose Time Zone dropdown and select the appropriate time zone.
- Locate the Choose Time Format dropdown and select the desired date and time format.
- Find the Display Language dropdown and choose your preferred language.
- Click the Save button to apply the changes.
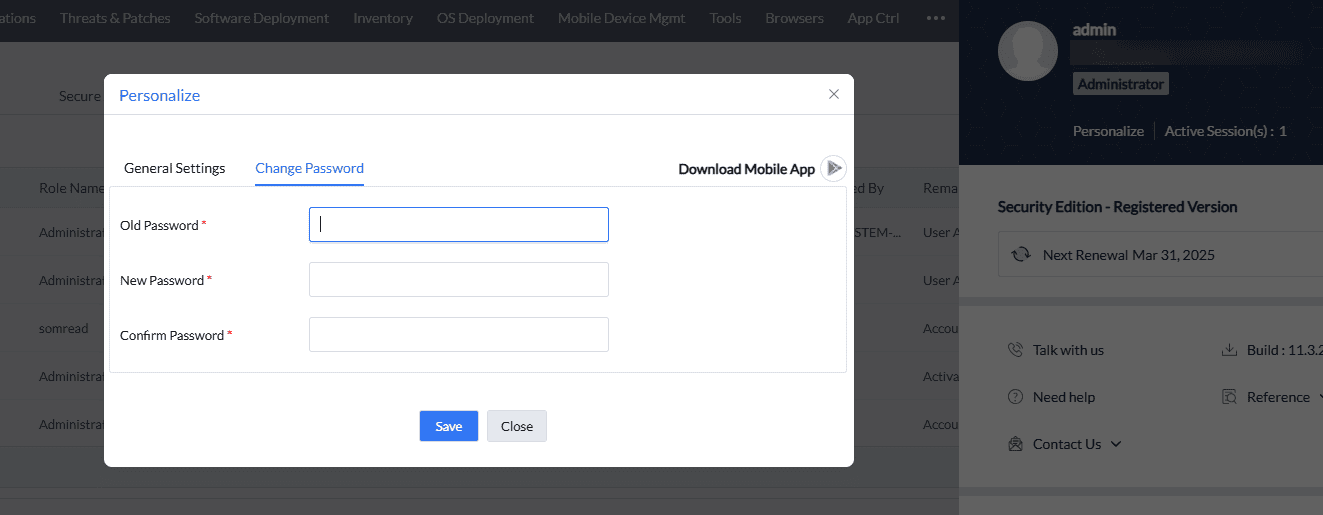
Changing Your Password
- Open the Personalize window and click the Change Password tab.
- Enter your current password in the Old Password field.
- Type your new password in the New Password field, ensuring it meets the policy requirements.
- Re-enter the new password in the Confirm Password field for verification.
- Click Save to update your password or Close to cancel. Refer to the detailed password reset document for more information.

Active Session
Users can log in to multiple sessions simultaneously on different browsers.
How to view Active User Sessions?
- Navigate to the Admin tab.
- Click the user profile icon located at the top-right corner.
- Select Active Session.
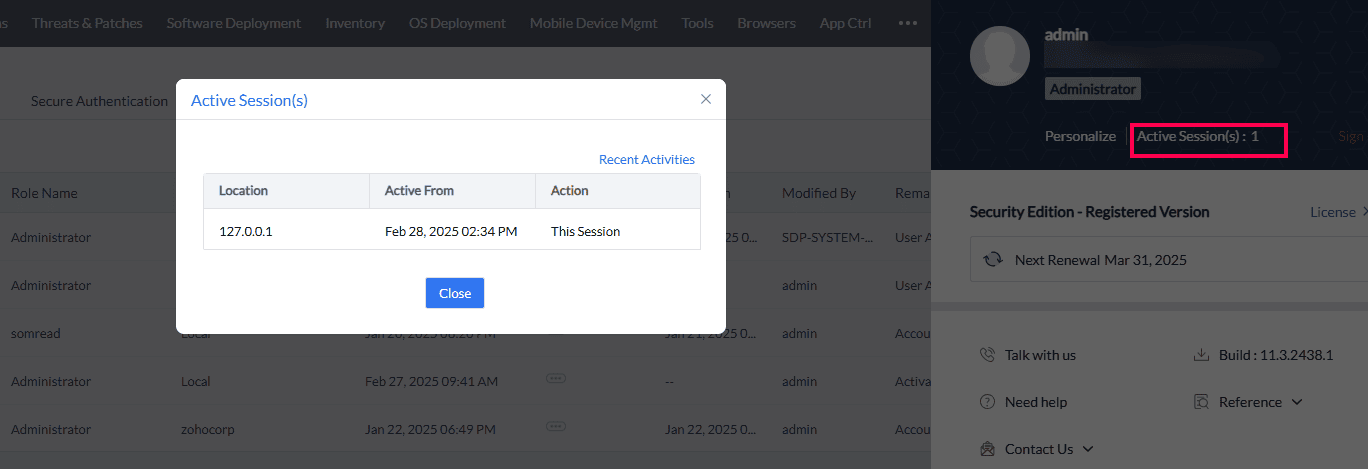

The Administrator can configure session expiry settings in the User Account Policy; refer to the related link.
Notifications
The Notification feature allows the Administrator to receive alerts when users perform various operations. To receive these alerts, the Administrator's email address(es) must be configured.
How to Configure Notifications?
- Log in to the Central Server.
- Navigate to the Admin tab.
- Select User under User Administrator.
- On the user page, select Notifications.
- Configure notifications for the events as shown in the image below:

- Administrator's E-mail Address: Enter one or more email addresses.
- Mobile App Notification for Administrator: Use the dropdown labeled Select Administrator(s) to be notified to choose the Administrator who will receive mobile notifications.
- Save the Configuration: Click Save to apply the changes.


