Prerequisites for OWA logs gathering task
You must schedule the OWA Logs gathering task to fetch the Windows Internet Information Services (IIS) logs. IIS logs are gathered from Exchange Servers from the default log path (C:\inetpub\logs\LogFiles\W3SVC1). You can update the log path using the Log Path configuration option of Exchange Reporter Plus. Different approaches are required to enable website log collections for different servers. Provided below are the approaches to collect website log data for IIS 6 and IIS 7 servers.
Steps to enable website log collections from IIS 6 servers
Note: To enable CSCookie, follow the steps given in the Appendix.
- Click Start and navigate to Control Panel → Administrative Tools → Internet Information Services (IIS) Manager.
- Right-click on Websites. Go to Default Web Site, and select Properties.
- Click the Properties button under Enable Logging section.
- Click on the Advanced Tab.
- Ensure that the following fields are selected: date, time, cs-uri-stem, cs-username, c-ip, cs(User-Agent) and sc-status.
- Click OK.
Steps to enable website log collections from IIS 7 servers
- Click Start and navigate to Control Panel → Administrative Tools → Internet Information Services (IIS) Manager.
- In the Connections pane, expand the server name, expand sites, and then select the web site on which you want to configure logging. The default is W3SVC1.
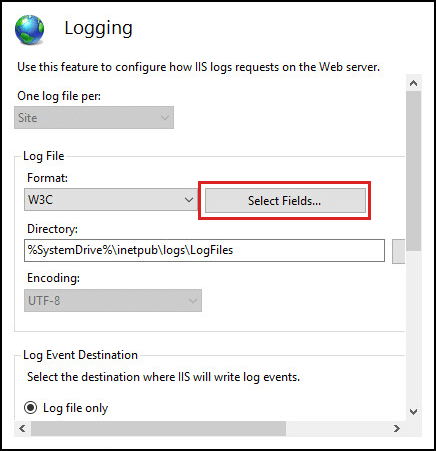
- In the Home pane, double-click Logging.
- Click on Select Fields.
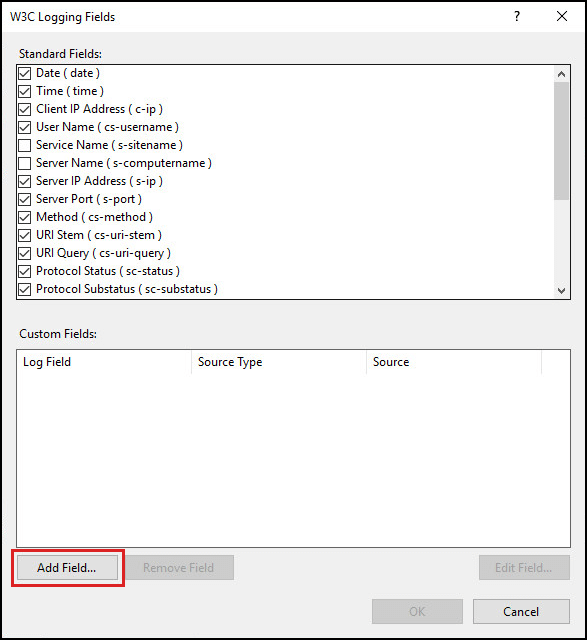
- In the W3C Logging fields, ensure that the following fields are selected: date, time, cs-uri-stem, cs-username, c-ip, cs(User-Agent), and sc-status.
- Click OK.
- Click Apply in the right side pane.
Advanced IIS logging configuration
When you load balance your website at layer 7, the actual client source IP address is replaced by the load balancer's IP address, and only this address will be recorded in the IIS logs. To circumvent this, you have to insert XFF headers on the load balancer to track the actual client source IP address. IIS should then be reconfigured to make this data available in the logs. The configuration steps varies based on the version of IIS you are using. Exchange Reporter Plus does not support advanced logging for IIS versions earlier than 7.0.
Steps to enable advanced IIS logging in IIS 8.5 and later servers
A custom logging field can be added to record XFF headers. To enable this feature:
- Click Start. Navigate to Control Panel → Administrative Tools → Internet Information Services (IIS) Manager.
- Click the appropriate website for which you want to enable XFF logging from the Connections pane on the left. The Home page will be displayed in the main panel.
- From the Home page, double-click Logging.
- In the Log File section, click on Select Fields.
- Click on the Add Field option.
- In the Add Custom Field window,
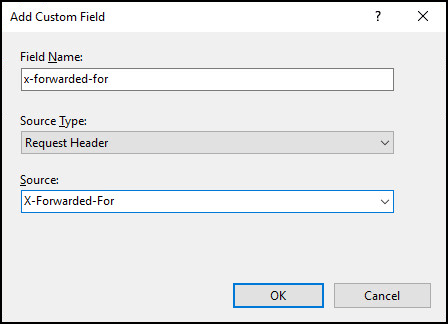
- Type X-Forwarded-For, or a name of your choice, in Field Name.
- Type X-Forwarded-For in Source
- Leave Source Type set to Request Header.
- Click OK in the Add Custom Field window.
- Click OK in the W3C Logging Fields window.
- From the Actions pane, click Apply to implement the changes.
- The log files are located by default in the directory %SystemDrive%\inetpub\logs\LogFiles. IIS creates new log files and appends _X to the log file names to indicate that they contain custom fields.
- The custom field you added in Step 6 must be configured in Exchange Reporter Plus.
- Go to the Settings tab of Exchange Reporter Plus.
- Navigate to Configuration → Exchange Server → Log/Database Path from the left pane.
- Select your Organization Name and Server Name.
- Click on the Advanced Logging option found near the OWA (IIS) Log Path field.
- Check the Enable Advanced Logging option.
- In the Custom Header field, enter the name you had provided for Field Name in Step 6.
- Click on Save.
Steps to enable advanced IIS logging in IIS 7 and 7.5 servers
For IIS 7 and 7.5, the Advanced Logging add-on must be installed. This can be downloaded here. Once installed on the IIS server, you'll see an option called Advanced Logging in IIS.
- Click Start. Navigate to Control Panel → Administrative Tools → Internet Information Services (IIS) Manager.
- Click the appropriate website where you want to enable XFF logging from the Connections pane on the left. The Home page will be displayed in the main panel.
- From the Home page, under IIS, double-click Advanced Logging.
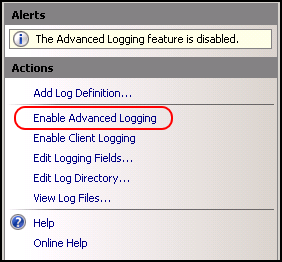
- From the Actions pane on the right, click Enable Advanced Logging, and then Edit Logging Fields.
- On the Edit Logging Fields window click Add Field, and
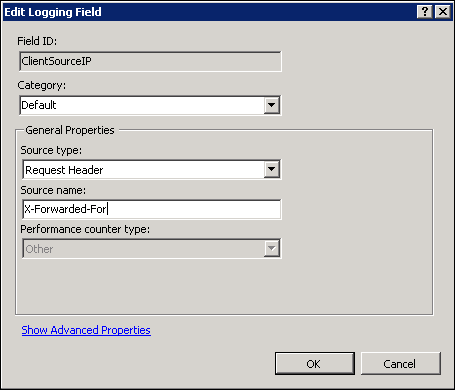
- Type X-Forwarded-For, or a name of your choice, in Field ID.
- Select Default in Category.
- Select Request Header from the Source type drop-down.
- Type X-Forwarded-For in Source name.
- Click OK in the Add Logging Fields form.
- Click OK in the Edit Logging Fields form.
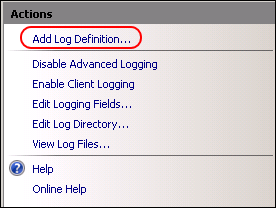
- From the Actions pane on the right, click Add Log Definition.
- Enter Advanced Logs, or a name of your choice, in the Base file name field.
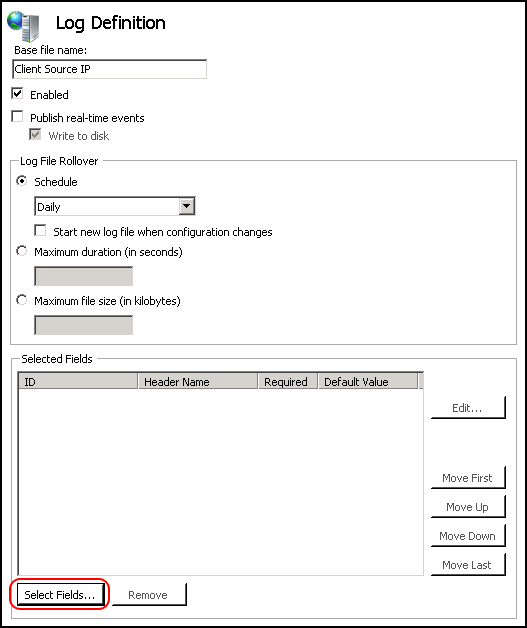
- Click Select Fields.
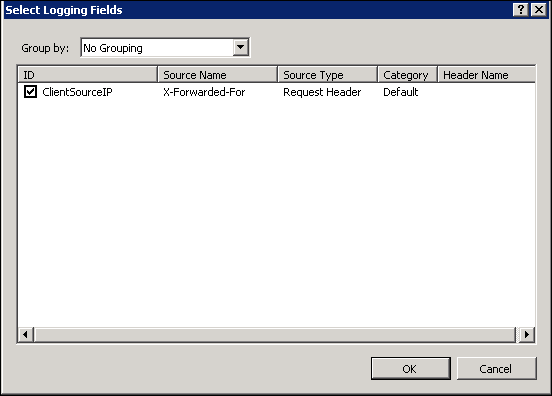
- Ensure that the following fields are selected:
- Custom field created in Step 5
- date
- time
- cs-uri-stem
- cs-uri-query
- cs-username
- c-ip
- cs(User-Agent)
- cs(Cookie)
- sc-status
- Click OK on the Select Logging Fields form, then click Apply in the Actions pane.
- Click Return to Advanced Logging in the Actions pane.
- From IISreset section, choose Restart to apply the new settings.
- In the Actions pane on the right, click Enable client Logging.
- Now click on the Edit Log Directory option found in the Actions pane.
- Copy and save the value of the Server log directory field. You will need this later.
- The Custom Field you had added in Step 5 must be configured in Exchange Reporter Plus.
- Go to the Settings tab of Exchange Reporter Plus.
- Navigate to Configuration → Exchange Server → Log/Database Path from the left pane.
- Select your Organization Name and Server Name.
- Click on the Advanced Logging option found near the OWA (IIS) Log Path field.
- Check the Enable Advanced Logging option.
- In the Log Name field enter the name you had provided for Base file name in Step 7.
- In the Custom Header field enter the name you had provided for Field ID in Step 5.
- Click Save.
In the OWA(IIS) Log Path field paste the value you copied in Step 15, and Replace %SystemDrive% by C:\. Eg: Replace %SystemDrive%\inetpub\logs\AdvancedLogs by C:\inetpub\logs\AdvancedLogs.
Failed request tracing configuration for login failure report and other reports under OWA General category
Prerequisite: After the default installation of IIS 7 or above, install the tracing role service to use failed request tracing. After you install the role service, you must enable failed request tracing at the site level, application level, or directory level.
Note: This logs and data will roll over every midnight (00:00).
Step to install tracing role service
Windows Server 2012 (or) Windows Server 2012 R2:
- Go to Server Manager.
- In Server Manager, click the Manage menu, and then click Add Roles and Features.
- In the Add Roles and Features wizard, click Next. Select the installation type and click Next.
- Select the destination server and click Next.
- On the Server Roles page, select Web Server (IIS), Web Server, Health and Diagnostics, and then select Tracing. Click Next.
- On the Select features page, click Next.
- On the Confirm installation selections page, click Install.
- On the Results page, click Close.
Windows 8 (or) Windows 8.1:
- Click Start and go to Control Panel.
- Navigate to Programs and Features → Turn Windows features on or off.
- Expand Internet Information Services, World Wide Web Services, Health and Diagnostics, and then select Tracing.
- Click OK and close the window.
Windows Server 2008 (or) Windows Server 2008 R2:
- Click Start. Navigate to Administrative Tools → Server Manager.
- In the Server Manager hierarchy pane, expand Roles, and click Web Server (IIS).
- In the Web Server (IIS) pane, scroll to the Role Services section, and click Add Role Services.
- On the Select Role Services page, select Tracing, and click Next.
- On the Confirm Installation Selections page, click Install.
- On the Results page, click Close.
Windows Vista (or) Windows 7:
- Click Start, and go to Control Panel.
- In Control Panel, click Programs and Features, and then click Turn Windows Features on or off.
- Expand Internet Information Services, World Wide Web Services, Health and Diagnostics.
- Select Tracing, and click OK.
Steps to enable tracing
- Open Internet Information Services (IIS) Manager.
- If you are using Windows Server 2012 or Windows Server 2012 R2:
On the taskbar, click Server Manager. Navigate to Tools → Internet Information Services (IIS) Manager.
- If you are using Windows 8 or Windows 8.1:
Hold down the Windows key, press the letter X, and click Control Panel. Go to Administrative Tools, and then double-click Internet Information Services (IIS) Manager.
- If you are using Windows Server 2008 or Windows Server 2008 R2:
On the taskbar, click Start, point to Administrative Tools, and then click Internet Information Services (IIS) Manager.
- If you are using Windows Vista or Windows 7:
On the taskbar, click Start, and then click Control Panel. Double-click Administrative Tools, and Internet Information Services (IIS) Manager.
- In the Connections pane, select the server connection, site, application, or directory for which you want to configure failed request tracing.
- In the Actions pane, click Failed Request Tracing.
- In the Edit Web Site Failed Request Tracing Settings dialog box, select the Enable check box to enable tracing.
- Leave the default value or type a new directory where you want to store failed request log files in the Directory box.
- Type the number of failed request trace files you want to store in the Maximum number of trace files box, and then click OK.
Known Issues on IIS version 7 and 7.5 as per Microsoft
1. No data is logged in the cs-username field while using the Advanced Logging feature of Internet Information Services (IIS)
Solution:
Note: The following steps involve editing the applicationHost.config file. Always back up your configuration files before making any changes.
To work around this issue, edit the applicationHost.config file for the Advanced Logging feature using the following steps:
- Open the applicationHost.config file under C:\Windows\System32\inetsrv\config path in a text editor.
- Locate the <advancedLogging> section.
- Inside advancedLogging, locate the <field id="UserName"...>
- Modify the sourceType field to be BuiltIn, as follows:
<field id="UserName" sourceName="UserName" sourceType="BuiltIn" logHeaderName="cs-username" category="Default" loggingDataType="TypeLPCSTR" />
2. Logging string values with quotation marks
The user name is displayed within double quotes in some cases. This is usually not the desired output. You can correct this issue by modifying the delimiter value.
Solution:
- Open the file under C:\Windows\System32\inetsrv\config\schema\IISAdvancedLogging_schema.xml path in a text editor.
- Locate the <attribute name="delimiter"...> entry.
- Modify the default value to | as follows: <attribute name="delimiter" type="string" defaultValue="|" />
Appendix
Steps to enable csCookie
- Open the Run dialog box and enter inetmgr.
- In the left pane, navigate to the Machine Name → Sites.
- Click Default Web Site.
- In the middle pane, double-click Logging.
- In the right pane, under Actions, click Enable.
- For IIS 7 and above:
- Under the Log File section, click Select Fields.
- Check the cs(Cookie) box.
- Click OK.
- For IIS 6:
- Click Properties and go to the Advanced tab.
- Check the cs(Cookie) box.
- Click OK.
Note:If you face any issues while configuration, click
here to review the troubleshooting tips.
 ADManager Plus
 ADAudit Plus
 ADSelfService Plus
 M365 Manager Plus