Organization Roles
Purpose and Introduction
Configuring the Organization roles helps in enabling the role based approval process for the service requests. Once the organization roles are configured and the users are associated with it, the role based approval can be configured from the service templates. These organization roles can be created by using the four cards representing four role types i.e Organizational Roles, Site Roles, Regional Roles and Departmental Roles. Organizational roles include roles that are specific to the organization as a whole i.e, roles such as CEO, CFO, COO will come under this Role Type. Site Roles are based on the sites the organization is split into. Roles such as Site Admin, Site Manager etc will come under this Role Type. Departmental Roles comprises of roles based on the various departments an organization may have. Roles such as Department Head, Department Manager etc will come under this Role Type. Regional Roles consists of roles based on the regions the organization is spread across. Roles such as Regional Incharge, Regional Head etc will come under this Role Type.
Quick links
- Creating Roles and Associating Users
- Managing the Roles
- Using Import XLS
- Configuring Role Based Approval
Creating Roles and Associating Users.
The roles can be created by clicking on the add new role icon ![]() present in all the four cards.
present in all the four cards.
Adding a New Role
- Go to Admin>> Account Details > Organization Roles.
- Select an Account.
- Click on add new role icon
 in the respective card such as Organizational roles card/Regional Roles card. For eg, For Organizational roles such as the CEO/COO, click the plus icon in the Organizational Roles card.
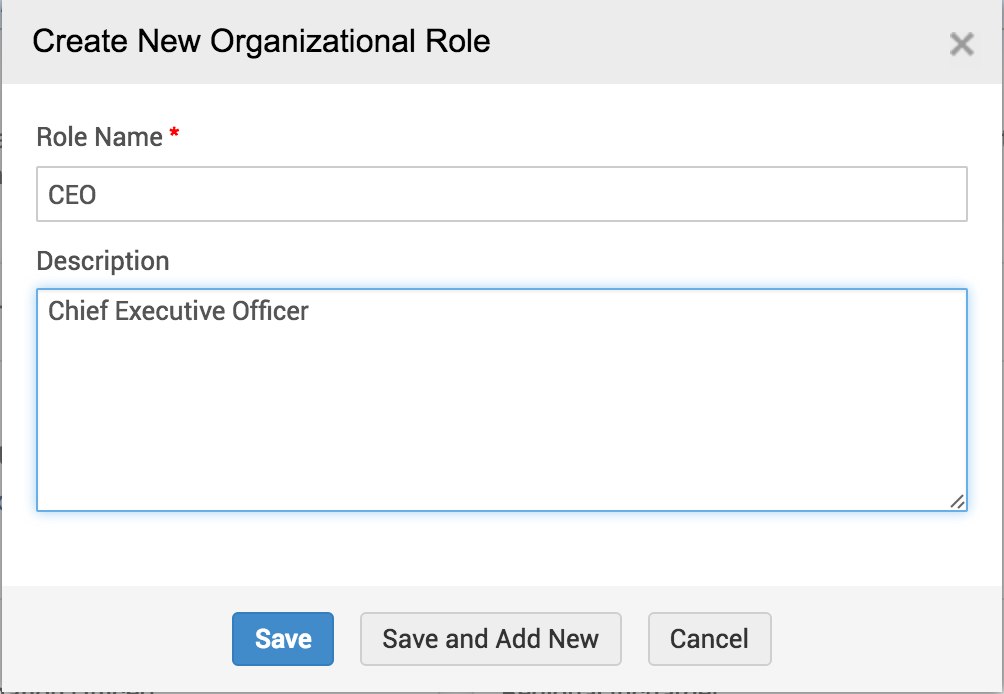
 - Enter the Role Name and the Description.
- Click Save. Same applies for the other three Role types.
- You can use Save and Add New option to save the role and create a new one. Same applies for the other three Role types.
Note
- The Role Name is mandatory.
- Character length for a Role name should not exceed 48. For Description it should not exceed 250.
Associating Users to the Roles
Associating users to Organizational Roles,
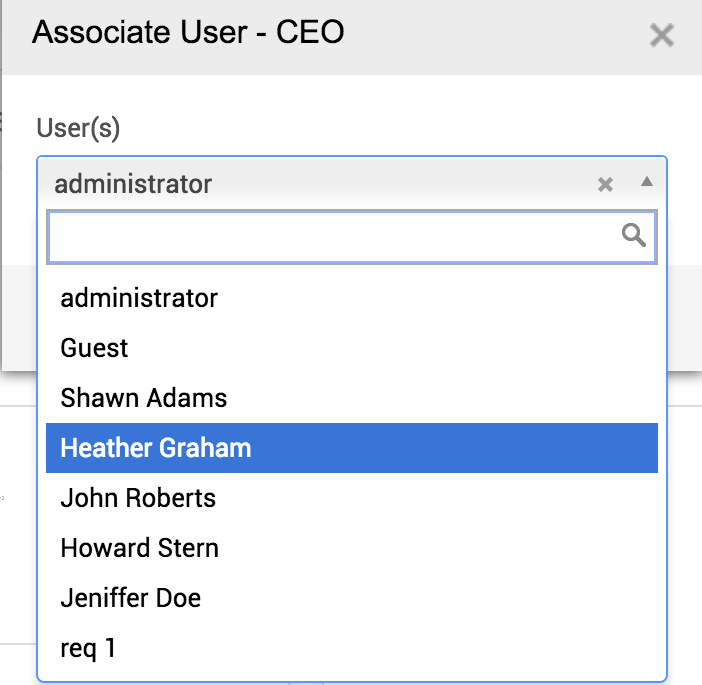
Assigning users to Organizational Roles is slightly different from assigning roles to the other Role Types. Since Organizational Roles are limited to one user per role, the roles tend to be unique across the organization without multiple profiles across department, region or sites unlike the other roles.
- Click on
 in the cards.
 - Select an user and click on Associate User.
- The users can be searched by using the user drop down menu.
Associating users to Departmental/Regional/Site Roles,
- Click on
 in the respective role.
For e.g. To associate users for Regional Manager role, click on in the Regional Manager role present in the Regional Roles card.
 - If you want to assign multiple regions to an user, select Multiple Region Option.
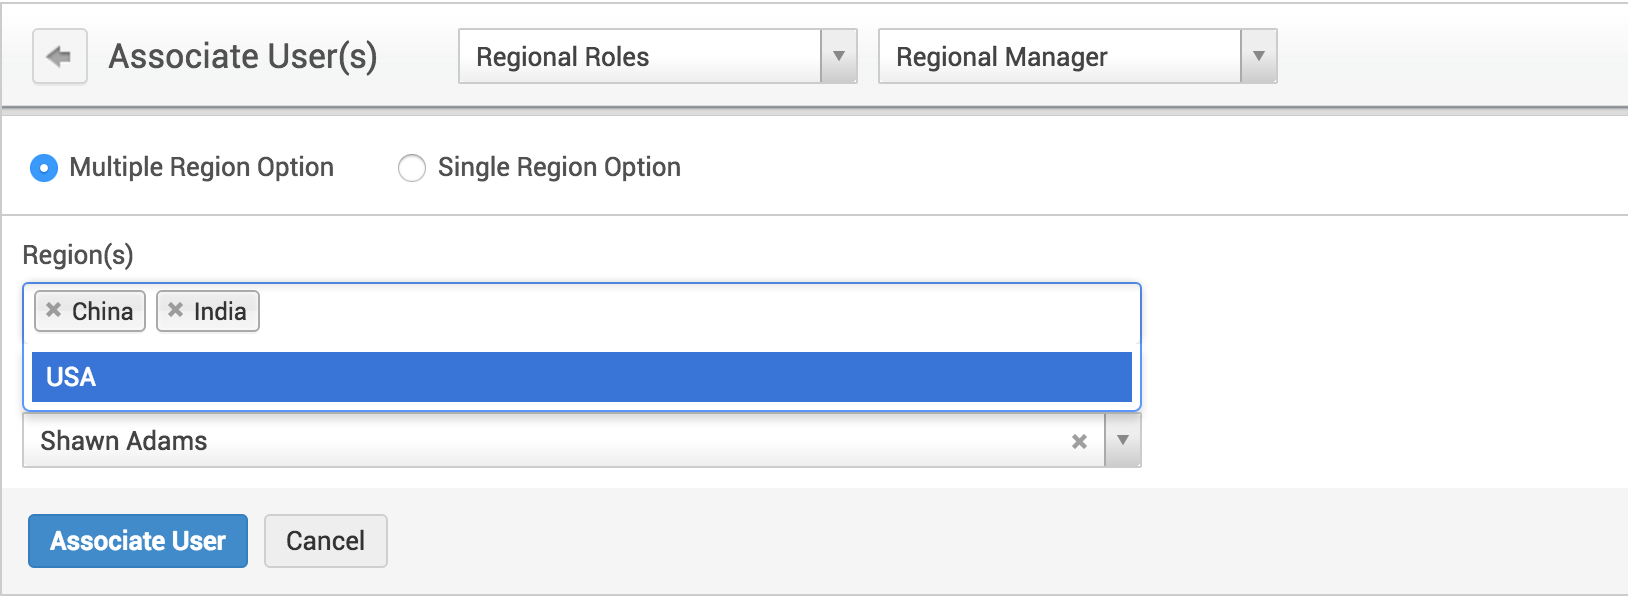
- Select the User and multiple Regions.
- Click on Associate User.
- If you want to assign user to a specific Region, select Single Region Option.
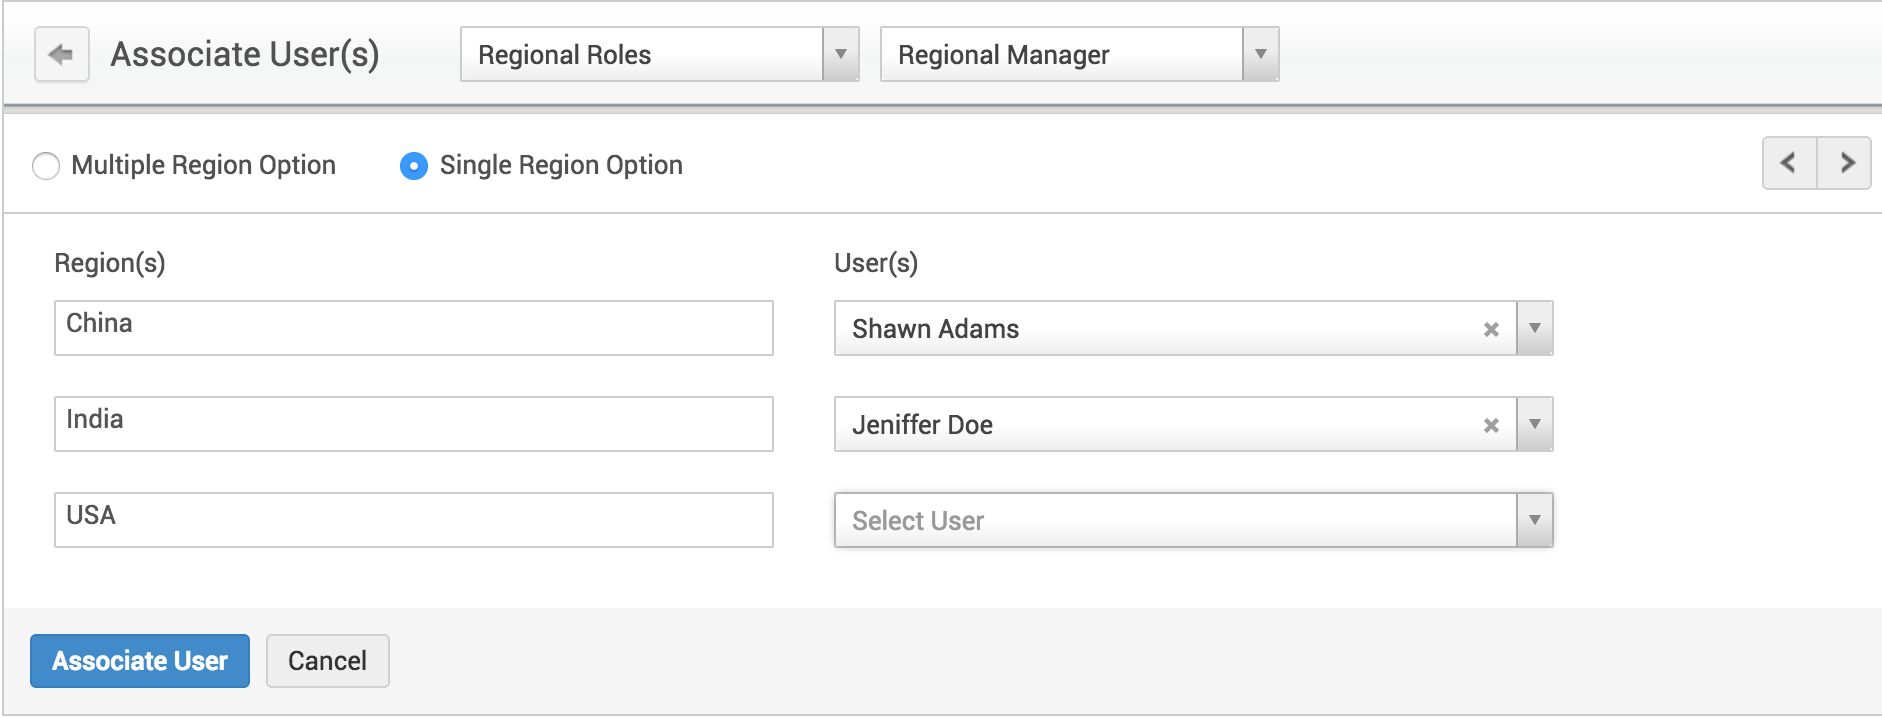
- Assign an User for the Regions individually.
- Click on Associate User.
Note
- Regions/Departments/Sites and Users can be searched in the corresponding fields.
- Use a "," followed by the search text to search the users using their email address and also to search sites/regions associated to the departments.
Managing the Roles.
The roles created can be edited or deleted. The users can be changed as well.
- Use
 present in the role cards to edit the user association.
 - You can add/remove regions, departments and sites using this option.
- Similarly use
 to delete a role.
 - To remove/change an user associated with a role, click on the association list.
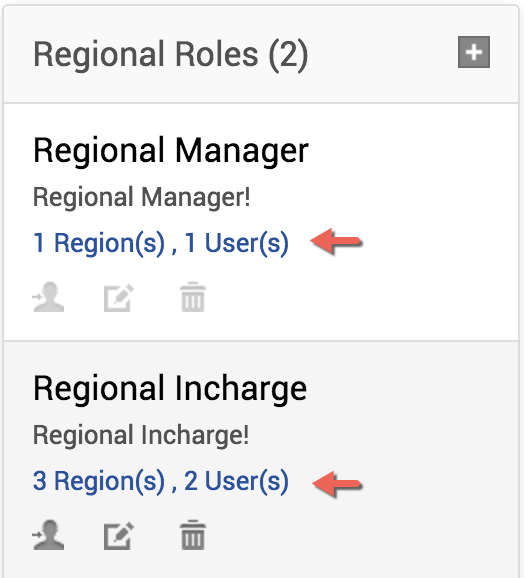
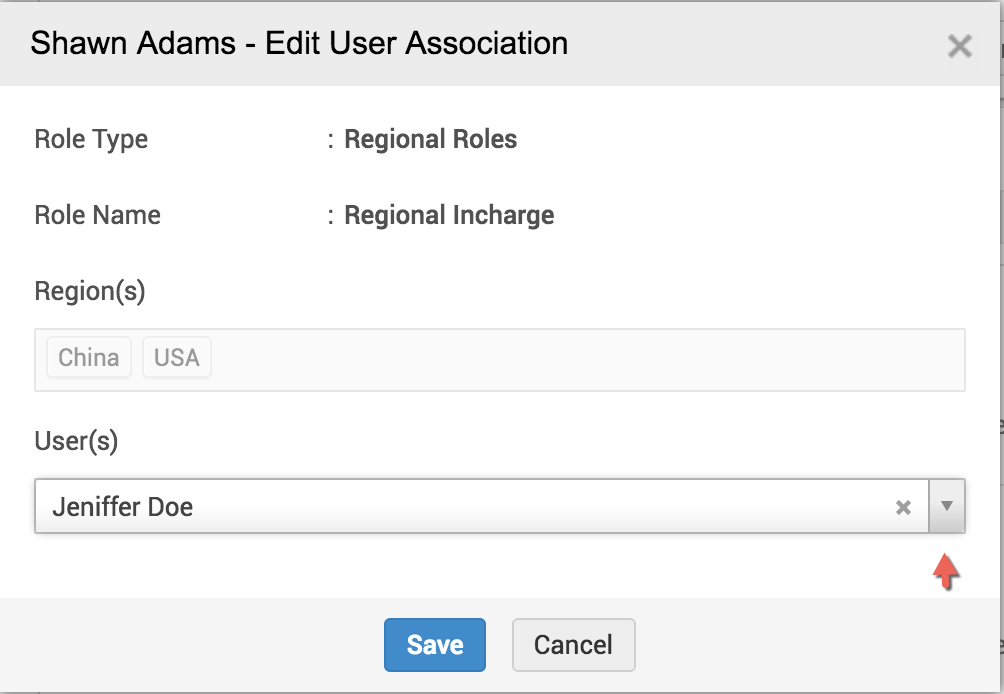
- Select Change user in the respective role.

- Select a new user and click Save.
Note
- If you delete a Role, all the user associations will get deleted as well.
- All the created roles will be listed in the respective cards. The roles/users can be edited from that list as well.
Using Import XLS
You can use the Import XLS option to import the roles and users from the excel sheet. Once the role names and users are imported from the excel sheet, field mapping can be done using the map fields option.
To import XLS,
- Click on the association list in any of the cards.

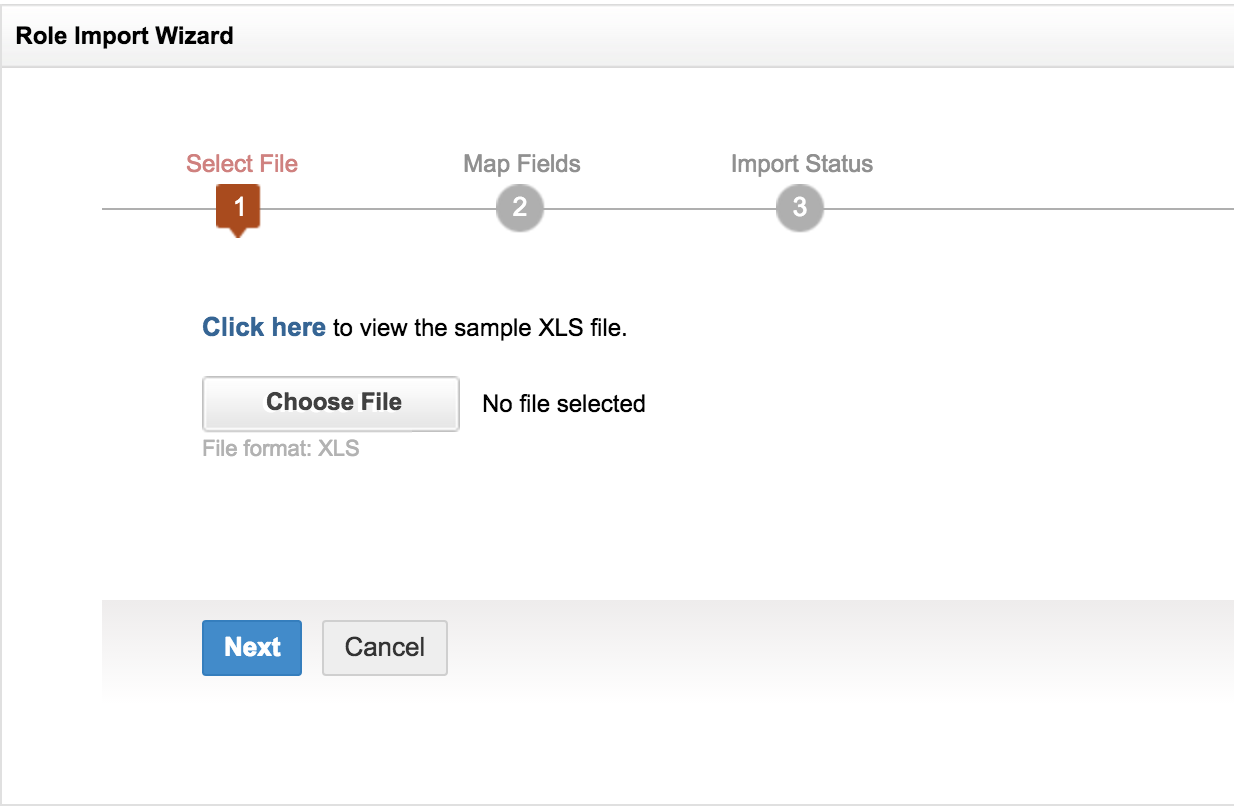
- Click on Import XLS option.

- Click on Choose File to select the excel file from your system. Download and use the sample file to use the same format.
- Once the import is done, the columns in the xls file will be populated in the select boxes beside each field label such as "Email", "Role name", "Role entity" and "Parent entity".
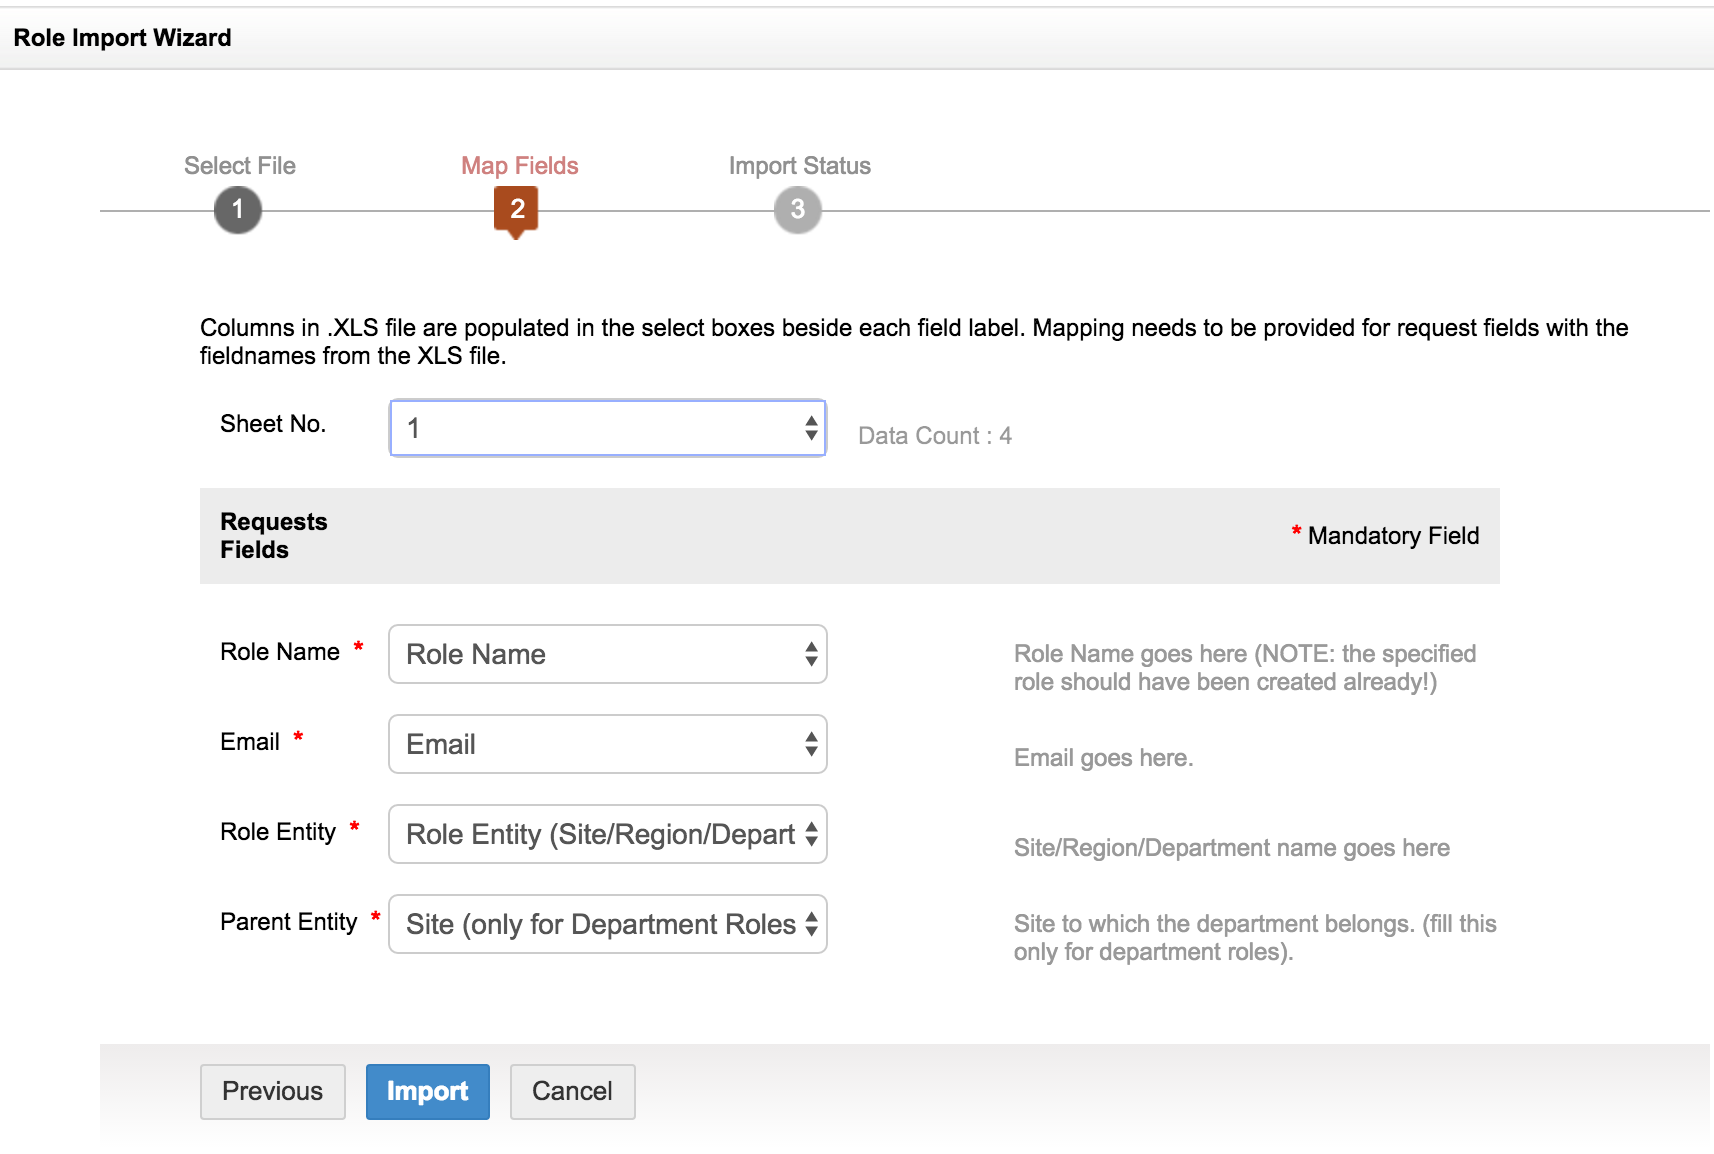
- Map the column names with the respective request fields. For e.g if the column1 contains the role name, choose column1 in the Role name request field.
- Click on Import. The import will be completed.
- Click on Finish.
Configuring Role Based Approval
Once the organization roles are configured and the users are associated with it, the role based approvers can be configured through the service templates.
For e.g. In a service template in the communications service category, role based approvers can be set upfront so that the all the service requests pertaining to that service will be directed to the approver(s) you have selected.
To configure the role based approval,
- Go to the service catalog from the admin module.
- Choose a service category and click on the edit icon in the service template for which you want to configure role based approval.
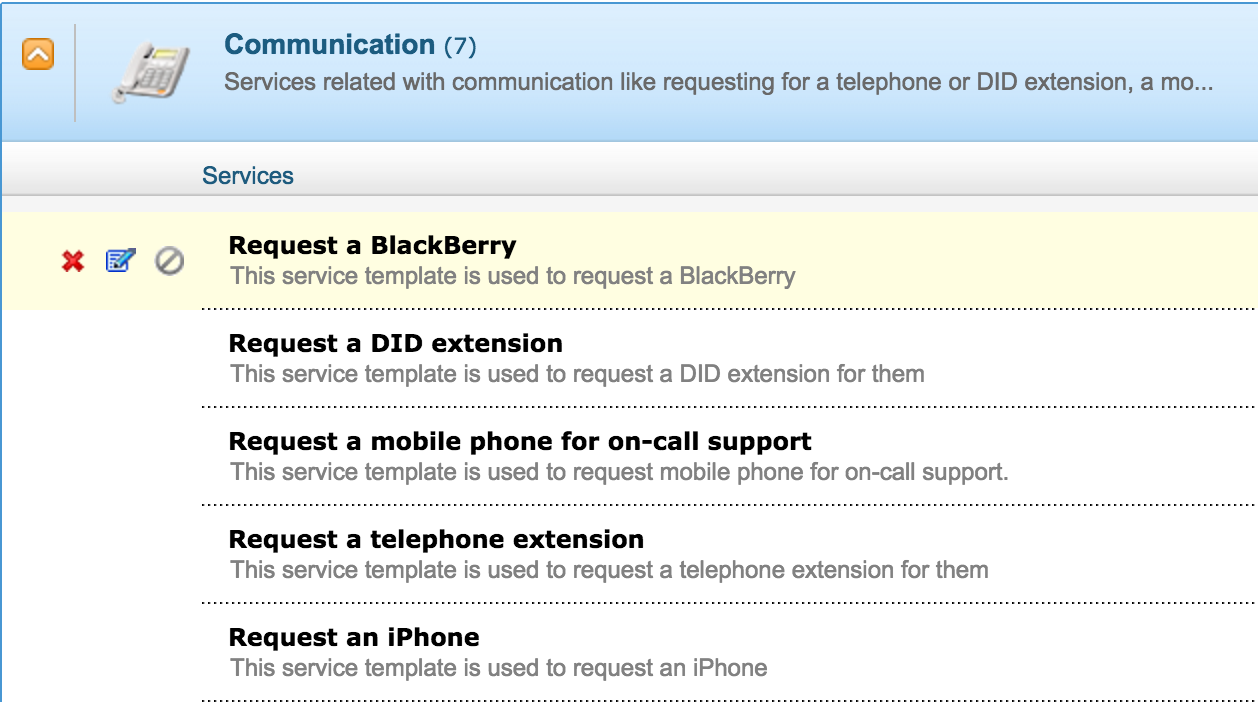
- The service template form opens up. If you want the requesters to select their approvers, drag and drop the "Select Approvers" field into the template from the Form Designer tab.
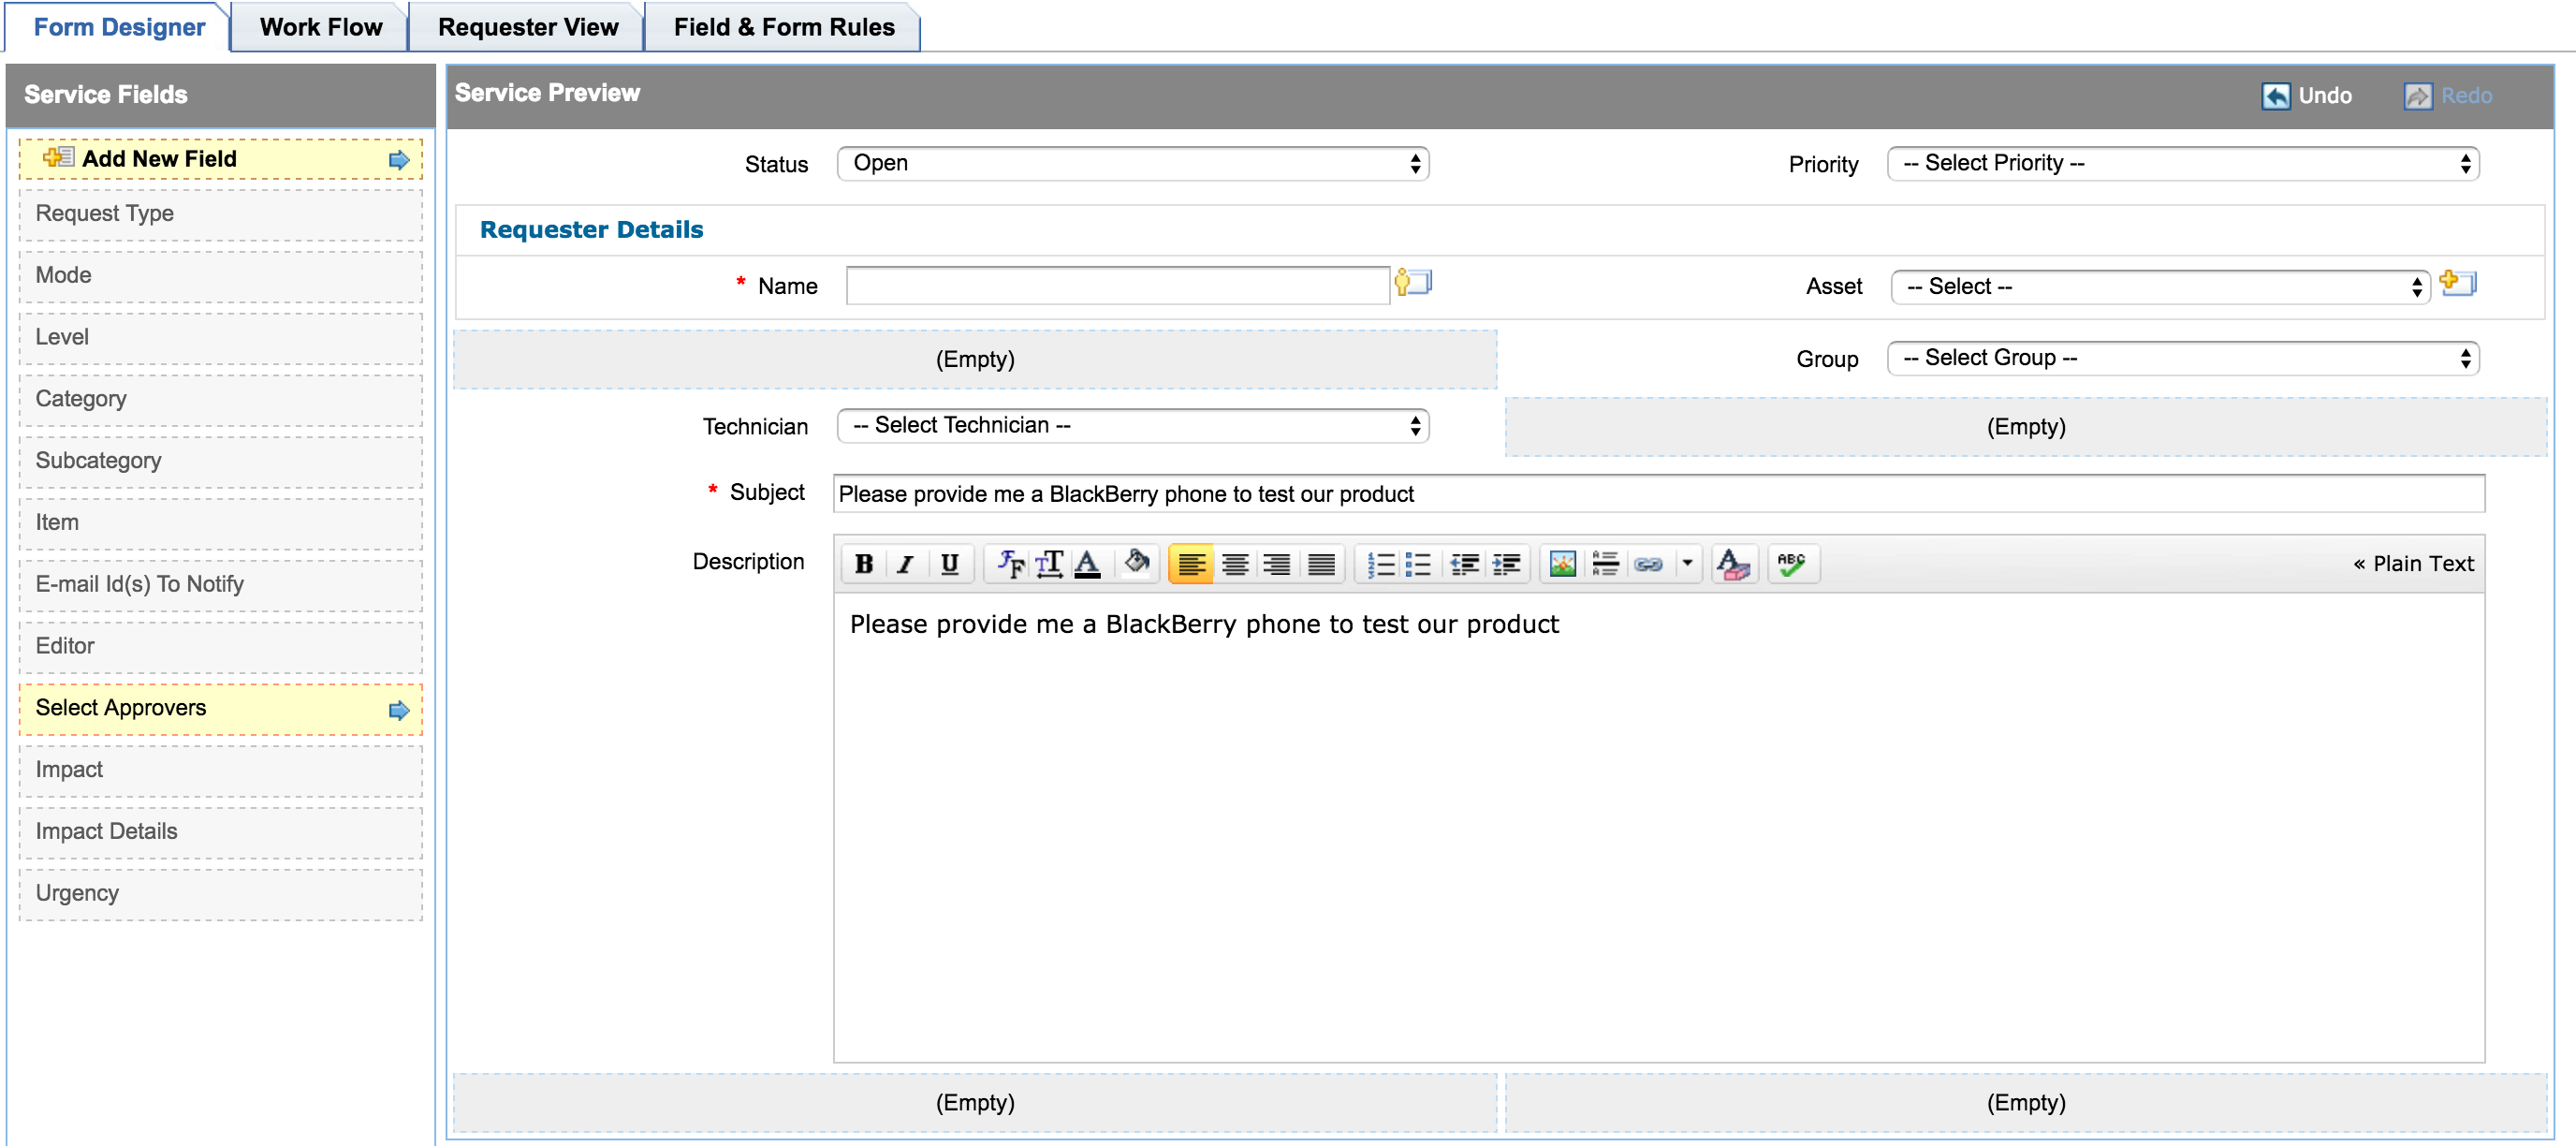
- Click on the "Work Flow" tab, from there you can add approvers for the service template by clicking on the select service approvers icon.

- Click on Save.

