
Working with Milestones
Adding Milestones is the first step to creating a project. They help outline the entire project and present a clear picture of the innumerable Tasks involved by allowing project members to design the Task Hierarchy and Task Dependency.
In this section you will learn how to: create, edit, and delete Milestones.
To create a milestone,
-
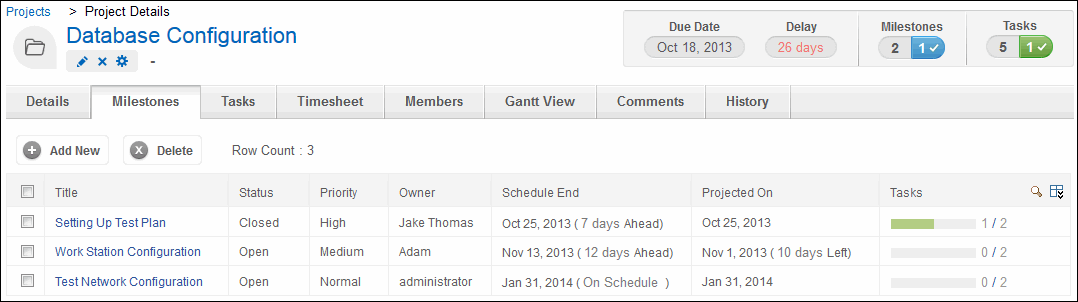
Click on Milestones tab in the Projects View page.
-
Click the Add New button to open the New Milestone form. You can use 'Add New' link while creating first Milestone.
-
Specify the Title and Description of the Milestone.
-
Select the Status, Owner and Priority from the drop down.
-
Specify Project Schedule Start date.
Adding more details to Milestone
To add more details about the milestone, click More Fields... button in the New Milestone form.
-
Select the Actual Start date of the milestone. This information is used for recording real-time milestone completion date.
-
Select the Projected On date on which the milestone is projected to get completed.
-
Enter the approximate hours required for completing the milestone in the Estimated Hours field.
-
Enter the Actual Hours required to complete the milestone.
-
Enter the real-time expenditure towards the milestone in the Actual Cost fields.
-
Click Save. You will find the Attach button beside the Milestone Attachments header.
-
To add an attachment, click Attach button. You can use also use New file link to when you are attaching the file for the first time. This opens an Attach File pop-up.
-
Click Browse button and select the file to be attached from the file chooser window and click Open button.
-
Enter any Description about the attachment.
-
Click the Attach file button. The selected file is listed below the Project Attachments heading. Please ensure that the maximum size of the attachment is 10 MB.
-
Milestone Scheduling not only helps you schedule the milestone but also determine whether the milestone is 'on-schedule', 'delayed' or 'ahead' by comparing it against real-time completion.
To schedule the milestone do the following:
-
Configure the Scheduled Start and Scheduled End Date
-
Fill in the Actual Start and Actual End Date (upon project completion)
-
Based on Scheduled/Actual Dates, milestone would be considered:
-
On Schedule if the Scheduled Date and Actual Date are the same.
-
Delayed if the Project (Actual Date) has past the Scheduled Date. (no of days by which project is delayed gets displayed on the project list view page)
-
Ahead if the Project (Actual Date) is completed before the Scheduled Date. (no of days by which project is ahead gets displayed on the project list view page)
To edit a milestone,
-
Click the Title of the milestone which you want to edit from the Milestone list page. This opens the Milestone Details page.
-
Click the Edit icon
 displayed below the Milestone title to modify the milestone details.
 -
On modifying the details, click Update Milestone button to save the changes. If you do not want to save the changes, click Cancel.
Milestones can be deleted in two ways:
a. Bulk Delete: From Milestone List View, select Milestone(s) to be deleted, and click on Delete button.
b. Single Delete: Select the project to be deleted by clicking on the project title in the Project List view page and click on Delete icon ![]() .
.