Description
Java is one of the most widely used third-party application in any organizations and patching Java updates is a crucial task for many SCCM administrators. This document will explain the steps to patch Java updates in System Center Configuration Manager(SCCM) using Patch Connect Plus.
Steps
Publishing Java Patches to SCCM
Follow the steps given below to automatically publish Java patches to SCCM,
- Log In to Patch Connect Plus console and go to the Admin tab.
- Click on Select Applications and select Java application. This is a one time job, once you select Java application, whenever a new patch is released in Java it will be automatically published to SCCM.
- Configure WSUS and SCCM settings to automatically publish Java patch updates to SCCM
You have now successfully published the Java patches to SCCM console
Deploying Java Patches in SCCM
To deploy the published Java patches using SCCM follow the steps given below,
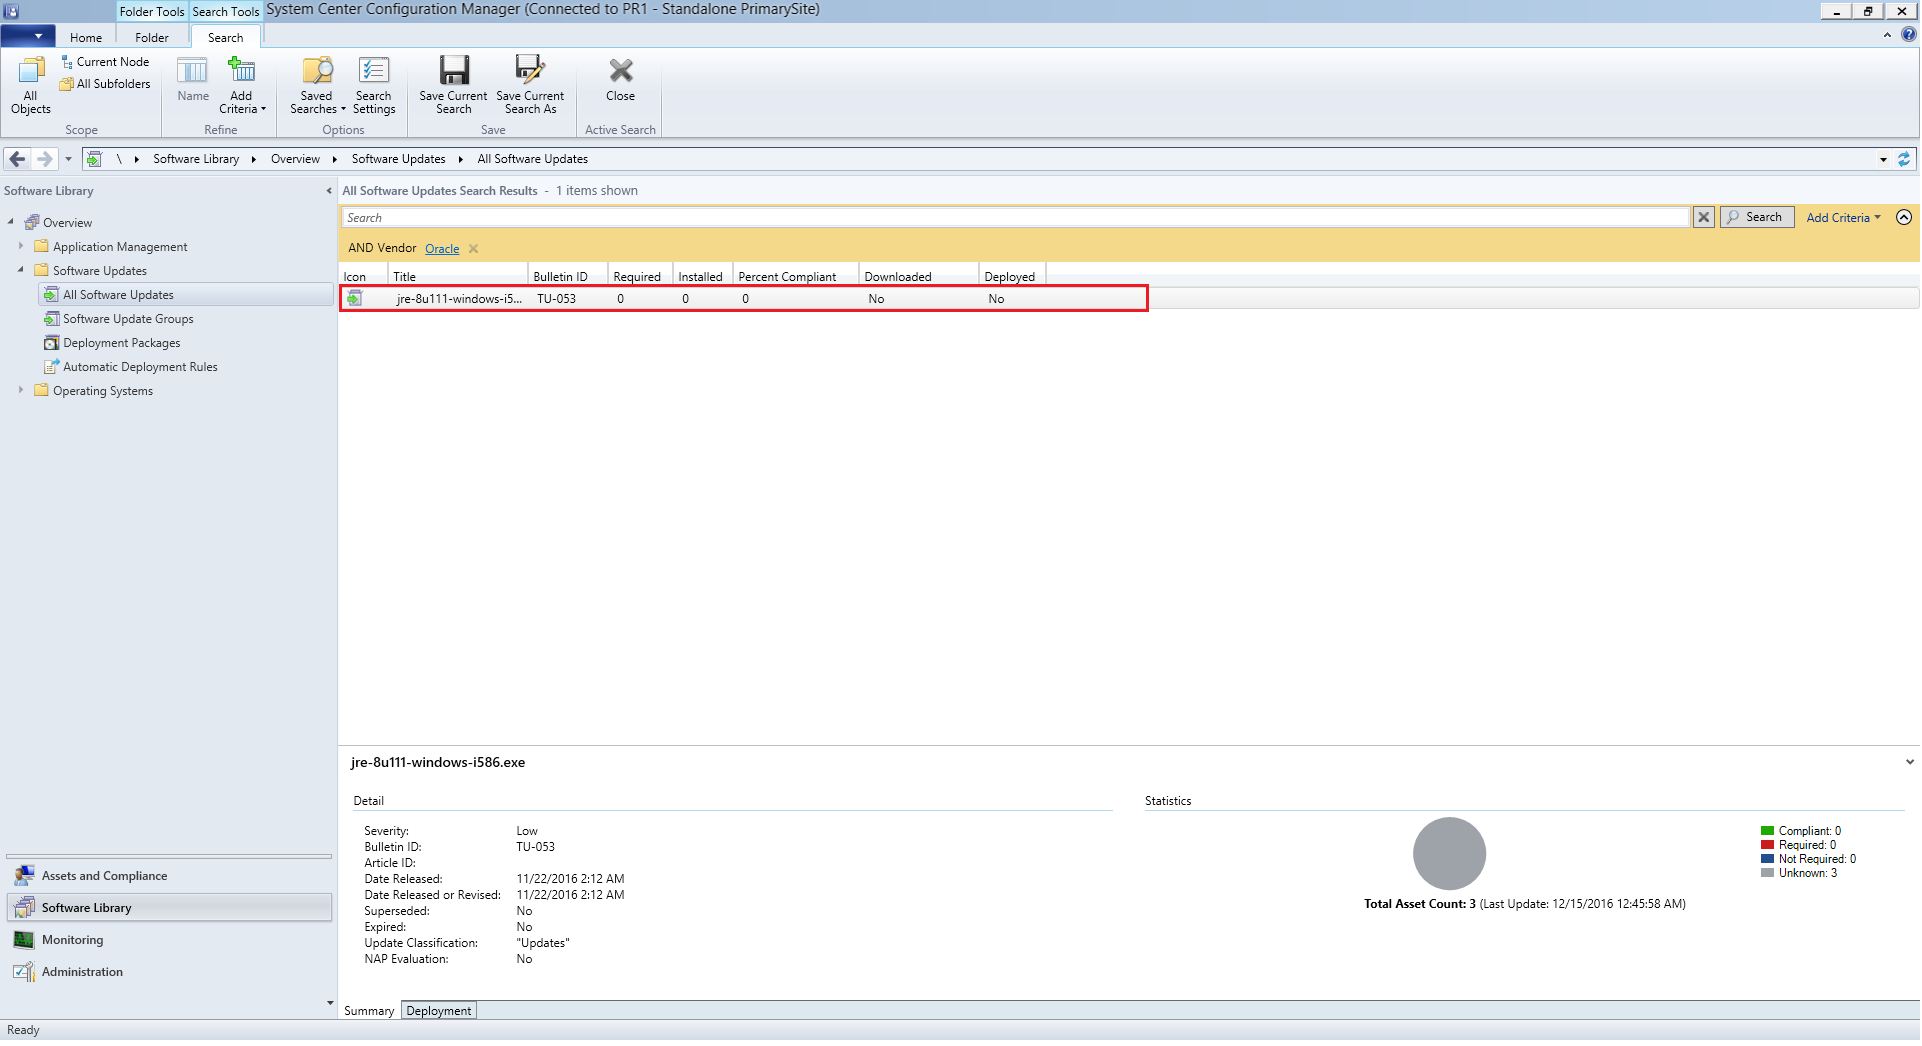
- Go to SCCM All software updates and view the Java patches published using Patch Connect Plus.
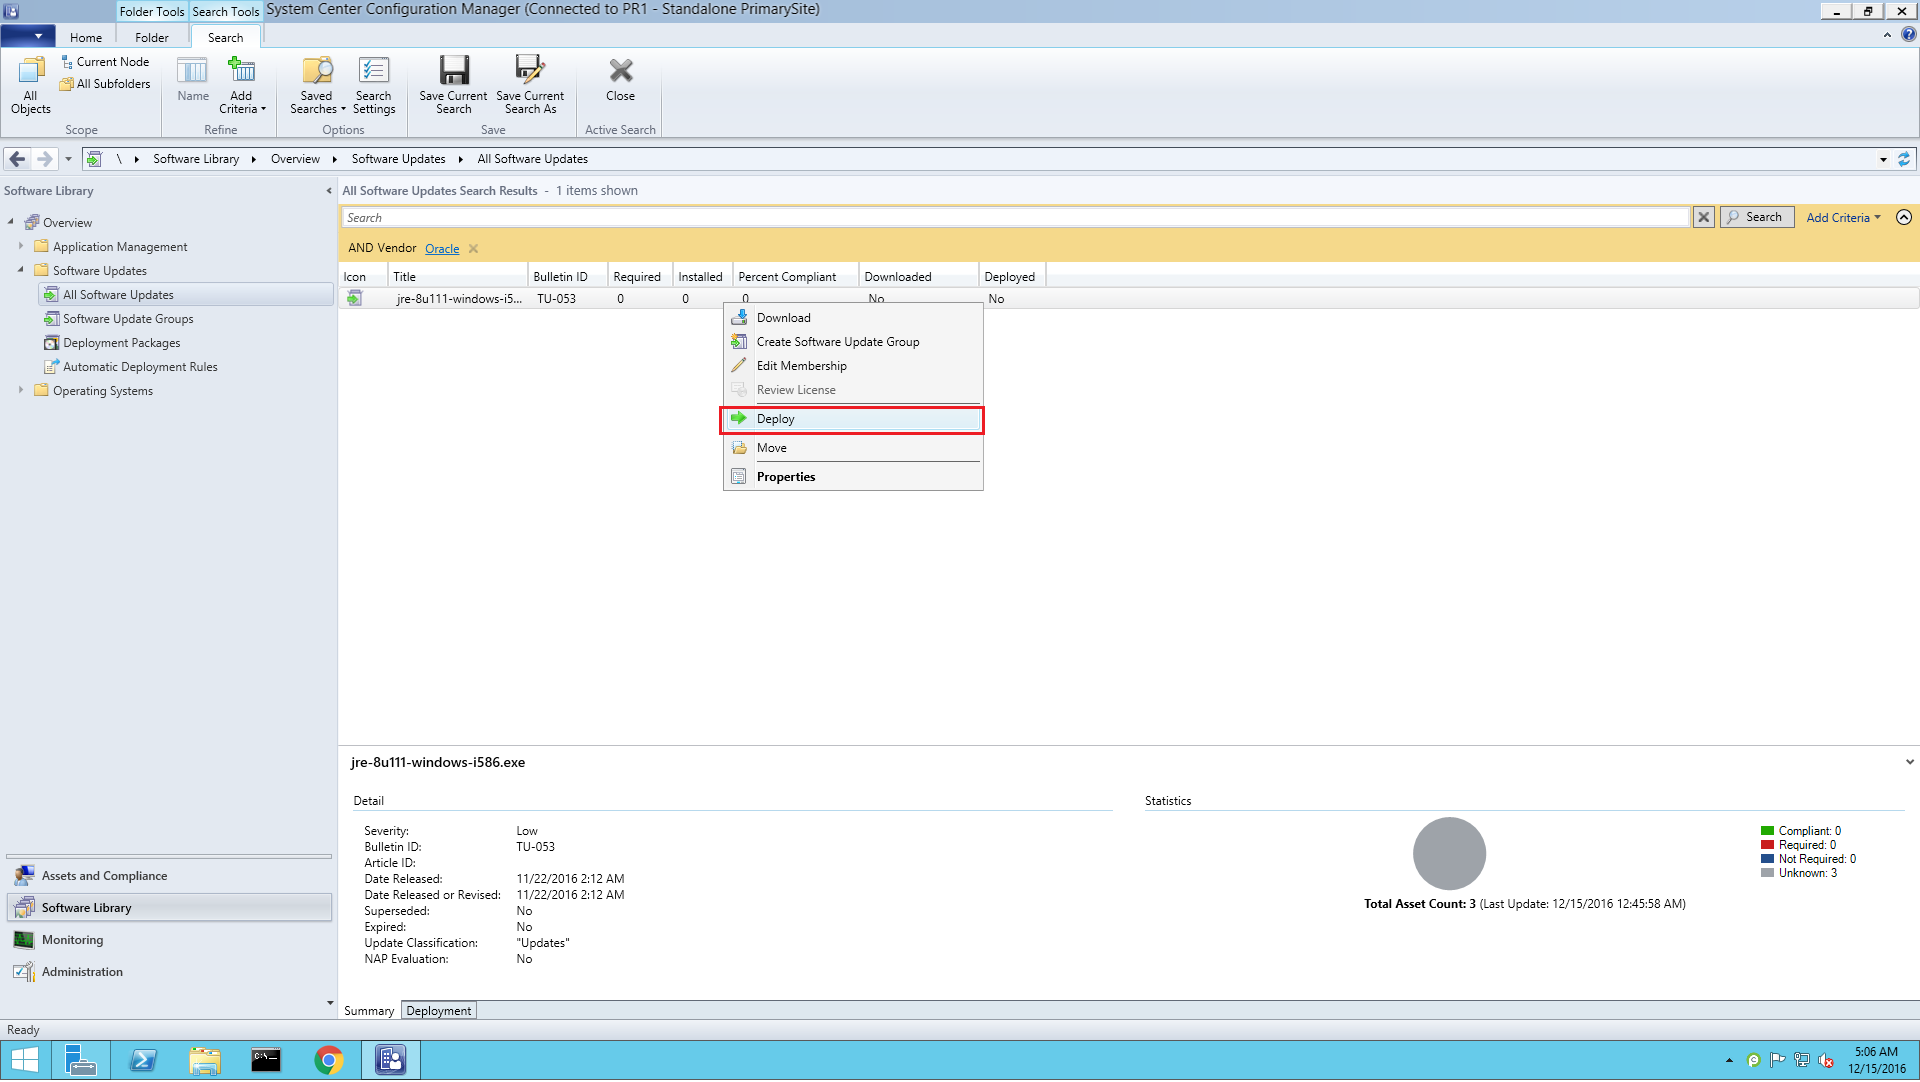
- Select the Java patches, right click and select Deploy.
- Configure Deployment settings, scheduler details, User Experience, Alerts, Download Settings and Deployment Package settings.
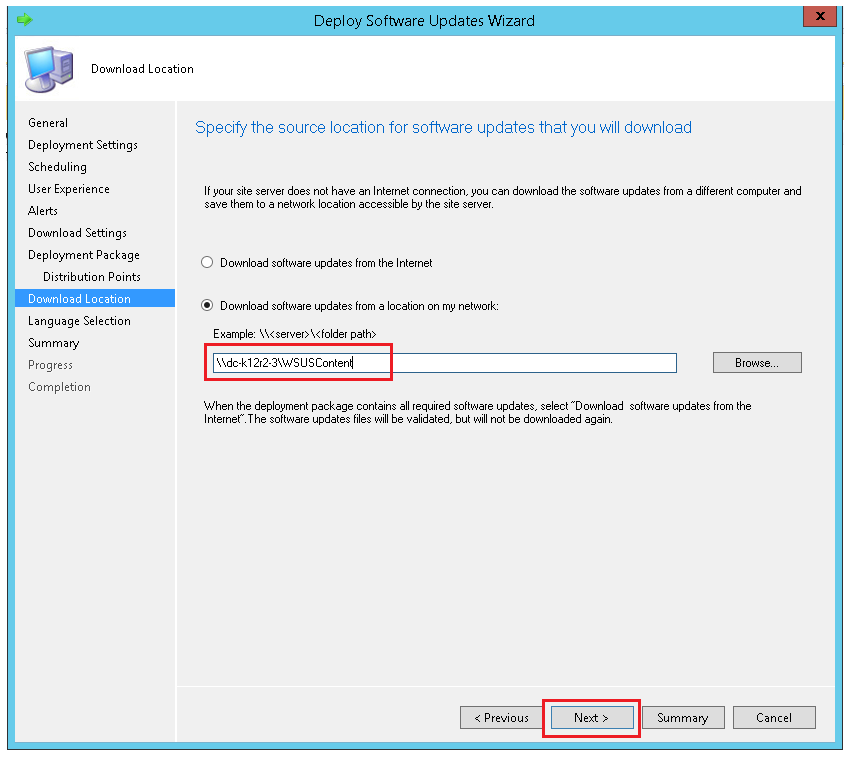
- Specify the location from where the update(s) has to be downloaded and click Next . This location is the shared WSUS server content folder to which the patches were published by Patch Connect Plus . Folder example: <wsus server name>\WSUSContent
- Complete the remaining steps and click Close.
You have now successfully deployed the Java updates in SCCM using Patch Connect Plus.
Keywords: Java updates, deploying java patches, third-party applications, SCCM.