Free Trial
Overview
Features
Demos
Documents
Get Quote
Support
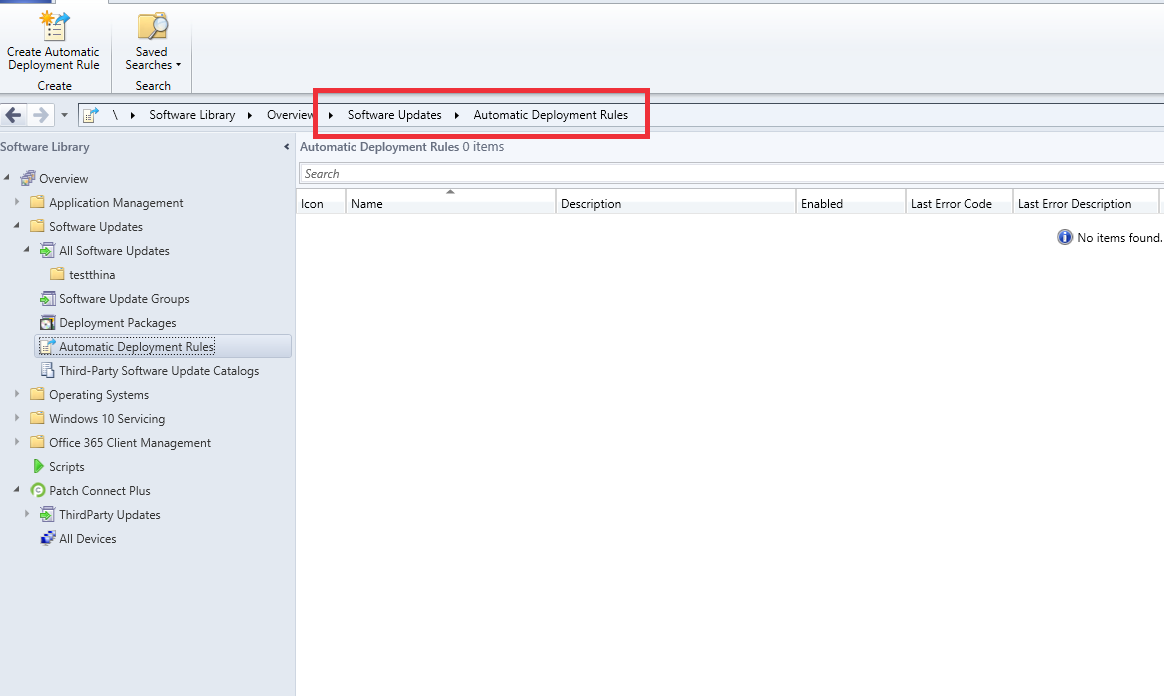
Steps to configure Automated Deployment Rule in SCCM
Open Automatic Deployment Rule, located under Software Library -> Software Updates tab
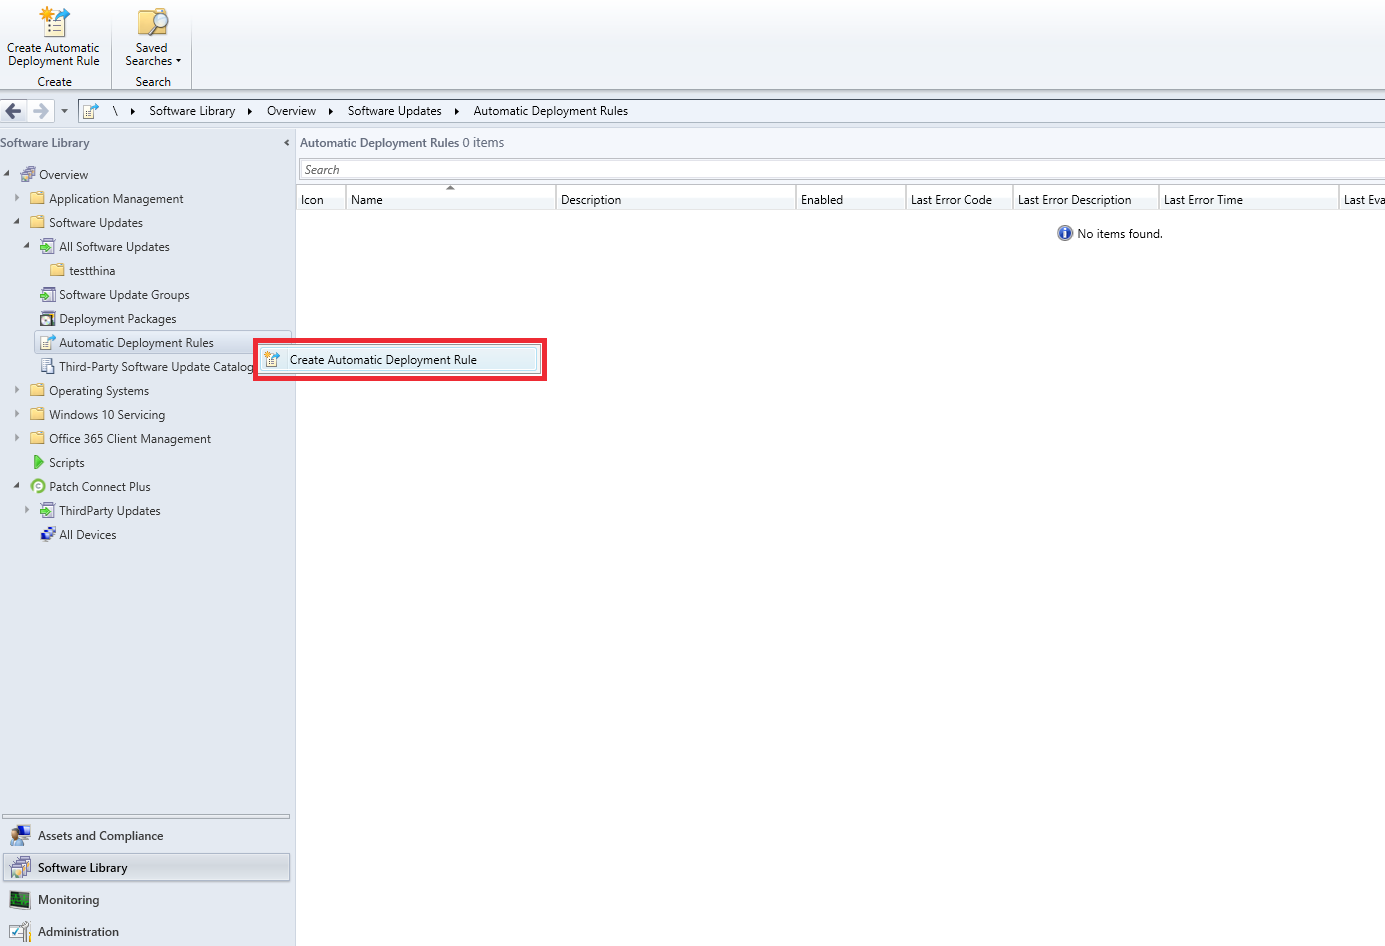
Right Click and select 'Create Automatic Deployment rule' option
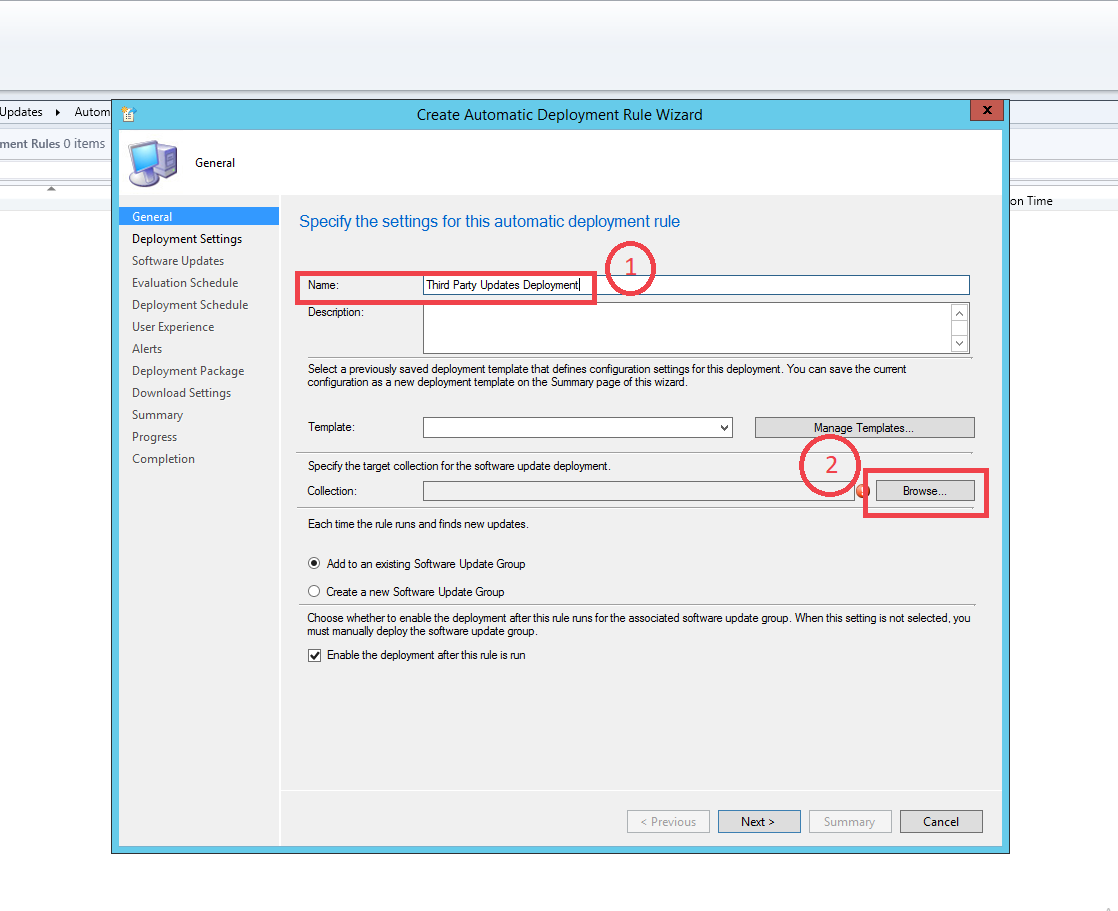
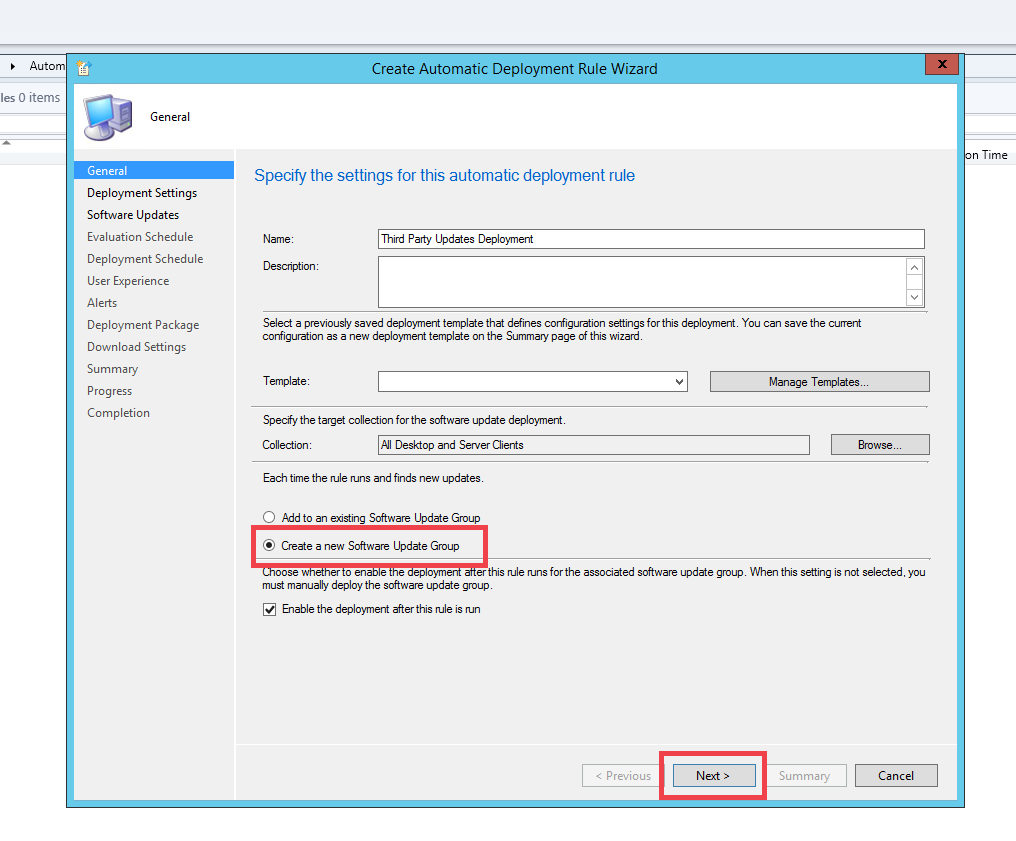
Enter a name and specify the target collection by clicking on 'Browse' option
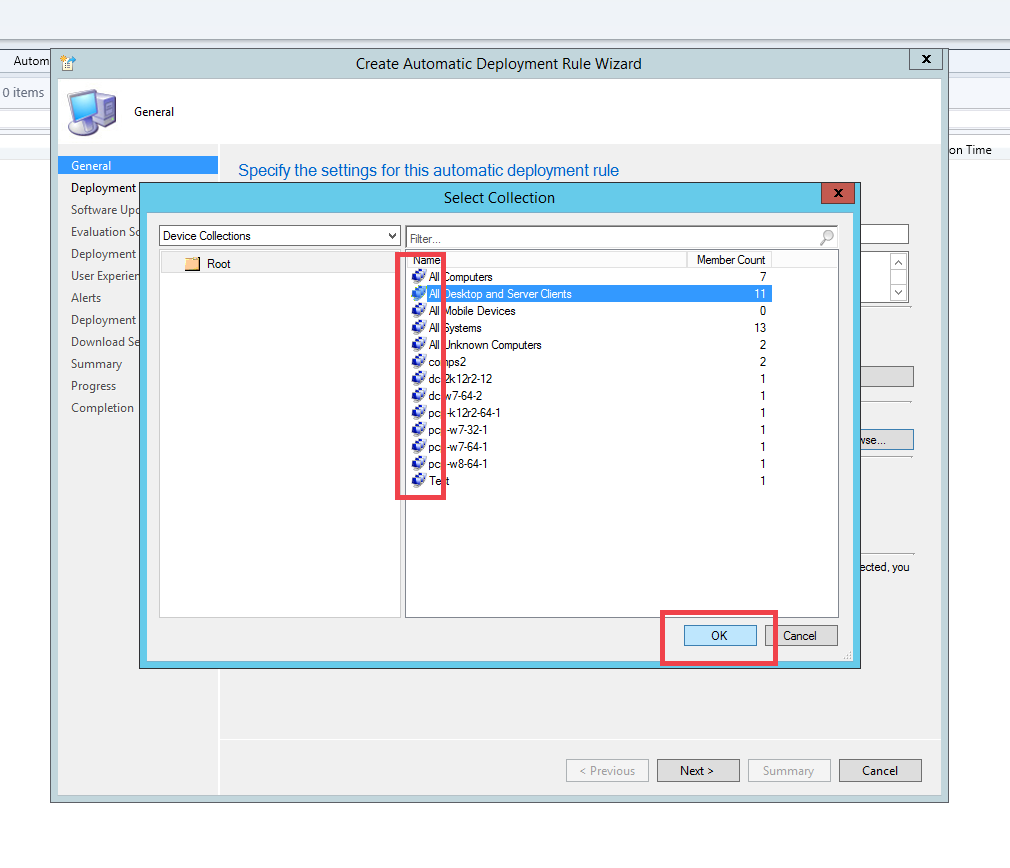
Select the required collection and click ok
Select 'Create a new Software Update Group' option and click next
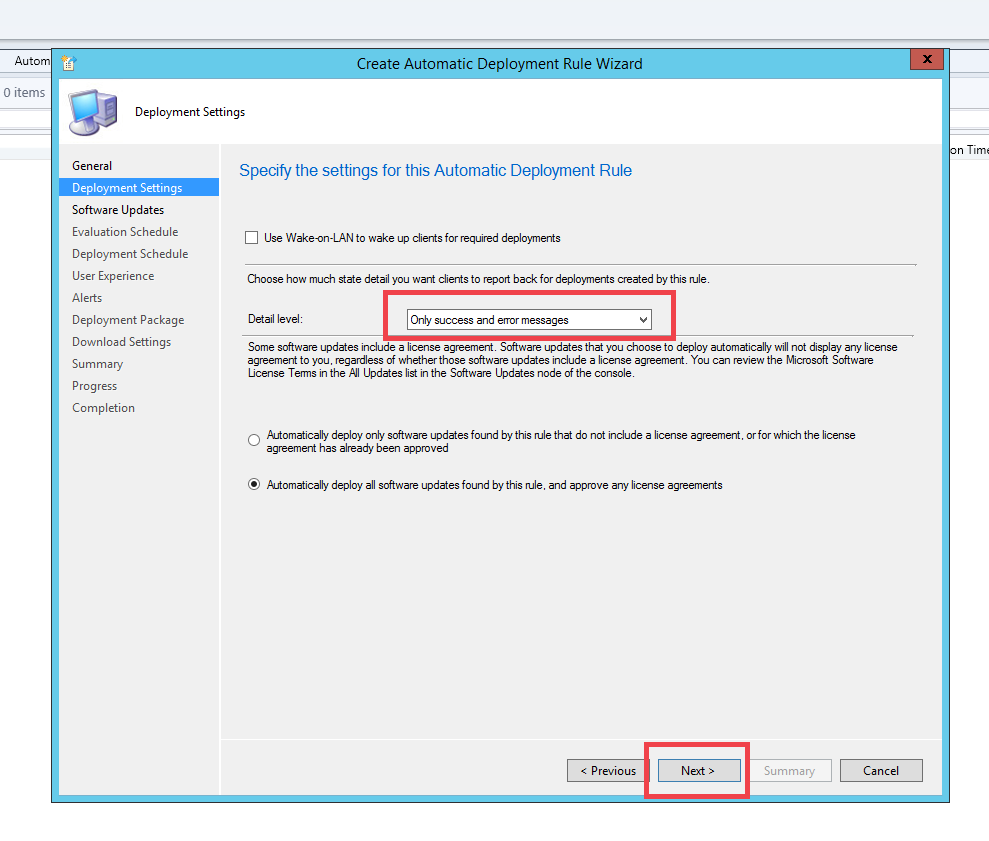
Select a Detail level that you want and click next
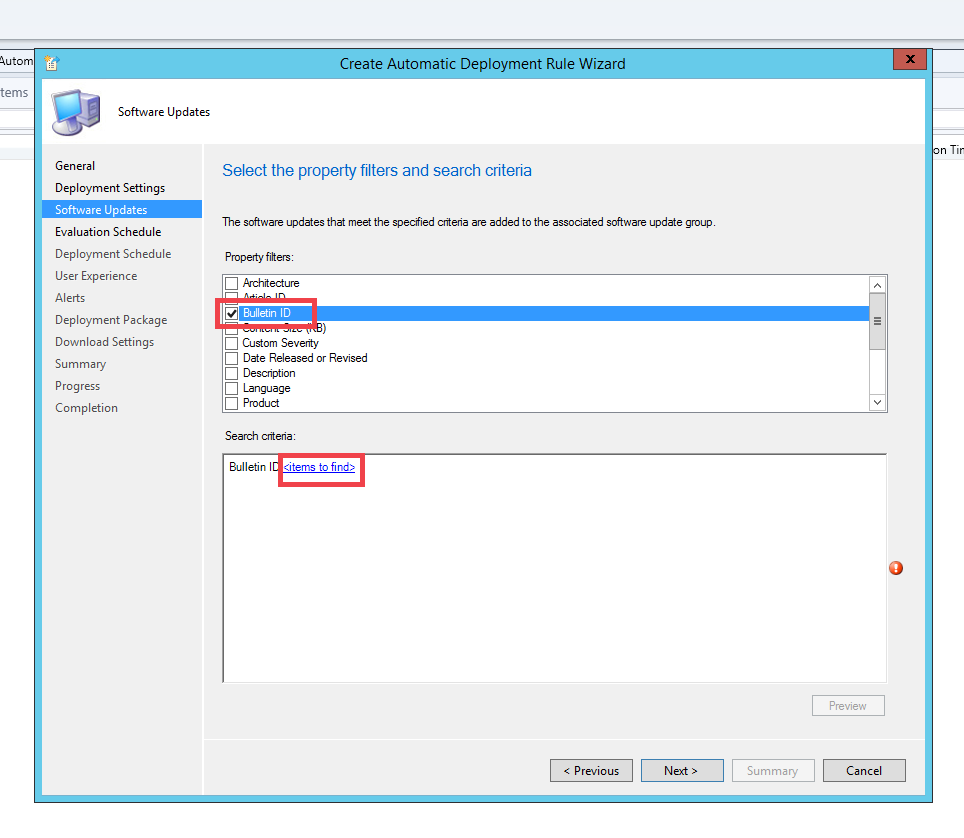
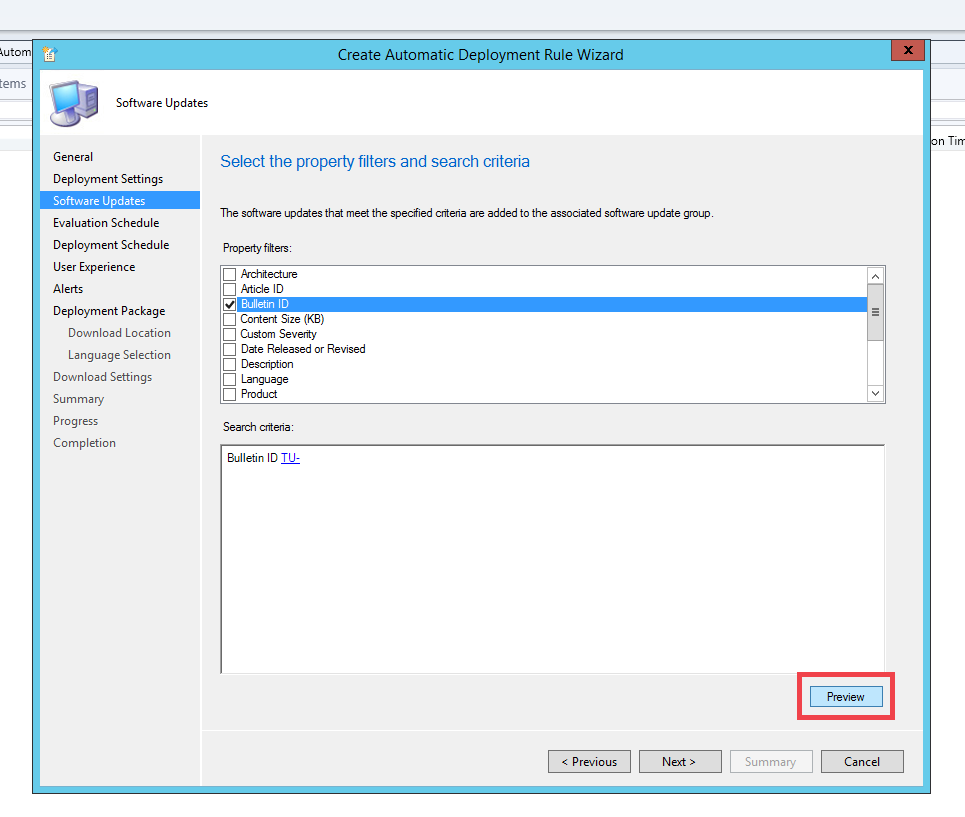
Select the third-party applications by using the Bulletin ID filter. Select Bulletin ID Filter and click
option to enter filter option.
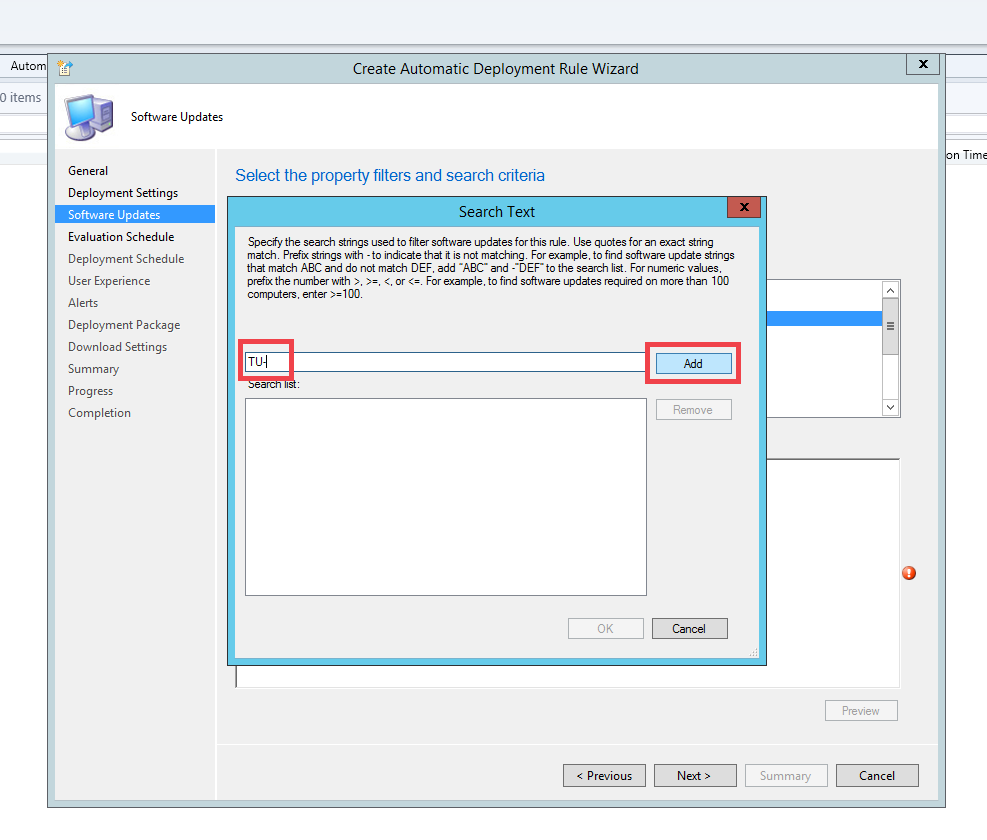
Enter TU- in filter textbox to select all the third-party updates published by Patch Connect Plus and click OK
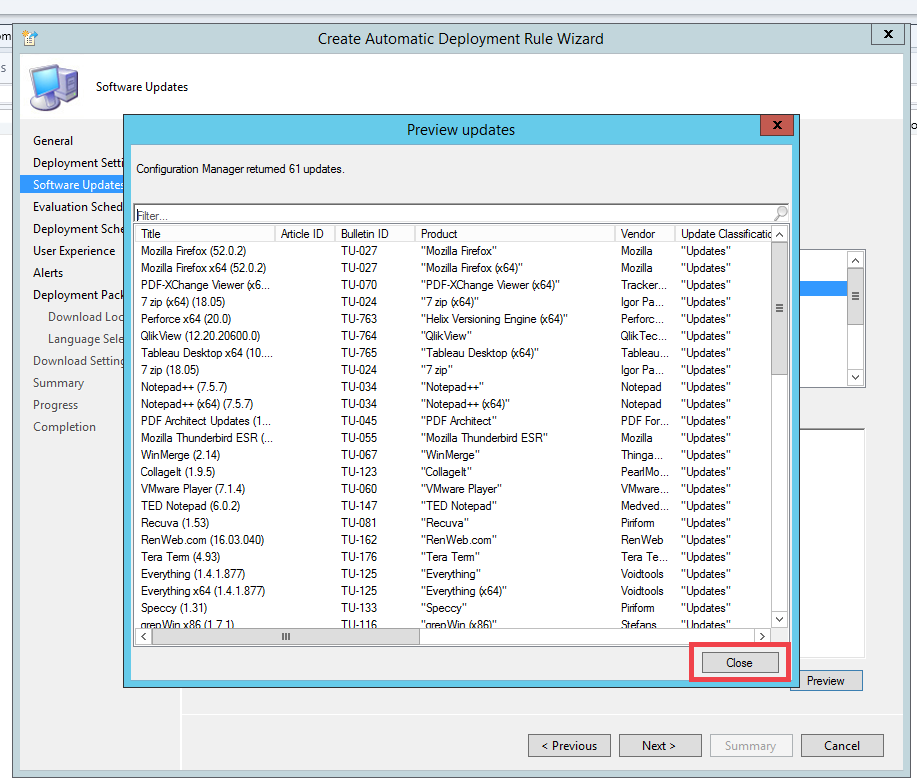
Click on the Preview option to view the list of updates
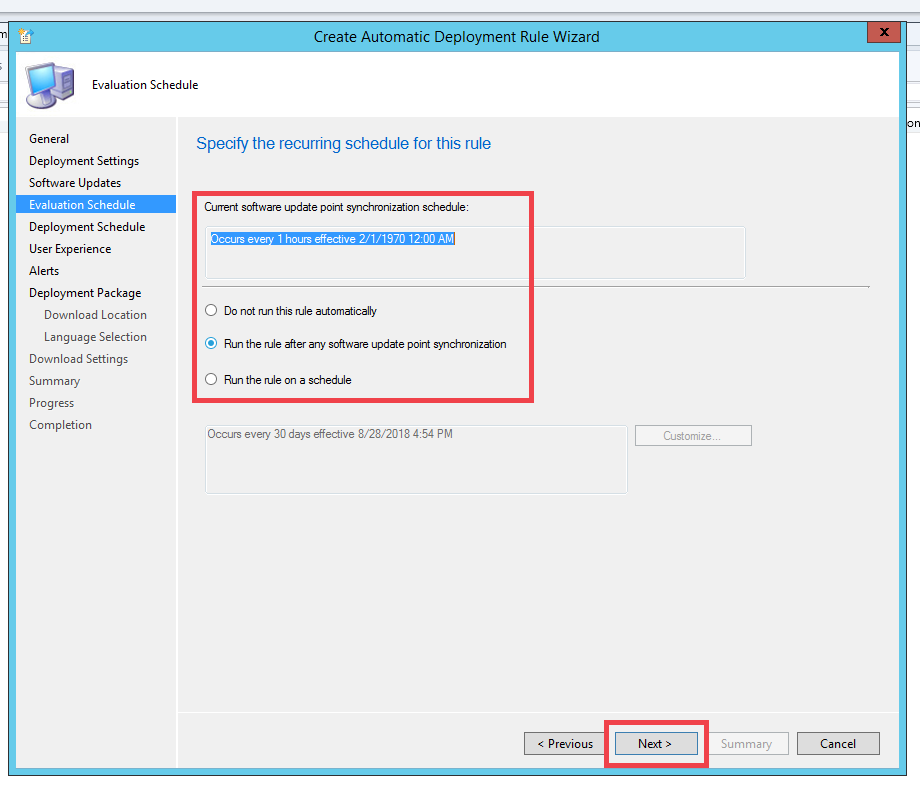
Select 'Evaluation Schedule' and Click next
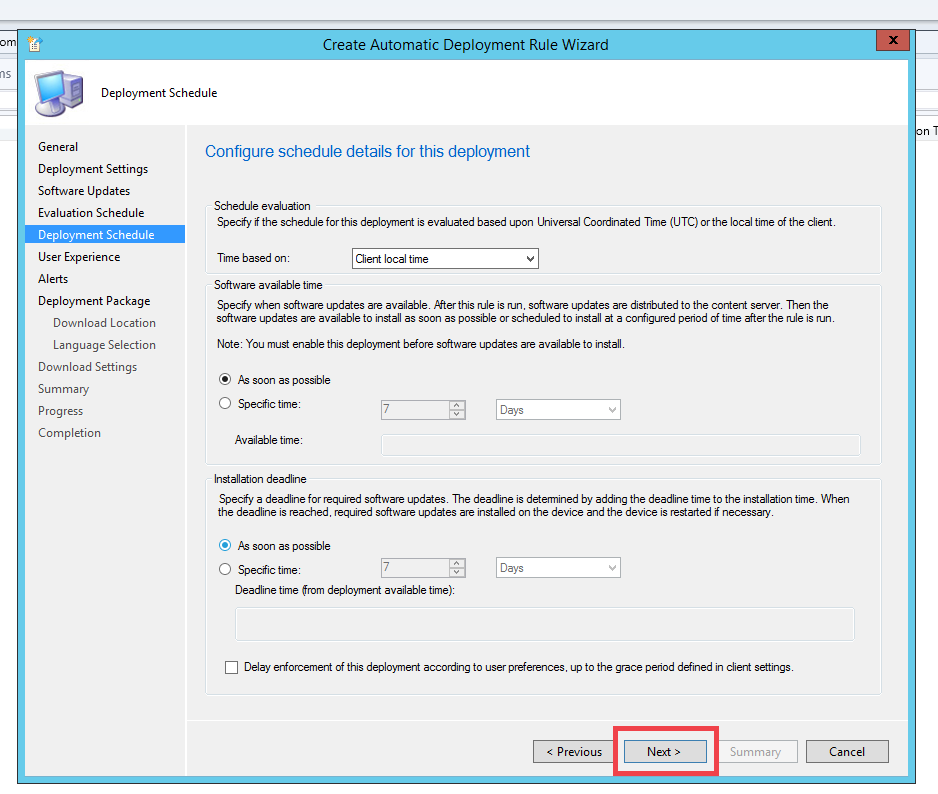
Select a 'Deployment Schedule' and click next
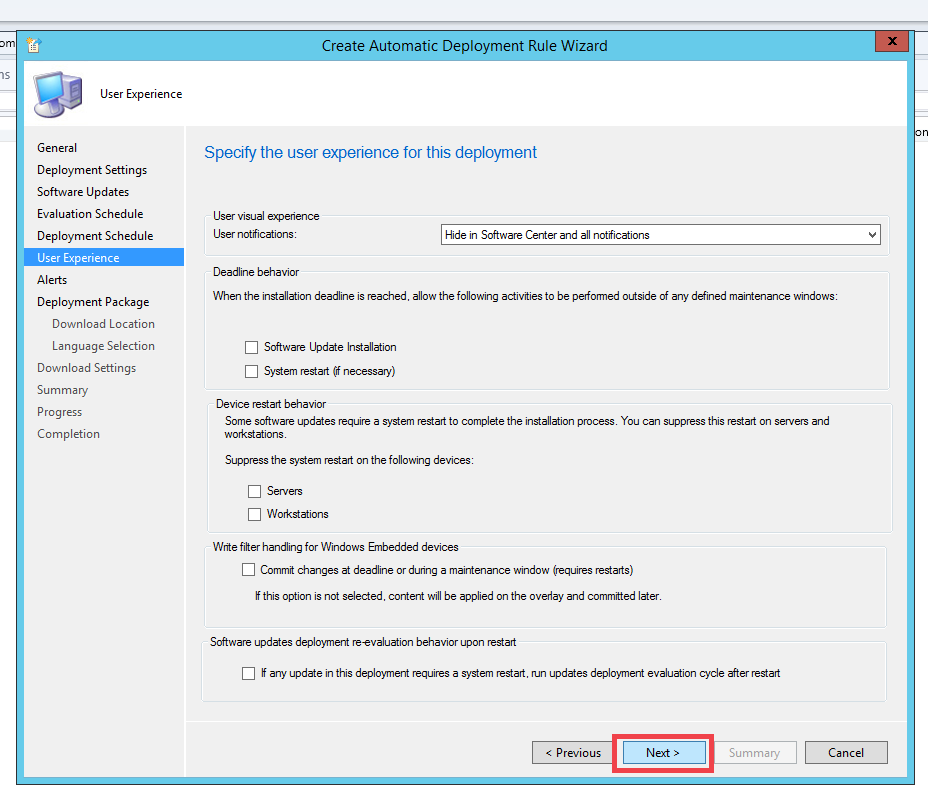
Configure the custom deployment option and click Next
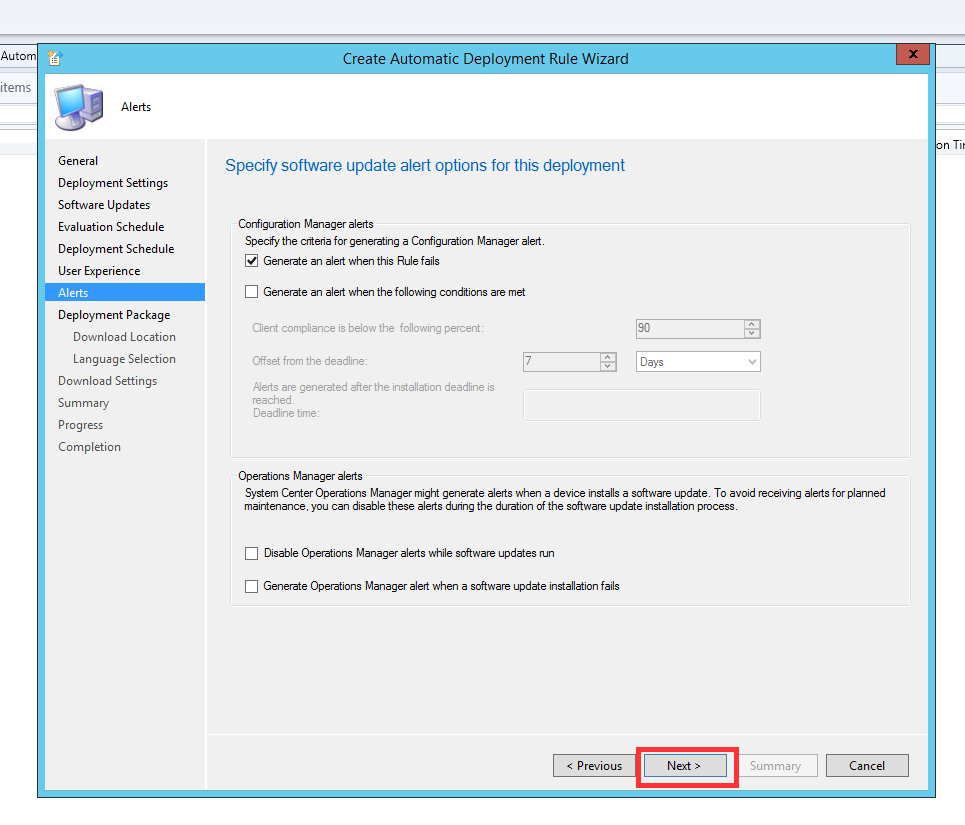
Configure Alerts and click next.
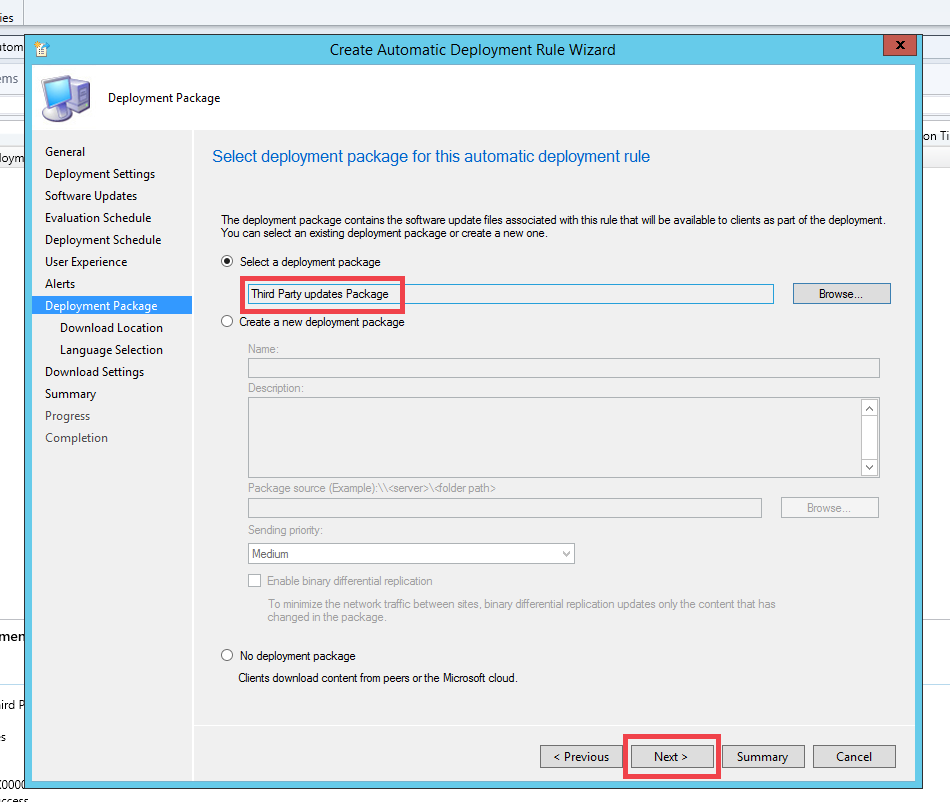
Select the Deployment Package created for Third party Updates and click Next
Select the download option as 'Download software updates from the internet'
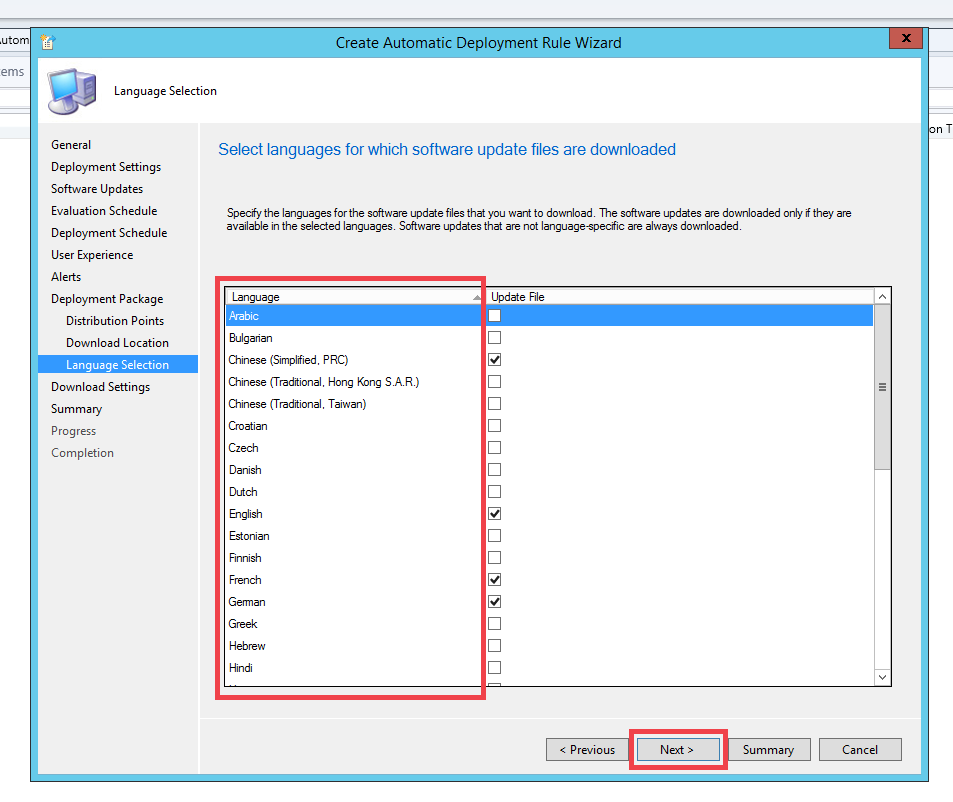
Select the required language and click next
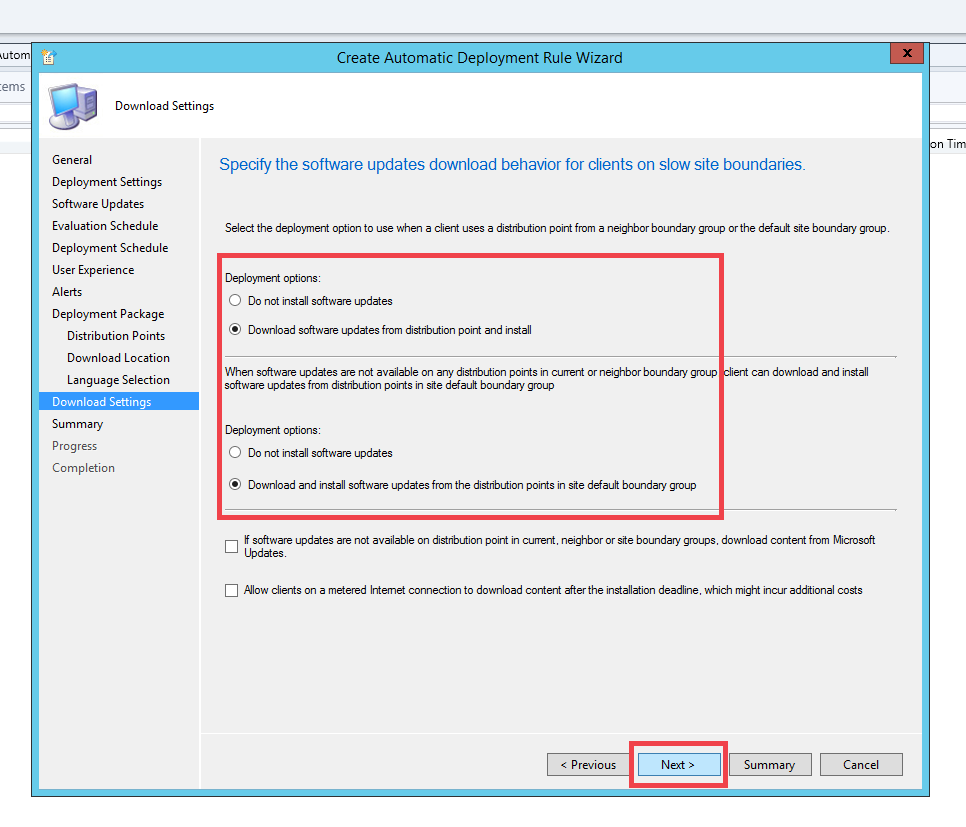
Select the Deployment option and click Next
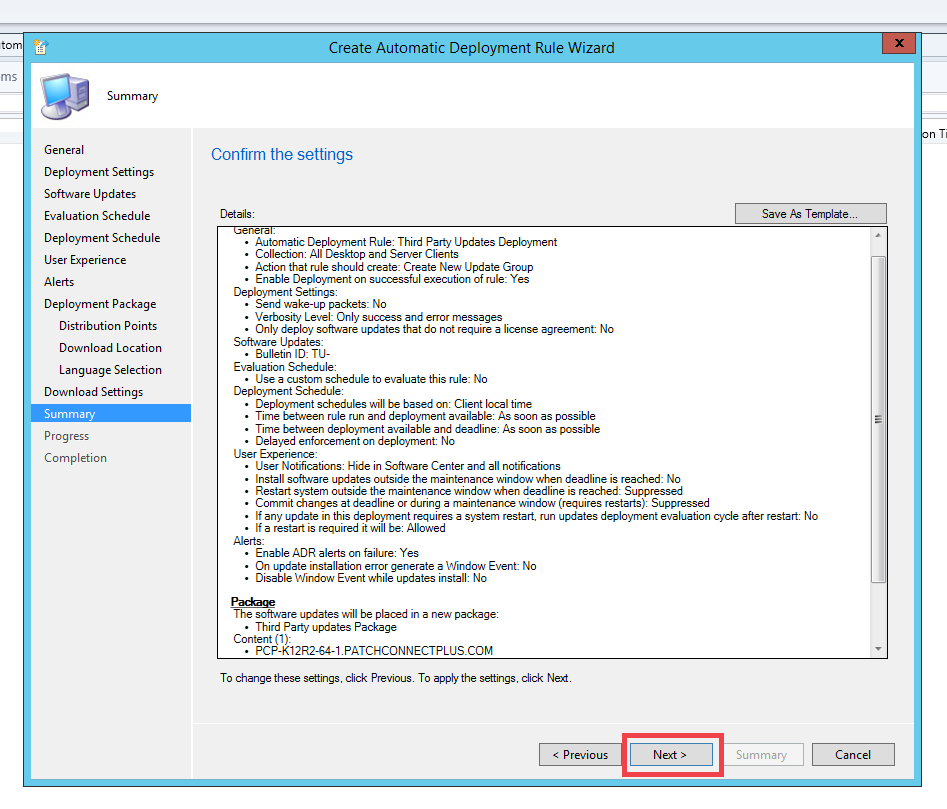
View the summary of the setup and click next to complete
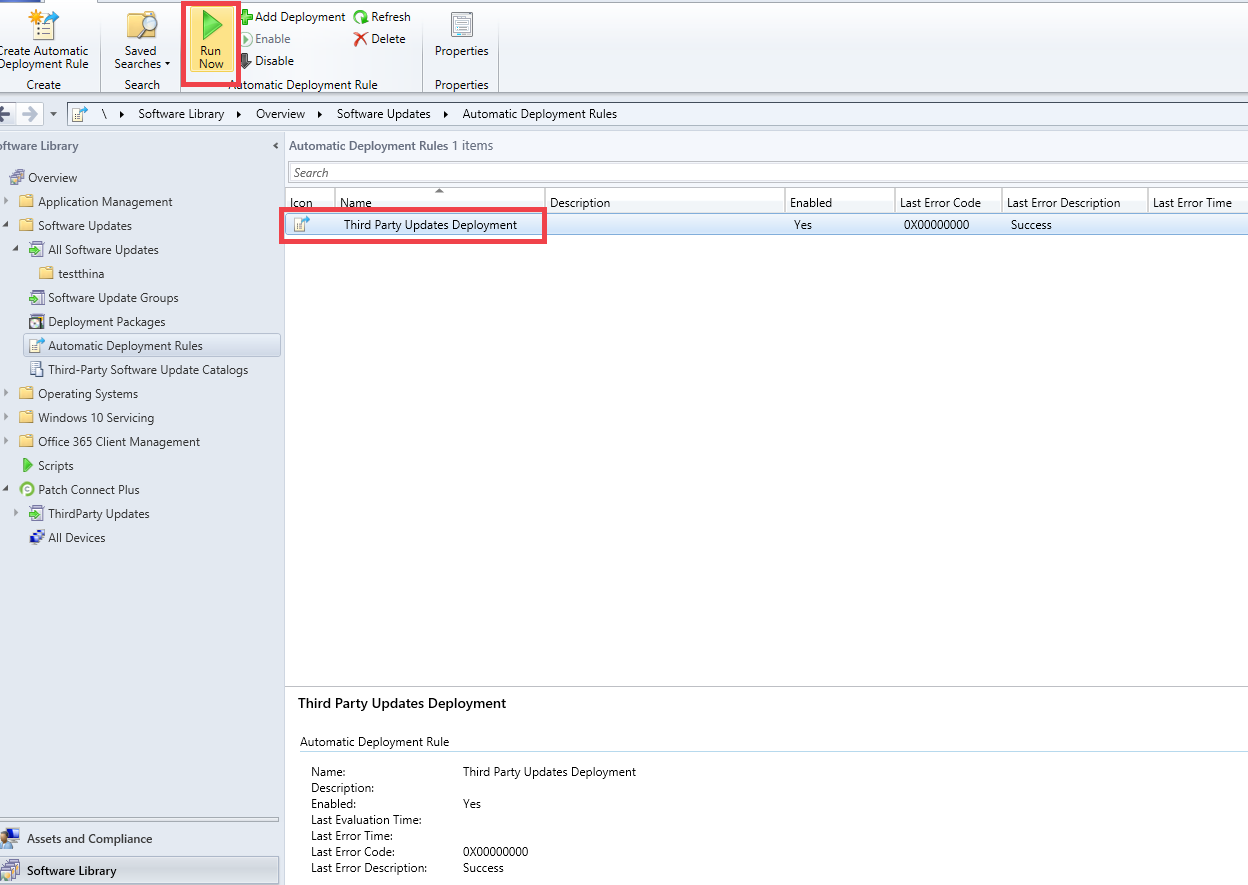
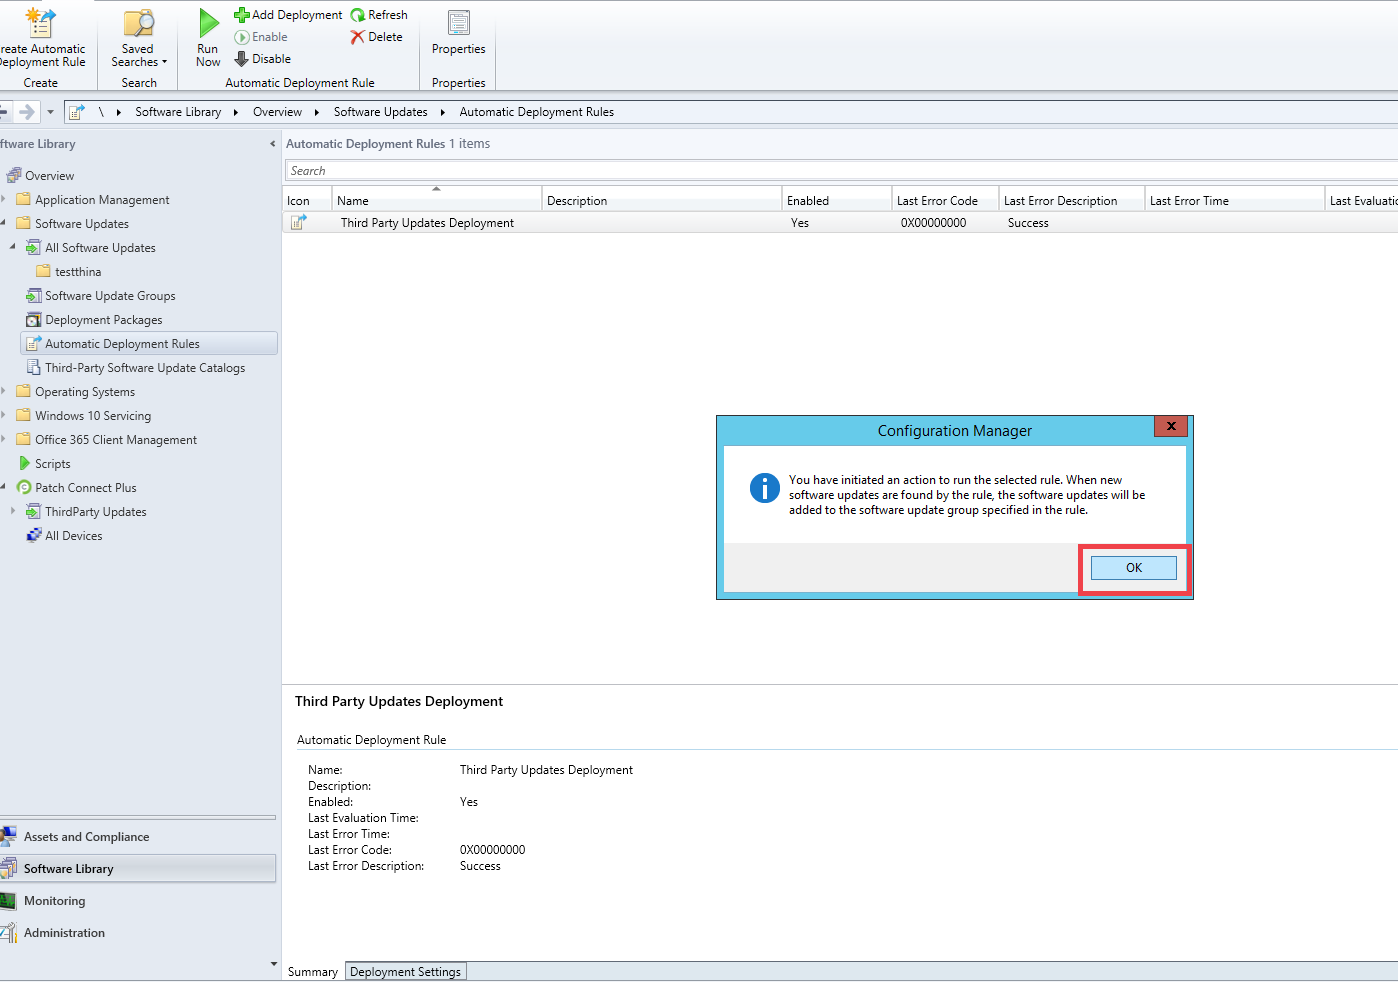
Select the created template and click 'Run Now' to start
Free Trial
Request Demo
Compare Editions
Get Quote
Buy Now