How to check in and check out documents in SharePoint
Last updated on:On this page
Documents stored in a SharePoint document library can be controlled using the check in and check out features, which ensure that only one user edits a file at a time. When a document is checked out, it is locked for editing by a specific user, and others can only open it in read-only mode. After finishing the edits, the user must check in the document, which saves the changes and makes the updated version available to other users.
Understanding how to check in a document in SharePoint is essential for maintaining proper version control, avoiding editing conflicts, and managing collaboration workflows. Administrators and site owners may also configure SharePoint check in and check out settings to enforce document control in sensitive libraries where co-authoring is not preferred.
This document explains how to check in a document using the SharePoint Online browser UI and PowerShell.
- SharePoint Online
- Windows PowerShell
Method 1: How to check out and check in documents in SharePoint Online
SharePoint Online allows users to check out and check in documents directly from the browser interface, making it easy to control edits and prevent conflicts without using scripts.
Prerequisites
Before checking in or checking out a document, ensure that:
- You have Edit or Contribute permissions for the SharePoint document library.
- The library supports versioning, which typically creates a new version when a document is checked in.
Steps to check out a document in SharePoint
- Sign in to SharePoint Online and open your site.
- Open the SharePoint document library that contains the document or file.
- Select the file, click the three dots (More commands) or right-click the file, and choose Check out.
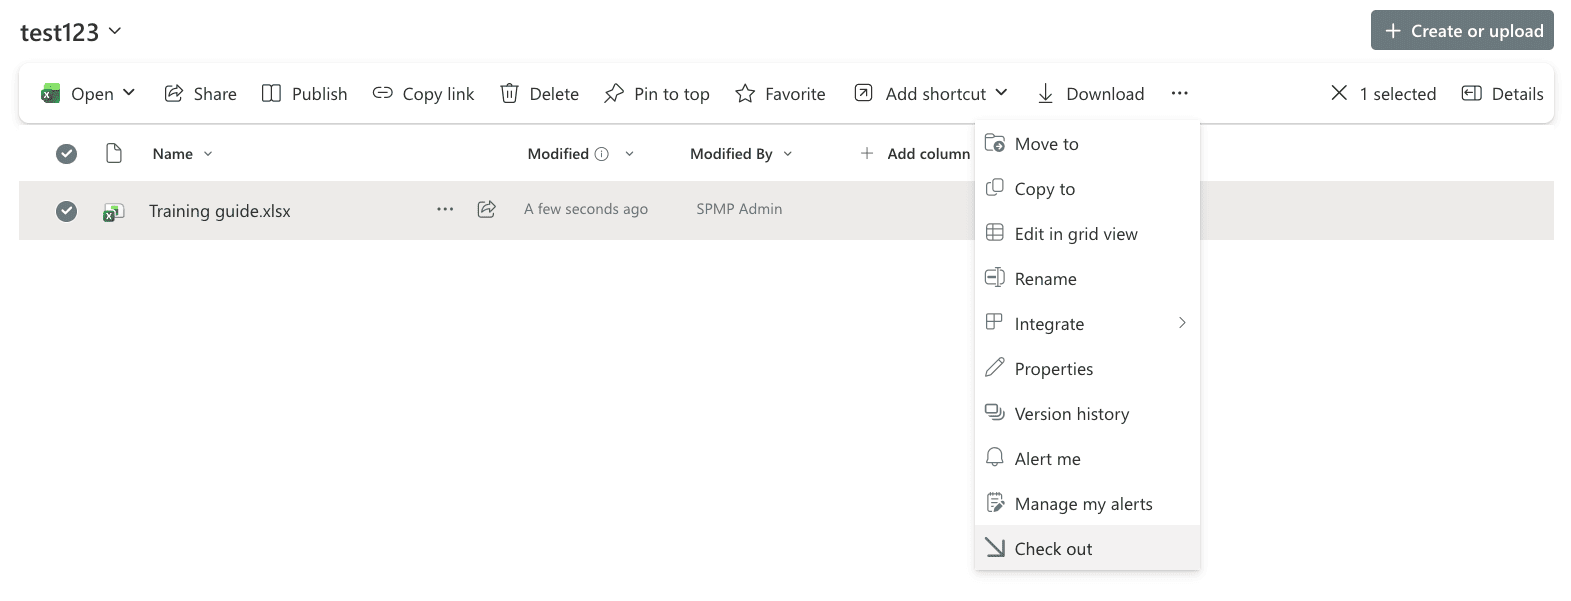
- The document will now display a checked out icon
 showing that the file is locked for editing.
 - Open the document and make the required changes.

Steps to check in a document in SharePoint
- After completing your edits, go to the document library.
- Select the file, click the three dots (More commands) and choose Check in.
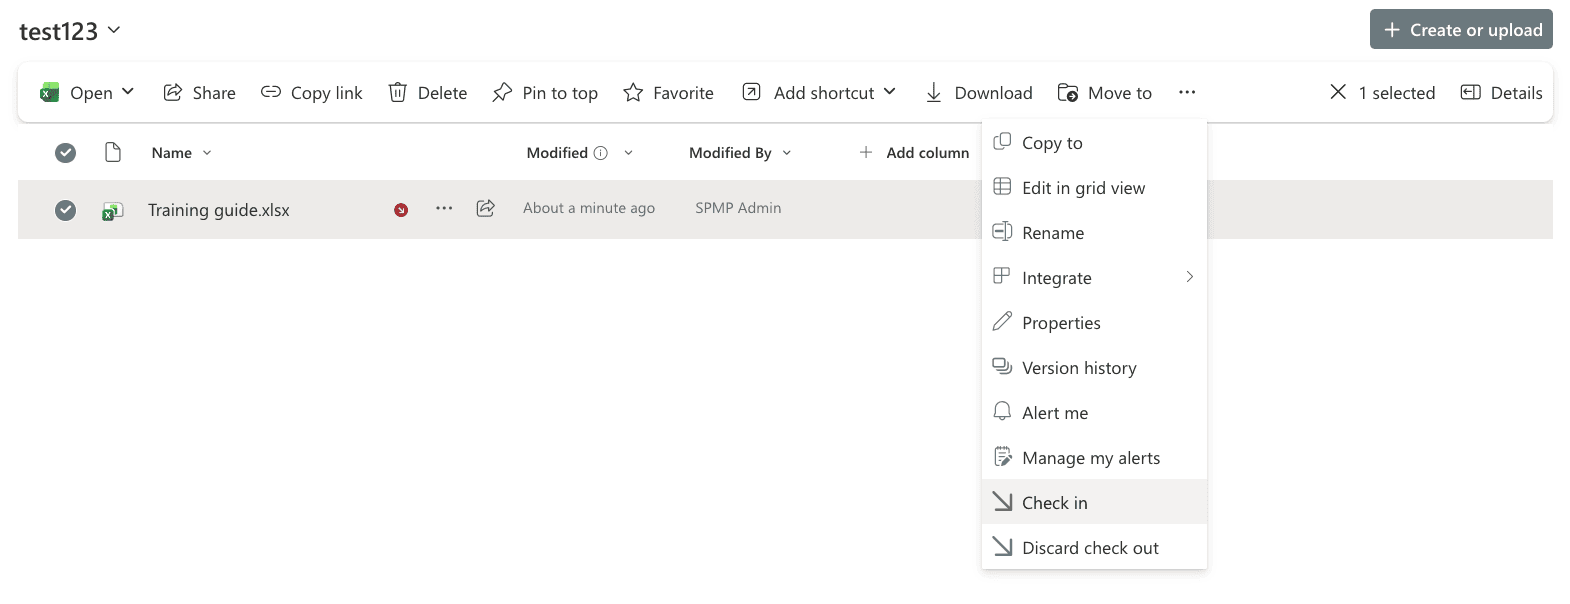
- Enter an optional version comment describing the changes made.
- Click Check in to save the changes and release the document for other users.

Once the document is checked in, the file becomes editable by other users again, and SharePoint may create a new version of the document depending on the library’s versioning settings.
Alternative: Check out and check in from the document ribbon
You can also check out and check in directly from Office Desktop Apps, which is useful when editing files such as Excel spreadsheets or Word documents.
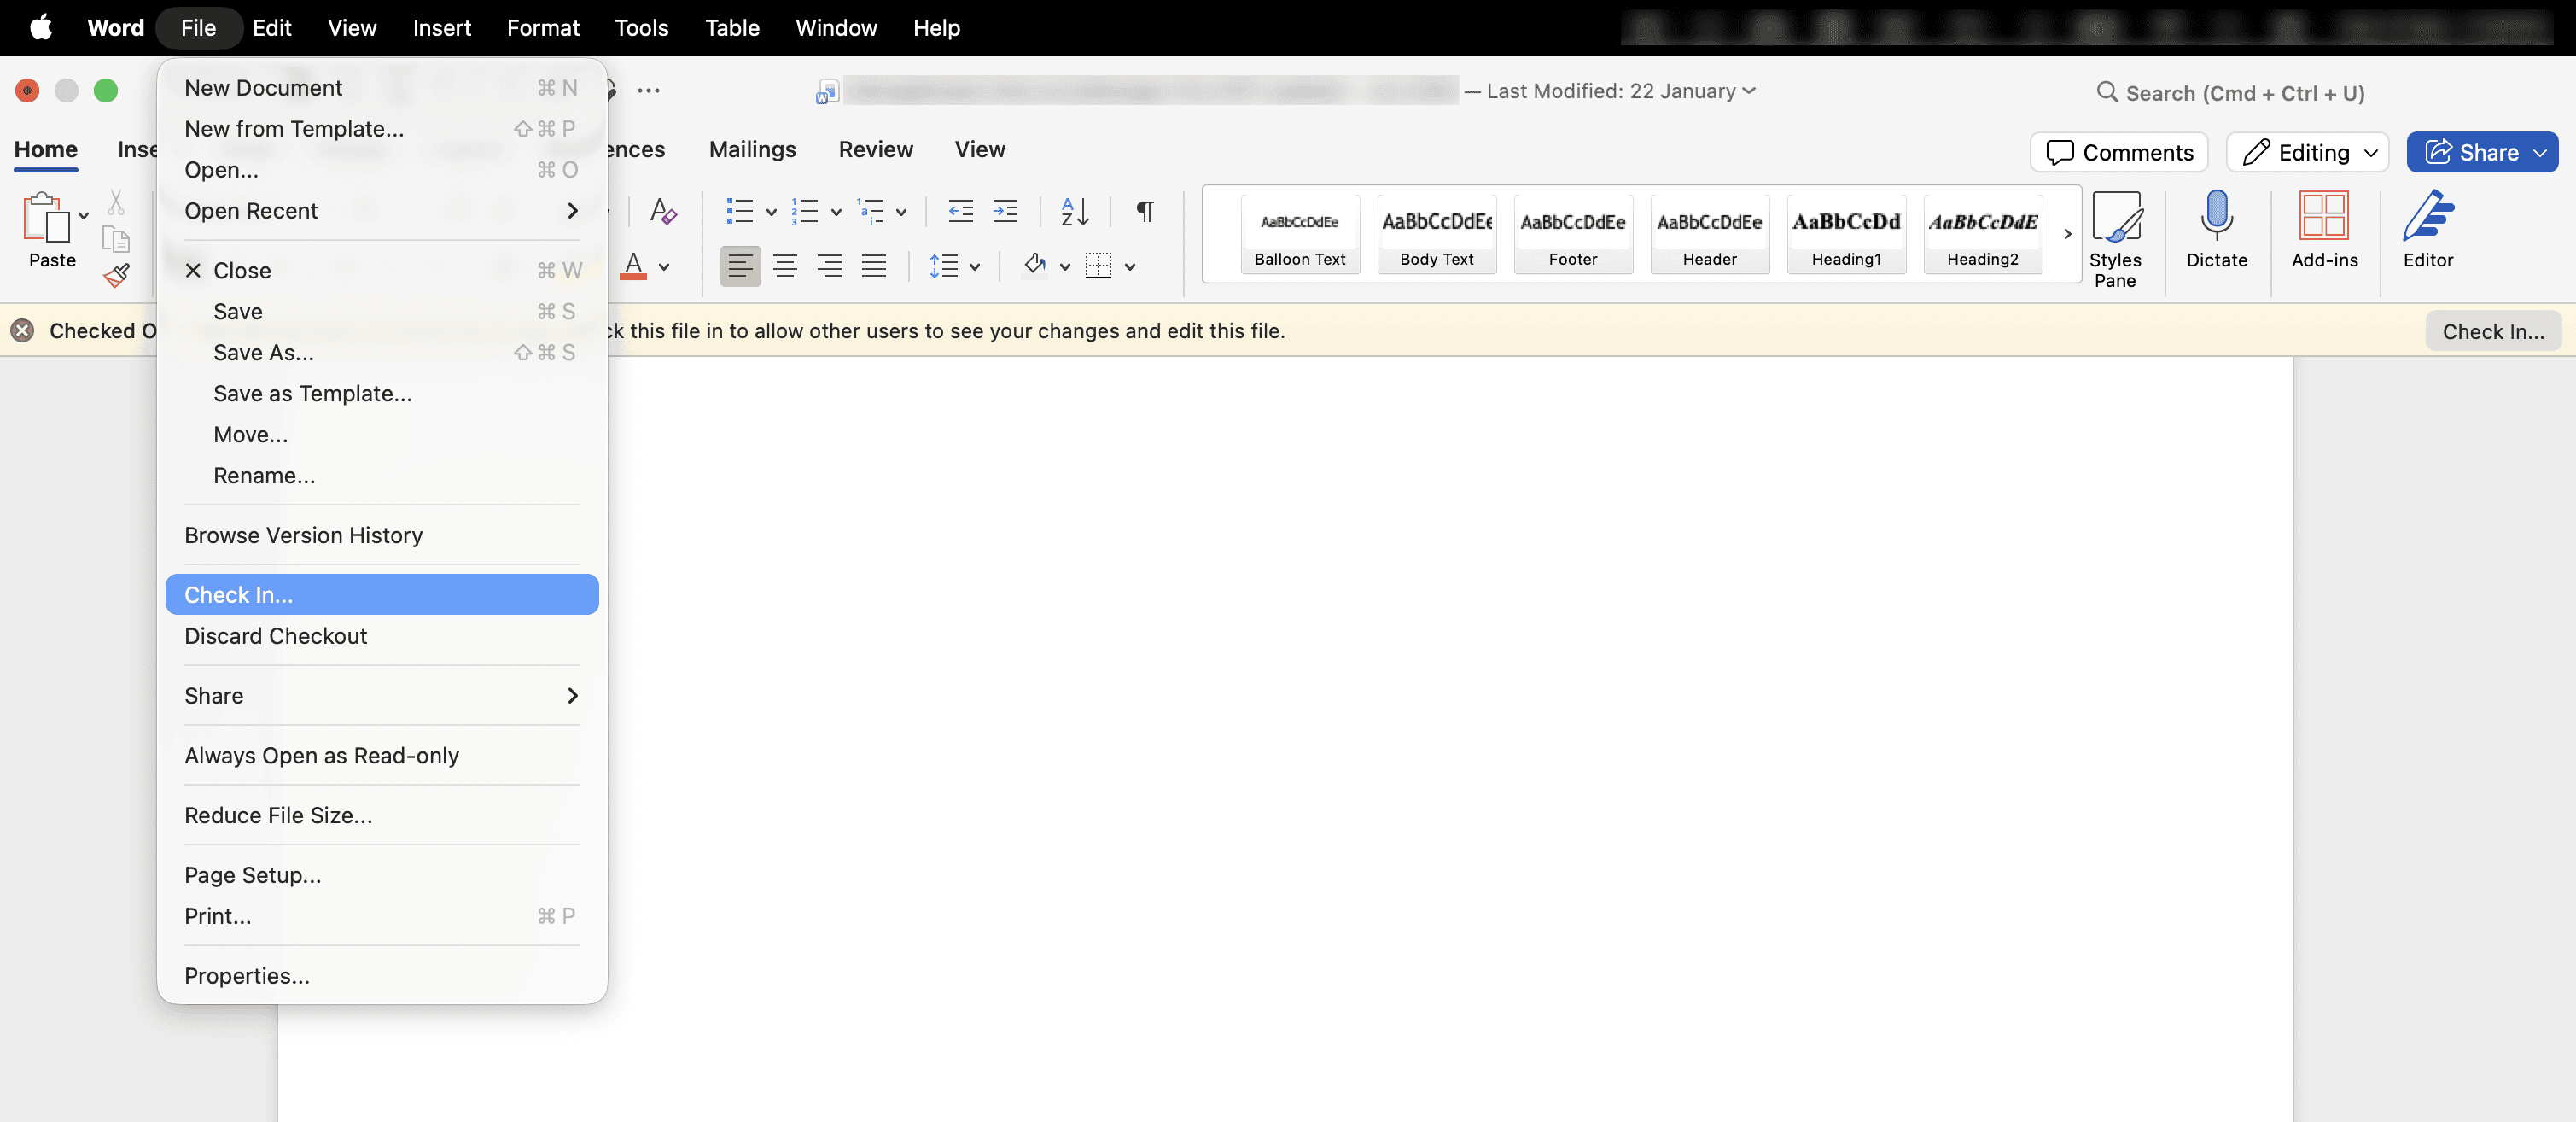
- Open the document in Microsoft Word, Excel, or PowerPoint.
- Select File > Info.
- Select Check Out or Check In depending on what you want to do.

Limitations to consider
- Administrators cannot easily identify all checked-out documents across multiple sites.
- There is limited visibility into who has files checked out across the tenant.
Method 2: How to check out and check in documents using PowerShell
PowerShell can be used to check in and check out documents programmatically, especially when automating SharePoint administration tasks or resolving locked files.
Prerequisites
Before using PowerShell:
- You must have SharePoint Administrator or Global Administrator privileges.
- Install the PnP.PowerShell module.
- Connect to the SharePoint site.
                     Install-Module PnP.PowerShell -Scope CurrentUser
                      Connect-PnPOnline -Url https://tenant.sharepoint.com/sites/ProjectSite -Interactive
Check out a document
Use the following command to check out a document from a SharePoint document library. This checks out the specified file so that only the current user can edit it, while others can open it in read-only mode.
Set-PnPFileCheckedOut -Url "Shared Documents/ProjectPlan.docx"
Check in a checked-out document
Use the following command to check in a document within a SharePoint document library.This checks in the file and creates a major version.
Set-PnPFileCheckedIn -Url "Shared Documents/ProjectPlan.docx" -CheckinType MajorCheckIn -Comment "Finalized edits"
Force check in a document
Administrators can perform a force check in if a user has left the organization or forgotten to check in the file.
Set-PnPFileCheckedIn -Url "Shared Documents/ProjectPlan.docx" -CheckinType MajorCheckIn -Comment "Admin forced check-in"
Discard a check out instead of checking in
If the changes should not be saved, you can discard the checked-out document. This restores the file to its previous version.
Undo-PnPFileCheckedOut -Url "Shared Documents/ProjectPlan.docx"
Supported parameters
The following parameters can be used to perform check in and check out operations in SharePoint:
| Parameter | Description |
|---|---|
| -Url | Path to the file within the SharePoint document library. |
| -CheckinType | Defines version type (MajorCheckIn, MinorCheckIn, OverwriteCheckIn). |
| -Comment | Adds a version comment during check in. |
| -Connection | Specifies the active SharePoint connection. |
| -Force | Forces execution when required. |
Limitations to consider
- Requires PowerShell knowledge and administrative permissions.
- Scripts must be executed site by site unless automation is implemented.
- Administrators need additional scripts to identify which files are checked out.
- There is no centralized dashboard for monitoring checked-out documents across the environment.
How do you see who has checked in or checked out a file in SharePoint?
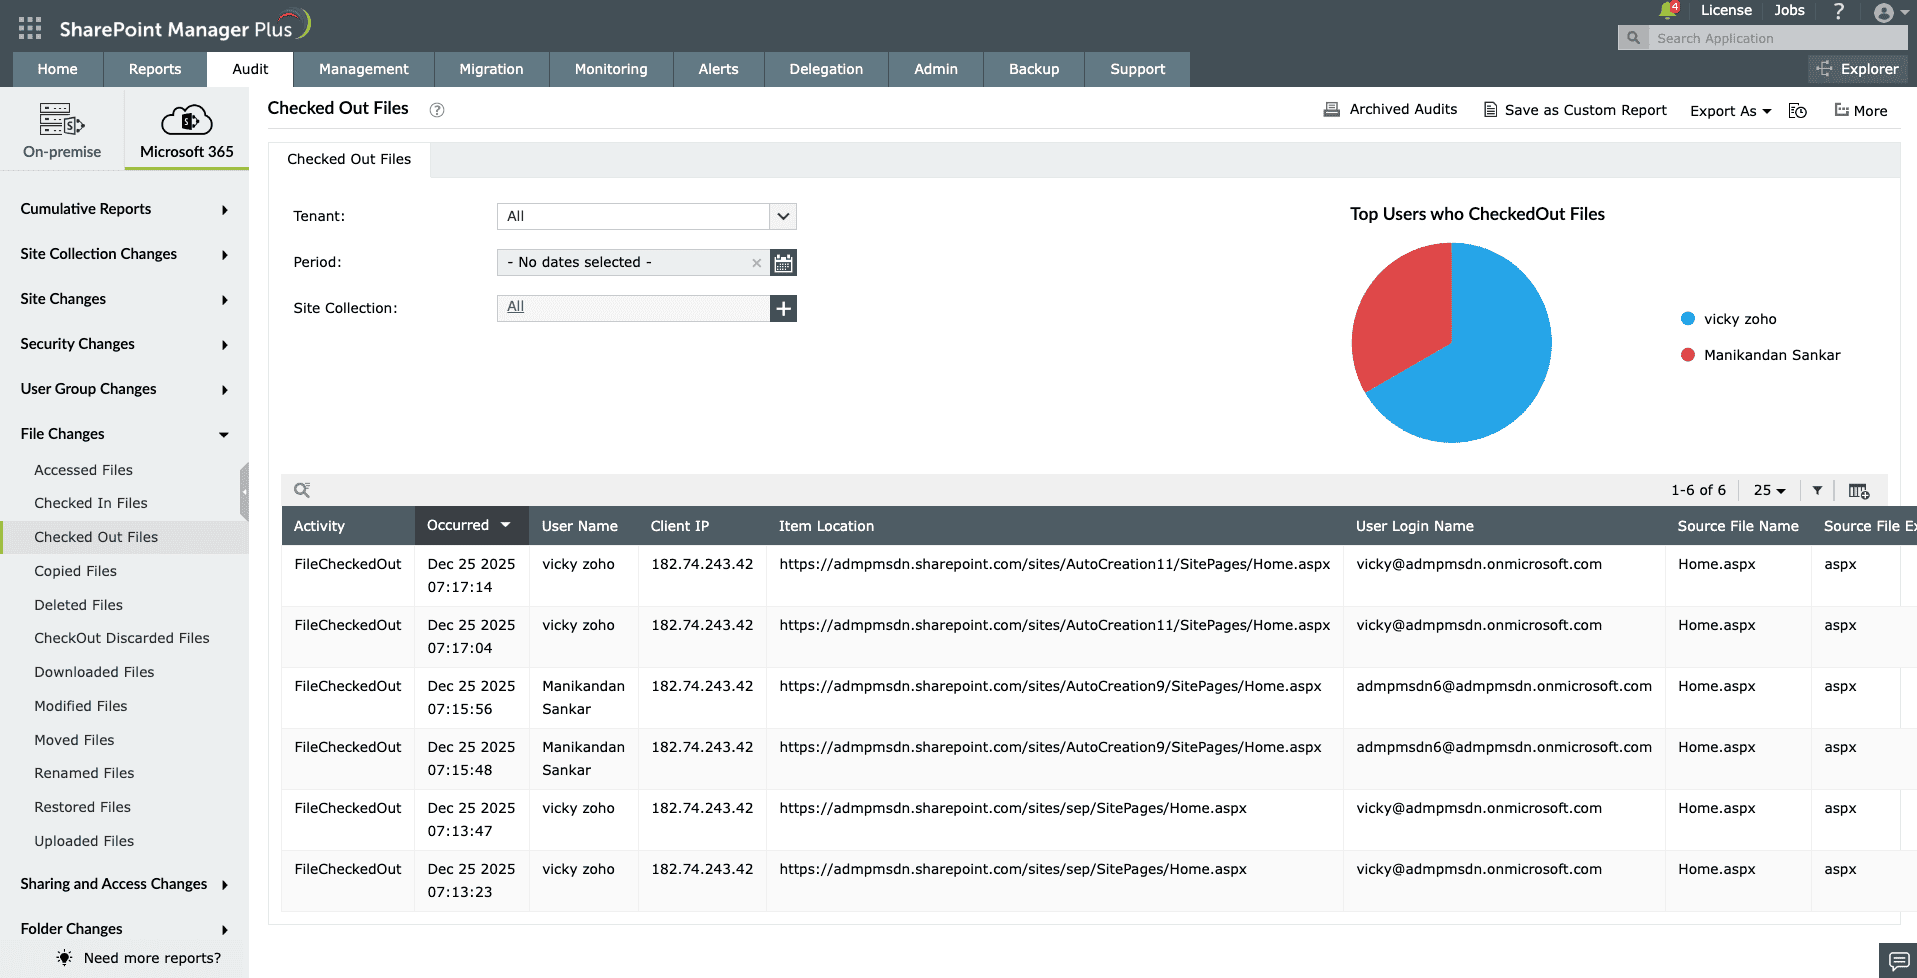
When a user checks out a document and forgets to check it back in, progress stalls and changes remain invisible to the team until the check in occurs. To maintain oversight and identify patterns of orphaned files, admins can use SharePoint Manager Plus to audit these specific events.
- Log in to SharePoint Manager Plus and navigate to Audit > Microsoft 365 > File Changes > Checked Out Files.
- Select your tenant, period, site, and click Generate Now.

Simplify document auditing and access management
Managing SharePoint check in and check out activity can be challenging as organizations scale and multiple users collaborate across hundreds of sites and document libraries. ManageEngine SharePoint Manager Plus provides centralized visibility into file activity, permissions, and document usage across SharePoint Online and on-premises environments.
Comprehensive file activity auditing
Track document activities such as check ins, check outs, downloads, edits, and deletions across SharePoint sites. Identify who accessed or modified files and when the action occurred.
Monitor checked-out files
Generate reports to identify documents currently checked out, including the user who checked them out and the location of the file. This helps administrators quickly resolve collaboration bottlenecks.
Permissions analysis
Analyze document library and folder permissions to detect excessive access rights and enforce least-privilege policies across your SharePoint environment.
Instant alerts
Get alerted via email when a user checks in a document, downloads a file, or performs other activities so you can always stay informed.
Automated reporting
Schedule detailed SharePoint document activity reports and export them in formats like CSV, PDF, XLSX, or HTML for compliance, auditing, and security investigations.
Important tips
Enable versioning for better tracking
When documents are checked in, SharePoint can create a new version of the file. Enabling versioning ensures that previous versions can be restored if needed.
Discard unnecessary check outs
If changes are no longer required, use Discard Check Out to revert the file to its previous version without saving edits.
Understand co-authoring vs. check out trade-offs
Modern SharePoint supports co-authoring, where multiple users edit files simultaneously. However, enabling check out enforces the single-editor workflow, which may be required for compliance or structured document approval processes.
Review library settings
Administrators can configure SharePoint check in and check out settings in Library Settings > Versioning settings, where check out requirements can be enabled or disabled.
Frequently asked questions
When you check out a document in SharePoint, the file becomes editable only by you. Other users can still open the document, but they can only view it in read-only mode until the file is checked back in.
When a document is checked in, your edits are saved and the file becomes available for others to edit again. If versioning is enabled, SharePoint will create a new major or minor version of the document.
Administrators can perform a force check in using PowerShell if a user forgot to check in the file. This releases the file lock and makes it available to others.
Yes. Go to the document library > Settings > Versioning settings and disable the option Require documents to be checked out before they can be edited. This allows co-authoring, where multiple users can edit files simultaneously.
If a document in a SharePoint document library is checked out and the user who checked it out is unavailable (e.g., they are on leave or have left the organization), administrators or users with sufficient permissions can resolve the issue in a few ways:
- Force check in the document: A SharePoint administrator can use PowerShell to perform a force check in, which saves the latest version and releases the file lock.
- Discard the check out: If the changes are not required, the administrator can choose Discard Check Out from the document’s menu to revert to the last saved version.
- Take ownership via permissions: Site owners with Full Control permissions may be able to override the checkout depending on library settings.
Open the SharePoint page, click Edit, and then choose Check in or Publish depending on the page approval workflow. This makes the updated page visible to users.