How to restore a SharePoint document library
Last updated on:A SharePoint document library may need to be restored due to accidental deletion, unwanted modifications, or ransomware impact. Depending on the scenario, restoration can mean reverting the library to a previous version, recovering it from the Recycle Bin, or restoring it from a backup.
This guide walks you through each restoration scenario with different solution methods so you can choose one that best suits your organization's needs.
Scenario 1: Restore a document library to a previous version
SharePoint allows you to restore a document library to a previous point in time through versioning. If your library still exists but its contents, structure, or settings have been modified, you can revert it to an earlier state. This is essentially an undo button for your document library.
Prerequisites
- You must be a Site Owner or have Full Control permissions on the document library.
- Ensure version history is enabled (Library settings > Versioning settings).
Steps
- Navigate to the SharePoint site.
- Open the document library.
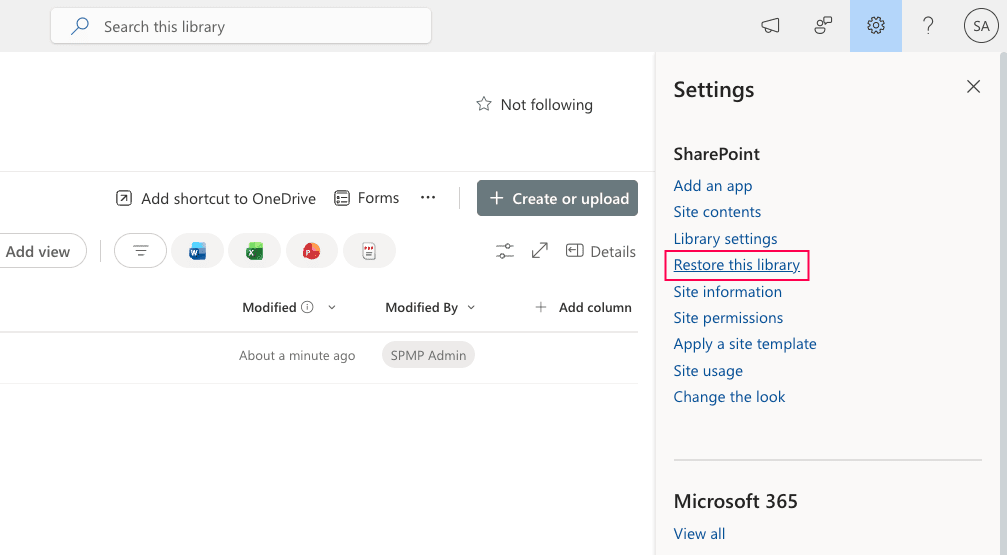
- Click the Settings icon ⚙ and select Restore this library.
- On the Restore page, choose a preset time (like Yesterday) or select Custom date and time to pick a specific point.
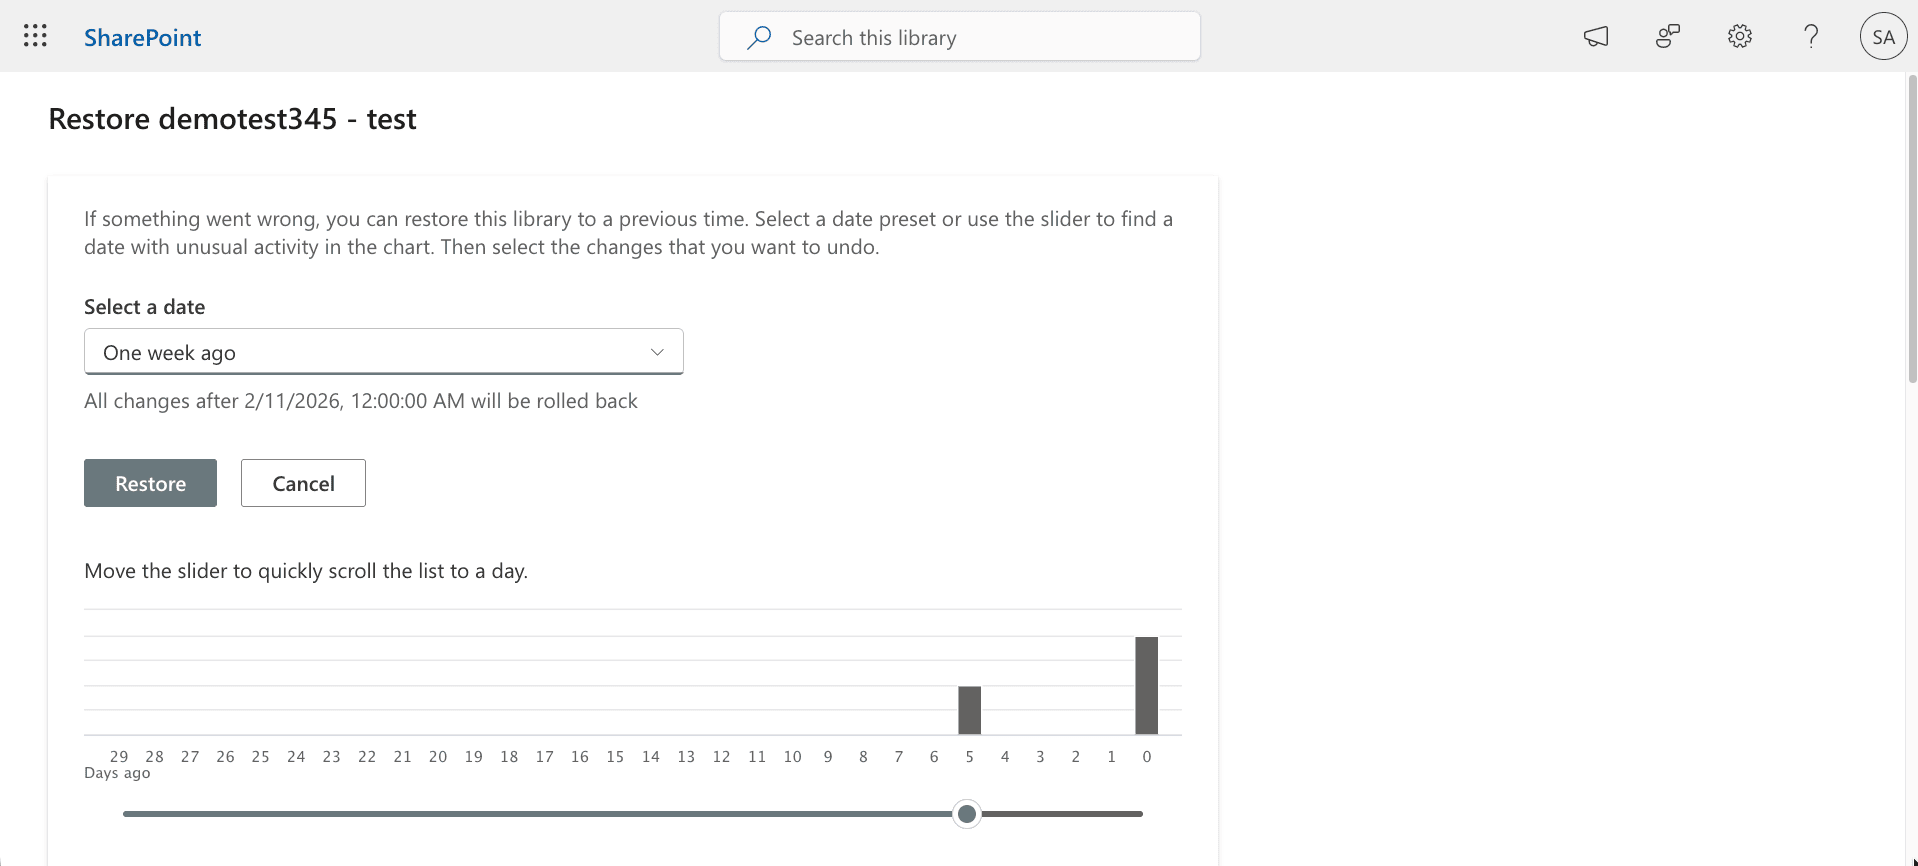
- Use the activity chart and activity feed to review recent activities and find the exact restore point you want.
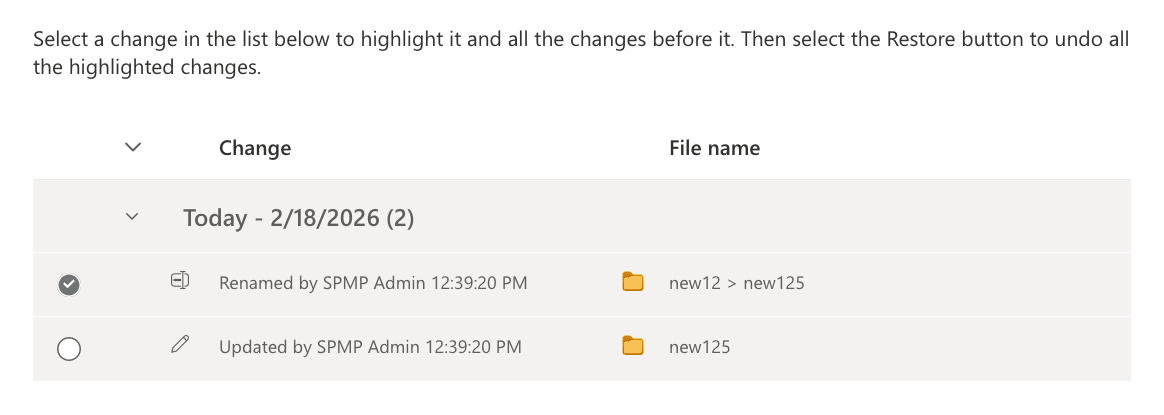
- Once you’ve selected the correct date and time, click Restore to begin the process.
- Confirm the action when the warning appears.


The library will revert to its previous state, including files and metadata as of the selected date.
Scenario 2: Restore individual files to a previous version
You can revert a SharePoint file to previous version without affecting the whole document library using the browser UI and PowerShell.
Steps to restore using the SharePoint Online browser UI
Prerequisites
- Ensure version history is enabled (Library settings > Versioning settings).
- You must have Edit, Contribute, or higher permissions.
Steps
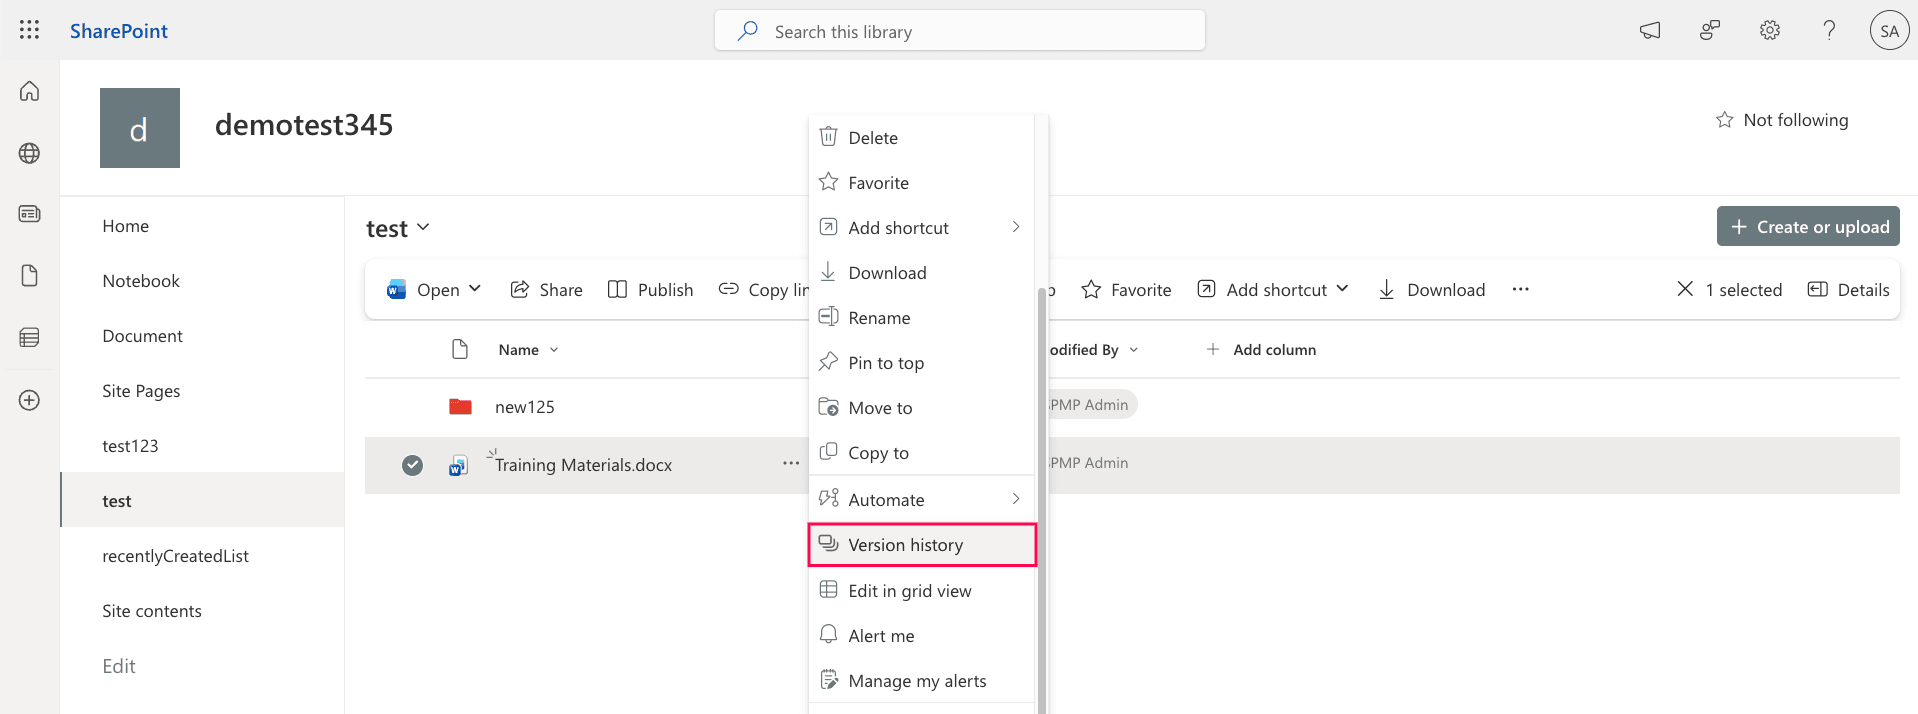
- Open the document library and locate the file you want to restore.
- Click the three dots (…) next to the file name and select Version history.
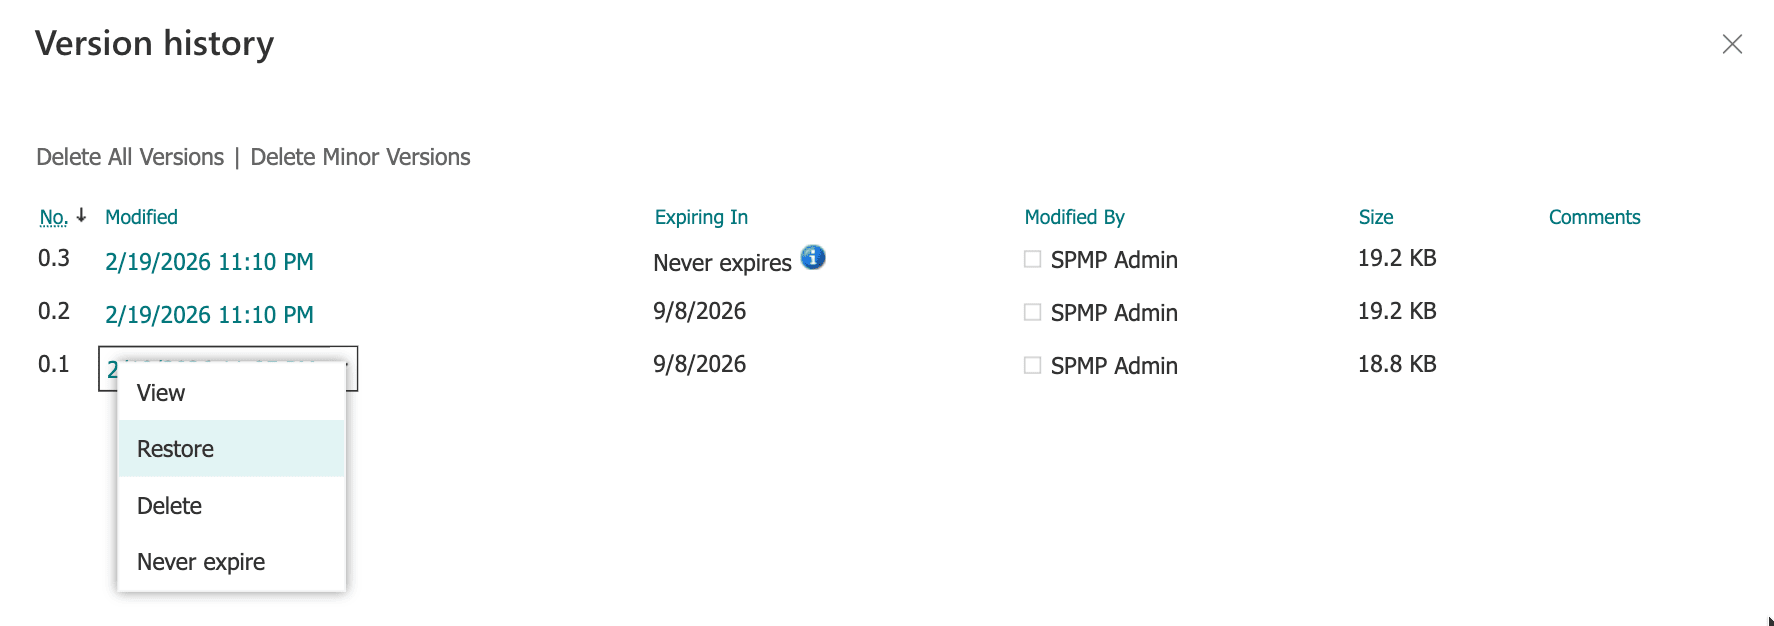
- Review the list of previous versions.
- Click the drop-down arrow next to the version you want.
- Select Restore.


Steps to restore using PowerShell
Prerequisites
- Before using PowerShell, ensure that:
- You have SharePoint Administrator or Global Administrator rights.
- The PnP.PowerShell module is installed.
- Install and connect to the specific site where the file is:
                                            Install-Module PnP.PowerShell -Scope CurrentUser
                                            Connect-PnPOnline -Url "https://tenant.sharepoint.com/sites/ProjectSite" -Interactive
Restore a specific version
Run this script to restore a specific version is using the Restore-PnPFileVersion cmdlet. This is useful if you know the exact version ID or label you want to revert to.
Restore-PnPFileVersion -Url "Shared Documents/MyFile.docx" -Identity "1.0" -Force
Restore the immediate previous version
If you need to quickly revert to the version just before the current one, you can use this script to find the last entry in the version history and restore it by its label.
                                # 1. Target the file
                                $file = Get-PnPFile -Url "Shared Documents/MyFile.docx" -AsListItem
                                $fileObject = $file.File

                                # 2. Load the versions into memory
                                Get-PnPProperty -ClientObject $fileObject -Property Versions | Out-Null

                                # 3. Logic to restore the most recent backup
                                if ($fileObject.Versions.Count -gt 0) {
                                    # Grabs the very last item in the version array (the newest history entry)
                                    $previousVersion = $fileObject.Versions[$fileObject.Versions.Count - 1]

                                    $fileObject.Versions.RestoreByLabel($previousVersion.VersionLabel)
                                    Invoke-PnPQuery
                                    Write-Host "Success! Restored to version: $($previousVersion.VersionLabel)" -ForegroundColor Green
                                } else {
                                    Write-Warning "No previous versions found to restore."
                                }
Limitations of using native solutions
- Restore points are limited to a defined retention window.
- Recent changes after the restore point will be overwritten.
- PowerShell cannot restore an entire document library in a single operation; items must be restored individually.
- This method requires specific admin roles and familiarity with the interface, which may not be ideal for all users.
Scenario 3: Restore a deleted document library from the Recycle Bin
When a file, folder, or document library is deleted, it is automatically moved to the site Recycle Bin. Follow the steps below to recover deleted files using the browser UI and PowerShell.
Steps to restore using the SharePoint Online browser UI
- Go to the SharePoint site.
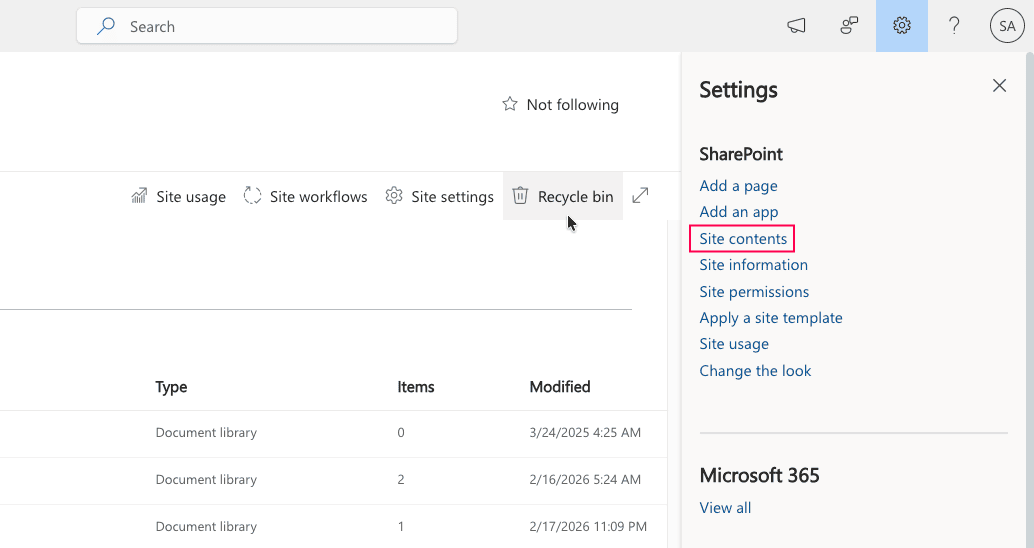
- Click the Settings icon ⚙ and select Site contents.
- Select Recycle bin.
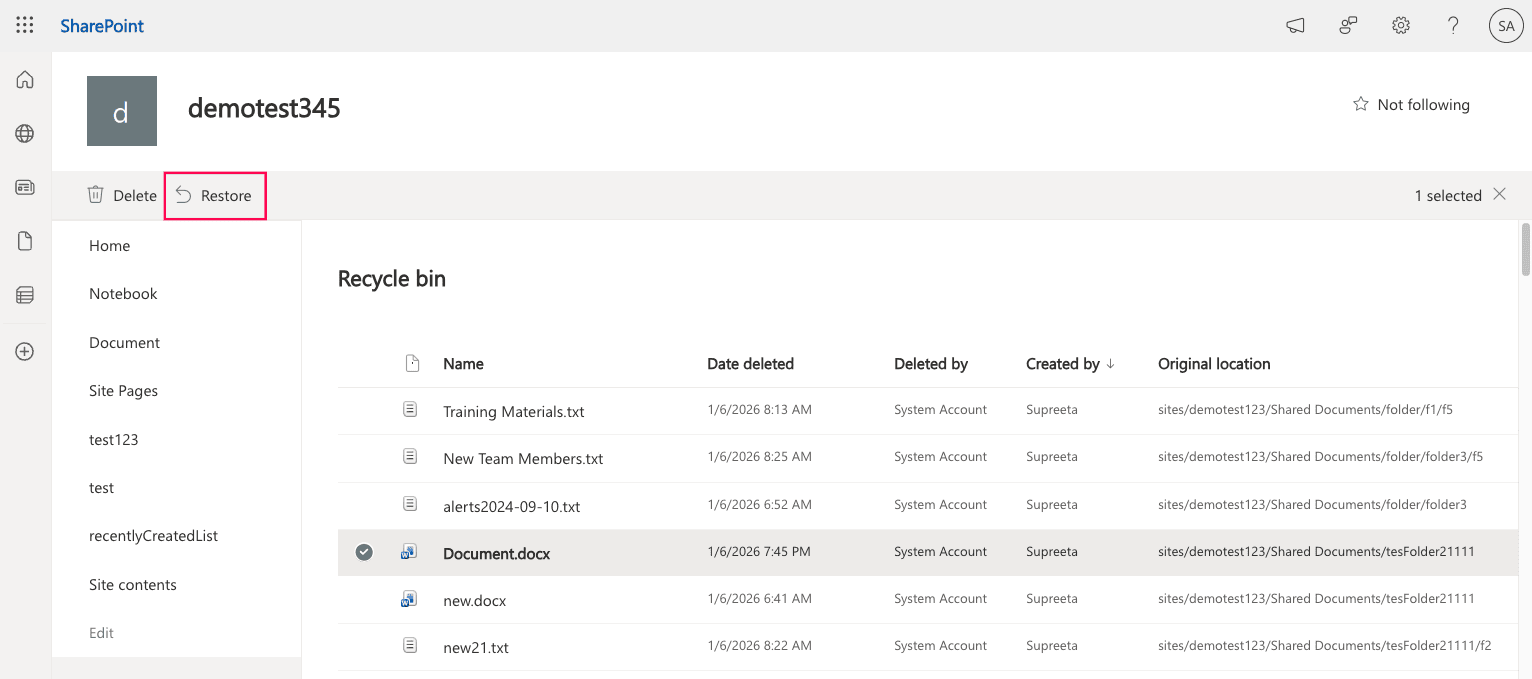
- Locate the deleted object, select it, and click Restore.


Steps to access the second-stage Recycle Bin in SharePoint Online
If the library is not visible in the site Recycle Bin, it must have been moved to the second-stage Recycle Bin, also called the Site Collection Recycle Bin.
- At the bottom of the Recycle Bin page, click Second-stage recycle bin.
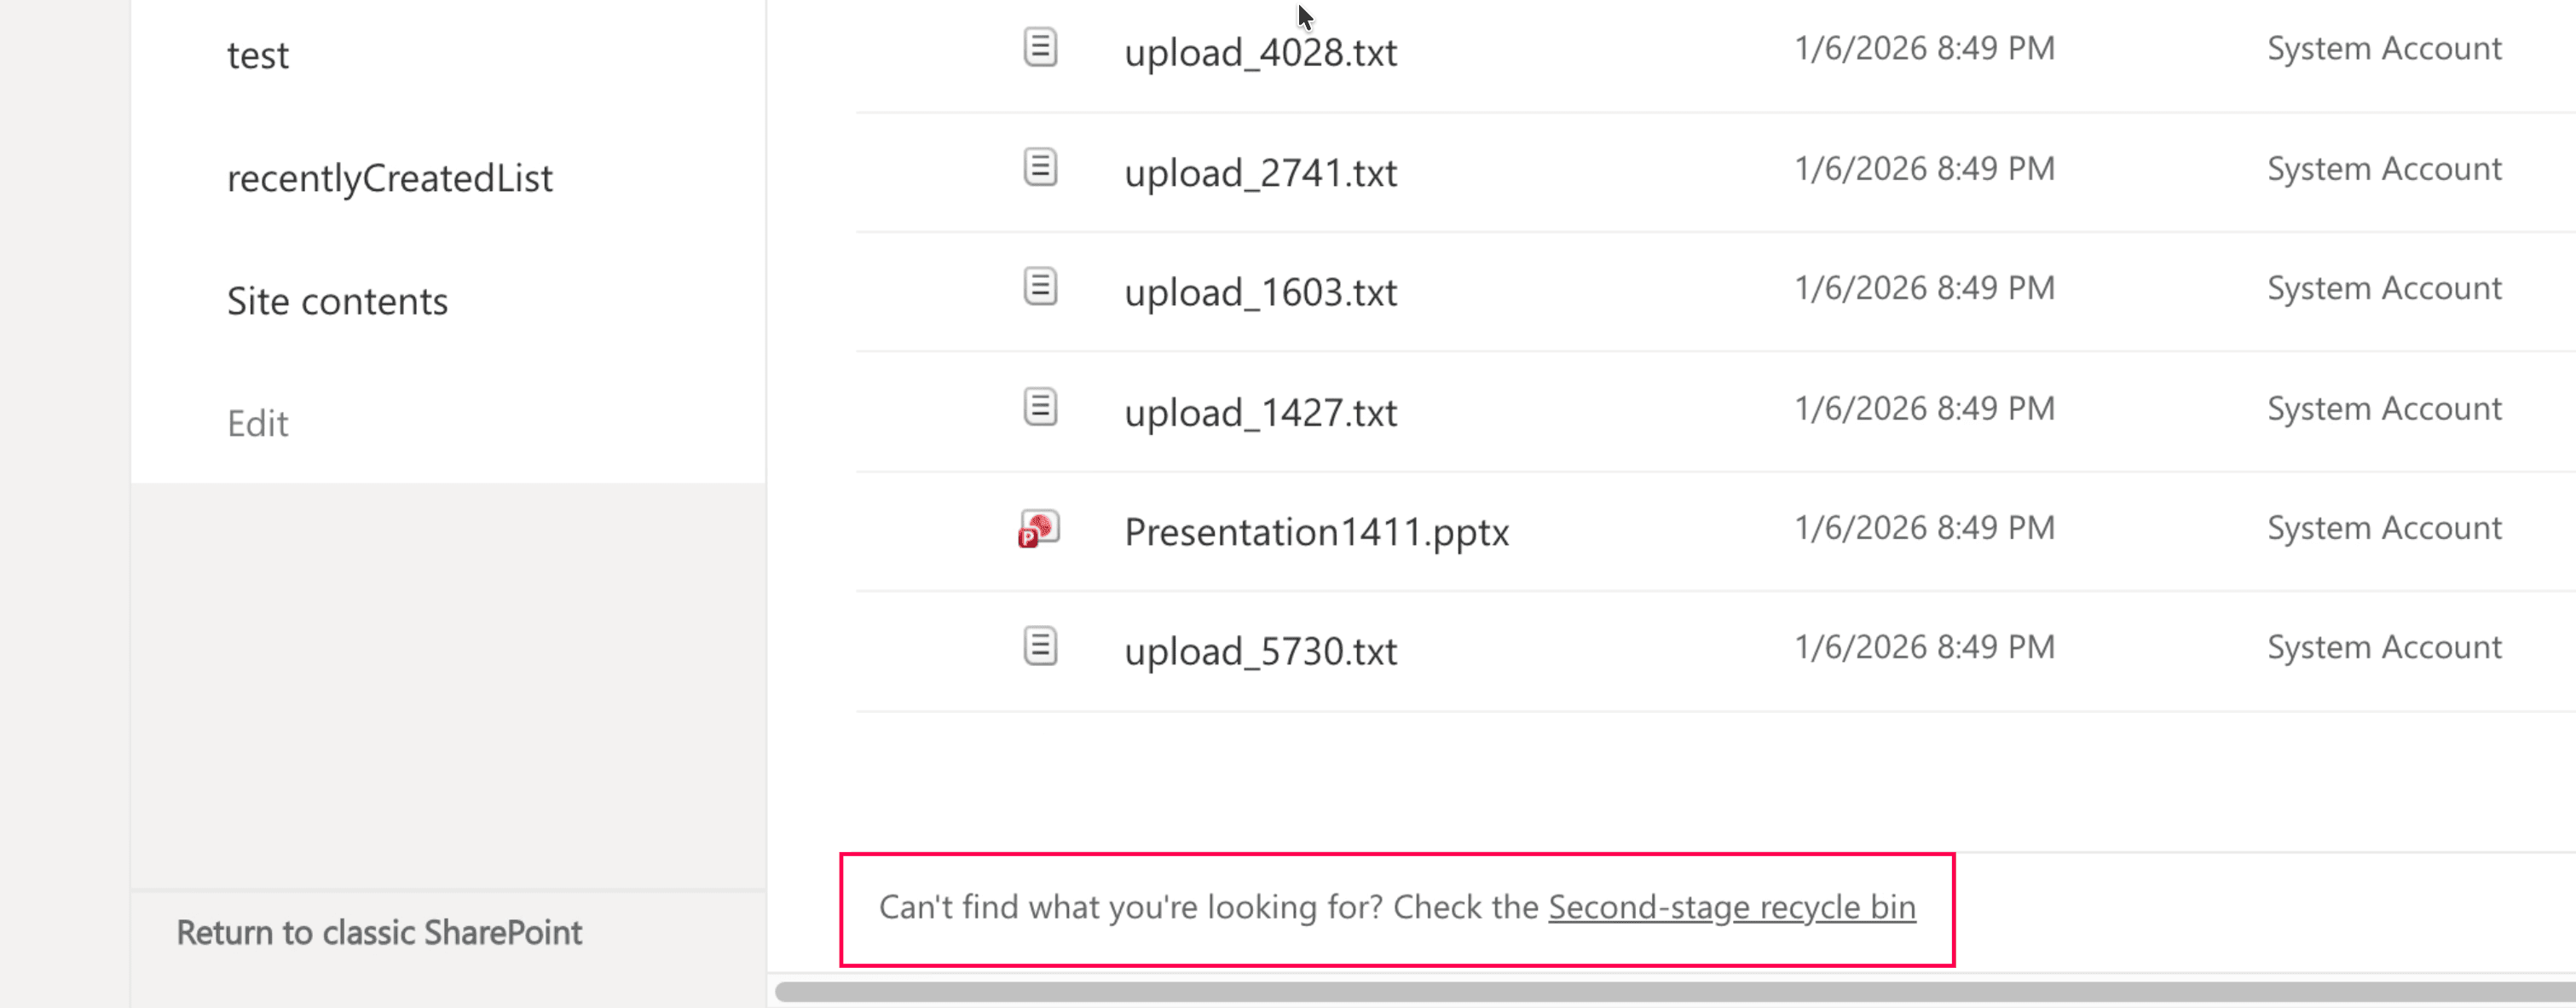
- Locate the deleted document library on the Second-stage recycle bin page.
- Select the item and click Restore.

Steps to restore using PowerShell
Prerequisites
Before using PowerShell, ensure that:
- You have SharePoint Administrator or Global Administrator rights.
- The PnP.PowerShell module is installed. If not, run:
Install-Module PnP.PowerShell -Scope CurrentUser
Steps
- Connect to the specific site collection where the library originally existed:
Connect-PnPOnline -Url "https://tenant.sharepoint.com/sites/ProjectSite" -Interactive - Restore the deleted document library from the Recycle Bin:
Get-PnPRecycleBinItem | Where-Object { $_.Title -like"*Project Documents*" } | Restore-PnPRecycleBinItem-Force
Limitations of using native solutions
- Items are retained for up to 93 days from the original deletion date.
- Once permanently deleted, Recycle Bin restore won't be possible without backups.
- This method requires high-level permissions and familiarity with scripting.
Scenario 4: Restore a document library from a backup
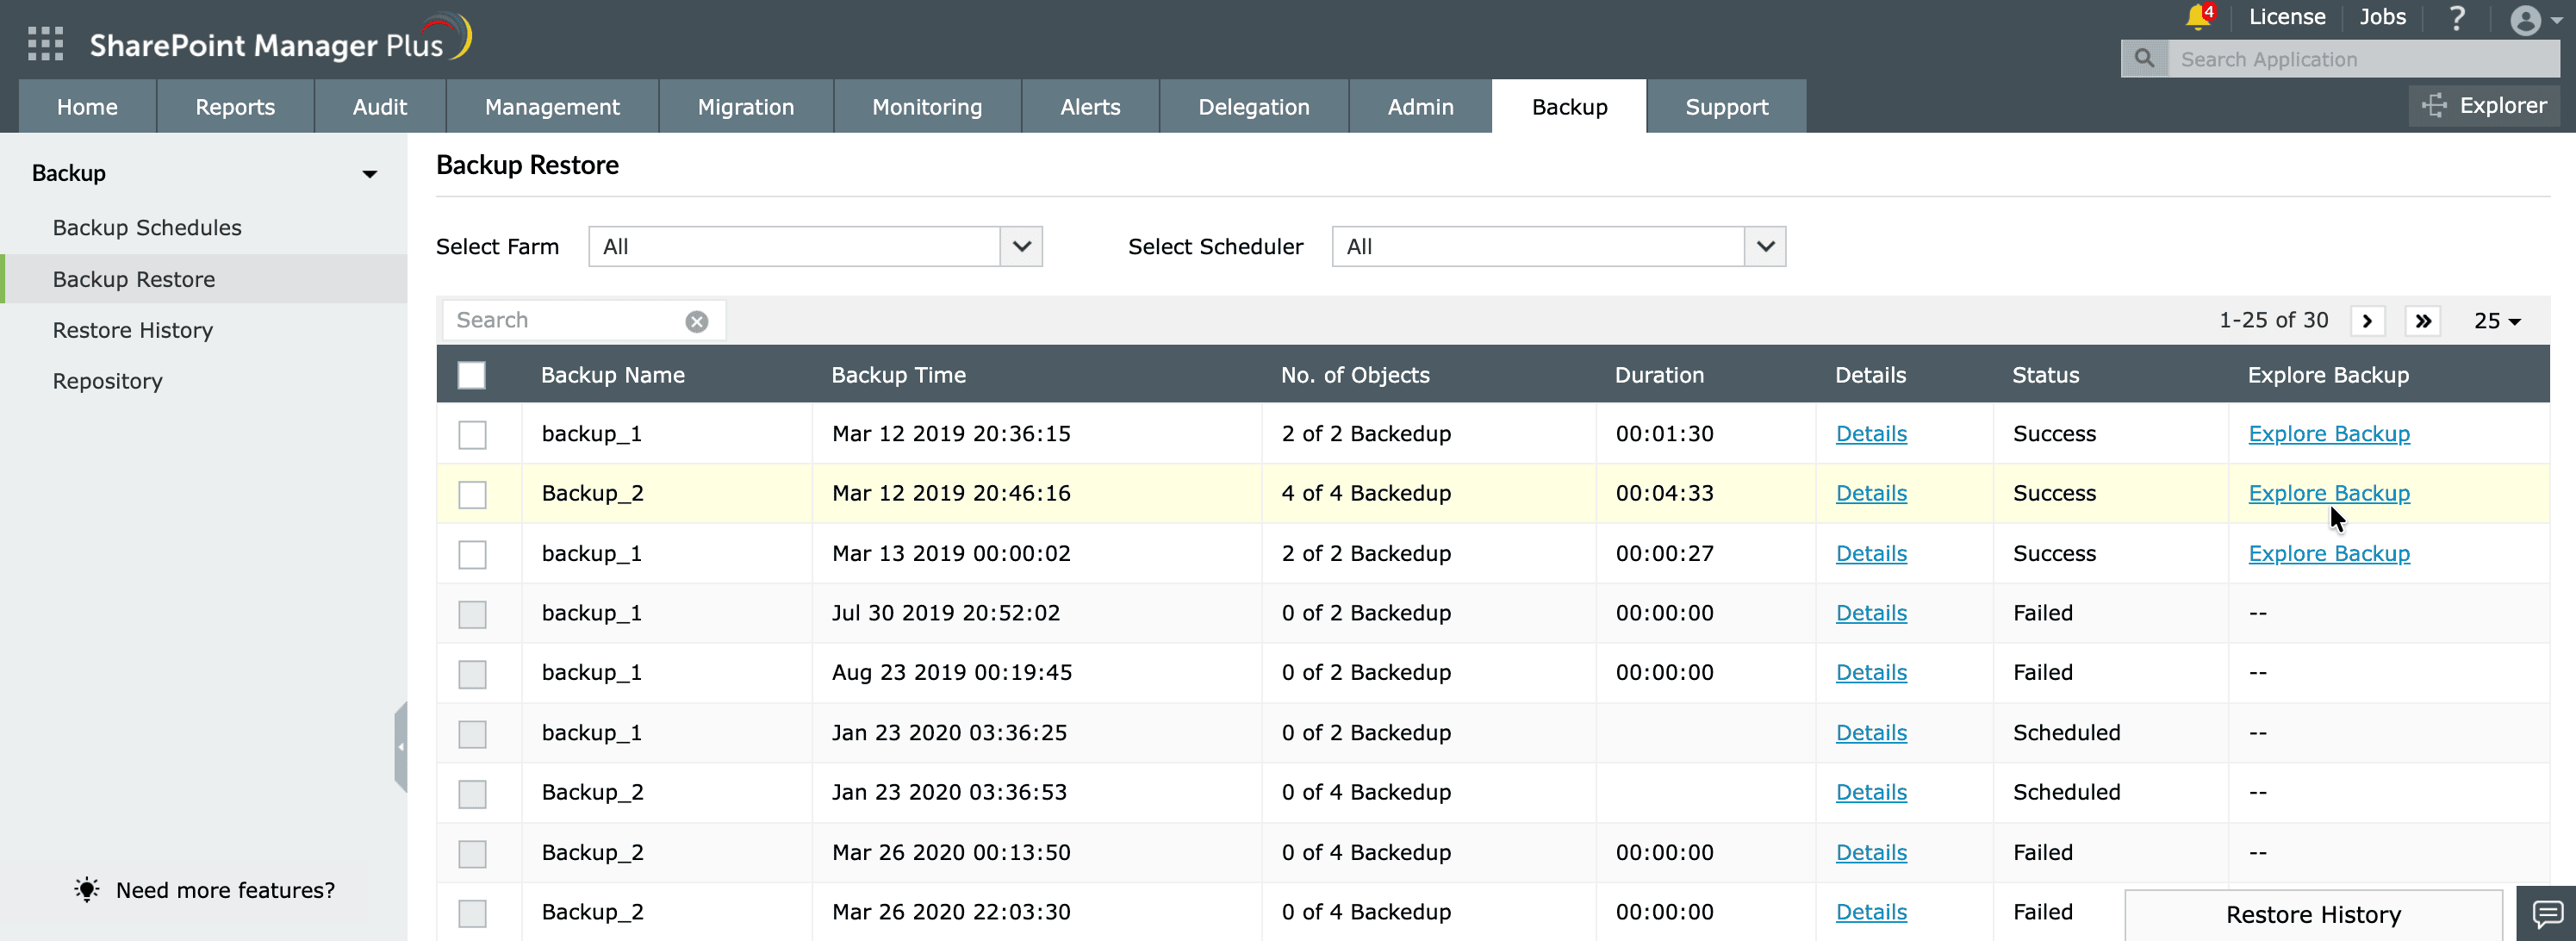
If the library was permanently deleted or corrupted beyond Recycle Bin recovery, restoration must be performed from a backup. Third-party tools like SharePoint Manager Plus support full-site backups and restoration, ideal for restoring corrupted document libraries to previous states.
- In SharePoint Manager Plus, navigate to Backup > Backup Restore.
- Click Explore Backup on the backup that contains the document library.
- In the Select Objects pop-up, select the site that contains the document library.
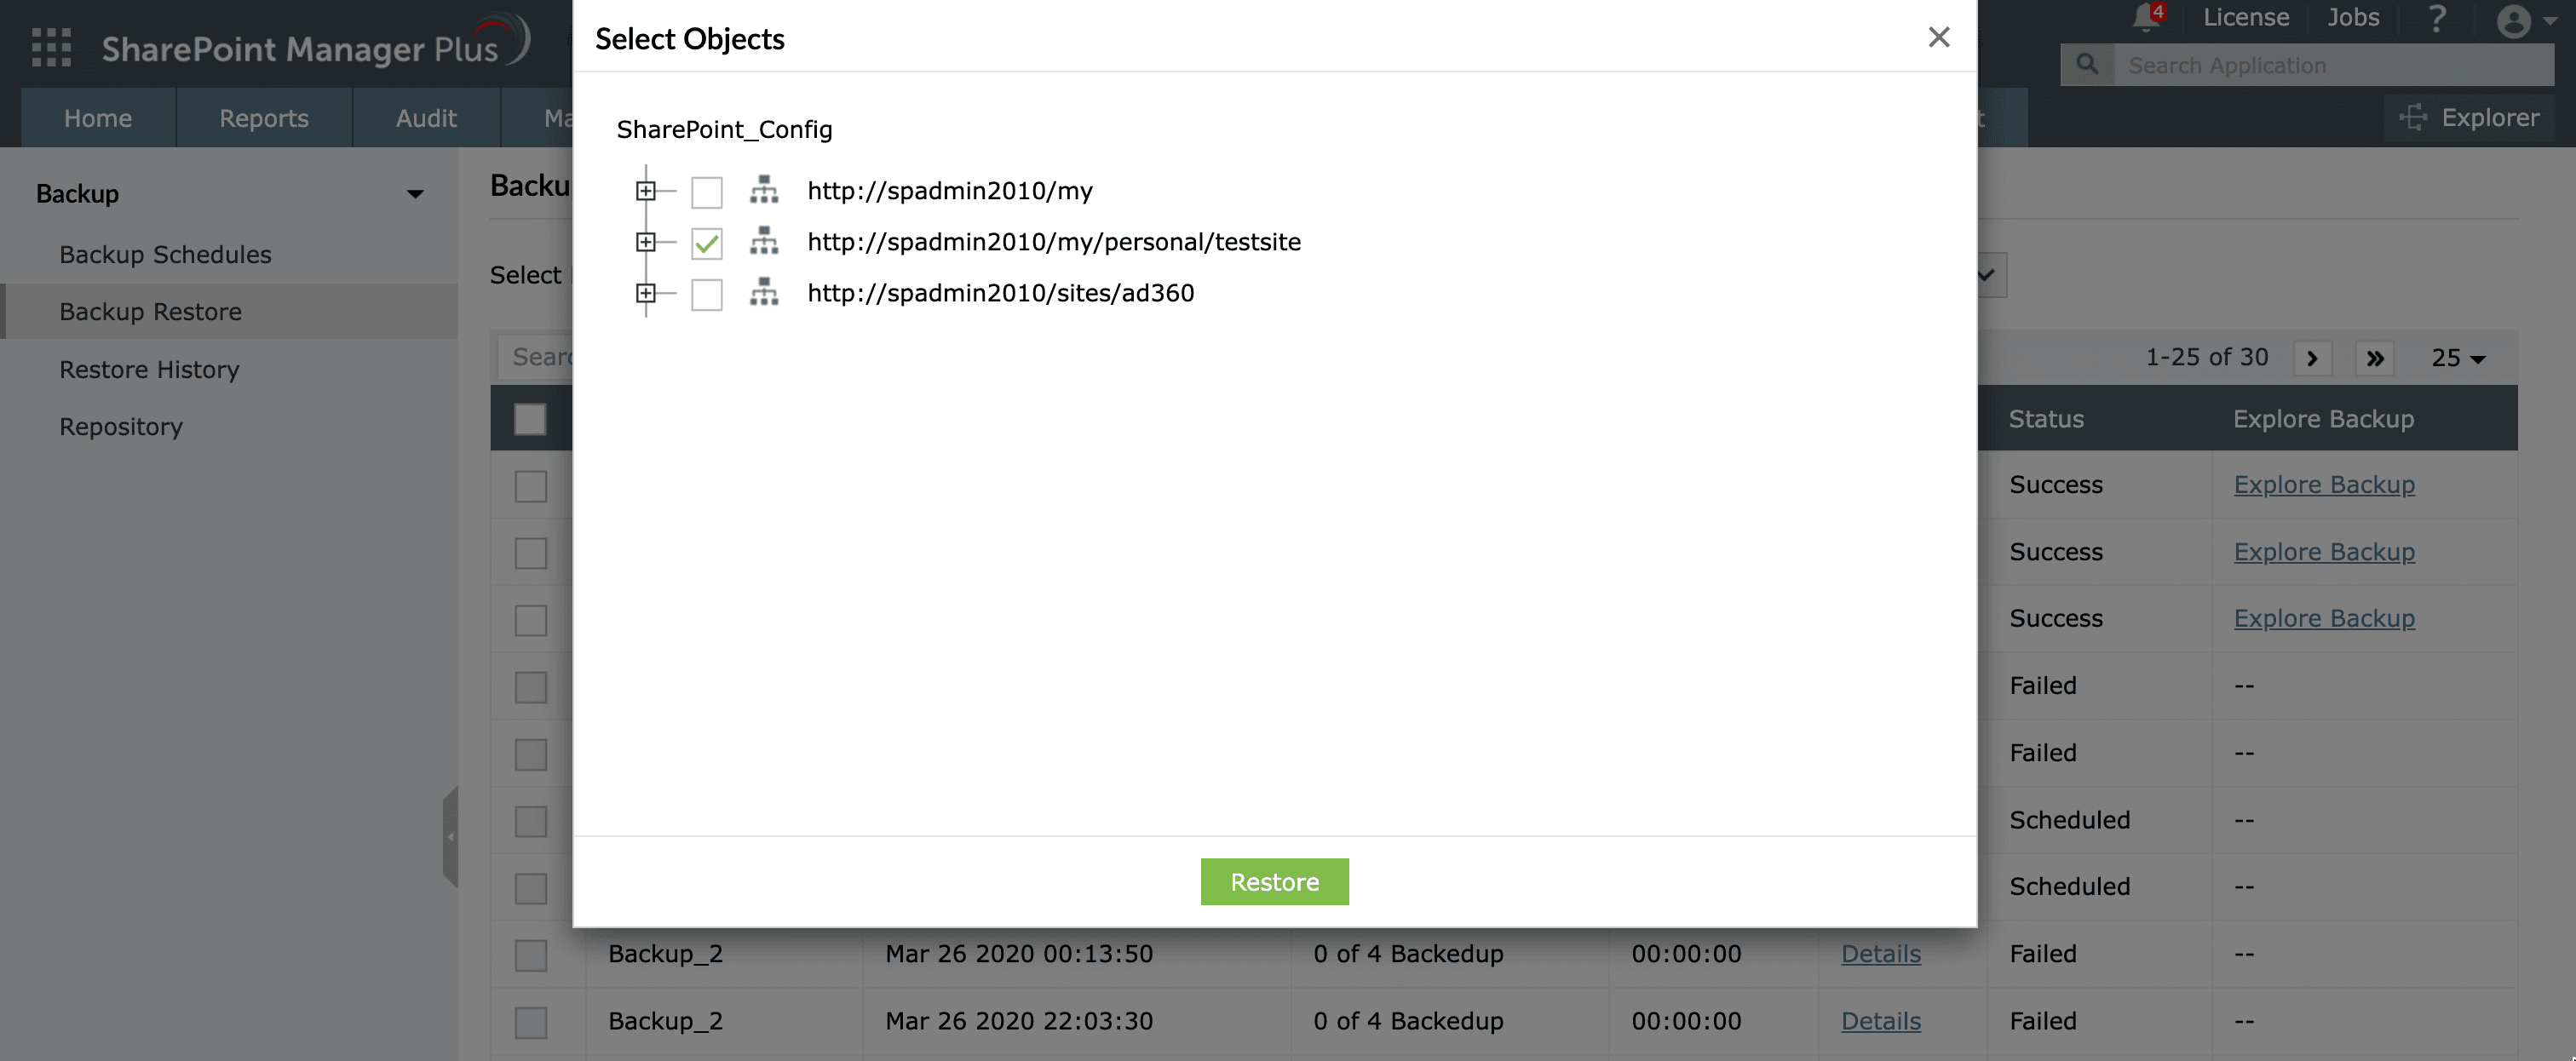
- Click Restore. You can check the status by clicking Restore History at the bottom.


Streamline document library management with SharePoint Manager Plus
Managing document libraries in SharePoint often requires navigating multiple admin centers, running PowerShell scripts, or manually reviewing settings. SharePoint Manager Plus provides a centralized, web-based console to streamline document library management.
Automate SharePoint backup
Secure document libraries by scheduling backups of individual sites or entire site collections. Restore them at any time to a previous state to quickly recover from disasters and ensure business continuity.
Audit document library changes
Track who created, modified, deleted, or accessed files and document libraries. Detailed audit logs help you monitor suspicious activity, investigate incidents, and prepare for compliance checks.
Manage permissions and inheritance
Control document library access at scale or granularly. Identify broken inheritance, remove excessive permissions, and enforce consistent access controls to minimize security risks and oversharing.
Generate detailed reports
Schedule comprehensive reports on document library permissions, activity, storage usage, and more. Export reports in different formats, such as CSV, PDF, XLSX, and HTML.
Role-based delegation
Easily delegate reporting and management tasks on document libraries and other SharePoint files to non-IT users and help desk staff, without affecting native SharePoint permissions.
Important tips
Follow these best practices to ensure safe restoration and avoid data loss:
Understand restore limitations
Native SharePoint Online restore operations are bound by a 93-day retention period. Once content is permanently deleted from both Recycle Bins after this period, it cannot be recovered without a backup.
Verify restore location
Ensure the restore location does not conflict with an existing library of the same name. Name conflicts may require manual resolution.
Check permissions and site owner access
After restoring a document library, verify that permissions and site owner settings are intact. Broken inheritance may require manual review.
Review Microsoft Teams impact
Files shared in Microsoft Teams channels are stored in associated SharePoint document libraries. Restoring or modifying these libraries can impact Teams collaboration.
FAQ
There isn’t a single universal undo button in SharePoint, but you can reverse actions using the options below:
- Undo file changes (version history)
Open the document library > click the three dots (…) next to the file > select Version history > choose a previous version > click Restore. - Undo deleted files (Recycle Bin)
Go to Site contents > select Recycle bin > choose the deleted item > click Restore. - Undo large library changes (restore the library)
Open the document library > click the Settings icon ⚙ > select Restore this library > choose a date and restore the entire library to that point in time.
The method you use depends on whether you're undoing a file edit, a deletion, or broader library changes.
In SharePoint Online, the Recycle Bin can be accessed from the Site contents page. Go to Settings > Site contents and click Recycle Bin at the top-right corner. Site owners and administrators can also access the second-stage Recycle Bin from within the Recycle Bin page.
When a file, folder, or document library is deleted from a SharePoint site, it moves to the first-stage Recycle Bin. If deleted again, it moves to the second-stage Recycle Bin. You have 93 days from the original deletion date to restore it.
When you perform a restore operation:
- The item returns to its original location (same library and folder path).
- Folder structures are automatically recreated if needed.
- Document libraries are restored with their files, folders, metadata, permissions, and version history intact.
If the entire document library was deleted, it must be restored first before restoring individual files inside it.
In SharePoint Online, you have up to 93 days to recover deleted files, folders, document libraries, and other content from the Recycle Bin. If your organization has retention policies or legal holds configured, those may override standard deletion behavior.
To view version history for a file in SharePoint:
- Go to your SharePoint site and open the document library.
- Locate the file and click the three dots (…) next to the file name.
- Select Version history.
You’ll see a list of previous file versions, including who modified them and when. From there, you can view, restore, or delete specific versions (depending on your permissions).