- Free Edition
- Quick Links
- Active Directory Auditing
- Active Directory auditor
- Active Directory monitoring
- Account lockout analyzer
- Login monitoring software
- Active Directory change notifier
- User logon audit reports
- AD logon logoff tracker
- User logon failure auditing
- Login history tracking tool
- AD change auditor
- Insider threat detection software
- Permissions change auditing
- Entra ID reporting
- Privileged user monitoring
- User behavior analytics tool
- Active Directory security monitoring
- Group Policy auditing tool
- GPO change auditor
- Entra ID auditing
- Audit user account management
- OU change auditor
- Audit group membership changes
- Active Directory auditing and reporting tool
- GPO reporting tool
- Remote desktop monitoring software
- PowerShell logging and auditing
- Azure password protection auditing
- Azure sign-in risk detection
- File Server Auditing
- Windows Server Auditing
- Employee Tracking
- Workstations Auditing
- Compliance Auditing
- Other features
- SIEM Integration
- Windows DNS - Schema Auditing
- Windows security event log monitoring
- SIEM audit solution
- Schedule Active Directory change reports
- Reports from Archived Data
- Aggregated summary reports
- AD new/old attribute changes
- Audit trail
- Audit Active Directory LAPS
- Scheduled Reports & Alerts
- Account lockout examiner
- Industry
- Documents
- Success Stories
- Related Products
- Log360 (On-Premise | Cloud) Comprehensive SIEM and UEBA
- ADManager Plus Active Directory Management & Reporting
- EventLog Analyzer Real-time Log Analysis & Reporting
- ADSelfService Plus Identity security with MFA, SSO, and SSPR
- DataSecurity Plus File server auditing & data discovery
- Exchange Reporter Plus Exchange Server Auditing & Reporting
- M365 Manager Plus Microsoft 365 Management & Reporting Tool
- RecoveryManager Plus Enterprise backup and recovery tool
- SharePoint Manager Plus SharePoint Reporting and Auditing
- AD360 Integrated Identity & Access Management
- AD Free Tools Active Directory FREE Tools
How to create child domain in Windows Server 2012 R2?
Written by Mahidhar Adarsh, IT security team, ManageEngine Updated on July 2026
Step 1: Install Active Directory Domain services
- Log into your Active Directory Server with administrative credentials.
- Open Server Manager → Roles Summary → Add roles and features
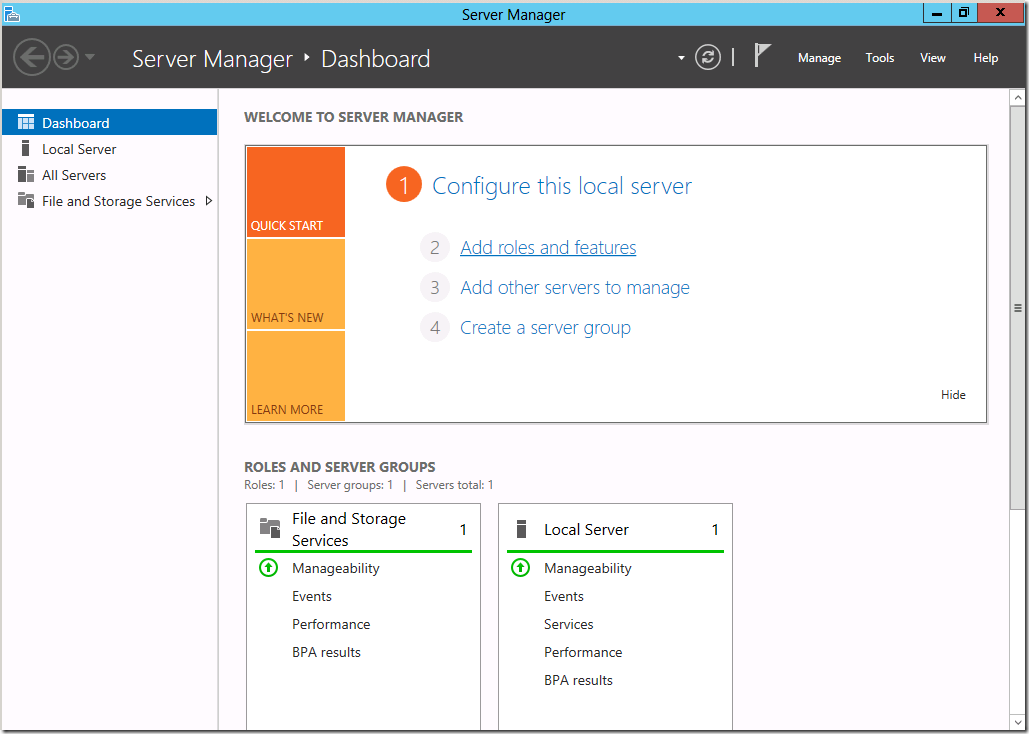
- The "Before you begin" screen, which pops up next, is purely for an informational purpose. After you finish reading it, click Next.
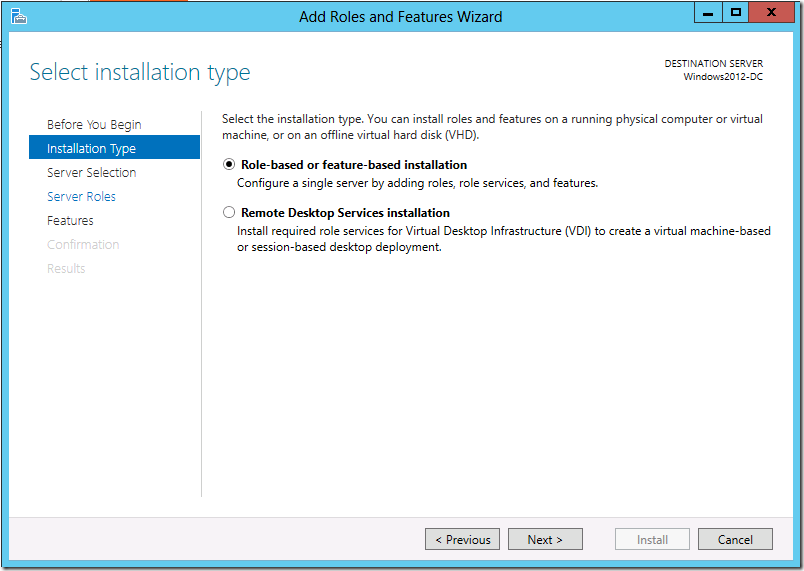
- Select the installation type. If it is a virtual machine based deployment, choose Remote Desktop Services
installation. Else, choose Role-based or Feature-based installation.
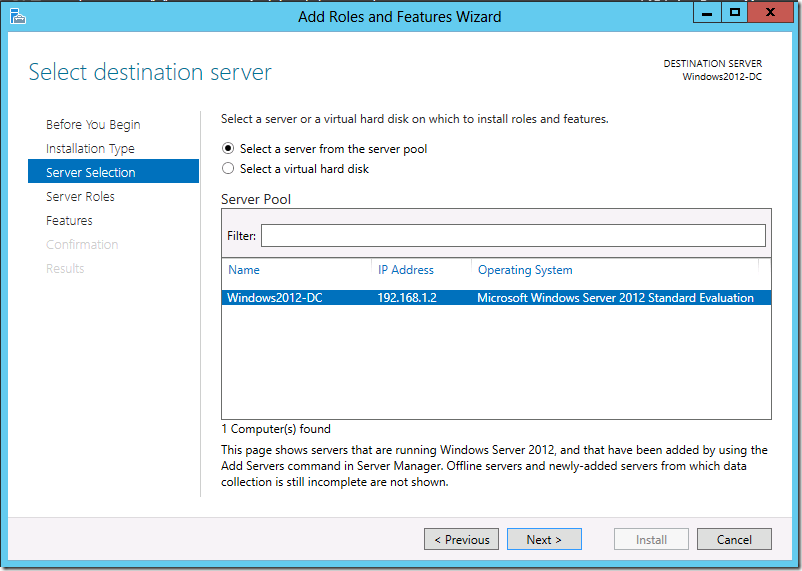
- Now, select the destination server on which the role will be installed. Make sure the IP address is that of the
selected server. Else, close the server manager and retry.
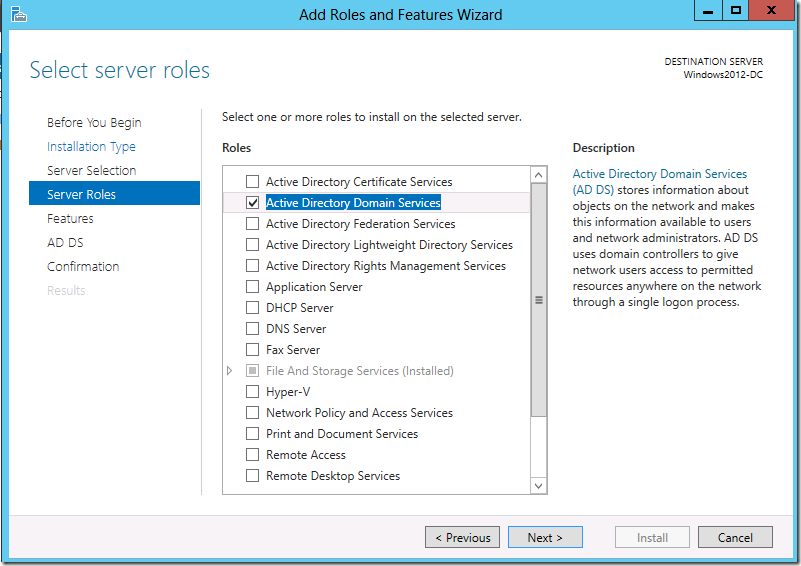
- Select the roles you want to install on this server. The basic requirement to promote this server to a domain
controller is the Active Directory Domain Services.
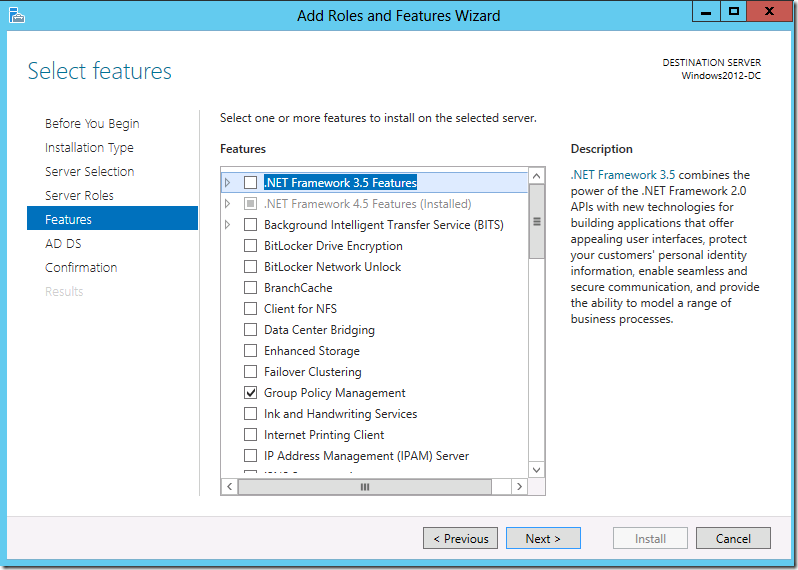
- The features for this role are ready to be installed. The basic features required for this service are
auto-selected by default. Click next.
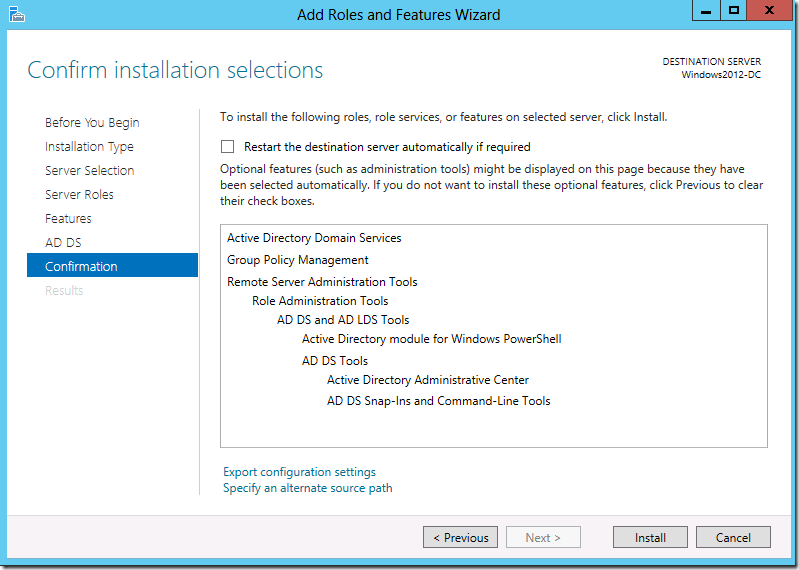
- Confirm your installation selections. It is recommended to select the "Restart the destination server automatically if required" option to make it easier and avoid human intervention. Select "Install" and once installation is complete, close the window.
Step 2: Promote the server to a domain controller
- Once the ADDS role is installed in this server, you will see a notification flag next to the Manage menu. Select "Promote this server into a domain controller".
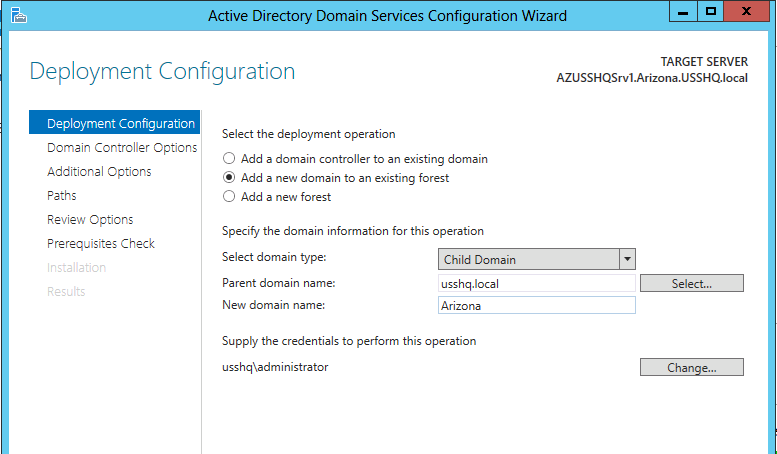
- Select “Add a domain to an existing forest” and fill in the parent domain name. Choose a name for
your child domain. Click change and enter an enterprise administrator's credentials to initiate the operation.
- On the Domain Controller Options page De-select DNS or GC during this installation, Enter a desired DSRM
Password, click next.
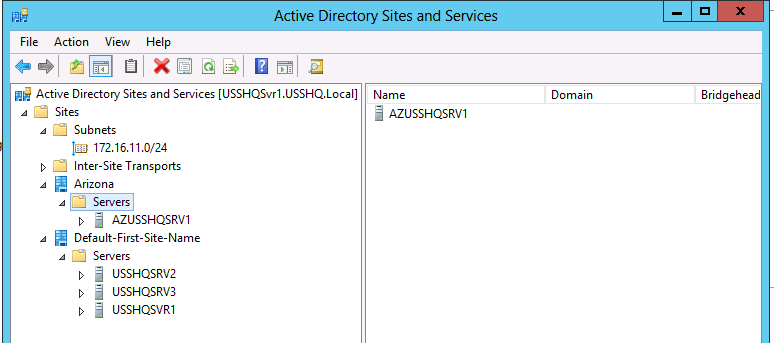
Note: Because the server’s IP Address is in a different site defined in Active Directory Sites and Services, the site name has been pre-selected for that site.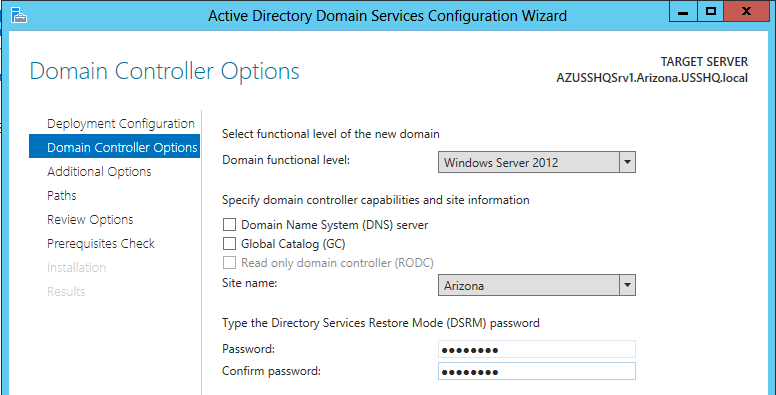
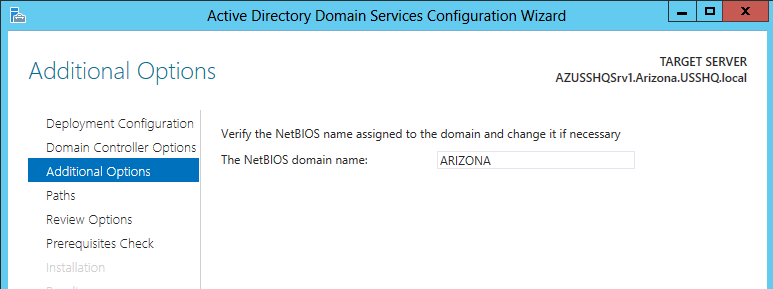
- Verify the NetBIOS name of your domain.
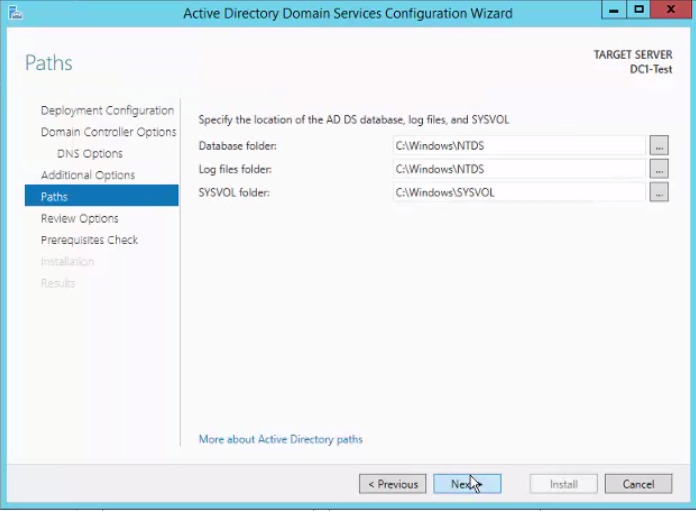
- Select the folder where your database, log files and SYSVOL will be stored. It is recommended to stick to the
default settings.
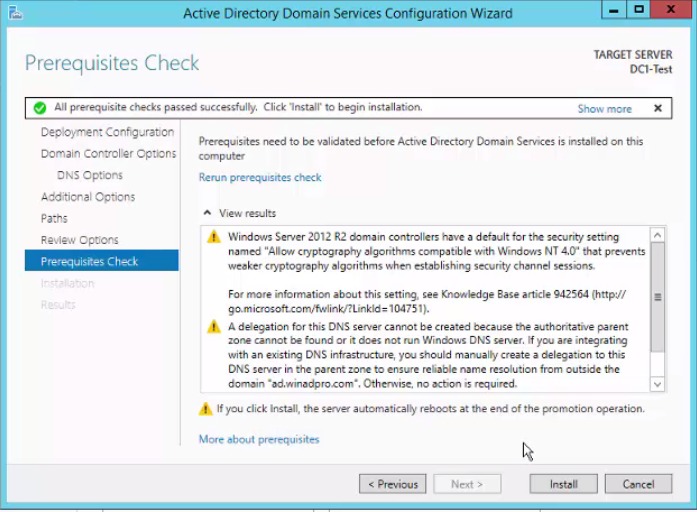
- Review your options and click Next. A prerequisites check will be done by Active Directory. Once it is complete,
click Install.
- Your system will be rebooted automatically for the changes to take effect. Verify the health of the domain
controller by running the command dcdiag /v from the command line.
Step 3 - Verifying the installation of AD DS
- Logon to the Parent Domain’s First Domain Controller using the administrator account's credentials.
- Launch the DNS console and verify the creation of Service Records for the newly established domain controller in the appropriate domain and site.
- Launch Active Directory Sites and Services, and verify if the new Domain Controller has populated the correct
site.