How to Customize Compliance Policies?
Introduction
The Center for Internet Security (CIS) provides globally recognized, industry-standard benchmarks to securely configure systems, applications, and networks. However, these rules may not be directly applicable to every organization’s compliance and operational requirements, as each environment has unique security, business, and regulatory needs.
Compliance requirements vary across industries. Healthcare organizations must protect sensitive patient data, while financial institutions focus on transaction security, fraud prevention, and auditability. Retail organizations prioritize securing payment systems and customer data, whereas government entities emphasize strict access controls and data sovereignty. Similarly, manufacturing environments often need to balance security with operational continuity to avoid disruptions. These differences make it essential to customize CIS benchmarks to align with specific organizational requirements.
Using Vulnerability Manager Plus, organizations can tailor CIS compliance by creating custom rules from scratch, modifying existing rules, or combining multiple rules into policy templates. This flexibility ensures that compliance policies are aligned with CIS standards while adapting to business needs, enabling consistent security enforcement and effective compliance audits across endpoints.
Tailor your compliance strategy to match your security needs
Create Custom PoliciesSteps for Compliance Customization
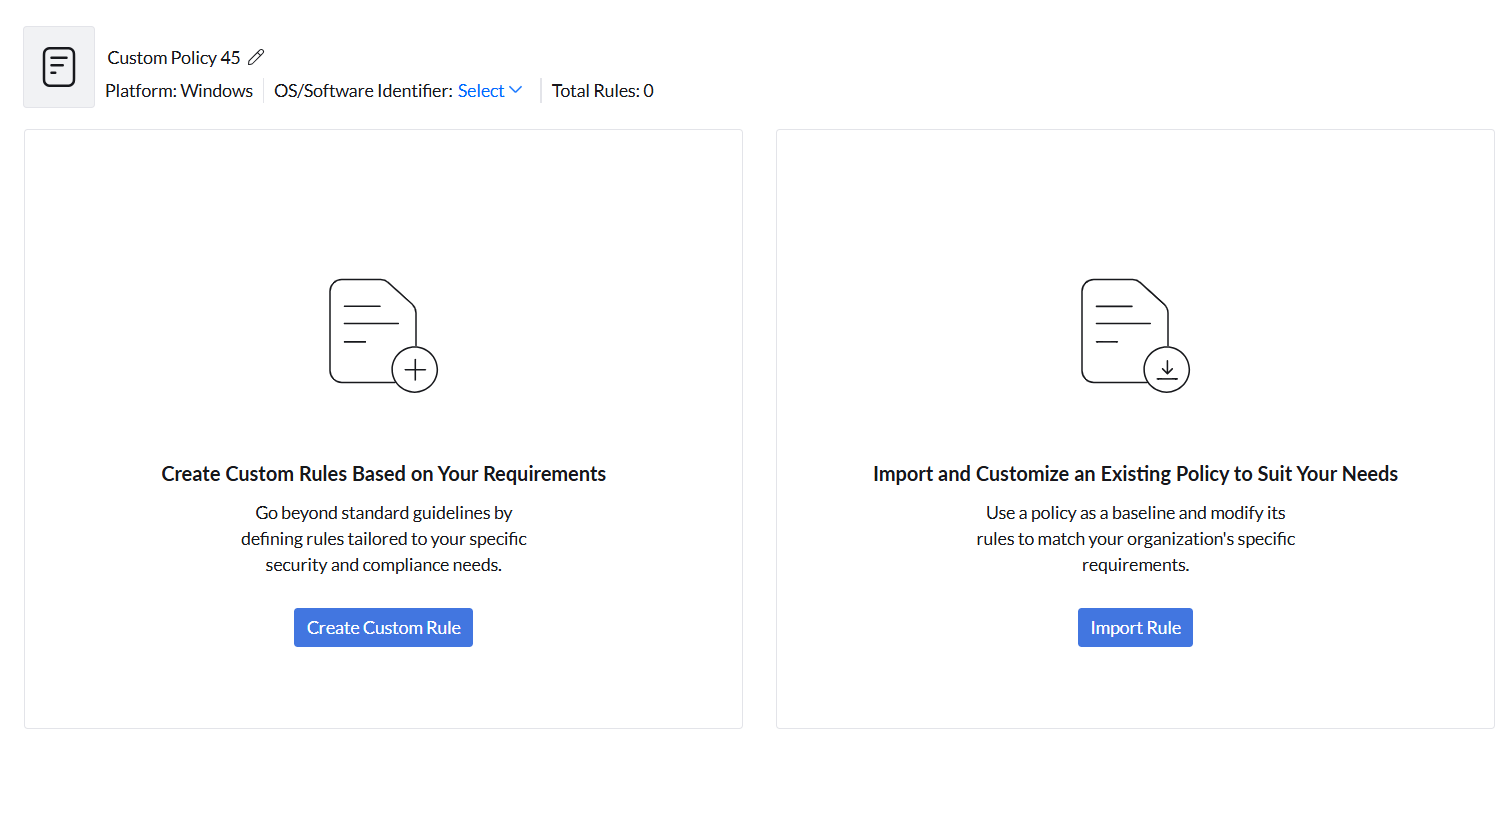
Go to Compliance → Policy Templates, and click on Create Custom Policy. Select the required operating system (Windows or Linux). After selecting the required Operating System, you can either create policies with custom rules from scratch or import and customize exisitng policy to suit your needs.
Creating Policies with Custom Rules from Scratch
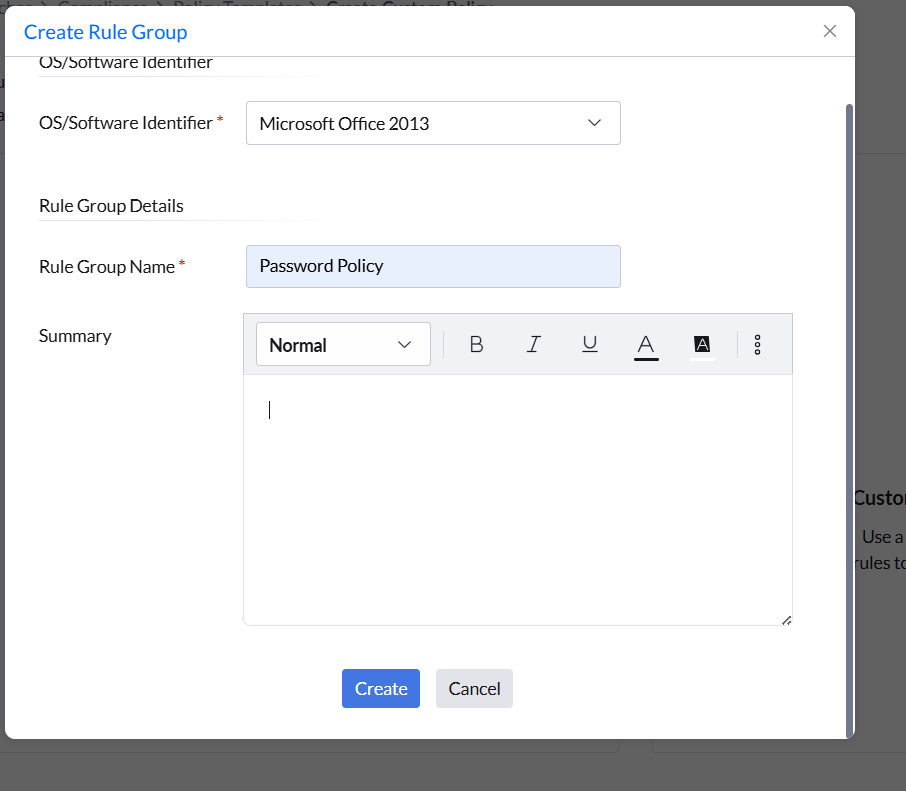
- Click on Create Custom Rules, define the OS/Software Identifier, and provide details such as Rule Group Name and Summary. Save the configuration to create a new policy.
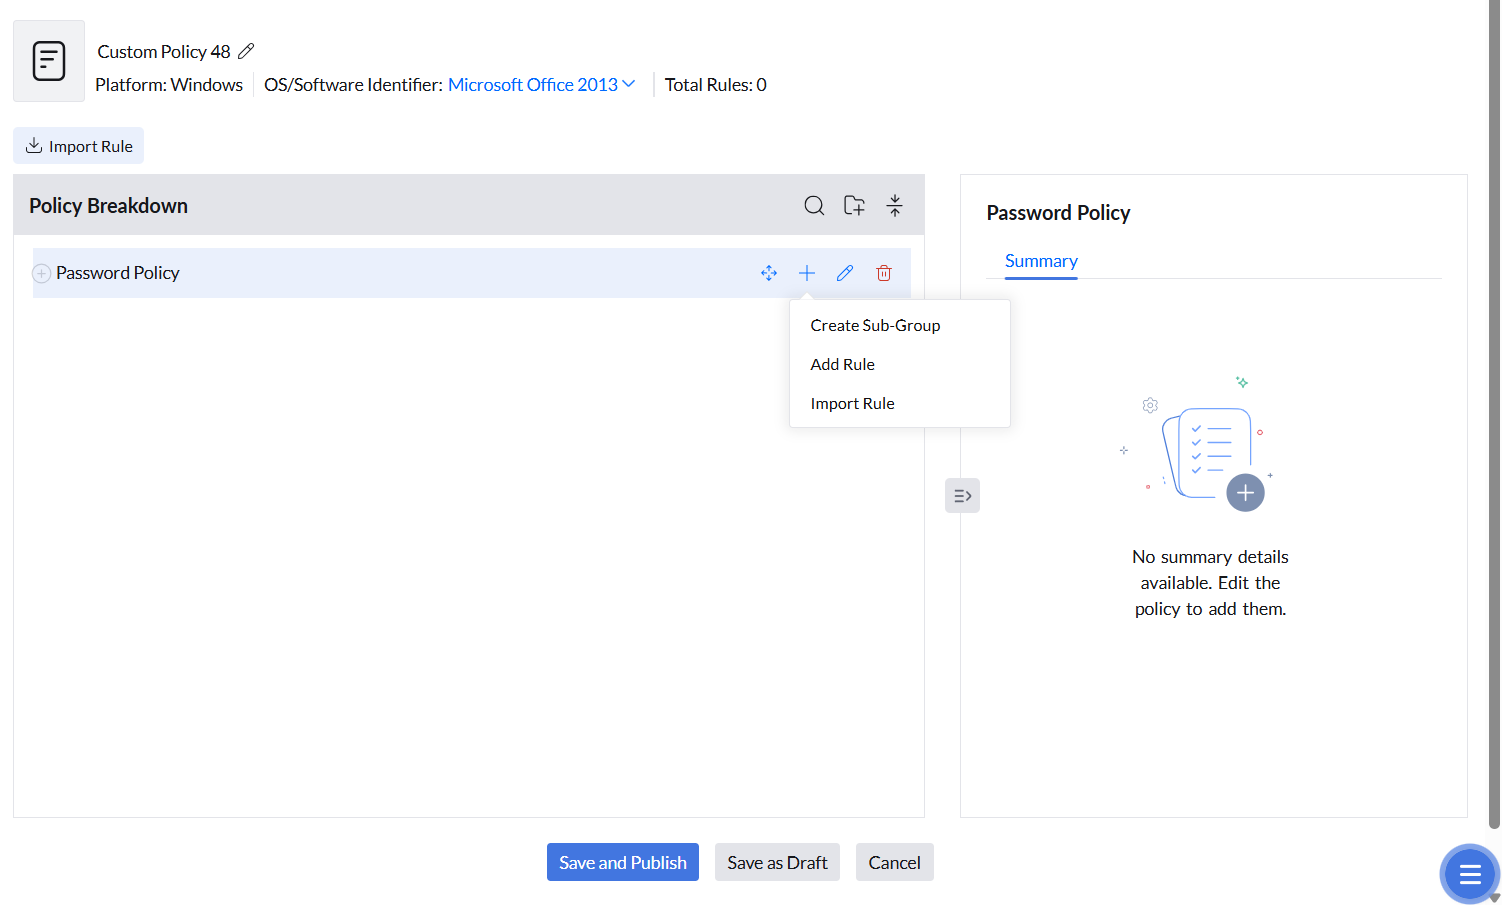
- Once you have configured the above, you can view the policy breakdown for the rule group or policy you created. At the top, you can see the name of the policy, which can also be edited. You can also view the platform for this policy, the corresponding OS/Software identifier, and the total number of rules associated with the policy. By hovering over the rule group name, you can perform operations such as Move, Edit, Delete, or other additional Actions for that particular rule group.
- By clicking on Action, you can perfrom actions like Create Sub-Group within this rule group, Import Rule from other existing policies or Add Rules. If you click on Add Rules, you can create rules from scratch.
Creating Custom Rules from Scratch within a Policy
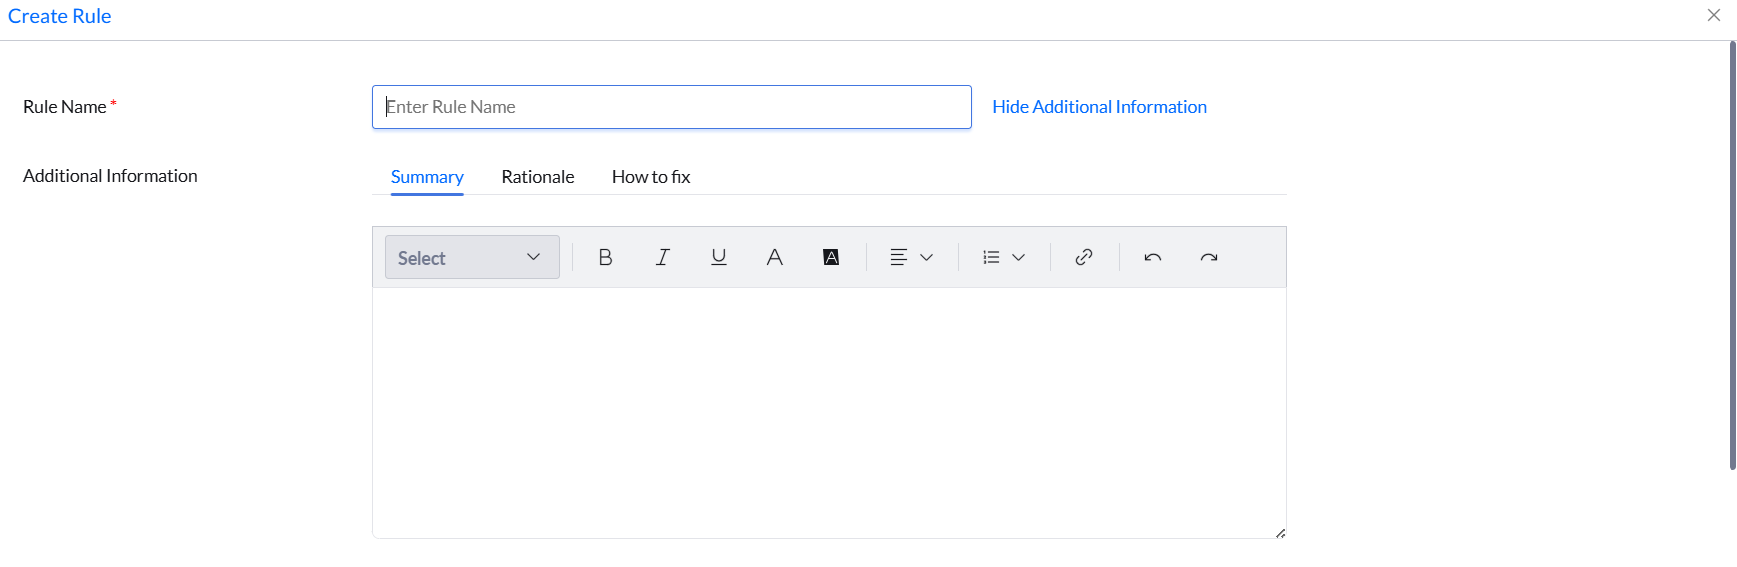
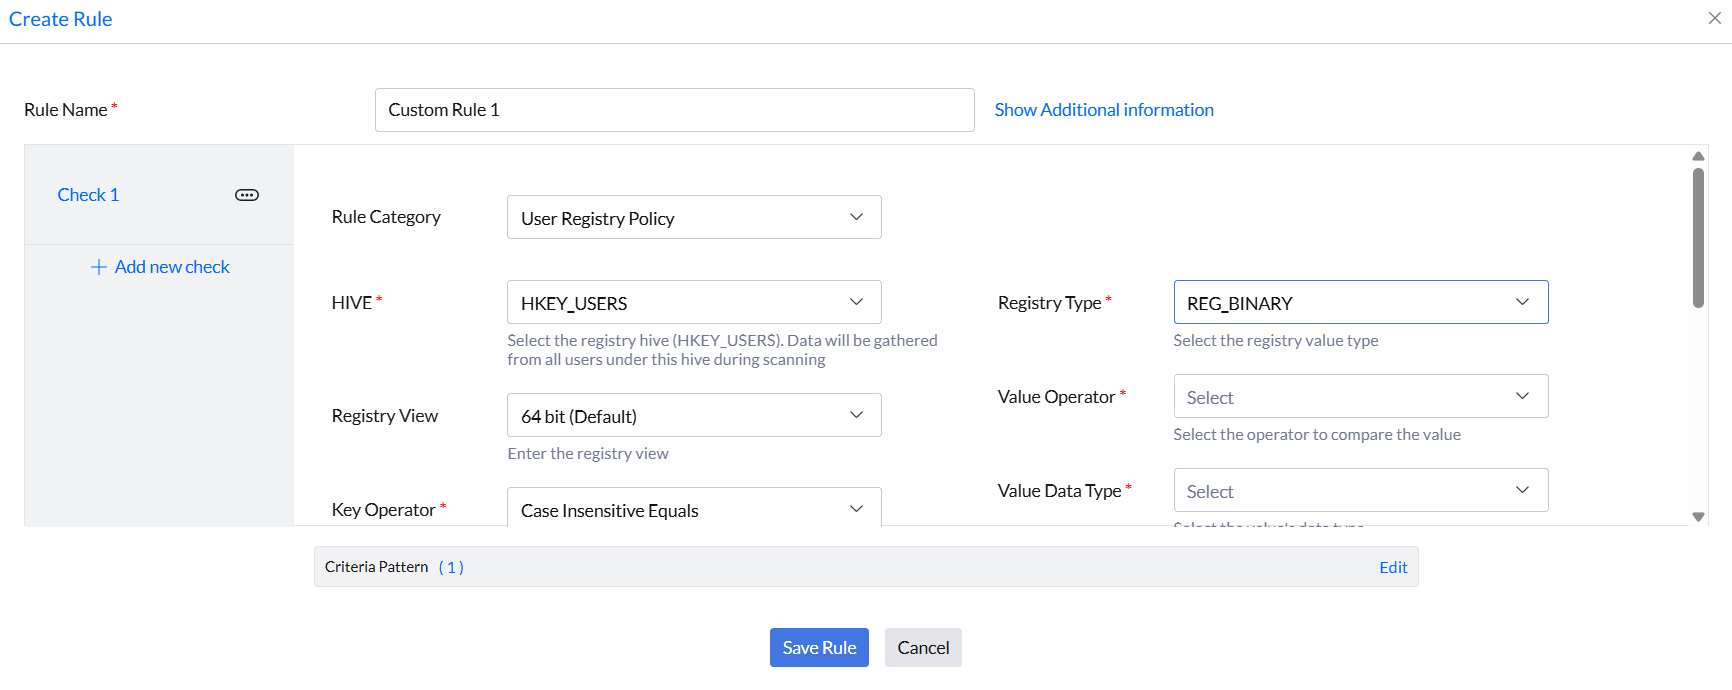
- Once you click on Add Rules, the Create Rule settings window will open, where you need to enter a Rule Name. By clicking on Show Additional Information, you can define:
- Summary — describe what the rule checks
- Rationale — explain why the rule is important
- How to Fix — provide remediation steps
- Once the above details are configured, you can proceed to configure the individual check settings for the rule. Select a Rule Category from the dropdown based on the type of check you want to create. The Rule Categories available for customization include:
For Windows
- User Registry Policy
- User SID Validation
- Password Policy
- Registry Policy
- Account Lockout Policy
- Trustee SID Validation
- Advanced Audit Policy Configuration
- User Rights Assignment
- File Folder Check
- System Services
- File Version Check
For Linux
- DEB Package Existence
- Partition Information
- File Properties Information
- Text File Content
- RPM Package Existence
- AppArmor Status Information
- User Information
- Kernel Parameters Information
- Script Information
- Systemd Unit Property Information
- Password Policy Information
To know more about configuring rule categories for windows, refer to this page. For linux refer to this page.
- Once you have configured the individual check settings, you can add additional checks under a specific rule by clicking on Add New Check. If multiple checks are added, configure a Criteria Pattern to define how the checks should be evaluated together, and then save the pattern.
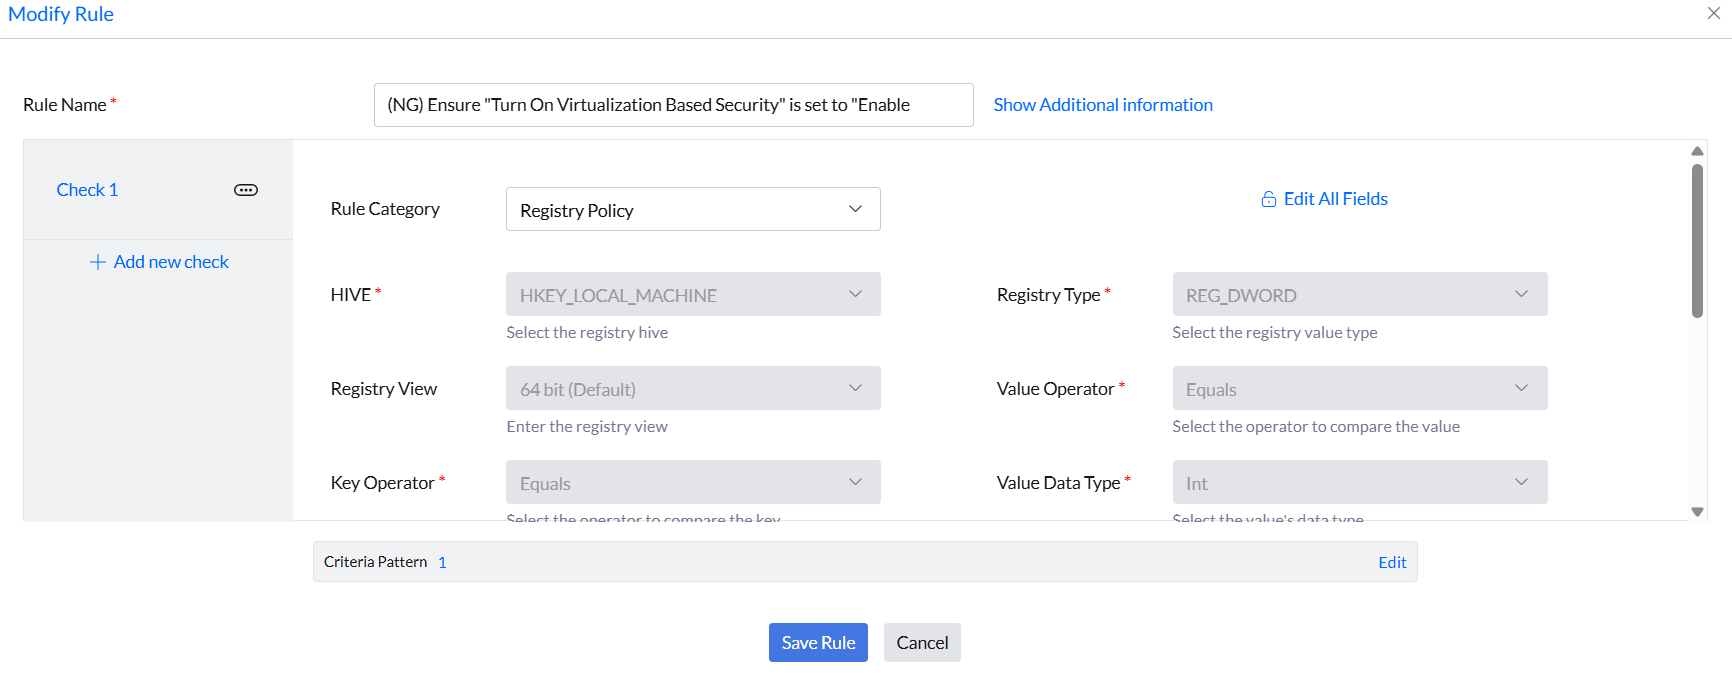
- Once all the settings are configured, click on Save Rule. Your custom rule is now created. You can also modify the checks for these rules and can also add and modify additional rules under the created sub-groups in the same way, as needed.
- Once you have configured all the required customizations for the policy, click on Save as Draft to save the policy for later modifications, or click on Save and Publish to finalize and publish the policy.
The Policy Breakdown View
Creating Policies with Imported Existing Rules
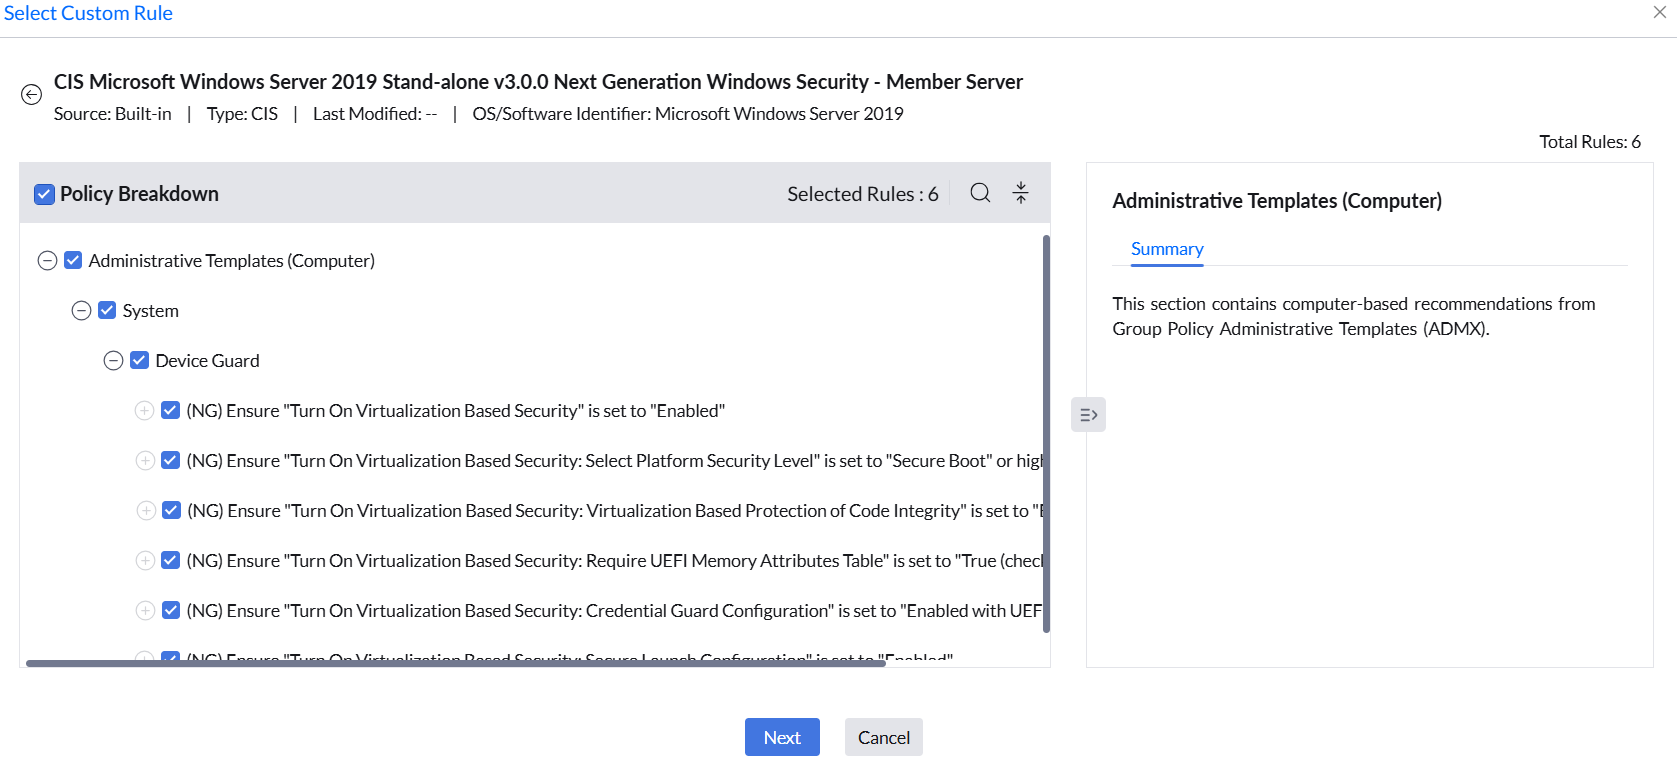
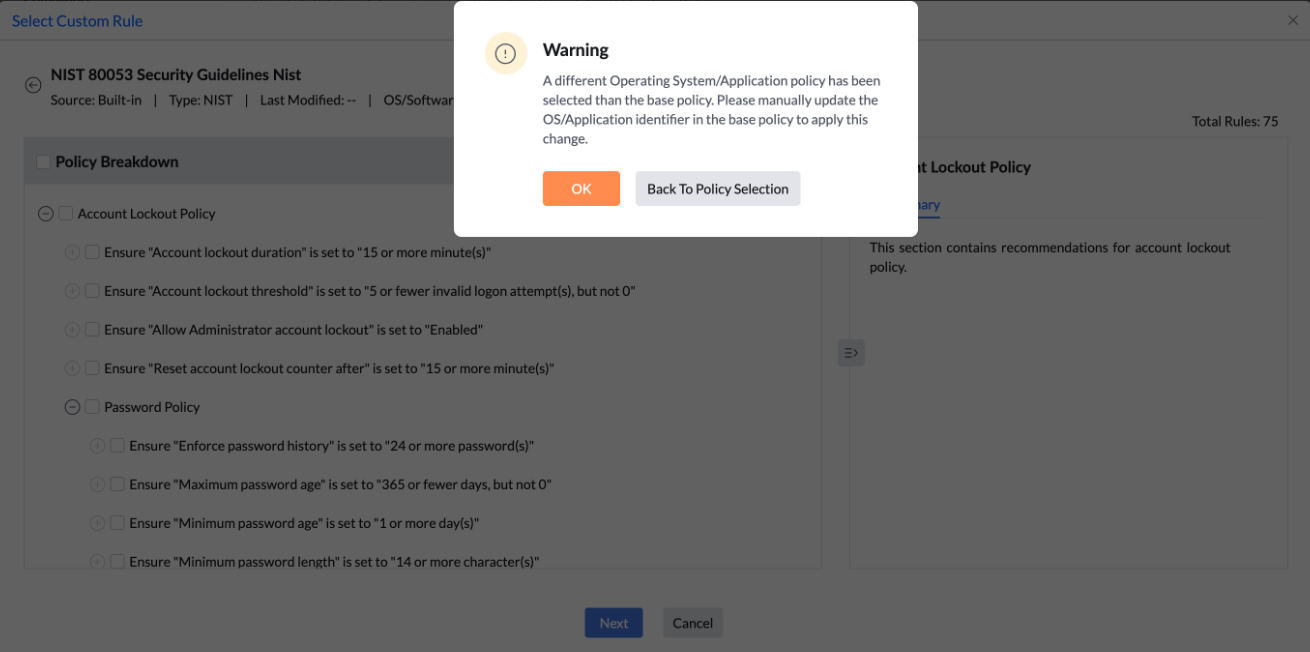
Note: Ensure that the rules and policies you select while customizing or importing are of the same OS/Software Identifier. If different OS/Software Identifiers are selected, the compliance audit will still be performed, but the rule will be marked as Not Applicable. A warning message similar to the one below will also be displayed.
Note: Under each rule group/policy, a maximum of 1000 rules can be configured, and under each rule, you can configure up to 50 checks. If you want to configure more than the mentioned limit, create additional rule groups or policies or rules as needed.
Once you have published the customized policy, you can use them to perform compliance audits. To learn more about compliance audits, refer to this page.