Connection Settings
Overview
The Connection Settings page is where you control how the ADSelfService Plus server communicates with the users, agents, and external services it depends on. From a single page, you can choose the port and protocol the portal runs on, enforce encrypted HTTPS access and restrict the TLS versions and cipher suites the server accepts, route outbound requests through a corporate proxy server, control how product logs behave, end idle sessions automatically, and stop users from holding more than one session at a time.
Configuration instructions
The Connection Settings page is organized into three tabs. Configure each tab that applies to your environment, then restart ADSelfService Plus to apply your changes.
Configuring the port and SSL settings
To set the port, protocol, and encryption that the portal uses:
- Navigate to Admin > Product Settings > Connection. The page opens on the Connection Settings tab.
- Select the protocol for the portal:
- To run ADSelfService Plus over an encrypted connection, select ADSelfService Plus Port [https].
- To run it over an unencrypted connection, select ADSelfService Plus Port [http].
- In the field next to the protocol you selected, enter a port number, or keep the default.
- To encrypt the communication between Active Directory and ADSelfService Plus, select Use LDAP SSL(LDAPS).
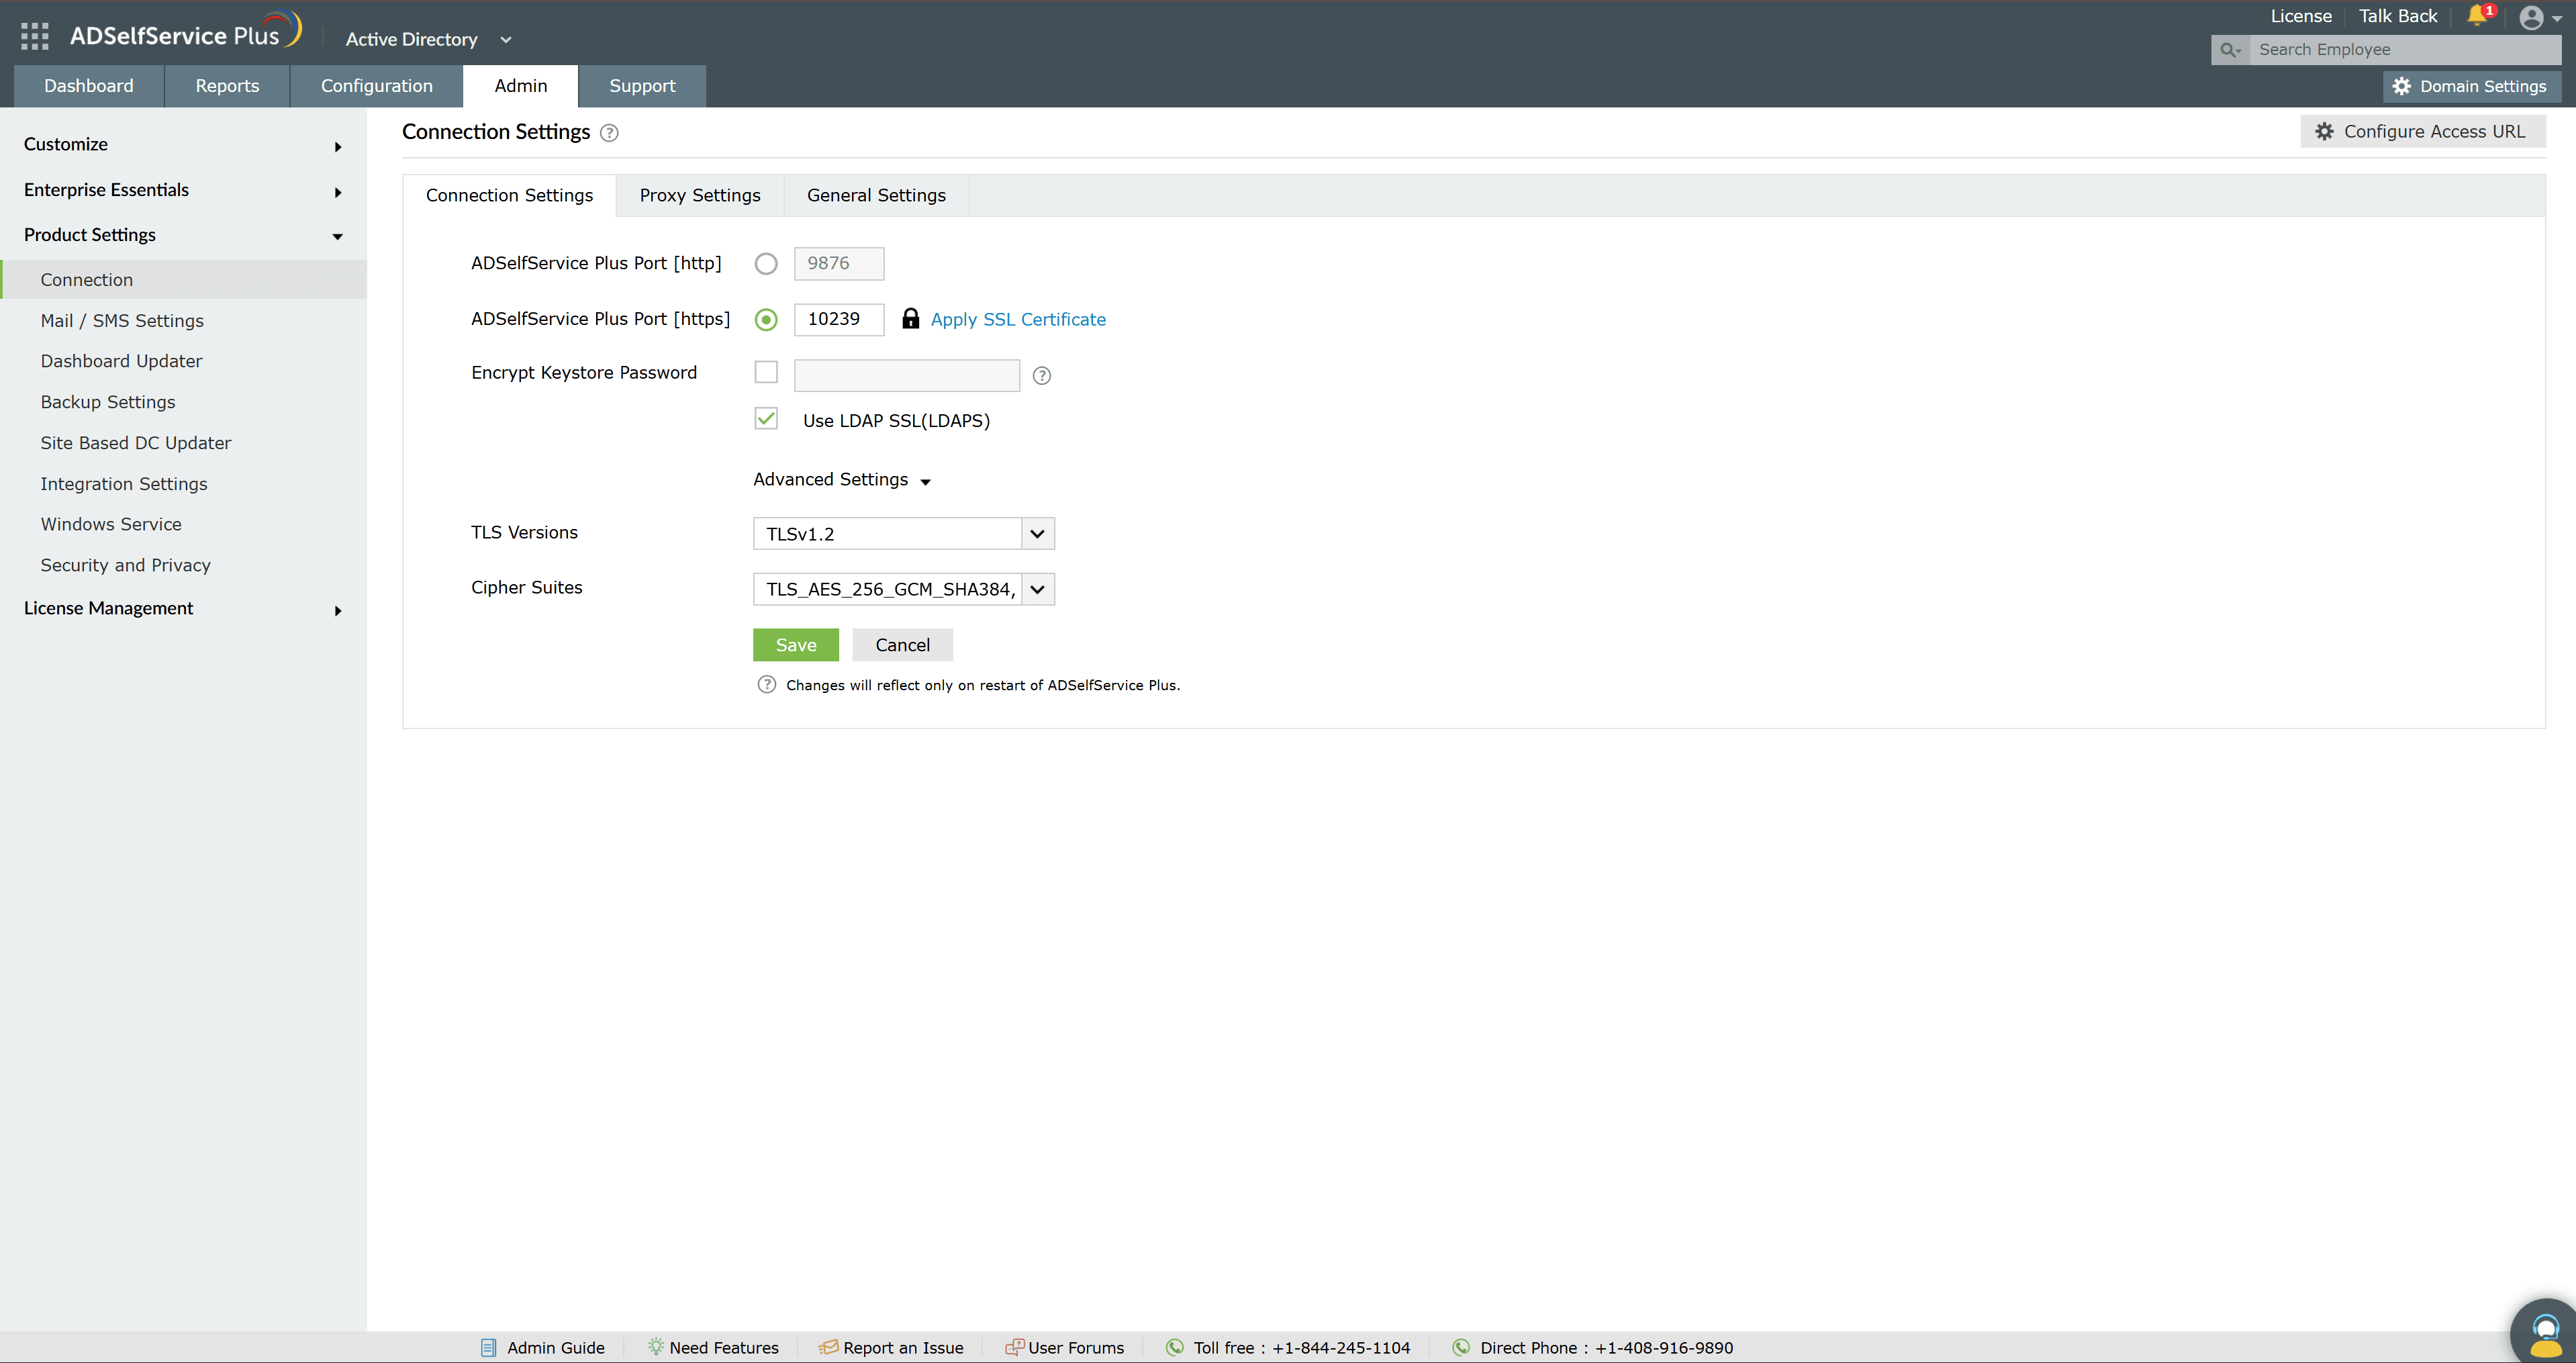
- If you selected ADSelfService Plus Port [https], configure the SSL options. These options appear only when HTTPS is selected:
- Click Apply SSL Certificate and follow the on-screen instructions to apply your SSL certificate.
- Select Encrypt Keystore Password, then enter the keystore password in the field beside it. ADSelfService Plus stores the password in encrypted form for better security.
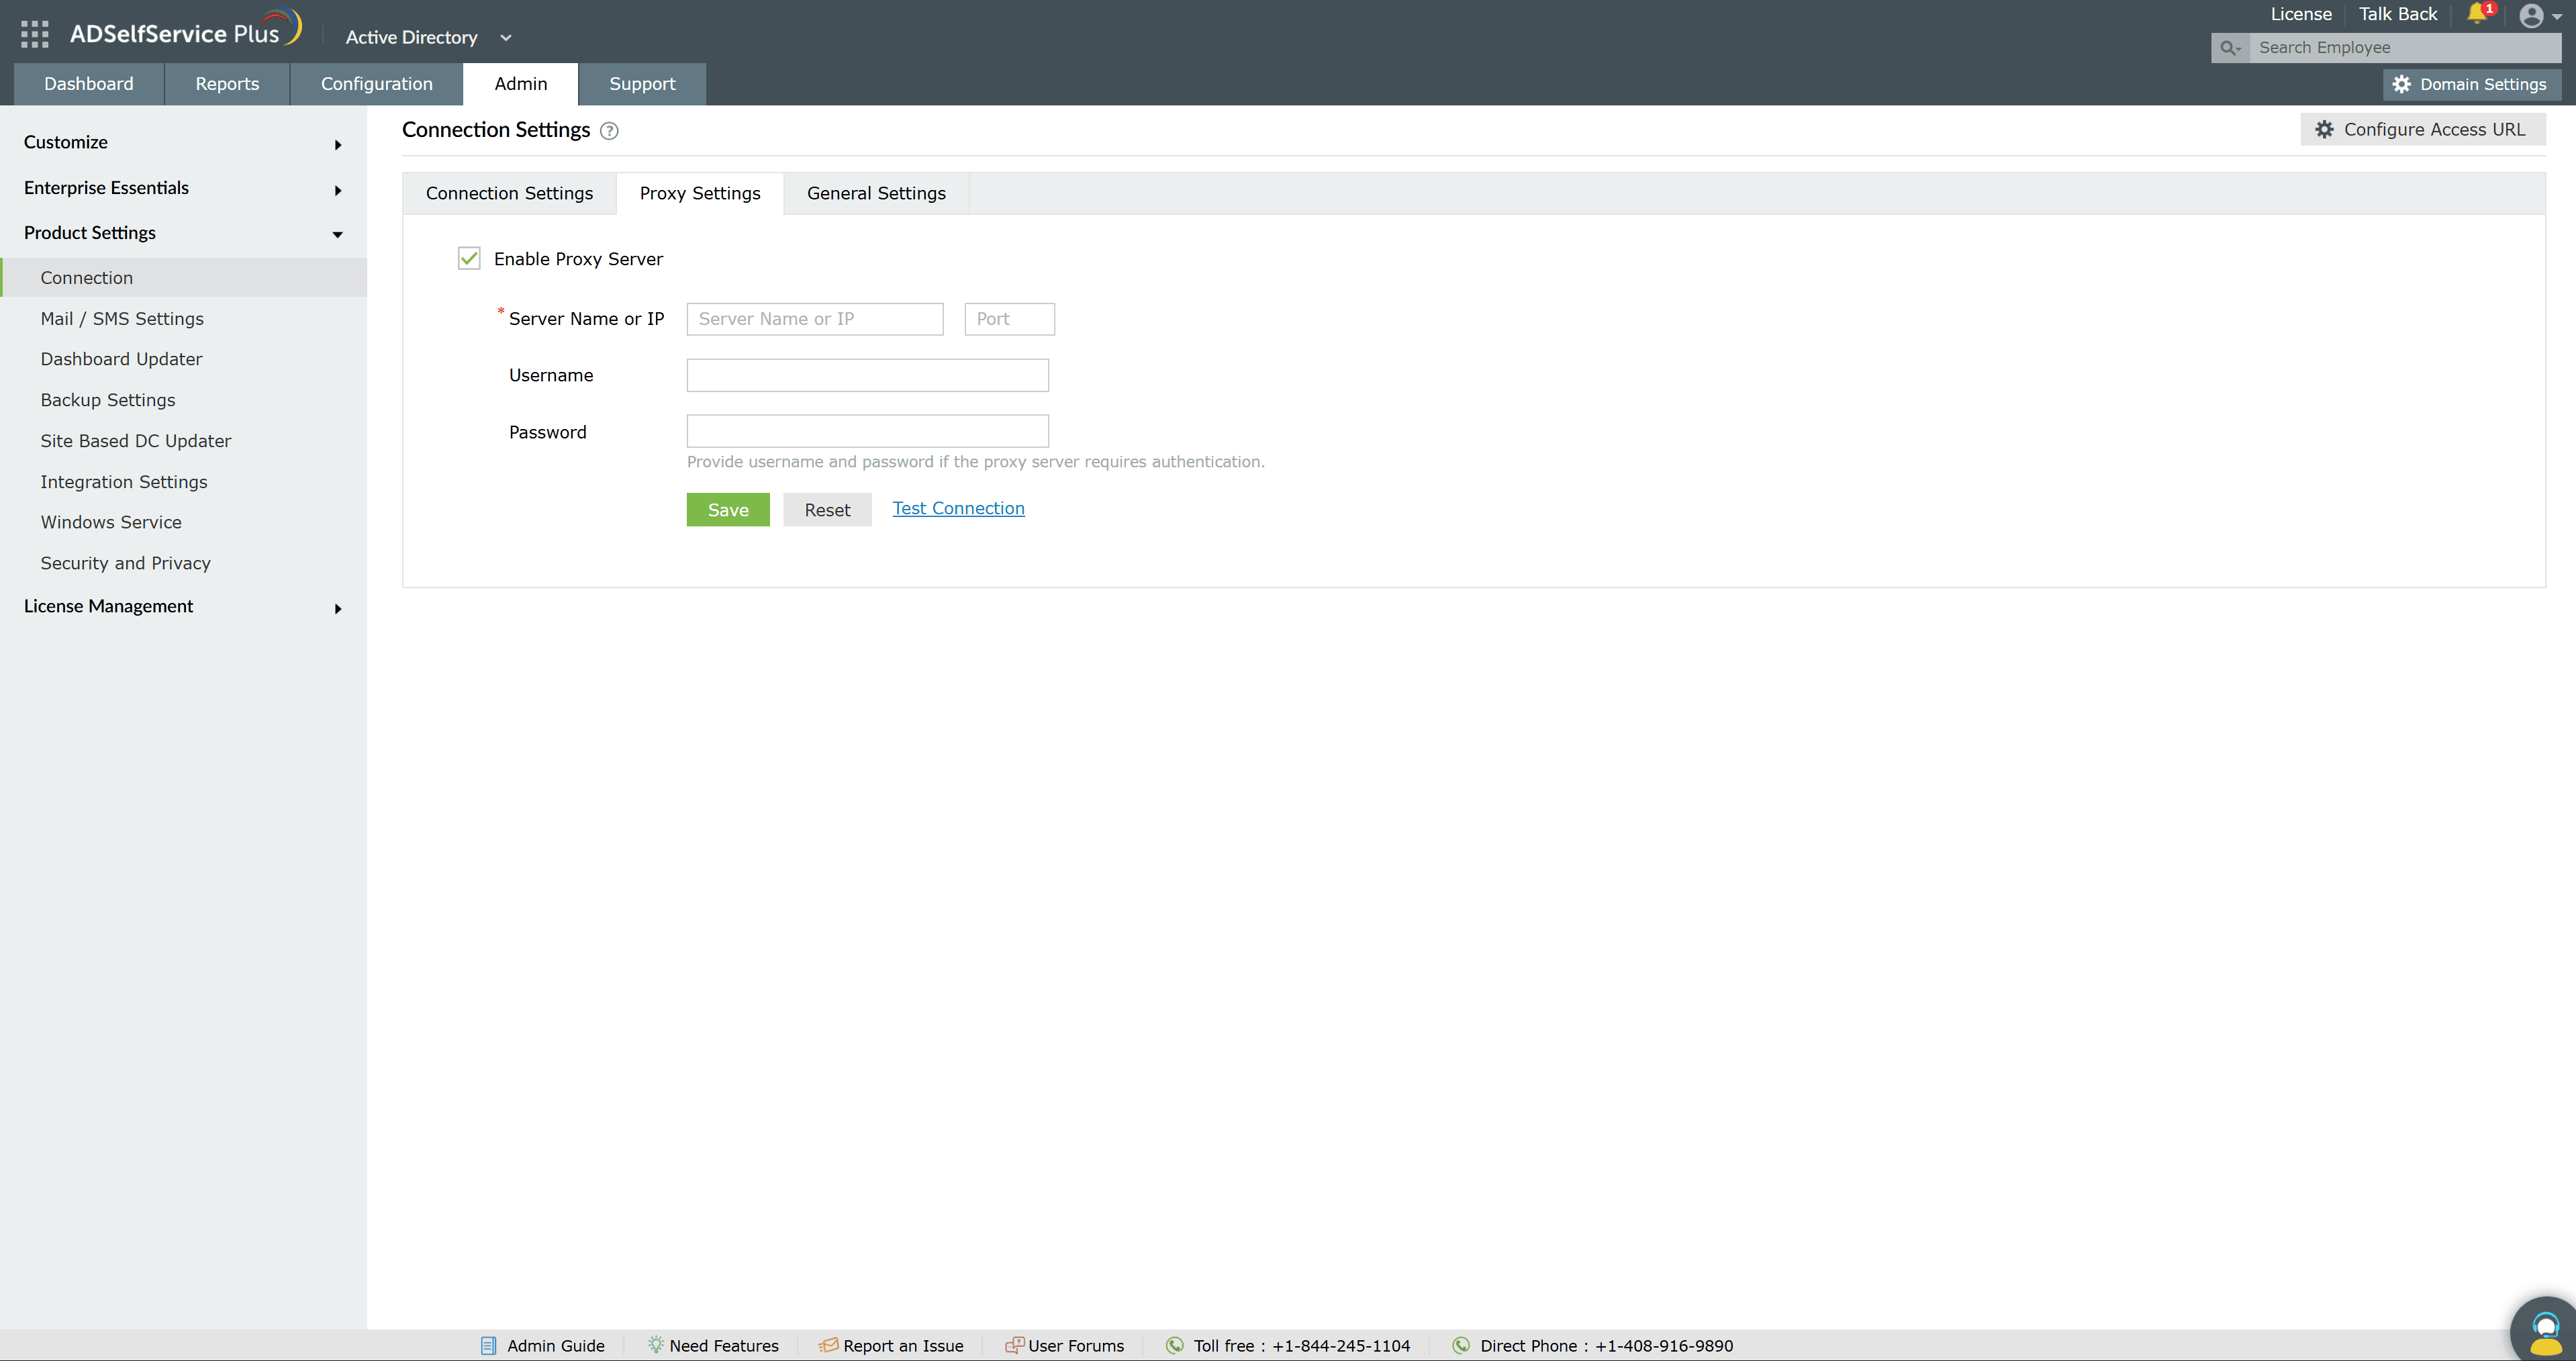
Configuring proxy settings
If your network routes outbound traffic through a proxy server, configure ADSelfService Plus to use it:
- On the Connection Settings page, click the Proxy Settings tab.
- Select Enable Proxy Server. The proxy fields become editable.
- In the Server Name or IP field, enter the host name or IP address of the proxy server. This field is required.
- In the Port field, enter the port the proxy server listens on.
- If the proxy server requires authentication, enter the Username and Password.
- Click Test Connection to confirm that ADSelfService Plus can reach the proxy server.
- Click Save.
Configuring session settings
Session settings control how long users stay signed in and whether they can hold more than one session. To configure them:
- On the Connection Settings page, click the General Settings tab.
- From the Session Expiration Time drop-down, select how long a session can stay idle before ADSelfService Plus ends it. The options range from 10 mins to 60 mins, plus 24 hrs, or Never to keep sessions open indefinitely.
- To stop a user from holding more than one active session at the same time, select Deny Concurrent Logins. A user who tries to log in while another session is active is blocked until that session is logged out or expires.
- Click Save Settings.
When Deny Concurrent Logins is enabled, a user who closes the browser without logging out keeps an active session and cannot log in again until that session expires. You can clear these idle sessions for everyone without disturbing users who are currently active:
- On the General Settings tab, under Session Settings, select Deny Concurrent Logins.
- Select the Click here link that appears.
- In the Confirm Action dialog, click Yes.
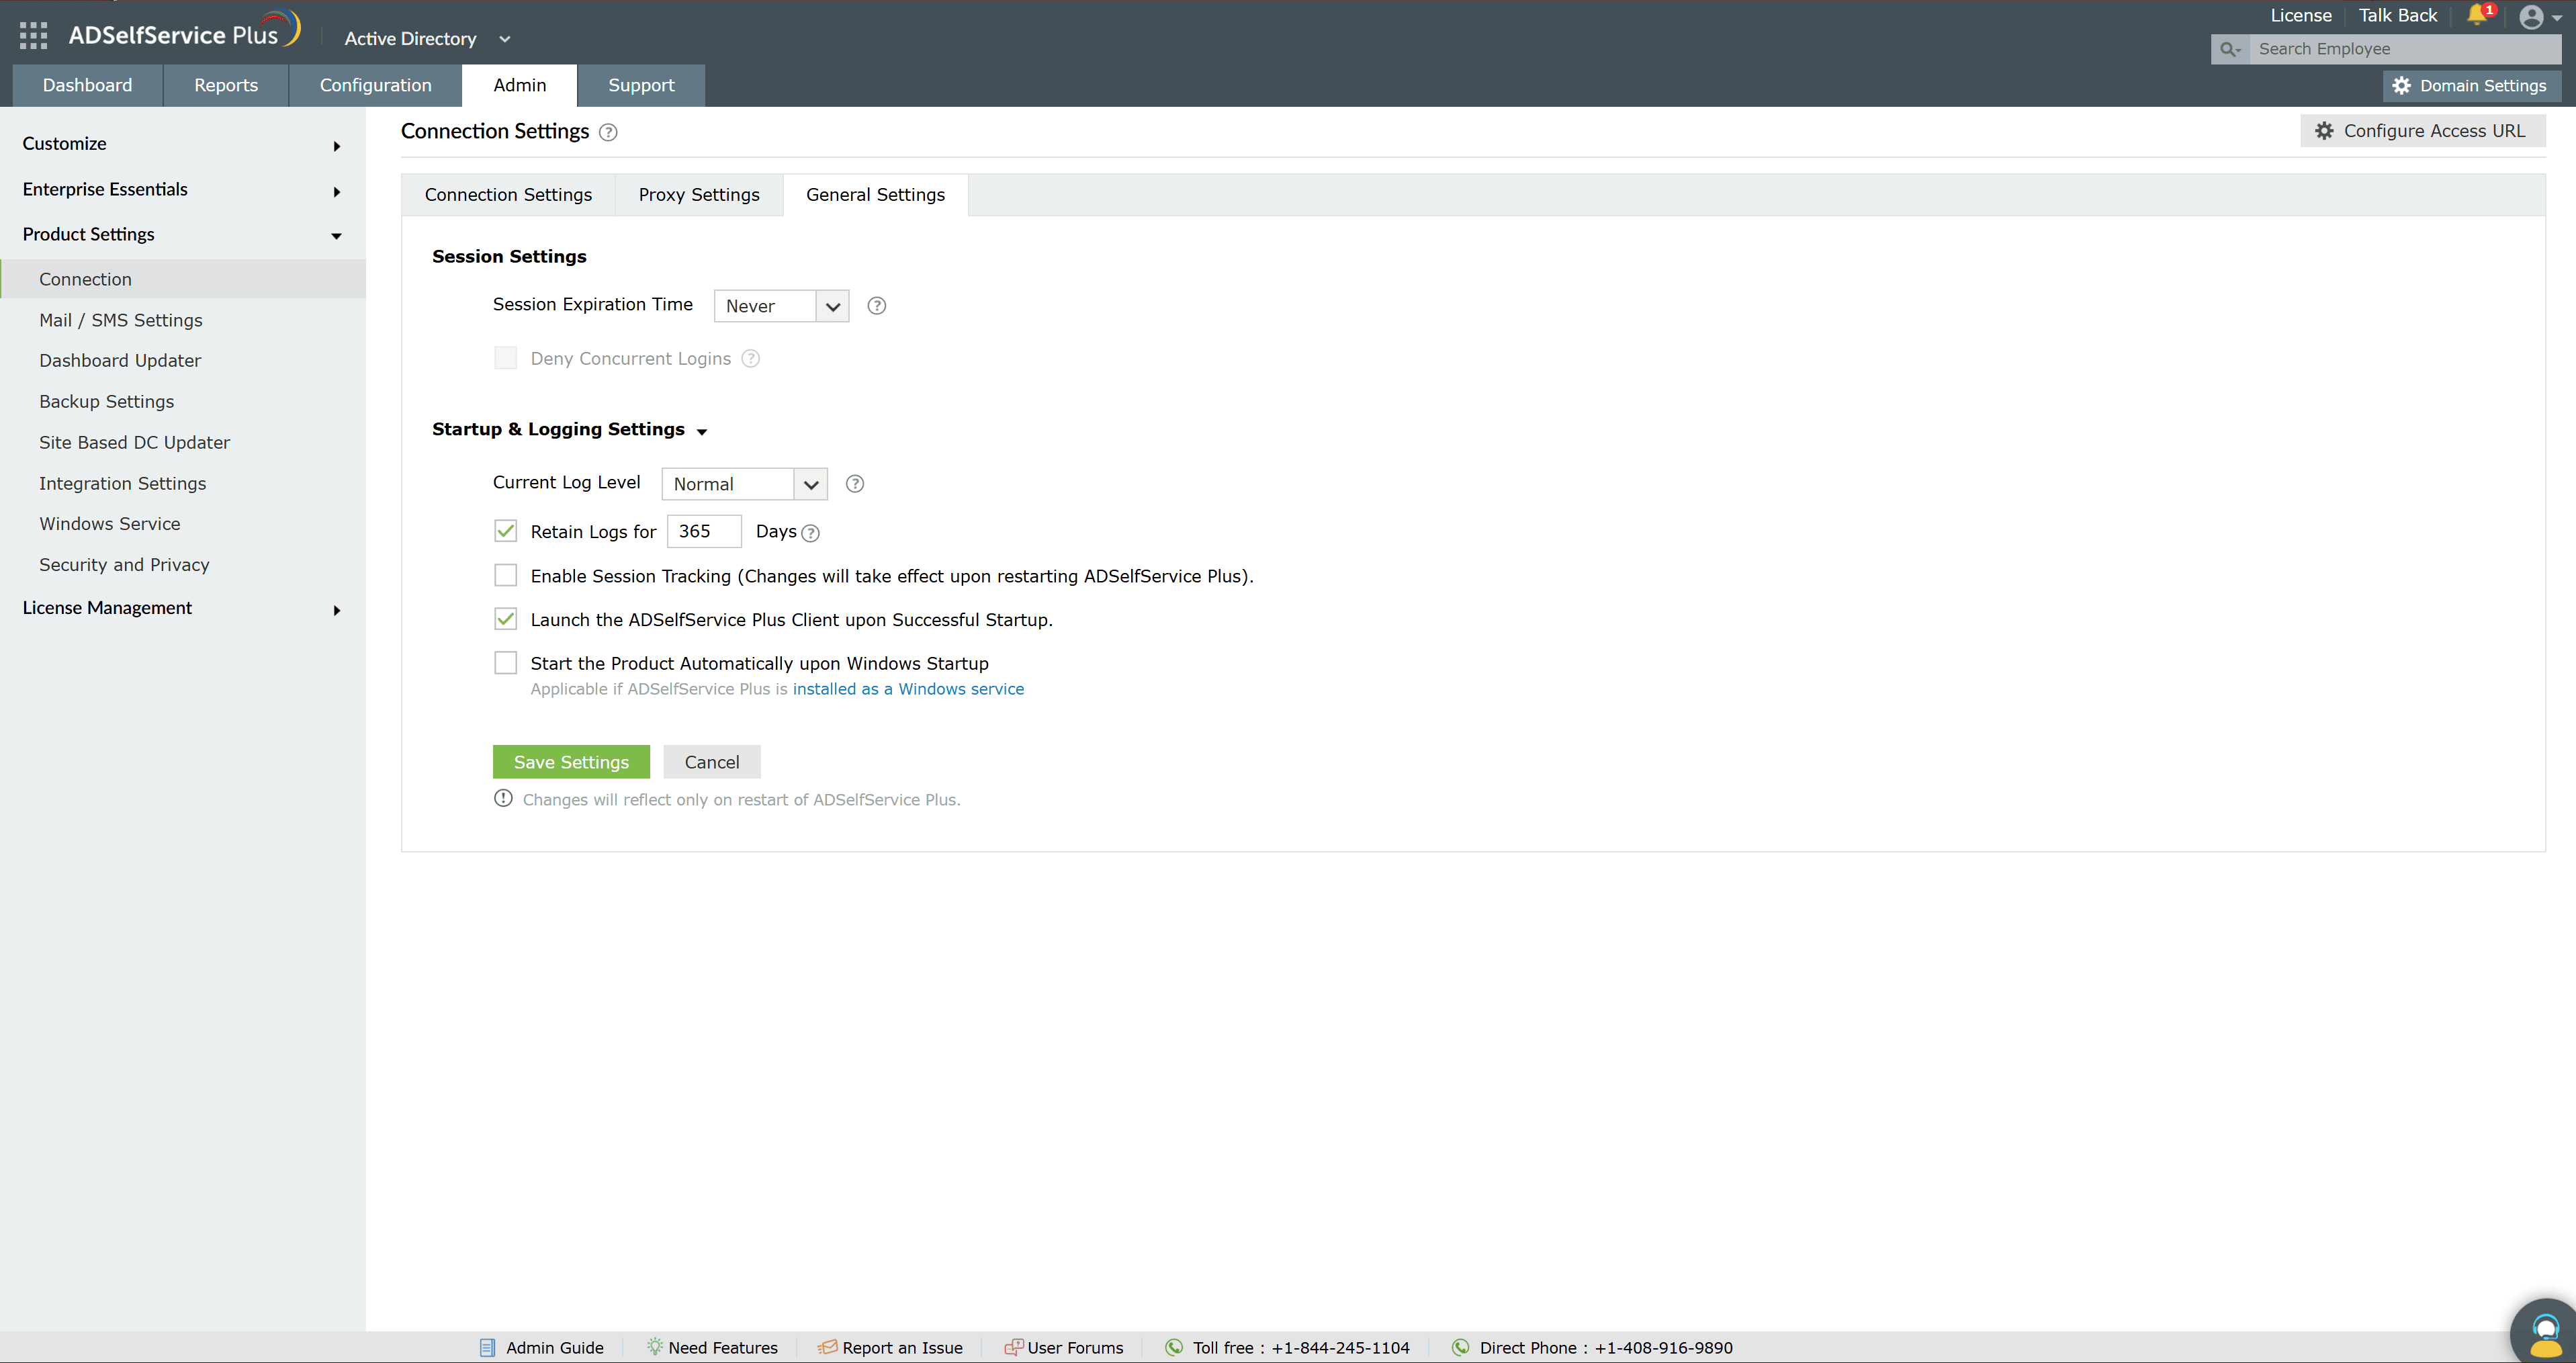
Configuring startup and logging settings
Startup and logging settings control how much diagnostic detail ADSelfService Plus records and how it behaves when the server starts. To configure them:
- On the General Settings tab, click Startup & Logging Settings to expand the section.
- From the Current Log Level drop-down, select Normal to record only basic diagnostic information, or Debug to record detailed diagnostic information for troubleshooting.
- Select Retain Logs for ___ Days and enter the number of days to keep log files. ADSelfService Plus automatically deletes log files older than this value. The default is 365 days.
- Select Enable Session Tracking to monitor user sessions for in-depth debugging.
- Select Launch the ADSelfService Plus Client upon Successful Startup to have ADSelfService Plus open its web console in a browser automatically once the product finishes starting.
- Select Start the Product Automatically upon Windows Startup to have ADSelfService Plus start automatically as a Windows service when the server starts.
- Click Save Settings.
Limitations
- Changes to the port, protocol, SSL options, session settings, and startup and logging settings take effect only after ADSelfService Plus is restarted.
- Deny Concurrent Logins is available only when Session Expiration Time is set to a value other than Never.
- Encrypt Keystore Password and the Advanced Settings options, TLS Versions and Cipher Suites, are available only when ADSelfService Plus Port [https] is selected. They are hidden when the portal runs over HTTP.
- Start the Product Automatically upon Windows Startup applies only to installations of ADSelfService Plus that run as a Windows service.
Tips
- Run ADSelfService Plus over HTTPS in any production environment. HTTP is suitable only for testing, because it does not enforce SSL certificate validation.
- Click Test Connection before you save proxy settings, so that you can correct any connectivity problem before it affects the product.
- Keep Retain Logs for ___ Days enabled so that old log files are cleaned up automatically and do not fill up disk space.
- Set the log level to Debug only while you are actively troubleshooting, then return it to Normal. Debug logging records far more detail than normal logging.