Manage form workflow dashboard
A form workflow dashboard provides you with the overall perspective of form workflows in an application. This organized dashboard with it structured set up enables easy identification of your form's workflows, their actions, their status, and other details. The workflows are grouped under their respective forms. The dashboard also captures the record and form event for which the workflow is created.
By default, the workflows are listed by the their time of creation. If required, you can change the order of execution of the workflows within a form event. To rearrange the workflows, you need to drag and drop them based on your requirements.
Components of form workflow dashboard
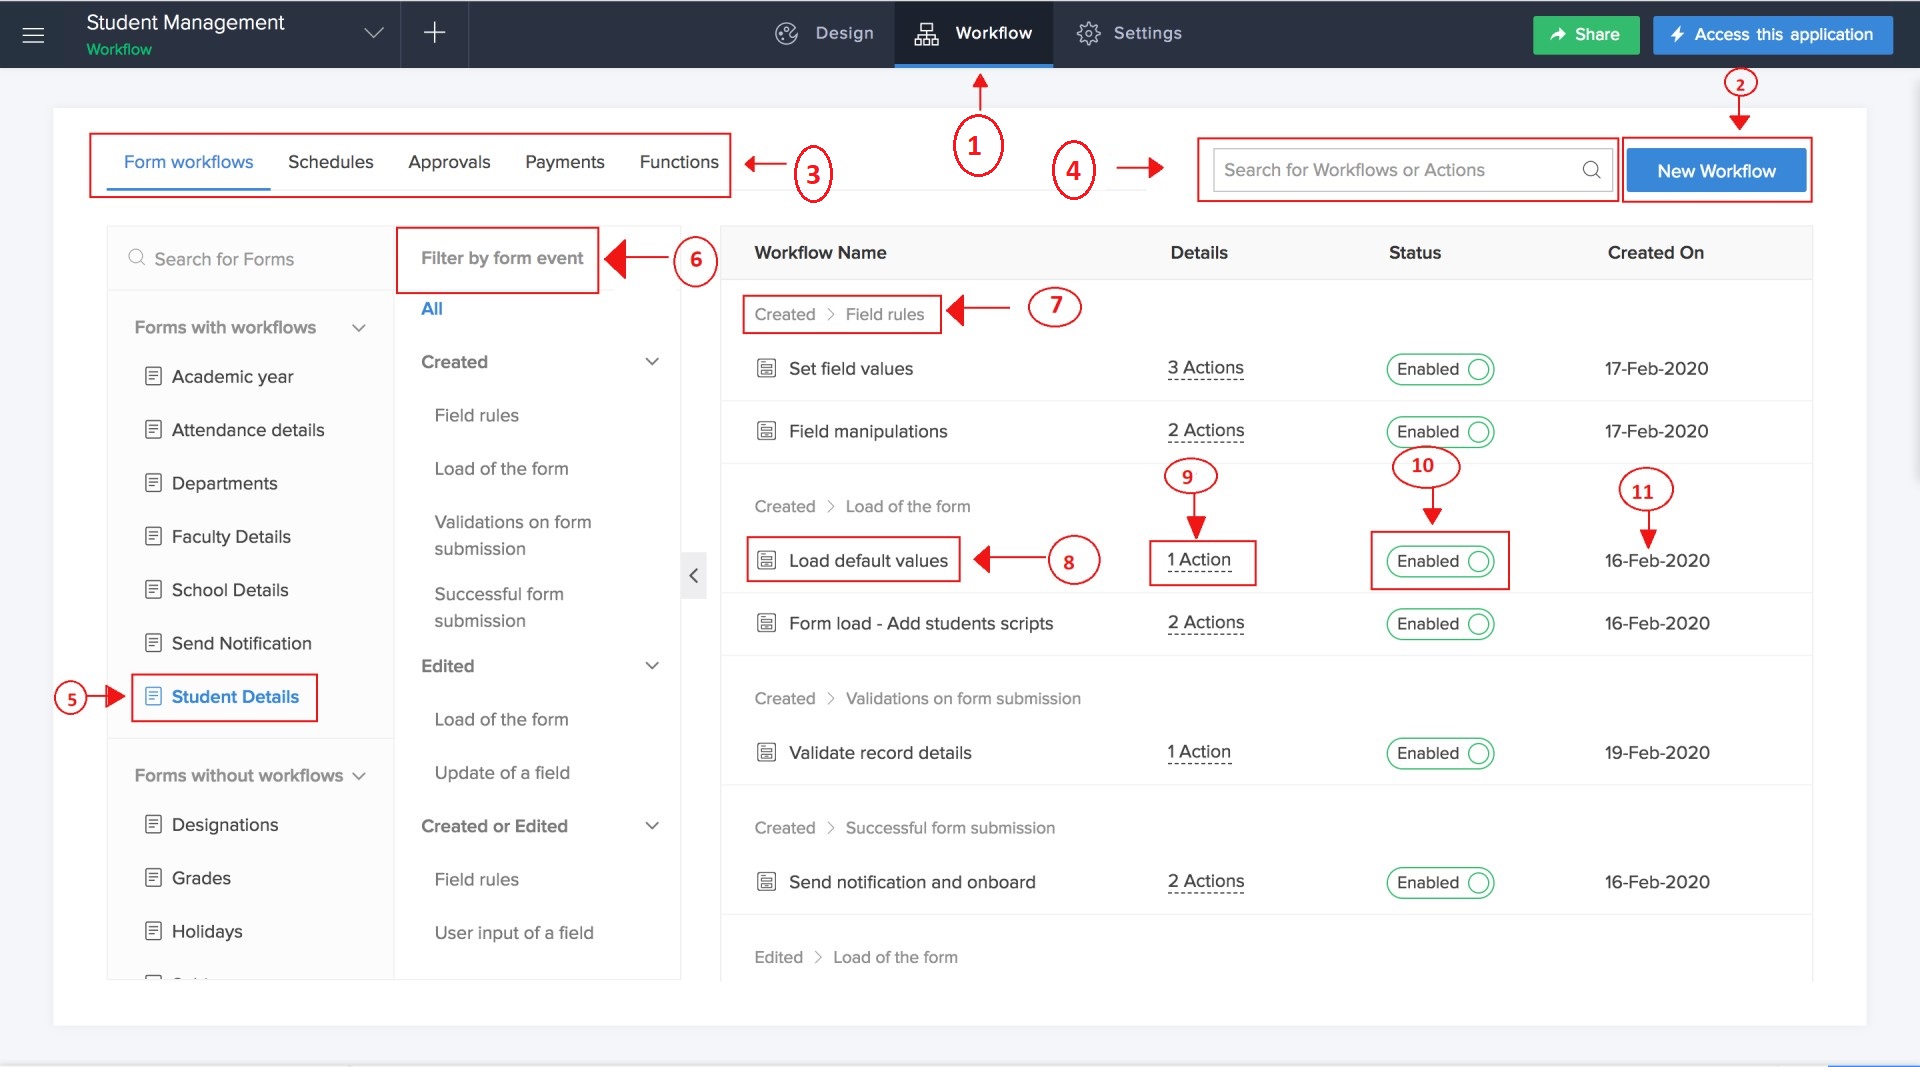
- Workflow: The workflow dashboard will load when you click on the Workflow section in the header strip.
- New Workflow: Create a new form workflow using the New Workflow button. This will lead you to the form workflow's creation screen.
- The workflows are grouped and listed under separate tabs based on the instances in which they occur. You can switch tabs to view and edit the workflows in the respective sections.
- Search: Search for workflows using Workflow Name, Form, or Actions. Type in one of the key words in the search bar to drill down to the required workflow.
- Form Name: Use the left navigation pane to select the form based on which the workflows need to be displayed. The forms are sorted into forms with workflows and forms without workflows.
- Form Event: Click the arrow beside the left pane to view the Form Events. Form Events are further categorized into Record Events. Click the down arrow for each record event to view the respective form events. For instance, if you click Load of a form, the workflows for that form event is displayed along with the number of actions in the workflow, status of the workflow, and the date of creation.
- The workflows are listed based on the record event on which they are triggered.
- Click on the workflow name to navigate to the workflow's edit screen. You can view, add, and edit the associated actions.
- The number of actions associated with a workflow is shown here. Mouse over the text to see the action information.
- Enabled/Disabled: Toggle the Enabled/Disabled switch to enable a workflow or disable the same workflow. This allows you to temporarily suspend that workflow from being executed.
- The date of creation of the workflow will be displayed.