How to add users of a specific department to a specific AD group
Last updated on:In this article
Objective
This article explains how to add Active Directory users from a specific department to a group using ManageEngine ADManager Plus. You can either create a dynamic distribution group based on the department attribute or schedule an automation to add matching users on a recurring basis. This helps you ensure distribution lists and access groups are aligned with organizational policies.
Prerequisites
- User permissions: The ADManager Plus technician account or delegated help desk role needs rights to create groups and modify group membership in the target domain or OUs.
- Data: The department attribute must be populated on the user accounts you want to target as both methods rely on it. For the automation method, you can alternatively supply a CSV file of the users to add.
Steps to add department members to a group
For these method examples, we'll use the Finance department, but your select could reflect another department name.
Method 1: Using a dynamic distribution group
A dynamic distribution group derives its members from a condition rather than a fixed list. Define the condition on the department attribute, and the group resolves to all users in that department automatically.
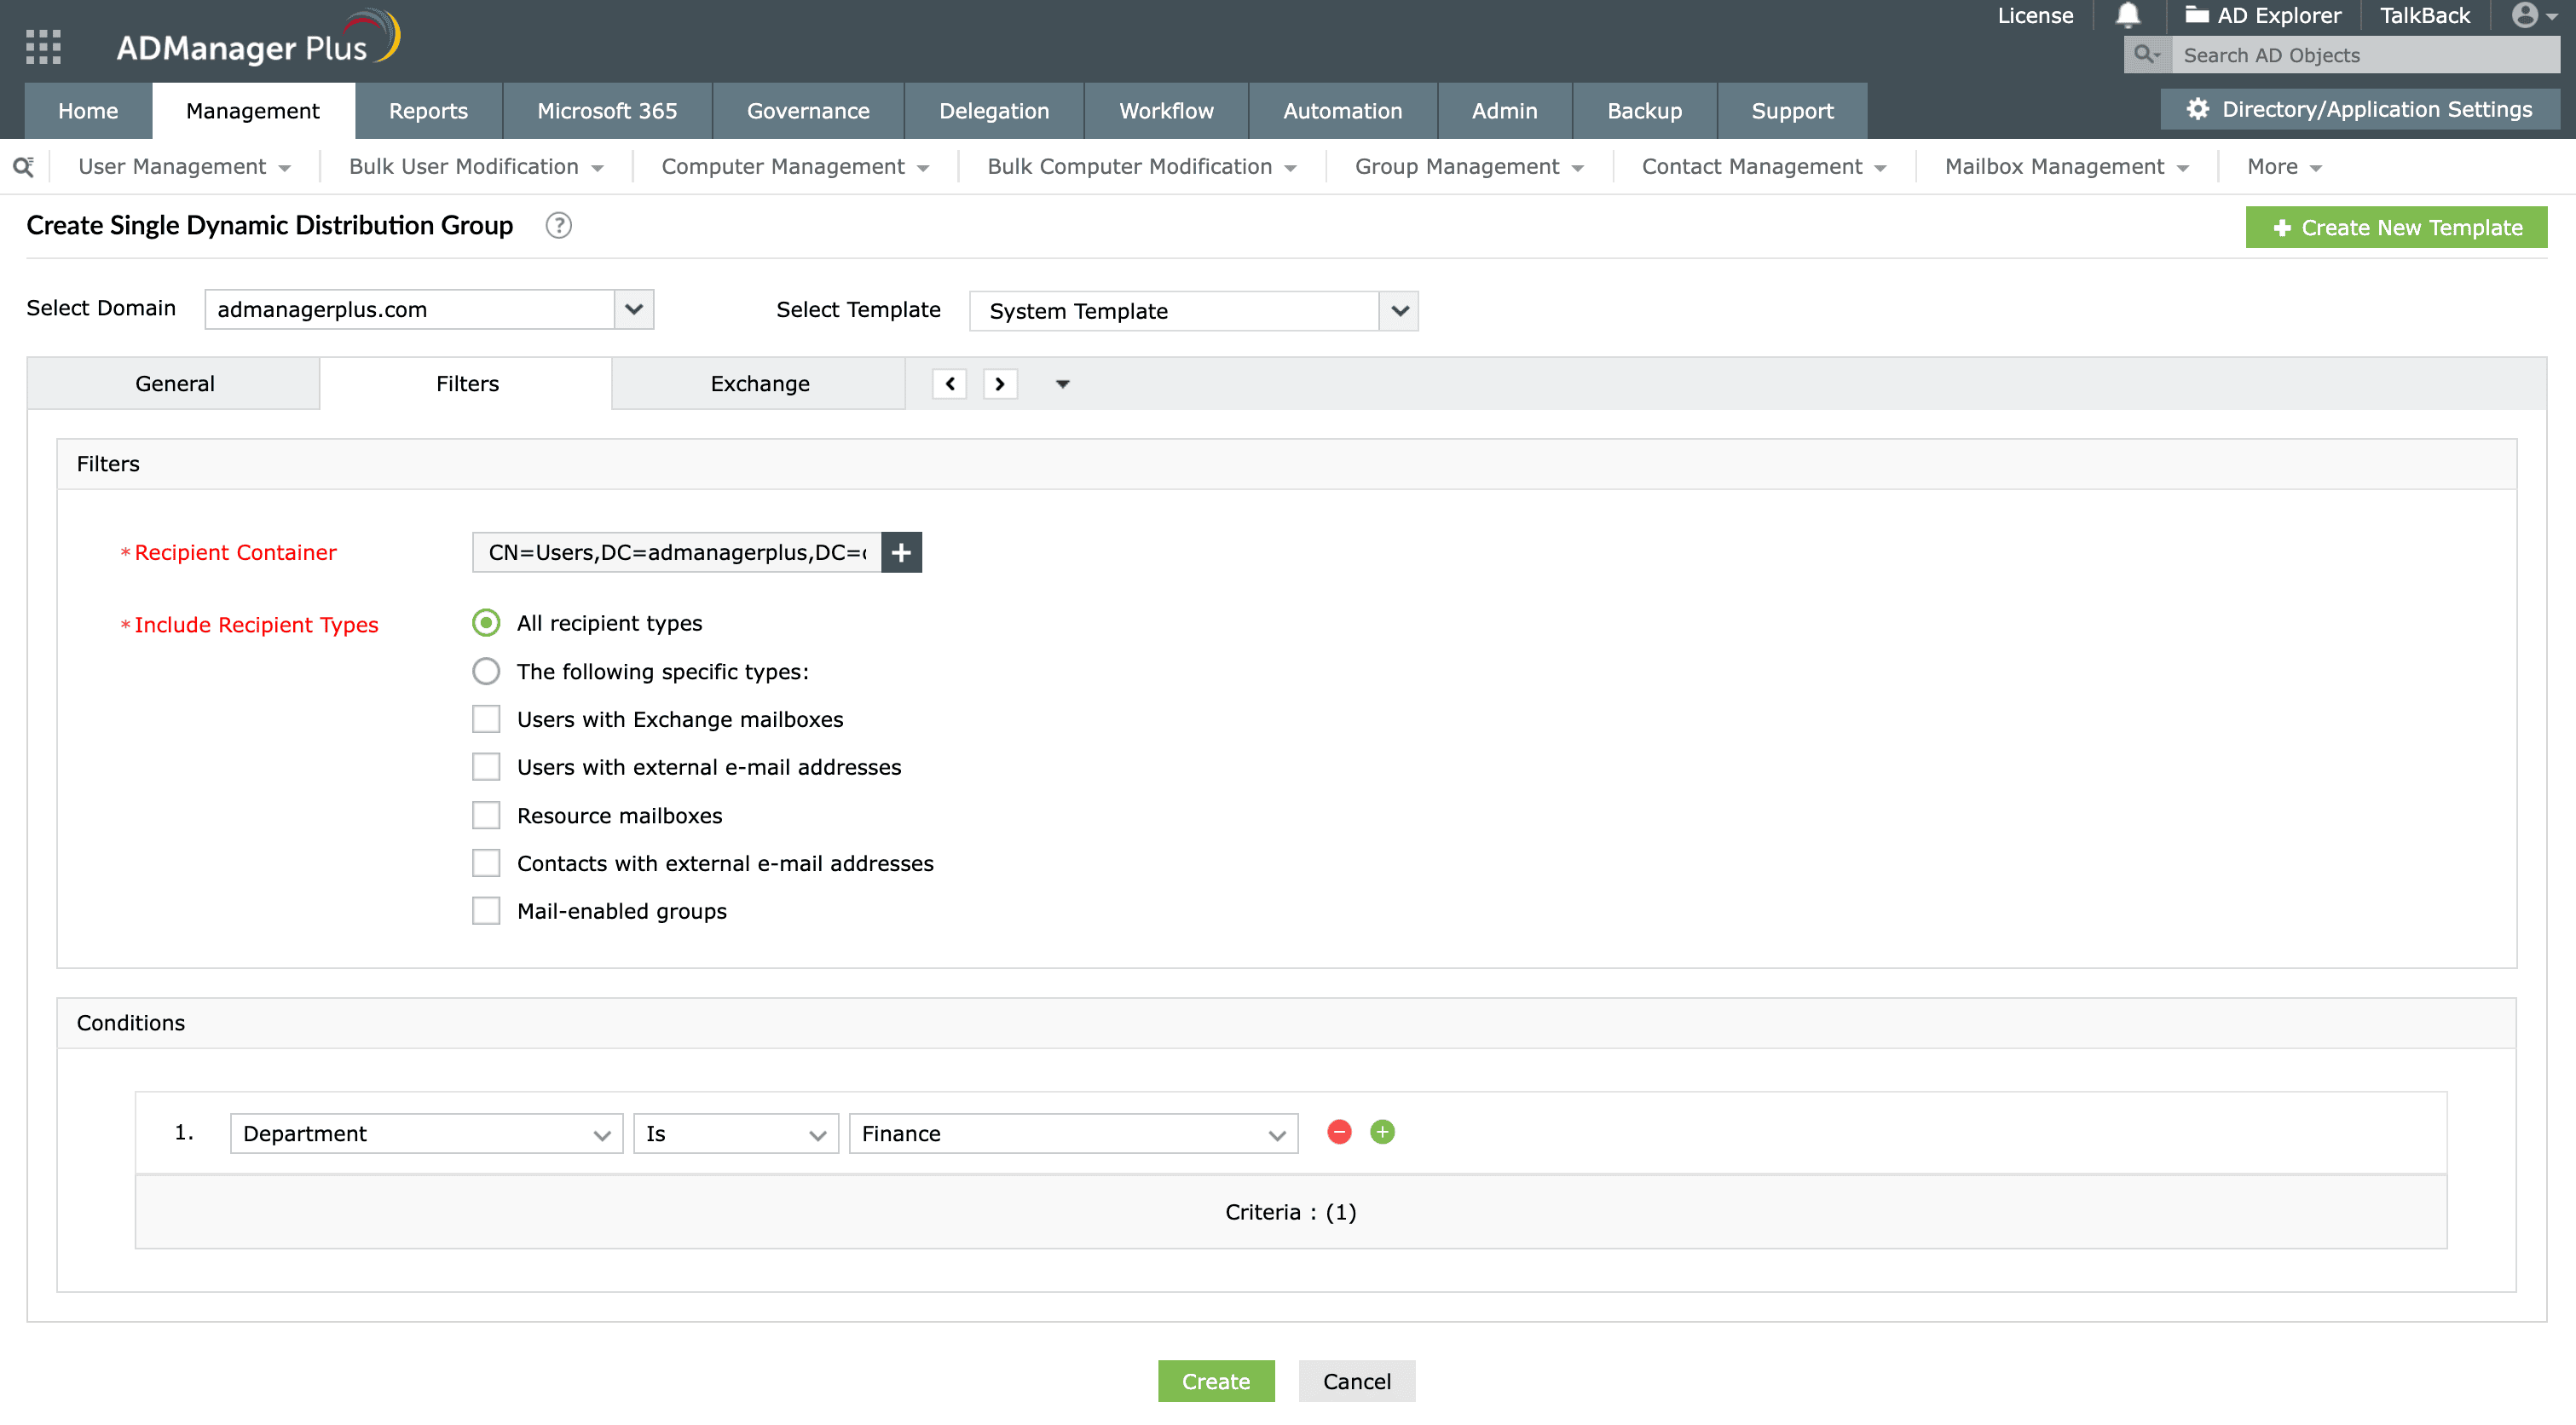
- Click the Management > Group Management > Dynamic Distribution Group Management > Create Single Dynamic Distribution Group.
- Select the domain in which the dynamic distribution group is to be created, and choose the template of your choice.
- Enter the values in the fields across all the tabs in the group creation dialog box.
- To assign the users belonging to the Finance department, add a condition. In the Filters tab, click Add Conditions.
- From the Select Field drop-down, choose Department
- Choose Is from the second drop-down
- Select Finance from the last drop-down.
- Then click Create.
The members of the dynamic distribution group will now resolve to all users from the Finance department.
Note: Dynamic distribution groups are mail objects. This means that membership is calculated when mail is sent, so there is no static member list to maintain. If you need a security group or a stored membership, use the automation method below.
Method 2: Using automation
Automation adds the matching users into an existing group on a schedule, so the group’s stored membership stays current as people join the department.
- Navigate to Automation > Create New Automation.
- Enter the Automation Name and Description. In the Automation Category, select User Automation. Select the domain from the drop-down and, if necessary, select the OU(s).
- In Automation Task/Policy, select the Add to Group task to add your desired group.
- Under Select Objects, choose a report (for example, Enabled Users) containing the users from the Finance department to be added to the selected group, then click OK.
- Under the Execution Time section, enter the time and interval at which the task should run.
- Select Enable Notification to get notified each time the automation runs.
- Click Save.
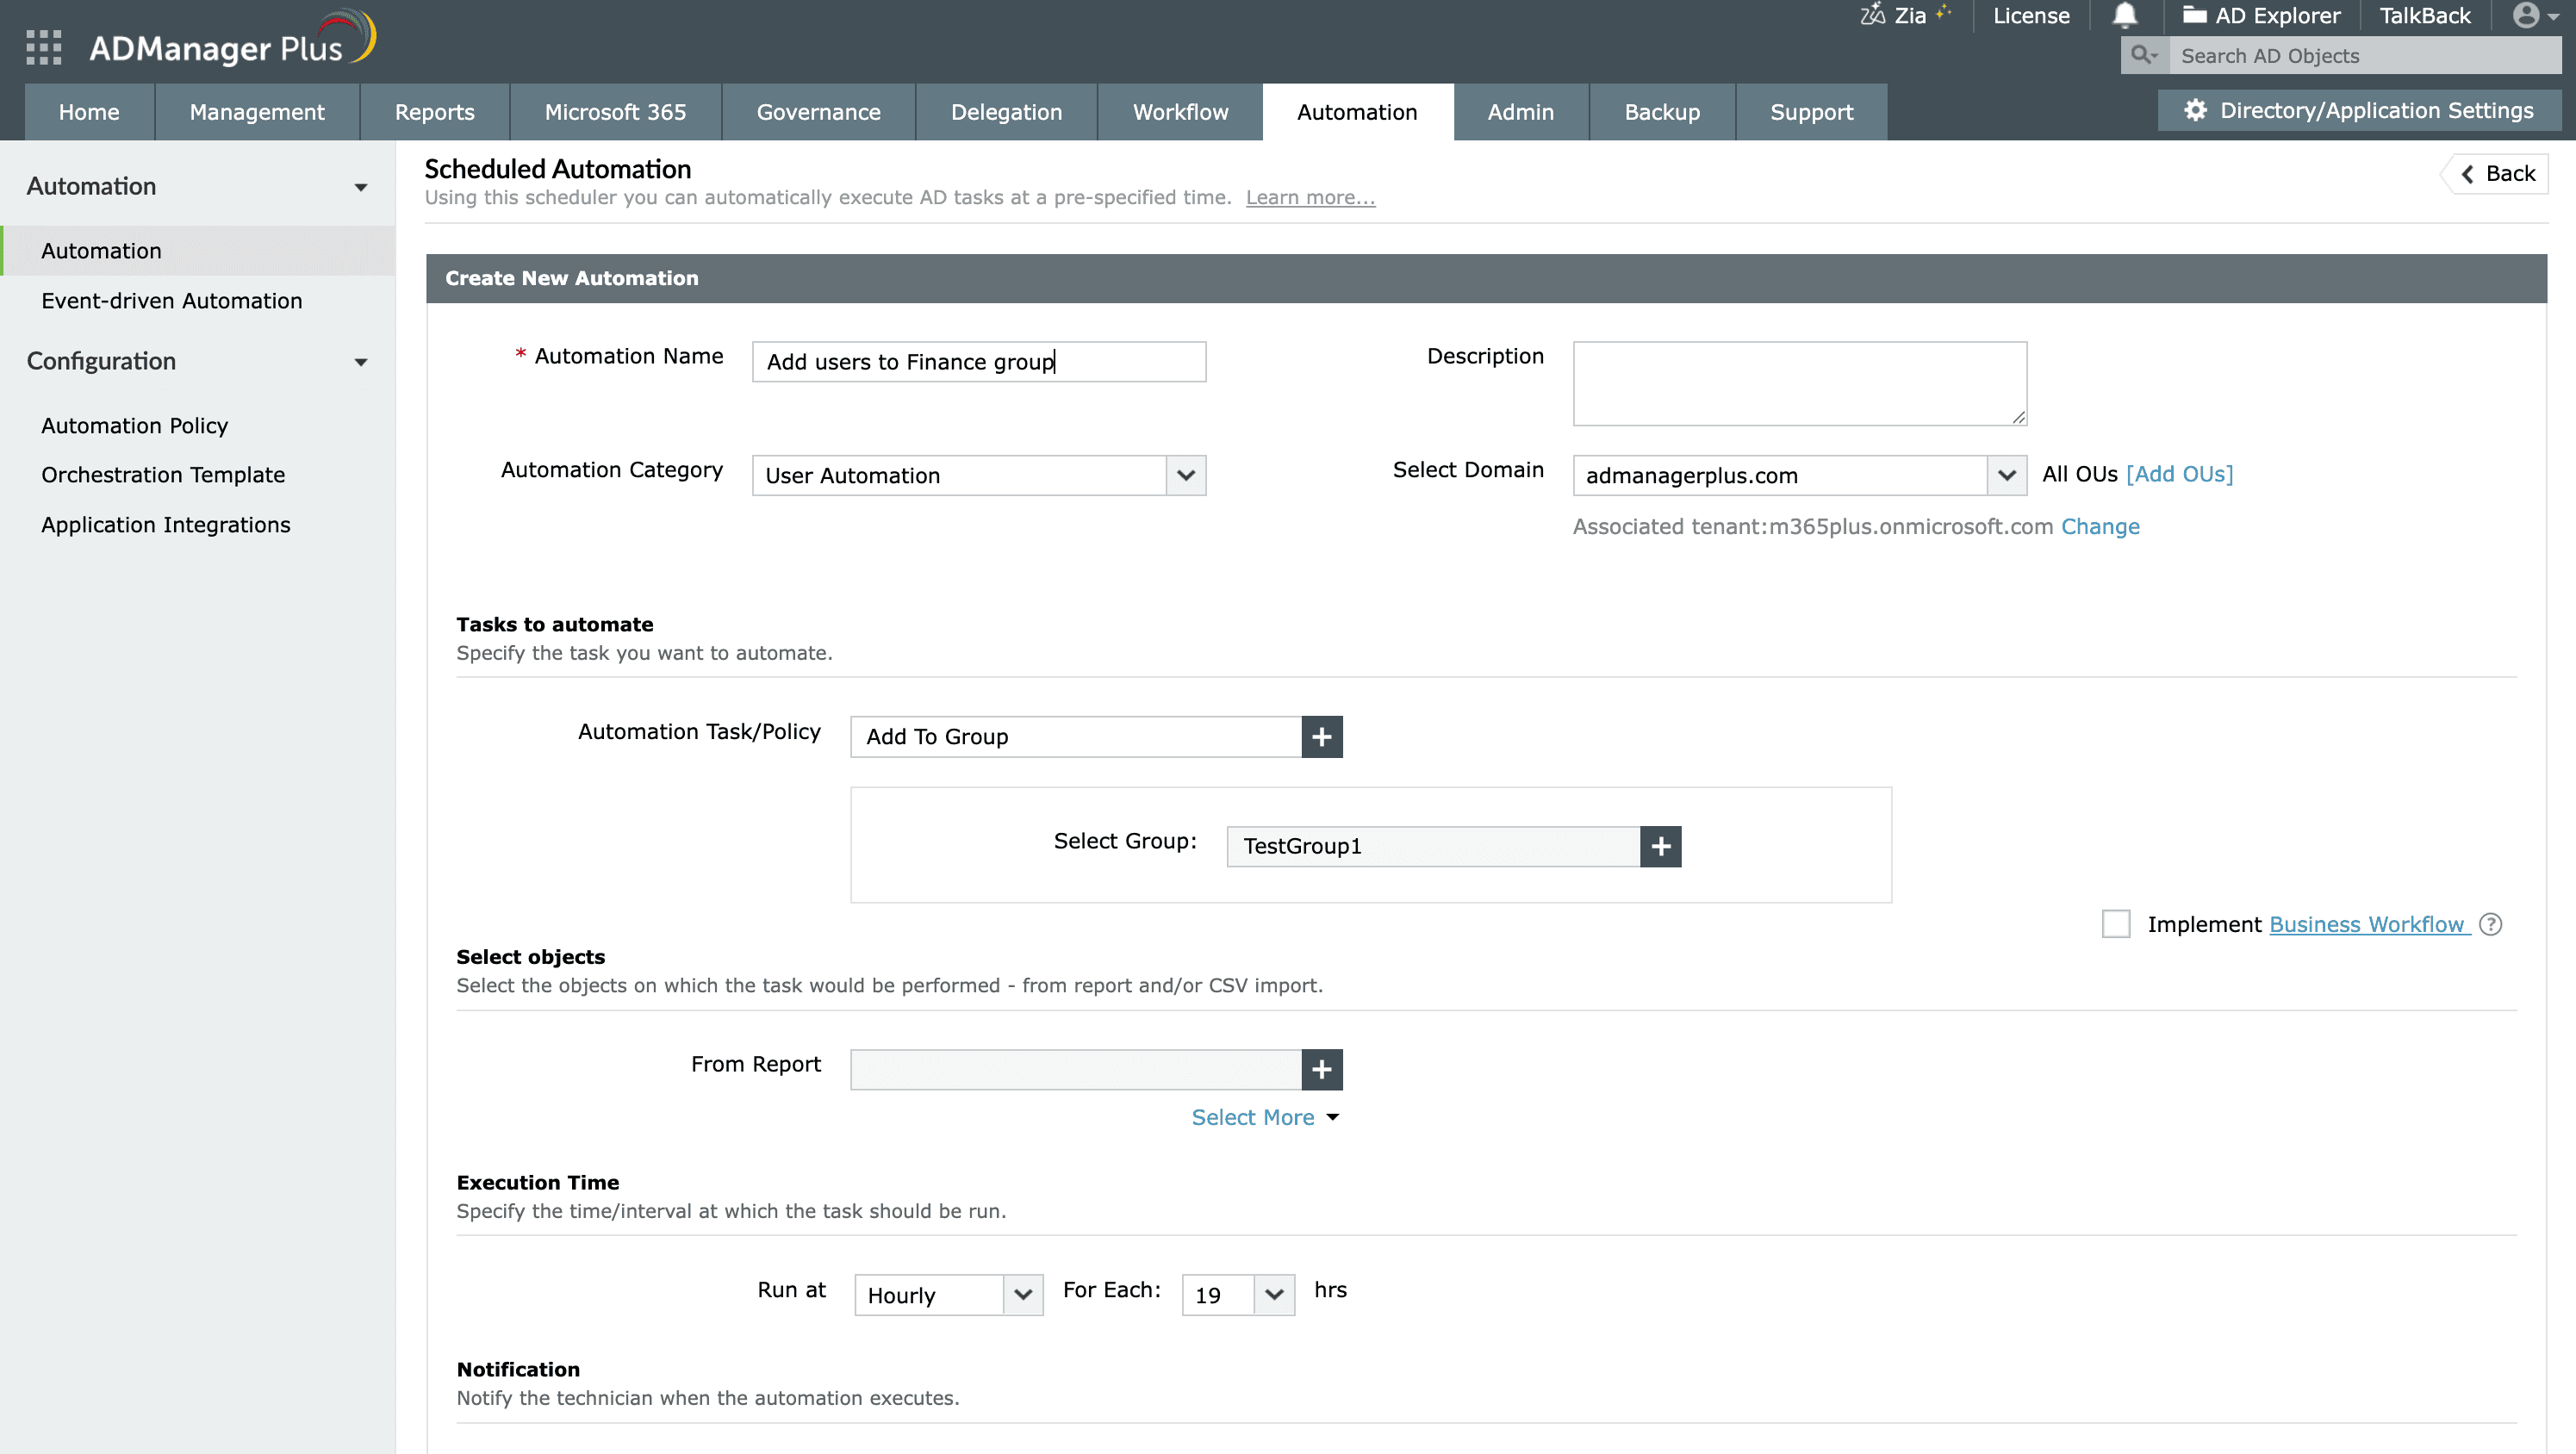
The automation will then run at the configured time and interval, adding the selected users from the Finance department to the specified group.
Validation and confirmation
- For a dynamic distribution group, review the resolved members in the group’s preview to confirm the department condition returns the expected users.
- For automation, check the group’s membership after the first scheduled run, and review the automation’s execution status or notification to confirm it completed.
- Run a group members report to cross-check that the group’s membership matches the department roster.
Tips
- Choose a dynamic distribution group for email scenarios where membership should update automatically based on defined criteria, and use automation for security groups or any scenario that requires a persistent, stored member list.
- Keep the department attribute clean and consistent. Both methods are only as accurate as the data they filter on.
- For automation, select a tightly scoped source report (such as Enabled Users filtered to the department) so only the intended accounts are added.
- Set a sensible execution interval so newly joined department members are picked up promptly without running the task more often than needed.
- Enable notifications on the automation so the technician is alerted each time it runs.
Related topics and articles
- Active Directory group management
- Active Directory bulk group management
- Active Directory automation
- Active Directory user management
- Active Directory bulk user management
Frequently asked questions
1. How do I add a user to an AD group based on their department?
In ADManager Plus, either create a dynamic distribution group with a Department Is <name> condition, or schedule an Add to Group automation that draws department users from a report or CSV. Both add the right users without picking them one by one.
2. Which method should I use to manage group membership by department?
Use a dynamic distribution group when you need an email distribution list whose membership is calculated automatically from the department attribute whenever a message is sent. Use scheduled automation when you need to maintain actual, stored membership in a security or distribution group. The automation periodically adds users who match the selected department criteria, making it suitable for access control and other scenarios that require a persistent member list.