Starting Log360 Cloud
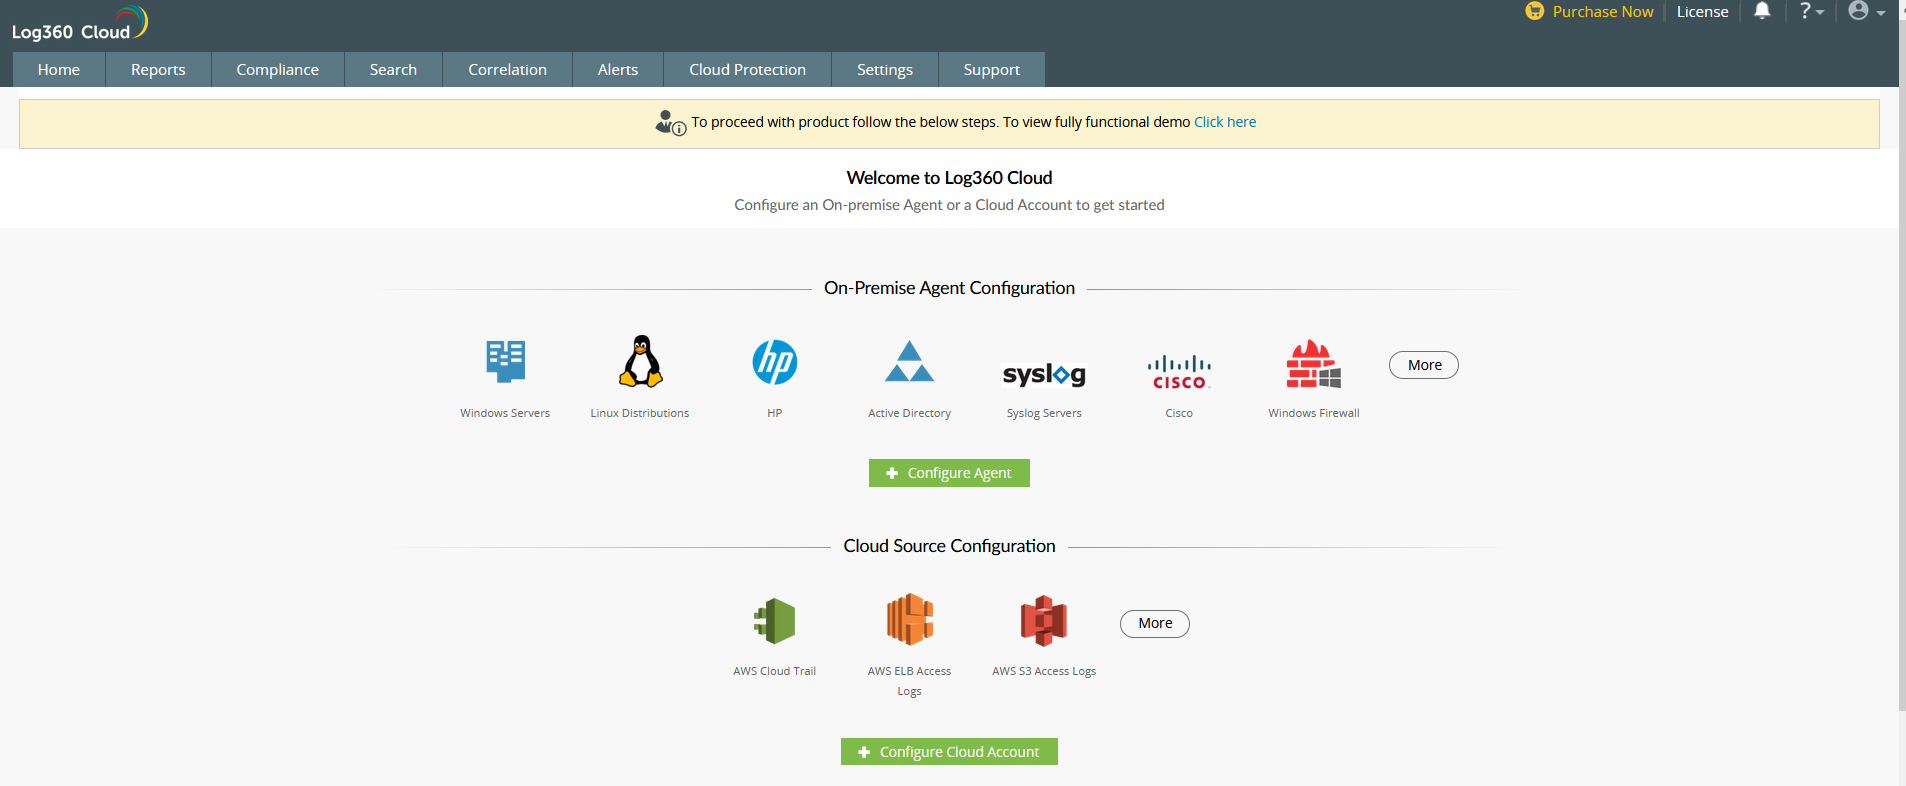
You can either configure an On-premise agent or a Cloud Account to get started.
This page describes the various steps involved in configuring an on-premise agent or a cloud agent.
- Configure an agent
- Configure advanced threat analytics
- Configure Log360 Cloud Account
- Configure Import Logs
Configure Log360 Cloud Agent
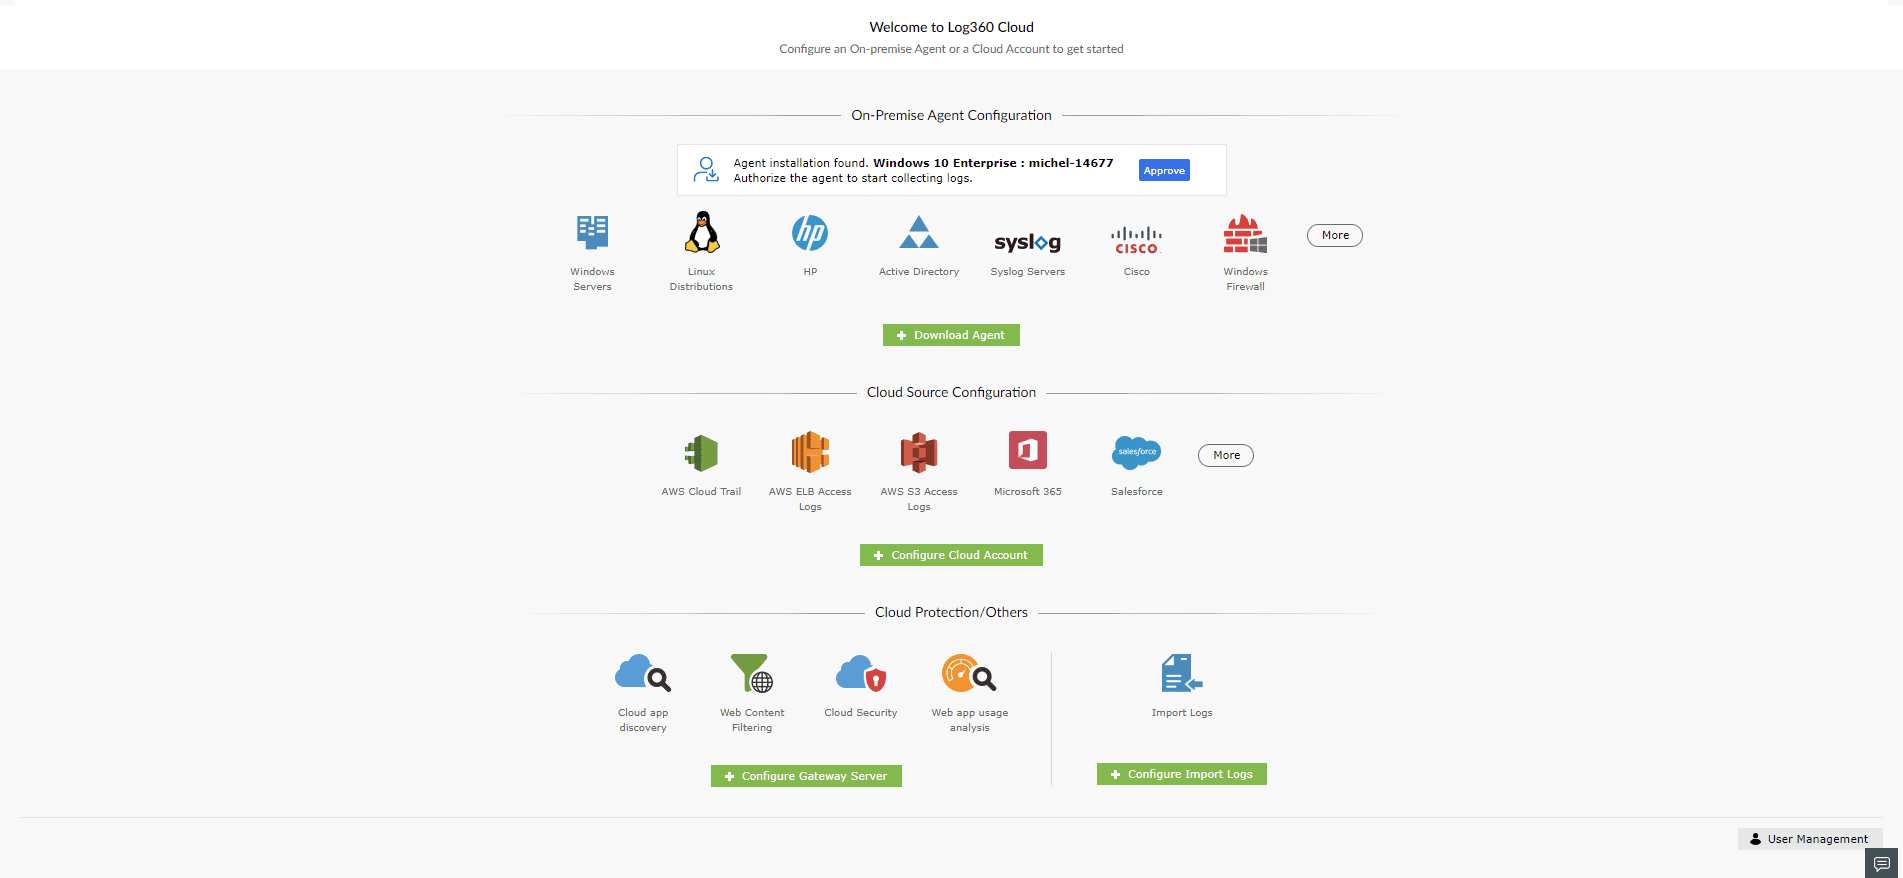
1.1 Download agent
- Click the Download Agent button to download the agent.
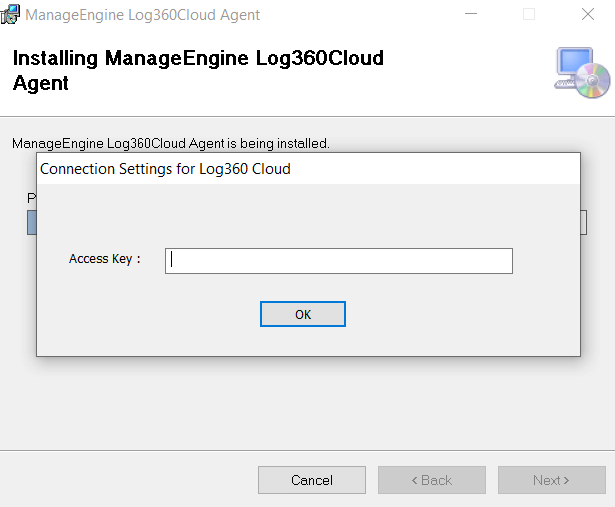
- Run the downloaded Log360CloudAgent.exe file and complete the installation process.
- Once the agent installation is completed, it will be automatically identified. However, the agent will not communicate with Log360 Cloud until it is approved.
1.2 Approving the agent
Downloaded agents can be approved once they are identified.
- For a single agent:
- Approve directly from the Log360Cloud setup page using the Approve button.
- Once the agent is approved, it will take some time for the agent to synchronize with Log360 Cloud account.
- For multiple agents:
- Agents will be listed in the Pending Agent Registrations table. Click Show to view this table.
- Select agents in bulk or filter them to complete approval.
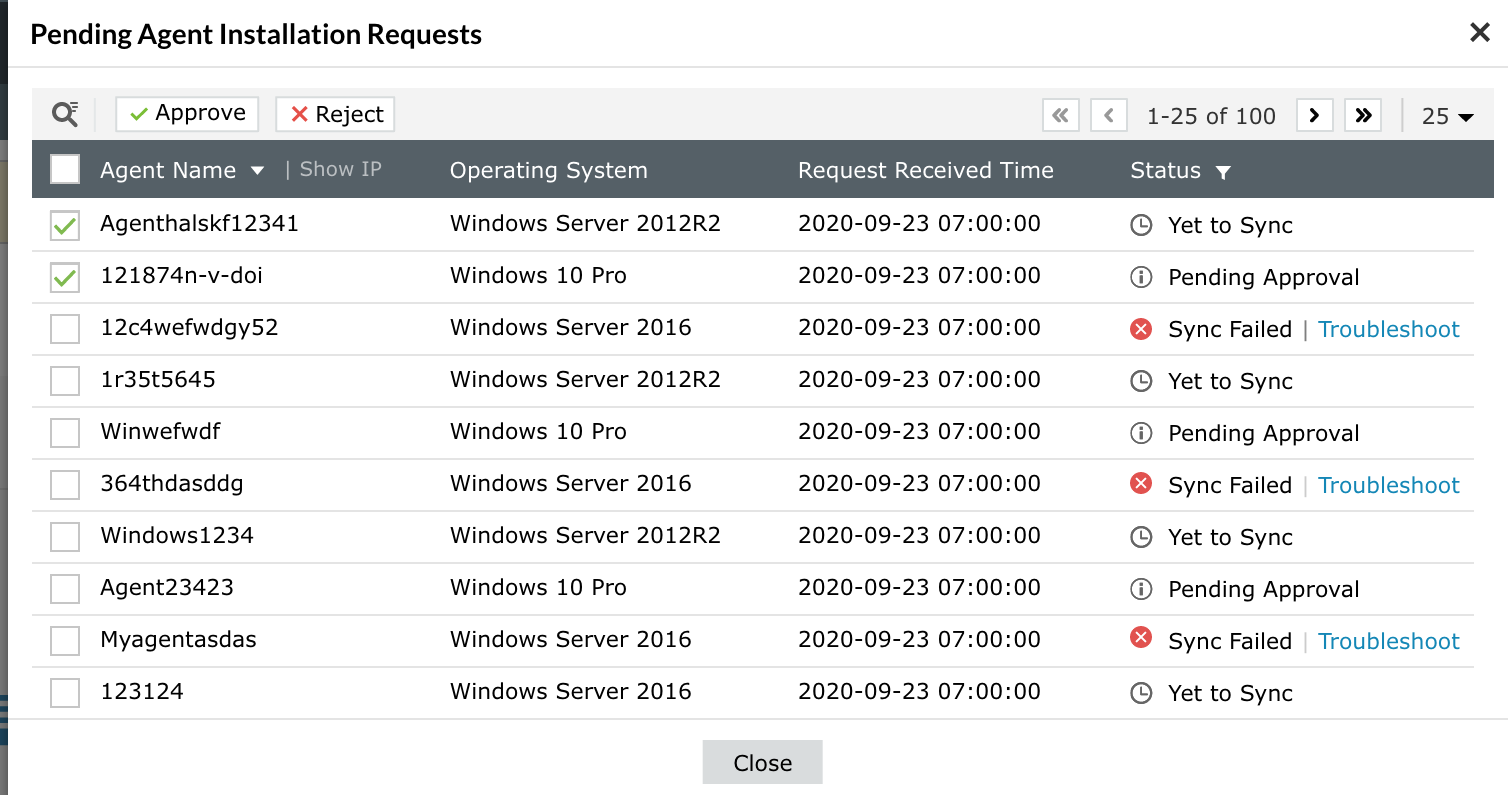
- If approved agents fail to communicate with Log360Cloud, the status will change to Sync failed. To resolve this issue, follow the troubleshooting steps to re-establish communication.
- Agents will be automatically uninstalled from machines that are rejected
Note: When multiple agents are installed, the Log360 Cloud redirects to the home page upon approval of at least one agent. The status of other unapproved agents can be viewed under Manage Agents.
On completing installation, data synchronization will begin and Log360 Cloud Agent will start pushing logs to the cloud.
Configure Log360 Cloud Agent without GUI
Note: For operating systems without a graphical user interface, like the Windows Server Core, you can perform silent installation of the agent using the following steps:
- Download Log360CloudAgent.exe from Log360Cloud and place it in your preferred folder.
- Open a command prompt window and navigate to the folder where the agent was downloaded.
- Enter the following command to initiate the silent installation:
Log360CloudAgent.exe SILENT_INSTALL /hide_progress /hide_splash
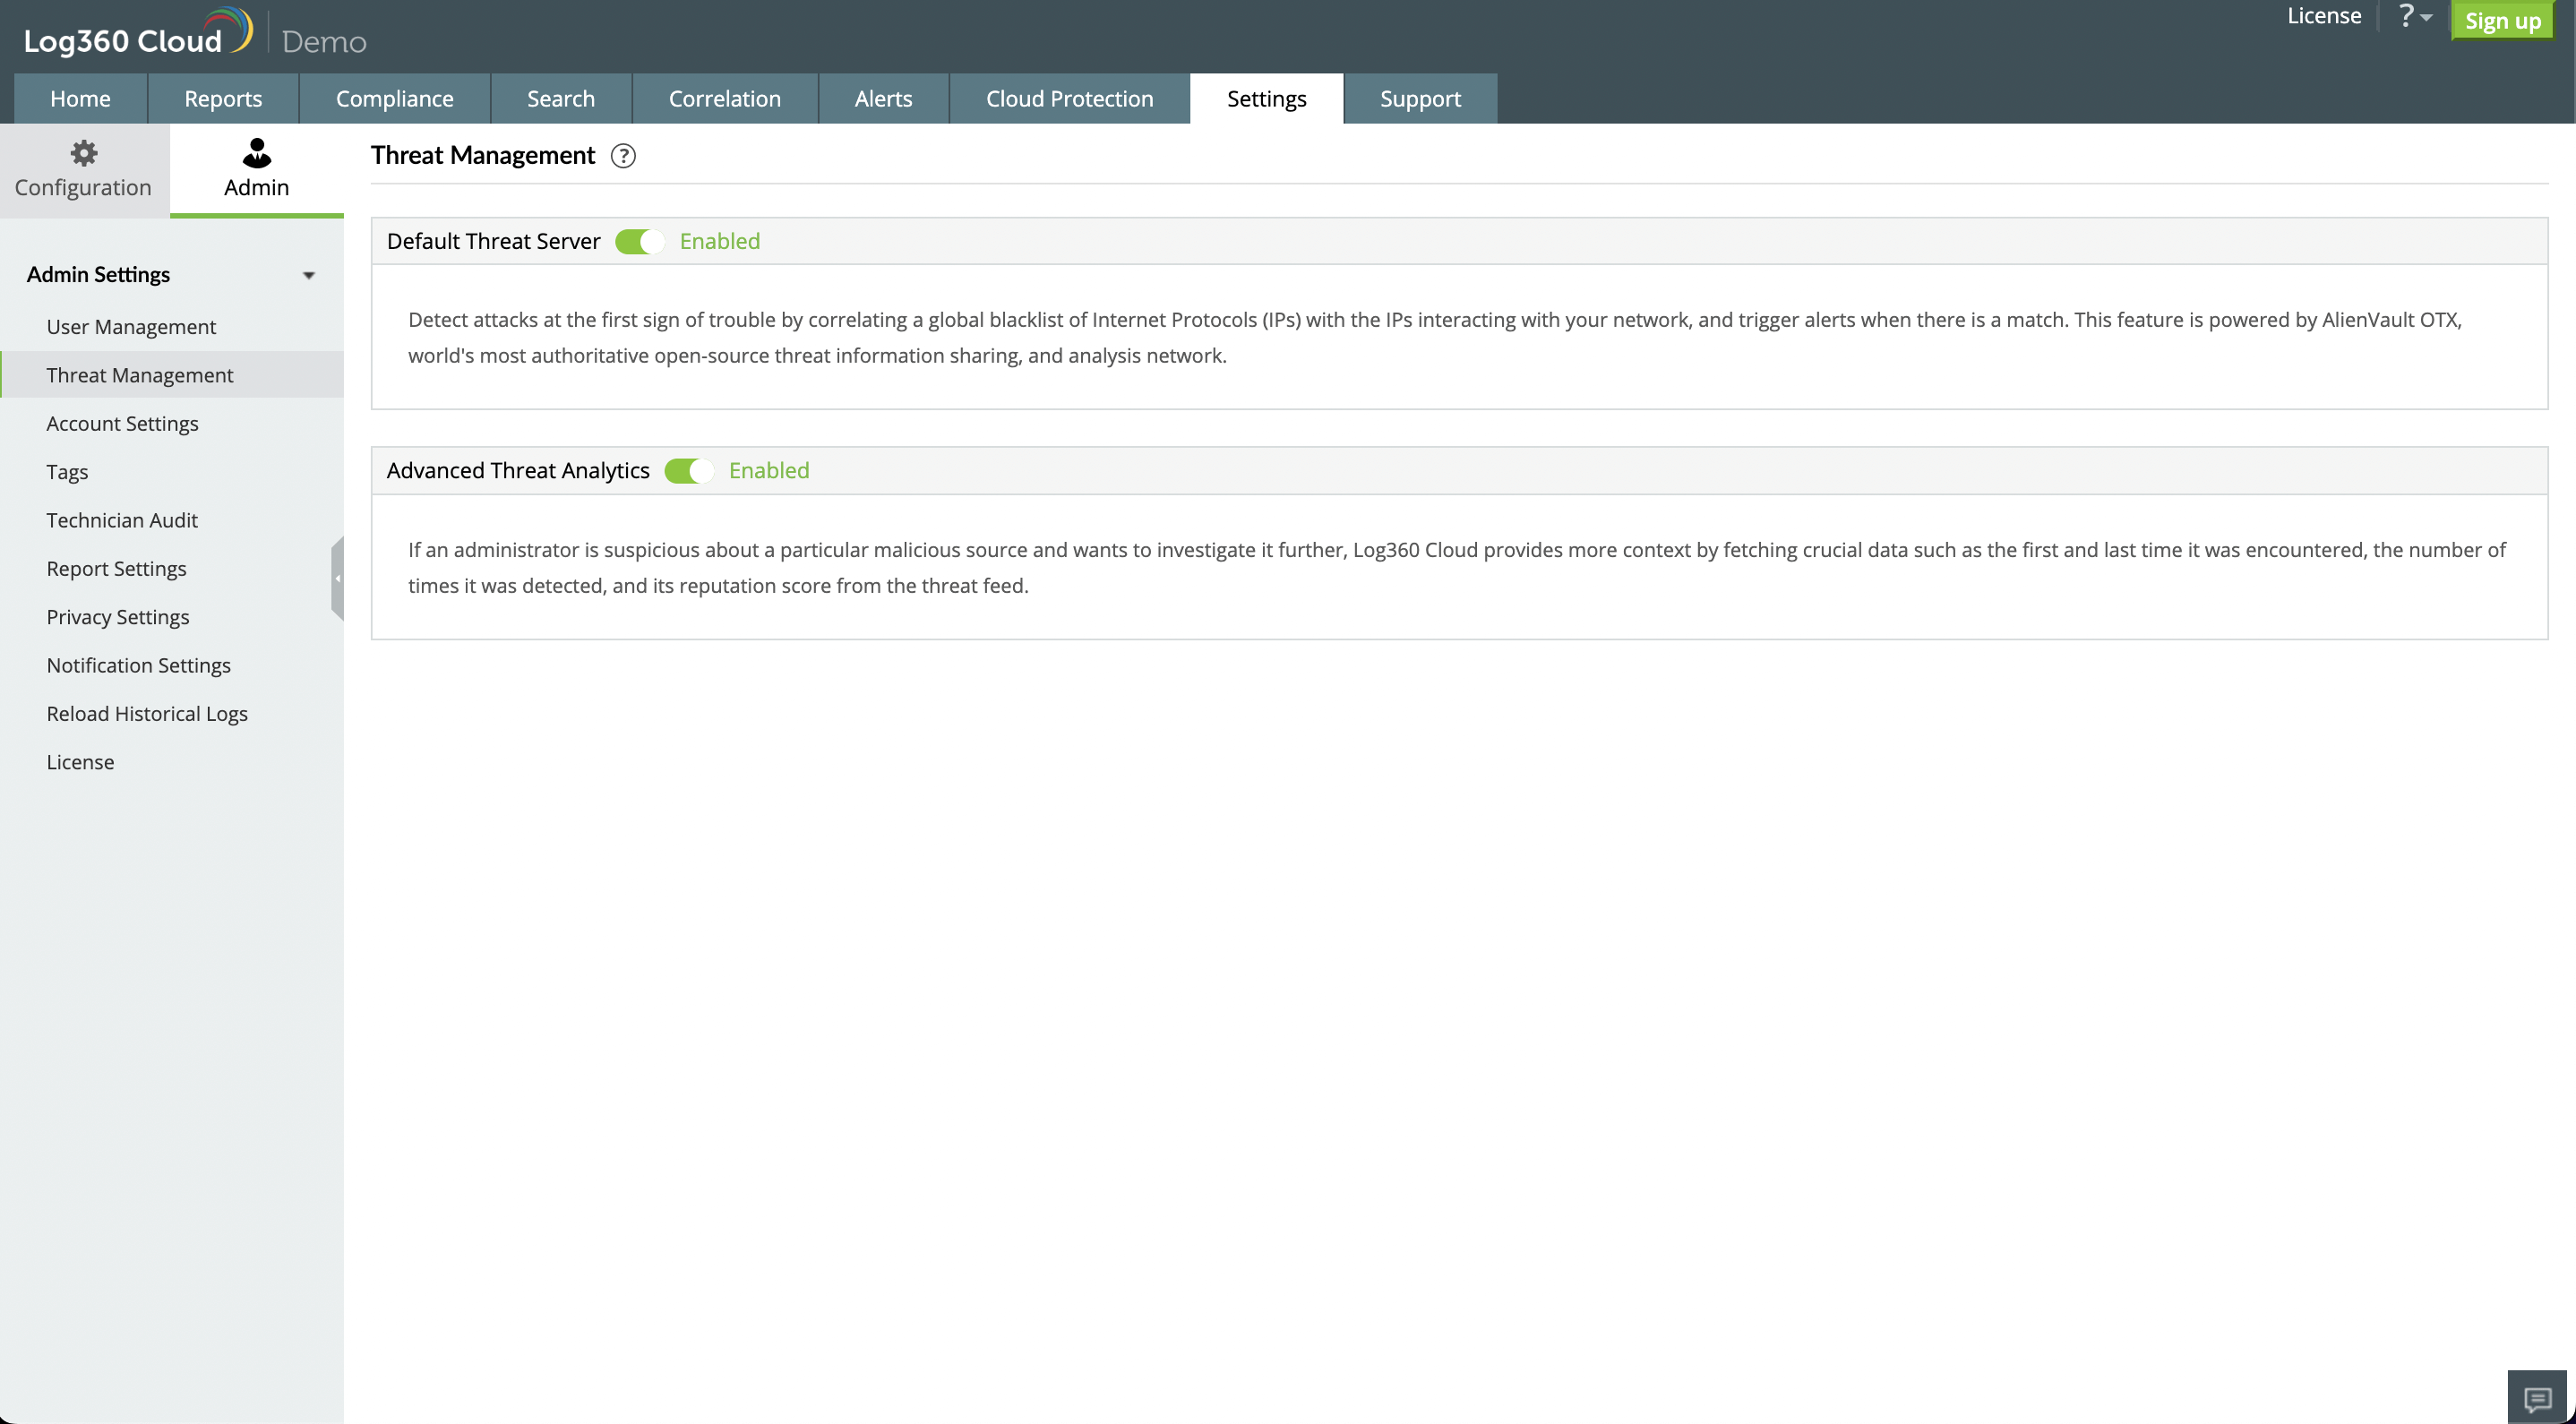
Configure advanced threat analytics
- Login to Log360 Cloud and navigate to Settings → Admin Settings → Threat Management.
- Enable the Default Threat Server and Advanced Threat Analytics options.
- Now the threat feeds have been enabled.

Configure Log360 Cloud Account
Click on Configure Cloud Account under Cloud Source Configuration.
The following page will appear.
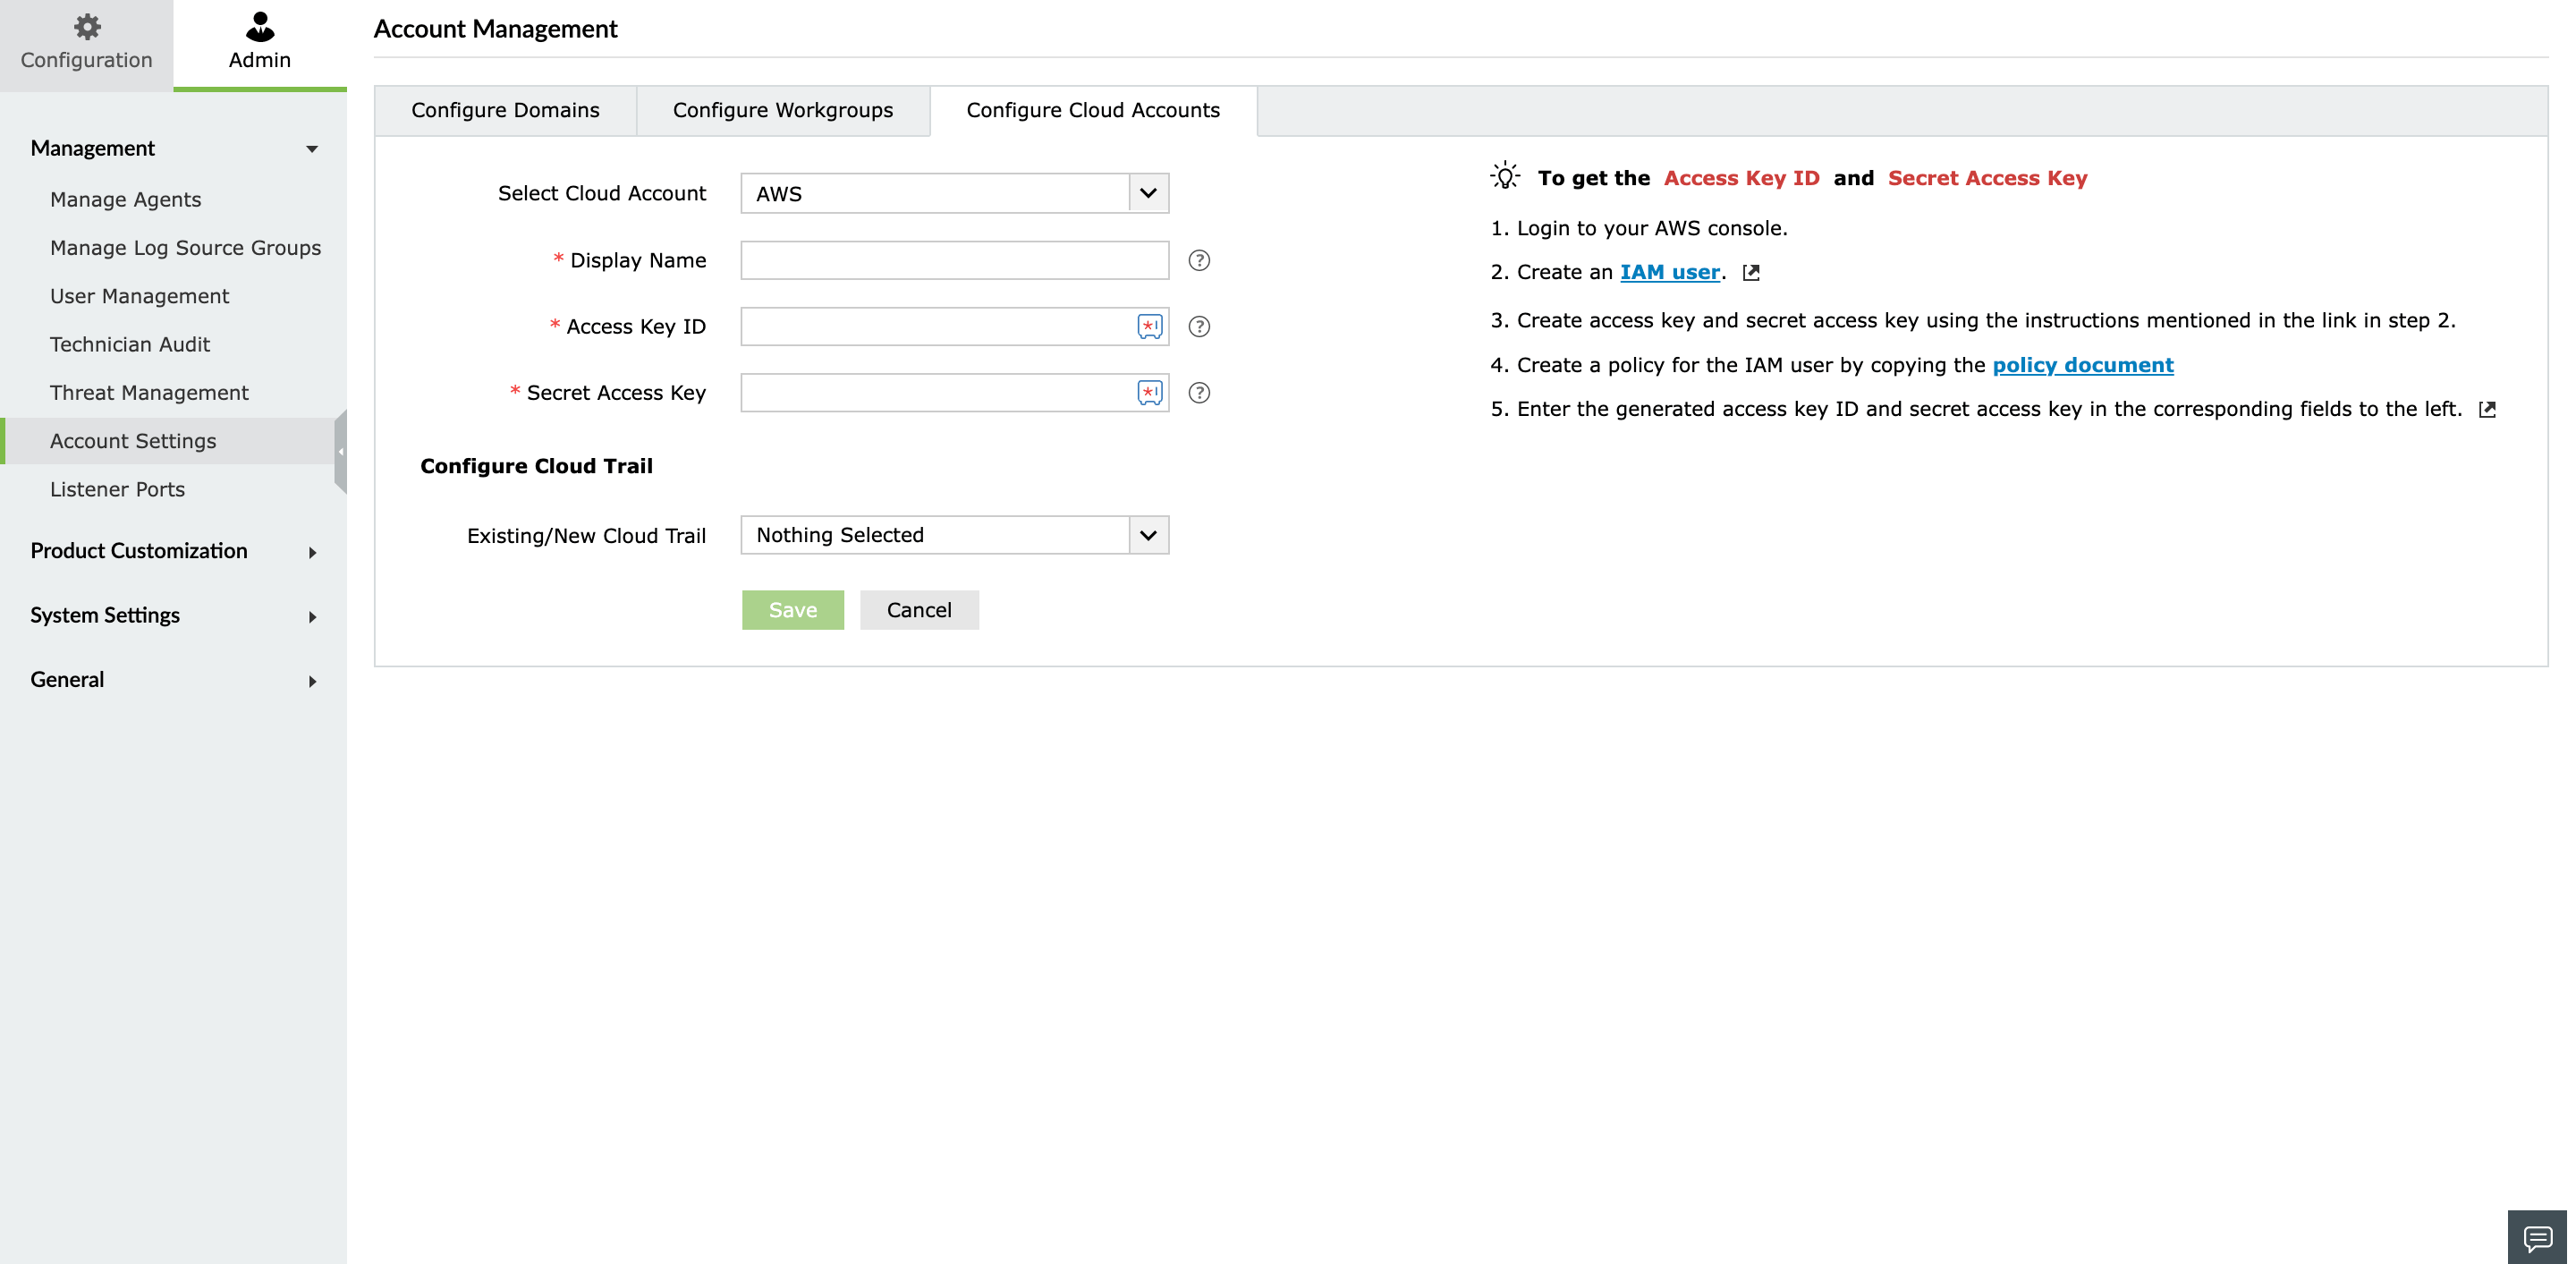
Enter the following details:
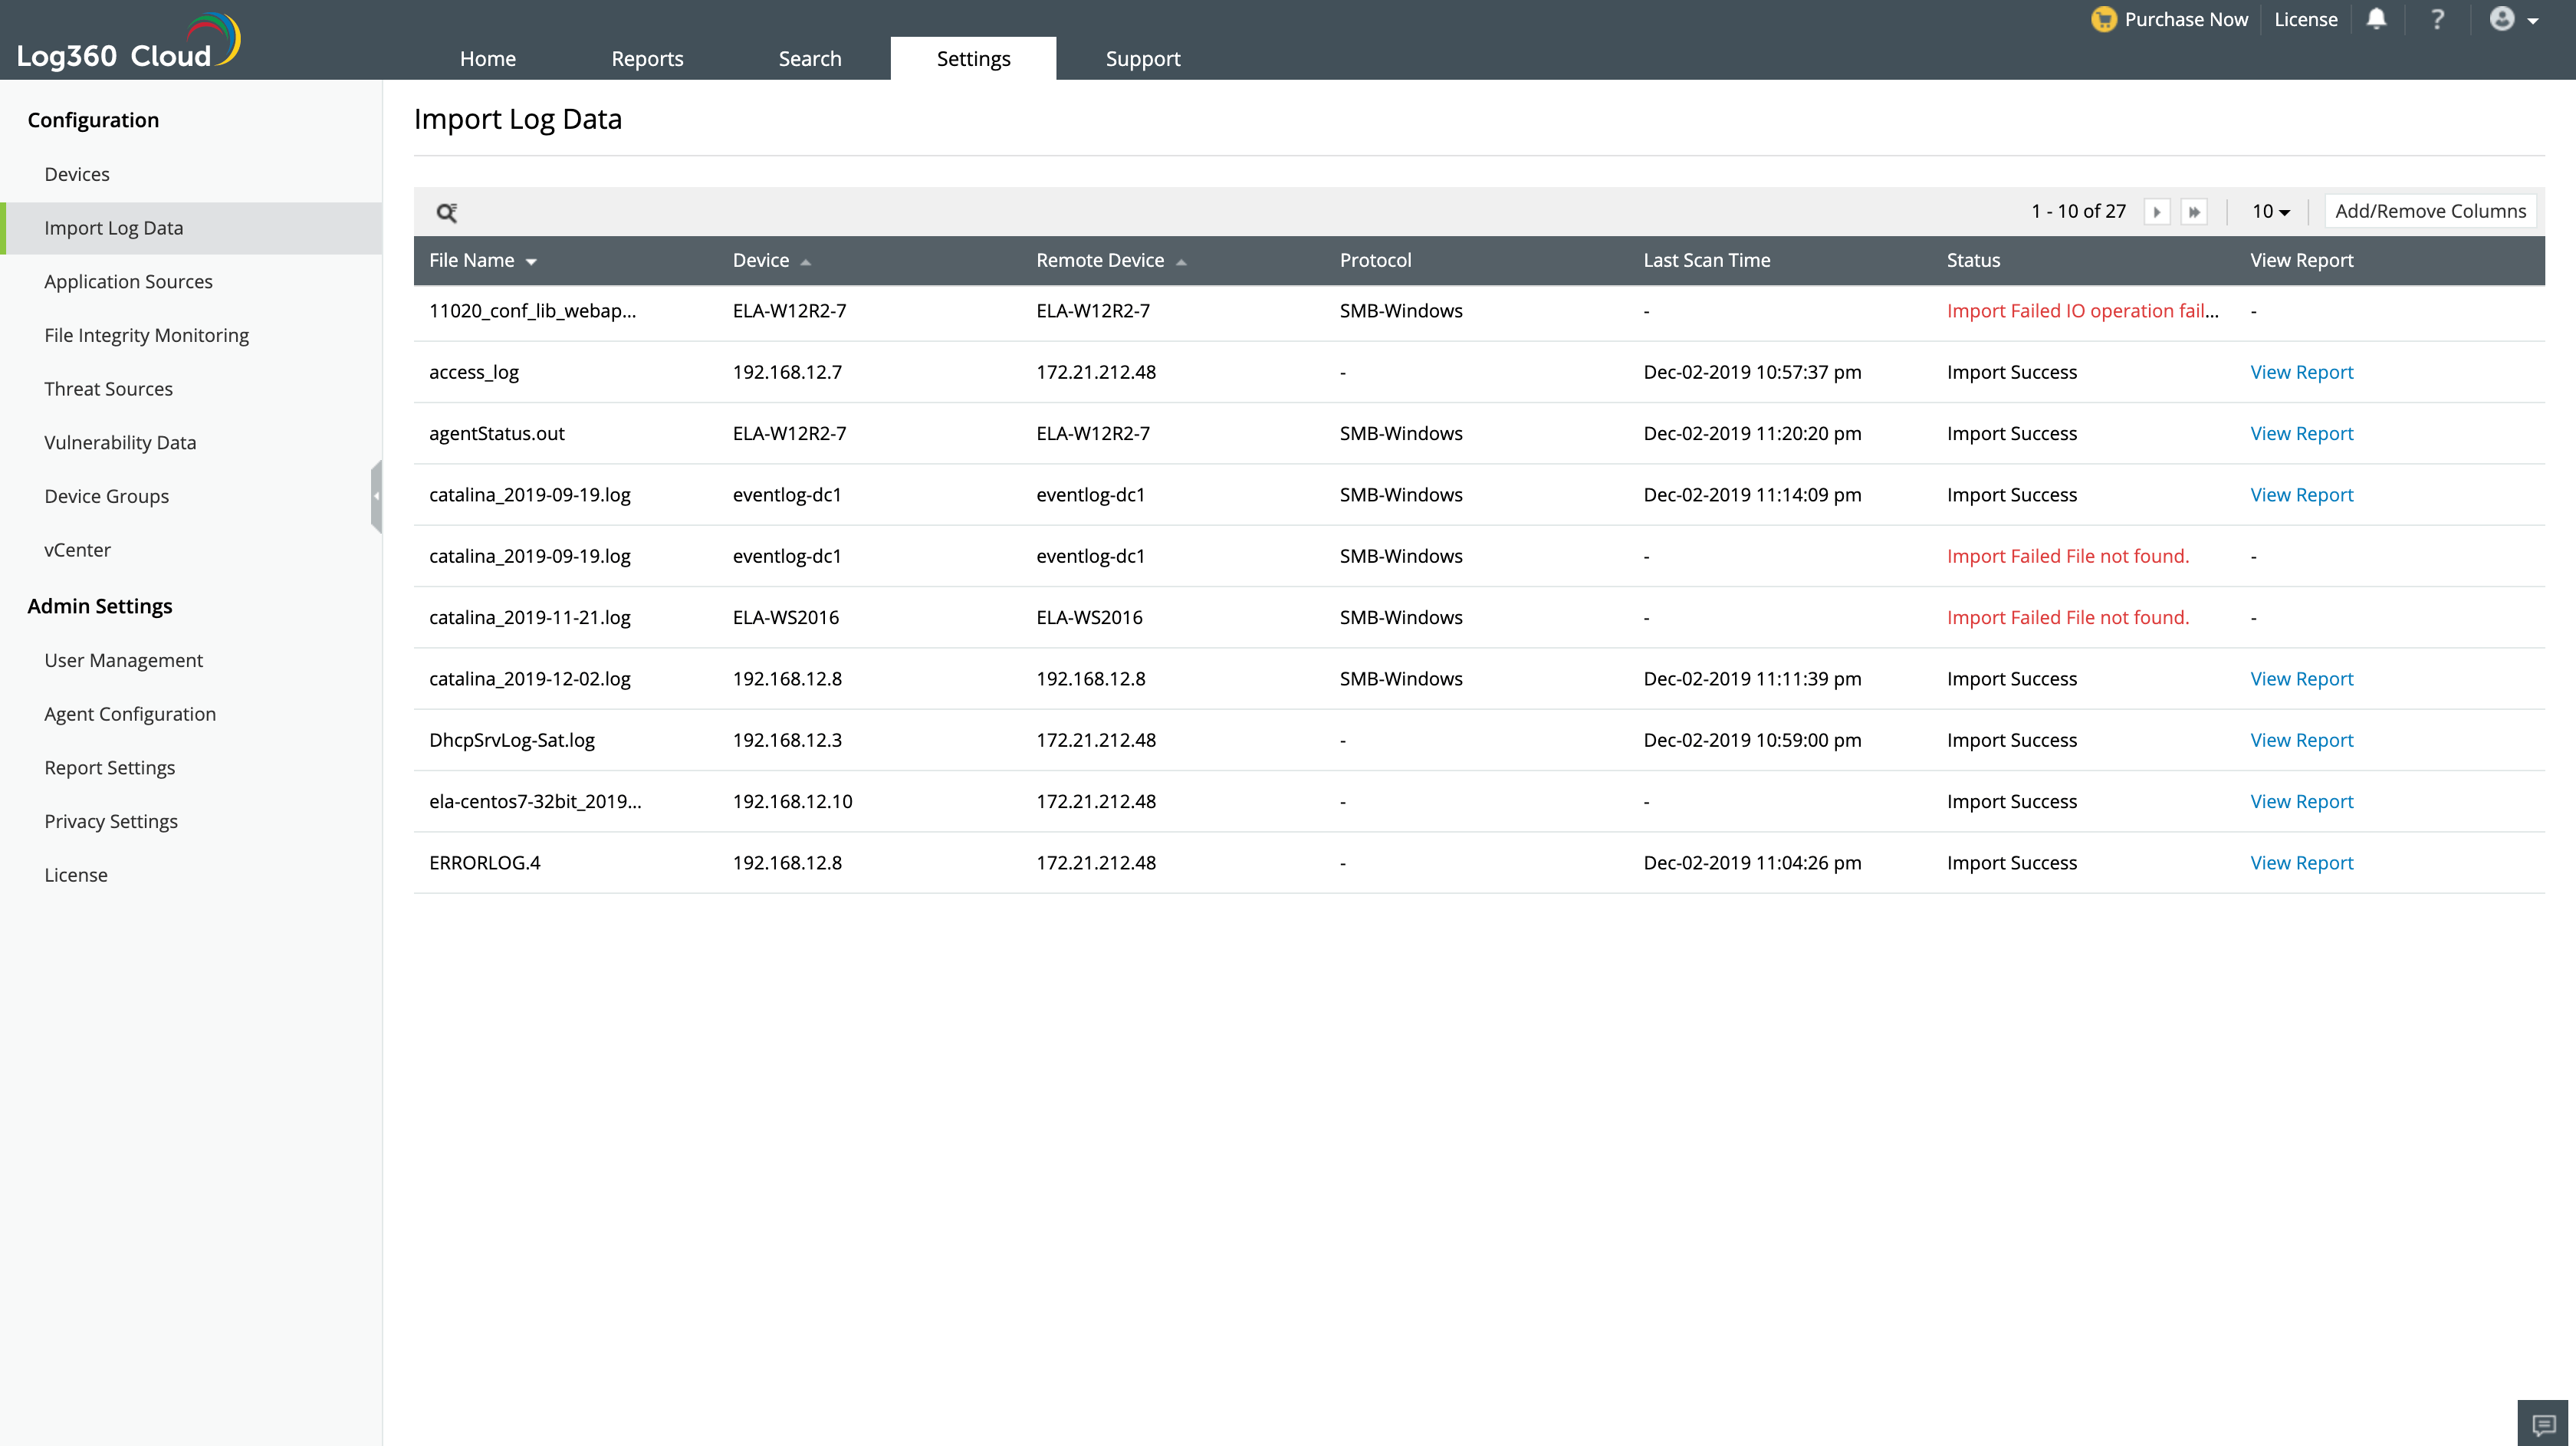
Configure Import Logs
Log360 Cloud allows you to import:
Note:
- Only 512 MB can be imported at once, whether from local or remote sources
- The storage consumed may differ from the imported file due to the storage of parsed logs, which could result in additional storage usage.
Log file import from a local path
With this option, you can import log files from any device that has access to Log360 Cloud.
Note: Log import cannot be scheduled to run at regular time intervals.
- From the File Location option, select Local Path.
- Click on Browse to select the necessary file(s) from your local device.
- If you know the log format of the log file, select the log format from the given drop-down. If you do not know the log format select Automatically Identify.
- Click the + button and OK to select the device that the log file is associated to. You can also enter the name of the device or select the device from the pop-up that appears.
- Click Import.

Log file import from a remote path
Importing log files from a remote path in Log360 Cloud needs authentication. This authentication can be achieved in two ways:
- Username and password
- SSH private key file sharing (Specific to SFTP protocol)
Note: Remote paths are only accessible for internet facing FTP/SFTP servers.
Authentication type: Password
- From the Browse Files option, select Remote Path.
- Enter the server name from which you wish to import the log file.
- Choose the required protocol (FTP and SFTP) and enter the port number.
- Select the desired file from the server and click OK.
- Provide the Username of the remote server and select Authentication Type as Password.
- Enter the password in the field below.
- Browse and select the Associated Device.
- You can choose to schedule the log import at specific time intervals.
Authentication type: SFTP-based SSH private key file sharing

- Select Remote Path from the Browse Files options listed.
- Enter the server name from which you wish to import the log file.
- Choose SFTP as the protocol and enter the port number. (Default port value is 22)
- Provide the username and choose Key File as the Authentication Type.
Note: Log360 Cloud supports OpenSSH key file format only.
- Browse and select the key file from the device. You can refer to this link to learn how to generate a key file with ssh-keygen, a standard component of Secure Shell protocol.
- If the key file is passphrase protected, select the Use Passphrase checkbox and enter the phrase in the field below.
- Browse and select the Associated Device.
- If you would like to automate a log file import at regular time intervals, enable the Schedule Log Import option.
- Additionally, you can build a Filename Pattern for the imported log files using the time format options given. The name of the file stored at the specified time will be updated in accordance to the file name pattern.
- Click on Import to save the configuration.
Log file import from cloud storage
To import logs from AWS S3 buckets, you first need to create an IAM user with access to the S3 bucket(s).
To configure AWS S3 buckets for importing logs,